

When you hit the power button, a stunning band starts backstage. Actually, the conductor leading it is a special firmware called BIOS. It even kicks in before you load your OS.
This firmware sits on a small chip on the motherboard. It runs the hardware start-up with ease. At each boot, it tests your parts and shares the results. Moreover, it does all this in seconds.
Today, a more modern boot manager like UEFI stands out. However, knowing the classic BIOS basics gives you a big edge. Indeed, stability tests and hardware compatibility start at this layer.
We are field experts. We built this guide from scratch. Its goal is to mix theory with real-world cases. Moreover, we cover flaw handling and performance tuning.
Ready? Let’s dive into motherboard firmware together. First, I’ll give the core definition. Next, I’ll walk you through all settings, no matter the brand.
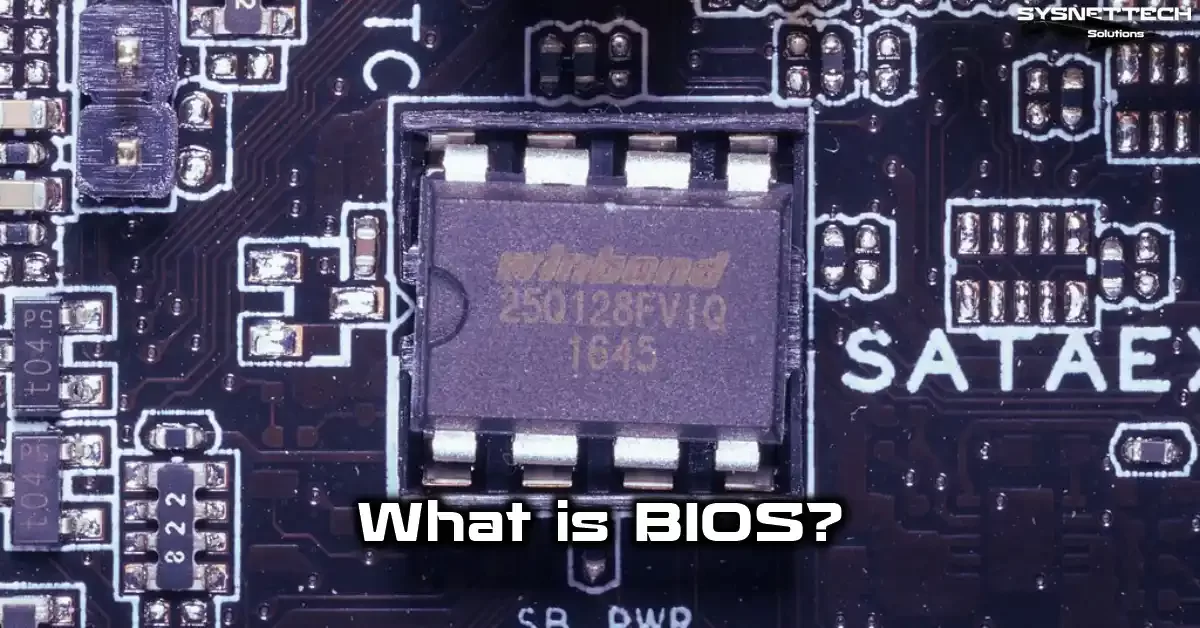
What Is BIOS? Basic Definition and Functions
In short, I’ll give you the clearest answer now. The BIOS on the motherboard lets the computer take its first breath. It tests all hardware. Plus, it builds a solid base for the OS.
It acts as a hardware abstraction layer. That lets the CPU talk with RAM and storage. It also stores date and time info. It runs power management rules. So, we think of it first for system start-up.
Most users only think of it during a format. Yet at each boot, it works in silence. It also handles the POST stage. Luckily, we can now explore this key firmware layer in much more depth.
Basic Input Output System: Meaning and History
Basic Input Output System means just that. Gary Kildall coined this acronym in 1975 for the CP/M OS. Later, it became an industry standard with the IBM PC.
Back then, this startup program lived on a ROM chip and ruled 640 KB of base memory. Today’s motherboard chips run on SPI Flash memory. They offer a much faster and more flexible design.
In history, three big makers shaped the market: Phoenix, Award, and AMI. Now they have dropped the old names. Instead, they moved to UEFI-based builds like AMI Aptio V. Still, the core ideas have never changed.
Even now, you see traces of that old design while browsing the setup menu. Legacy OpROM support keeps old hardware alive, for example. This backward compatibility makes the firmware a must.
Similarly, users often tie the CMOS structure to this firmware. The coin-cell slot and non-volatile memory differ now, but the basic idea remains. In the end, this is one of computer engineering’s finest gifts.
BIOS’s 5 Main Jobs (POST, Boot, Hardware Detection, Configuration, ACPI)
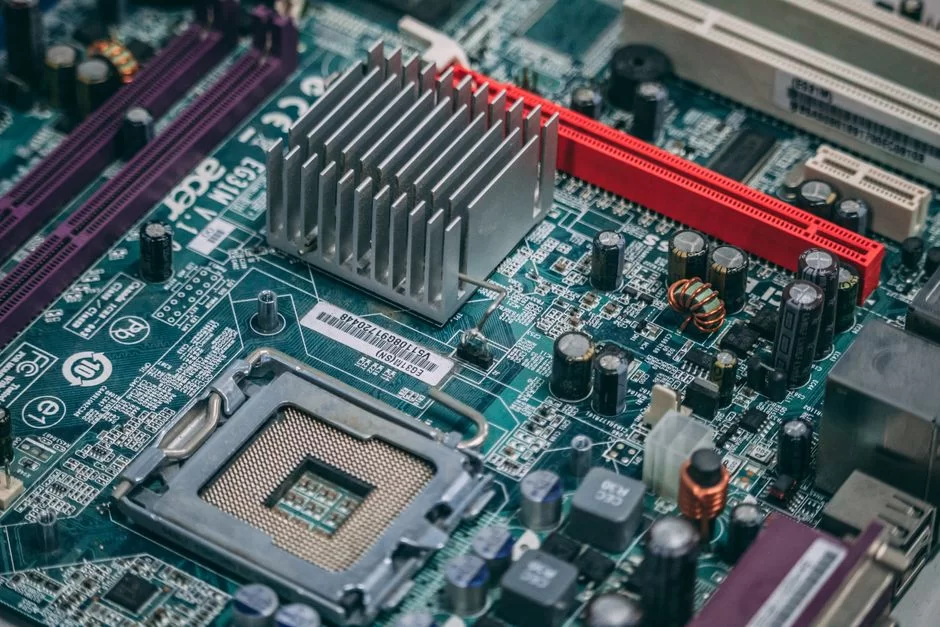
First comes POST, the power-on self test. The system checks the CPU, memory, and peripherals one by one. Any fault triggers beep sounds or error codes.
Second is the boot task. This job finds a bootloader based on the boot order and starts it. If it works, the OS load begins.
Third, hardware detection kicks in. The BIOS queries all attached hardware and fixes resource conflicts. Then it reports this data to the OS via the SMBIOS table.
Fourth, system configuration follows. You set key items here like the clock, fan curve, and voltage control. Modern UIs make this quite easy.
Fifth is ACPI, the Advanced Configuration and Power Interface. Thanks to this protocol, your PC can sleep and shut down cleanly. This layer also directly controls energy-saving standards like ErP.
| Job | Description | Failure Result |
|---|---|---|
| POST | Hardware test and first start | System won’t start; beep sounds |
| Boot | Find and start a bootloader | OS doesn’t load |
| Hardware Detection | Update SMBIOS and NVRAM | Devices don’t show up or conflict |
| Configuration | Apply user settings | Wrong clock, faulty boot order |
| ACPI | Manage power states | PC won’t turn off or sleep |
What Does BIOS Do? The Boot Process and POST
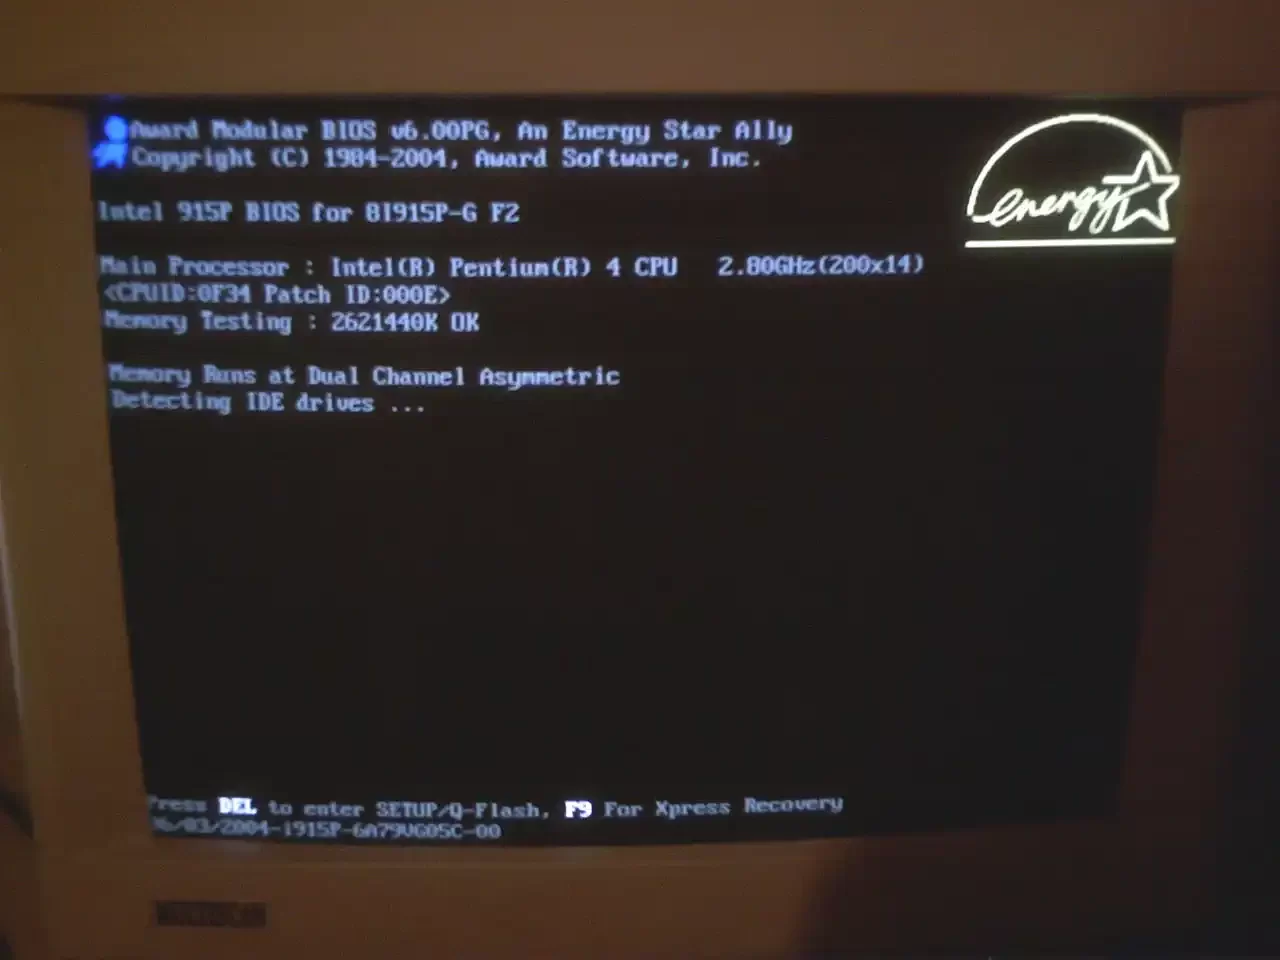
Now let’s go deeper. Without BIOS, your PC is just a pricey pile of metal. The CPU has no clue where to fetch its first instruction.
Once the firmware kicks in, it sends a reset signal to all chips. Next, it starts the northbridge, then the southbridge. After that, the memory check and graphics card start-up routine runs.
After the graphics adapter card starts, your monitor shows the first image. That’s when you see the motherboard maker’s logo and breathe easy. Yet dozens more tasks run in the background.
At this stage, the system preps USB controllers, SATA ports, and sound cards. It then scans boot options for a valid bootloader. Finally, when it hands off to the operating system, the BIOS job is done.
POST (Power-On Self Test) Process and Error Handling
When power hits, a series of checks kicks in like a POST card. First, it tests the CPU registers. Then it probes each memory cell and flags faults.
If the graphics card can’t start, you usually hear long and short beeps. The meaning of these beep codes changes by brand. We’ll share the most common AMI BIOS buzzer code table later.
Debug LEDs on today’s motherboards make this much easier. If the DRAM light glows, you know the RAM is the issue. So, you can debug without hunting down the exact board model.
When POST fails, the system protects itself and shows no boot screen. That’s when rescue mode or flashback features step in. This way, a wrong setting won’t turn your board into trash.
Last, note that the system writes POST logs into NVRAM. Later, you can check those records and pinpoint the cause. Indeed, this method makes catching chronic faults a breeze.
Bootloader and OS Handoff: How the Boot Order Works
After POST runs cleanly, the boot phase begins. The BIOS looks at the boot priority list. It tries to read the first sector of the first device.
If it finds a valid bootloader there, it hands over control. Then it starts Windows Boot Manager or GRUB this way. After that, the OS loads its own kernel and shows the desktop.
The disk partition style plays a key role here. MBR triggers the old Legacy Boot method. GPT, on the other hand, gives you a safer start via the UEFI driver.
NVMe boot support lets you power up the system in seconds. The board also activates security layers like Secure Boot and TPM during this. As a result, the boot manager does its job fully.
Initial Program Load also starts right here. This process begins at the BIOS level and reaches up to the OS kernel. If all goes well, the system boot completes.
| Boot Mode | Disk Style | Max Capacity | Security |
|---|---|---|---|
| Legacy Boot | MBR | 2 TB | Low |
| UEFI | GPT | 9.4 ZB | High (Secure Boot) |
BIOS vs UEFI: Which Is Better?
A classic ROM-based build and modern UEFI are worlds apart. First, the old system runs in 16-bit mode and is stuck with a 1 MB address space. SO, the new one runs in 32- or 64-bit mode, reaching far more memory.
The interface gap is huge, too. The old setup greets you with a blue screen you steer with a keyboard. UEFI gives you mouse support and a colorful graphic UI. Some models even offer a UEFI shell.
Capacity is also very different. SPI Flash size is limited; large firmware images won’t fit. Modern versions can use gigabytes of storage. So, they host Option ROMs and drivers on board.
On the security side, Secure Boot and TPM integration stand out. The old system let malicious software hide itself. The new one blocks unsigned code from running. This keeps firmware integrity intact.
For performance, UEFI wins hands down. It runs the hardware init process in parallel. The boot time shrinks visibly. That’s why all modern motherboards now follow this standard.
UEFI vs Legacy BIOS: Which Mode Should I Use?
This is a key choice, mainly for new PC builders. If you plan to run Windows 11, you must pick UEFI mode. Also, choose GPT as the disk partition style.
Old operating systems or some special cards may need Legacy Boot. In that case, you must turn on CSM support. Still, I suggest staying away from this mode if you can.
Legacy OpROM use invites security holes. Plus, you lose out on modern hardware acceleration features. So, unless you have a very specific reason, UEFI boot manager is always the right pick.
- UEFI Pros: Faster boot, Secure Boot, GPT support, and mouse use.
- Legacy Pros: Old OS compatibility, some special PCI device support.
- Cons: UEFI won’t work on old hardware; Legacy carries a security risk.
Secure Boot and TPM 2.0: The BIOS Side of Windows 11 Requirements
Secure Boot is a shield that works right at the BIOS layer. Its goal is to launch only code signed by trusted makers. This way, it stops rootkits and such threats before they even enter the system.
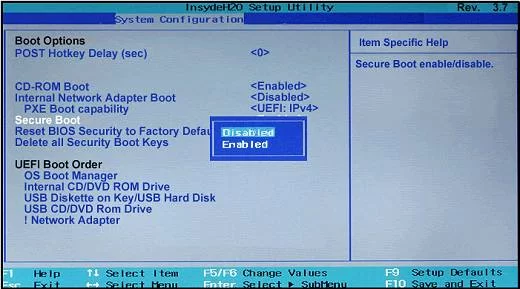
TPM 2.0, known as Platform Trust Manager, is a security chip. The OS stores your encryption keys on it. It also keeps checking hardware integrity nonstop.
You must enable both to install Windows 11. Go to the Security tab in the setup menu. Set TPM and Secure Boot to Enabled. Then save the changes and exit.
Some old boards ship with PTM turned off by default. You might even see this setting grayed out. Then you must first turn off CSM support. After that, the TPM option becomes active.
When a Secure Boot breach happens, the system halts and warns you. This often occurs after loading an unsigned driver. The fix is to use signed drivers or stick to trusted sources.
How to Enter BIOS: A Key Guide for All Brands
I’ll give a clear answer to this most-asked question. Right after you hit the power button, you just press a certain key. But that key changes by brand.
Usually, Del, F2, or F10 are the most common. Laptops may need an Fn key combo. Also, with fast startup on, you might fail to get in. Then try holding Shift while you restart.
Now most systems let you reach the UEFI shell right through the boot menu. Still, use the full table below as your guide. This list will save you when you face an old computer.
Desktop Motherboard BIOS Keys (ASUS, MSI, Gigabyte, ASRock)
| Motherboard Brand | BIOS Entry Key | Boot Menu Key | Flashback Key |
|---|---|---|---|
| ASUS | Del or F2 | F8 | ASUS EZ Flash (F3) |
| MSI | Del | F11 | M-Flash |
| Gigabyte | Del | F12 | Q-Flash |
| ASRock | Del or F2 | F11 | Instant Flash |
| Biostar | Del | F9 | BIOS Flasher |
Above, you see the firmware entry keys for the most popular boards. You also reach special tools like ASUS EZ Flash and M-Flash from this menu. Pressing the Q-Flash button can take you straight to the update mode.
ASUS boards typically have the most user-friendly interface. MSI adds gaming-focused graphics and simplifies fan curve tuning. Meanwhile, Gigabyte models offer a cleaner menu.
Laptop BIOS Entry: Lenovo, HP, Dell, Acer, Huawei Guide
- Lenovo BIOS key: F2 or Fn+F2. Some models have a small Novo button.
- HP: F10 takes you right to the setup menu.
- Dell: F2 is the main entry key. F12 opens the boot menu.
- Acer: F2 is the most used key. But on old models, Del also works.
- Huawei: You use F2. F12 is for boot options, too.
On laptops, you might worry if the device will turn on when the battery is dead. It will, but the system date and time reset. Also, some models may need service if the battery is fully drained.
Basic BIOS Settings: Boot Order, Date/Time, Hardware Detection
When you enter the interface, a few main tabs show up. The Boot tab is the one you’ll use most. When installing an OS, you must boot from a USB flash drive.
The Main tab shows date and time settings. You also see attached SATA devices and memory amount there. This lets you quickly check hardware detection results.
The Advanced tab holds CPU and chipset configuration. You reach CPU virtualization and power management options here. Luckily, the option to reset to factory defaults is always within reach.
| Tab | Content | Frequent Use |
|---|---|---|
| Main | Date, time, attached drives | Hardware check |
| Boot | Boot priority, CSM | Formatting and rescue |
| Security | Encryption, Secure Boot | Security setup |
| Advanced | CPU, chipset settings, virtualization | Performance tuning |
Setting the Boot Order
To change the boot order, go to the Boot tab. Find the Boot Option Priorities heading there. Move your USB drive or DVD drive to the first spot.
Then put your system disk second. Because of that, if no USB is plugged, it goes straight to the OS. Last, press F10 to save and exit.
Some systems let you open the boot menu instantly with F11 or F12. This gives you a one-time choice without permanent changes. It’s the most handy method for USB boot settings, too.
If you get a boot error, first check the disk connections. Next, make sure the right disk sits at the top of the boot priority list. The system sometimes resets this list after a BIOS update, you know.
SATA Mode: AHCI, RAID, and IDE Differences
| Mode | Advantage | Disadvantage | Use Case |
|---|---|---|---|
| IDE | Full old OS support | Low speed, no NCQ | Windows XP and old Linux |
| AHCI | Native command queue & hot-plug | Needs driver on old XP systems | Daily use, SSD and HDD |
| RAID | Redundancy or speed pooling | Driver must be loaded before setup | Servers and workstations |
If you use an SSD disk, AHCI mode is a must. The TRIM command only works in this mode. Also, NCQ boosts read/write speed by ordering commands.
The RAID option pools multiple disks into one unit. But you need to load a driver first. Unless you’re building a special server, AHCI is the right pick for you.
BIOS Performance Settings: XMP, Re-Size BAR, Fan Curve
Now we come to my favorite part. Performance tuning starts right here. With the right settings, you gain free speed.
Most users never use their RAM’s full speed. That’s where the XMP profile saves the day. Similarly, Re-Size BAR widens the pipe between your graphics card and CPU.
But remember, any overclock attempt can void your warranty. So follow the steps with care. The risk is all yours.
XMP and EXPO Profiles: How to Unleash Your RAM Speed
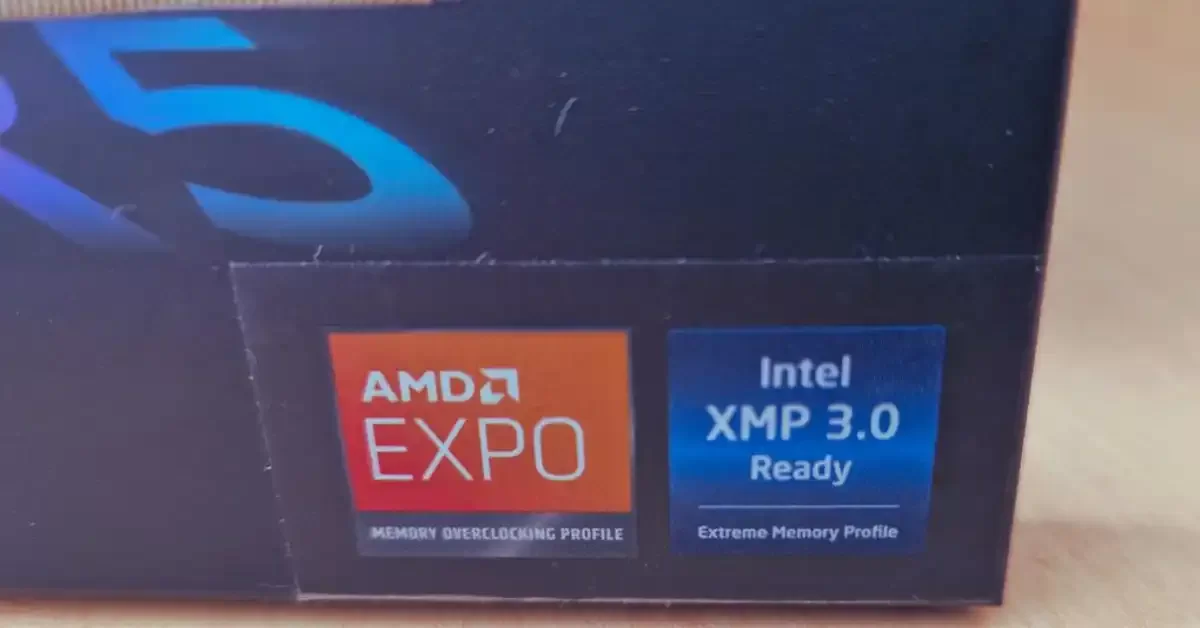
Extreme Memory Profile, or XMP, is a tech Intel built. It’s a ready-made overclock profile stored on your RAM module. You just pick the profile, and the system does the rest.
EXPO is a similar standard used on the AMD side. It fits Ryzen processors like a glove. Both handle memory timings and DRAM frequency for you.
Don’t be shocked if you see the DOCP option in your setup menu. On ASUS boards, it serves the same role. That way, you break out of JEDEC standards and hit the true speed.
The XMP Profile 1 and 2 difference mainly lies in memory controller aggression. The first profile offers more conservative settings. So, the second aims a bit higher on frequency but needs a stability test.
| Profile | Goal | Risk | Advice |
|---|---|---|---|
| XMP 1 | Guaranteed speed | Low | Ideal for daily use |
| XMP 2 | Higher frequency | Medium | For overclock fans |
| DOCP | Auto profile | Low | For ASUS users |
| EXPO | AMD tuning | Low | For Ryzen builds |
The QVL list is your most trusted guide here. You can see tested memory models on your board maker’s site. RAM from this list works without a hitch.
How to Turn On Re-Size BAR and Smart Access Memory (SAM)
Re-Size BAR tech lets the CPU access the whole GPU memory at once. The old way split this access into 256 MB chunks. Now the system opens this gate all the way.
With this feature, you see a 5% to 15% performance boost in games. But a few must-dos exist to enable it. First, CSM support must be off, and Secure Boot must stay on.
AMD calls this tech Smart Access Memory. The core idea is the same, though. First, turn on Above 4G Decoding in the setup. Then, enable Re-Size BAR right after.
Next, you must boot the OS in GPT mode with a UEFI driver. Once you finish all steps, you can check with GPU-Z to confirm your win.
The PCI Express bus forms the base of this tech. So your board’s PCIe version also directly affects performance.
- First, turn off CSM support.
- Set Above 4G Decoding to Enable.
- Set Re-Size BAR Support to Enable.
- Save, exit, and check inside the OS.
Fan Curve Setup: The Silence and Cooling Balance
Changing the fan profile lets you control your PC’s noise. Default settings are often performance-oriented and sound like a jet under load. With the right curve, you can build a near-silent system.
Enter the Hardware Monitor or Smart Fan tab in the setup menu. You’ll see separate curves for the CPU and case fans. You set the temp and fan speed points yourself.
For example, I keep my CPU fan at 40% speed up to 50 °C. At 70 °C, I push it to 70%. At 85 °C, it runs at full power. That way, my system stays whisper-quiet for daily use.
When adjusting fan speed, note the PWM and DC mode difference. With 4-pin fans, PWM gives very fine control. Old 3-pin fans only speed up through voltage control.
| Temperature (°C) | PWM % (Silent) | PWM % (Performance) |
|---|---|---|
| 40 | 20 | 30 |
| 55 | 35 | 50 |
| 70 | 60 | 80 |
| 85 | 100 | 100 |
BIOS Overclock and Undervolt Guide (Advanced)
Before we go further, I must give a serious warning. A wrong setting can permanently damage your CPU or board. Also, does BIOS overclock void the warranty? For most brands, yes. Please follow each step with care.
Overclocking rests on two main knobs. They are the CPU multiplier and voltage. The first sets the speed; the second keeps it stable.
Patience is the key, based on my own time. Take small steps each round. Always run a stress test after any change.
CPU Overclock: Multiplier, Voltage, and Power Limits
First, make sure your CPU is a K-series or supports overclocking. Then enter the CPU Configuration menu. Start by raising the CPU Ratio one step.
To check stability, run a system test like Prime95. If it doesn’t crash, raise it one more step. Keep going until you hit a blue screen.
When the blue screen hits, voltage tuning kicks in. Increase VCore in 0.025V steps. But never go past the safe ceiling. You can find this limit on the maker’s official site.
Power limits matter just as much. Pull the CPU Package Power Limit to the max your board supports. This way, the CPU won’t have to drop its speed under load.
The system also indirectly affects virtual memory settings at this stage. So always check overall system stability after overclocking.
| Parameter | Safe Start | Advanced | Dangerous |
|---|---|---|---|
| VCore | 1.25V | 1.35V | 1.40V+ |
| CPU Ratio | +1 | +3 | +5 and above |
| Temperature | 70°C | 85°C | 95°C+ |
Undervolt: Run Cooler with Lower Voltage
Everyone chases CPU overclocking, but I’m an undervolt fan. You get the same performance at a much lower temp. Plus, hardware lasts longer, and fan noise drops.
On laptops, this method works wonders. You lower the CPU voltage step by step. Move forward with a stability test each time.
I suggest doing the CPU voltage drop in offset mode. That way, the system also saves power under light load. Start around -0.050V and try to go down to -0.100V.
Some processors handle this quite well. On my Intel system, -0.075V runs 10 °C cooler. And I see no performance loss.
| Offset Value | Temp Drop | Stability Risk |
|---|---|---|
| -0.025V | 3–5°C | Very low |
| -0.050V | 5–8°C | Low |
| -0.075V | 8–12°C | Medium |
| -0.100V | 10–15°C | High |
Virtualization and Power Management in BIOS
Virtualization tech is now a need for home users, not just servers. Tools like WSL2, VMware, or VirtualBox won’t run without it. The good news? Turning it on is very easy.
Power management settings are key for 24/7 systems. ErP mode lets you use nearly zero energy while off. Wake-on-LAN also gives you remote access power.
With hardware virtualization, you can run dozens of guest systems on one real machine. You first need to enable the right tech at the BIOS level.
Intel VT-x and AMD-V: Enabling Virtualization Tech
To turn on virtualization from the BIOS, go to the Advanced tab. Under CPU Configuration, find Intel Virtualization Technology or SVM Mode. Set this to Enable.
Some systems show this choice grayed out and won’t let you change it. Then first learn your board model and check for the newest BIOS. After an update, the option often unlocks.
An Intel ME BIOS update can also affect this setting. So get in the habit of reading BIOS version notes. Finally, save, exit, and check inside the OS.
Power Management: ErP, Wake-on-LAN, and USB Power Settings
The ErP EuP setting cuts all power when the PC is off, including USB. Standby draw drops below 0.5 Watt. However, features like keyboard wake won’t work.
Wake-on-LAN lets your network card wake the system with a magic packet. First, enable this setting. Then also turn it on in the NIC driver inside the OS. That gives you a great remote access fix.
With USB power settings, you can charge your phone even when the PC is shut down. But this raises standby power use. So choose based on your own need.
Power loss protection becomes key in areas with shaky grids. This setting lets the system auto-recover after a sudden power cut. The system also handles early power-on signals under this heading.
- ErP Ready: Saves energy when off.
- Wake-on-LAN: Gives remote wake ability.
- USB Power Delivery: Supports charging while off.
- AC Power Recovery: Auto-starts when power returns.
BIOS Security: TPM, Secure Boot, and Rootkit Protection
Firmware security has become one of the hottest topics in recent years. Attackers now skip the OS and target the motherboard chip directly. They can fully own your system without you even knowing.
Board makers have taken strong steps on this. They built hardware shields like tamper protection and lock bits. Regular updates also keep closing the gaps.
The answer to how to close BIOS security holes is quite simple. Just stay current and use Secure Boot plus TPM. Also, disable loading unsigned Option ROMs.
With a BIOS password, no unauthorized person can enter the setup. This is a must for data safety in business settings. Boot Blocker stops booting from unapproved devices, too.
BIOS Rootkits and Firmware Attacks: Can Your PC Be Taken Over Without You Knowing?
Yes, absolutely. Rootkits like LoJax managed to write themselves into SPI Flash. As a result, they survived even after you wiped the OS. That’s why firmware integrity checks are life-or-death matters.
The BIOS attack surface is far wider than you might think. Through System Management Mode holes, they can slip into the deepest layer. Intel Boot Guard and AMD PTM cut this risk, thankfully.
The firewall link here is different. A firewall checks network traffic. But a rootkit at this firmware layer can even bypass network rules. It runs at the most basic level.
A system with a firmware security hole is fully open. That’s why developers built extra checks like Boot Integrity Services. They keep checking code integrity during the whole boot.
BIOS Password Reset and Removal Methods (Jumper, CMOS Battery, Backdoor)
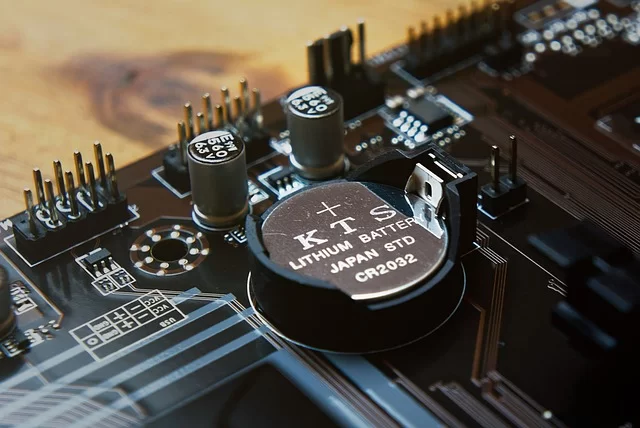
If you forgot your BIOS password, don’t panic. Three main ways exist to fix this. The first and easiest is to pull the CMOS battery from its slot on the board.
Take the battery out, wait a few minutes, and put it back. This will reset all your settings. This method usually works on laptops, too. But on some models, the battery is soldered in place.
The second way is the Clear CMOS jumper reset. You’ll find two pins on the board labeled CLR_CMOS. With the PC off, short those pins with a screwdriver for 10 seconds.
The last resort is the master password makers use. These backdoor passwords change by brand, and you can find them by searching online. Still, they may not always work.
| Method | Difficulty | Success Rate | Data Loss |
|---|---|---|---|
| Battery Removal | Easy | 95% | Settings cleared |
| Jumper | Medium | 90% | Settings cleared |
| Backdoor | Easy | 50% | None |
BIOS Update Guide and Brick Recovery Methods
The update process scares many users. Yet, when done right, the risk is nearly zero. But a power cut or wrong file choice causes big trouble.
If you ask what a BIOS update does, I can list three main wins. First, it adds support for new CPUs. Second, it closes security holes. Third, it boosts system stability.
Thanks to tech like flashback and dual BIOS, rescue is now very easy. Still, always be careful and avoid updates you don’t need. There’s no point in fixing a system that already works.
Backing up the BIOS ROM is the most critical step before an update. Some boards do this backup on their own. Still, taking an external backup never hurts.
5 Critical Steps Before a BIOS Update
- Note the current version: Look at the BIOS Version line in the setup menu and snap a photo.
- Download the right file: Learn your board model and pick the exact file for your board from the maker’s site. A wrong version will brick the board.
- Prepare the USB drive: You must pick FAT32 as the format. Also, use an empty, error-free flash drive.
- Secure the power: Plug a UPS into a desktop PC. On a laptop, charge the battery fully and keep the power cord plugged in.
- Read the version notes: Get in the habit of reading BIOS update notes to know if you need to skip any in-between versions.
Be careful during the USB prep step for a BIOS update. Some boards only support certain ports. For example, ASUS asks you to use the specially marked USB port for Flashback.
Motherboard Bricked (Won’t Start): Recovery with Flashback, Dual BIOS, and SPI Programmer
If your board is bricked and you ask what to do, stay calm. The first thing to try is the flashback method. You plug a drive with the update file into the special USB port on the board.
Then hold the flashback button down. This works even when the system is off. What’s more, the mechanism directly writes the firmware ROM. Q-Flash Plus and ASUS EZ Flash work on a similar idea.
Some high-end boards have a dual BIOS feature. If the first one fails, the second kicks in on its own. It starts the rescue mode. The board even re-writes the broken chip.
If those fail, the last resort is an SPI flasher. With this tool, you can program the motherboard chip directly without desoldering it. But this job needs advanced soldering skills.
The answer to what happens if the power fails during a BIOS update is the methods above. So, before running to a repair shop, always try flashback and dual BIOS first.
Learning how to back up and restore the BIOS saves you from this headache fully. Keep a rescue image file in a safe place or have a rescue disk ready.
| Technology | How It Works | Success Rate |
|---|---|---|
| Flashback | Writes via USB without CPU | 95% |
| Dual BIOS | Auto-copies from backup chip | 99% |
| CrashFree BIOS | Auto-rescue from disk | 80% |
| SPI Programmer | Writes to chip with external tool | 100% |
Issues After BIOS Update and Fixes
After an update, you sometimes face odd issues. The top ones are a black screen or unrecognized hardware. The fix is simple in most cases, though.
First, you should know how to reset the BIOS. The new version may clash with old profiles. After a reset, everything usually goes back to normal.
Also, be patient during the first boot after an update. The system may restart a few times while it does memory training. This is fully normal.
If you hit a firmware error, don’t panic. Run the basic checks. Often, the issue stems from a wrong setting, not a bad version. A microcode update can also create brief clashes.
Computer Won’t Start After BIOS Update: What to Do?
If this happens, make Clear CMOS your first move. Do a jumper reset or pull the battery and put it back. This fixes the problem most of the time.
Next, unplug all USB devices and external drives. Keep only the keyboard and monitor connected. Sometimes, a new version clashes with an old USB device and blocks the boot.
If it still won’t start, try with a single memory stick. Even use a different RAM slot. A new microcode update can sometimes affect memory compatibility.
Last, use flashback to go back to the previous stable version. Going back is always possible at this point. Just don’t panic and follow the steps in order.
Hardware Not Detected After Update (USB, Graphics Card)
Sometimes, after an update, USB ports or NVMe drives go missing. This usually happens because CSM or Legacy OpROM settings got reset. Check those settings right away.
If the graphics card isn’t seen, you face a black screen during BIOS boot. Then switch to the built-in graphics and try to re-detect the external card. Also, lock the PCI Express config to Gen3 instead of Auto.
AGESA bugs cause similar issues, mainly on AMD systems. Luckily, the Ryzen BIOS update guide helps you fix these fast. Just be sure you picked the right version.
BIOS Error Codes and Beep Meaning (POST Codes)
When your PC won’t start, it’s actually crying out for help. This cry comes as beep sounds or debug LED lights. Learning to read these codes lifts you to a technician’s level.
Before, we used to plug in a POST card at the shop to read error codes. Now boards come with built-in displays. In short, you can crack BIOS error beep meanings much faster.
Beep codes differ for each maker. But the two most common brands are AMI and Award. Now I’ll give you a full table.
AMI, Award / Phoenix BIOS Beep Code Table
| Beep Sound | AMI Meaning | Award Meaning | Suggested Fix |
|---|---|---|---|
| 1 Short | DRAM refresh failure | System booted fine | Re-seat the RAM |
| 2 Short | Parity error | Minor error (CMOS setting) | Clear CMOS |
| 3 Short | Base memory error | Keyboard controller error | Replace RAM |
| 4 Short | System timer error | Memory error | Replace battery |
| 5 Short | Processor error | Processor error | Check the CPU |
| 1 Long 2 Short | Display card error | Display card error | Re-seat the GPU |
| 1 Long 3 Short | Memory error | Display card error | Change slot |
| Continuous Short | Power supply error | Memory or display card | Test PSU |
This table points you in the right direction, but a debug LED is more reliable for a firm diagnosis. Makers can tweak beep codes a bit. Also, you might not hear any buzzer code on some systems.
Motherboard Debug LED and POST Card Use
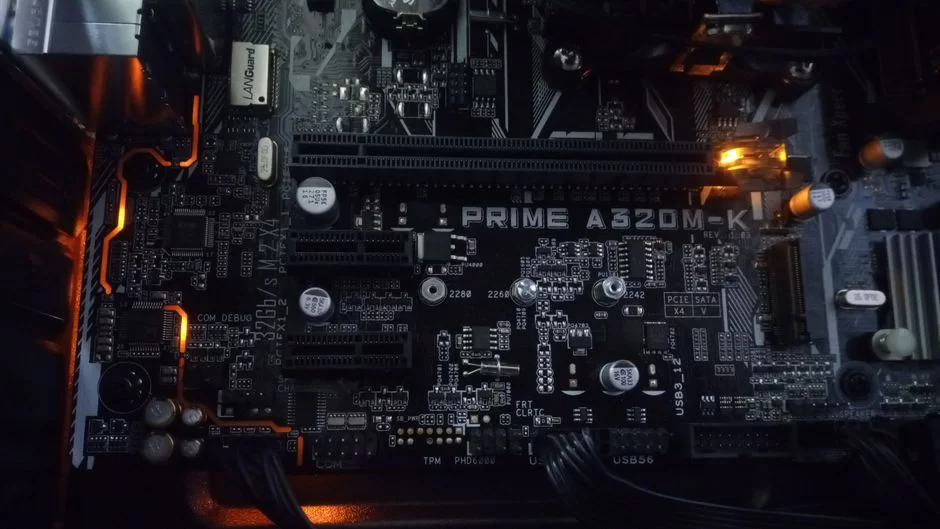
Modern boards have four LEDs: CPU, DRAM, VGA, and BOOT. Each one shows the hardware startup stage. Whichever light stays on points to the faulty part.
High-end models show a numeric error code display. With the POST code you see there, you can pinpoint the fault exactly. For example, code 00 often means the CPU isn’t seated.
For those who don’t know what a debug LED is, here’s the gist. It’s a flashlight that saves you from stumbling blindly through the board’s dark world. That’s why I always look for a debug feature when buying a new board.
| Debug LED | Meaning | First Check |
|---|---|---|
| CPU | CPU couldn’t start | Check power cables |
| DRAM | Memory error | Try RAM sticks one by one |
| VGA | Graphics card issue | Check GPU power cables |
| BOOT | No boot device found | Review disk connections |
BIOS CMOS Battery Replacement and Clear CMOS Reset
The flat, round battery on your motherboard never crosses your mind day to day. Not until your PC forgets the time at each boot. That’s when you start asking how long the BIOS battery lasts.
The average life span is 3 to 5 years. Damp air and being off all the time shorten it. The good news? Swapping it is a very simple task.
Can you boot the PC if the BIOS battery dies? Of course you can. But the system date resets each time. Even worse, you might lose your boot settings. So don’t put it off; change it right away.
When and How to Replace the CMOS Battery
The signs are very clear. The system clock keeps falling behind. You also need to press F1 at every boot. Some systems even throw a straight CMOS Checksum Error.
To swap it, first pull the power cord. Then open the case and find the CR2032 battery on the board. Press the small clip on its side and pop it out of the slot.
Don’t worry about data loss when changing the BIOS battery. Yes, you will lose all your custom settings. So, I suggest snapping a photo of your settings first.
Put in the new battery, start the system, and fix the date and time. Then redo your custom settings like XMP profile and fan curve. That’s all there is to it.
Clear CMOS: Jumper, Button, and Battery Removal Methods
You’ll find two pins on the board labeled CLR_CMOS. Normally, these two pins sit in the open state. To reset, short them with the PC turned off—that’s all.
Some models include a built-in button. With a Clear CMOS button on the rear panel, you can reset without opening the case. This is a huge help during overclock tests.
The battery removal method is the most surefire one. The jumper method may not work on some boards. Pull the battery, wait 5 minutes, and put it back.
| Method | Time | Ease |
|---|---|---|
| Jumper | 10 seconds | Case must be opened |
| Button | Instant | Easiest |
| Battery Removal | 5 minutes | Guaranteed method |
Formatting via USB from BIOS and Boot Settings
To format from a USB drive, you must set the right boot options first. Otherwise, you’ll see a Missing Operating System error. Here’s the guide with all the key points.
The most-used method today is UEFI USB boot. It’s both faster and compatible with Secure Boot. But on old systems, you must turn on CSM support.
BIOS Settings for USB Boot (Secure Boot, CSM, Boot Order)
- Secure Boot state: Can stay on for modern systems. But you must turn it off for some Linux distros.
- CSM setting: Enable it if you’re installing an old OS. For Windows 10 and 11, it should stay disabled.
- Boot Order: Move your USB drive to the first spot. Also, pick the option with the UEFI prefix.
- USB prep: Use Rufus or Media Creation Tool with FAT32 format. The UEFI environment sometimes can’t read NTFS.
That sums up how to format from BIOS. After you save and exit, the system reboots and the setup screen from USB appears. The rest follows the classic steps.
BIOS MBR and GPT Conversion: Which Disk Partition Style to Pick?
You can’t directly switch between MBR and GPT from the BIOS. This job runs via the command line from installation media. Yet the firmware decides which mode you must be in.
MBR, an older tech, forces a 2 TB disk limit on you. It also lets you have only four main partitions. In contrast, GPT offers unlimited partitions and 9.4 ZB of space. Plus, it pairs fully with UEFI.
If your system boots via Legacy Boot, MBR is a must. But with a UEFI boot manager, you should pick GPT. For Windows 11, GPT is no longer a choice—it’s a requirement.
Open-Source BIOS Alternatives: Coreboot and Libreboot
A community stands up to the world of closed-source firmware. They dream of a fully free and open-source motherboard software. The dream is called Coreboot, with its freedom-loving sibling Libreboot.
These projects aim to end secret code behind closed doors. They also bring fresh security patches to aging hardware. Most of all, they fully disable back doors like Intel ME.
I follow this movement closely. I believe firmware freedom is the cornerstone of software freedom. But I must note that it doesn’t work on every board.
Coreboot and Libreboot: Why Choose Them? (Speed, Security, Freedom)
What is Coreboot? In short, speed and simplicity. The project only starts the hardware and then hands off to a payload right away. That gets you to the OS in seconds.
All needless old code is stripped out. The result is an insanely fast startup program. The code is open for anyone to inspect, so security holes have less room to hide.
Libreboot setup goes one step further. It removes all binary blobs—closed-source parts that aren’t fully free. This philosophy revolves fully around digital privacy.
| Feature | Standard BIOS | Coreboot | Libreboot |
|---|---|---|---|
| Speed | Slow | Very fast | Very fast |
| Security | Closed code | Open-source | Fully free |
| Compatibility | Very wide | Limited | Very limited |
Virtualization BIOS: OVMF (QEMU) Use
Even in virtual machines, you need to run as if a real firmware is there. OVMF meets this need exactly. It is a virtual adaptation of the UEFI standard.
When creating a VM with QEMU, you assign this file as the firmware. This way, you can use Secure Boot and GPT disks even in a virtual world. Developers also use this setup to test their own drivers.
Thanks to virtual BIOS OVMF, the gap between real hardware and a virtual setup shrinks to a minimum. That brings huge flexibility to the software development cycle.
Further Reading Resources for BIOS
We took a very thorough journey in this guide. For those who want to dig deeper, I’m leaving a few top-shelf resources. They hold the official standards and the latest research on the topic.
- I suggest first reading the official spec published by the UEFI Forum. You can reach the newest standards at the UEFI Forum Official Specification Page.
- Also, the OSDev.org UEFI dev guide, built for OS developers, lays out everything from UEFI protocols to boot services in deep detail. The OSDev.org UEFI Page is a must-use reference for both newcomers and seasoned devs.
- Last, the Coreboot project’s official docs are a gold mine for open-source fans. Through Coreboot Official Developer Docs, you can even pitch in to the project.
Everything on Your Mind About BIOS: 10 Key Questions
Will the computer not turn on if the BIOS battery dies?
What happens if the power goes out during a BIOS update?
Does converting MBR to GPT from the BIOS cause data loss?
Does overclocking void the BIOS warranty?
I get no BIOS screen, just a black screen. What should I do?
Does setting the fan speed in the BIOS cool the computer?
Is turning on TPM 2.0 in the BIOS required for Windows 11?
Does a BIOS update boost performance?
How do you format from the BIOS?
How do you reset a forgotten BIOS password?
Conclusion: The Future of BIOS and Smart Use
We’ve reached the end of our tour through the vast BIOS chip universe. A journey that started as a motherboard chip now stretches to cloud computing. So never take this small piece of software lightly.
In the future, Project Mu and Rust-based firmware projects promise a safer world. Firmware updates will roll out silently, just like OS patches. Use this guide as your go-to source to keep pace with that change.
Remember, a well-tuned startup program is the backbone of your system. So don’t shy away from entering the setup menu and keep learning. Best of luck and stable systems to you!

Be the first to share your comment