
You can achieve maximum efficiency by turning on Virtualization Technology on your devices with Intel or AMD processors.
This technology is a processor-related feature available on your desktop or laptop computers. This characteristic must be enabled to use virtualization programs such as VMware Workstation, VirtualBox, and Hyper-V.

How to Activate Virtualization Technology to Use Software on a PC
To enable virtualization on your PC, your Intel or AMD CPU must first support this feature. You can help with this by enabling the feature on your CPU after opening the BIOS settings.
If your CPU does not support virtualization technology, you may need to purchase a new one and update your computer.
It is helpful to note that the processor has the VTx when you buy a new PC. Alternatively, if you have a desktop computer and your CPU lacks this characteristic, you will need to upgrade your system with a new one.
Before you start turning on this feature, I suggest you learn your processor’s abilities. The CPU, the brain of your computer, sets not only speed but also these kinds of special skills.
Virtualization support is just one of these special instruction sets. What most people miss is how these skills change your work load. A small search could save you from needless cost.
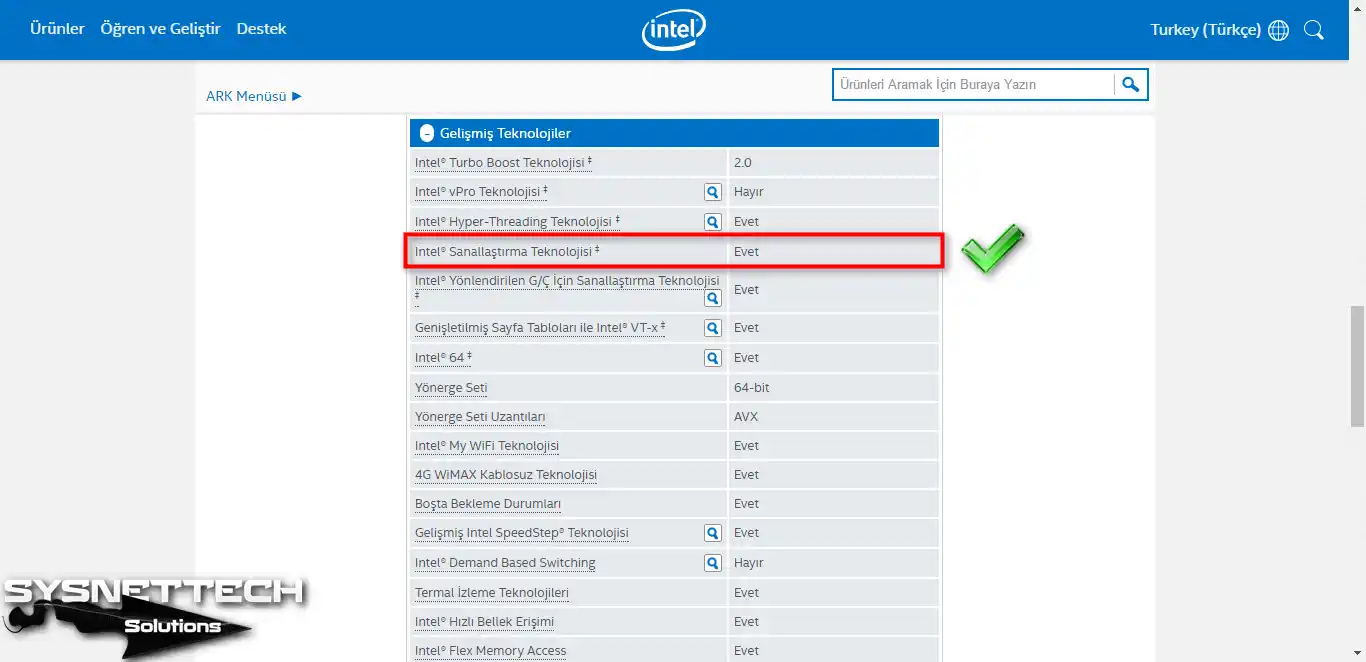
You can visit its website to check all the features of Intel hardware. The following image displays all the information about the Core i7-3632QM.

As shown in the image below, Intel VTx Technology is available.
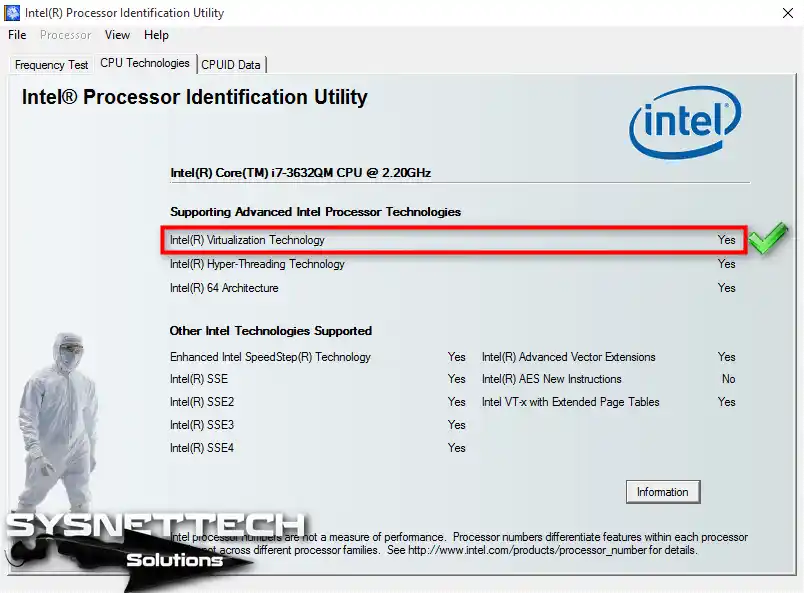
How to Check Processor VT-x Using Intel Processor Identification Utility
Download the Intel CPU software from here to your computer and install it. After opening the tool, you can find out whether your processor supports the VTx feature.
Additionally, if you have an AMD processor, download the relevant program from this link and review the processor’s features.
How to Activate AMD/Intel VT-x in BIOS on PC/Laptop
Many people are researching what BIOS virtualization is, but there is no such thing as BIOS virtualization. This is a processor feature that can be enabled in the BIOS settings of your computer’s motherboard.
To enable VTx for these CPUs, you must first enter the BIOS. Restart your computer and press F2 or DEL to enter the BIOS.
At this stage, you’re interacting with the BIOS for the first time in a serious way. This software, which contains all the basic settings of your motherboard, acts as a bridge between the PC hardware and the operating system.
To go into more detail, a wrong setting can stop the system from starting. So, I strongly suggest that you learn the details of the BIOS settings. This knowledge will give you great trust when doing tasks.
Follow the steps below to open VTx on a desktop computer or laptop.
Steps:
Step 1
To access the Configuration option, use the directional keys on the keyboard and press Enter.
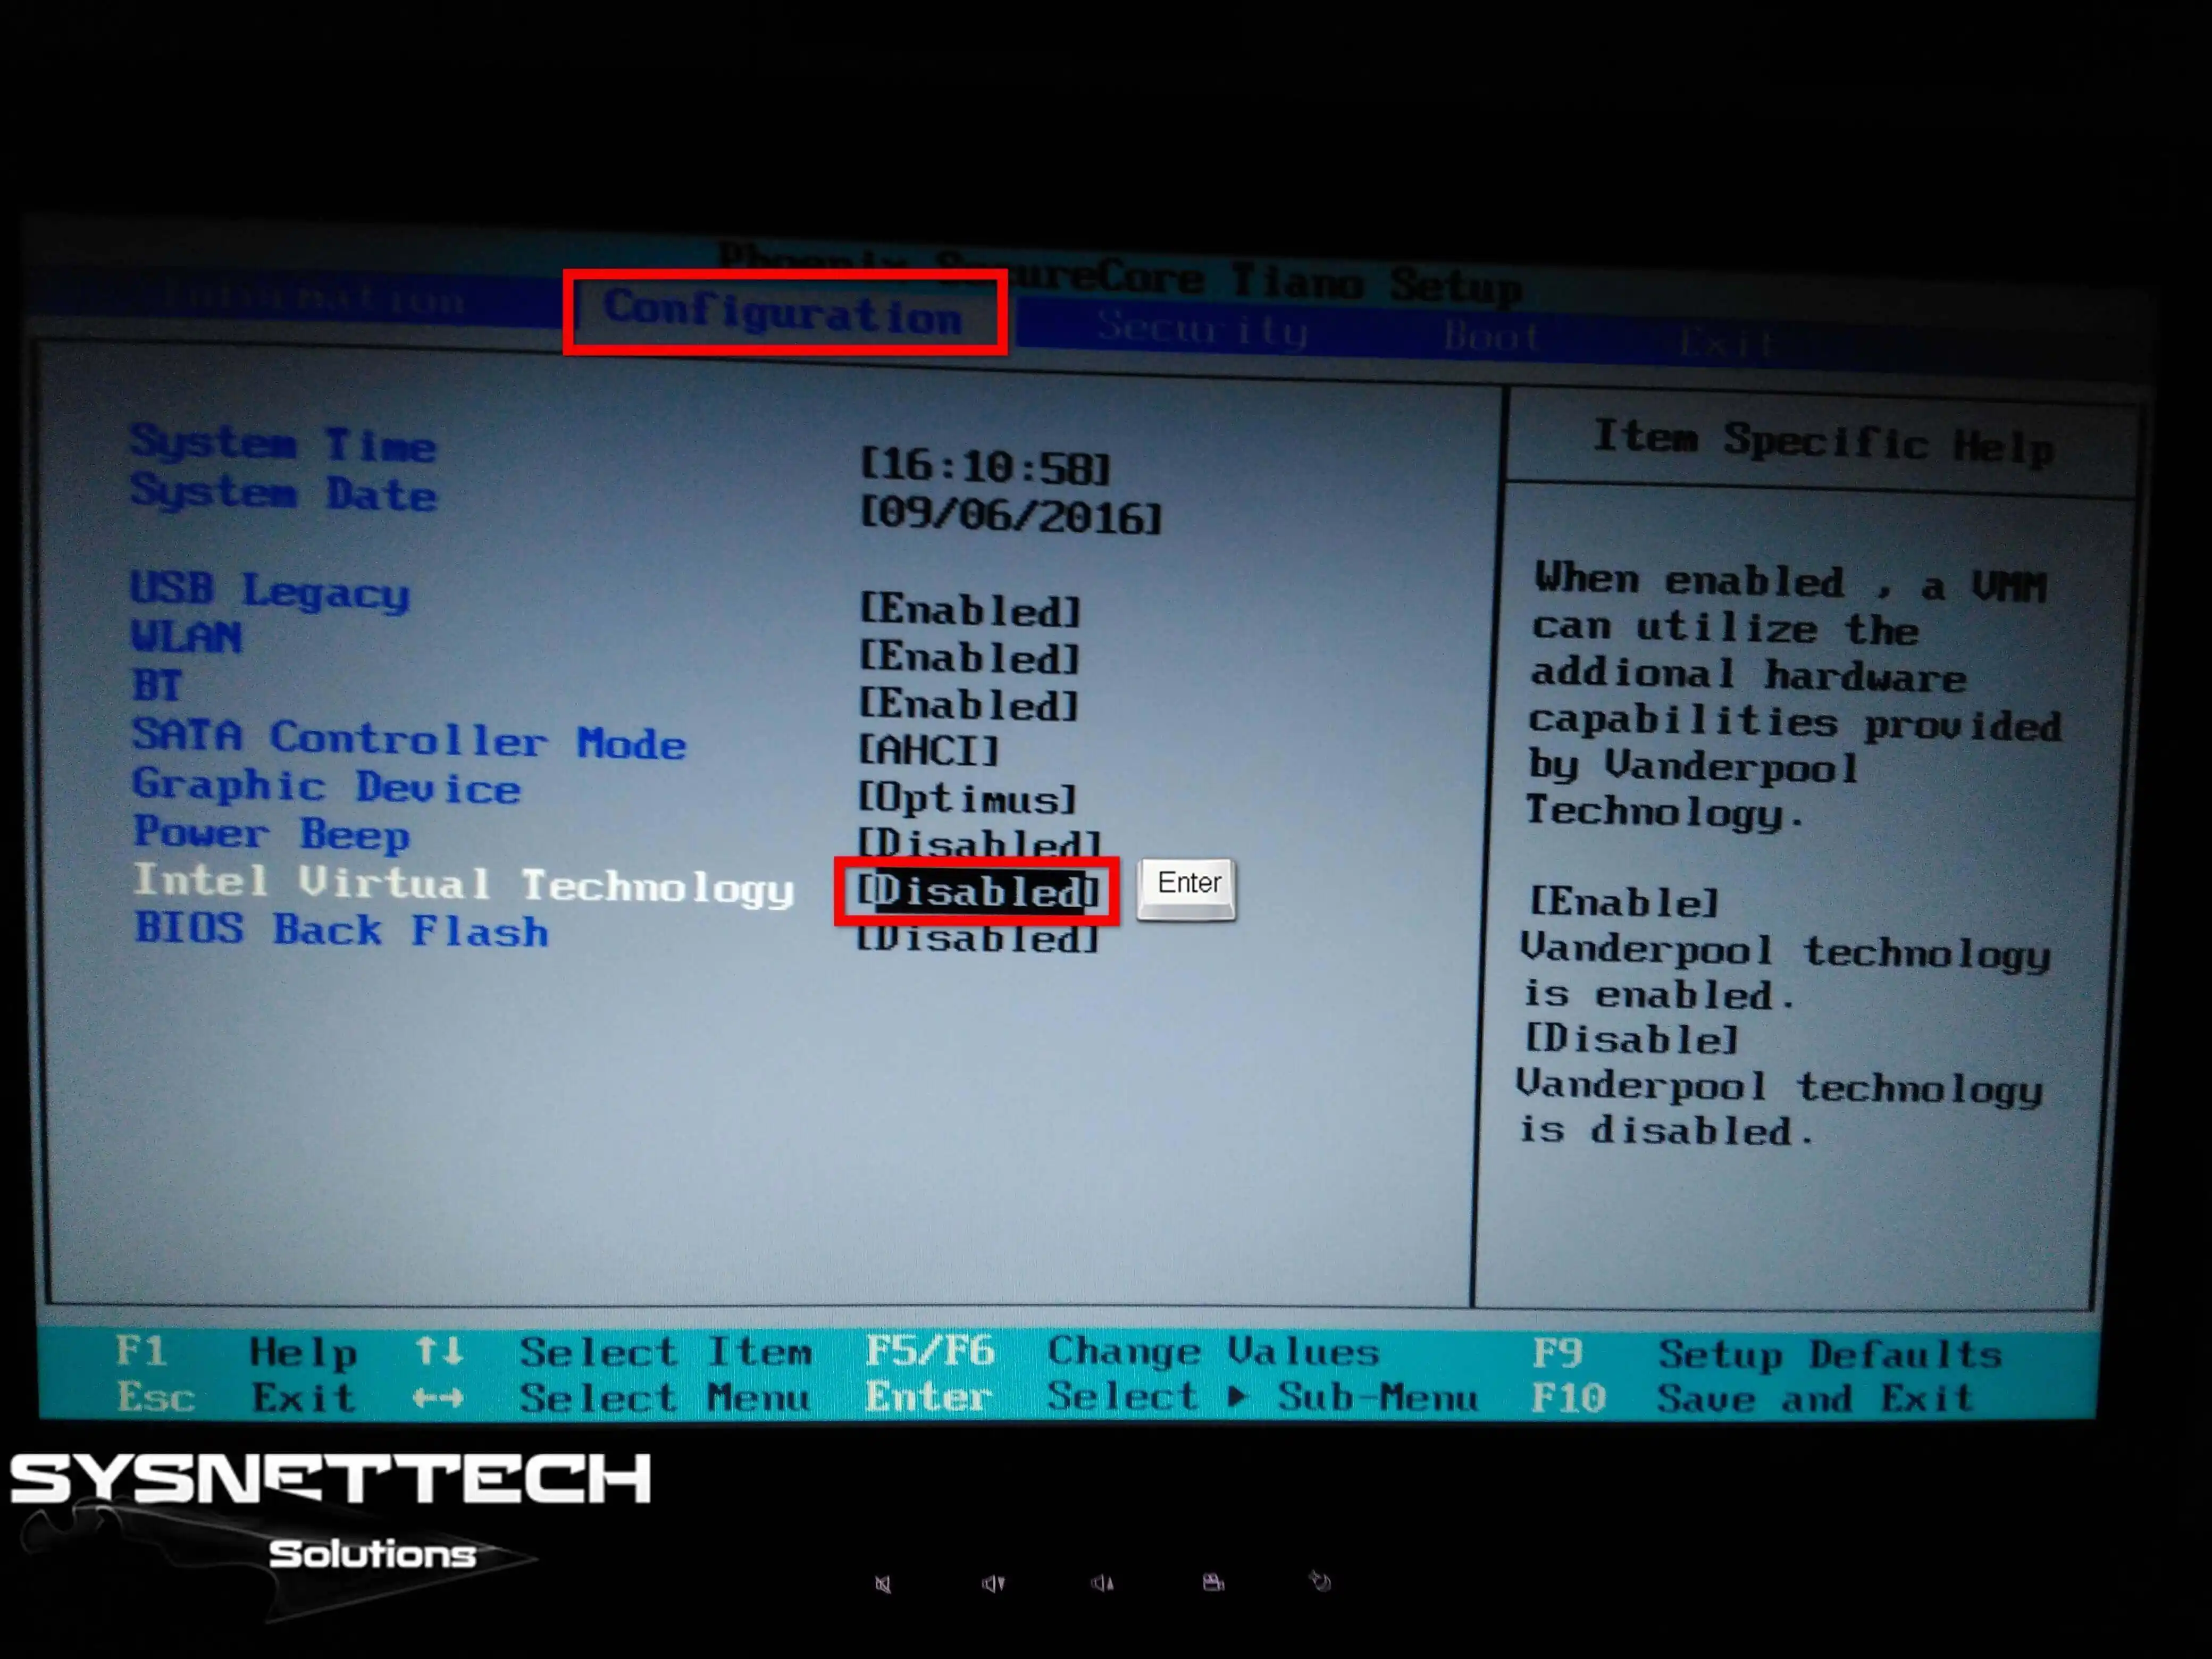
Step 2
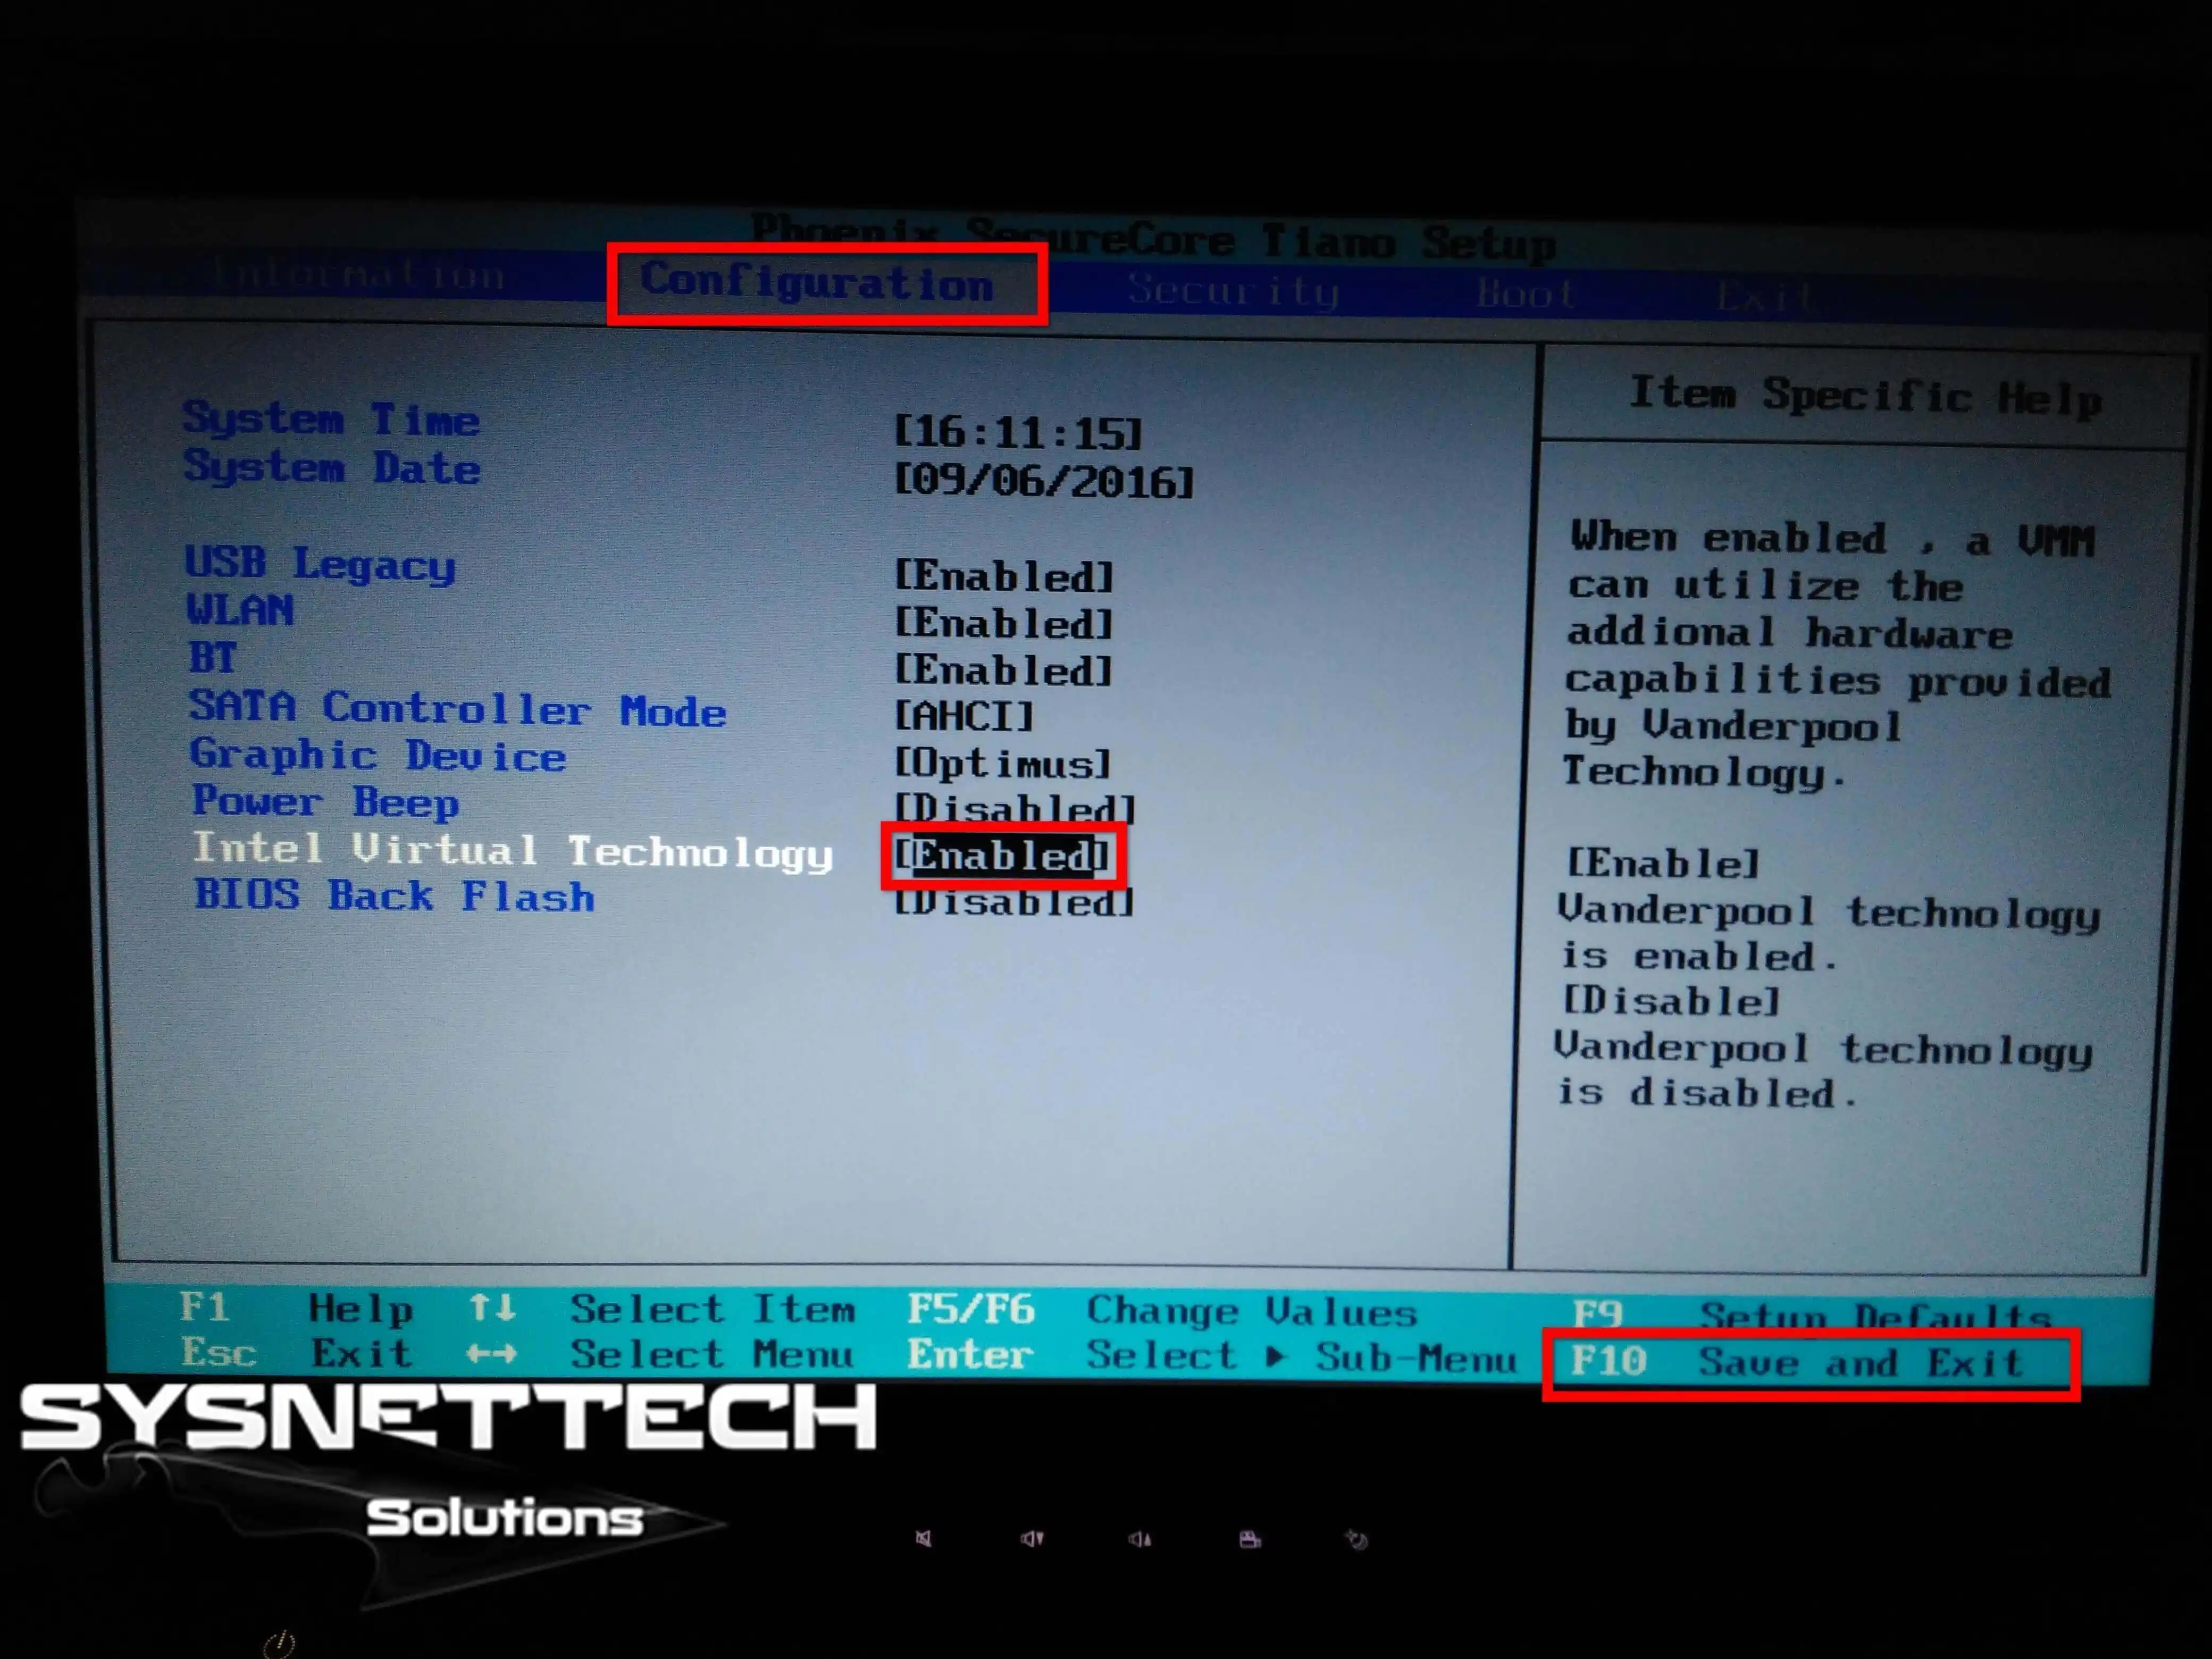
On the VTx option, and then press Enter on the Enabled option.

Step 3
After enabling it in the BIOS, press F10 to save your settings.
Step 4
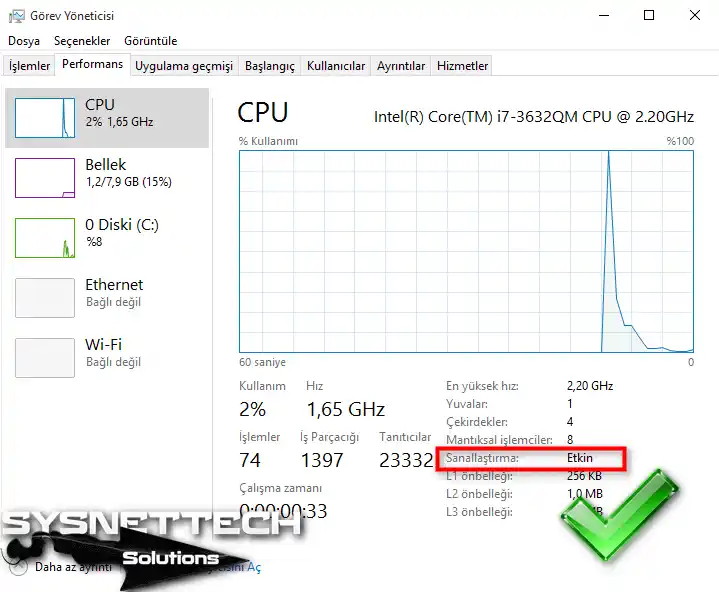
After you turn on your operating system to verify your process, you can test it using Task Manager. In the picture below, you can see that it is enabled in the CPU section.
FAQ About the Guide to Enabling Virtualization Technology
I enabled this setting in BIOS but my virtual machine still runs slowly. Is there another trick I missed?
How can I quickly find out if my processor supports this feature without formatting Windows at all?
My laptop’s BIOS screen does not look at all like the images on the internet. Where should I look for this VT-x option?
If this CPU-level feature is turned off, do virtual programs not open at all or do they just run slowly?
I saved the BIOS setting and exited, but Task Manager still shows it as disabled. What went wrong?
I am building a new computer. What should I watch out for so I do not accidentally buy a processor that does not support this technology?
Conclusion
In conclusion, if you are a system administrator, check the CPU feature before purchasing a new PC.
You are likely using software such as VMware Workstation or VirtualBox on your computer. If you enable this feature, you will ensure compatibility and be able to run virtual machines.

Be the first to share your comment