

You have an old laptop and dream of blazing speed. Maybe you want to add budget storage to your new case. That is where SATA comes in.
Years have not worn out this giant of technology. It still remains in millions of computers. But would you still buy it in 2026? Or have you shelved it in history’s dusty corners? This guide shares my hands-on experience. I will give you every up-to-date detail.
SATA is not just a cable or a port. It is a deep-rooted storage interface. It marks the close of one era and the start of a new one. In fact, it is the hero that moved us from the clumsy world of PATA. It brought modern storage through serial communication.
Even today, NVMe winds blow strong. Yet SATA holds a firm spot in the storage order. It offers a unique capacity/cost edge. This is true mainly for archive storage.
We will configure BIOS SATA settings step by step in this guide. Also, we will fix nagging problems like alignment and CRC errors at the root. I will share my guide for installing a SATA SSD in an old computer. I will include my CrystalDiskMark results from my system.
Years ago, we wrestled with flat ribbon cables in labs. Now, palm-sized SSDs boot systems in seconds. However, the hardware world is ruthless. Is SATA technology dead, or is it still at the center of our lives? While we seek answers, I will also touch on SATA-IO standards and current motherboard technical manuals.
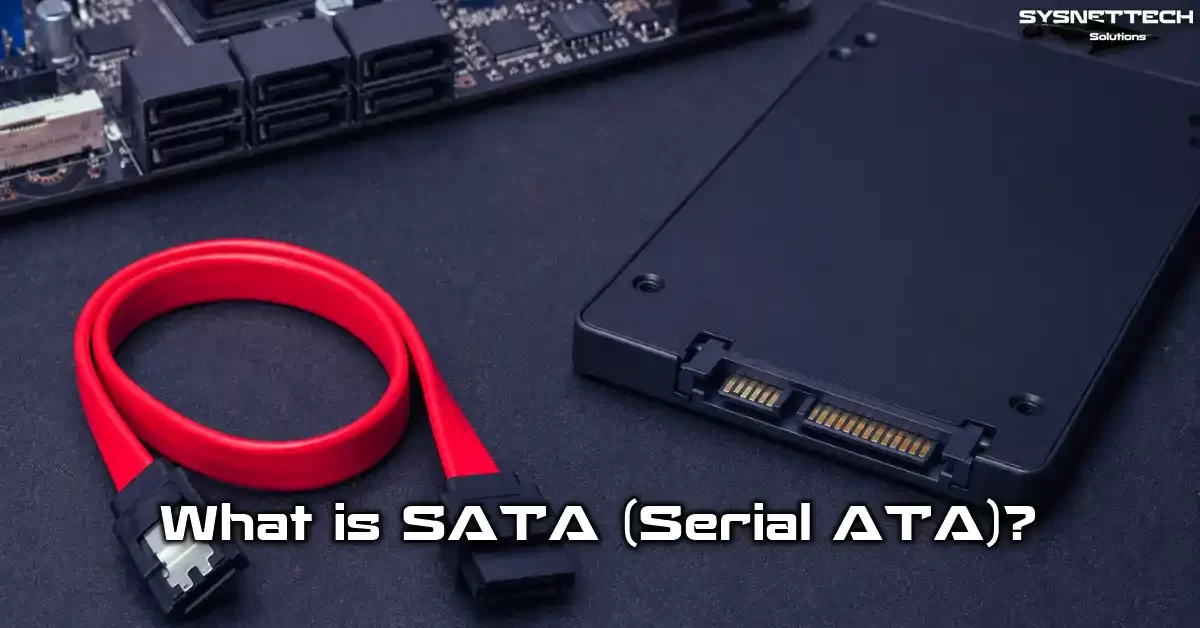
What Is SATA (Serial ATA)? Basic Definition and Importance
SATA stands for “Serial Advanced Technology Attachment.” This serial transmission protocol is ingenious. It carries data at high speed over a single line.
It bridges your motherboard and storage units. This bridge is a turning point in computer hardware interface history. The interface is perfectly suited to mechanical disk performance.
To grasp the core philosophy of SATA technology, we must look at its rival. The old parallel ATA option, PATA, used wide cables. These cables blocked airflow.
However, this new-gen interface uses differential signal transmission. What’s more, thin cables give a much cleaner setup. As a result, your system runs cooler and looks tidier.
Is this standard just a physical upgrade? Absolutely not. An 8b/10b encoding mechanism with an embedded clock signal lifts data integrity to a high level.
Also, the native command queuing feature lets the disk sort incoming commands efficiently. Consequently, it finishes tasks much faster. That is why SATA remained the hard disk standard for many years.
What Does SATA Mean? Technical Expansion and Serial Communication Logic
The full technical expansion of this term is Serial Advanced Technology Attachment. In short, it is a storage interface that sends data in serial, not parallel, fashion.
Historically, the parallel ATA design sent multiple bits at once. Yet it battled signal loss. Serial communication sends data in single file. However, it does so at very high clock speeds. This strategy gave system designers incredible freedom.
It uses differential signal transmission during transfer. This method carries data over a positive and a negative signal line. Thus, electromagnetic noise cancels itself out. The signal stays crystal clear.
This logic is critical for data integrity as cable length grows. The embedded clock signal removes the need for an external clock line.
Thus, this device is not just a connector. It is a whole, complex bus protocol system. Plus, it connects via OOB signaling. It also performs speed negotiation. Additionally, the frame information structure ensures a stable data transfer.
Users do not feel these things. Yet, in servers that produce millions of IOPS, these details are critical. In daily use, your job is to harness this power with correct BIOS SATA settings.
Its Role in Computer Hardware and Current Importance (2026)
As we reach 2026, this standard claims its kingdom. This is true in the capacity-focused segment. NVMe SSDs are incredibly fast.
However, things change when you plan an 8TB or larger archive unit. At that point, the cost calculation points you straight to this standard.
You can buy an HDD with nearly twice the capacity for the price of one NVMe. This is a huge edge, especially for big data professionals and content creators.
It is also still popular in the enterprise storage world. Swapping disks with the hot-swap feature is a key convenience for administrators.
Companies set up RAID 5 or RAID 6 arrays with 7200 RPM disks in data centers. They build safe and low-cost storage infrastructure this way. Additionally, latency in these systems is usually at acceptable levels.
For daily use, keep this ranking in mind when choosing among SATA, NVMe, and HDD: Pick an SSD for the OS and frequently used programs. Alongside that, you can get a low-cost SATA SSD for your game library.
Finally, use a high-capacity HDD for long-term archive and backup. This triple combination gives the most optimized budget-performance balance of 2026.
Old system compatibility is another weapon that makes the interface immortal. You can even revive a 10-year-old motherboard by plugging in a new SSD. Thus, you cut e-waste and protect your budget.
Furthermore, even modern operating systems like Windows 11 have no driver conflicts with this standard. In the end, we can keep using SATA technology as long as chipset support lasts. Thus, the system quietly keeps serving us.
SATA History & Versions: SATA 1, 2, 3 Differences
The historical journey began in the early 2000s under Intel’s lead. In short, the goal was to end cable chaos and improve airflow.
The first version came with 1.5 Gbps data transfer speed. It was revolutionary for its time. Users could now add disks with a plug-and-play approach. They no longer wrestled with jumper settings.
As developers moved the versions forward, they doubled data transfer speeds. We hit 3 Gbps with SATA II. Native command queuing also entered our lives.
This feature optimized head movements in mechanical disks. It dramatically increased the number of operations per second. However, the real big leap came with this version. It is still the most common standard today.
At this point, you might ask: What are the differences between Revision 3.2 and 3.3? These minor updates brought hybrid solutions like DevSleep power saving and SATA Express.
Finally, we can examine SATA Revision 3.4 features. This version shows big improvements in disk health monitoring and cleaning commands. All these steps prove that the standard was built on solid foundations.
Key Differences Between PATA (IDE) and SATA

PATA, or parallel ATA alternative, used huge 40- or 80-pin flat ribbon cables. These cables badly blocked airflow inside the case.
Also, you could only connect two devices per channel. You had to set one device as master and the other as slave. Wrestling with jumpers was a total nightmare.
The new serial interface offers point-to-point links. Each device uses its own private line, so you share no bandwidth with anyone.
Significant differences exist in data transfer technology. PATA could not reach high speeds due to signal loss. It could hit a maximum of 133 MB/s in Ultra DMA mode.
Serial communication, however, works at much higher frequencies thanks to differential signals. Therefore, theoretical bandwidth climbs to 600 MB/s. The gap has even exceeded a typical HDD’s limits in practice.
You cannot even compare the physical traits of the two designs. The new-gen 7-pin data interface is thin and handy. Developers even designed a latch mechanism so you can avoid loose cable problems.
Integration with the southbridge chipset is much more modern. In the end, this shift makes computers cooler and faster. It also greatly improves internal case layout. If you still find an old IDE disk somewhere, you can take a look and enjoy some nostalgia.
SATA 1, SATA 2, SATA 3 Speeds and Technical Specs Table
The table below shows the critical values of the three main generations side by side. This data is vital when you install a SATA SSD in an old computer because it helps you understand the speed drop.
Backward compatibility always exists. However, it reduces system speed to the lowest common denominator.
| Feature | Revision 1.0 (1.5 Gbps) | Revision 2.0 (3 Gbps) | Revision 3.0 (6 Gbps) |
|---|---|---|---|
| Raw Bandwidth | 1.5 Gb/s | 3.0 Gb/s | 6.0 Gb/s |
| Theoretical Data Rate | 150 MB/s | 300 MB/s | 600 MB/s |
| Real-World Speed (SSD) | ~130 MB/s | ~275 MB/s | ~560 MB/s |
| Cable Length (Max) | 1 meter | 1 meter | 1 meter |
| NCQ Support | Optional | Yes | Yes |
| Hot Plug Support | No | Partial | Yes |
As you can see, this third revision offers enough IOPS even for modern SSDs. Still, the 6 Gbps speed limit now falls behind some entry-level NVMe drives.
Nevertheless, you will not hit a performance bottleneck for daily office work and gaming. What matters is the motherboard SATA port count and speed. If a motherboard still uses an older revision, the system boot time may increase.
SATA Cable & Connection Types
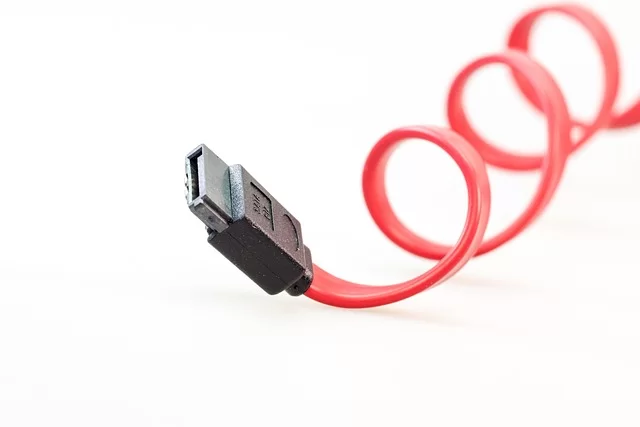
Cables are the unsung heroes of this standard. Most users cannot tell a cheap data cable from a quality shielded one.
However, when CRC data integrity checks come into play, this quality gap surfaces. Cable types on the market can sometimes lead to data corruption. Therefore, never take cable choice lightly.
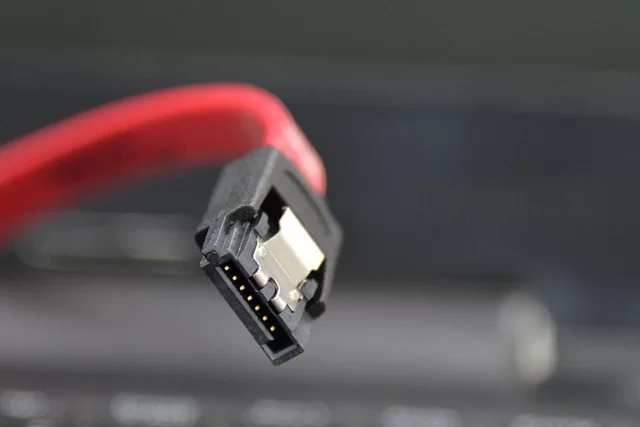
You plug one end of this 7-pin data interface into the motherboard. You plug the other end into the disk. Moreover, this part has a physical L-shaped design. This design prevents incorrect insertion.
Also, thanks to the locking SATA cable design, you stop the cable from coming loose during transport. This small metal clip is crucial, especially in server and backplane settings.
The power connection is a separate consideration. The 15-pin power interface supplies the disk the needed energy. Here, different voltages like 3.3V, 5V, and 12V exist together and feed all disk components.
Be very careful when using Molex power connector converters we often see on old power supplies. A cheap adapter can permanently disable your disk with a sudden voltage fluctuation.
SATA Data Cable and Power Cable Pin Layout with Voltage Values
The data cable pin structure is quite simple. It has 7 pins total, and 4 of them handle differential signal transmission. These lines work in two pairs and perform send and receive tasks at the same time.
The other 3 pins act as ground lines and prevent signal loss. This minimal design works wonders when combined with shielding for data line protection. The physical L-shape sets the cable direction, and you cannot plug it in backward.
Let’s move to the power connector. The 15-pin power interface is much smarter than you think. The first three pins provide 3.3V, the next three provide 5V, and the following three supply 12V. Additionally, the remaining pins serve as ground and device status signals.
The 3.3V line holds critical importance, especially in M.2 SATA converters. If you use an old Molex converter, the 3.3V line is often absent. This can cause a no-power issue on some modern disks.
Is a power splitter safe? This question sparks debate. You must check the wire gauge when feeding multiple disks from a single line. You should also check the power supply’s rail capacity.
A quality port multiplier usually causes no trouble. However, if you use a cheap splitter with thin wires, you might draw too much current and melt the connectors. Therefore, based on my experience, always choose solid, quality power cables.
SATA Cable Quality and CRC Errors: CrystalDiskInfo C7 Warning Fix
Has your computer started to respond increasingly slowly? Does file copy speed suddenly drop to zero and then come back? These signs point to CRC data integrity errors.
When you open CrystalDiskInfo and see a yellow C7 warning, the cause is often data cable quality. This error shows that the sent data arrived corrupt. The system then requests the same packet again. The result is a performance bottleneck.
Before moving to the fix steps, let me stress this: No software can repair a faulty cable. If signal loss or oxidation exists in the hardware, your only fix is physical replacement.
However, sometimes the issue can be a software driver conflict. Let’s now look at how to solve this annoying situation step by step.
Step-by-Step Fixes and Technical Warnings
Step 1 — Physical Check and Re-plug: First, turn off the computer and unplug the power cord. Remove both ends of the SATA data cable and inspect the connectors. If you see oxidation or dust, clean them with a dry, soft brush. Plug the cable into a different motherboard SATA port. Sometimes loose ports or motherboard resource sharing errors cause this issue.
Step 2 — Cable Swap: Discard the old cable and get a new shielded cable with a latch mechanism. Quality data line protection keeps differential signals clean. After this swap, look at the raw C7 value in CrystalDiskInfo. If the value keeps rising, the problem lies with the disk’s electronics.
Step 3 — Driver Update: Update the southbridge chipset drivers of your motherboard. The Windows 11 SATA controller driver update process sometimes fixes incompatibilities. Open Device Manager, find IDE ATA/ATAPI controllers, right-click, and update. If the error continues, you will understand firsthand that the SATA cable affects performance. It might be time to check a new disk.
SATA SSD vs HDD: Which Is Better? (2026 Current Tests)
This comparison is the classic clash of the storage world. On one side, we see the hard disk drive (HDD) with moving parts. On the other side stands the solid-state drive (SSD) based on chip technology.
In 2026, I can now say this clearly: Using a mechanical disk as a system disk is torture for the computer. However, for archive, it is still unmatched. Let’s now lay out the difference between these two giants.
SATA SSDs offer tens of thousands of IOPS. Therefore, you open Windows 11 in seconds. An HDD, however, causes input/output latency due to head movements.
Mechanical disk performance crawls when reading many small files. This directly affects game load performance and render times. A video editor may face timeline stutters while working on an HDD.
However, speed is not everything. When cost and capacity enter the scene, HDD still wins. An SSD’s TBW value is limited, and it has a write lifespan.
With mechanical disks, you can predict data loss risk more easily as long as the motor does not wear out. Also, HDDs do not suffer cell voltage leakage in long-term cold storage. That is why using both together is the smartest path. For more information, visit our article titled “What is an HDD?“.
Speed Difference Between SSD and HDD (CrystalDiskMark and Real-World Test)
Without further ado, let me share the results from my test lab.
I compared a popular 2.5-inch SSD with a 7200 RPM HDD in the test. I used CrystalDiskMark and real-world file copy scenarios. Seeing the huge gap will eliminate all your doubts about speed.
| Test Metric | HDD (7200 RPM) | SSD (2.5″) | Difference |
|---|---|---|---|
| Sequential Read (SEQ1M Q8T1) | ~160 MB/s | ~560 MB/s | 3.5x |
| Sequential Write (SEQ1M Q8T1) | ~150 MB/s | ~520 MB/s | 3.5x |
| Random 4K Read (Q32T1) | ~1.5 MB/s (2 IOPS) | ~350 MB/s (85k IOPS) | 230x |
| Windows 10 Boot Time | ~45 Seconds | ~10 Seconds | 4.5x |
| 40GB Game Copy | ~4.5 Minutes | ~1.3 Minutes | 3.5x |
The most striking difference in the table is the random read value. 4K random read is the backbone of OS and game load performance.
HDDs perform very poorly in this area. The head constantly changes track. An SSD, on the other hand, reaches data with almost zero latency. Therefore, what makes even an old laptop fly is its random access ability.
In the real world, heavy applications like Photoshop take minutes to open on an HDD. An SSD opens them instantly. Another critical point is game load performance.
During map transitions, you get a seamless experience with an SSD while an HDD stutters. Therefore, installing a SATA SSD in an old computer is like giving it a new soul. Our guide on what an SSD is will walk you through this conversion process.
SATA SSD Lifespan, TBW Value, and Durability Analysis
Manufacturers usually measure SSD lifespan with the TBW value. This term represents the total data amount the drive can write under warranty.
For example, a 300 TBW value is quite common for a 500 GB drive. Even if you write 50 GB of data every day, that means over 16 years of life. Therefore, you do not need to worry about how long a SATA disk lasts in daily use.
But does a SATA SSD work without the TRIM command? Yes, it works, but write speeds drop after a while. The operating system cannot tell the controller which cells are empty. That is why TRIM command support is vital.
This feature comes enabled by default in modern operating systems. Still, it pays to check once in a while. Also, a 4K alignment error is a subtle issue that shortens disk life.
Temperature, Cooling, and Enterprise Use
You should not forget temperature when doing a durability analysis. The question of what the SATA disk temperature should be is critical. Generally, the 40–50 degree range is safe. Temperatures above 60 degrees quickly degrade NAND chip life.
Flash memory chips inside SSDs are heat-sensitive. Too much heat shortens the lifespan. I must underline this: cooling is a serious topic. A quality case provides airflow.
Can you use a SATA SSD in a server? Yes, but you must pick enterprise-class models under heavy write load.
At this point, you might wonder about the difference between SAS and SATA and which one is better. We will cover SAS in detail soon.
SATA or NVMe? Which One to Buy in 2026?
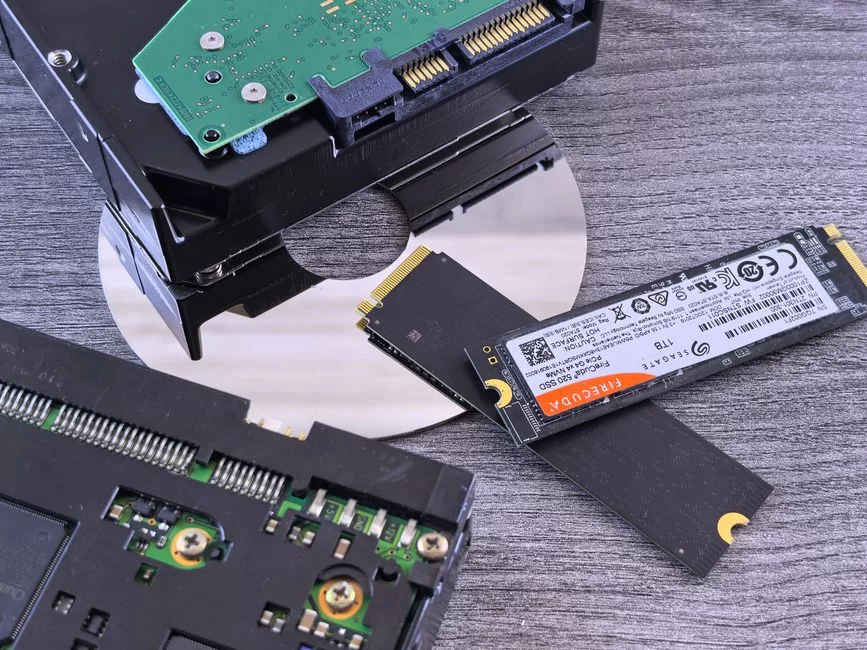
Here we reach the most debated question. If you build a new system or upgrade an old PC with an SSD in 2026, your choice is critical. NVMe SSDs use PCIe data lanes.
However, SATA SSDs still offer an unbeatable price/performance ratio. Thus, which one is right for you? The answer depends on your use case and the chipset support on your motherboard.
The biggest edge of NVMe is its data transfer bandwidth and low latency. You can see speeds of 7,000 MB per second.
However, do you really use that speed? If you do not edit 8K video or manage large databases, you do not need it. Therefore, most of that performance goes to waste.
Even in a gaming computer, load time differences are just seconds. That is why SATA is still the best choice for budget builders.
Now let’s look at the architectural side. The gap between the AHCI protocol and the NVMe protocol goes far beyond performance. AHCI works with the command queue depth of earlier times. The NVMe protocol was designed specifically for multi-core processors.
This gap provides huge IOPS value gains in dense settings like server storage architecture. However, in daily use, you can hardly feel it.
Architectural Differences Between SATA and NVMe SSD: AHCI vs NVMe Protocol
AHCI, or Advanced Host Controller Interface, is a host interface bridge built for this serial interface. This protocol uses a single command queue. Additionally, it offers a maximum depth of 32 commands.
This situation was ideal for spinning disks. However, on fast devices like a solid-state drive, this queue creates a bottleneck. NVMe, on the other hand, supports a full set of 65,535 command queues. Each one can take 65,535 commands. This huge parallelism reduces latency to microseconds.
NVMe connects directly to PCIe data lanes. Therefore, it does not go around through the southbridge chipset. Data reaches the CPU via the shortest path. However, SATA hits the southbridge over motherboard data buses. That adds a tiny delay.
However, the difference here sits at the nanosecond level. In practice, you would need a stopwatch to catch this gap on an office PC.
Another difference lies in interrupt mechanisms. The old protocol interrupts the CPU for each command. NVMe, however, uses MSI-X for multi-queue management. This cuts the load on the processor.
Thus, copying files in the background while rendering is much smoother on NVMe. However, let’s be honest, these tasks are quite fluid on SATA SSDs too. That is why I say: focus on your need without obsessing over the technology.
SATA vs NVMe in Gaming, Office, and Rendering: How Much Difference Do You Feel?
In the gaming world, technology such as DirectStorage tries to push NVMe forward. However, the reality is, even in 2026, most game engines have not fully embraced it.
The game load time gap between SATA SSD and NVMe generally stays limited to 1–2 seconds. For example, Cyberpunk 2077 map load takes 8 seconds on NVMe and 10 seconds on SATA. Does it make sense to pay nearly double for those 2 seconds? I think not.
In office applications, the difference is nonexistent. Word, Excel, or browser tabs rarely even hit 500 MB per second. Therefore, the bottleneck here is not the storage interface. It is usually the RAM or CPU.
If you connect an SSD to your old laptop, you will see it boot as fast as an NVMe machine. In short, installing a SATA SSD in an old computer is still the most effective upgrade.
Things change a bit in rendering and video editing work. If you work at 4K and above, NVMe’s sequential read speed truly speeds up your work. However, if you do 1080p editing, SATA 3 speed is more than enough.
What really matters here is the TBW lifespan of the disk where you put your project files. For professionals, reliability usually comes before raw speed. Therefore, take your time and decide by analyzing your needs.
What Is M.2 SATA? Confusion with NVMe and Port Disable Problem
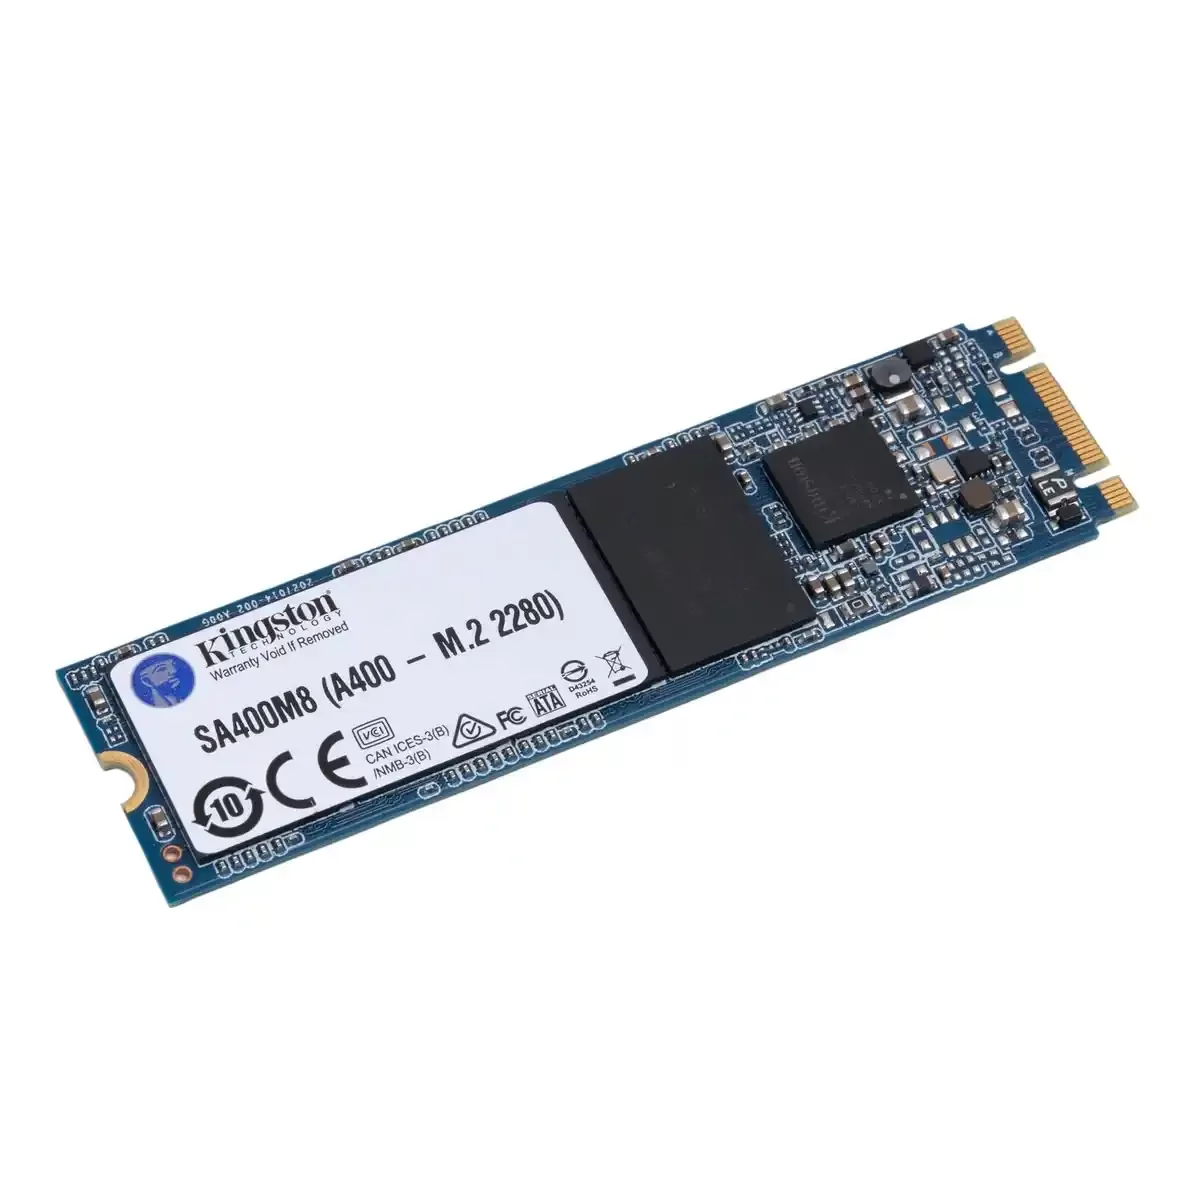
Welcome to one of the biggest sources of confusion in the hardware world. The M.2 form factor is a physical slot standard. You can plug both SATA and NVMe disks that use PCI Express lanes into this slot. Right at this point, users get confused.
You buy an M.2 SATA SSD. Yet its speed is no different from a classic 2.5-inch SSD. That is because it works with the same southbridge chipset and the same command set.
You look at the socket notches to tell the difference between M.2 SATA and M.2 NVMe. Terms like M.2 B key or M key show which interface the disk uses. Generally, B+M key ones use the SATA interface, and M key only ones are NVMe.
If you buy the wrong disk and try to fit it, it physically won’t match. However, what if you buy a fitting M.2 SATA disk and your other disks vanish?
Now that is annoying. Many motherboards disable certain SATA ports when you plug a device into the M.2 slot. The reason is motherboard resource sharing and the limited number of HSIO lanes.
The chipset shares these lanes with M.2, so a physical SATA port gets canceled. This is not a fault; it is a design choice. Therefore, definitely read the motherboard manual before installation.
Physical and Technical Differences Between M.2 SATA and M.2 NVMe
Physically, both disks are thin and long. However, when you run a compatibility check, the notches are the first thing to spot. NVMe disks generally use M Key and only communicate over PCIe data lanes.
M.2 SATA disks, on the other hand, use B Key or B+M Key. This socket gap physically stops you from putting the wrong disk in the wrong place. Still, do not force it, or you may break the pins.
Also, some motherboards support both NVMe and this standard in the same slot. That shows the flexibility manufacturers offer in motherboard data buses.
Technical Performance and Specifications
Technically, the biggest gap is speed. M.2 SATA works at the 6 Gbps speed limit. M.2 NVMe reaches 8 GB/s with PCIe 4.0 x4. However, do not forget this fact: In daily tasks, you can switch between the two without noticing.
You would need a stopwatch to measure the system boot time gap. The real difference shows up in large data transfer tasks.
| Feature | M.2 SATA SSD | M.2 NVMe SSD |
|---|---|---|
| Interface | Serial ATA (AHCI) | PCIe (NVMe) |
| Max Speed | ~560 MB/s | ~7,000+ MB/s (PCIe 4.0) |
| Socket Notch | B Key or B+M Key | M Key |
| Command Queue | 1 Queue, 32 Depth | 65,535 Queues, 65,535 Depth |
| Price (1TB, 2026) | ~50–60 USD | ~80–100 USD |
| Compatibility | More compatible with older boards | Only NVMe-supported M.2 slot |
Another mix-up is the mSATA vs SATA difference. mSATA was a tiny card for old laptops. M.2, based on the NGFF architecture, took its place.
mSATA is fully dead and appears only in old devices today. Therefore, do not confuse mSATA with M.2 when hunting for old system parts. Otherwise, you will end up with a piece of hardware that does not work.
Why SATA Ports Get Disabled When Installing M.2 SATA SSD: Causes and Fixes
SATA port disabling after M.2 installation is a common issue. On most B460, B550, and similar motherboards, the M.2 slot shares lanes with a specific physical port.
For example, when the M.2_1 slot is active, the SATA6G_2 port is disabled. This is a hardware limit and a driver update will not fix it. Here is what you need to do:
- Read the Manual: Find the booklet that came with the motherboard box. It clearly states which port will be disabled.
- Port Swap: Move your HDD or optical drive connection cable to a motherboard SATA port that does not shut off.
- BIOS SATA Settings: Enter BIOS and check if the ports are active under the SATA device management menu.
If all ports are full, you may need to make room for the new disk. In this case, you can use a storage controller card that fits into a PCIe x1 slot.
These cards add an extra two or four ports. If you look for a cheap fix, this method works quite well. However, make sure you get a quality SATA controller.
Otherwise, you could easily face data loss or incompatibility. Also, remember that you might need to load a special driver to see this add-in card during Windows 11 setup.
SATA Power Management: What Are HIPM, DIPM, and DevSleep? Performance Impact

Proper power management for your storage units is essential for both the electric bill and hardware lifespan. SATA’s active power management technology is called ALPM (Aggressive Link Power Management). This feature puts the idle disk into sleep mode on its own.
This is a great feature. Yet, it sometimes causes in-game micro-stutters. A millisecond-level delay happens as the disk wakes from sleep. Desktop users sometimes want to turn this off.
This issue becomes evident, especially on older systems or cheap disks. DIPM and HIPM settings decide how aggressively the disk sleeps. Host-managed HIPM is safer, while device-decided DIPM is riskier.
Also, DevSlp, or DevSleep power saving mode, pulls the disk down to milliwatt levels. Waking from this mode takes a bit longer than normal. Thus, the wake-up time sometimes causes the system to hang.
Explanation of HIPM, DIPM, and DevSleep Power Saving Modes
HIPM, or Host Initiated Power Management, means the motherboard manages power. The operating system tells the disk when to sleep. This method generally causes no conflicts.
DIPM is Device Initiated Power Management, and the disk sleeps on its own. This situation sometimes creates driver conflicts. In 90% of cases where users face SATA disk micro-stutter, DIPM is the culprit. The disk may be asleep just when you want to request data.
DevSleep is a low power state standard designed for ultrabooks. It almost fully shuts down the disk and only waits for a wake-up signal. Thanks to this mode, laptops can stay in standby for weeks.
However, the system may face a few seconds of instability during wake-up. That sometimes causes Windows to lose the disk. Therefore, turning off DevSleep on desktop computers is usually healthier.
| Power Mode | Manager | Consumption | Wake-Up Time | Risk |
|---|---|---|---|---|
| HIPM | Host (Motherboard) | Medium | ~10 ms | Low |
| DIPM | Device (Disk) | Low | ~50 ms | High (Stutter) |
| DevSleep | BIOS / Device | Very Low | ~100 ms | Medium (Disk loss) |
These power management features also lower disk temperature. However, if you are a gamer, you do not want to wait for the disk to wake up while an opponent pops up in a competitive match.
Therefore, setting your configuration correctly directly shapes your gaming experience. Let’s now see how to fix this annoying situation step by step.
How to Adjust HIPM/DIPM Settings? Fix for Micro-Stutter Problem
The fix for micro-stutters is quite simple. We solve the issue by changing hidden OS power settings or turning off the related feature in BIOS.
Our first method will be via the Windows registry or power options. Here is what you need to do step by step:
- Power Options: Follow Control Panel > Hardware and Sound > Power Options. Click “Change plan settings” next to your active power plan. Then select “Change advanced power settings”. Here, change “Hard disk > Turn off hard disk after” to “Never”. This disables HIPM signals.
- AHCI Link Power Management: In the same advanced settings window, find “PCI Express > Link State Power Management” and set it to “Off”. Also, if you have Intel drivers, additionally set the AHCI Link Power Management option to “Active”. This setting turns off aggressive power management IPM protocols and eliminates the latency value.
- BIOS Setting: Restart the computer and enter UEFI settings. Under the Advanced tab, find a menu like “SATA Configuration” or similar. Here, set options like “Aggressive LPM Support” or “DevSleep” to “Disabled”. These changes completely block SATA DevSlp power saving signals. When you save and exit, your stutter problems will be resolved.
SATA Hot Swap and RAID Configuration: Step-by-Step Setup Guide
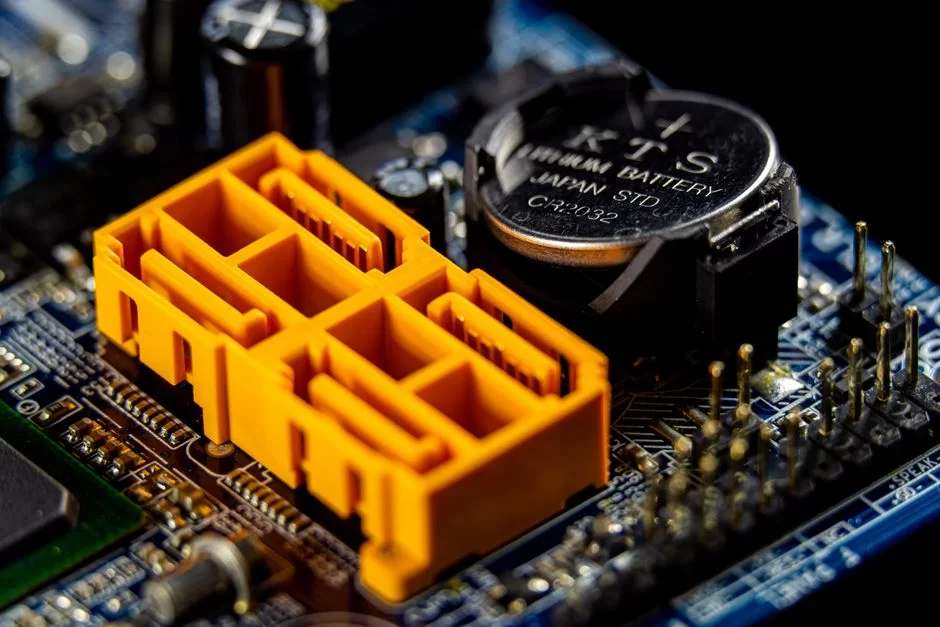
Data storage means not just speed, but also accessibility and safety. Hot swapping, the ability to swap a disk without shutting down the system, is essential in server rooms.
Thanks to this feature, you can pull a failed disk and plug in a new one without turning off the system. However, certain hardware conditions must be met for this to work. Also, this technology brings great convenience in RAID controller setups for home users too.
RAID lets you combine multiple disks to gain speed or safety. If you ask how to set up a SATA RAID configuration, the answer is quite simple but requires care.
You activate RAID mode via your motherboard’s southbridge or an external I/O controller. Then you pick the disks and choose the RAID level that fits your goal. This way, you can set up everything from simple configurations like JBOD to complex setups like RAID 10.
I have used this technology for years on my home server. RAID 1 especially suits my photo archive. When one disk fails, I still access data from the other. That gives me incredible peace of mind.
However, a wrong configuration during setup leads to losing all your data. Therefore, follow each step carefully.
What Is Serial ATA Hot Swap? What Hardware and BIOS Settings Are Needed?
The SATA Hot Plug feature instantly detects when a disk is plugged in or pulled out. For this, first, your motherboard and southbridge chipset driver must support this feature.
Second, you must set the “Hot Plug” option to “Enabled” for the relevant port in the BIOS SATA settings menu. If you skip this setting, the OS will not notice the hardware change and the disk will not show up.
On the hardware side, equipment such as a backplane or drive tray increases safety. These structures ensure the ground line breaks last when you pull the disk plug. Additionally, the latch mechanism keeps the disk from coming loose due to vibration.
The most critical precaution when setting up these systems is to never pull the disk during data transfer. Otherwise, a sudden voltage fluctuation can cause permanent damage to the drive connector.
In the operating system, you must use the “Safely Remove” icon before pulling the disk. This action ensures the write cache data is flushed to the disk. If not, data corruption is inevitable.
In server environments, administrators usually manage this via the command line. For example, in Linux, you must flush the write cache before removing the disk. You also need to run a few commands to unmount the file system. This discipline is vital for enterprise storage solutions.
SATA RAID 0, 1, 5, 10 Setup and Performance Comparison
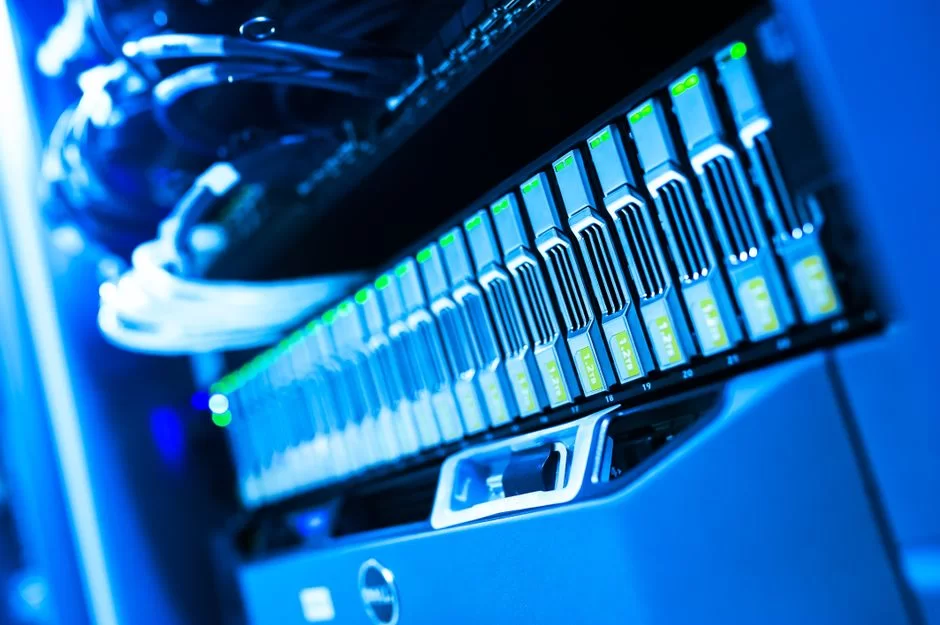
To set up RAID, you must first change the SATA mode in BIOS. Generally, you pick RAID mode instead of AHCI.
After saving and exiting, a key combination will appear at startup to enter the BIOS for the RAID controller. You pick the disks in this menu and create the array. Let’s now see the pros and cons of these levels in a clear table.
| RAID Level | Min. Disks | Advantage | Disadvantage | Use Case |
|---|---|---|---|---|
| RAID 0 | 2 | High read/write speed | High data loss risk | Gaming, Temp Files |
| RAID 1 | 2 | Instant backup (Mirror) | Capacity is halved | Operating System, Archive |
| RAID 5 | 3 | Good speed and parity safety | Write speed is slower | Enterprise File Server |
| RAID 10 | 4 | Both fast and very safe | Expensive (Half capacity) | Database Servers |
Performance and Level Comparison
When you compare performance, keep this in mind: RAID 0 doubles sequential read speed in games. However, if one disk fails, all data is gone. That is why I suggest RAID 0 only for a game library.
For key data, definitely use RAID 1 or RAID 10. Also, a hardware RAID controller consumes far less CPU than software solutions. That is another detail you should weigh during bottleneck analysis.
RAID 5 sets the balance between cost and safety. It calculates parity during writes. Therefore, you face a performance bottleneck in databases that write nonstop.
If you have the budget, RAID 10 is the best option. It is both incredibly fast and your data stays safe unless multiple disks fail at once. If you’d like to learn more, be sure to visit our guide on what RAID is.
The Future of SATA: SATA Express, eSATA, U.2, and SATA DOM
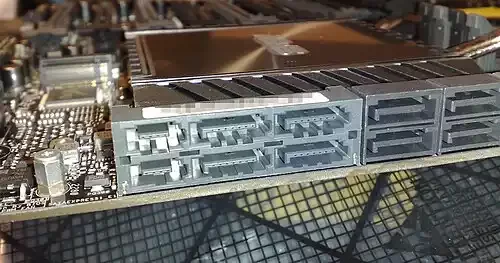
This technology took many different forms over the years. Some endured, while others faded into history. The SATA Express interface was a hybrid solution that used PCIe lanes to boost speed. However, it could not hold its ground in the market.
On the other hand, eSATA was a reliable option for years for external disk connection. Today, the U.2 connection still lives on in the enterprise world.
When your external drive shows up as RAW, your main suspect should be the USB bridge board. Take the drive out of its case and test it with a direct SATA connection. If the drive itself is damaged, you can move to the right recovery steps. Check out this guide to see how to repair a RAW SATA drive.
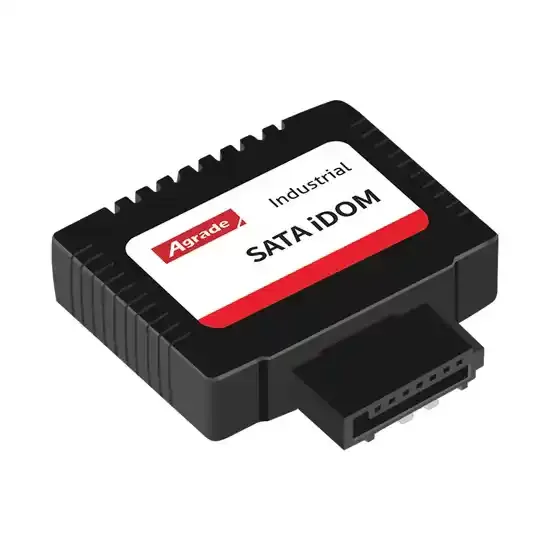
On the embedded side, SATA DOM is an interesting solution. This small device plugs right into the motherboard port and power connector. It is ideal for installing a hypervisor on servers.
Also, slimline SATA and similar thin versions found a place in ultrabooks. This variety shows how flexible the standard is. However, let’s now look at one of the biggest failure stories.
Why Did SATA Express Fail? The Story of the PCIe Hybrid Solution
The SATA-IO organization announced SATA Express technology with the 3.2 revision. Their goal was to exceed the 6 Gbps speed limit.
It combined two SATA ports and two PCIe lanes on the motherboard, so it could reach about 1 GB/s. However, this technology was obsolete on arrival. The M.2 form factor offered the same speed in a much smaller space. Additionally, the M.2 NGFF architecture gave both SATA and NVMe support.
The biggest reason for this failure was the lack of interest from manufacturers and users. Motherboard manufacturers chose to install more M.2 slots instead of reserving space for a SATA Express port.
Users also loved the compact build of M.2 over bulky cables. That is why SATA Express faded into history. Furthermore, NVMe won this standards race.
Therefore, what exactly were the reasons for SATA Express’s failure? The list below clearly lays out the answer:
- Physical Bulk: The port used a huge connector for two SATA and two PCIe lanes, and it went against the shrinking motherboard trend.
- Extra Cost: Manufacturers had to spend on extra controllers and PCB space to add this port.
- Rise of M.2: M.2 offered the same speeds in a much smaller area. It became the favorite of both manufacturers and users.
- Marketing Gap: The SATA-IO organization failed to promote this technology enough and could not build an ecosystem.
The lesson we draw from this is that SATA-IO mistakes can sometimes push the standard back instead of forward. However, the group learned from this error. It poured all its energy into the stability of the existing standard.
As a result, they tightened SATA compliance and interoperability testing. These strict tests are behind the smooth operation of the devices we use today.
eSATA, U.2, and SATA DOM: External, Enterprise, and Embedded Disk Use
eSATA, or External SATA, was a great method for high-speed external disk connection. It offered lower latency and higher throughput compared to USB 3.0. However, it needed a separate adapter because it did not carry power.
eSATAp was developed to solve this issue. This port provided both data and power from the same connector. However, the rise of USB Type-C also brought the end of this technology.
Despite that, you still run into eSATA ports on some old NAS devices. Naturally, these devices show us the use cases of eSATA.
What is a U.2 SATA connection? This is a full-fledged enterprise solution. It brings NVMe speed into a 2.5-inch case. It uses connectors compatible with SATA passive backplane design.
Therefore, data centers can move to NVMe speed without changing their old infrastructure. However, if you ask about the difference between SAS and SATA and which is better, U.2 is usually SAS-based and not pure SATA.
SATA DOM is a tiny solution. You can plug it right into the motherboard port and power connector. It is perfect for installing a hypervisor on servers. It takes up very little space and is reliable. These three different paths prove that the standard is not limited to just personal computers.
| Technology | Use Case | Speed | Supplies Power? | Status Today |
|---|---|---|---|---|
| eSATA | External Disk | 6 Gbps | No (eSATAp yes) | Rare, USB-C dominant |
| U.2 | Enterprise Server | 32 Gbps (NVMe) | Yes | Active, in data centers |
| SATA DOM | Embedded System | 6 Gbps | Yes (Via port) | In industrial use |
This serial data link keeps working quietly in every part of our lives. Whether in your old laptop at home or a bank’s huge data center, this standard has proven its reliability.
Now, the most critical tweak to the heart of this technology awaits you: installing an SSD in an old computer.
Guide to Installing a SATA SSD in an Old Computer and BIOS Settings
Now we reach my favorite part. Nothing beats taking an old laptop or desktop and breathing new life into it. Your 10-year-old device starts flying with Windows 11. However, this job is not just about plugging in the disk and moving on.
You might skip critical details like changing BIOS SATA mode and fixing 4K alignment errors. Naturally, your system crashes or fails to deliver the expected performance. I will now explain how to do this process step by step and with confidence.
First, start with the physical mount. Place the disk into the drive bay on a desktop case. Thin laptops usually do not need an adapter frame.
You might ask where the SATA port is on the motherboard. You generally see these connections next to or below the RAM slots. The L-shaped ports stand out at this point.
Watch the direction when plugging the cable. You cannot plug it backward anyway. You may want to install an M.2 SSD model into a SATA slot. However, you cannot do that. The drive physically does not fit the bay.
After making the cable connections, turn on the computer and enter BIOS. The most critical step awaits you here. A wrong setting can cause a blue screen error. Let’s now make these settings together. Do not be afraid. A computer is not a magic box. It just wants the right commands.
Should You Choose AHCI or IDE Mode in BIOS? Blue Screen Fix
When you enter BIOS, find the “SATA Configuration” or “Integrated Peripherals” menu. You will see the “SATA Mode” option here. The choices are usually IDE, AHCI, and RAID.
If you use an old system, the BIOS setting holds critical weight. At this stage, you need to know whether to pick AHCI or IDE for the SATA mode. Users generally installed old mechanical disks in IDE mode.
If you plug in your new SSD and switch the mode to AHCI, Windows displays a blue screen at boot. This is a driver conflict, not a fault.
The fix is simple. If you plan a clean Windows install from scratch, definitely pick AHCI mode. This mode enables modern features like NCQ data queue and TRIM command. Your disk runs at full performance.
However, if you want to move your old Windows, you have two methods. First, install the AHCI driver in safe mode on the existing system and then change the mode in BIOS. Second, leave the system in IDE mode and accept the performance loss. I never recommend that.
Troubleshooting SATA Compatibility & Clean Installation Steps
To turn on BIOS SATA AHCI mode, follow these steps:
- Fully shut down the computer and install your new SSD.
- Press DEL or F2 at boot to enter UEFI settings.
- Find the “SATA Mode Selection” section under the “Peripherals” or “Advanced” tab.
- Change the value from IDE or RAID to “AHCI”.
- Save changes and exit (F10) and start your Windows install media right away.
Despite all these steps, you face a problem if BIOS does not see the SATA disk. Therefore, check the cables and power connection one more time.
Sometimes old power supplies fail to provide enough voltage. Also, on some old motherboards, the answer to what happens if a SATA port breaks is simple: The disk does not show up. To spot a faulty port, try the disk on a different port.
4K Alignment Error, TRIM Check, and Performance Tuning
You installed the disk and set up Windows. However, the system does not perform as you hoped. That is where the 4K alignment error steps in. If you cloned with old backup software, the partitions may sit misaligned. This wrecks random write speeds.
To check, type “msinfo32” and open System Information. Look at the “Partition Starting Offset” value under Components > Storage > Disks. If this value is 1,048,576 bytes, no problem exists. If it is a value such as 32,256, an alignment error is present. The fix is to reformat the disk.
A TRIM command check is just as vital. Does a SATA SSD work without TRIM? Yes, but cells fill up over time. Still, this reduces your write speed.
To check, open Command Prompt as an administrator and type fsutil behavior query DisableDeleteNotify. If the result is “0”, TRIM is on and you can relax.
If it is “1”, turn it on with the fsutil behavior set DisableDeleteNotify 0 command. This small tweak keeps your disk like new for years.
Real-World Performance & Benchmark Insights
Finally, let’s look at the 2026 real-world SATA SSD speed test results. What is the gap between theory and real life? Specifications claim 550 MB/s. Yet, you might see 560 MB/s in a CrystalDiskMark test.
However, under heavy use, this speed can drop to around 400 MB/s. The reason is the disk’s thermal protection or background TRIM jobs. For performance tuning, you can track disk load by watching the disk activity LED connection.
If speeds are very low, you need to update the SATA controller driver. Download the newest drivers from the manufacturer’s website.
SATA vs SAS: Which Is Better in Enterprise Storage?
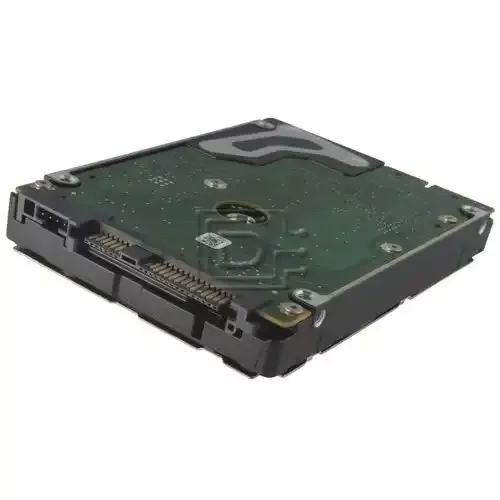
This comparison is a bit like pitting a Formula 1 car against a city sedan. Both are cars, but their purposes are entirely different.
SAS, or Serial Attached SCSI, is a solution built for enterprise storage. While developers designed the SATA standard for home users, they optimized the SAS architecture for server storage systems. The gap between them is not just speed. It is also command set and error tolerance.
SAS comes with multipath support. You can connect to one controller via two different paths. If one cable breaks, data flow continues over the other path. This feature is essential for bank servers that must run nonstop.
Also, SAS disks have much lower latency and astronomical IOPS performance values. However, as you can guess, this power comes at a price: high cost and high energy use.
| Feature | SATA | SAS |
|---|---|---|
| Command Set | ATA | SCSI |
| Max Speed (Interface) | 6 Gbps | 12 Gbps (SAS-3) |
| Full Duplex | No (Half) | Yes |
| Multipath | Not supported | Supported |
| MTBF (Typical) | ~1.2 Million Hours | ~2.5 Million Hours |
| Plugs into SATA Port? | — | No (Notch is different) |
Technical Differences Between SAS and SATA: Speed, Latency, and Command Set
Technically, SAS uses the SCSI command set. This set is much wider and deeper. It gives advanced features like error management and background scrubbing. SAS drives generally spin at 10K or 15K RPM. Therefore, input/output latency falls below a millisecond.
Standard desktop disks generally spin at 5400 or 7200 RPM. Also, SAS works full duplex, meaning it can read and write at the same time. SATA is half duplex. That also creates a performance bottleneck.
Looking at the physical link, SAS connectors look almost the same as this standard. However, a notch stops you from plugging a SAS disk into a SATA port. The reverse is possible: you can plug a SATA disk into a SAS backplane.
That is a result of SATA interoperability standards. Signal voltages are much higher in SAS, so it can work on active and long-distance backplanes instead of a SATA passive backplane design.
In the SAS world, disk durability is also different. The TBW value or MTBF of a SAS disk is many times higher than that of a consumer-grade disk.
Also, SAS has smart power management features like staggered spin-up. This stops multiple disks from starting up all at once and overloading the power supply. In short, SAS is a full-fledged enterprise solution.
Should You Choose SATA or SAS for a Server or Workstation?
If you set up a server, the answer is clear: Choose SAS when possible. In database servers, the IOPS value and low latency SAS offers are unmatched.
However, if you build a backup server or file archive, high-capacity SATA disks make far more sense. You can get huge capacities like 8TB for much less money. Also, if energy use and silence matter to you, this standard stands out.
Workstations paint a slightly different picture. If you do 3D modeling or video editing, SAS’s stability and speed make a real difference. However, if your budget is tight, you can get near-SAS speeds by putting two SATA SSDs in RAID 0.
Still, do not forget: RAID 0 carries a data loss risk. Therefore, always back up your projects. In the end, weigh your needs and budget to decide. Do not spend money unnecessarily just for the enterprise label. However, if safety is essential, stick with SAS.
SATA Connection Protocol and Layered Architecture (Technical Depth)
Now let’s see how this bus protocol works so reliably. The SATA connection protocol consists of four main layers: Physical (PHY), Link, Transport, and Application.
The layered design is just like a factory assembly line. Each layer has its own task and works in harmony with the others. The PHY layer sends signals electrically. In addition, the Link layer checks these signals for errors and corrects them.
The Transport layer splits data into frames. These frames reach the target via the SATA data transfer frame information structure. These layers provide great convenience. For example, when your operating system sends a write command to the disk, the data is delivered uncorrupted and in order.
This structure eliminates the complex sync problems of the old parallel ATA alternative. Let’s now get to know these layers a bit more closely.
What Do the PHY, Link, and Transport Layers Do?
The PHY layer is the most fundamental layer. It sends differential signals and runs the SATA speed negotiation process. When a device plugs in, a handshake happens between the motherboard and the disk. This process is called SATA link setup OOB signaling.
These signals ensure the best speed is picked. Thanks to SATA feedback equalization, signal losses are minimized.
The Link layer handles data integrity control. It adds a CRC data integrity code to every sent packet. The receiver checks this code and re-requests the packet if it is corrupt. That is exactly why C7 errors occur at the Link layer.
This part also runs flow control and power management signals. This layer prevents data loss with SATA transmission error correction mechanisms.
The Transport layer turns data into structures called FIS. The system packages read and write commands coming from the CPU at this layer.
When an NCQ command arrives, the system sorts it right away. As a result, the disk works in the most efficient way. All these layers work hand-in-hand with the storage unit controller. Thus, while you copy a file, the system carries millions of bits of data flawlessly in the background.
Command Set and NCQ’s Impact on Performance
The SATA command set is an evolution of the ATA command set. It contains read, write, diagnostic, and security commands. However, the star of this set is surely Native Command Queuing. The NCQ data queue lets the disk head or controller draw the best route.
In earlier times, the system processed commands in arrival order. Thanks to NCQ, the disk reads the nearest data first and optimizes the order. This dramatically increases the IOPS value, especially under heavy multitasking.
NCQ’s performance effect is much more noticeable on mechanical disks. It cuts head movement, so speed rises and wear drops. On SSDs, the effect is more about lowering write delays.
I always give this example to someone who asks what SATA NCQ is and what it does: You request 10 books in a library. Without NCQ, the librarian searches books in order and runs between shelves. With NCQ, they draw a route and collect them all in one go. That is the difference.
Command queue depth is usually capped at 32. That is more than enough for daily use. However, when we see NVMe’s 65,535 queue depth, we can better grasp the architectural gap. Even so, you cannot feel this gap in an office PC even in 2026.
Thus, the AHCI protocol and the NCQ it brings still fit this standard perfectly. To be sure your system uses this feature, confirm you turned on AHCI mode in BIOS.
Advanced Reading Resources on the SATA Port
In this guide, I blended my field experience and technical details as best I could. Yet technology does not stand still, and standards constantly update. If you want to dig deeper into the topic, I strongly suggest you check the authoritative sources below. Official documentation and the most current technical details await you there.
- You can access the official specification documents of the SATA standard on the SATA-IO developer page. Also, the organization’s interoperability test program lets you track the current compatibility status in the industry.
- You can access the official technical specification of the AHCI protocol via Intel’s direct PDF link. This document called Specification Rev 1.3.1 gives all the details of the software interface. Furthermore, this 1.6 MB file is a full reference source.
- The T10 committee’s main page is one of the most authoritative reference points on storage interfaces. That is because this committee officially manages SCSI, SAS, and ATA standards. You can check the documents here to grasp the technical ties between SAS and SATA.
The 10 Most Asked Questions About the Serial ATA Standard
In the simplest terms, what is a SATA port or slot?
What are all the types of Serial ATA connection ports?
What is the theoretical and real-world speed of the third-gen interface in MB/s?
How long do SSDs with this interface last? Is the TBW value important?
My HDD does not show up on my computer. What should I do?
What is the maximum safe length of a data cable?
Why do some motherboard ports get disabled when I install an M.2 SATA SSD?
Does SATA or NVMe matter in daily use?
How do I fix a CRC error on a SATA cable?
Is TRIM on for my SSD? How do I check?
Conclusion & Overall Review: Should You Still Buy Serial ATA in 2026?
We have reached the end of a long journey. Now is the perfect time to ask the most critical question: Is SATA dying in 2026? My answer is a resounding no. This technology keeps standing by us, just like an old but trusted friend.
It cannot match NVMe’s speed, that is a fact. However, no one can snatch its price-performance crown. In large-capacity storage, this old wolf knows no rival. For breathing life into old systems, nothing beats it.
My future outlook is this: The SATA port count may drop on motherboards. Solutions like M.2 and U.2 connections will take up more space. However, it will not fully vanish.
Industrial computers, embedded systems, and the need for low-cost storage will never end. Just like USB has existed for years, this serial interface will continue to exist. As long as the SATA-IO organization puts out new revisions, this harbor will stay open.
SATA’s Place in 2026 and Future Outlook
You can check SATA motherboard support in 2026. The reality is that every motherboard still has at least 4 ports. Manufacturers keep these ports so users can plug in their old disks.
Also, in the gaming world, large and affordable HDDs for game libraries are still popular. You might not want to pay double for an NVMe disk. Therefore, you choose a cheap 2TB HDD and fit your whole library. For this reason, the standard will stay with us for many more years.
However, even entry-level laptops are slowly moving to M.2 NVMe. This is an unavoidable evolution. Yet, this shift is not the end of SATA; it is just a change of its role.
It is now stepping down from being the primary speed champion. It turns into a trusted data warehouse. Frankly, we can see this as a not-so-bad career change. After all, not everyone needs a race car. Sometimes a strong pickup truck gets the job done much better.
Who Should Buy SATA and Who Should Buy NVMe? The Final Decision Guide
I say this in no uncertain terms: Cases Where You Should Buy SATA:
- If you want to revive an old laptop or desktop, this is an excellent choice.
- You might be looking for a cheap and large-capacity game library. In this case, you make a great duo with an HDD.
- If your budget is tight and you want the highest capacity for the lowest cost, do not hesitate.
- If you plan a huge JBOD array for backup or rarely accessed files on a server, it is the right solution.
- If your motherboard lacks an M.2 slot or the existing M.2 slots are full, this is your only path.
On the other hand, Cases Where You Should Buy NVMe are also quite clear:
- If you do professional video editing, 3D modeling, or heavy database work, NVMe is essential.
- If you constantly move large files and count seconds, you need PCIe’s speed.
- If you build a next-generation system and do not want to leave the M.2 slot empty, go straight for NVMe.
- If you are a gamer who will fully use technology such as DirectStorage, NVMe gives you a head start.
The choice is yours. However, whichever you pick, rest assured you made an informed decision. In the hardware world, the best component is the one that meets your needs and does not shake your budget. If anything sticks in your mind at the end of this comprehensive guide, let’s meet in the comments. May your speeds be high and your latency low!

Be the first to share your comment