

A desktop computer has a motherboard, CPU, RAM, graphics card, power supply, and storage drive. Also, these PC hardware components work together with the right setup. A small memory area called Complementary Metal Oxide Semiconductor (CMOS) stores this setup. If the system clock is wrong, suspect CMOS. An F1 error at boot often points to CMOS.
By 2026, motherboard architecture has matured greatly. Hardware setup still depends on a small memory chip. This chip uses a coin cell to keep settings when the system shuts down. Users still face a dead battery problem.
For example, imagine you built a new DDR5 system. You matched the CPU, RAM, and motherboard. However, with XMP enabled, the machine resets to default settings on every boot. That problem usually comes from a weak CMOS cell. Therefore, correct diagnosis and action are critical.
Also, parts like the power supply, storage drive, and graphics card use BIOS settings. When the cell dies, the CMOS memory that holds these settings resets. As a result, hardware compatibility can fail. This guide covers everything from CMOS cell replacement to clearing CMOS.
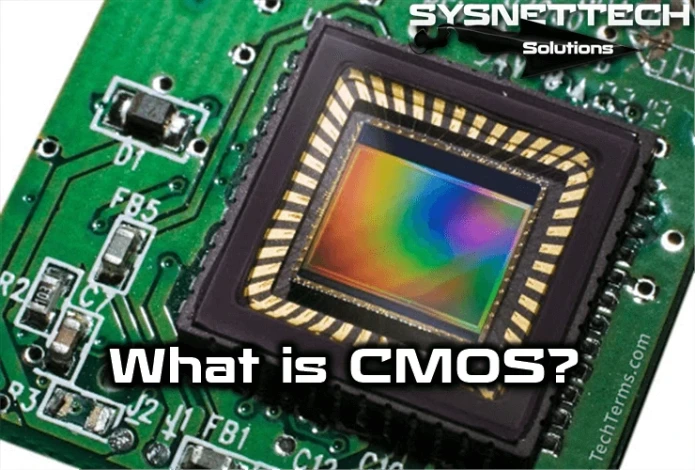
What is CMOS? Basic Definition, Full Form, and Role in Hardware
What is CMOS? This acronym comes from Complementary Metal Oxide Semiconductor. In practice, this term refers to the settings memory on the motherboard.
Many sources think this phrase is just a chip name. The truth is: CMOS is a manufacturing technology. This technology makes low-power transistors. It also forms the basis of the volatile memory that holds system setup.
Motherboard manufacturers use SRAM cells built with this technology. These cells store your BIOS settings. The power source keeps data even when the system is off. In addition, this protection lasts for years.
In short, CMOS is a small storage area that stores hardware settings. The power source that feeds this area makes all settings permanent. Without this structure, the system resets BIOS settings on every boot.
Where Is the CMOS Chip and How Does It Work?
On modern motherboards, this chip often sits inside the chipset. Looking for a separate CMOS chip is often unnecessary. On older boards, you saw an independent chip near the southbridge. Now this role has largely merged into the chipset.
Motherboard labels often appear as CLR_CMOS or CLRTC pins. Also, the cell socket sits right next to this circuit. That makes resetting and cell replacement easier. Some high-end boards even have a rear CMOS button.
This memory holds data such as the system clock and hardware ID. It also stores boot device priority, fan curve, and overclock profiles. The computer reads this data at startup. Therefore, the BIOS POST screen can identify hardware correctly.
For example, PCIe bus configuration is stored here. The system also reads SATA mode, AHCI, or RAID setup from here. Therefore, if this area fails, you face a boot error. The system also cannot identify its hardware.
The Relationship Between CMOS, RTC, and NVRAM
People often confuse these three concepts. CMOS is the memory technology that holds settings. The RTC circuit keeps time with the system clock cell. NVRAM is an acronym for non-volatile memory.
| Component | Task | Persistence | Power Source |
|---|---|---|---|
| CMOS | Stores BIOS settings | Temporary with cell | CR2032 cell |
| RTC | Real-time clock | Continuous with cell | CR2032 cell |
| NVRAM | Variable data store | Permanent | Usually flash |
The RTC crystal is a small metal cylinder on the motherboard. This crystal vibrates at 32.768 kHz. That vibration keeps accurate time. The BIOS clock also uses this signal.
NVRAM is a broader term. On Mac systems, this term is synonymous with PRAM. In the Windows environment, systems store UEFI variables in NVRAM. Therefore, these three components work together.
On the other hand, if the CMOS cell dies, the RTC stops too. However, flash memory usually protects data in NVRAM. That area is stored on flash memory. Therefore, the cell matters only for CMOS and RTC.
What Is a CMOS Battery and What Does It Do?
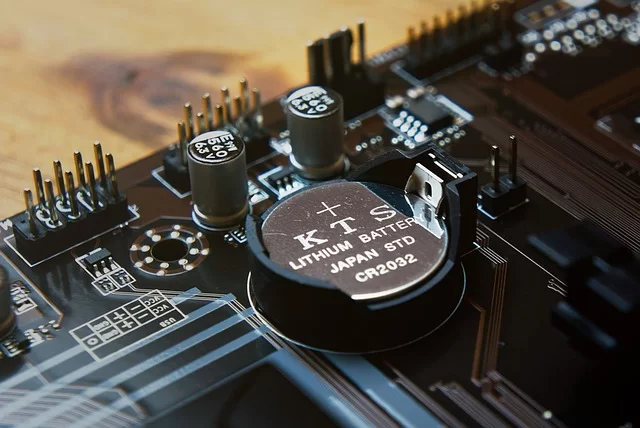
This component is a small coin cell on the motherboard. It powers CMOS memory while the system is off. Therefore, your BIOS settings stay safe. The system clock also runs correctly.
This cell feeds the circuit even when the PC is off. When it dies, the system resets settings. The PC still turns on. This cell is not required for the machine to run. However, it is needed for stability.
CR2032 Lithium Battery: Features and Equivalents
The standard CMOS cell on the market is the CR2032 lithium cell. It is rated at 3 volts. It has a 20 mm diameter and a 3.2 mm thickness. Capacity is about 220 mAh.
| Battery Code | Diameter (mm) | Thickness (mm) | Voltage | Capacity (mAh) |
|---|---|---|---|---|
| CR2032 | 20 | 3.2 | 3V | 220 |
| CR2025 | 20 | 2.5 | 3V | 160 |
| CR2016 | 20 | 1.6 | 3V | 90 |
You can use BR2032 or DL2032 as CR2032 equivalents. Thinner cells are risky. CR2025 or CR2016 may fit loosely in the socket. That leads to contact problems.
Always use the model from the manufacturer’s guide. Also, install the cell in the right direction. The positive side usually faces up. If you install it wrong, you cannot power the CMOS chip.
Why Is the CMOS Battery Important? System Clock and BIOS Settings
This small cell has three main tasks. They are listed below:
- It keeps date and time current as the system clock cell.
- It stores your BIOS settings, such as boot menu priority.
- It protects hardware setup, such as SATA mode or fan curve.
- It maintains CPU, RAM, and graphics card compatibility.
When the cell weakens, the system clock falls behind. The computer also resets the time on every boot. This corrupts file timestamps. Some licensed software also shows clock errors.
For example, Windows update servers tolerate clock drift. However, SSL certificates produce errors because of an incorrect system time. That is why the system clock cell plays a critical role.
How Long Does the Battery Last? Weak Battery Symptoms
Average lifespan is 5 to 10 years. This period changes with usage conditions. For example, if the PC stays off constantly, the cell drains faster. That happens because the cell discharges constantly.
Weak cell symptoms include:
- The computer resets the time on every boot.
- The system asks for F1 or F2 at startup.
- You see a CMOS checksum error on the POST screen.
- Your BIOS settings disappear.
- XMP profile or overclock settings revert.
- CPU speed or RAM speed drops to stock values.
Still, sometimes the cell is fine. The fault comes from oxidation in the cell socket. Check the socket first. You can even clean the contacts with isopropyl alcohol.
The Difference Between BIOS and CMOS: Misunderstood Concepts
People often use BIOS and CMOS as if they were the same. These two are completely different. BIOS is software that is stored in flash memory on the motherboard. CMOS is memory that holds the settings this software uses.
The BIOS chip holds the manufacturer’s firmware. CMOS stores user-specific configuration. Therefore, a BIOS update changes the software. Clearing CMOS only erases settings.
BIOS, CMOS, and UEFI Comparison Table
| Feature | BIOS | CMOS | UEFI |
|---|---|---|---|
| Type | Software | Hardware memory | Software |
| Storage | Flash memory | SRAM | Flash memory |
| Power | Not needed | Cell needed | Not needed |
| Role | Hardware startup | Settings storage | Modern hardware startup |
| Update | BIOS flash | None | BIOS flash |
This table makes the key differences clear. When you open BIOS setup, you actually read values from CMOS.
When you change and save settings, the system writes the data to CMOS memory. Therefore, BIOS software and CMOS data work together.
Why Do People Confuse BIOS Battery and CMOS Battery?
These terms describe the same cell. That cell powers CMOS memory and protects BIOS settings. Sellers sometimes call it a BIOS cell. Users adopt that name too. However, the correct technical name is CMOS cell.
For example, a service technician who says “BIOS cell is dead” actually means the CMOS cell. This misunderstanding is common in the industry. Still, everyone knows what it means. In practice, people accept both terms.
Some users also confuse the BIOS chip with the cell. The BIOS chip is an SPI flash chip that holds the software. The cell only powers the settings memory. These two are physically different.
Its Changing Role in the UEFI Era
CMOS still matters in the UEFI era. Its role has changed a bit. Modern motherboards store most UEFI variables in NVRAM. That area is stored on flash memory. Even if the cell dies, the system keeps some settings.
The RTC circuit still needs the CMOS cell. Some boards also keep certain settings in CMOS SRAM. The cell is not completely useless. The system reads fast boot options from here especially.
For example, UEFI boot order partly is stored in NVRAM. Hardware detection data may stay in CMOS. If the cell dies, the system still displays errors. Modern systems also need cell replacement.
What Happens When the CMOS Battery Dies? Symptoms and Error Codes
When the cell dies, the computer usually starts. The system loads BIOS software from flash memory. It starts with default settings. It also resets the date and time. This causes various errors.
Does a Dead CMOS Battery Stop the PC? Facts
No, the computer usually turns on. Some old motherboards cannot boot with a dead cell. Those boards read hardware setup entirely from CMOS. Boot fails without a cell. Modern motherboards overcome this issue.
For example, a new Asus or Gigabyte board reaches POST even with a dead cell. However, it shows a CMOS checksum error. The system loads default settings. Then it asks you to press F1.
The answer to “Can a PC run without a cell?” is yes. That operation is unstable. The system resets the clock on every boot. The boot order also changes. Replace the cell early.
Common CMOS Error Messages and Solutions
| Error Message | Meaning | Solution |
|---|---|---|
| CMOS checksum error | Settings data corrupt | Replace cell, load BIOS defaults |
| CMOS battery failed | Cell dead | Replace CR2032 cell |
| CMOS date/time not set | No time setting | Set time in BIOS setup |
| CMOS memory size wrong | Memory detection error | Reinstall RAM modules |
| CMOS settings wrong | Invalid settings | Clear CMOS, load defaults |
Some users panic when they see these errors. The fix is often simple. First, measure the cell. If its voltage is under 3V, replace it. Then load optimized settings in BIOS setup.
NOTE: Users whose CMOS battery runs out will find that the BIOS settings are reset; in this case, the virtualization setting is also disabled.
CMOS Warnings and F1 Error on POST Screen
The POST screen checks hardware at startup. During that time, it checks CMOS data. If it finds a mismatch, it warns you. These warnings usually prompt you to press F1.
- Press F1 to run setup.
- CMOS checksum error – defaults loaded.
- CMOS battery low.
- 0251 System CMOS checksum bad.
- 0271 Check date and time settings.
These messages ask you to enter BIOS setup. The system cannot find a valid configuration. You press F1 to accept default settings. This is a temporary fix. The permanent solution is a cell replacement.
Some motherboards also produce beep sounds. For example, two short beeps mean a CMOS error. That beep code changes with the motherboard model. Check the user manual.
How to Replace the CMOS Battery: Desktop and Laptop Step by Step
This job is user-friendly. It requires care. First, unplug the power cord. Then take static electricity precautions. The steps are below.
Steps to Replace the CMOS Battery on a Desktop Motherboard
- Turn off the computer and unplug the power cord.
- Open the case and expose the motherboard.
- Find the cell socket; it is usually near PCIe slots.
- Gently push the metal clip outward.
- Remove the old cell and insert a new CR2032.
- Check the cell direction; the positive side faces up.
- Close the case and reconnect the power cord.
- Turn on the system and enter BIOS setup.
On some boards, the socket points straight up. In that case, slide the clip sideways. A soft click tells you the cell is in place. That means it sits correctly.
Where Is the Laptop CMOS Battery? Soldered and Wired Models
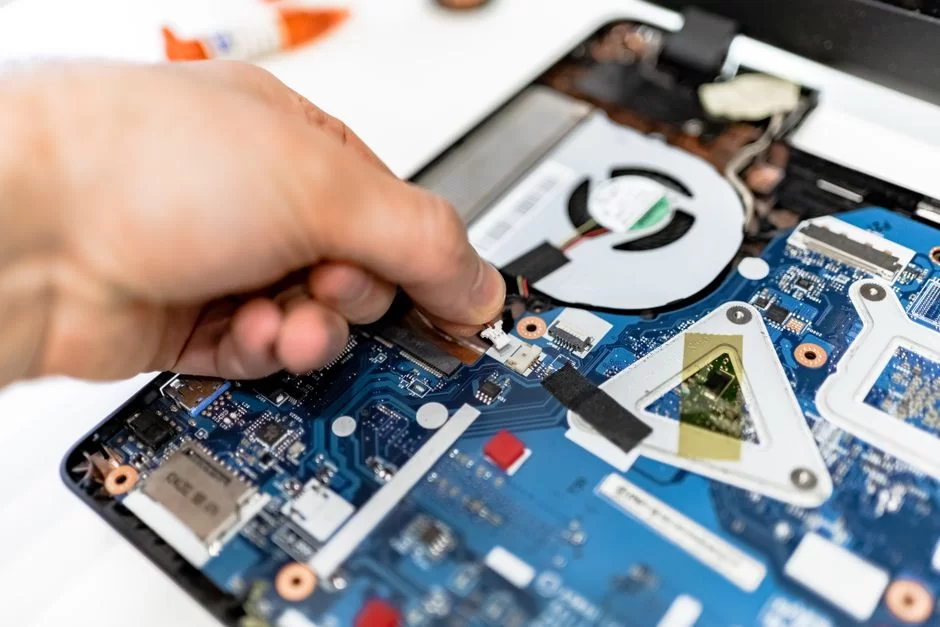
Laptops place the CMOS cell in different spots. Some models have a standard CR2032 socket. Most thin laptops use a wired cell module. You connect this module to a small connector on the motherboard.
For example, Dell and HP models often use a wired CMOS module. To replace it, remove the bottom cover. Then carefully disconnect the connector. Install the new module and plug in the connector.
On some models, the manufacturer solders the cell. In that case, desoldering is needed. Replacing a soldered CMOS cell requires service-level skill. A wrong move can permanently damage the motherboard.
You can download the manufacturer’s guide to find the laptop cell. YouTube also has model-specific teardown videos. These videos show the correct removal method. That way you avoid unnecessary risk.
Things to Consider When Replacing the CMOS Battery
- Always unplug the power cord.
- Wear an anti-static wrist strap or touch metal.
- Do not install the cell backwards.
- Follow the marks on the motherboard.
- Do not force the old cell out.
- Make sure the new cell is the same model.
- Do not damage the cell socket.
- Remember to enter BIOS setup after the change.
These steps prevent possible hardware damage. Static electricity can ruin sensitive chips. Always ground yourself. Work on a wooden table.
First Boot After Battery Replacement
After installing a new cell, the system may act differently. The first boot may show BIOS setup. You may also see an F1 error. That is completely normal. The system resets the CMOS data.
- Turn on the system and press Del or F2 at the first screen.
- Set the date and time in BIOS setup.
- Reorder boot menu priority.
- Enable the XMP or EXPO profile.
- Select AHCI or RAID as the SATA mode.
- Configure Secure Boot and TPM settings.
- Save changes and exit.
Some systems may also show a “No bootable device” error. That happens because the boot order changed. Select the correct disk in BIOS setup and restart the system.
How to Clear or Reset CMOS
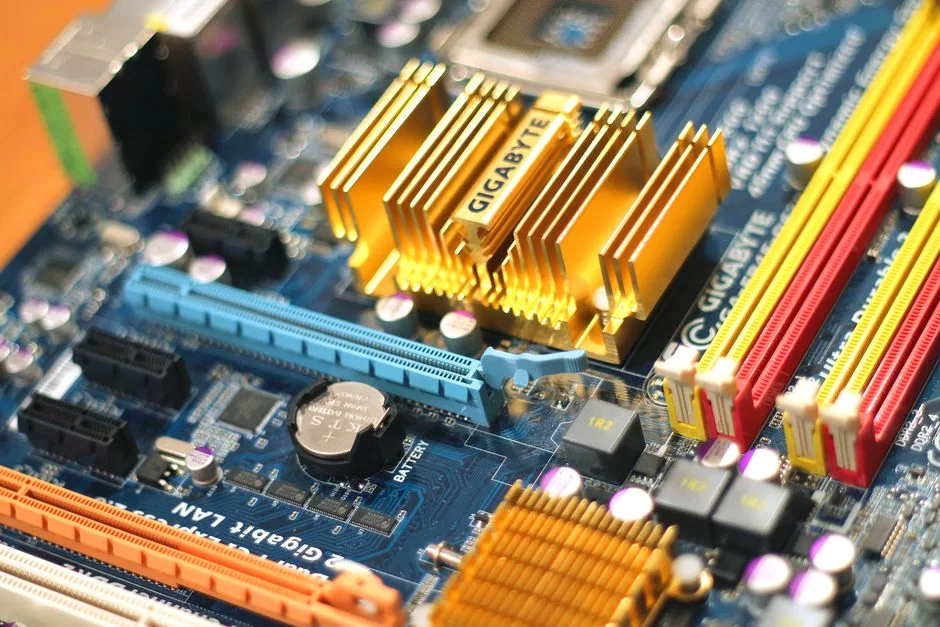
Clearing CMOS returns hardware setup to factory defaults. This solves boot problems after overclocking. Users also clear CMOS to remove a BIOS password. You must do this carefully.
What Is CMOS Clear? Jumper, Button, and Battery Removal Methods
Three main methods exist. They are jumper, button, and cell removal. So, the methods are compared below:
| Method | Difficulty | Risk | Application |
|---|---|---|---|
| Jumper | Easy | Low | Short the CLR_CMOS pins |
| Button | Very easy | Low | Press the rear panel or onboard button |
| Cell removal | Medium | Medium | Remove cell, wait 5 minutes |
The jumper method is the most common. The board has two or three pins. Normally the jumper sits on two pins. To reset, move the jumper to the other position. Wait a few seconds and move it back.
The button method appears on high-end boards. What does the rear CMOS button do? It lets you reset without opening the case. It is ideal for overclocking enthusiasts.
CMOS Clear Locations on Asus, Gigabyte, MSI, and ASRock
Each brand uses different labels. The table below summarizes common locations:
| Brand | Jumper/Button | Location | Label |
|---|---|---|---|
| Asus | Jumper + Button | Bottom edge or rear panel | CLRTC, Clear CMOS |
| Gigabyte | Jumper | Next to cell | CLR_CMOS |
| MSI | Jumper + Button | Bottom edge or rear panel | JBAT1, Clear CMOS |
| ASRock | Jumper | Next to cell or bottom edge | CLRMOS1 |
These locations change with the motherboard model. Check the manufacturer’s guide. Marks on the board also guide you. On some motherboards, the manufacturer highlights this area with a colored frame.
Wait Time and Precautions for CMOS Clear
- Unplug the power cord.
- Remove large parts like the graphics card if needed.
- Move the jumper to the reset position.
- Wait at least 10 seconds; 30 seconds is ideal.
- Return the jumper to its old position.
- Plug in the power cord and turn on the system.
Why does wait time matter? The remaining charge in CMOS memory must drain. If you wait less than 10 seconds, the reset may fail. Be patient.
Some users press the power button to drain capacitors. This method helps. The leftover voltage on the board discharges. Then the jumper method works better.
What to Do After Clearing CMOS
- Enter BIOS setup and set the time.
- Arrange the boot order.
- Enable XMP, EXPO, or DOCP profiles.
- Select AHCI or RAID as the SATA mode.
- Check Secure Boot status.
- Enable the TPM module.
- Reconfigure the fan curve.
- Restore overclock settings.
These steps bring the system back to its previous stability. Windows also needs them to boot correctly. Do not skip them after clearing CMOS.
Critical Effects of CMOS Clear on Modern Hardware
A CMOS reset affects more than just the clock. It also affects Secure Boot and disk modes. The effects are examined below.
Does CMOS Clear Erase XMP and EXPO Profiles?
Yes, it does. CMOS memory stores these profiles. After a reset, RAM speed returns to default. This causes performance loss, especially on DDR5 systems. RAM timings also return to stock values.
For example, a 6000 MHz CL30 kit becomes 4800 MHz CL40 after clearing. You must re-enable XMP after a reset. The same applies to EXPO on AMD. Do this in BIOS setup.
How TPM, Secure Boot, and RAID Settings Are Affected
The system resets these settings too. RAID setup carries serious risk. If SATA mode changes to IDE or AHCI, the system cannot read the existing RAID array. As a result, you see a blue screen at boot. Fix the SATA mode right after clearing.
Secure Boot often comes disabled by default. Windows 11 requires Secure Boot. Does Secure Boot turn off after clearing? Yes, it does. You must enable it again. The TPM module also returns to factory state.
If you use BitLocker, you may encounter a serious problem. When you reset TPM, the system asks for a recovery key. Back up your BitLocker key before clearing. Otherwise, you cannot access your drive.
Boot Order, SATA Mode, and NVMe Boot After CMOS Clear
- Boot order returns to default.
- SATA mode changes to AHCI.
- NVMe boot priority may disappear.
- The mode may switch between Legacy and UEFI boot.
- Some systems turn on CSM automatically.
These changes can stop the system from booting. The operating system is installed in a specific mode. For example, Windows 11 requires UEFI boot. If Legacy boot turns on, the disk disappears.
The fix is simple. Select UEFI boot in BIOS setup. Also set SATA mode back to AHCI or RAID. Then set the boot menu priority to the correct disk. That way the system boots normally.
Does CMOS Reset Return to Factory Settings? Do You Need to Clear CMOS After a BIOS Update?
Yes, clearing CMOS returns the system to factory settings. The BIOS version does not change. If you updated BIOS, the system keeps that version. It only pulls configuration values back to default. Do not confuse these two.
Is a CMOS clear needed after a BIOS update? It is usually recommended. The new BIOS may conflict with the old setup. Clearing after an update is advisable. Then re-enter the settings.
Some boards clear automatically after an update. Not every model does this. Manual reset is a safe method. The “Load Optimized Defaults” option also does the same job.
Troubleshooting After CMOS Battery and Clear
Sometimes new problems appear after these steps. They usually come from missing configuration. The most common scenarios are solved below.
BIOS Not Opening or Black Screen After CMOS Clear
- Check the power cord again.
- Reinstall the RAM modules.
- Try the graphics card in a different PCIe slot.
- Connect the monitor cable to the correct output.
- Look at the error LEDs on the motherboard.
A black screen usually comes from a RAM contact problem. During clearing, RAM modules may have shifted. Reseating them helps. Also make sure you did not touch the BIOS chip.
No Display After Battery Replacement / Fans Spin
- Check the cell direction.
- Check the metal clip in the cell socket.
- Reinstall RAM and the graphics card.
- Verify the power supply cables.
- Look for a short circuit on the motherboard.
The fans-spin-no-display issue is usually a simple contact fault. The CPU power cable may be loose. Check that cable. Also firmly seat the 24-pin ATX power connector.
Sometimes the BIOS chip shifts by accident. Do not touch the SPI flash chip on the motherboard.
If the problem continues, use a BIOS recovery method. Most motherboards have CrashFree BIOS or Dual BIOS.
I Replaced the CMOS Battery but the Clock Still Resets
This points to three possible causes. The new cell may also be bad. The cell socket may have oxidized. On the other way, the RTC circuit may have failed. Check them in order below:
- Measure the new cell’s voltage.
- Clean the cell socket with isopropyl alcohol.
- Gently lift the metal contacts in the socket.
- Check the RTC crystal on the motherboard.
- Update BIOS if needed.
Some boards have a vertical cell socket. These sockets break easily. If the socket is broken, solder a new one. If you do not know how, ask an expert.
CMOS Battery and Clear Button/Jumper by Motherboard Brand
Each manufacturer uses a different design. In this section, brand-specific locations are given. That way you save time during the job.
Clear Jumper and Button Locations on Asus and Gigabyte Boards
| Brand | Model Series | Jumper | Button | Location |
|---|---|---|---|---|
| Asus | ROG, TUF, Prime | CLRTC | Rear panel on some models | Bottom edge or rear panel |
| Gigabyte | Aorus, Eagle | CLR_CMOS | None or onboard | Next to cell |
On Asus boards, the rear panel button usually appears on high-end ROG models. Do not confuse this button with BIOS flashback. BIOS flashback writes BIOS from USB. CMOS clear resets settings. They differ.
On Gigabyte models, the jumper usually sits right next to the cell. It uses a two-pin design. To reset, short these pins with a metal object or remove the cell.
Clear Jumper and Button Locations on MSI and ASRock Boards
| Brand | Model Series | Jumper | Button | Location |
|---|---|---|---|---|
| MSI | MEG, MPG, MAG | JBAT1 | Rear panel on some models | Bottom edge or rear panel |
| ASRock | Taichi, Steel Legend | CLRMOS1 | None or onboard | Next to cell |
MSI boards often use the JBAT1 label. This jumper usually has three pins. Normally a jumper shorts pins 1 and 2. To reset, move the jumper to pins 2 and 3. Then move it back after a few seconds.
ASRock models use a similar CLRMOS1. Some Taichi motherboards also have a rear reset button. This button enables quick action without opening the case.
CMOS Battery in Dell, HP, Lenovo, Monster, and Casper Laptops
- Dell: Most models use a wired CMOS cell module. Remove the bottom cover.
- HP: Wired cells are common. Some models have a standard CR2032 socket.
- Lenovo: ThinkPad series uses a wired module; IdeaPad sometimes has a soldered cell.
- Monster: Usually uses a standard CR2032 or wired module.
- Casper: A wired or coin cell sits under the bottom cover.
Access depends on the laptop case design. Check the manufacturer’s service guide. Be careful when disconnecting the cell connector. The socket is small and fragile.
CMOS/NVRAM Equivalent on Apple MacBook
MacBook models do not have a traditional CMOS cell. Instead, Apple uses NVRAM or PRAM. This area stores system settings in flash memory. The main battery powers the RTC circuit. There is no separate coin cell.
Mac users press Option+Command+P+R to reset NVRAM. You can see this as a CMOS clear equivalent. It is not exactly the same. Macs do not need a cell replacement.
The answer to “Does a MacBook have a CMOS cell?” is no. Apple stores setup with a different architecture. That is an advantage for hardware maintenance. An RTC fault may require a main battery replacement.
Technical Infrastructure of CMOS and RTC/NVRAM
This section covers technical details. That way you fully understand the topic. Your troubleshooting skills also improve.
How the RTC Circuit and Crystal Clock Battery Work
RTC means real-time clock. A 32.768 kHz crystal oscillator on the board drives this circuit. This frequency is ideal for making a clock signal. Divide it by a power of two, and you get seconds.
The RTC crystal draws constant power from the CMOS cell. This oscillator runs even when the system is off. Date and time stay correct. The sleep mode timer also uses this signal.
The RTC circuit also manages some wake events. For example, scheduled boot works through this circuit.
The operating system also uses this circuit for clock sync. RTC is critical for hardware time sync.
Technical Differences Between SRAM and NVRAM
CMOS SRAM is volatile memory. It loses data when power cuts off. The cell supports this memory. NVRAM is non-volatile. It keeps data in flash memory. These are different technologies.
| Feature | CMOS SRAM | NVRAM |
|---|---|---|
| Persistence | Volatile | Non-volatile |
| Power | Cell needed | Not needed |
| Speed | Very fast | Slower |
| Capacity | Very small | Larger |
| Usage | BIOS settings | UEFI variables |
SRAM offers fast access. Its capacity is low. The system keeps only critical settings there. NVRAM suits larger data. The system stores UEFI variables and boot menu entries there.
On the other hand, NVRAM uses flash memory, so its write life is limited. This limit causes no issue for years in normal use. Users should not worry.
Can a Computer Run Without a CMOS Battery? Technical Explanation
Yes, the computer runs. BIOS loads default settings on every boot. The data in CMOS SRAM has disappeared. The system starts with factory settings. Date and time are wrong too.
You may see some boards hang during POST without a cell. These boards cannot verify hardware setup. That is rare. Modern motherboards turn on even without a cell. Still, they do not run stably.
You can use a cell-less boot for short-term troubleshooting. It is not a permanent fix. Network time sync also fails without a system clock cell. Installing a cell is essential.
Discover CMOS Technology and Working Principles
CMOS is a critical computer hardware component. It protects BIOS settings and the system clock. The links below help you understand the topic deeply.
- Intel – BIOS Settings Reset Guide: Intel’s official support article explains how this component stores BIOS settings. It also offers solutions for possible issues.
- IONOS – Hardware Component and Tasks: IONOS’s comprehensive digital guide examines the computer’s startup process. It also explains the main tasks, importance, and system clock link.
- TechTerms – Technical Term Dictionary: TechTerms’s dictionary entry briefly summarizes the basic principles of semiconductor technology. It also explains advantages and its place in computer hardware.
- Britannica – Semiconductor Technology: Britannica’s encyclopedia entry presents the historical development and working logic of these circuits. It also explains common uses in modern electronics.
- Lifewire – Key Component on the Motherboard: Lifewire’s technical explanation describes how this motherboard component stores computer settings. It clearly explains that this component protects these settings permanently.
FAQ About the CMOS Battery
What is CMOS?
What happens if the cell dies?
How do you replace this cell?
How long does the cell last?
What is the difference between BIOS and CMOS?
How do you clear CMOS?
Can a computer run without a cell?
Does a dead cell reset the BIOS password?
Does CMOS clear erase XMP profiles?
Does CMOS clear affect TPM?
I replaced the cell but the clock still resets. What should I do?
Does a MacBook have a separate CMOS cell?
Conclusion: CMOS Management and Hardware Stability
Good CMOS management is the foundation of system stability. A small cell protects your entire setup. Do not neglect maintenance. Also perform CMOS clears carefully.
Tips for Long Life in CMOS Maintenance
- Turn on and run the computer once a month.
- Use a quality CR2032 lithium cell.
- Check the cell socket once a year.
- Clean oxidation with alcohol.
- Document your BIOS settings.
- Do not touch parts without static protection.
- Clear CMOS if instability follows overclocking.
- Back up your BitLocker key.
These tips extend cell life and prevent data loss. You also notice possible hardware failures early. That way you avoid expensive repairs.
Hardware Stability with Proper Management
Your system starts with the correct time on every boot. It keeps boot device priority. XMP and RAID setup do not disappear. As a result, the machine runs stably for years. That saves you time and money.
Still, if you face a problem, you now know what to do. First measure the cell, then try the clear method. Also follow the motherboard manufacturer’s guide. That brings hardware management to a professional level.

Be the first to share your comment