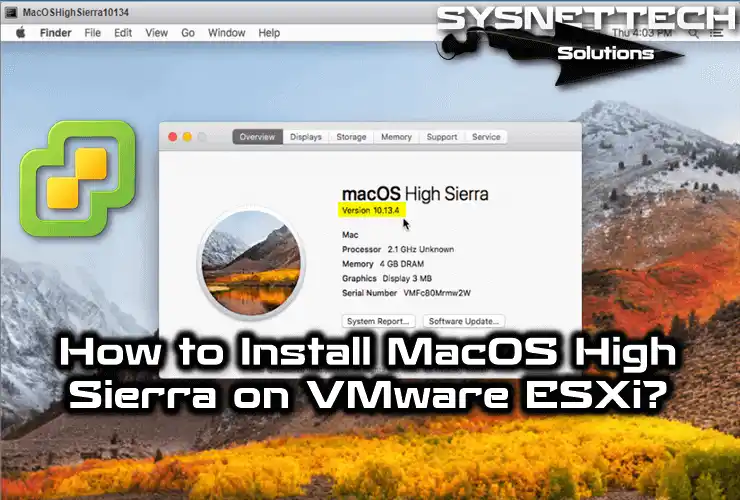
In this article, we’ll examine how to build macOS High Sierra on a virtual machine on VMware vSphere Hypervisor ESXi server.
How to Run macOS High Sierra on VMware ESXi
It is simple to install macOS High Sierra on a PC or Laptop with virtualization programs without a Mac computer.
In our previous articles, we installed the Sierra and High Sierra on Windows 10 using VMware Workstation and Oracle VM VirtualBox. In this article, we will build the High Sierra 10.13.4 with the virtual machine on the VM ESXi server.
Before installing macOS with VMware ESXi, you need to prepare the virtual machine for macOS. We were using VMware Unlocker to run macOS systems on the VM Workstation. Likewise, we also need to use VM Unlocker to run macOS on VM ESXi.
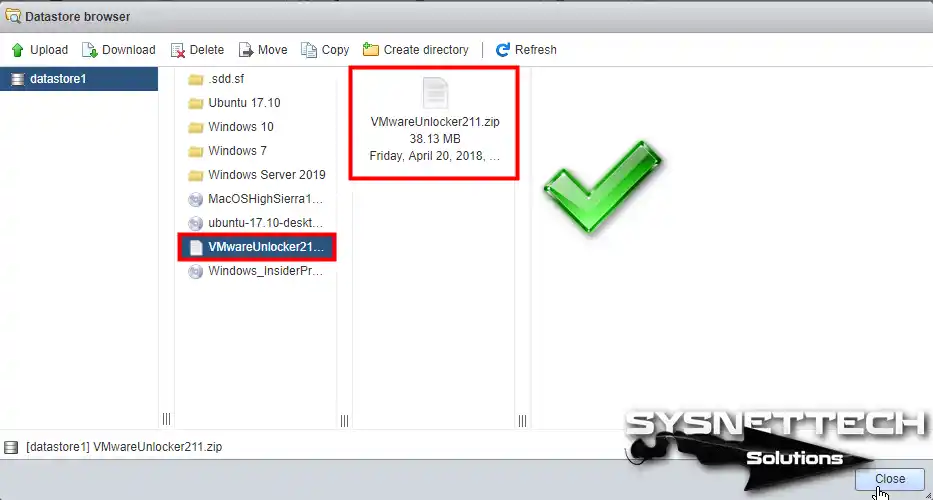
First, download the VMware Unlocker 2.1.1 to your computer and upload it to the ESXi datastore. Then, follow the steps below to set up macOS High Sierra on vSphere ESXi.
How to Setup macOS High Sierra on vSphere 6.5/6.7U2
If this is your first time doing ESXi installation, check out How to Install vSphere. After you have installed the ESXi, download the macOS ISO files from the following links.
Upload the macOS ISO and VMware Unlocker.zip files to Datastore on VMware ESXi. Then, download the Putty program to make an SSH connection.
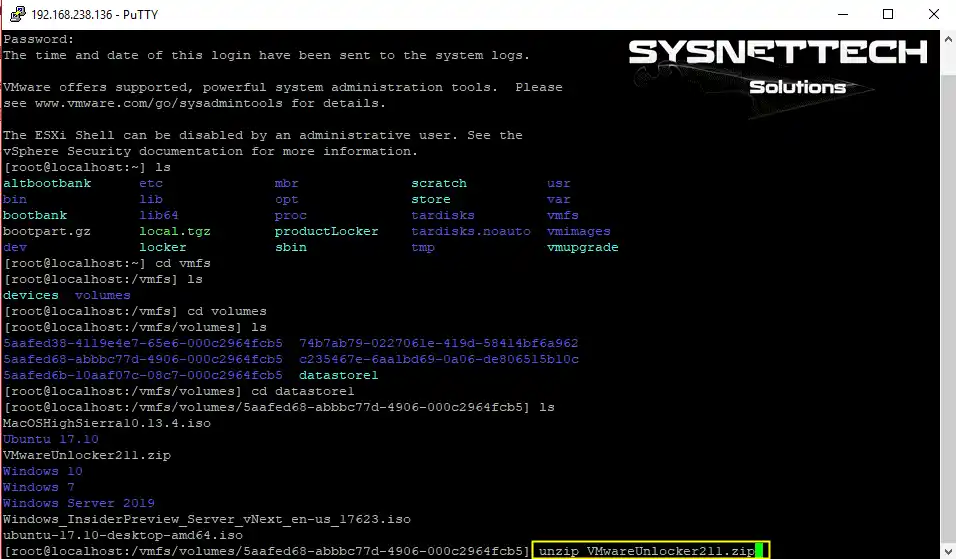
To set up Mac OS on VMware ESXi, follow the instructions below.
Step 1
After you copy the VMware Unlocker211.zip file in Datastore, open Putty.
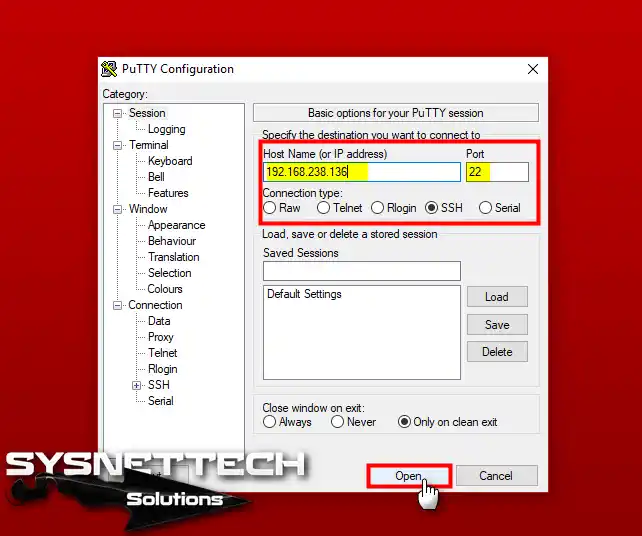
Step 2
On Putty, type in the IP address of the ESXi server in the Hostname section and 22 in the Port section. Once you are sure that you have selected the SSH connection on Putty, click on the Open button.
Type your username and root password for the SSH connection.
Step 3
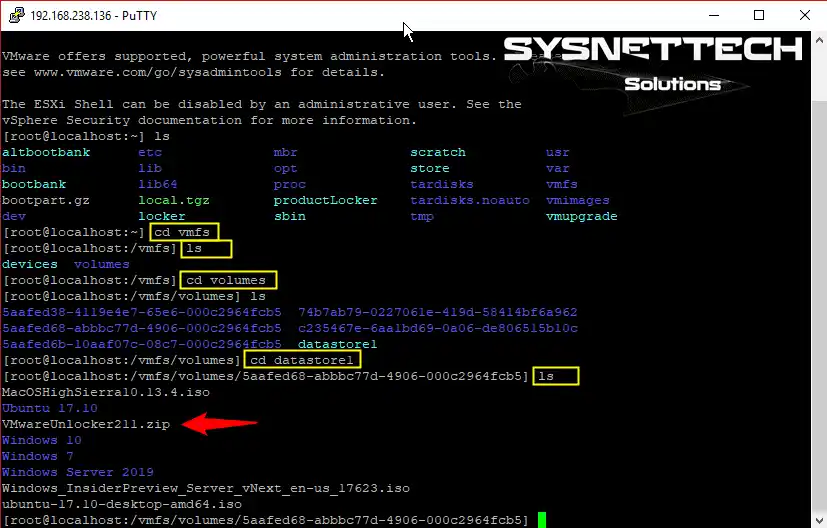
On the console screen, go to vmfs/volumes/datastore1.
Step 4
Execute the unzip VMwareUnlocker211.zip command to extract the VMwareUnlocker211.zip file.
unzip VMwareUnlocker211.zip
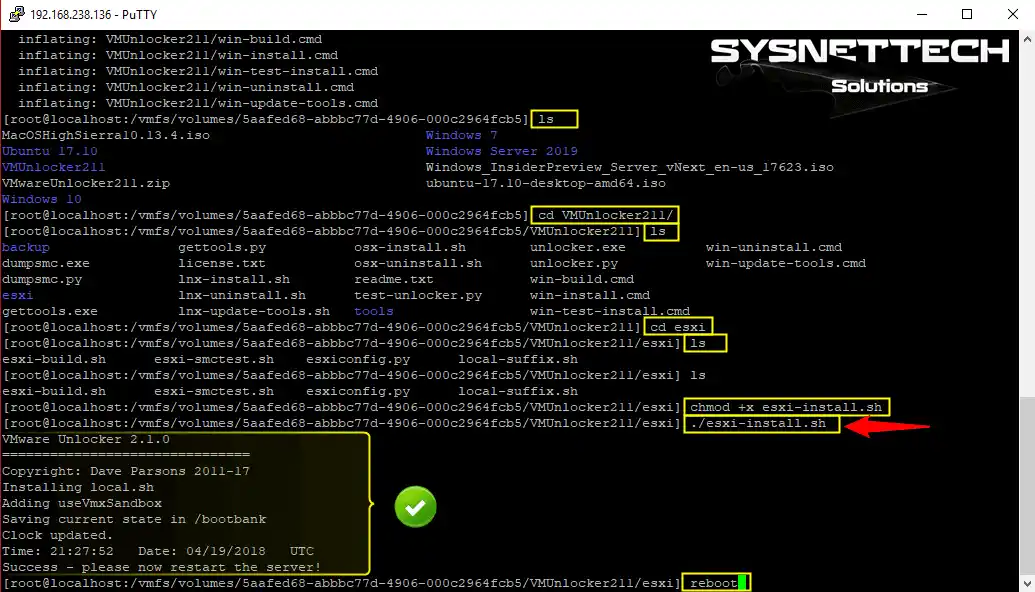
Step 5
After extracting the VMware Unlocker.zip file, please enter it in the folder and execute the following commands to build VMware Unlocker on VMware ESXi.
cd VMUnlocker211/
ls
cd esxi
ls
chmod +x esxi-install.sh
./esxi-install.sh
reboot
After setting up VMware Unlocker on VMware ESXi, restart your VMware ESXi server using the reboot command.
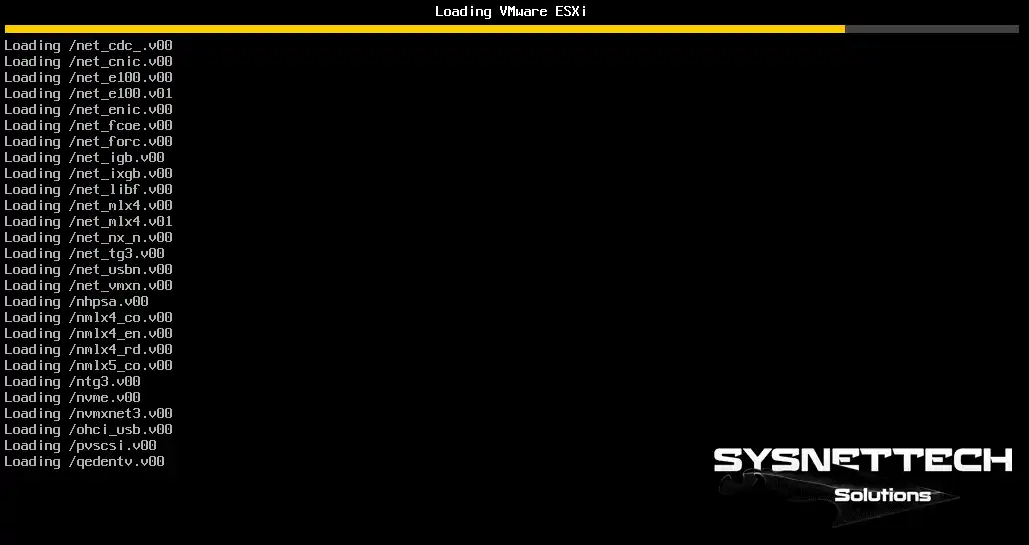
Step 6
Restarting VMware ESXi.
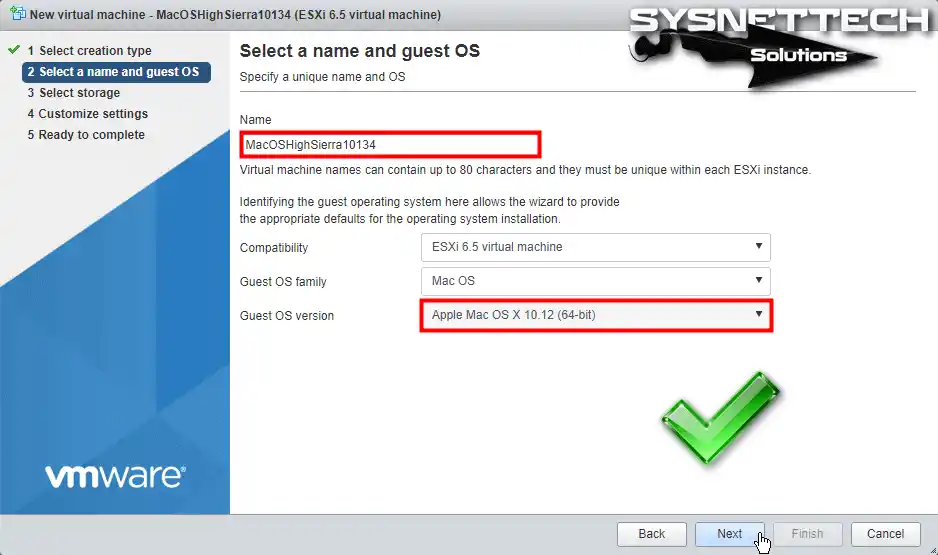
Step 7
After VMware ESXi is powered on, create a new virtual machine. In the macOS virtual machine, select Apple Mac OS X 10.12 (64-bit) in the Guest OS Version section.
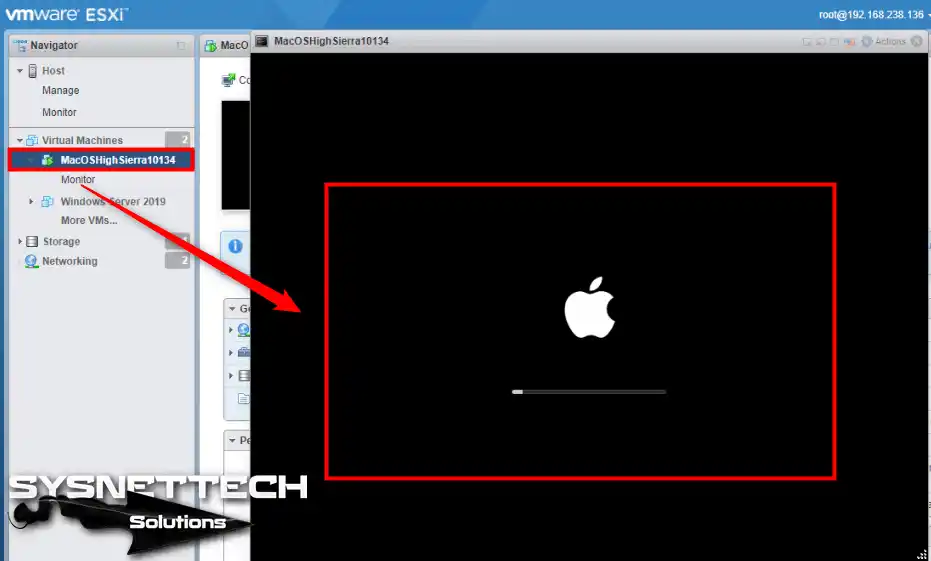
Step 8
Add the ISO file to the virtual PC and run the virtual machine. After starting the VM, the installation will begin as in the image below.
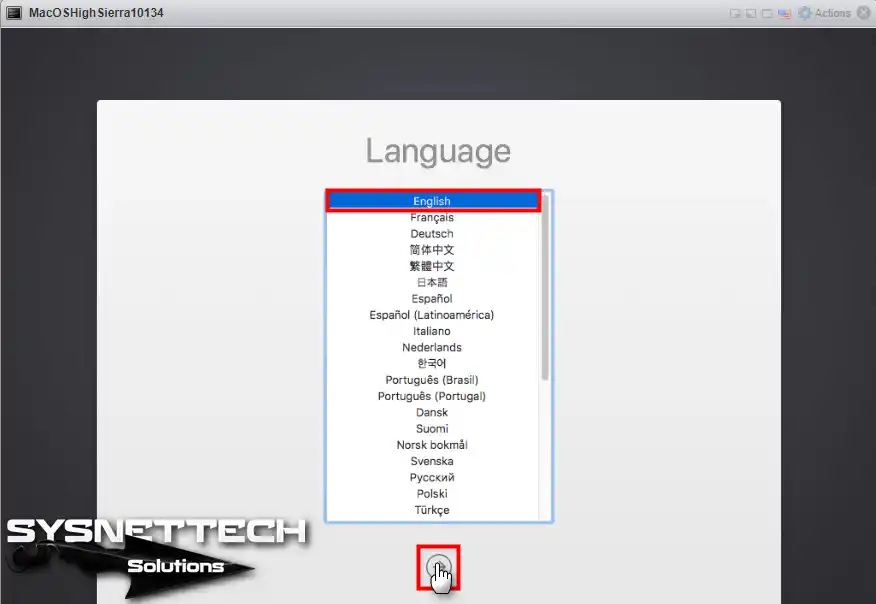
Step 9
On the macOS setup screen, select your system language and continue.
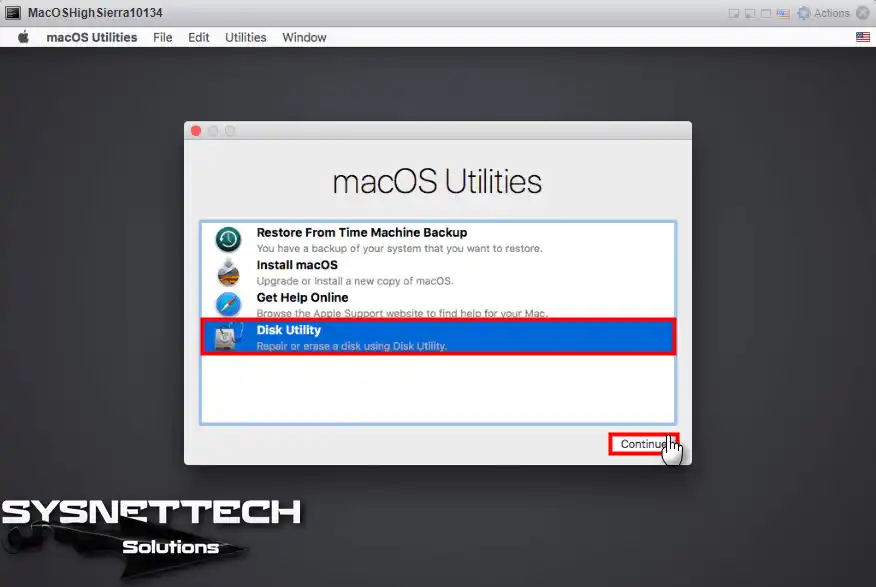
Step 10
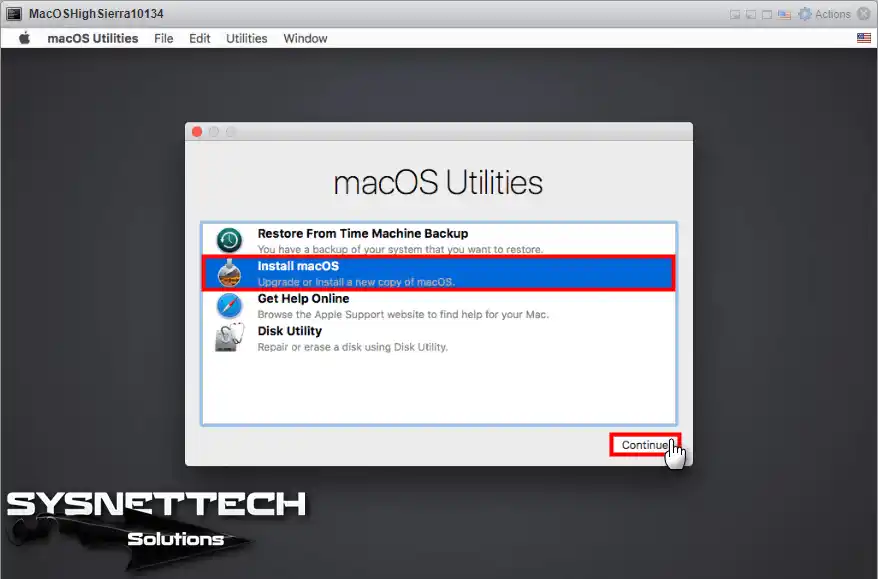
Open the Disk Utility program in the macOS Utilities window.
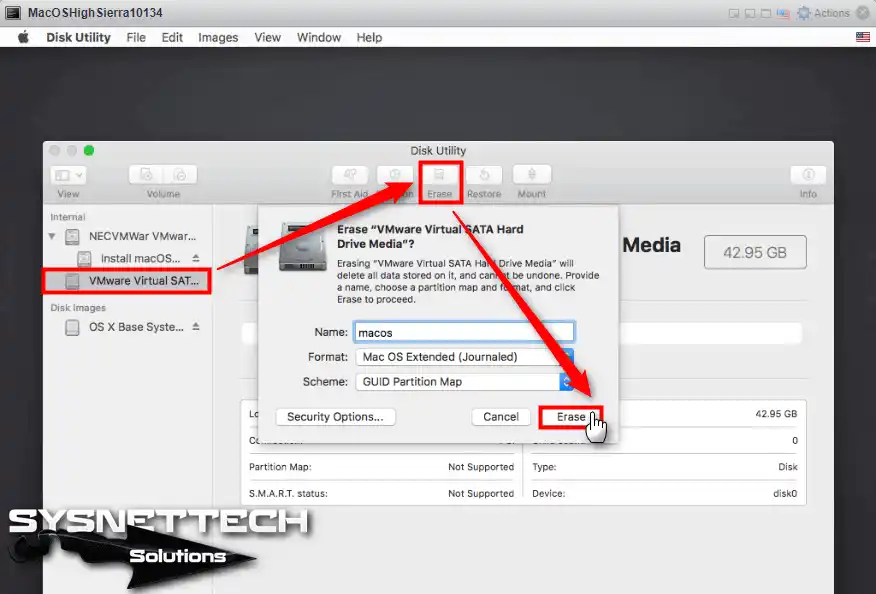
Step 11
Format the virtual disk as you need to prepare the disk before installing macOS. Once you have formatted the macOS hard disk, close the Disk Utility window.
Step 12
Select Install macOS in the macOS Utilities window and click the Continue button.
Step 13
Click on the Continue area to start the setup on vSphere ESXi.

Step 14
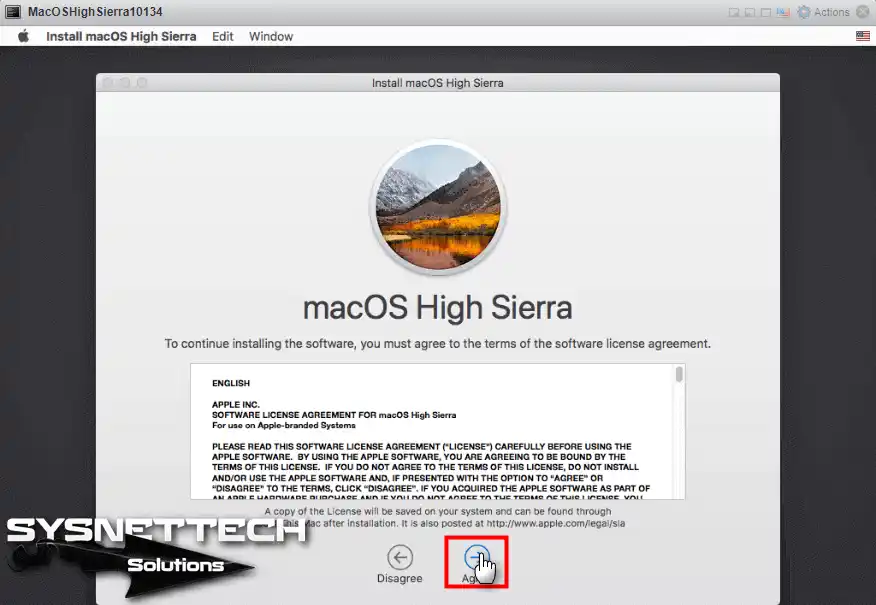
Accept the Apple OS license agreement.
Step 15
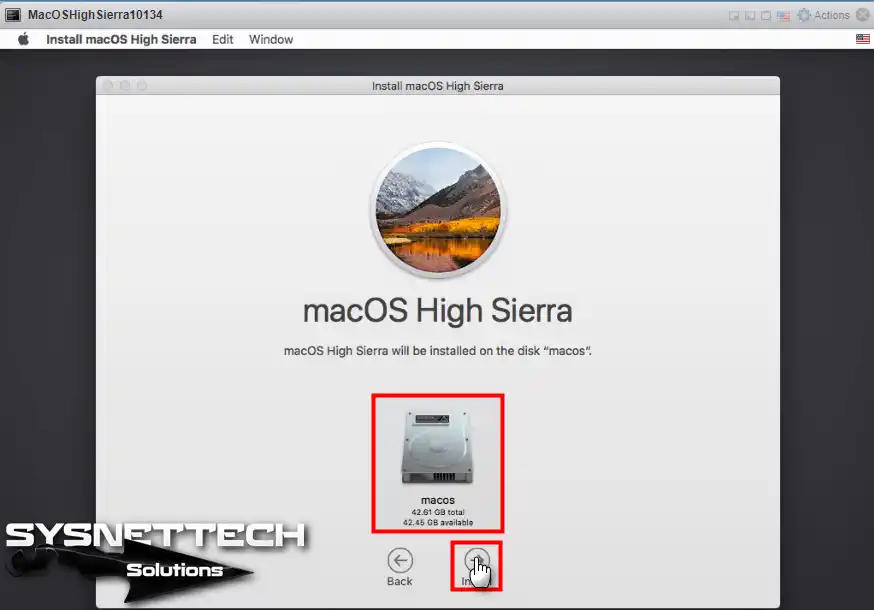
Select the disk you want to install and click the Continue button.
Step 16
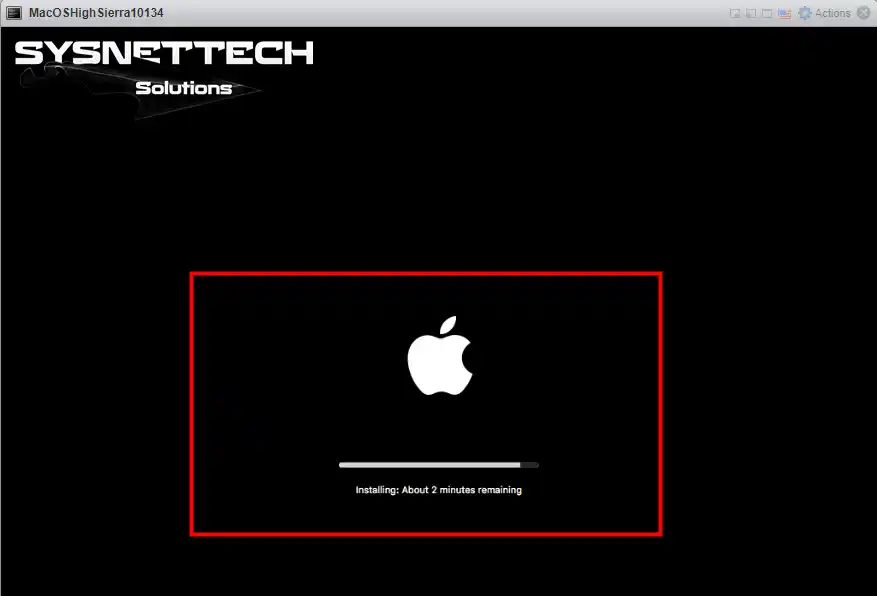
Once the installation files have been copied, the virtual machine will restart.
Step 17
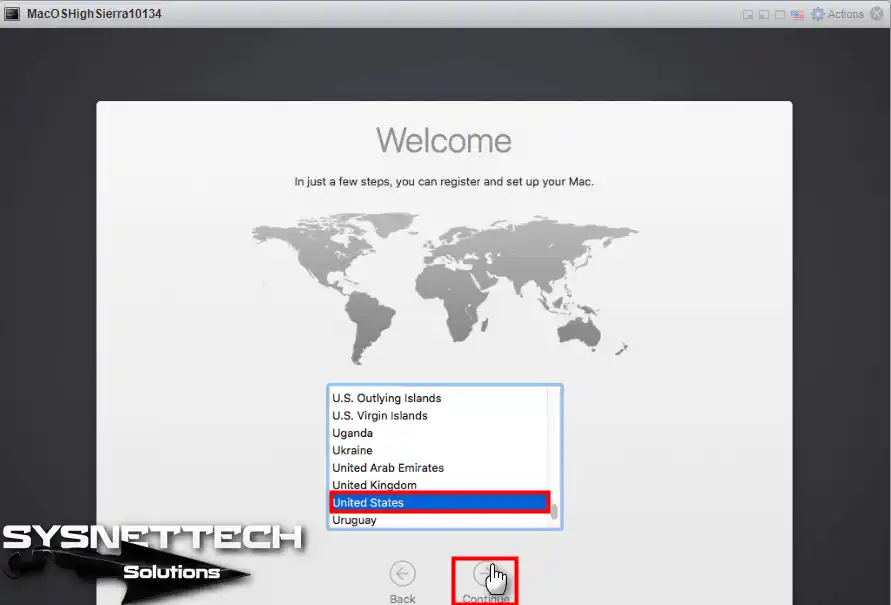
Please select where you live and click the Continue button.
Step 18
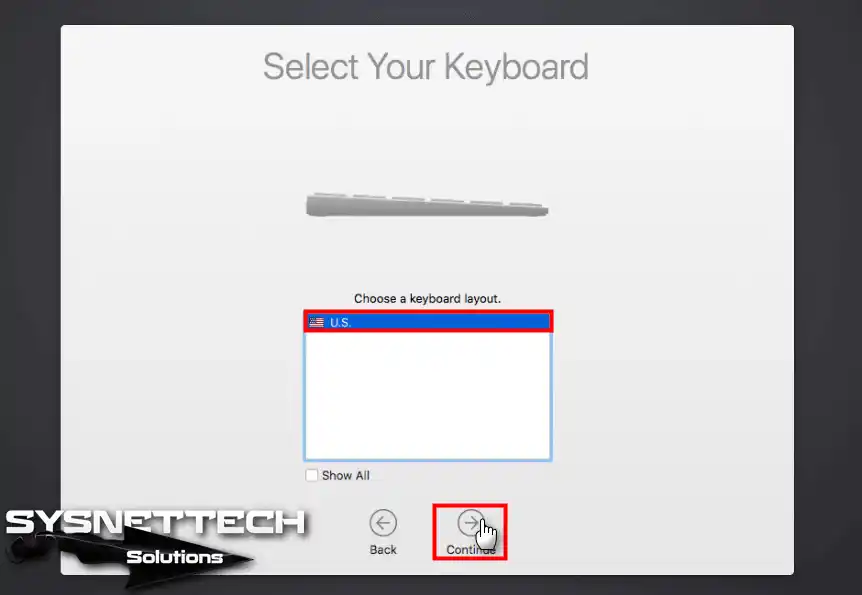
Choose your keyboard layout and continue with the setup.
Step 19
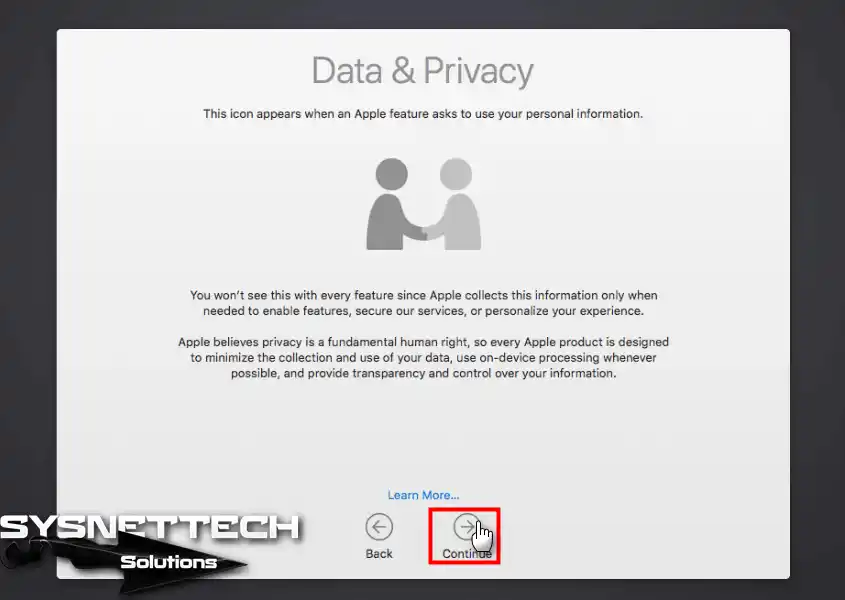
To proceed, please click on Continue in the Data & Privacy window.
Step 20
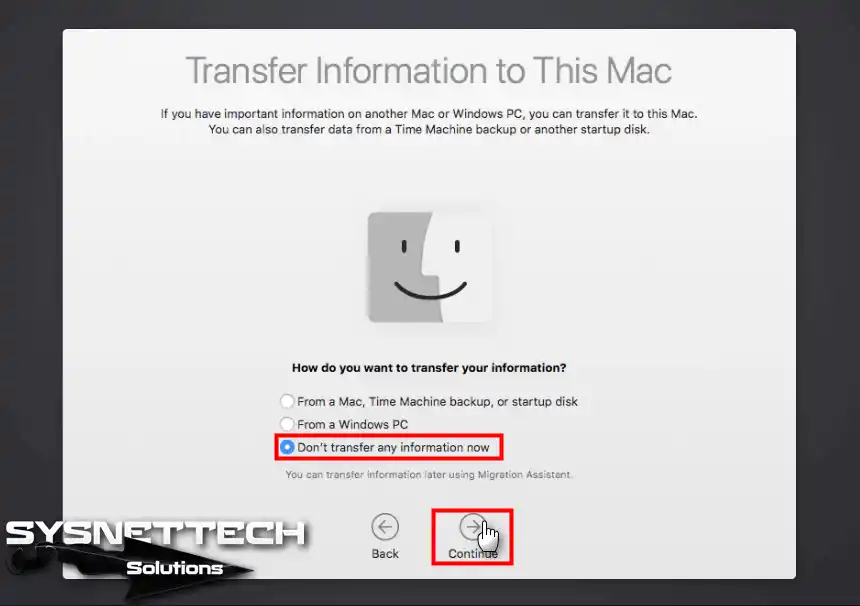
For clean installation, select Don’t transfer any information now and click Continue.
Step 21
Click Set Up Later to configure your Apple ID account later.
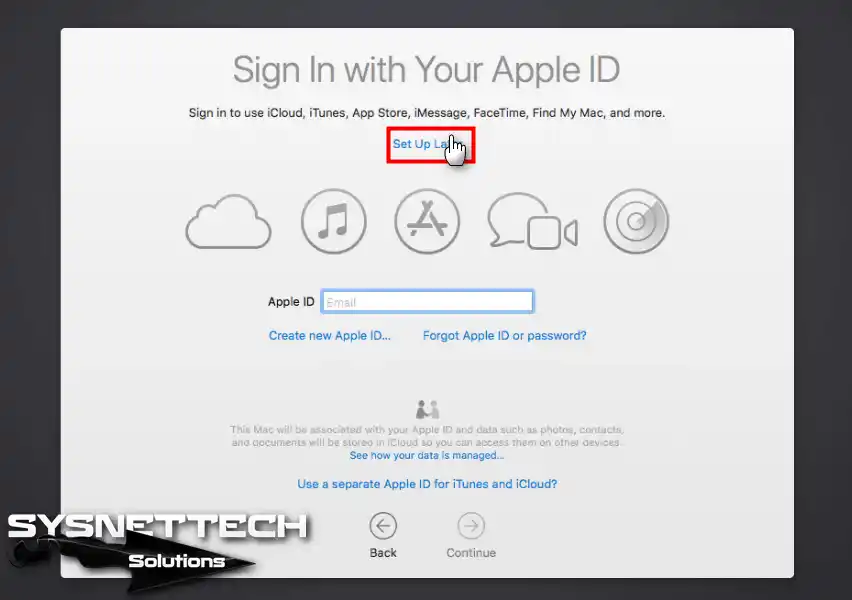
Step 22
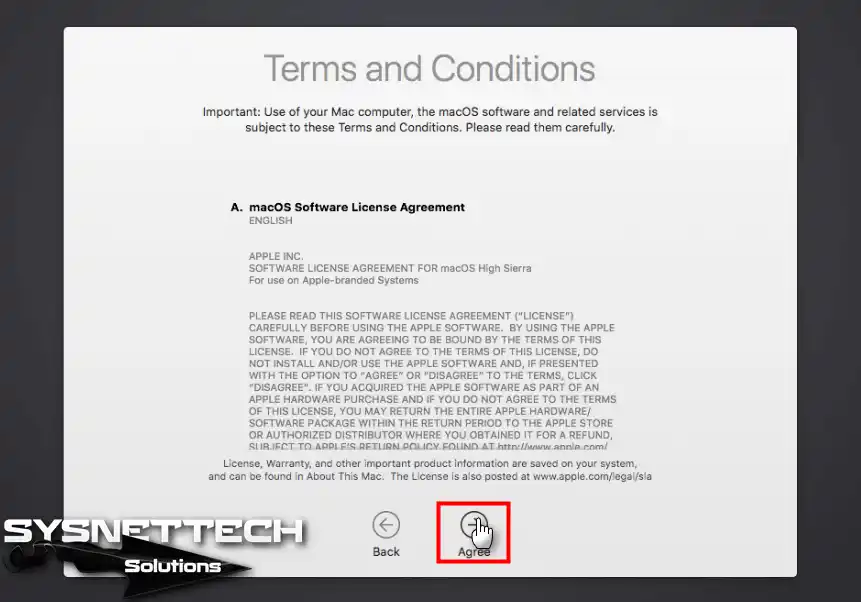
Accept the macOS software license agreement.
Step 23
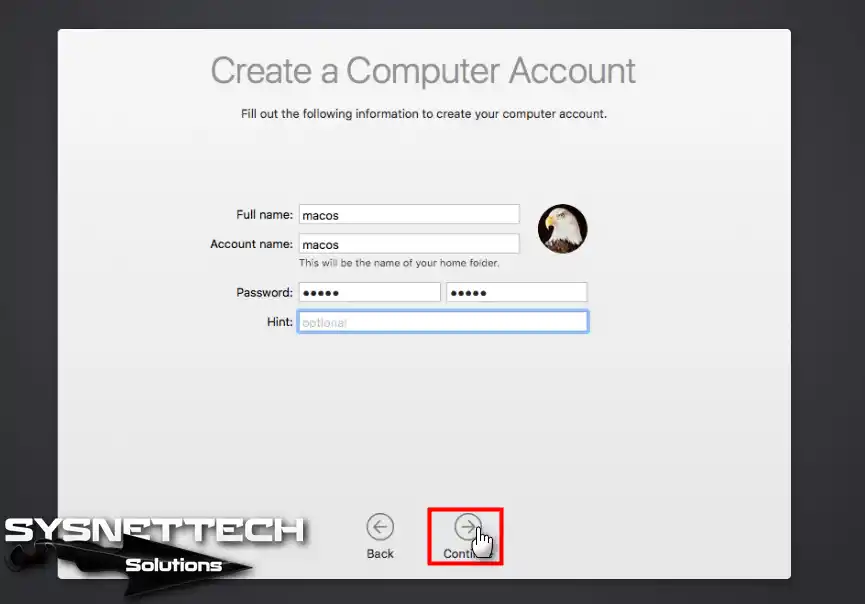
Configure your user account information and click Continue.
Step 24
Click on Customize Settings to configure Apple’s map, location, and data-sending properties.

Step 25
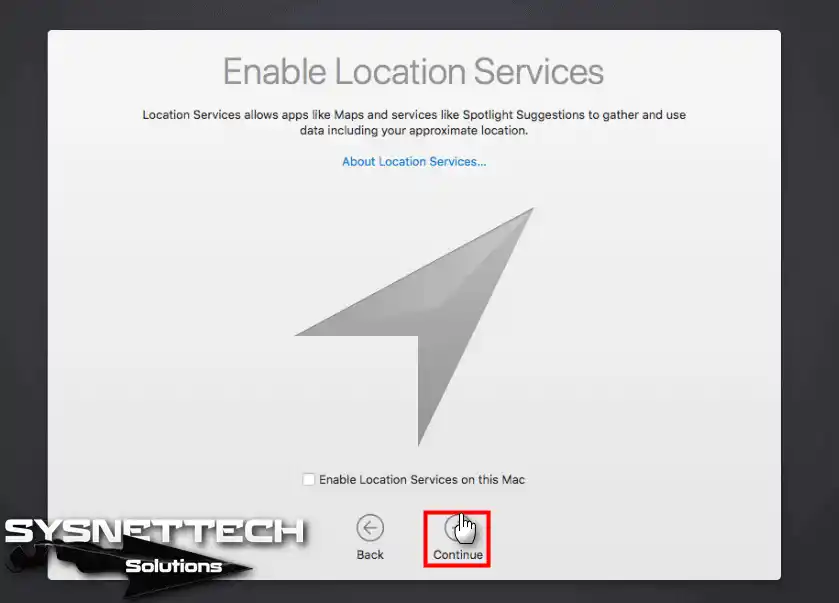
If you want to enable location services, select Enable Location Services on this Mac and click Continue.
Step 26
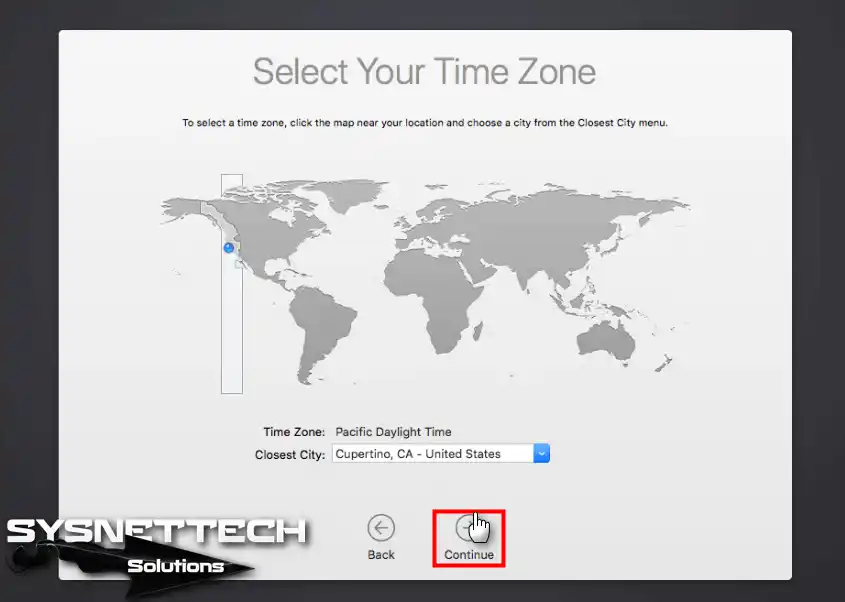
Select your time zone and click Continue.
Step 27
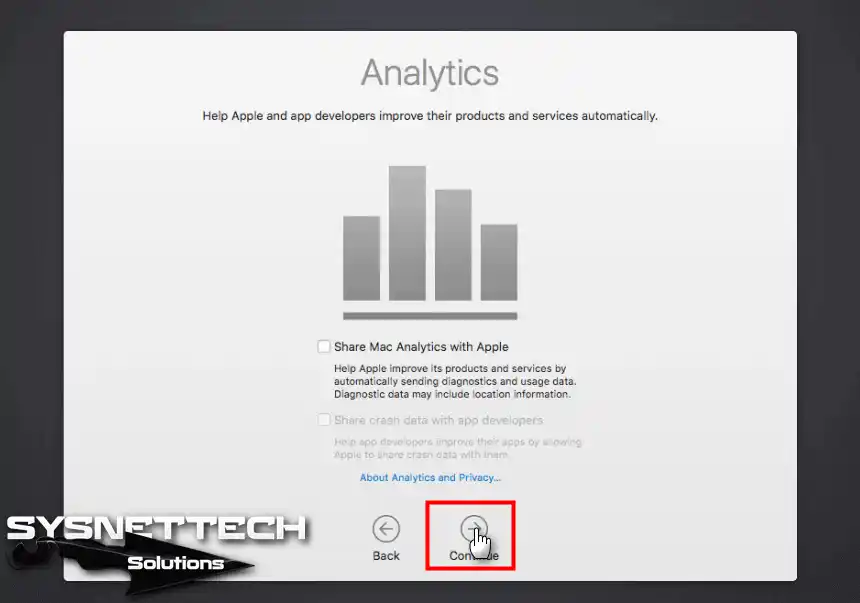
If you want to send Mac data analysis to Apple developers, select Share Mac Analytics with Apple.
Step 28
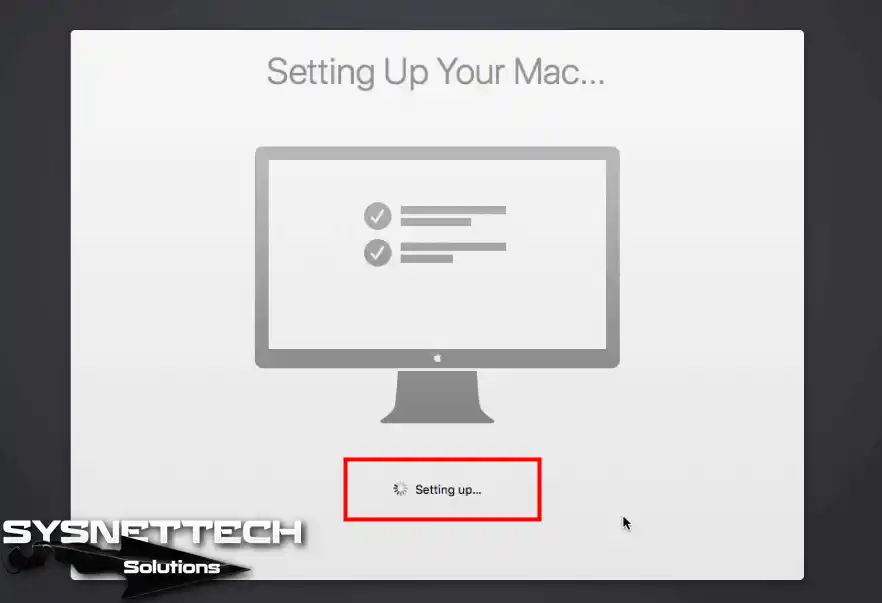
You are setting up your Mac virtual machine.
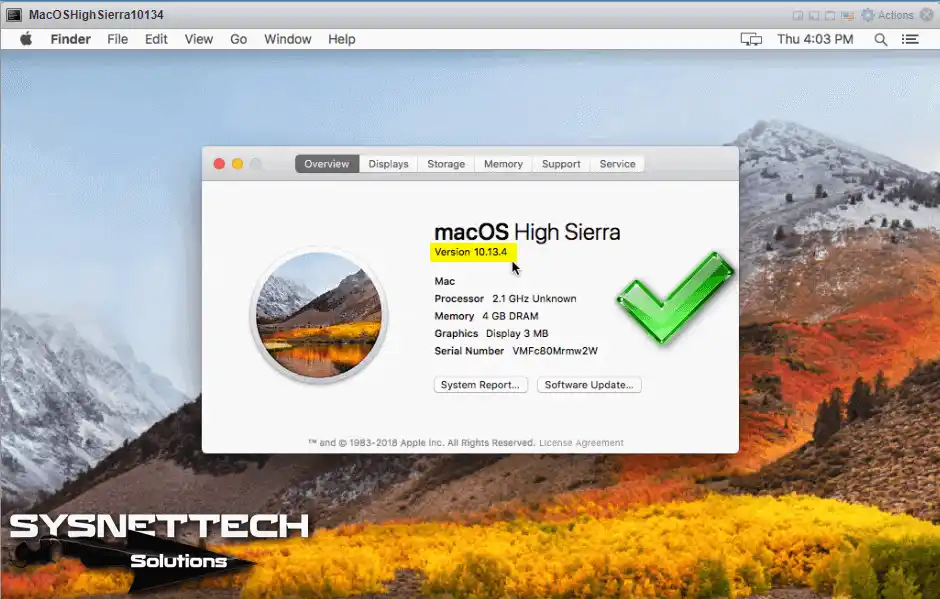
Step 29
We have successfully installed the Mac operating system using VM ESXi!
How to Install VMware Tools for macOS Virtual Machine
You must install VM Tools for the macOS virtual machine on which you installed vSphere ESXi. Check out this article on installing VM Tools using the Darwin.iso file on a macOS virtual machine.
Related Articles
1) How to Create a Virtual Machine for Mac OS
2) How to Install Windows 10 in vSphere
3) How to Install Ubuntu in vSphere
4) How to Add Physical Disk to Virtual Machine
5) How to Install Windows Server 2019 in VM ESXi

TolgaBagci
Hi, I'm Tolga, a computer expert with 20 years of experience. I help fix computer issues with things like hardware, systems, networks, virtualization, servers, and operating systems. Check out my website for helpful info, and feel free to ask me anything. Keep yourself in the loop about the newest technologies!
Works like a charm with your method of installation!~~
Unfortunately I encounter problem with no sound, and sometimes white noise occurs.
Do you happen to know how to make the sound work?
Thanks for your comment.
Can you check the audio device of your virtual machine?
i have tried installing 10.13.6 and 10.14 but both keep rebooting in a loop
im installing in ESXi 6.7
could i be missing something on ESXi?
Install this Unlocker for ESXi 6.7.
meet the same problem even after install the specified Unlocker.
Same here! On ESXi 6.5 and Unlocker Version 3. Any suggestions?
It worked for me. Chose “Apple Mac OSX 10.13” in ESXi.
I chose Unlocker 2.11. So I had to change “esxi-install.sh” in vi to check for version 6.7.0 instead of 6.5.0 because I was running 6.7.0.
Then after I formatted the drive under install it would not boot from iso. Said it was corrupt. So I had to start up the terminal, navigate to Install Mac OS X High Sierra/MacOS -folder. Then execute command”./InstallAssistant”.
Everything has worked smoothly since then.
I had to do the same workaround with 10.14 under the installation process. To clarify:
1. Start up the terminal after preparing the disk.
2. Go down to root folder. (3 x “cd ..”)
3. Go into folder “Install macOS Mojave.app”. Go into folder “Contents”. Go into folder “MacOS”.
4. Execute command: “./InstallAssistant”.
5. Continue installation per instructions in article above.
If anything just passthrough a usb soundcard on the host machine and connect headphones/speaker to it