
In this article, we will show you how to add files to Datastore on VMware vSphere ESXi. We will also detail the process of adding an ISO image.
When creating new virtual machines, it is essential to upload or copy ISO files to the server because it makes it easy to add image files directly to your virtual systems.
How Do I Add a File to an ESXi Server?
It would be best if you had an ISO or a file when setting up a new guest OS. The operating system also requires installation by adding it to the VM.
You can store these files in Datastore on your server. This process makes it easier to install and use a system on your host.
You may find it a bit difficult to add a file to the Datastore on VMware ESXi. However, it is easy, and the copying procedure is simple.
You can finish the job easily by using our step-by-step guide. First, you must add the needed file to your ESXi server. Last, your Windows 7 virtual machine will be all set.
We also recommend browsing the following articles;
After you install the VMware Hypervisor, make a new virtual system. Then, you can copy a file into the Datastore.
How to Copy ISO Files to VMware vSphere ESXi
Follow these steps to move the Windows setup files to your ESXi server. These steps will help make sure the move goes well. They will also help you use your virtual system’s power better.
1. Open the Datastore
Step 1
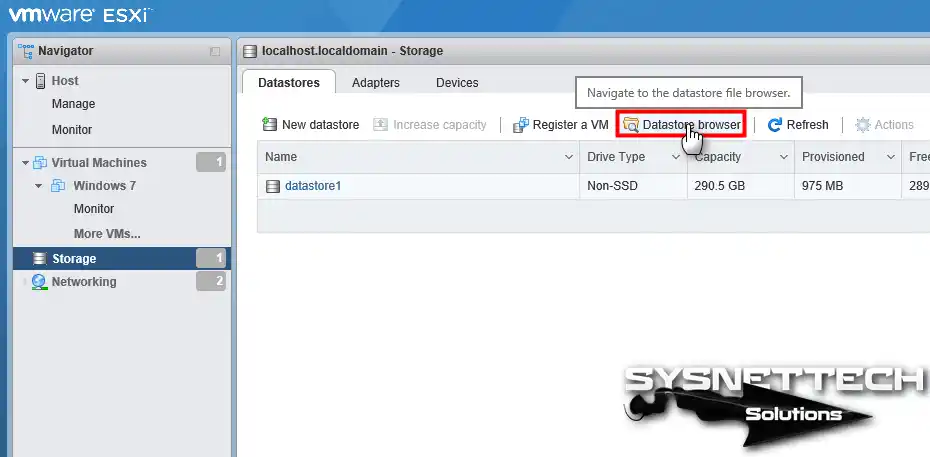
To begin, connect to your ESXi host. You will need to enter your credentials. Next, go to the main screen and locate the Storage option. Then, click on this option to view your storage configuration in detail.

Step 2
You need to open the Datastore Browser. To do this, find the choice on the right side of the ESXi web page and click it. This tool lets you easily find and handle the datastores linked to your virtual machines.
2. Pick the File You Want to Upload to the Server
Step 1
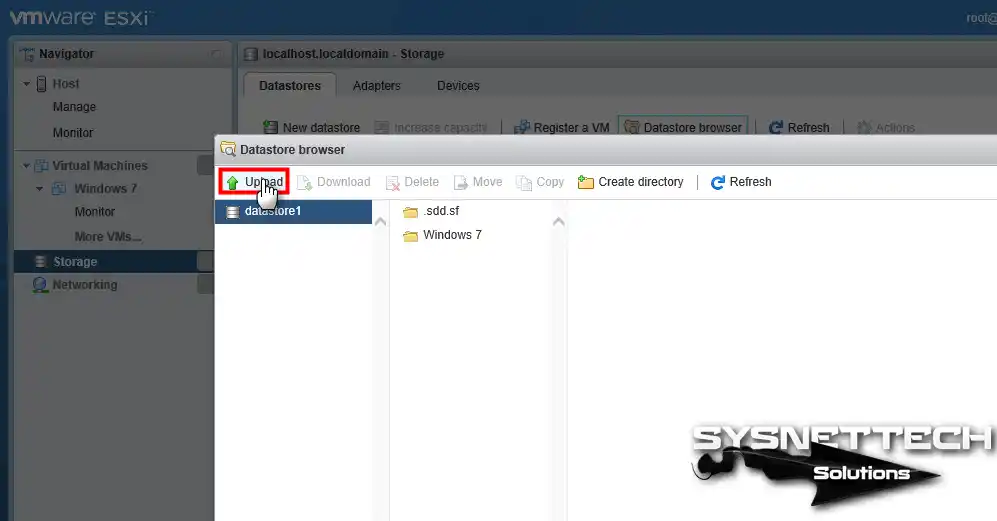
First, launch the Datastore Browser tool. Next, locate the Upload button on the interface. Finally, click this button to start the file upload process.
Step 2
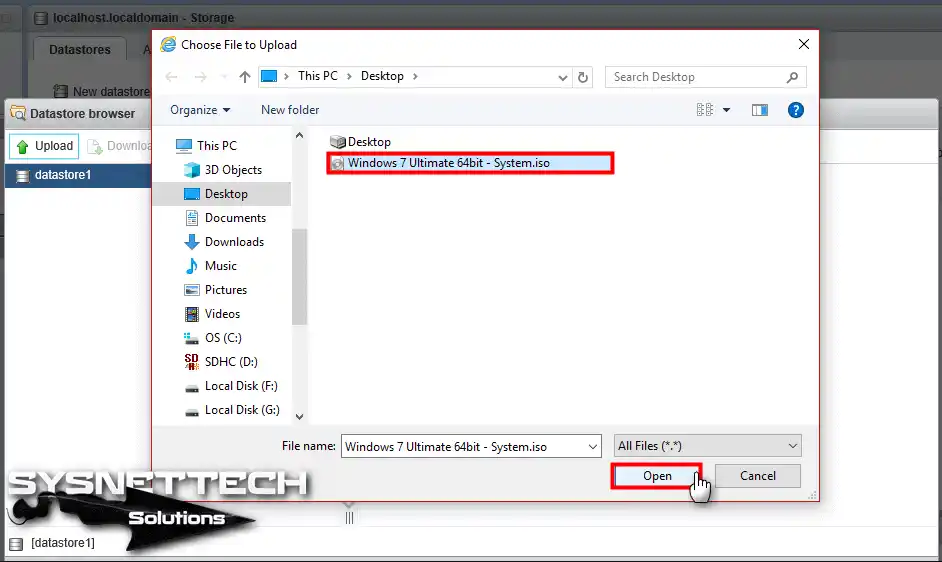
To upload data to the ESXi host, first go to the Choose File to Upload window. Here, pick the system image you need. Then, click Open to begin putting it on the server.
Step 3
For example, please be patient while transferring the Windows 7 image to your server. Sit back and relax, as this process will take some time. Because of this, you will safely send your data to its new place.

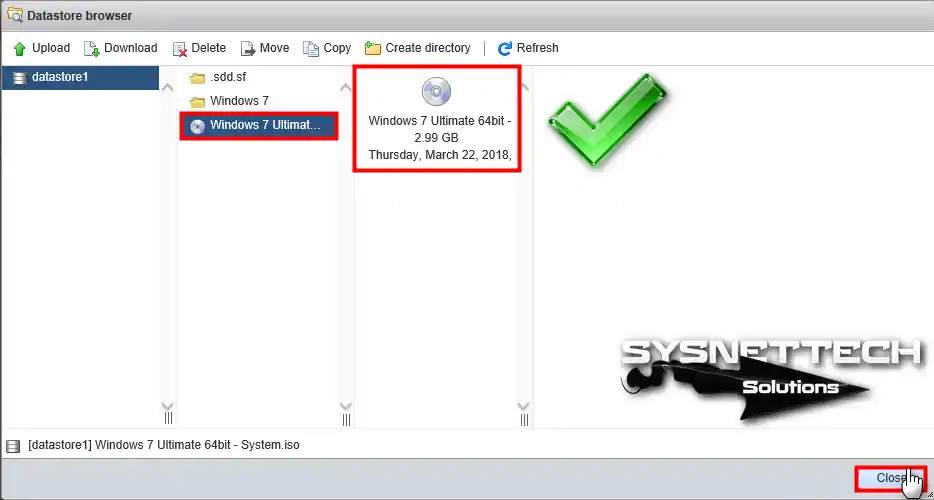
Step 4
After you finish loading the ISO document, click Close. This will close the Datastore Browser window. This step ensures that you keep all your changes. It also helps you stay organized while you work.
3. Use the ISO you added in the VM
Step 1
Pick any virtual machine you made before on VMware ESXi. Then, click Edit to choose the image you put on the guest machine.

Step 2
To add the desired ISO file to the VM, go to the CD/DVD Drive 1 section. Then, select the “Datastore ISO File” option. This allows you to browse your datastore. After that, you can choose the desired data and start the installation.

Step 3
After opening the data store, find the file you put there. After picking the proper ISO, press Select to finish the step.

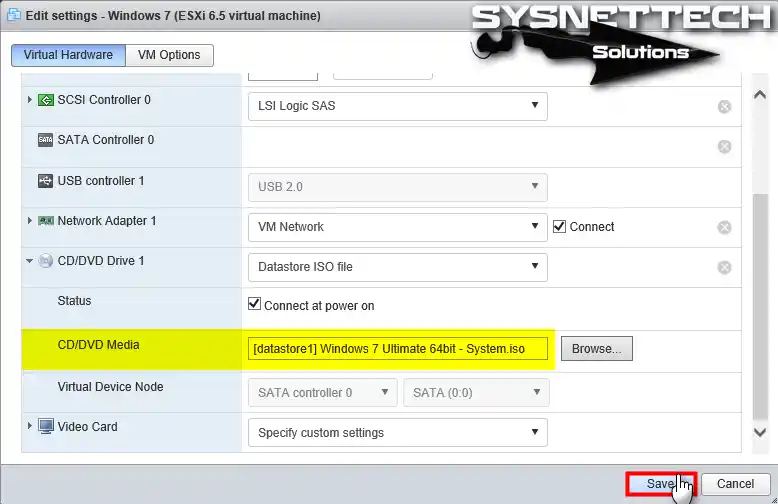
Step 4
After you put the image file on your guest system, check the details carefully. When you know it is all right, click Save.
Step 5
You can now turn on your virtual PC. To do this, use the file you got. This will let you keep going with the setup easily.
First, check all system needs and follow the steps on the screen. Because of this, you will finish the setup well.

Step 6
When you add the setup file to your guest machine, it will begin to start up. However, this step is vital because you are starting the setup program.
You will also begin to put the system on ESXi. So, check that you set up the disk image correctly. And, check that you can start it to start up correctly.

Video
Watch the video below to learn how to add or copy items on a VSphere server. Remember to click that subscribe button on our YouTube channel to show us some love!
Frequently Asked Questions (FAQ) About ESXi Datastore
- What is a Datastore in ESXi?
- How do I access the web interface?
- How can I use the ISO files I uploaded?
- Can I upload files to my ESX server via SSH?
- Are there any size restrictions?
- Can I upload many files at once?
Conclusion
In conclusion, the steps to upload an ISO or a file to your vSphere ESXi server are pretty simple. Additionally, this process dramatically increases the functionality of your virtual machines.
By reading the steps in this guide, you can quickly load the files into a server. With it, you can install various operating systems on your host machine without any problems.
Leveraging the capabilities of vSphere allows you to create VMs easily. Additionally, this provides a more efficient and productive computing environment.
In conclusion, we hope this ESXi article will be helpful. We invite you to explore more of our content to improve your virtualization skills.

1 Reader Comment
VMware Windows is running too fast!