
This article will examine how to set up and configure the GNS3 VM server, which is professionally used to prepare for Cisco exams on the Ubuntu 23.10 & 24.04 operating systems.
How to Import and Configure GNS3 VM 2.2.34 on Ubuntu 22.04 LTS
Your computer’s performance is essential when preparing for Cisco exams and creating and developing more professional network topologies. Using IOS images only with the GNS3 simulator software may affect your computer’s hardware performance. Therefore, it is recommended that you use the GNS3 VM for your more detailed work.
GNS3 VM is a Linux-based system that works with virtualization programs such as VirtualBox, VMware Workstation, Fusion, ESXi, and Hyper-V. You can manage your Cisco Router IOS images from a single virtual machine, and at the same time, it works very well.
In earlier versions, it was fully compatible with Linux. Still, in the latest versions, it is recommended to be used only on Windows and macOS, as stated on the official website. However, it works flawlessly on the Ubuntu distribution.
With GNS3 VM, you can import Cisco IOU images into the VMware virtual machine. You can find these images by researching on the Internet.
One of the main benefits of using the GNS3 Server is that it provides users with centralized management and web GUI support.
Requirements
Before configuring the GNS3 server, install GNS3 and VMware Workstation on your Linux computer using the links below.
- Installing GNS3 on Ubuntu
- Installing VMware on Ubuntu
How to Download and Import the GNS3 VM
After installing GNS3 and VMware virtualization software on your Ubuntu computer, you can install the GNS3 server on your system by following the steps below.
Step 1
To download the VM.ova file to your PC, go to the official GNS3 page and click on the “Download the GNS3 VM” link at the bottom of the page.

Step 2
To complete the download process, click the “Download” button next to the GNS3 VM.ova file, which is the virtual machine software you want to use.

Step 3
After downloading the GNS3.VM.VMware.Workstation.zip file to your computer, open the terminal in the Downloads location. Next, execute the following command to unzip the zip file on Linux.
unzip GNS3.VM.VMware.Workstation.2.2.34.zip
Step 4
Now, open the VMware Workstation program required for the GNS3 server and click File / Open.

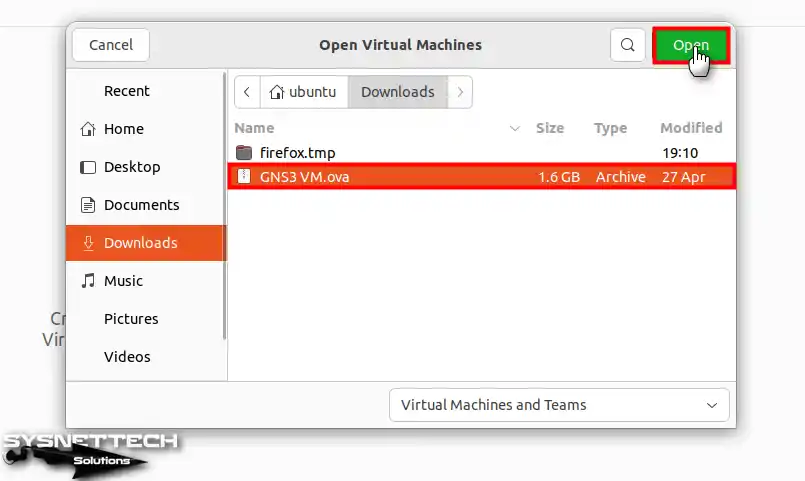
Step 5
Go to the location where you downloaded the OVA file, select the relevant file, and click the Open button.
Step 6
Click the Import button to convert and import the OVA file to the VMware virtual machine.

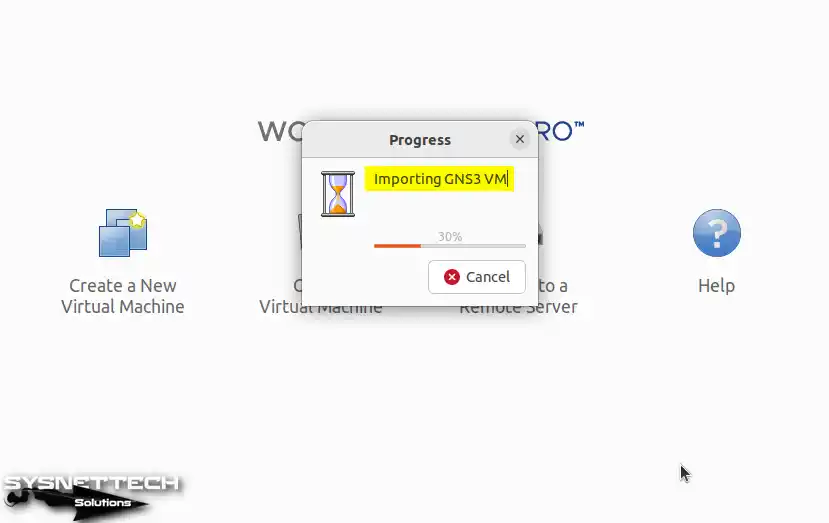
Step 7
Wait while the GNS3 VM is being imported into the virtual machine.
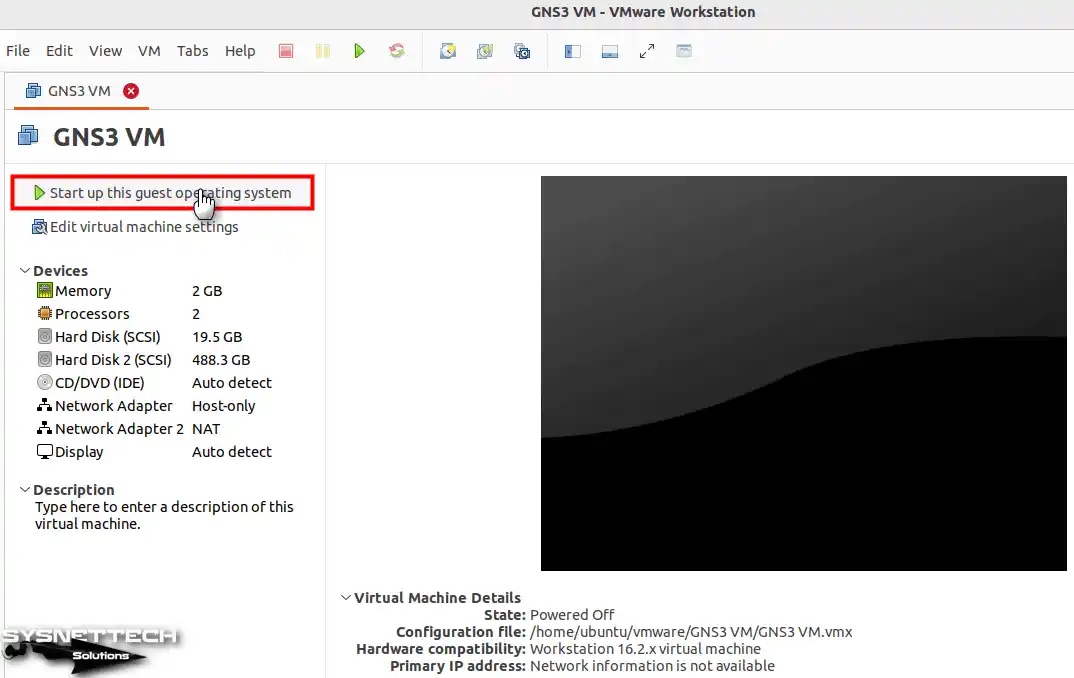
Step 8
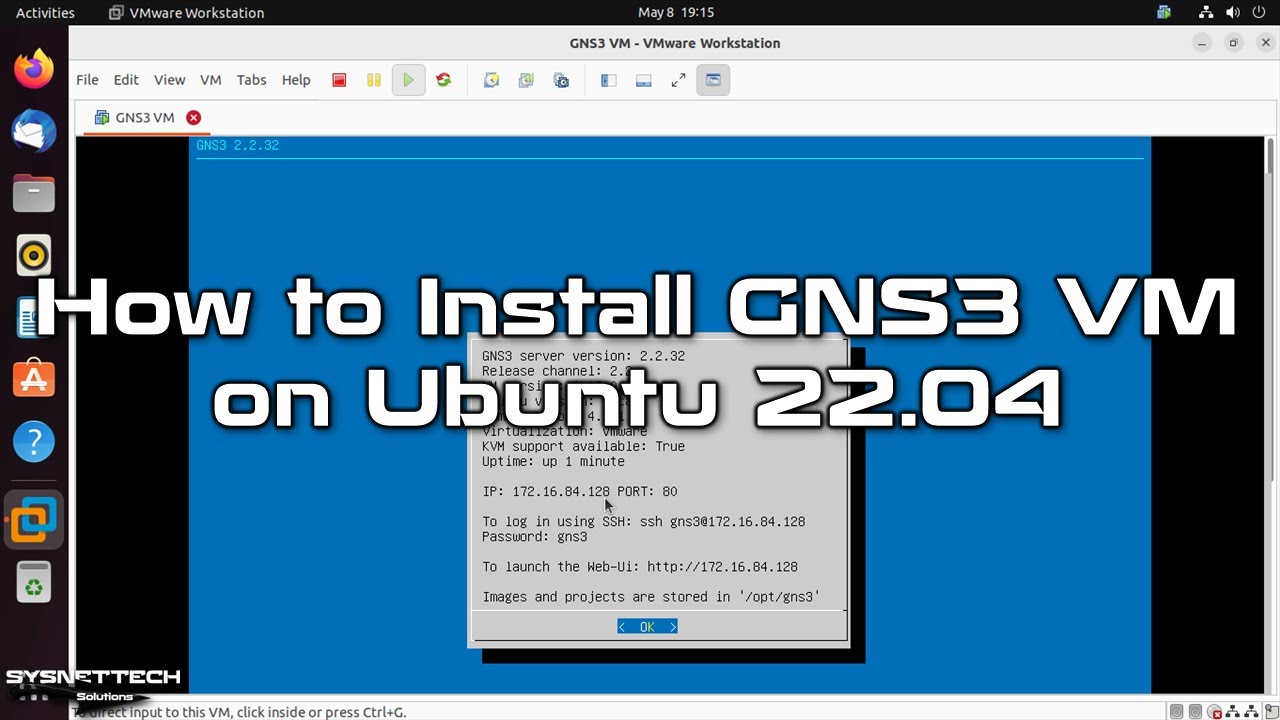
After completing the import process, click Startup this guest operating system.
Step 9
After running the GNS3 VM, you can see the IP and Web-UI address on its screen. After testing the server’s network connection with the ping command from the terminal, run the GNS3 simulator program.

How to Connect GNS3 with GNS3 VM
It would be best to establish a connection with your GNS3 software to use the iOS routers you will add to your Linux computer on the GNS3 VM.
Step 1
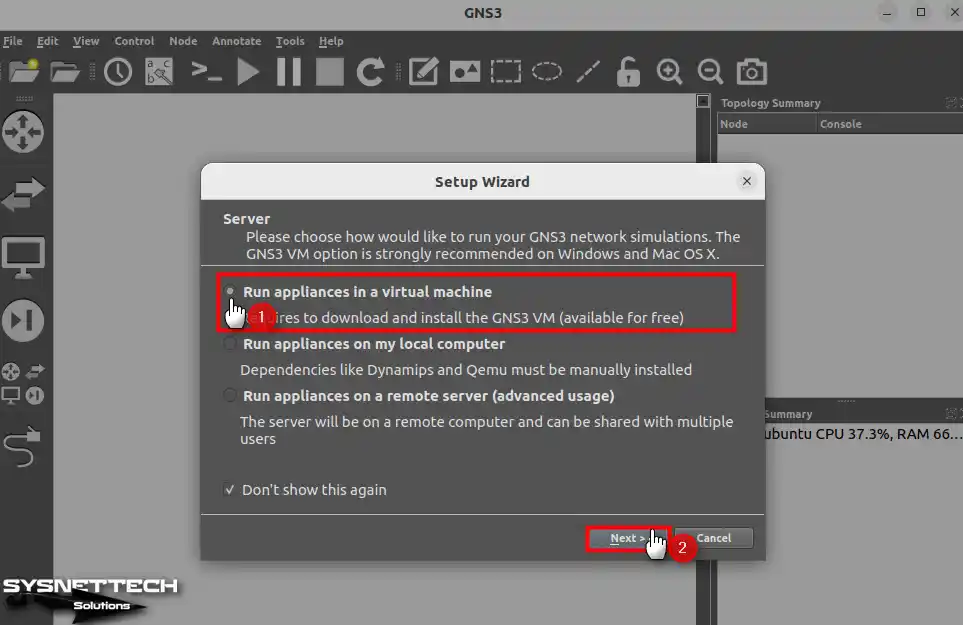
After clicking Help / Setup Wizard from the GNS3 tool menu, select the Run appliances in a virtual machine option from the open window and click Next.
Step 2
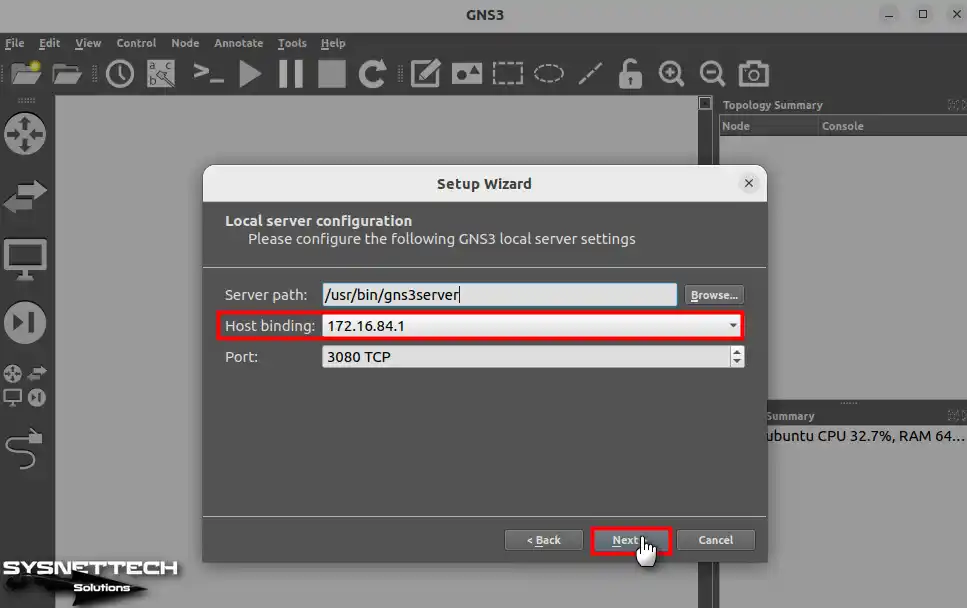
In the local server configuration, select the IP address block where the GNS3 VM gets the Host Binding address.
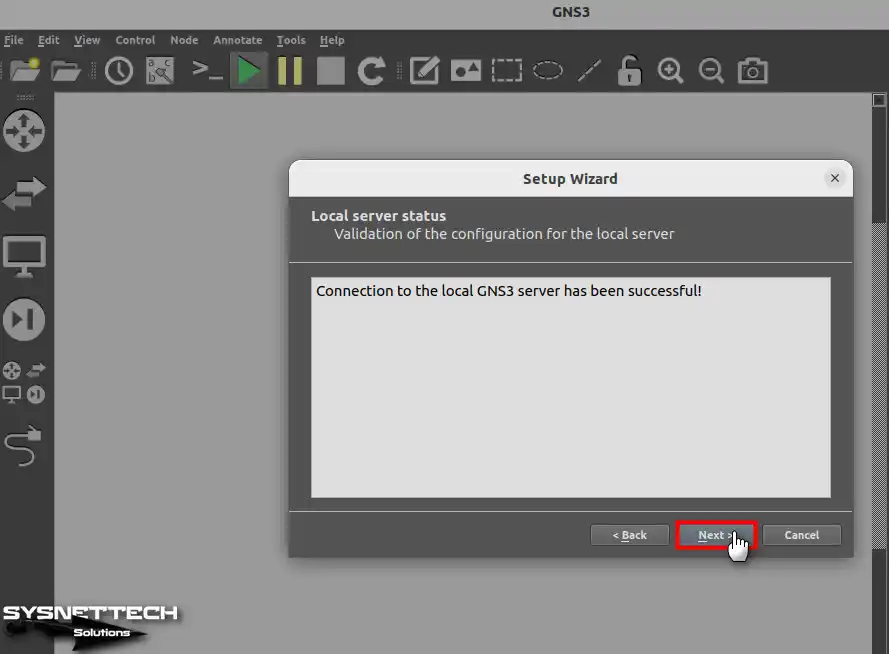
Step 3
After a successful connection with GNS3 Server, click Next.

Step 4
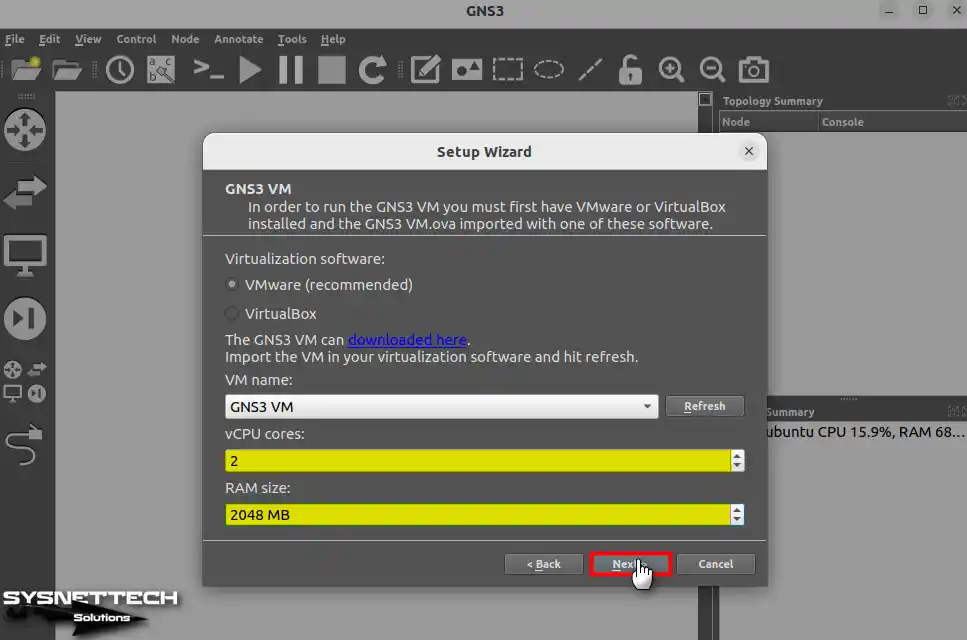
Since you have installed VMware Workstation on your Linux computer, tick VMware in the virtualization software section, select the GNS3 virtual machine you imported in the VM Name section, and configure the vCPU value to at least 2.
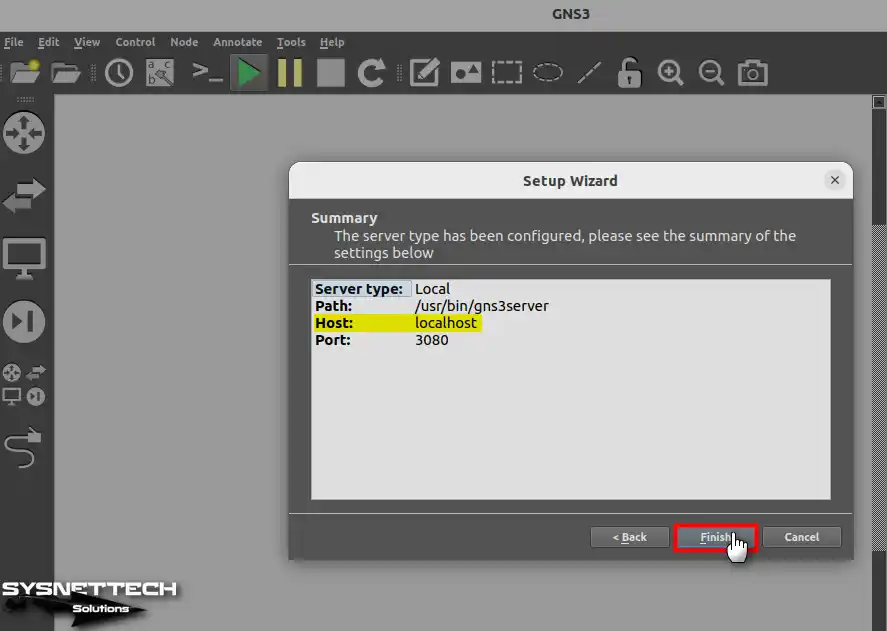
Step 5
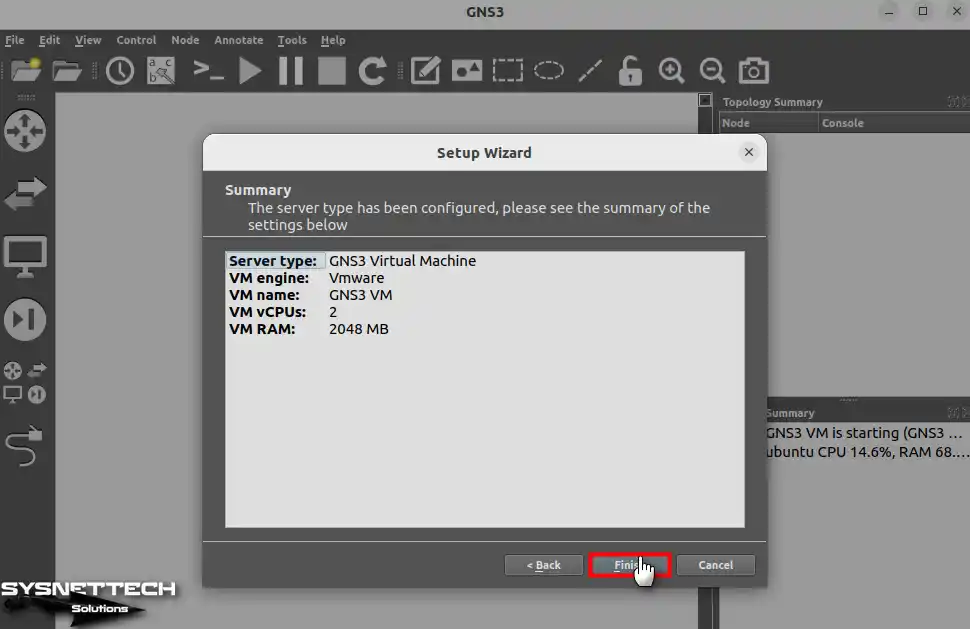
After checking the settings you have made in the GNS3 virtual machine summary window, click Finish.
How to Add a Cisco Router
After connecting to the GNS3 server, you need to add a Cisco Router or Switch IOS image to the server.
Step 1
Click Edit / Preferences from the GNS3 tool menu to open the IOS router add wizard.

Step 2
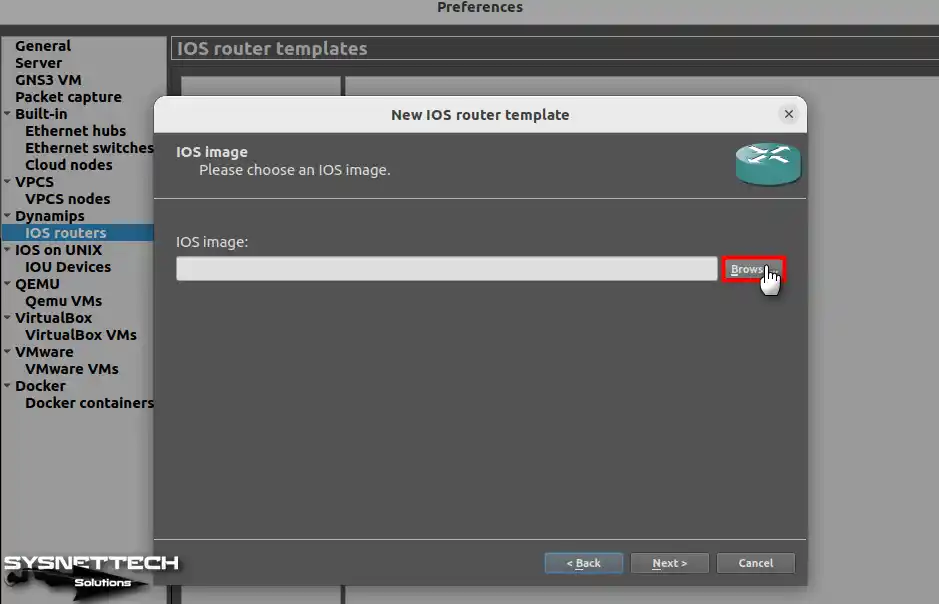
In the New IOS Router Template window, you must select the Run this IOS router on the GNS3 VM option because you will install the Router image on the server.

Step 3
Click the Browse button to add an IOS image that you have downloaded to your computer.
Step 4
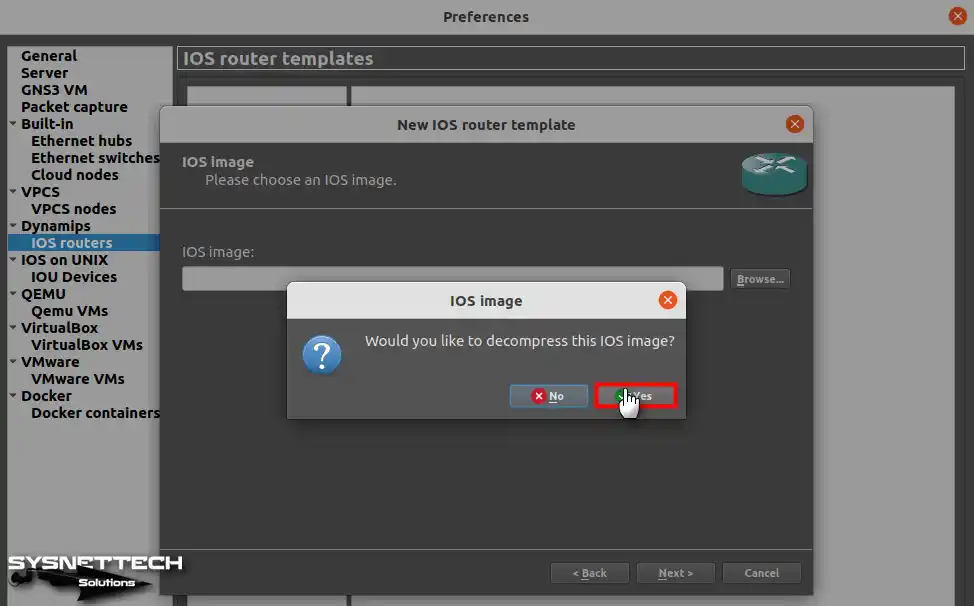
Select the c7200-adventerprisek9-mz.152-4.M7.bin image and open it.

Step 5
Click Yes in the window that appears to open the IOS compression.
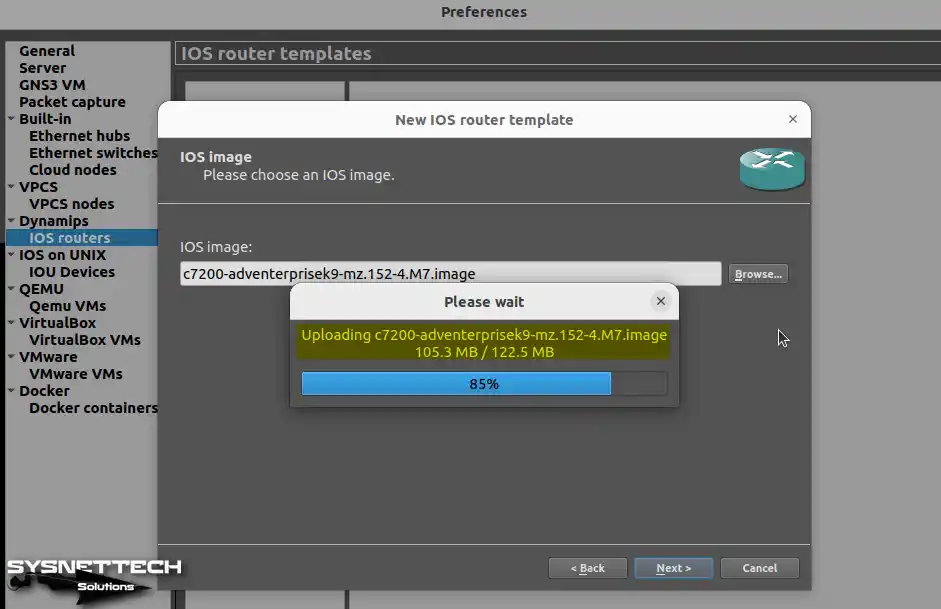
Step 6
Wait while the IOS image you selected is uploaded to the GNS3 VM.
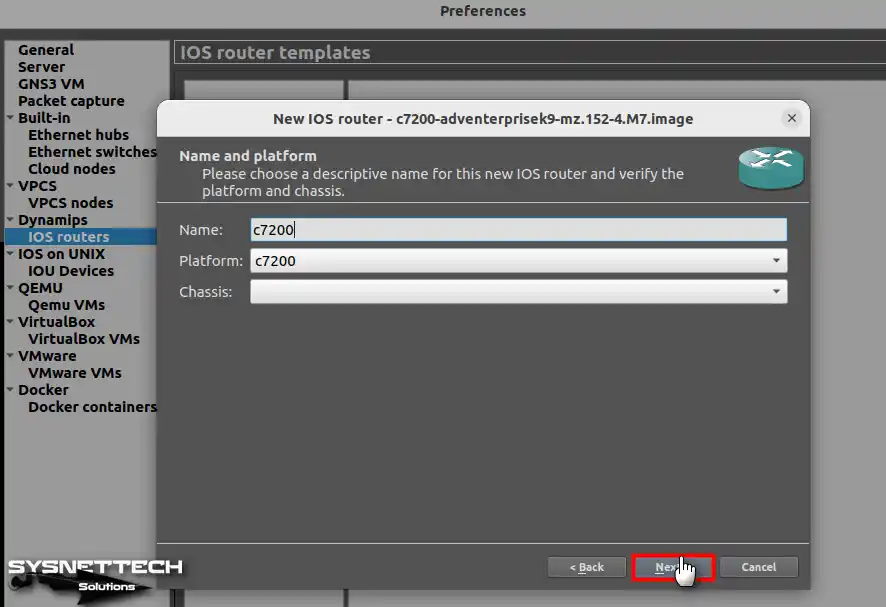
Step 7
Configure the name and platform of the IOS device you added to the GNS3 server.
Step 8
Set the 512 MB RAM value for the IOS Router and click Next.
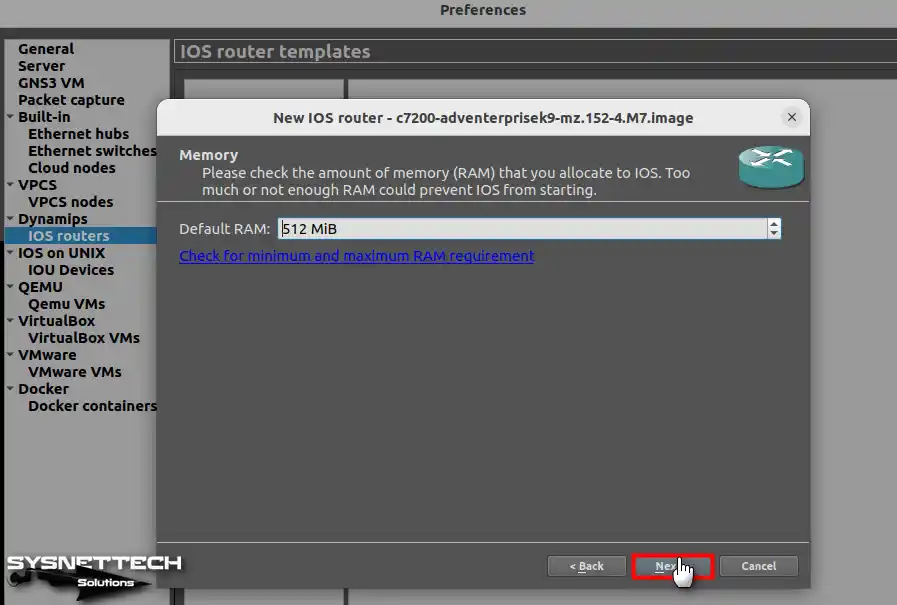
Step 9
After adding Gigabit Ethernet or Serial Interface interfaces to the empty slots, click Next, as in the image below.
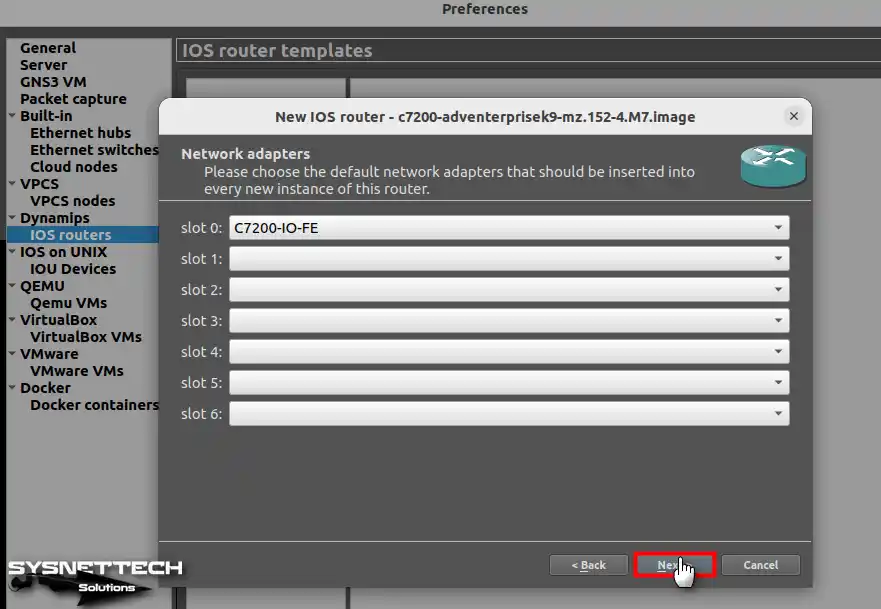
Step 10
To make your processor run the Cisco IOS Router more efficiently, click the Idle-PC Finder button and set a new value.
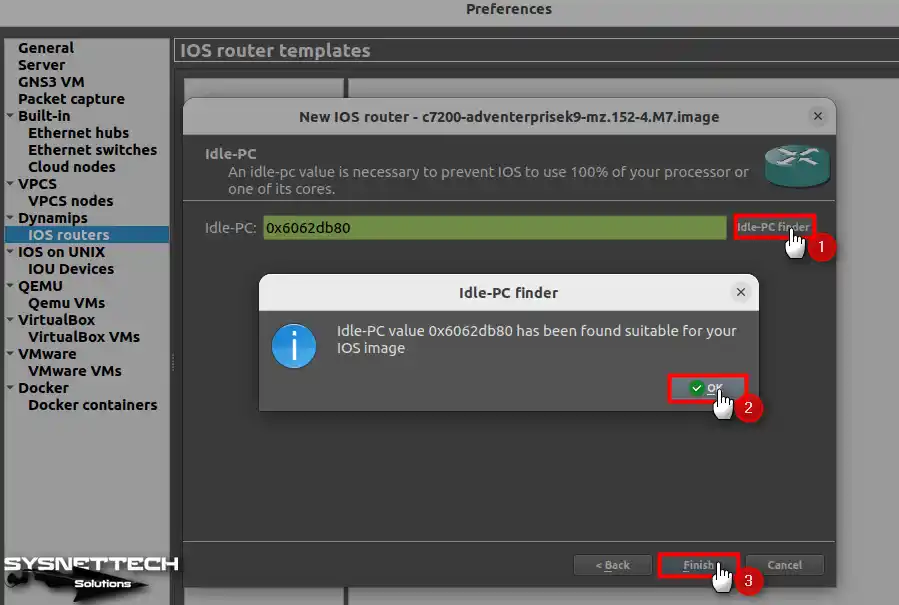
Step 11
After adding the Cisco Router device, you can check the working location of the IOS Router from the Server section in the window below.
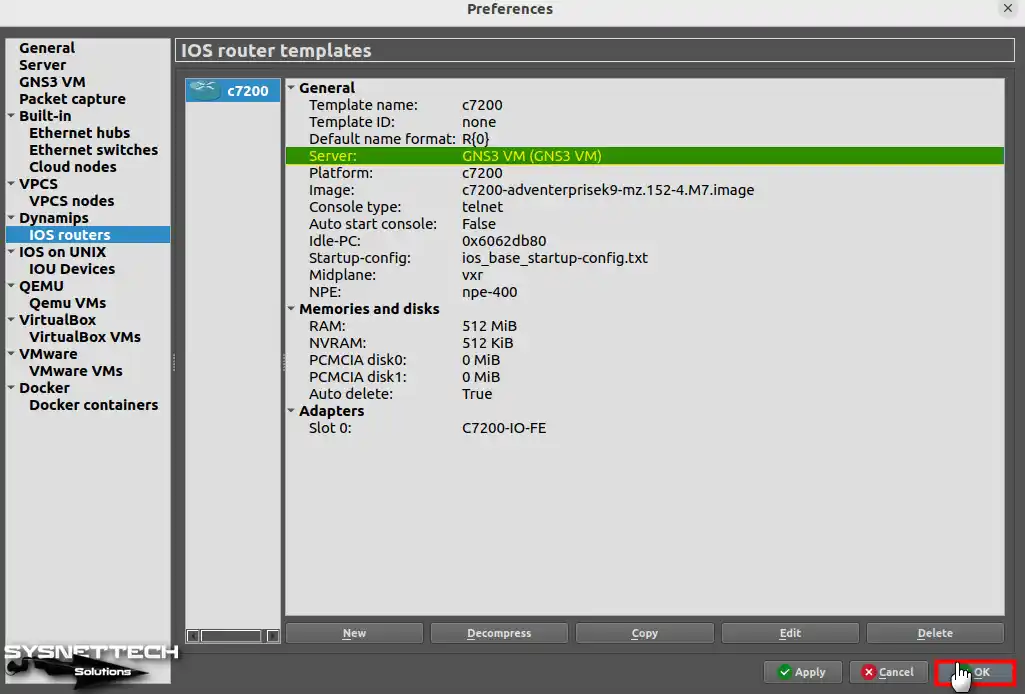
How to Create a New Project
After installing the GNS3 VM on Ubuntu and adding a new IOS to the server, you can create a new project to start designing networks.
Step 1
Press CTRL + N together or click the new project icon to open the project creation window. Name your network project, configure the location where you want to save it and click OK.

Step 2
Drag and drop two Cisco Router c7200s into your project.
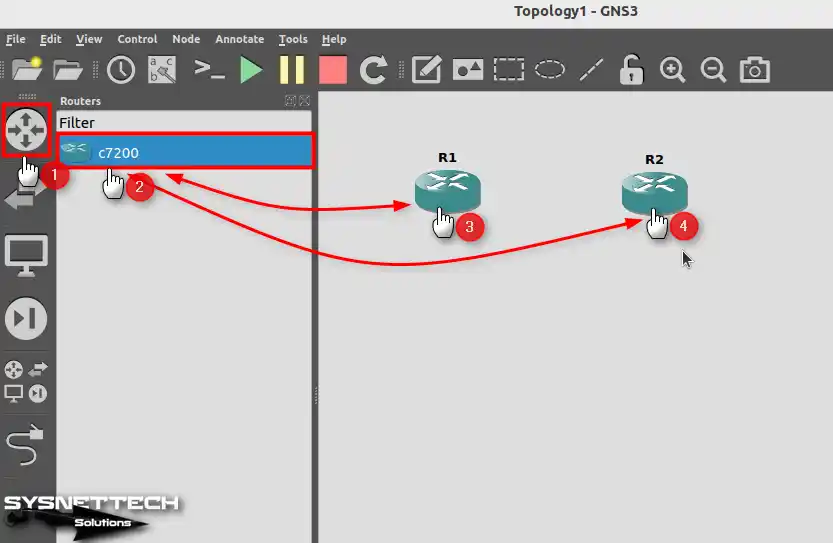
Step 3
After activating the wiring option from the left panel, click R1 and connect one cable end to FastEthernet0/0 from the empty slots.
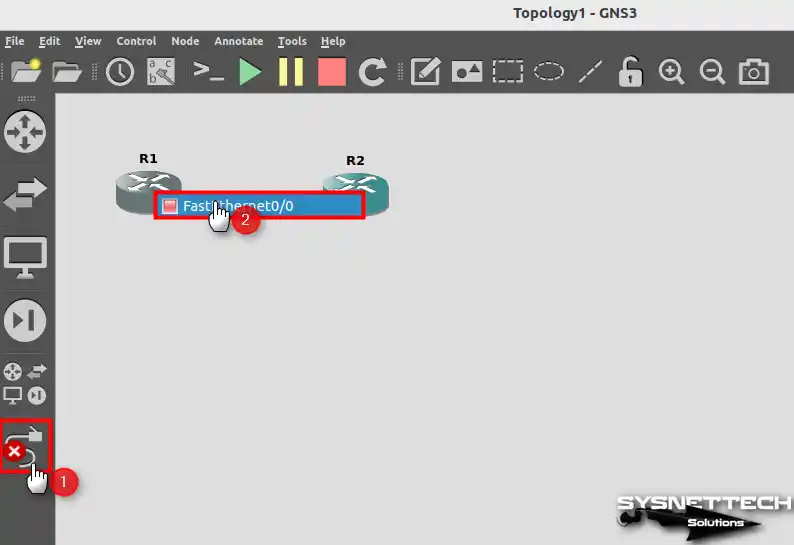
Step 4
Click the green arrow from the GNS3 tool menu and run all Routers.

Step 5
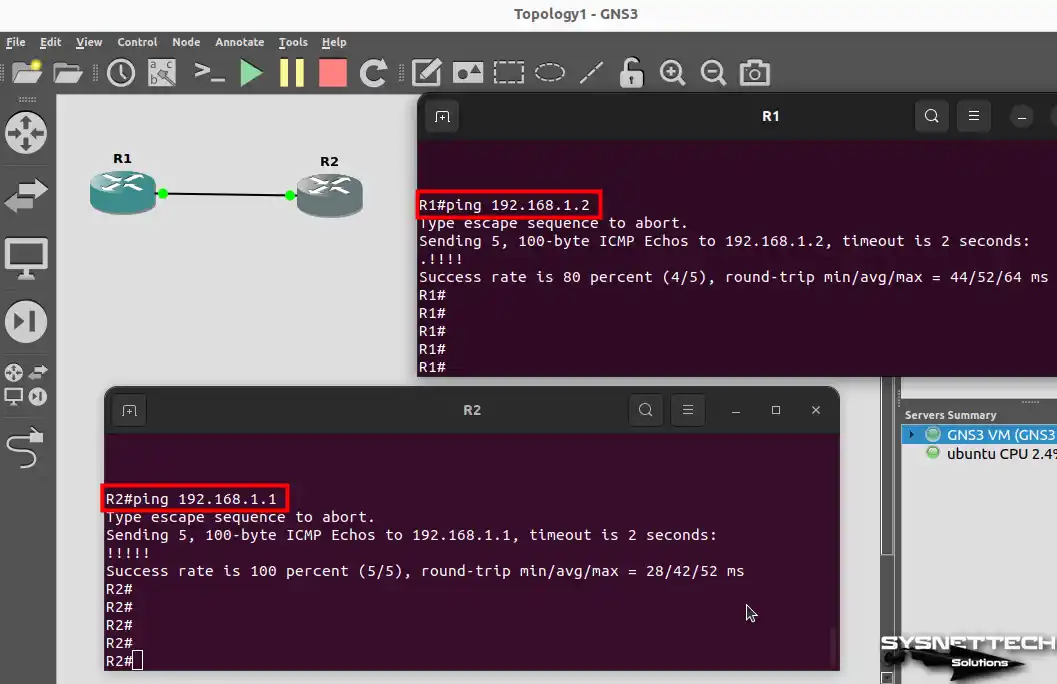
Open the console by double-clicking on R1 and assign a new IP address using the commands below.
R1# conf t
R1(config)# interface fastethernet 0/0
R1(config-if)# ip address 192.168.1.1 255.255.255.0
R1(config-if)# no shutdown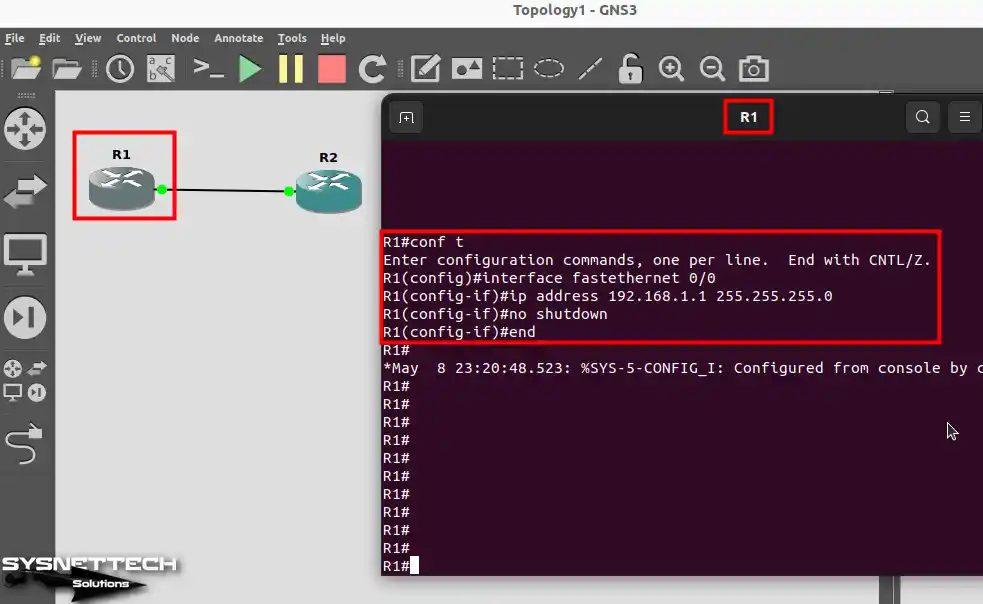
Step 6
Likewise, assign an IP address to R2’s FastEthernet0/0 interface.
R2# conf t
R2(config)# interface fastethernet 0/0
R2(config-if)# ip address 192.168.1.2 255.255.255.0
R2(config-if)# no shutdown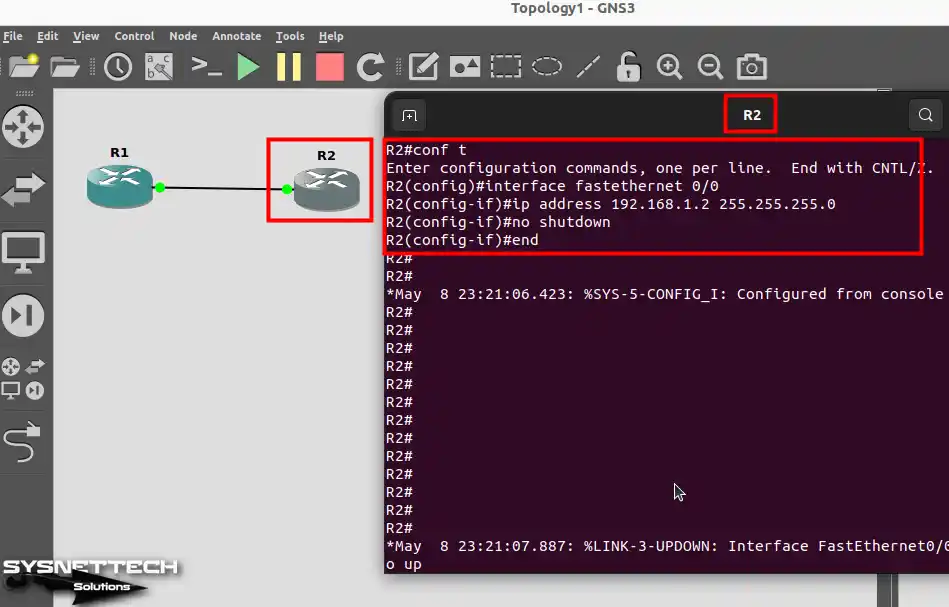
Step 7
When you ping the routers’ interconnected interfaces, you can see that the network connection is successful.
How to Disable GNS3 VM
If you want to remove the GNS3 virtual machine from your Linux computer, you must turn off the service in the simulator program’s settings and edit its local server settings.
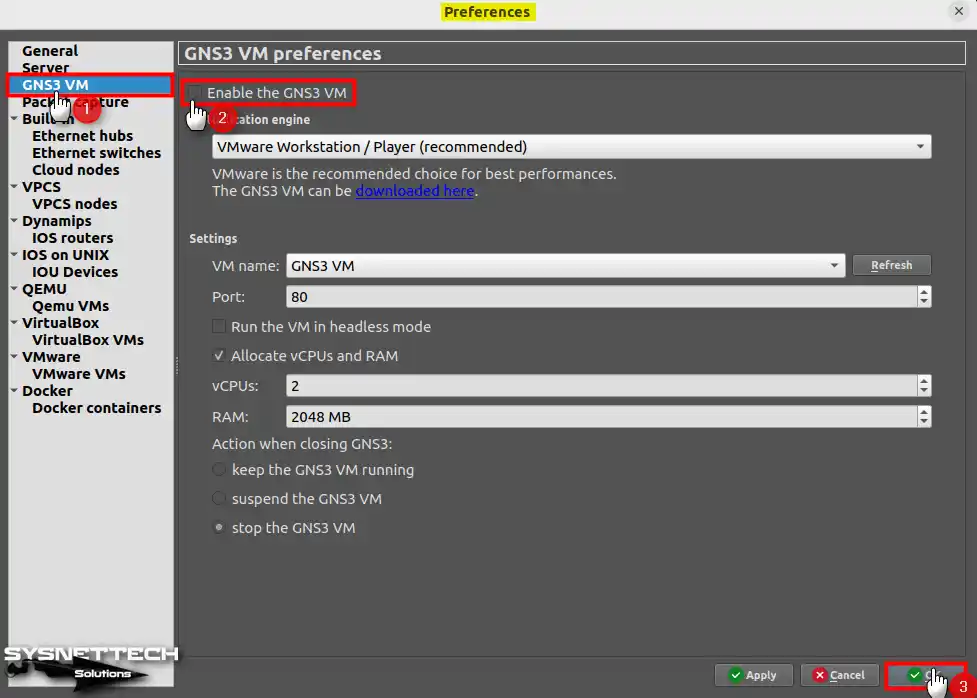
Step 1
After opening Preferences in GNS3, click on GNS3 VM from the options on the left panel, disable the “Enable the GNS3 VM” option and click OK.
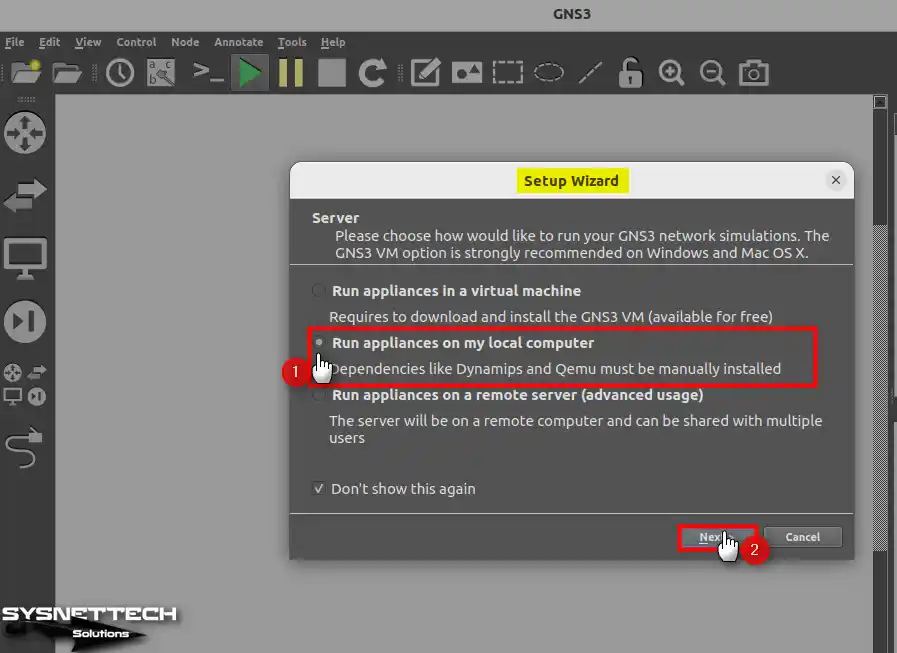
Step 2
After disabling the GNS3 VM, open the Help / Setup Wizard and tick “Run appliances on my local computer” to edit local server settings.
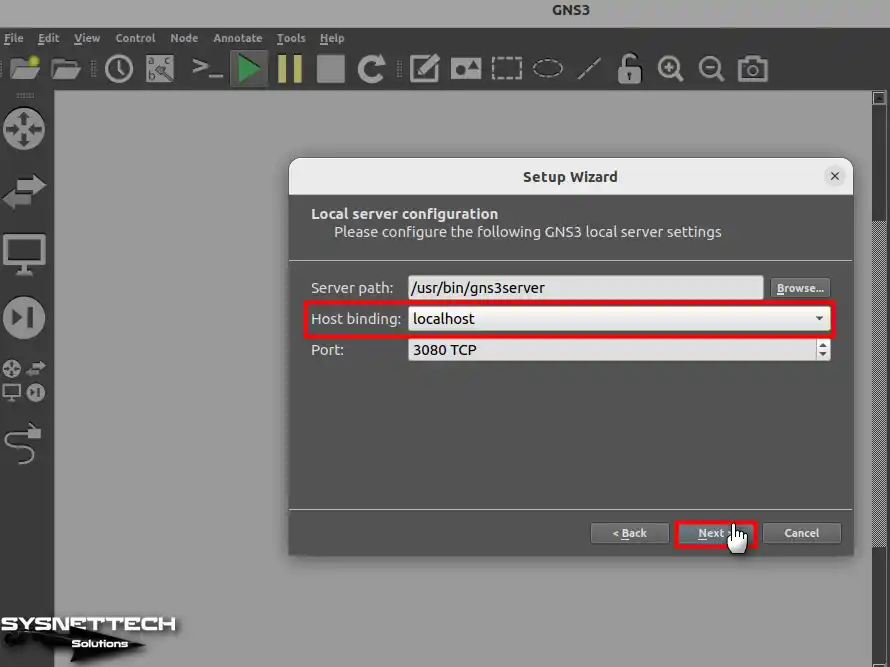
Step 3
In the Local Server Configuration window, change the IP address of the Host Binding option to “Localhost” and continue.
Step 4
Continue after checking the local server connection.
Step 5
Verify that the GNS3 simulator will run on Localhost on your Host PC and close the wizard.
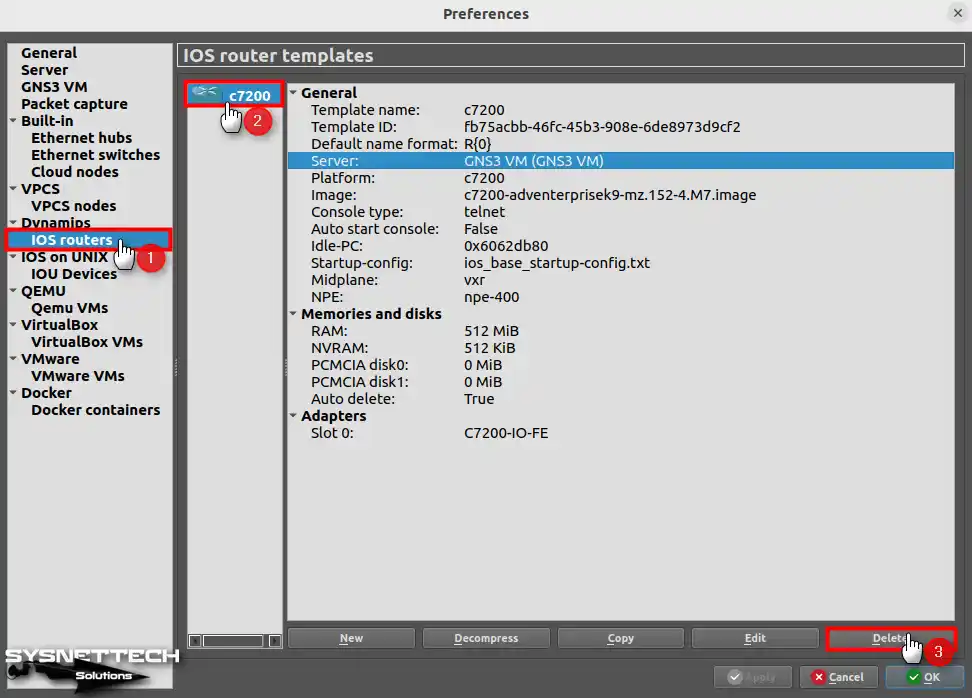
Step 6
Finally, delete the image of the c7200 Router you added from the Dynamips / IOS Routers settings.
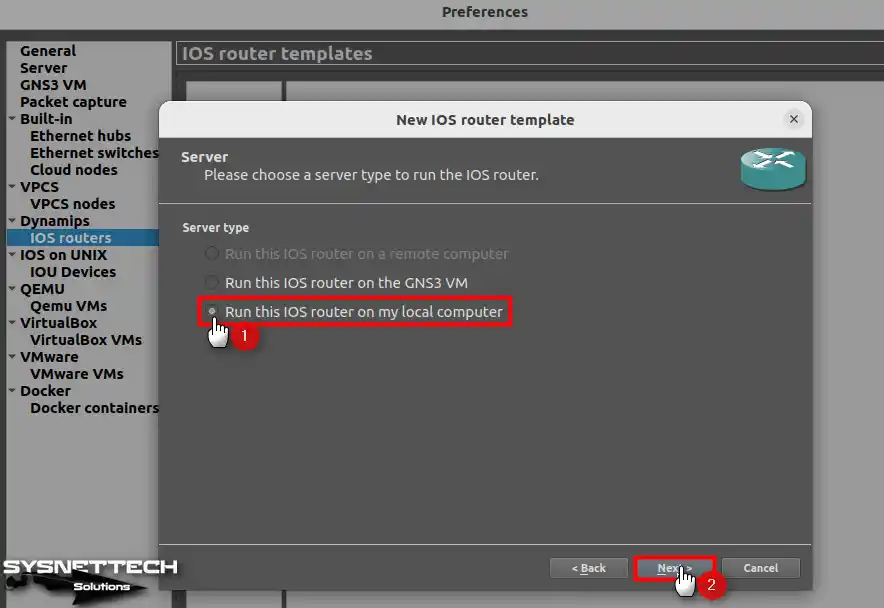
Step 7
Open the IOS add wizard again, select “Run this IOS router on my local computer,” and continue.
Step 8
When you check the Server section of the template window after adding the Router c7200, you will see that Ubuntu is your Host.

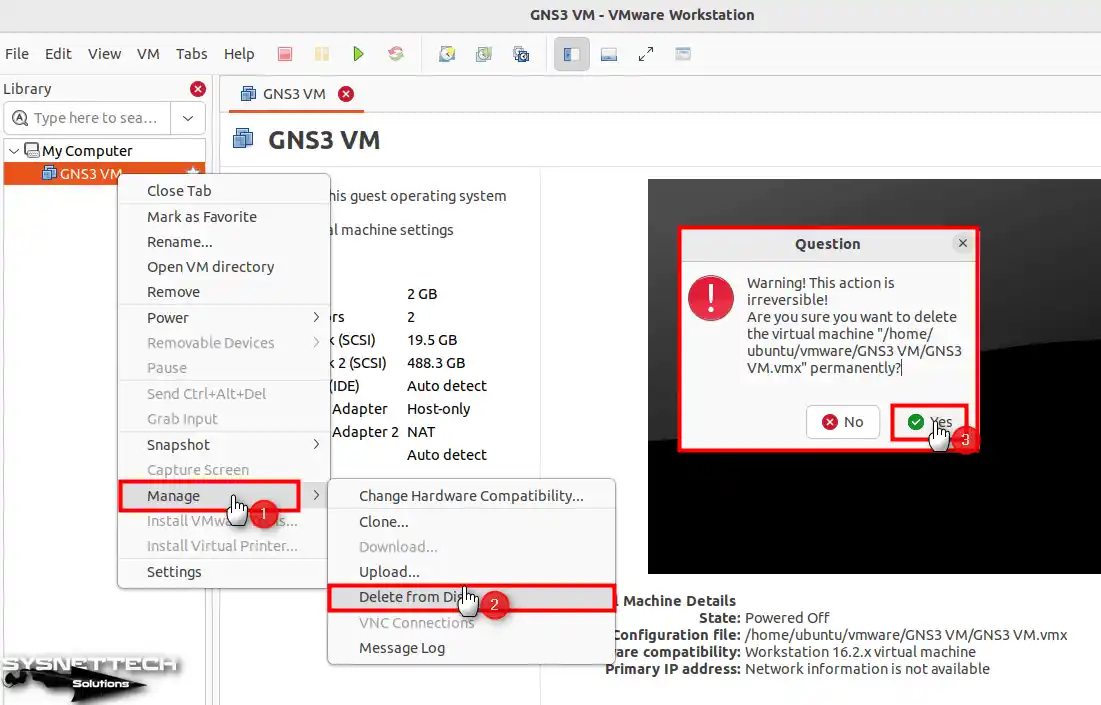
Step 9
To thoroughly delete the GNS3 server from VMware, right-click on it, click Manage, and then click Delete from Disk. In the warning window that opens, click Yes to confirm that the virtual machine has been completely deleted from the appropriate location.
Video
Installing Old Versions
| Ubuntu Version | GNS3 VM Version | YouTube Video | Slide |
|---|---|---|---|
| 17.10 | 2.1 | Watch | – |
| 17.10 | 2.1 | Watch | – |
| 18.04 | 2.1 | Watch | View |
| 20.10 | 2.2 | Watch | View |
| 21.10 | 2.2 | Watch | View |
| 22.04 (NEW) | 2.2 | Watch | – |
Conclusion
After all my explanations, I would like to say that installing GNS3 VM on Ubuntu is necessary for performance. This is a critical step, especially if you are preparing for Cisco exams.
Also, the power and virtualization capabilities of GNS3 VM provide you with advanced settings. Thus, you can create complex network topologies without reducing your local machine performance.
This structure also makes it easier to import IOS images, simplifying router configuration. It also provides more flexibility, allowing you to simulate real-world scenarios.
In short, I recommend using the right tools while developing your networking skills. In this way, you will significantly increase your learning experience and technical proficiency.

6 People Shared Their Experience
I really appreciate the works and efforts of you guys. You really help some us out here. Thank you guys.
Thank you very much for the nice comment! Keep following us!
how can i create smilation environment with freeradius server and layer 3 cisco switch in GNS3 so that i can test and configure mac address authentication network access control on LAN
please help me
Teşekkürler Tolga Hocam
Rica ederim, yorumunuz için teşekkürler!
my is like this
ping -c 2 10.10.10.2
PING 10.10.10.2 (10.10.10.2) 56(84) bytes of data.
From 102.64.66.86 icmp_seq=1 Time to live exceeded
From 102.64.66.86 icmp_seq=2 Time to live exceeded
— 10.10.10.2 ping statistics —
2 packets transmitted, 0 received, +2 errors, 100% packet loss, time 1002ms