
Cisco SDM (Security Device Manager) simplifies the maintenance of Cisco Routers through a graphical user interface. We can use this strong and easy program made by the Cisco company on the web.
You can put Cisco SDM on a real computer or a software-made computer. With this web tool, you can set up the safety rules for your network machines using ACL (Access Control List). You can also create private networks, such as VPNs, and enhance your network.
Specifically, you can access the user interface using a web browser. This lets you use a simpler visual screen for basic Cisco Router settings. So, this tool for handling routers gives you a great Cisco AutoSecure tool.
How to Install Cisco SDM on a Router using GNS3
When you set up a Cisco Router, you usually use a text command screen (CLI). This tool gives you strong abilities and many choices.
However, some people like a much user-friendly approach. For these people, SDM (Cisco Security Device Manager) is a perfect choice. Also, you can set up and control Router choices from a web browser.
Cisco SDM makes the setup steps easier, which makes it simpler to use. This tool gives you routing, safety, and network control for new and expert users.
Of course, the key point is that it does this without needing deep command-line skills. In brief, Cisco SDM software lets you use a graphical interface.
Also, SDM helps you see your settings and watch your system work right now.
Cisco SDM has two main versions you can install. The simple one, or Express pack, is right for most easy setups and jobs. However, the complex tasks, or Full pack, are for more difficult network and safety tools.
1. Express Package
The Express Package is for people who want a much more straightforward answer. You can do simple network setups with SDM Express. Plus, you can easily manage your Router devices.
This version gives you a user-friendly screen for simple jobs. You can do basic device setup, connection choices, and watch tasks.
However, it has fewer tools than the full one. This pack is perfect for small and medium-sized networks. These users do not need expert skills. It lets people do simple jobs fast and well. In all, it cuts out too much difficulty.
2. Full Package
The Full Package version is robust. It allows you to configure primary and advanced settings for Cisco Routers. It lets you set up both simple and complex settings for Cisco Routers. In other words, this version offers you a comprehensive range of options.
On the other side, you can set up local network (LAN) and wide network (WAN) links. You can also turn on different tools, like a private network (VPN). Also, you can set Firewall rules for stronger safety.
You can also control key tools like Quality of Service (QoS) choices. For example, you can set up access control lists (ACLs) and network address translation (NAT).
Basically, the Full Package version gives you many tools. You can turn on or fine-tune features using an easy, friendly screen. But if the screen is limited, you can change to the CLI for direct orders.
When you buy a new Cisco router, the SDM setup CD/DVD is often in the box. Also, some Cisco models have SDM already on them, so you do not need to add it.
To install Cisco SDM on your computer, you must have Java (JRE) 1.5 or 1.6. This is because the program will not work with newer Java types.
So, you must check that the right Java type is on your computer. Newer types may create problems and will not run some tools.
Why Do They Use SDM Software?
Cisco Device Manager is a strong tool for managing network devices. Specifically, they designed it just for Cisco Routers.
People like network managers and computer safety experts use it. They need this program to run and set up network equipment.
SDM gives you an easy-to-use web interface. Therefore, you can easily set up Cisco Routers.
The graphical screen helps you make connections. We can quickly activate both LAN and WAN ports and assign IP addresses.
Alternatively, we can also set up a VPN to safely link faraway users or offices. This lets us send coded messages over public networks.
Also, with SDM, we can precisely set the Firewall on network devices. This lets us make network safety better by controlling traffic with set rules.
Those new to Cisco courses are also curious about the simple interface of Routers. This program guides them through complex setups, removing the tough learning curve of network work.
SDM gives powerful tools to skilled users. These tools make fast changes or fixes easy. So, they quickly meet network needs at companies.
In all, Cisco SDM is a vital tool for network managers. It makes handling and setting up Routers practical. Also, it makes strong safety rules user-friendly.
Benefits of Using SDM
Cisco’s SDM tool really makes device control simple. It swaps burdensome text commands for an easy graphical screen.
This design lets you easily set up your devices. You can use icons like symbols, buttons, and guides. This makes things much easier to learn for new people. Also, it makes jobs easier for skilled workers.
Cisco device tool also lets you manage things from far away. For example, network managers can set up devices and fix problems from a distance.
This is very helpful for devices in faraway places. You do not need to be there in person. In short, it works better by saving time. This is great when handling many devices in different spots.
Additionally, the SDM tool has strong security measures. It also lets you control access by job role for better network device care.
Thus, you can grant specific permissions based on the user roles connected to the device. In the end, this is great for stopping unwanted access. Also, you can pick trusted people for sensitive setups.
In short, Cisco’s SDM software makes router configuration simple. It gives a great way to manage things by sight, not by typing commands.
It becomes even more powerful when used with GNS3, a network simulation tool. This allows you to create, modify, and test settings in a virtual environment.
Altogether, this mix helps you learn network ideas better. At the same time, it makes trying things out easier and more open.
What Do They Use SDM For?
Cisco SDM (Security Device Manager) is a type of software for Cisco Routers. People who work with computer networks, such as network administrators and IT professionals, use it.
SDM gives administrators an easy web interface to set up and control Cisco Routers. So, it makes configuring connections for local and wide-area networks simpler, setting up VPNs, and adjusting the Firewall to make things more secure.
People who care for the network use SDM, which stands for Security Device Manager. This tool helps them handle routers on the web better.
It makes the setup more accessible, especially for beginners. Whether you’re just starting or know a lot about it, you can easily adjust many things using its simple interface.
Benefits of Using SDM
Cisco’s SDM software helps you do things without remembering complex commands. So, you can easily set up Cisco network devices using pictures and buttons instead of memorizing complex command lines.
It also helps you set up things from far away. This is handy for caring for routers in places that are not nearby. You can set up your device without actually going to it. It saves you time when you’re doing basic setup stuff.
Cisco SDM also adds a safety layer for managing things securely. It lets you give special permissions and approvals for different users to set up something. This helps stop people who shouldn’t be there from getting in and makes the network more secure.
In short, you can experience configuring routers using this excellent software with GNS3. In this case, you can make and modify most settings on the Router without using commands.
Required Programs
First, download Cisco SDM V2.5, Java, and the Router IOS c3725 image using the download links below.
| File Name | Download Link |
|---|---|
| SDM V2.5 Software | Download |
| Java JRE-6u17 Software | Download |
| c3725 Router | Download |
How to Install the Cisco SDM Management Software on a Router in GNS3
You need to add one Router to GNS3 for setup. Then, before running the Router, you must insert a Flash Disk and format it using the delete command.
Follow the steps below in order to install and configure Cisco SDM on a Cisco Router.
1. Add Router, Switch, and PC to Workspace
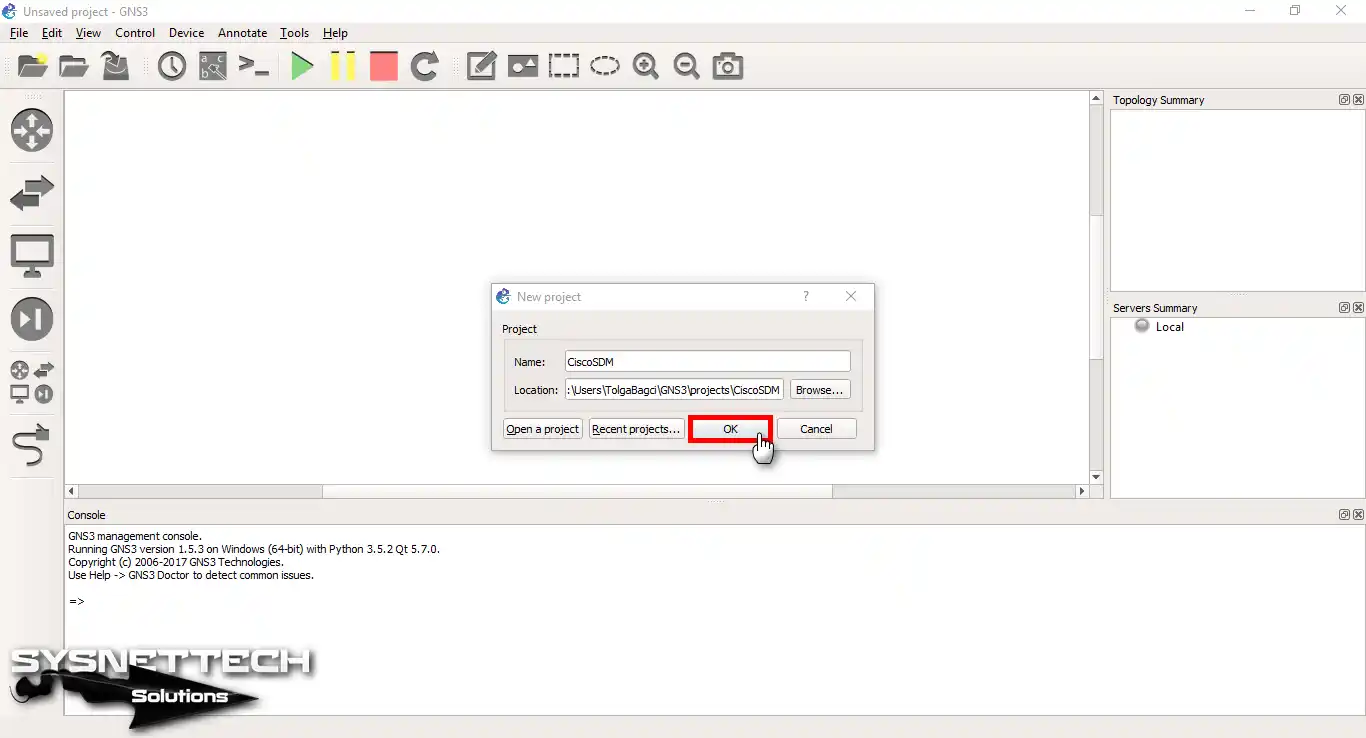
Step 1
To begin with the Cisco Router management tool, start by creating a clean project in GNS3.
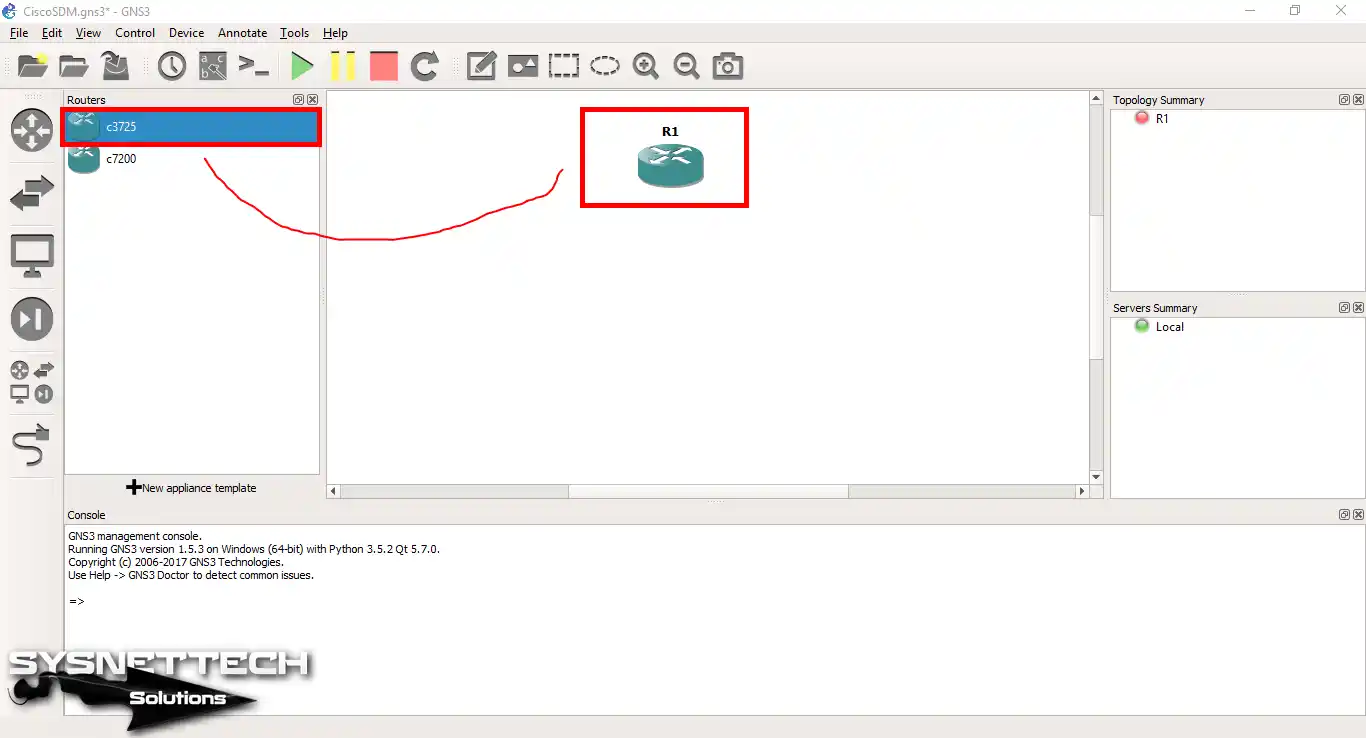
Step 2
First, download the c3725 IOS image using the button above. Then, add this file to the GNS3 program. Finally, drag and drop the Router device into the workspace.
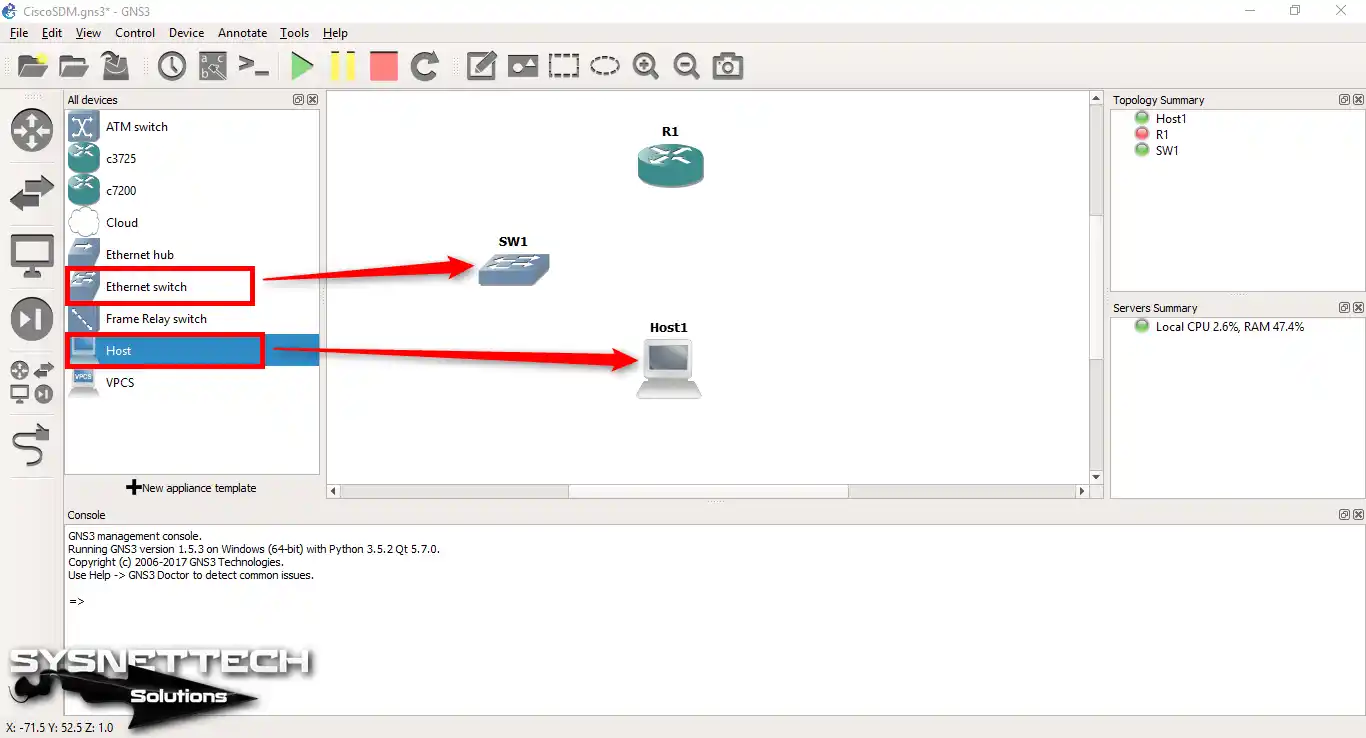
Step 3
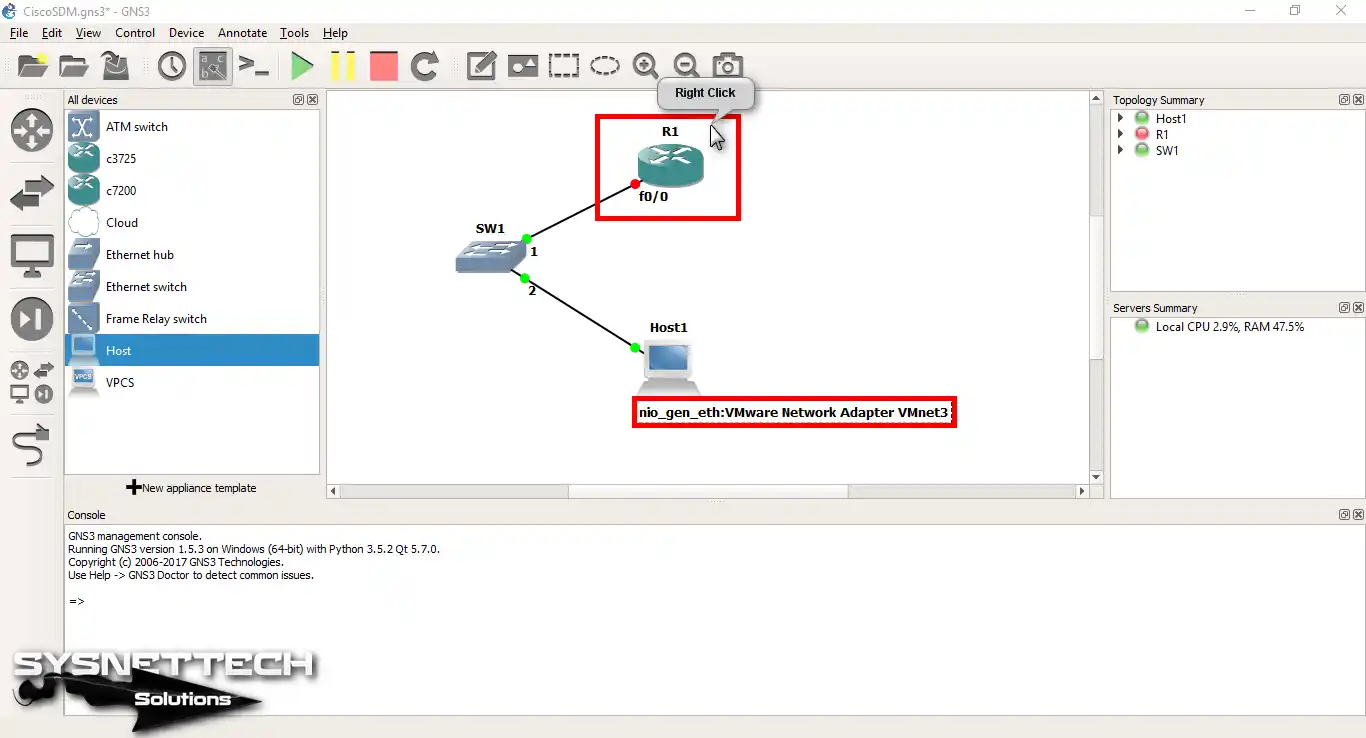
First, add one Switch & Host to the GNS3 workspace. Then, plug all the device cables in the right way.
Next, go to your VMware virtual machine’s connection settings. To do this, pick the VMnet you made in the Virtual Network Editor. Last, set up the same for Host1, too.
2. Expand the Router’s Disk Space
Step 1
Now, I will increase the Flash Disk size of the Router. When I do this, the storage capacity of the network device in GNS3 will expand further.
First, right-click the device picture and pick Configuration. Here, you need to change the Flash Disk size and other parameters.
Step 2
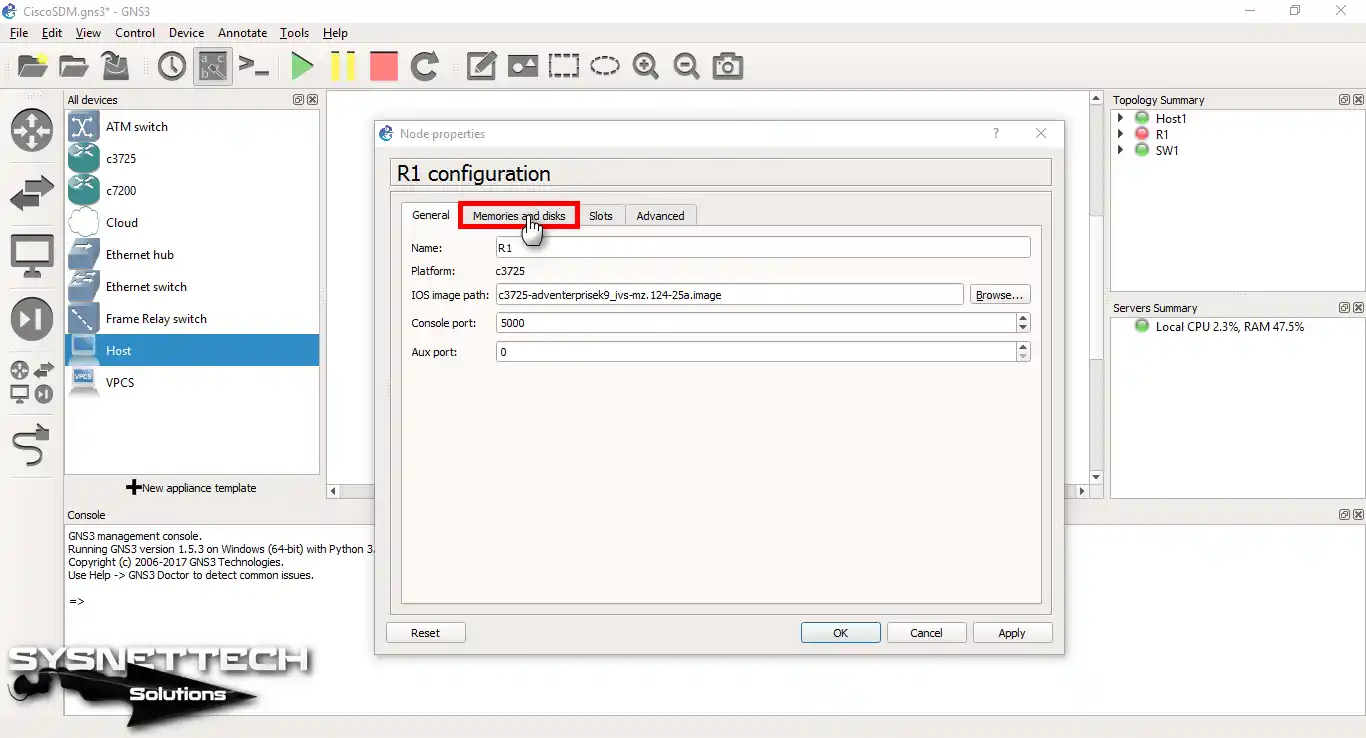
Since we are on the relevant screen, let’s add a flash drive to the Router. To do this, click on the Memories and Disks tab.
Step 3
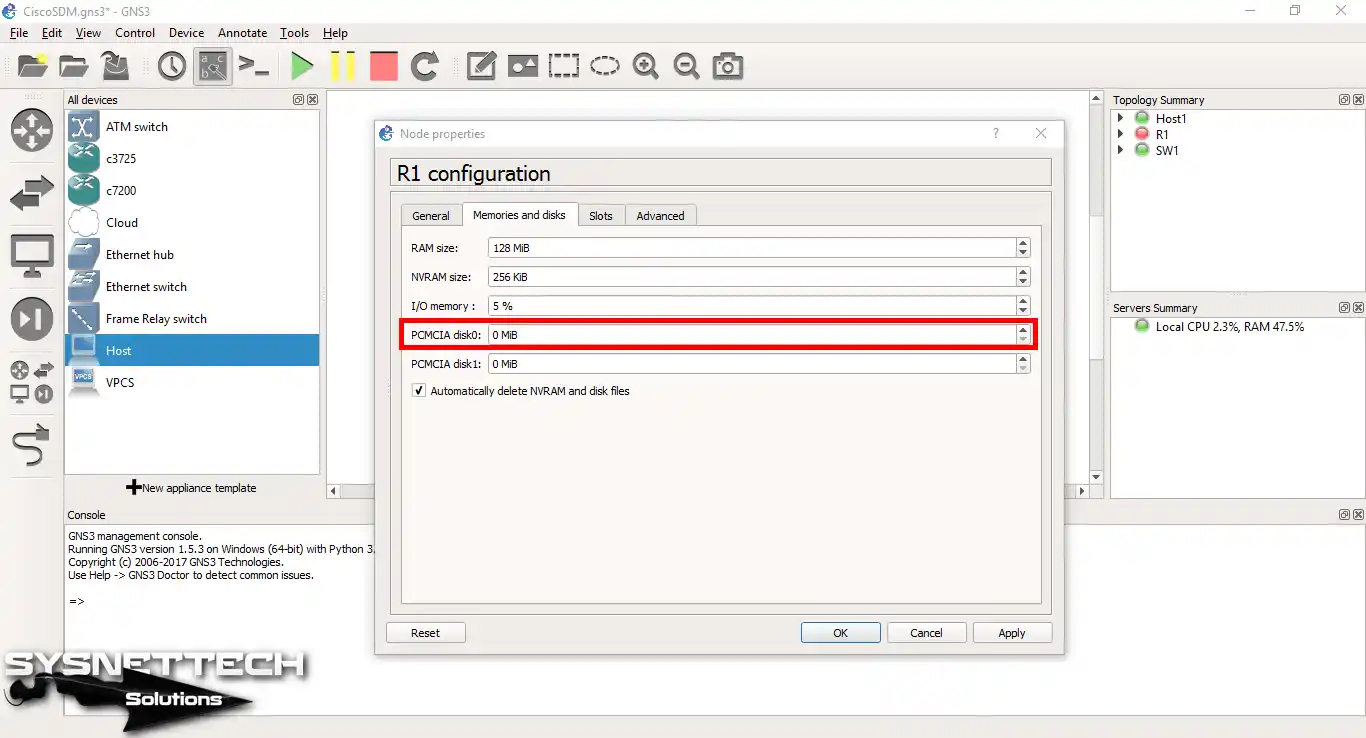
To configure the disk size for the Cisco Router, first examine the “PCMCIA disk0” section in the device settings. The value here usually is 0 MB. Here, specify the desired disk size for the SDM software.
Step 4
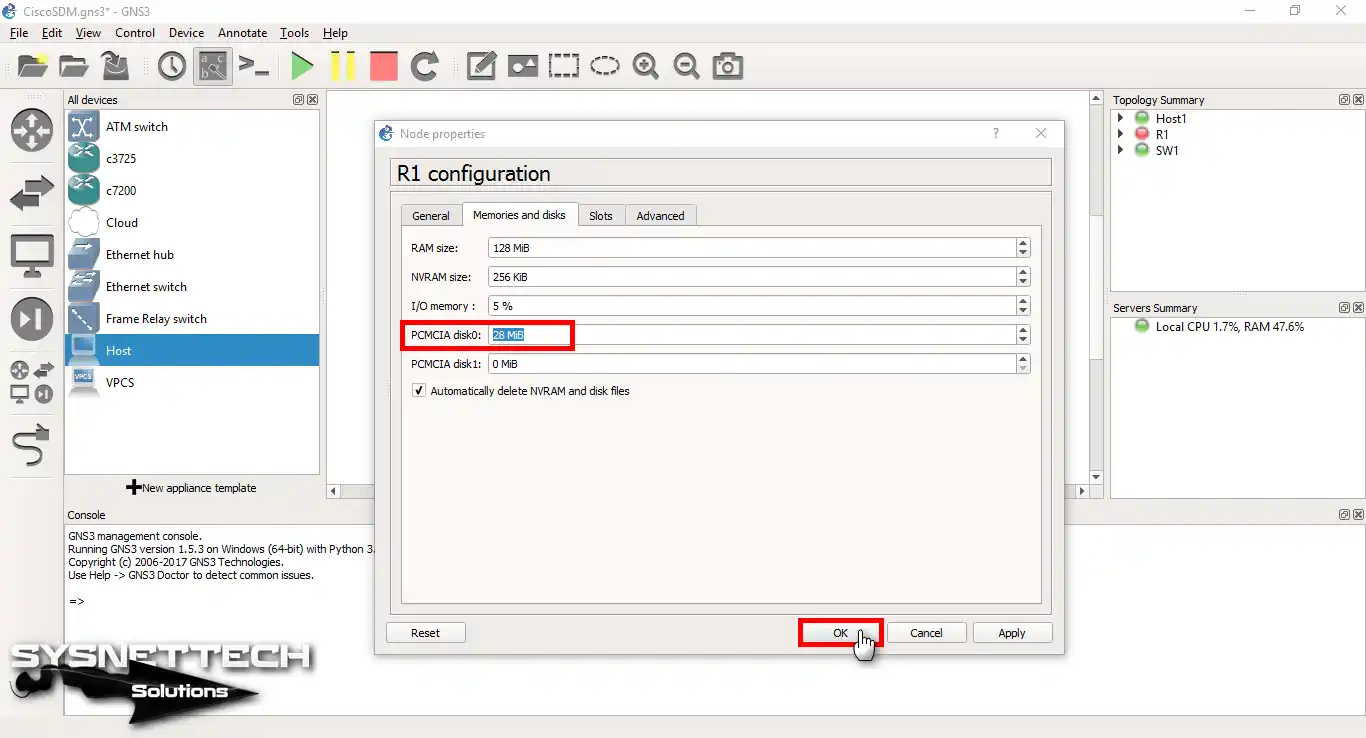
Here, I changed the flash disk size to 28 MB. But, depending on your project needs, you can allocate a larger disk size. Thus, you will get more storage room for routing images & configurations.
Once you have decided on the size, press OK to apply & save the changes. You will now have configured disk0 for the Cisco Router.
3. Enable HTTP and HTTPS
After the disk setup, start your Router by pressing the green arrow. Then, use the commands I gave below to make a new user with a strong password for the device.
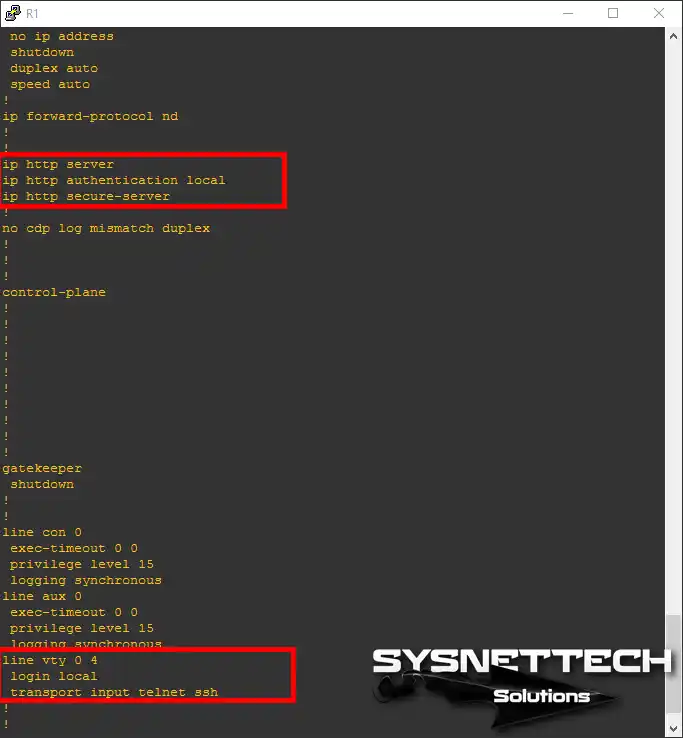
Also, turn on telnet and allow only local access. Finally, enable the HTTP & HTTPS rules using the commands “ip http server” & “ip http secure-server”.
R1# conf t
R1(config)# interface FastEthernet 0/0
R1(config-if)# ip address 192.168.8.1 255.255.255.0
R1(config-if)# no shutdown
R1(config)# ip http server
R1(config)# ip http secure-server
R1(config)# ip http authentication local
R1(config)# line vty 0 4
R1(config-line)# login local
R1(config-line)# transport input telnet ssh
R1(config-line)# exit
R1(config)# username sysnettechsolutions privilege 15 password 123456
R1(config)# end
R1# wr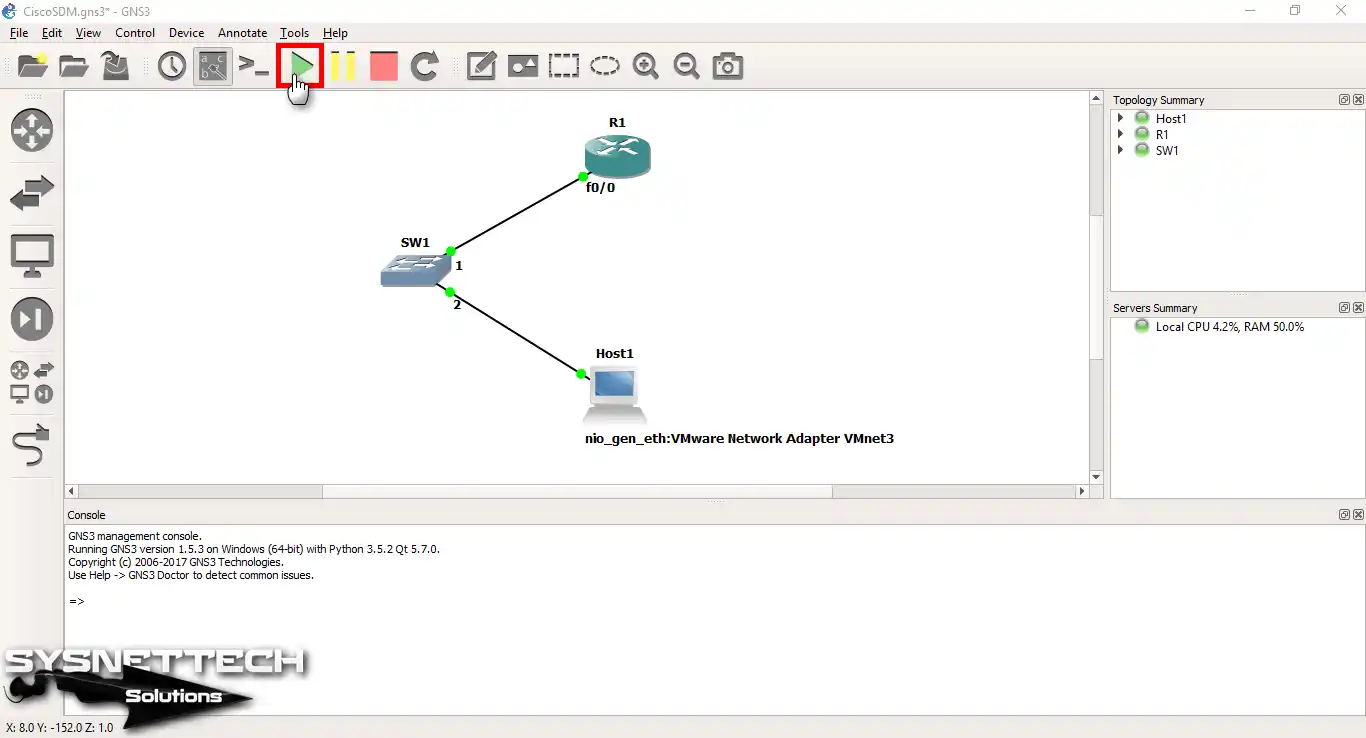
4. Check the Configuration Running on the Cisco Router
Step 1
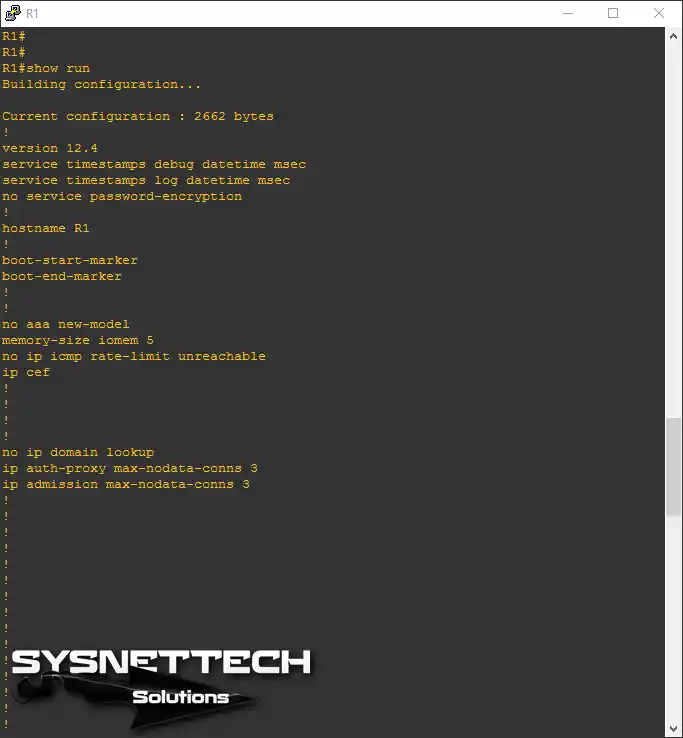
If you have finished the steps before, save the settings using Write (short: wr). After, check your work in the CLI with “show running-config” for a full look.
Step 2
You can also tell that you have enabled HTTPS on the Router from the working configuration. For example, in the process I performed, you can see that a certificate has been created, as shown in the image below.

Step 3
Make sure you have turned on the HTTP rule for control through the web browser.
5. Prepare the Host & VM for the Topology
Step 1
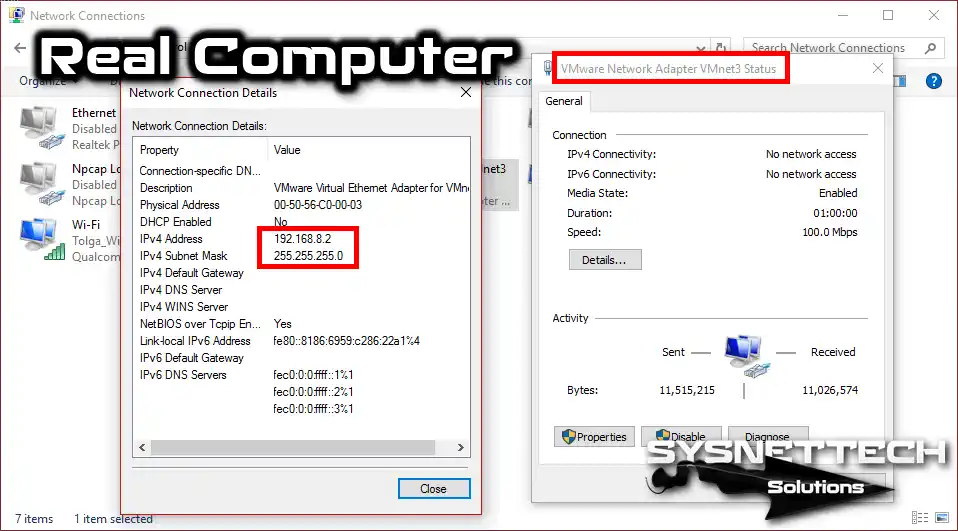
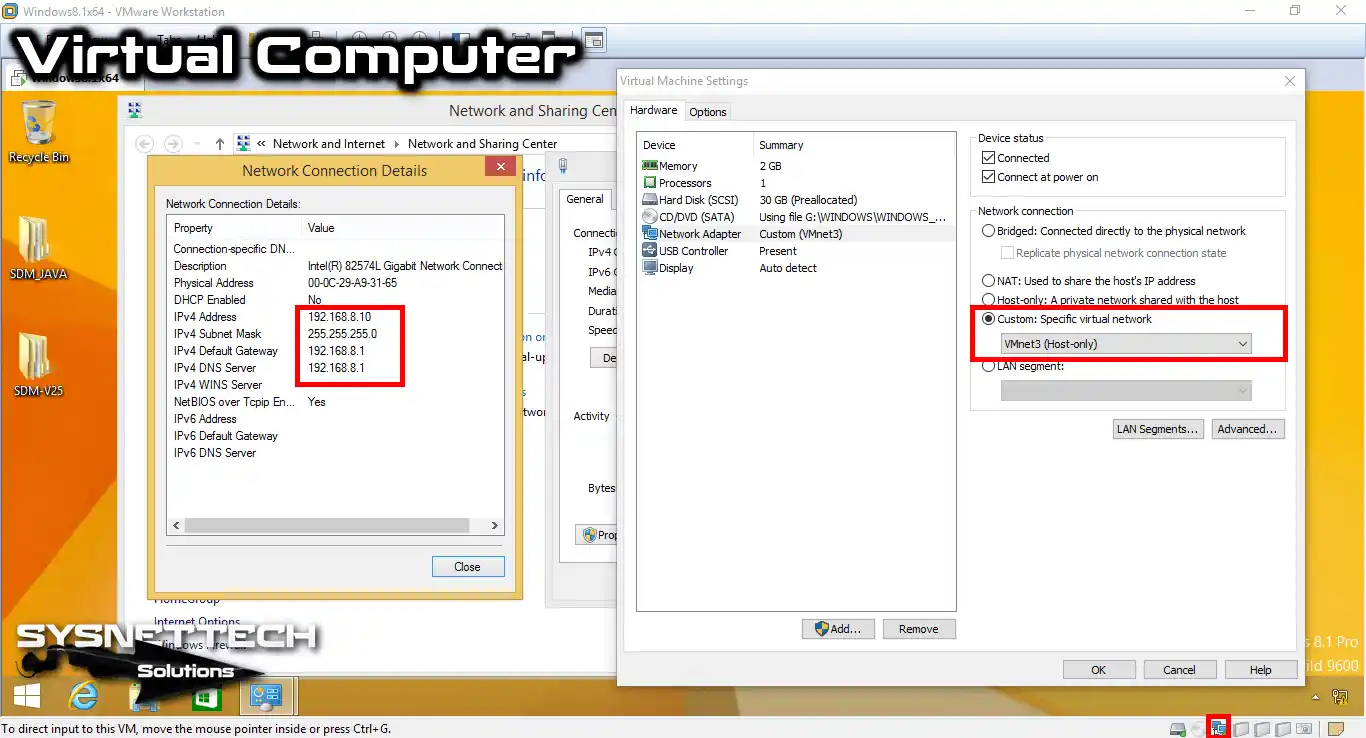
First, open the VMware adapter settings on your main computer. Then, set up the TCP/IP details here correctly.
However, note that you have assigned 192.168.8.1 to the Fa0/0 port for the Cisco Router. Therefore, I am changing the IP of the VMnet here to 192.168.8.2.
Step 2
To set up your VMware virtual machine correctly, you must change the TCP/IP details. First, pick the VMnet you made before. To do this, check Host-Only in the Custom box and pick VMnet3, for example.
Next, configure the VMnet3 IP address range as 192.168.8.0/24 in the Virtual Network Editor. Ensure that you set the subnet mask to 255.255.255.0. This will match the CIDR notation you selected.
Finally, assign a static IP address of 192.168.8.10 to your VM. Once you have completed these settings, your virtual PC will be ready.
6. Install Java for SDM Software
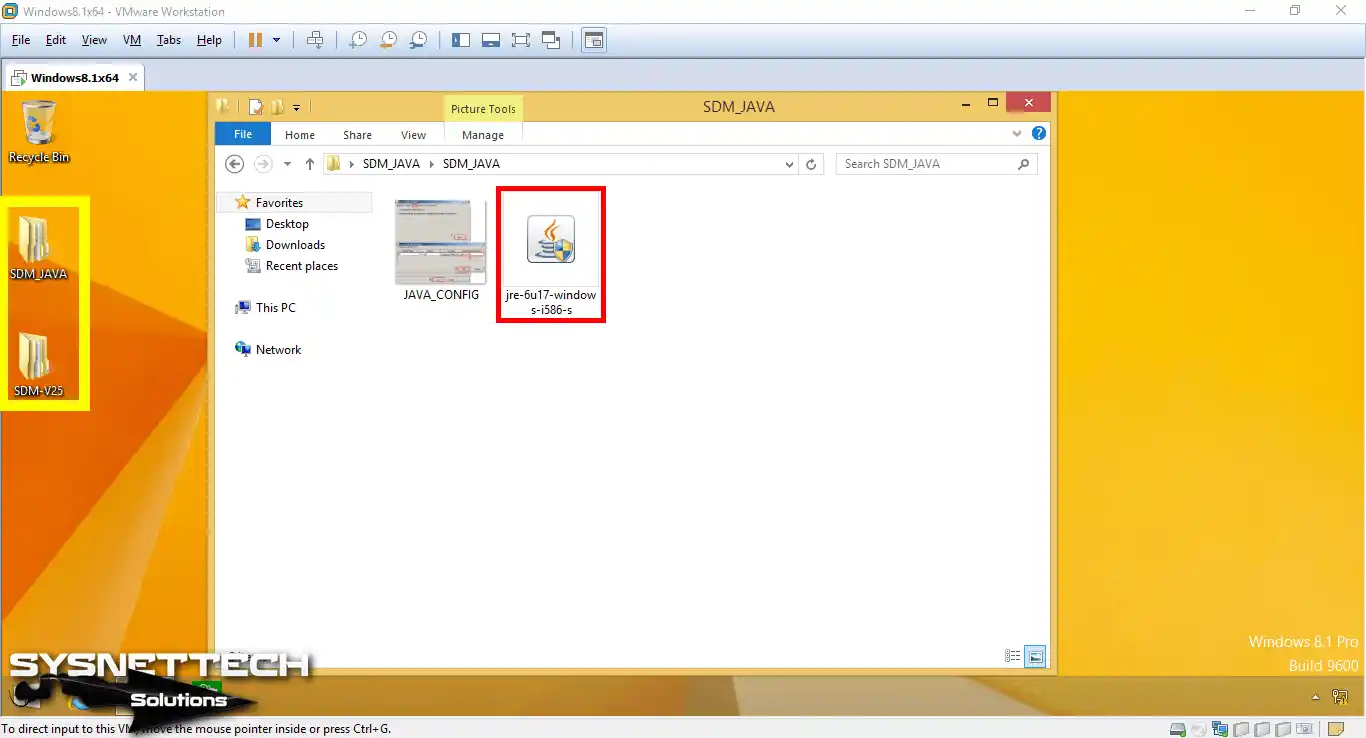
Step 1
First, get the Java JRE and SDM setup files on your computer. Then, move them to your Windows virtual PC by dragging them or copying them.
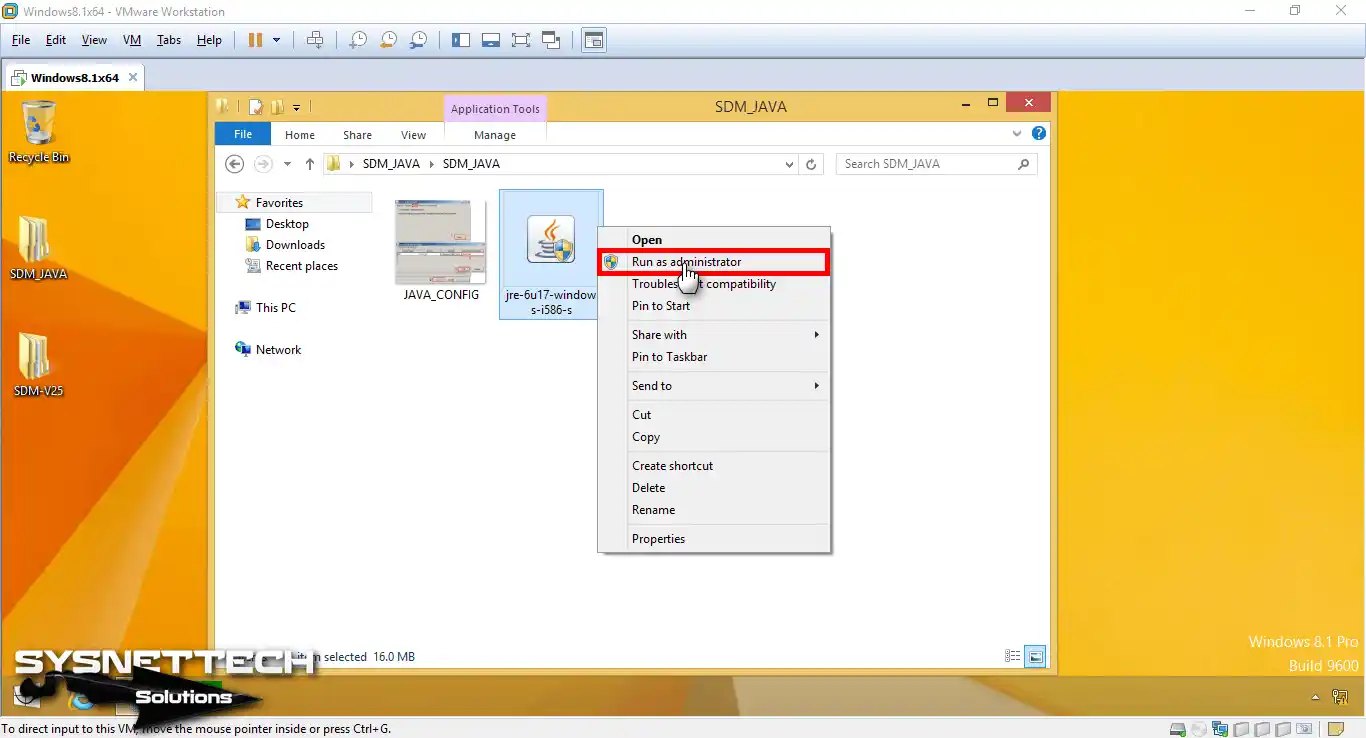
Step 2
Next, run the Java JRE setup file with full computer (admin) rights.
Step 3
After installing Java JRE, go to the Control Panel on your VM. From there, click on the Java (32-bit) option.

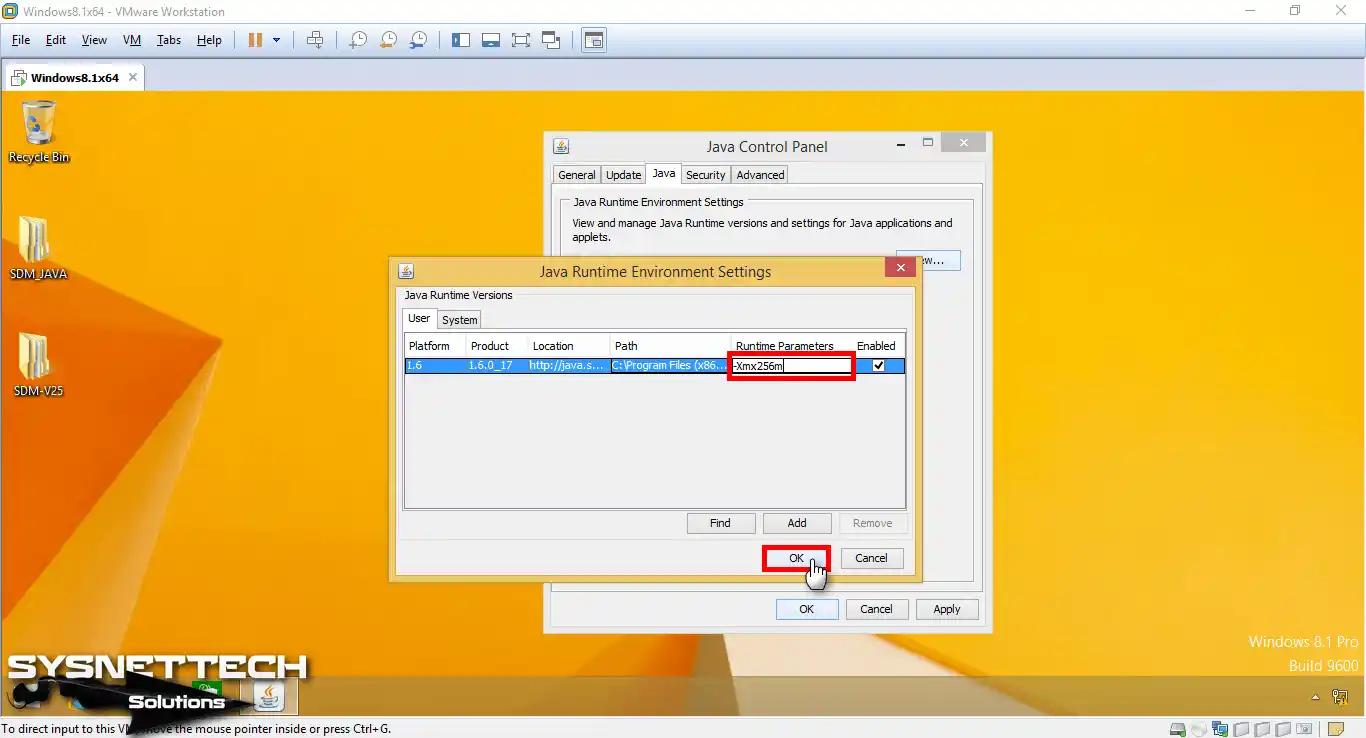
Step 4
Here, when you open the Java Control Panel, you will see Environment Settings. In the User tab, verify that the Platform is 1.6. Then, enter [ -Xmx256m ] in the Runtime Parameters section, click OK, and save.
7. Format the Router’s Flash Drive
Step 1
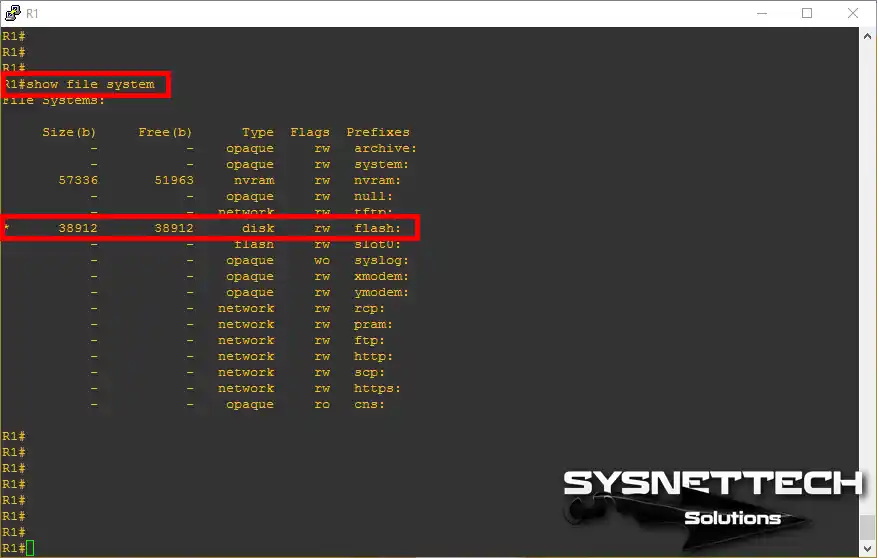
Run the “show file system” command to evaluate your Router’s storage space. This command will show details about your device’s file systems.
You can also find the Flash memory size here. As shown in the image below, you can see that the flash space is not ready in the Prefixes section. This is because you have not formatted your disk.
Step 2
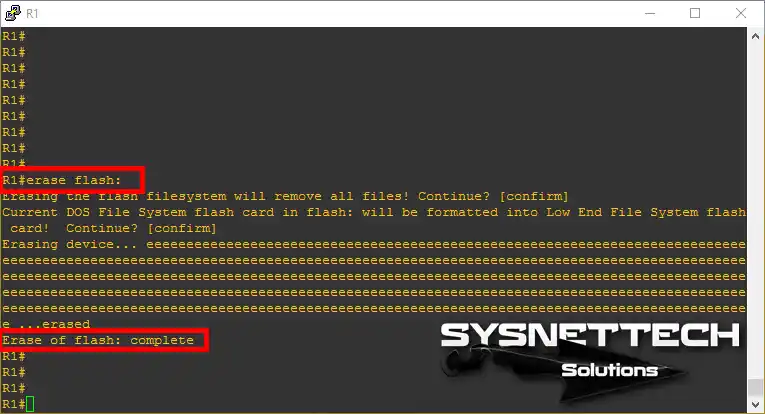
To prevent the “no disk space” error when putting in Cisco SDM, format the Flash Disk first. This step is very needed, but you might erase any old files that could use up space.
To format, enter privileged mode on your device. There, run the “erase flash” command. This command securely erases all content on the Flash Disk.
After that, you will be able to install Router SDM without having storage problems. But be sure you save all needed files before using this command.
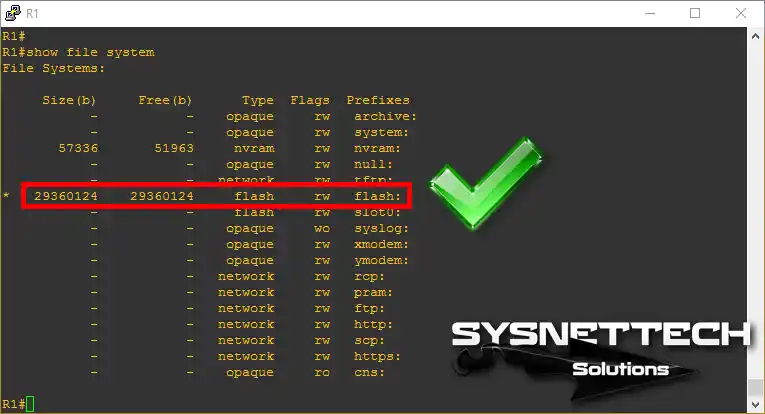
Step 3
Finally, recheck your Router’s Flash using the “show file system” command. This time, you will see the full size you specified for PCMCIA disk0 in the GNS3 program.
8. Install Cisco SDM Software
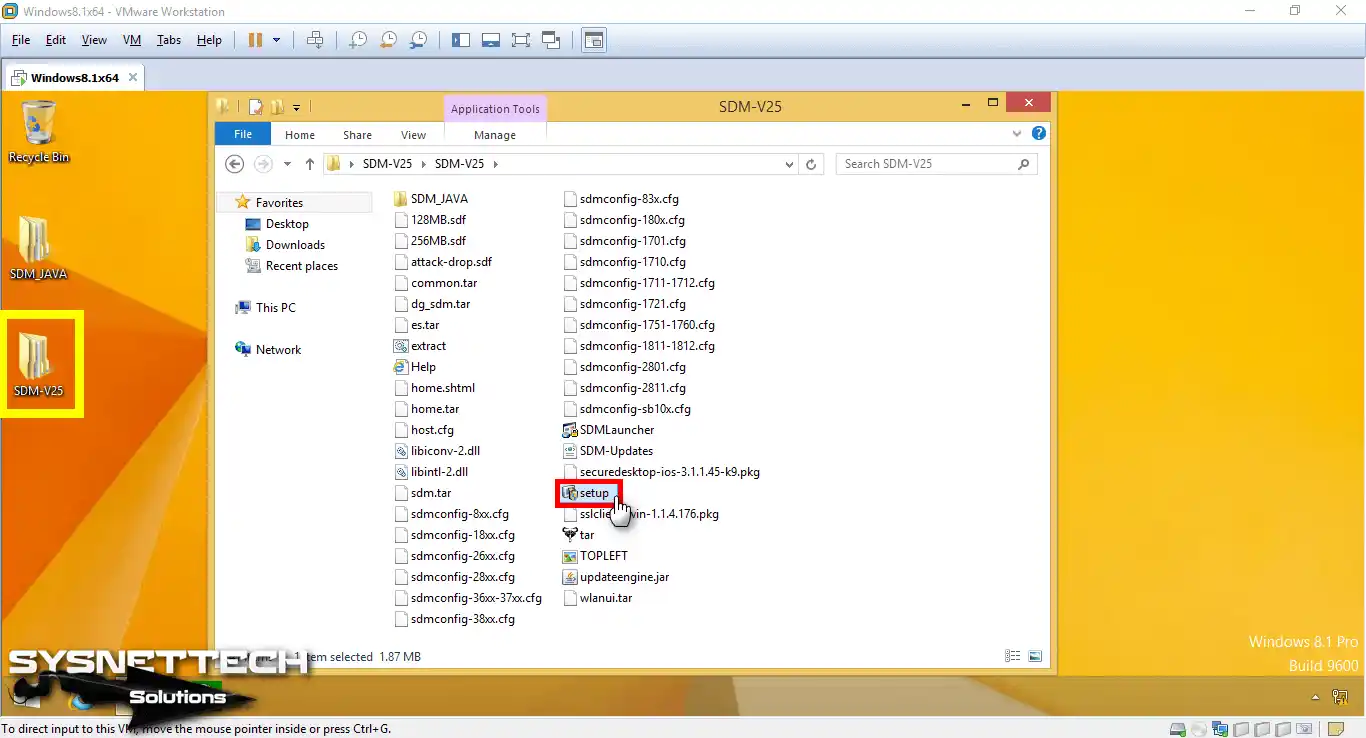
Step 1
You have now finished all the needed setups for SDM on your VM & Router. Now, run the setup file from the SDM-V25 folder to begin the installation.
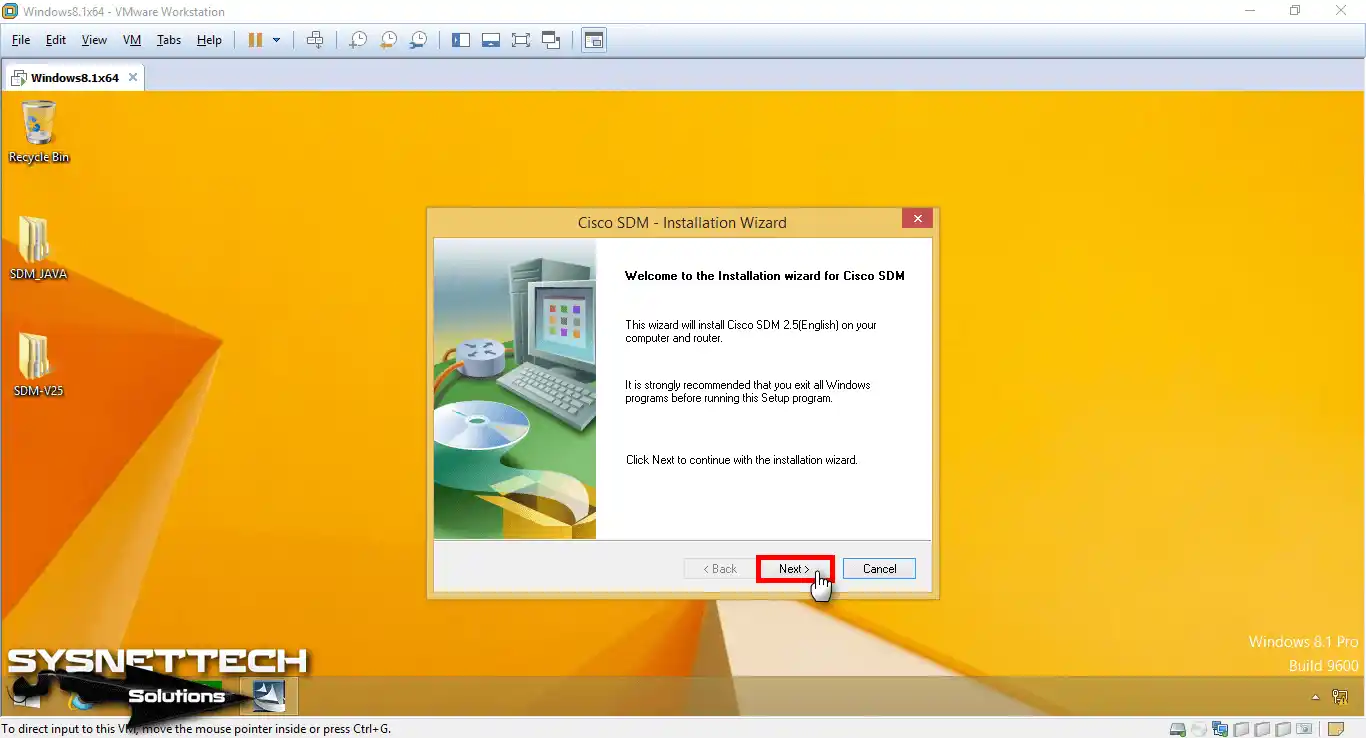
Step 2
When you open the Cisco SDM Installation Wizard, read the text and click Next.
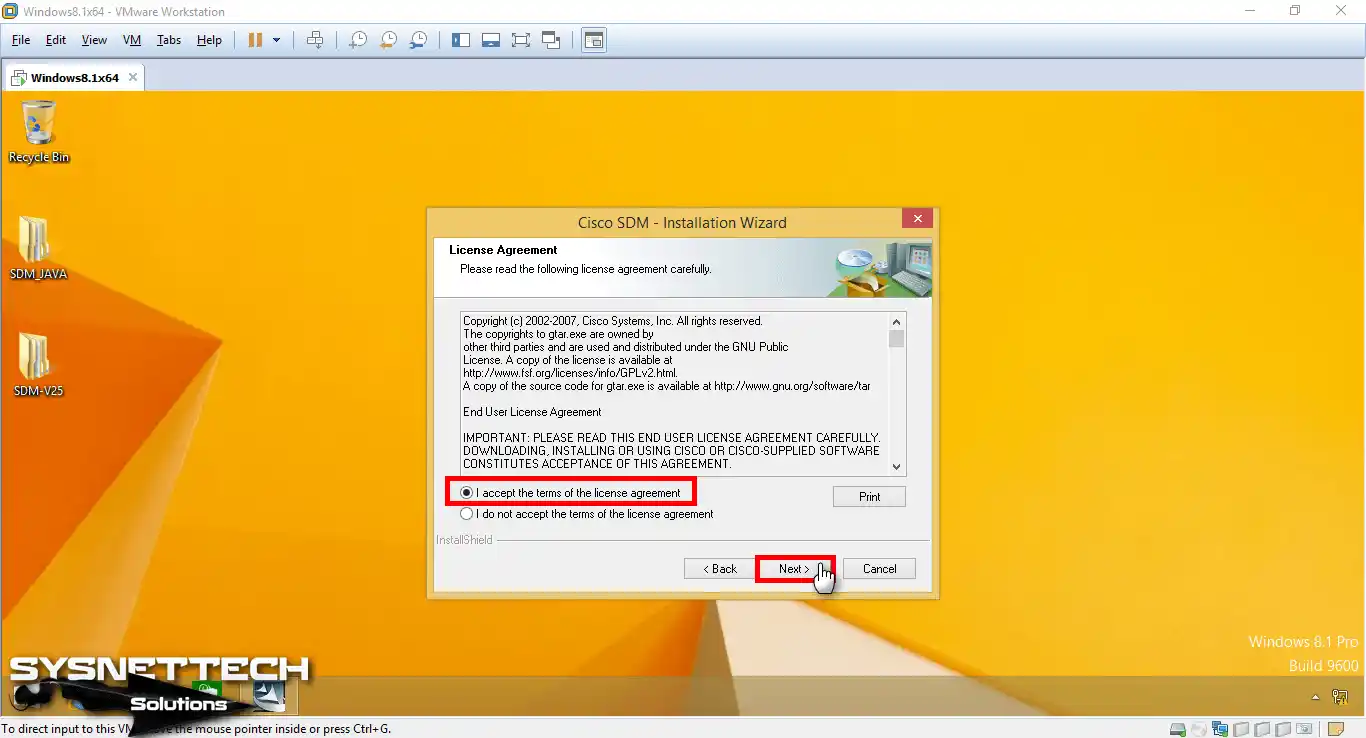
Step 3
Please read and accept the SDM license to continue the process.
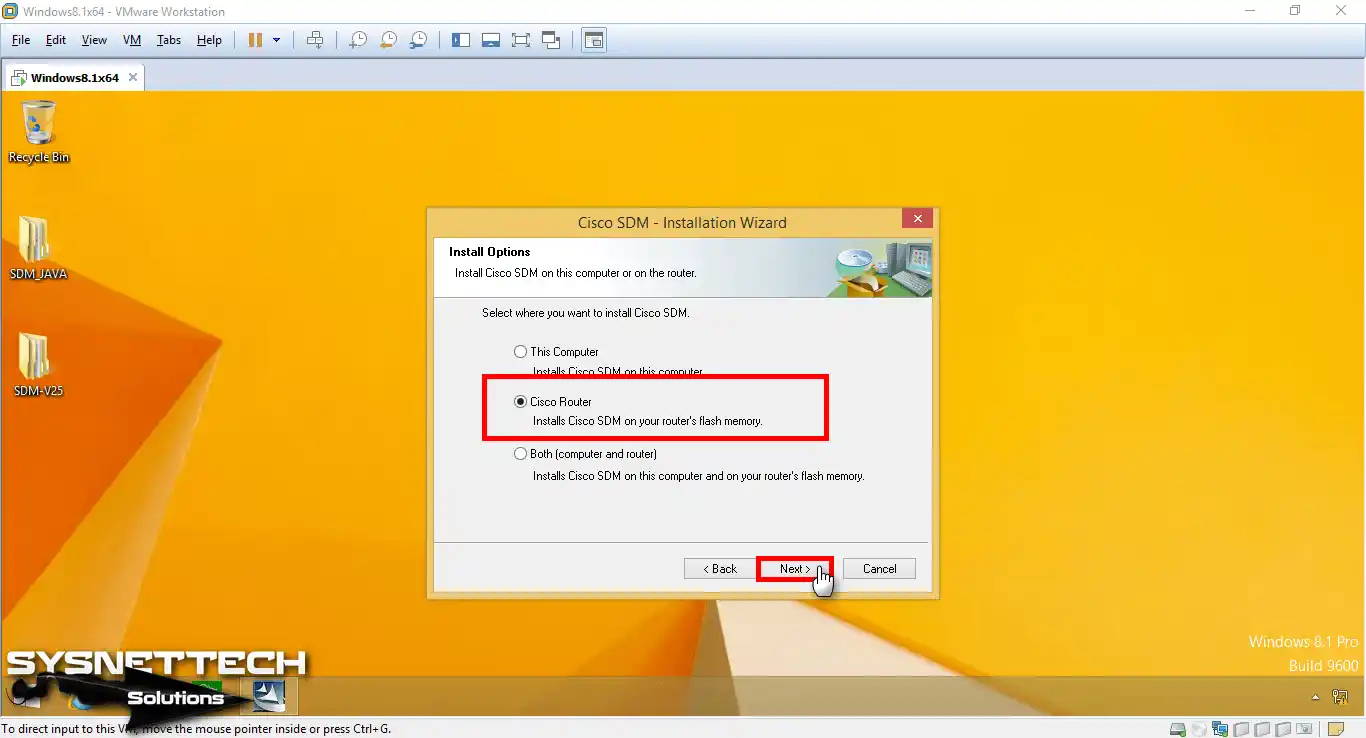
Step 4
When you reach Install Options, the wizard will ask you something. Here, it asks where you want to install the Router SDM program.
If you wish, you can install it on both your PC and your Router. However, I am only selecting “Cisco Router” here. The reason is to install the SDM tool only on the network device.
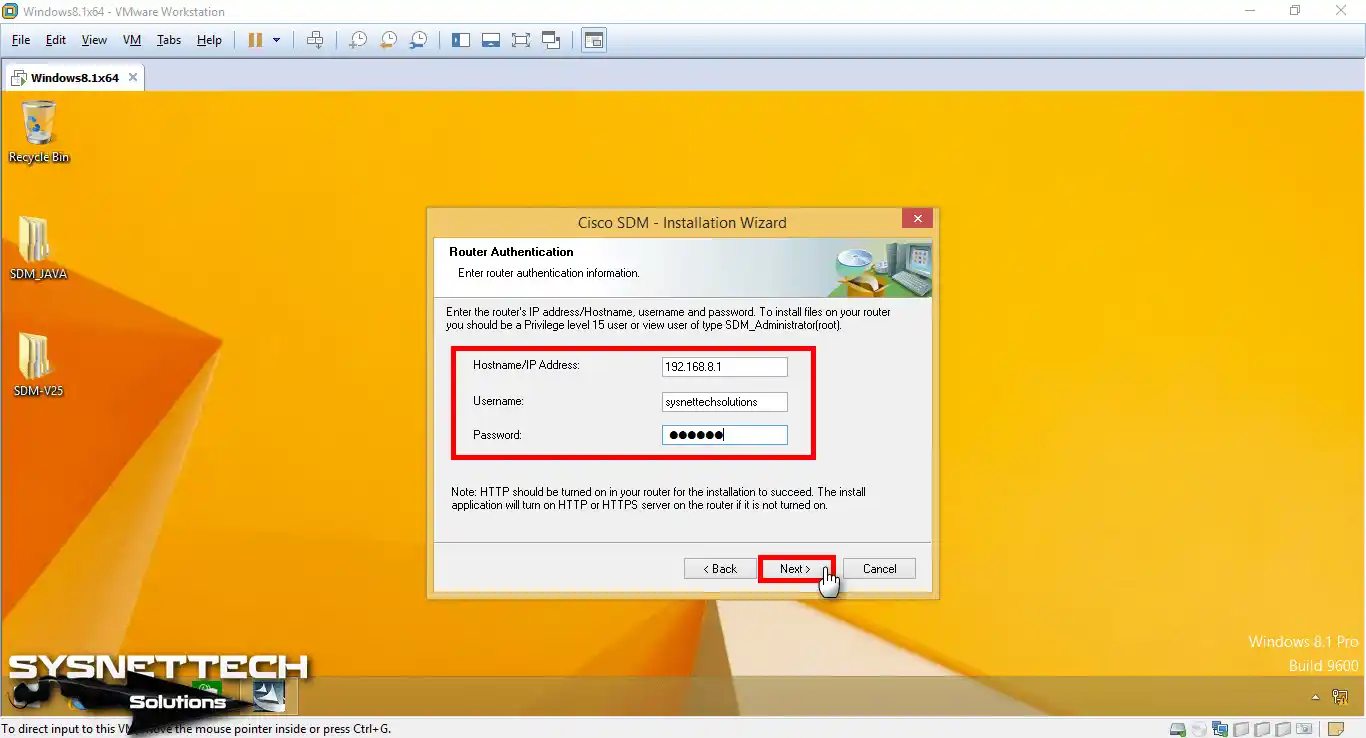
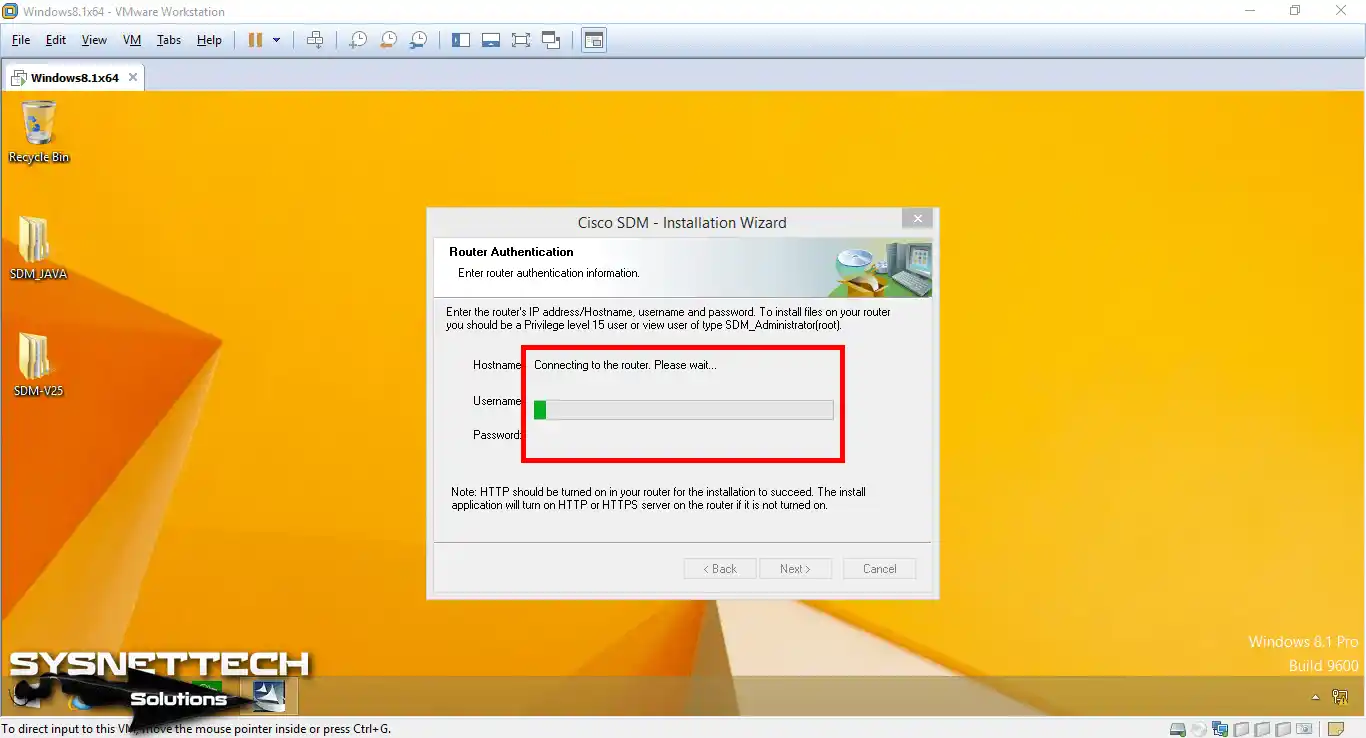
Step 5
In the Router Authentication window, type the IP address for your Cisco device’s FastEthernet0/0 port. Then, keep going by typing the username and password you made.
Step 6
After typing your details correctly, the wizard connects to your Cisco device.
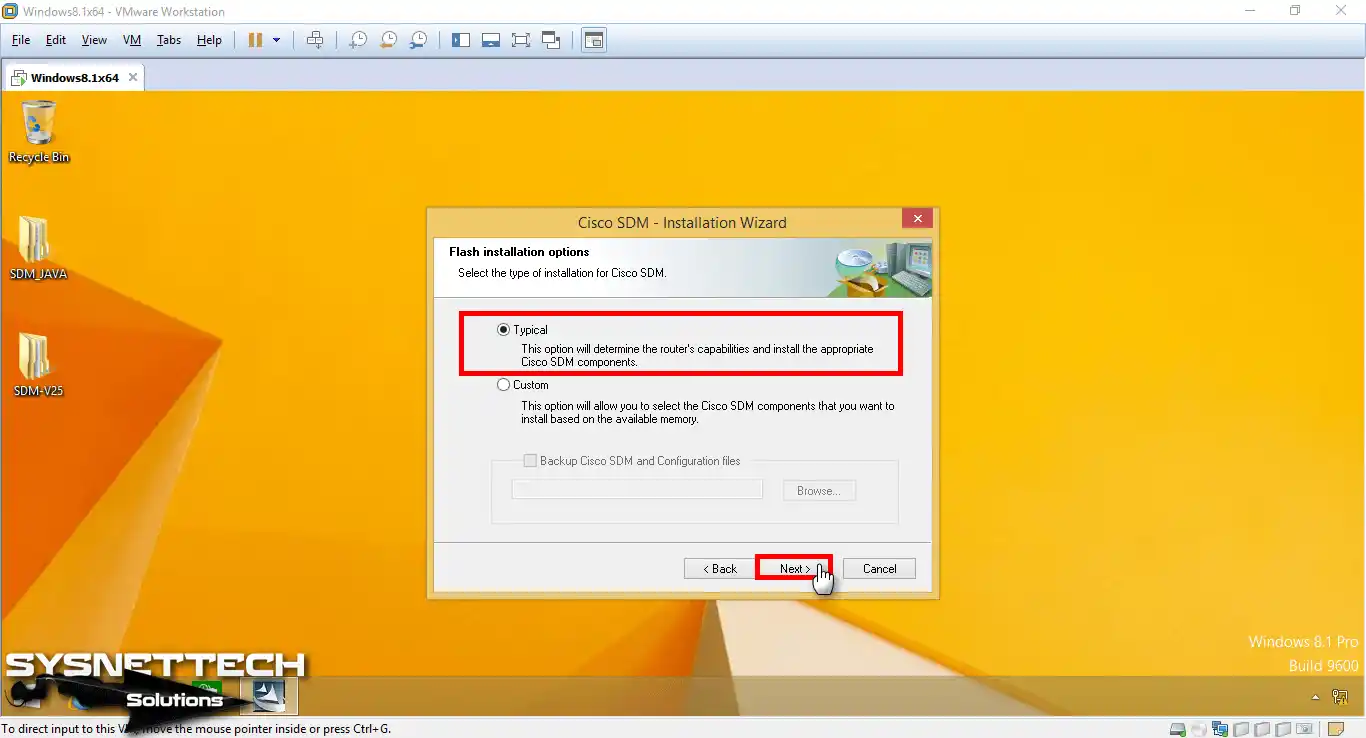
Step 7
You will now see the Flash Installation Options, which are almost at the final stage. There are two types here: Typical & Custom.
I am moving ahead by picking Typical here. This is because I want the SDM parts to be picked for me based on the Router’s skills.
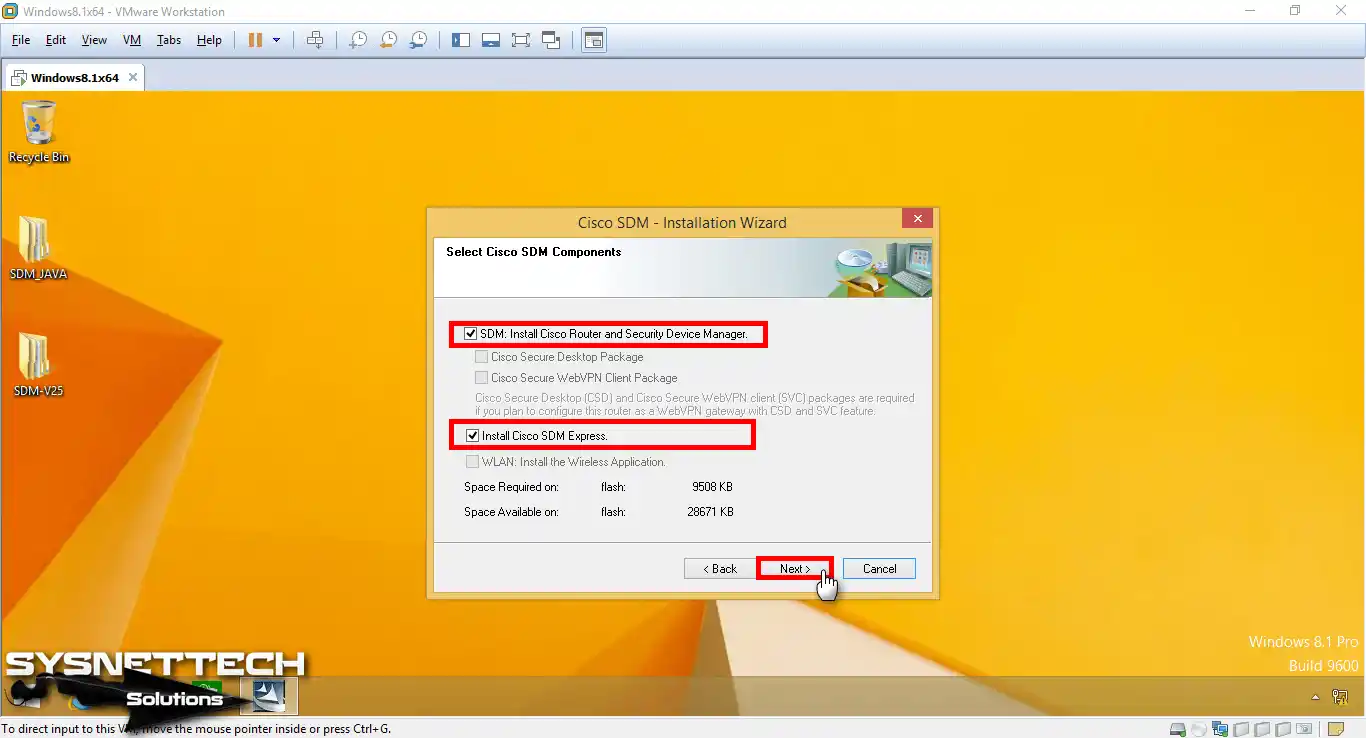
Step 8
I go on by picking both choices in the Cisco SDM parts, as the picture shows.
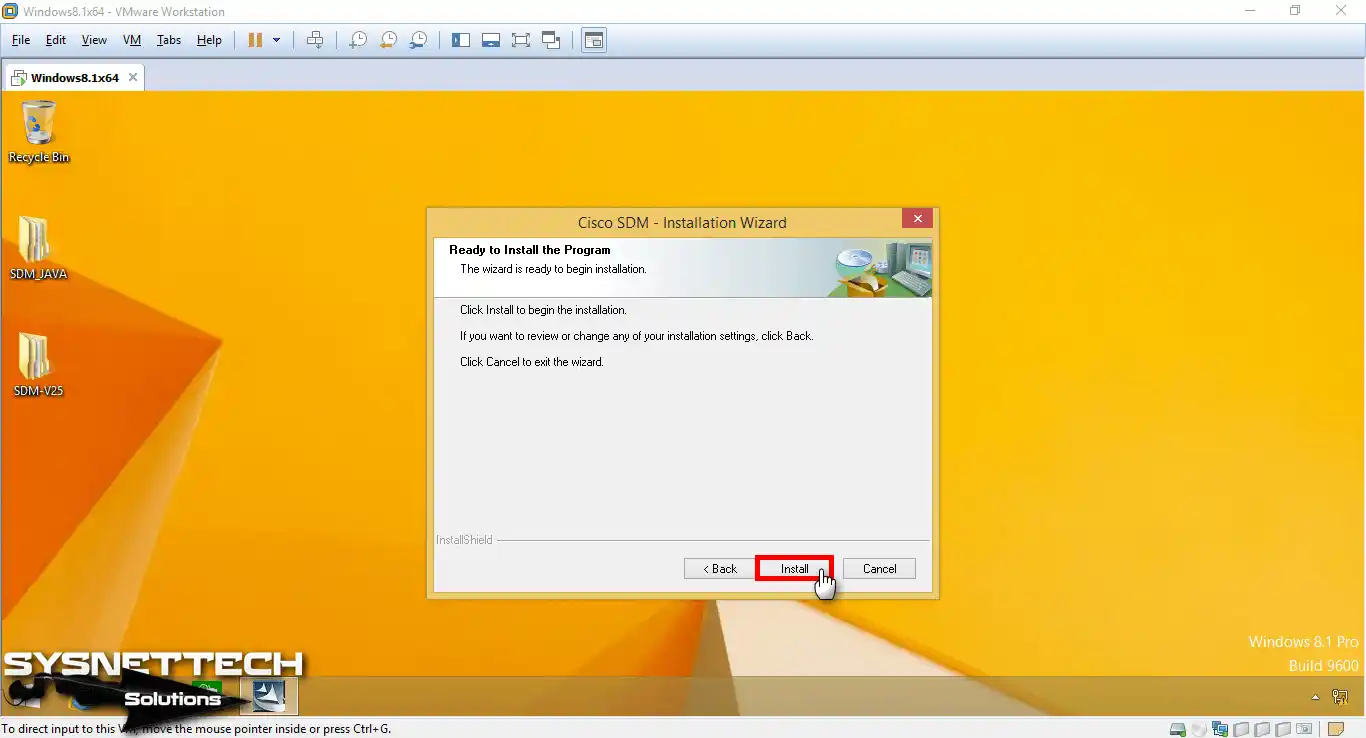
Step 9
At this step, you are on the Ready to Install the Program screen. Here, press Install to start putting in the Cisco management software.
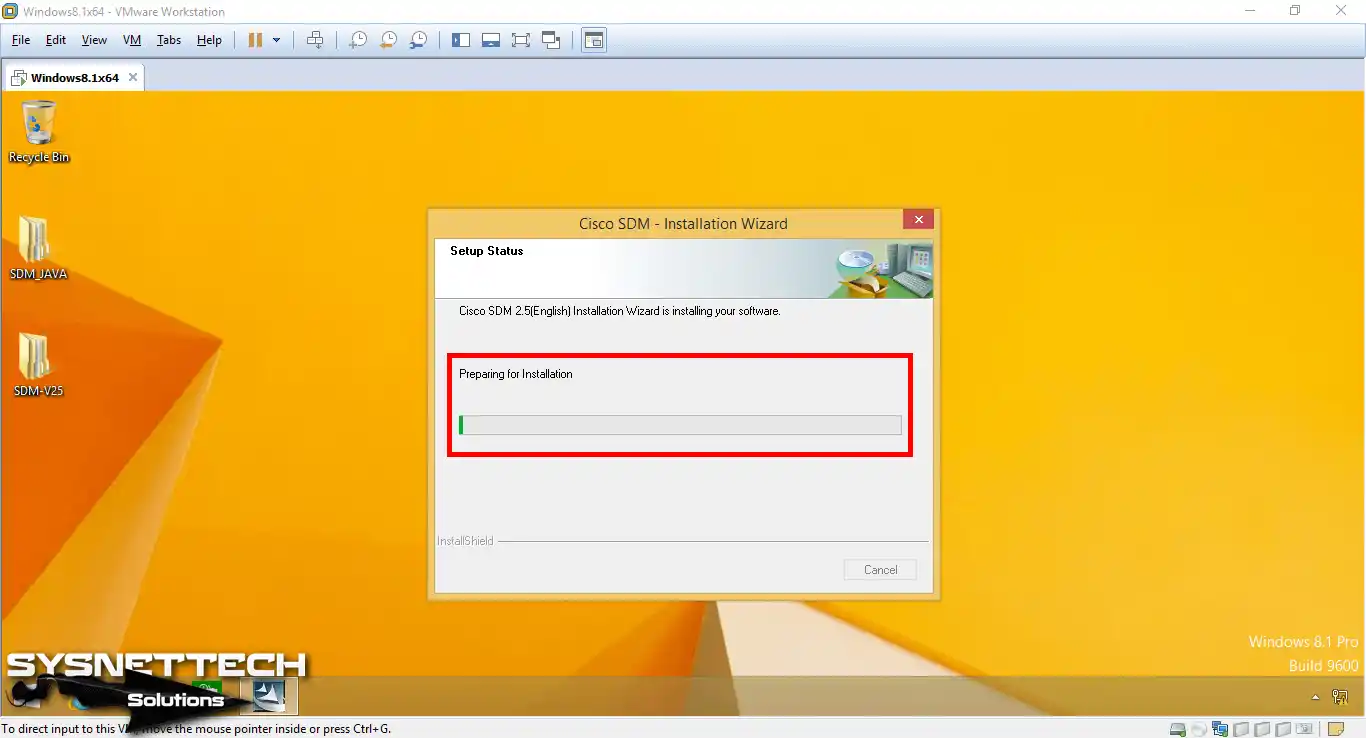
Step 10
Please wait while the Cisco Security Manager helper gets everything ready to install.
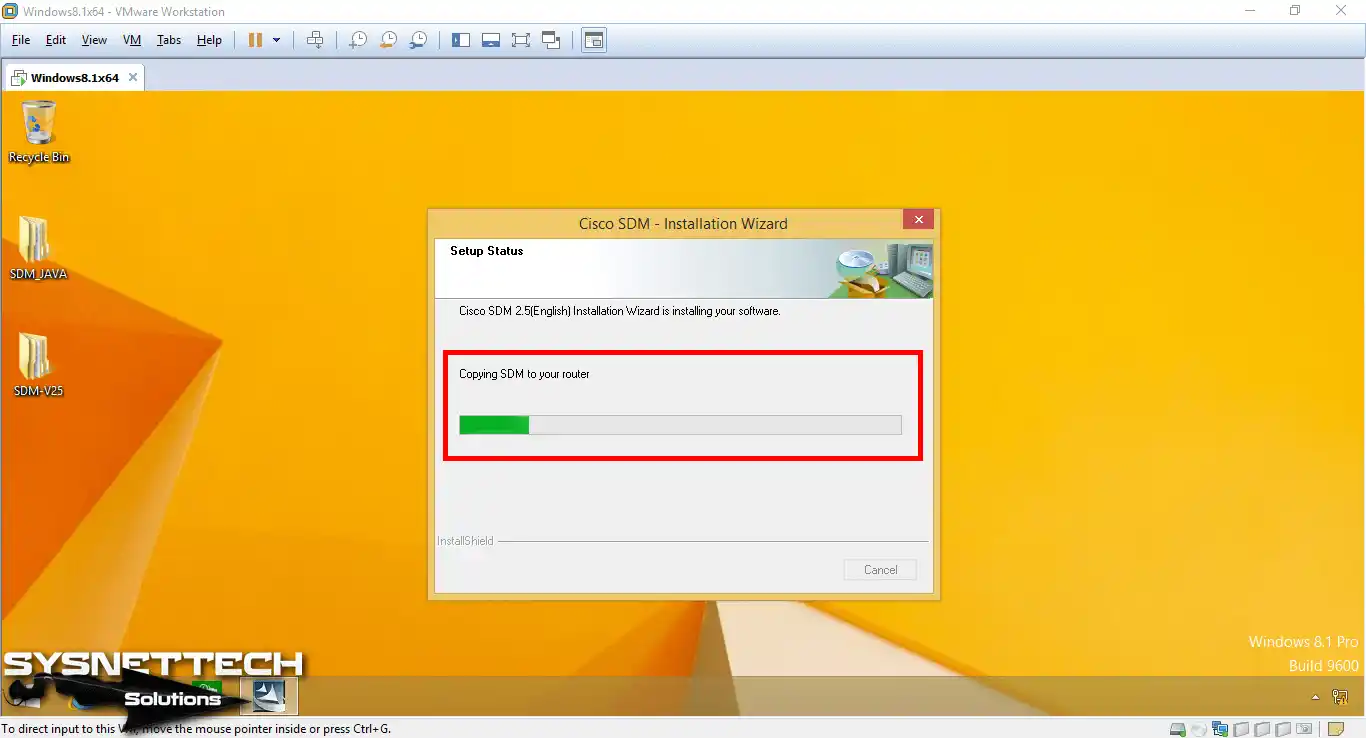
Step 11
Please be patient while the wizard copies the SDM files to the Router.
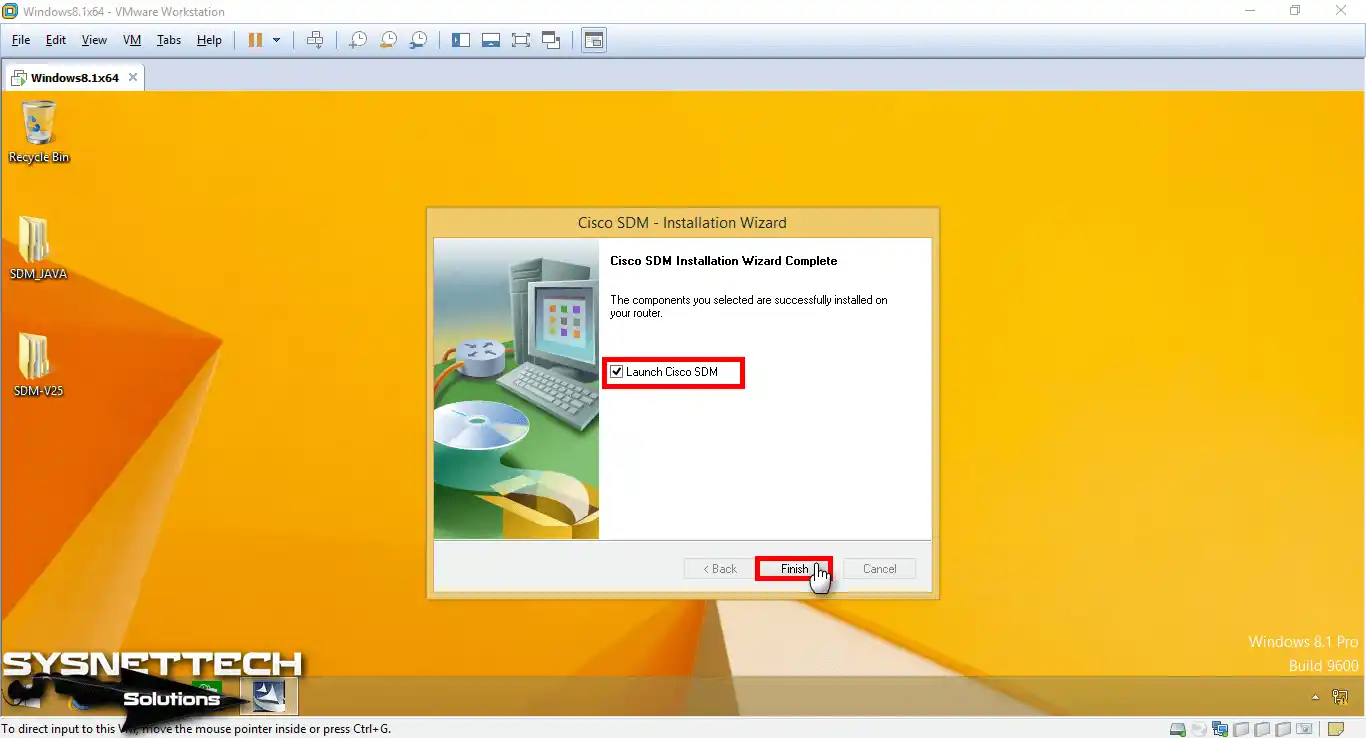
Step 12
Start the SDM management tool as soon as you finish installing it.
9. Troubleshoot Browser Issues for SDM
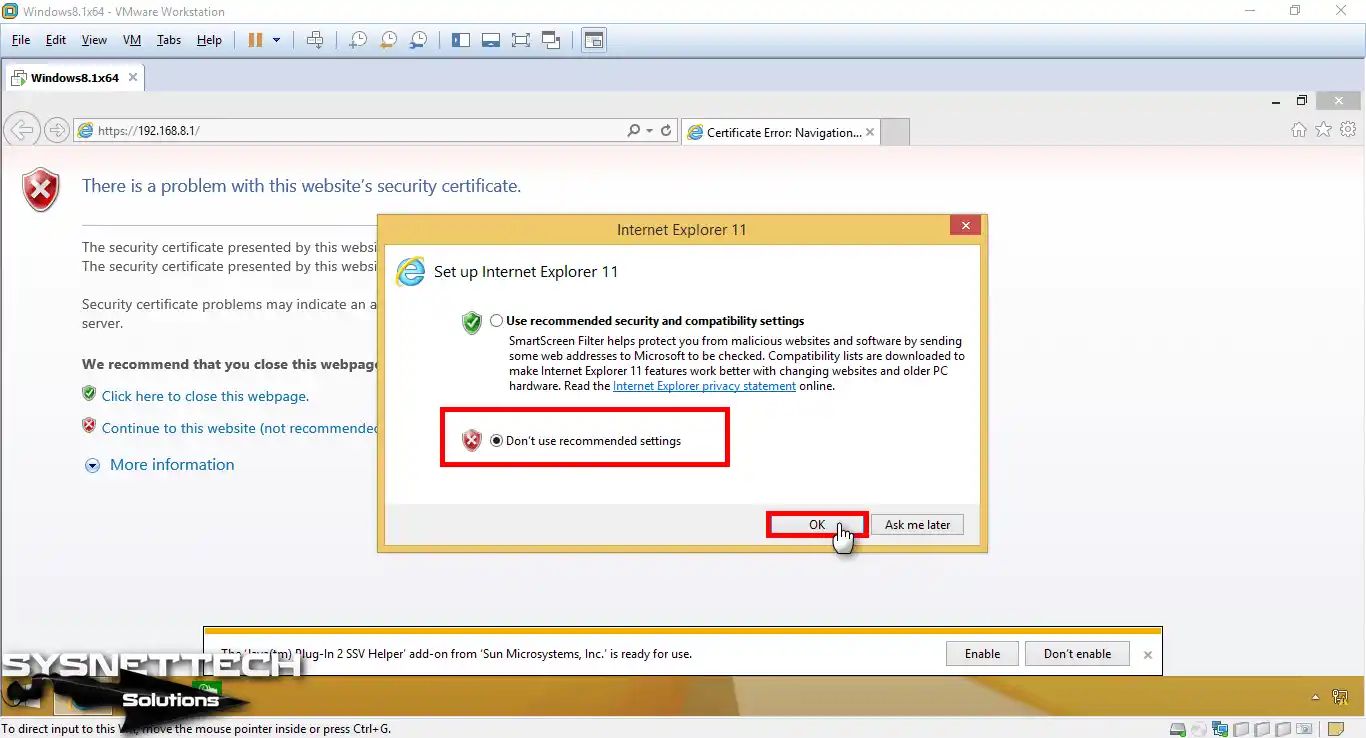
Step 1
Now, let’s try to connect to the Router’s interface using the web browser with the IP address 192.168.8.1. But, since I am using Internet Explorer, I go on by checking “Don’t use recommended settings”.
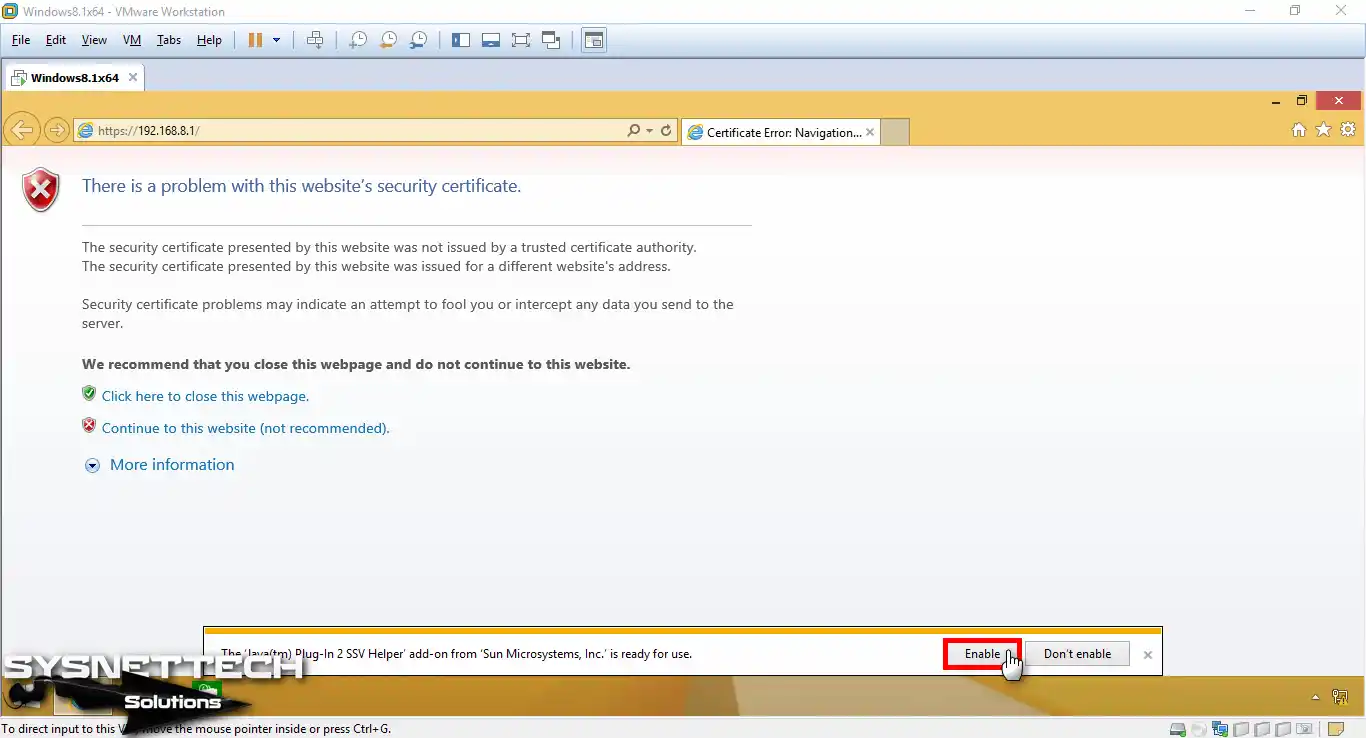
Step 2
To confirm that our Java plugin is working, I click Enable at the bottom of the browser.
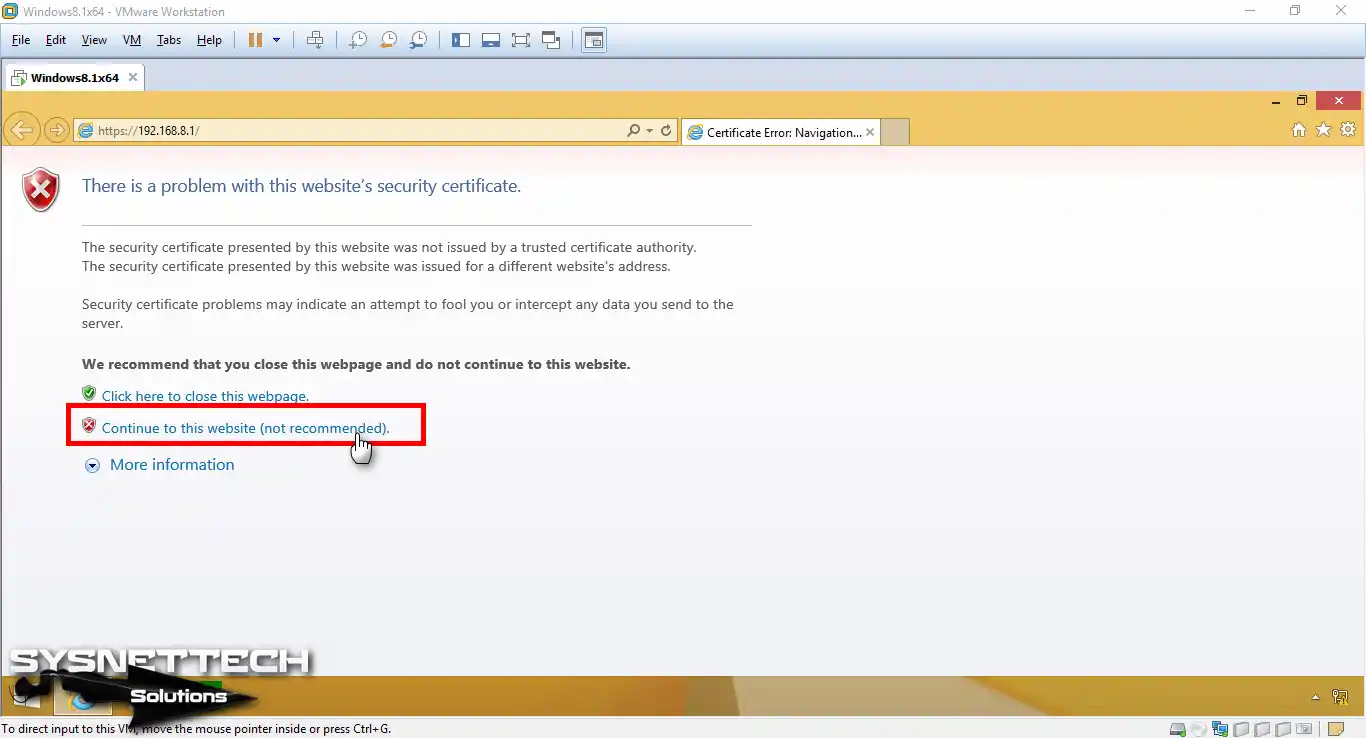
Step 3
To go on and skip the certificate alerts, pick the choice below.
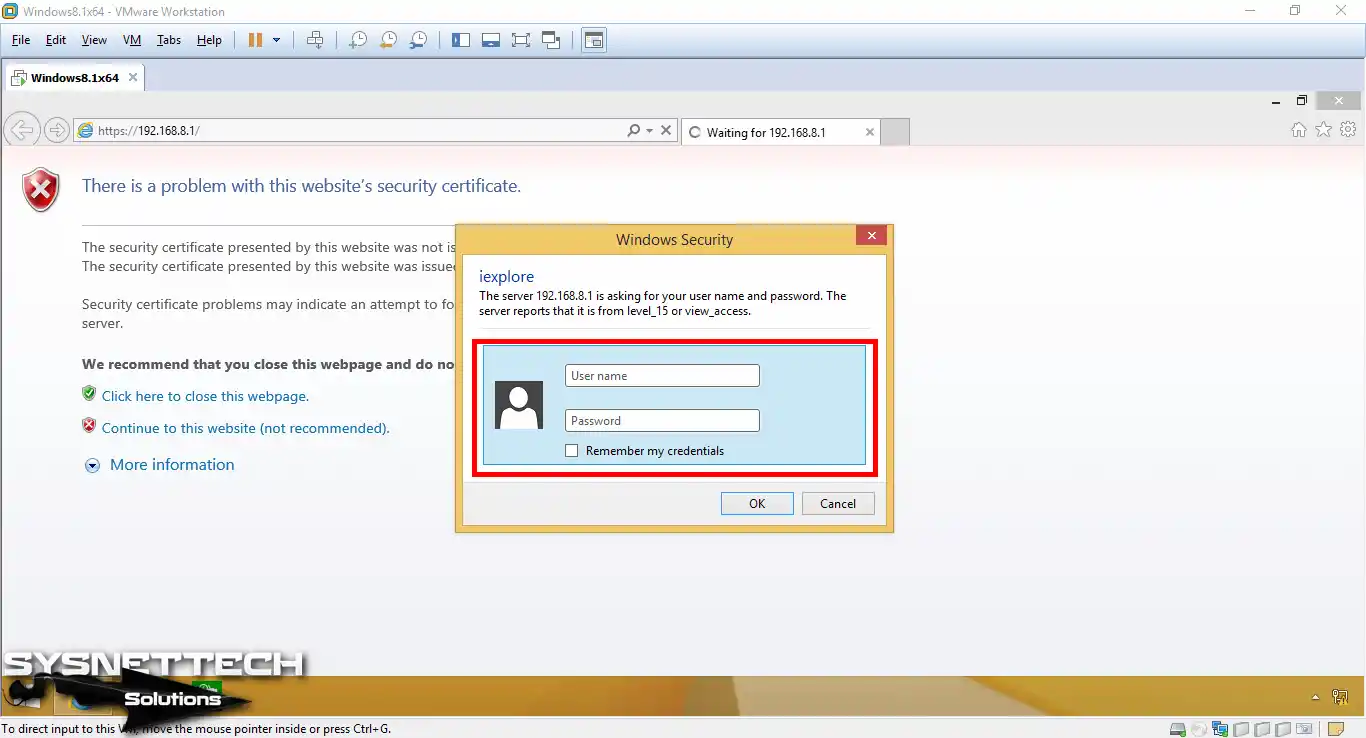
Step 4
On this page, we will link to the Cisco Router Security Device Manager. On the Windows Safety page, type your username and then your password to finish.
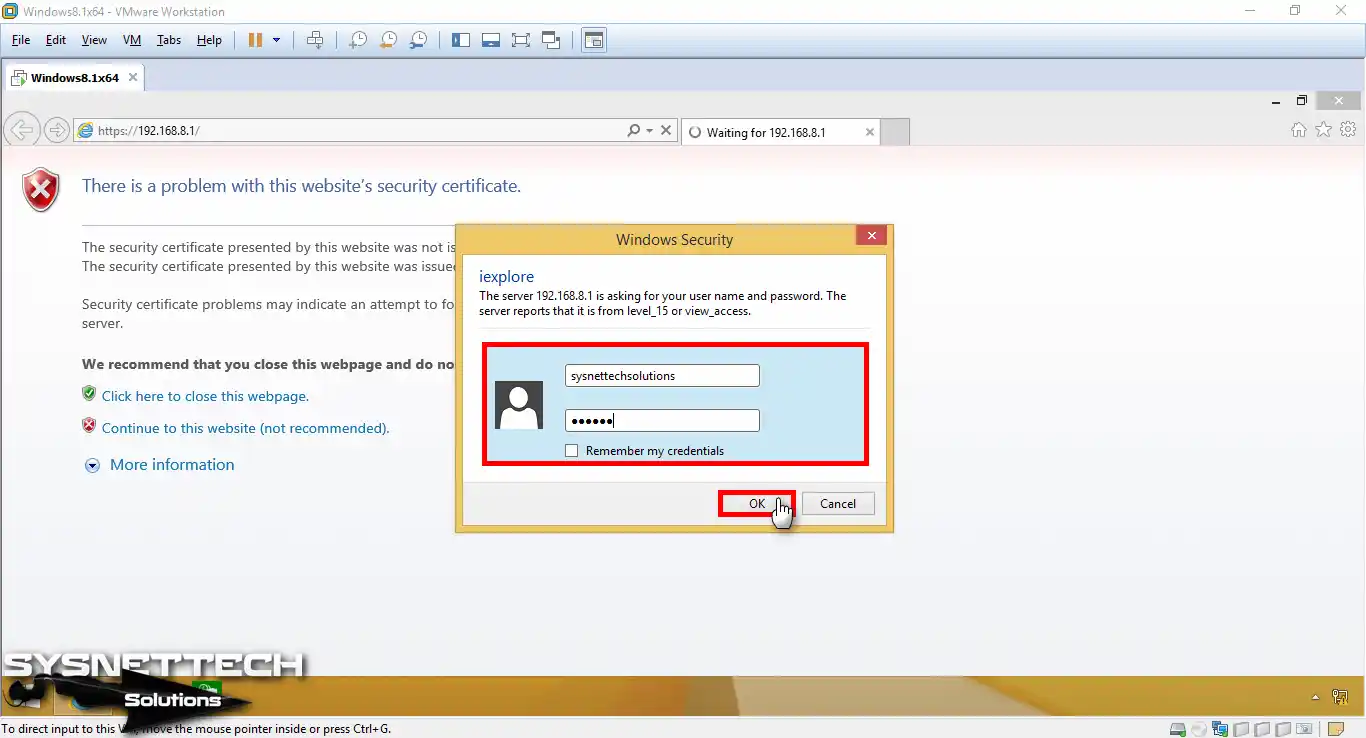
Step 5
If you don’t want to re-enter your credentials, check the “Remember my credentials” box. Then, click OK again to log in to your Cisco network device.
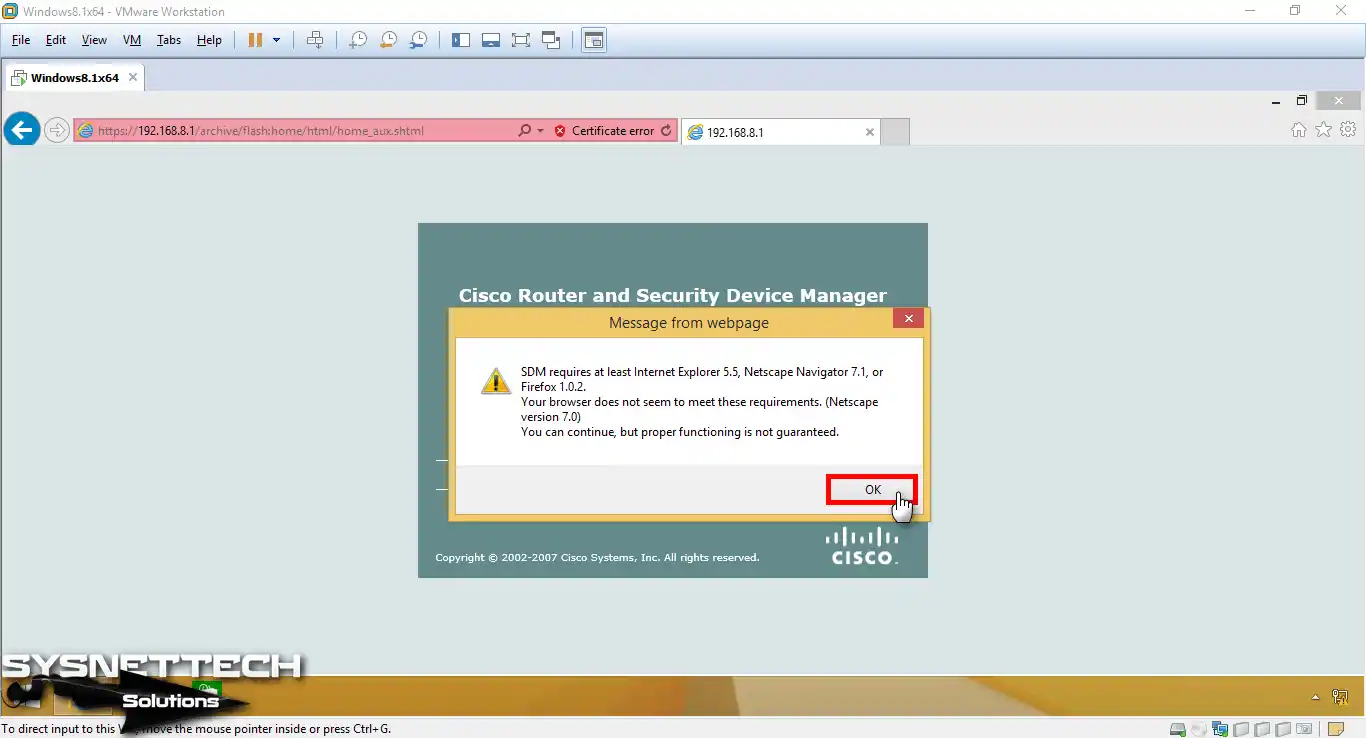
Step 6
If you see a browser compatibility error like this one, just click OK to go to the next step.
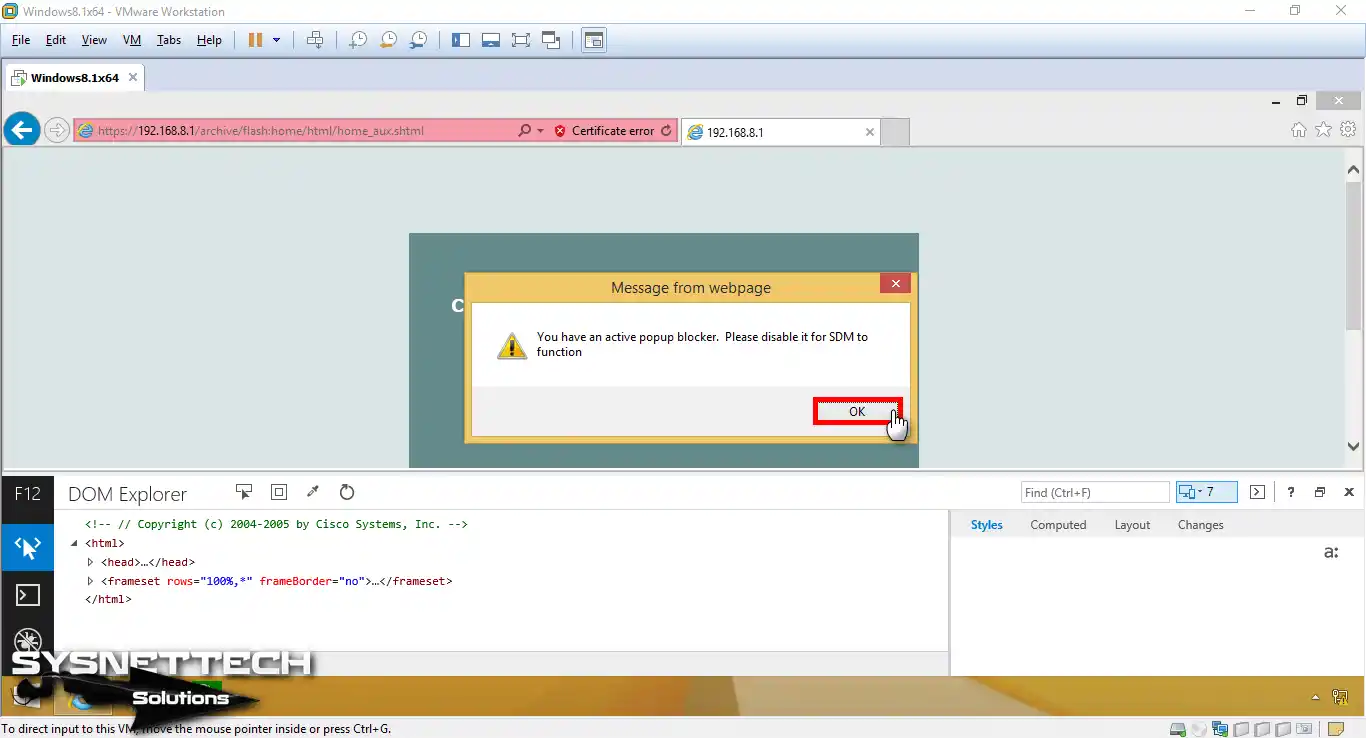
Step 7
Set the browser mode to version 7 in the browser developer choices. If you still see the Popup Stopper error, you will change another setting later.
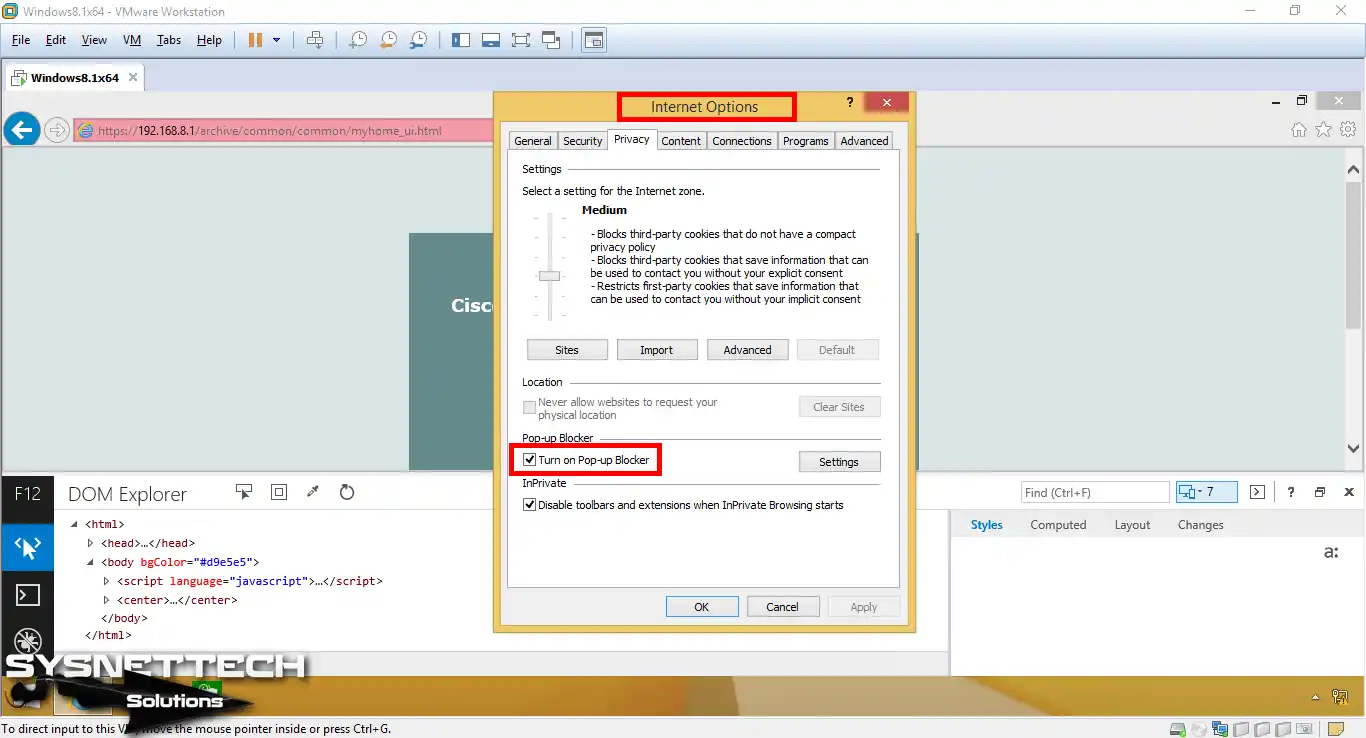
Step 8
Now, go to the Privacy tab in Internet Explorer’s Options screen. There, if the Turn on Popup Blocker option is enabled, disable it.
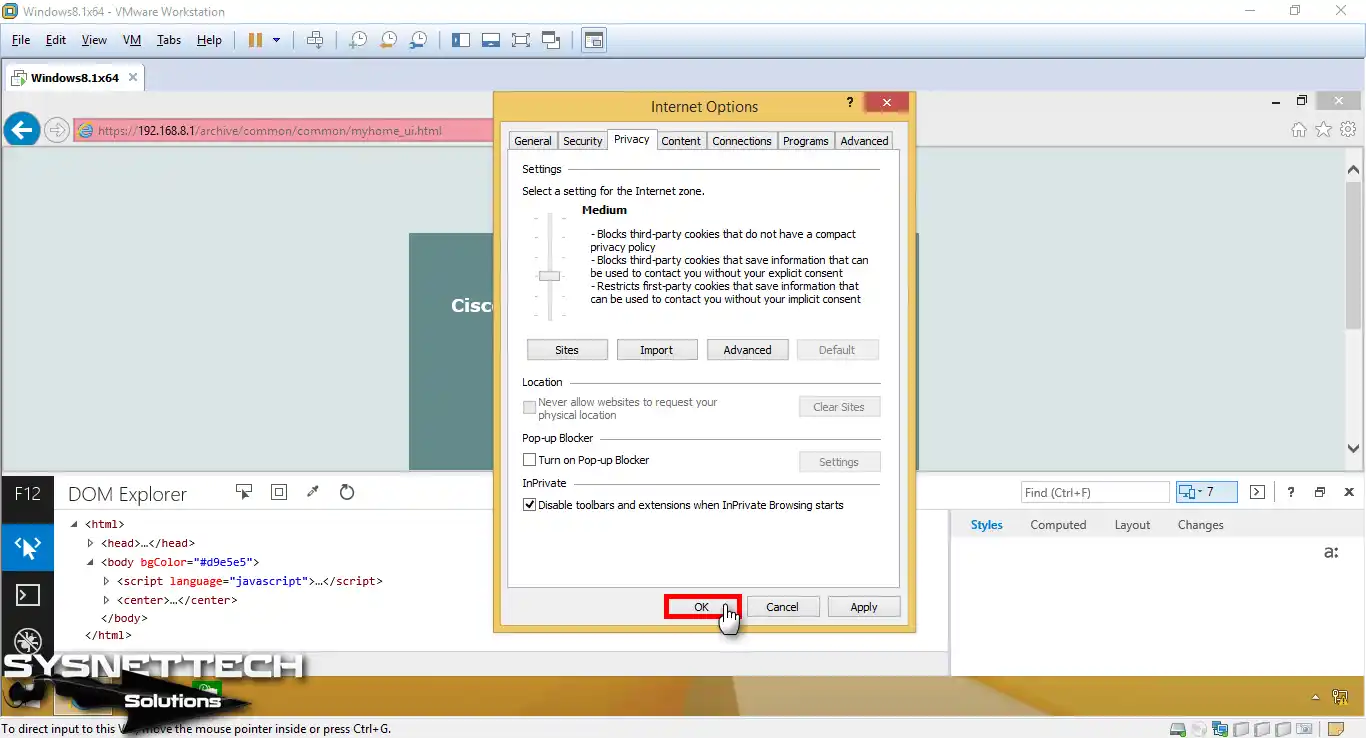
Step 9
To change your IE privacy settings, click OK.
Step 10
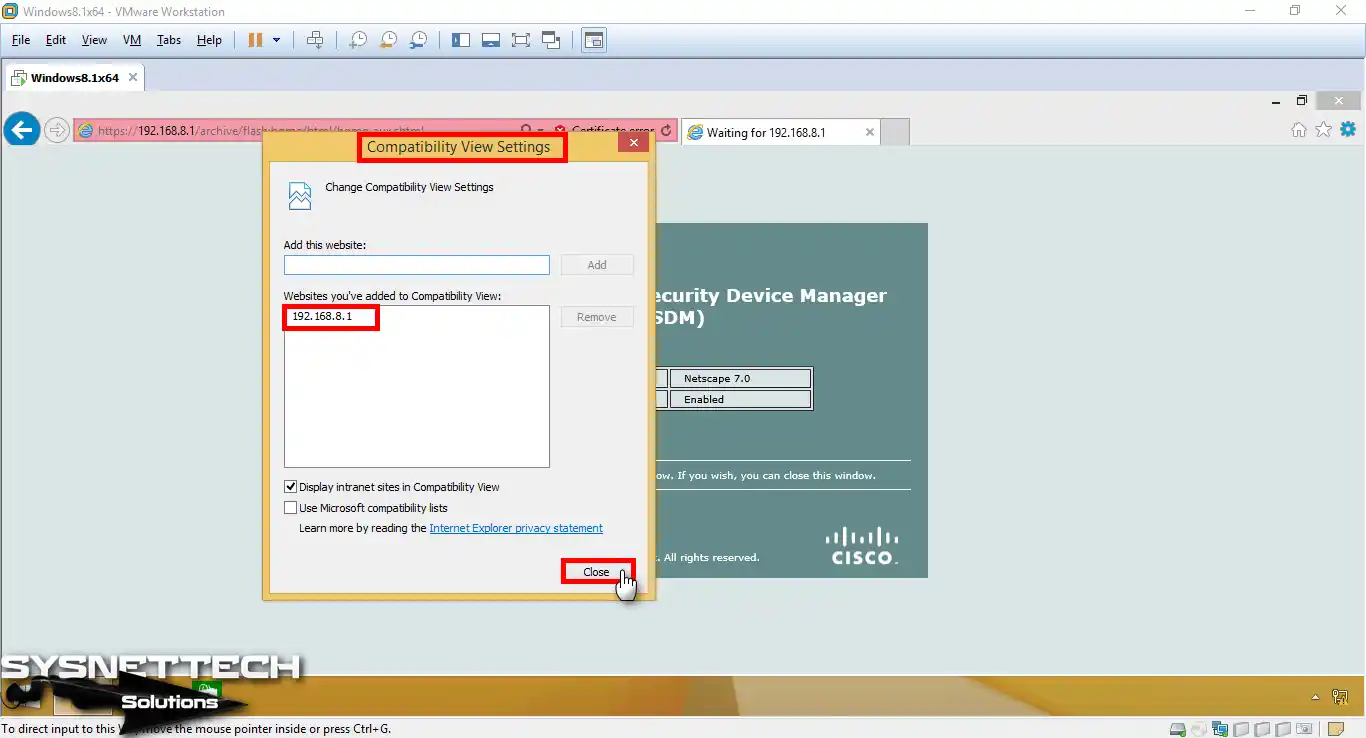
Click the Compatibility View choice by showing IE tools again.

Step 11
Here, add the IP address of your Cisco Router device, 192.168.8.1, to the compatibility list.
10. Access the SDM Software Interface
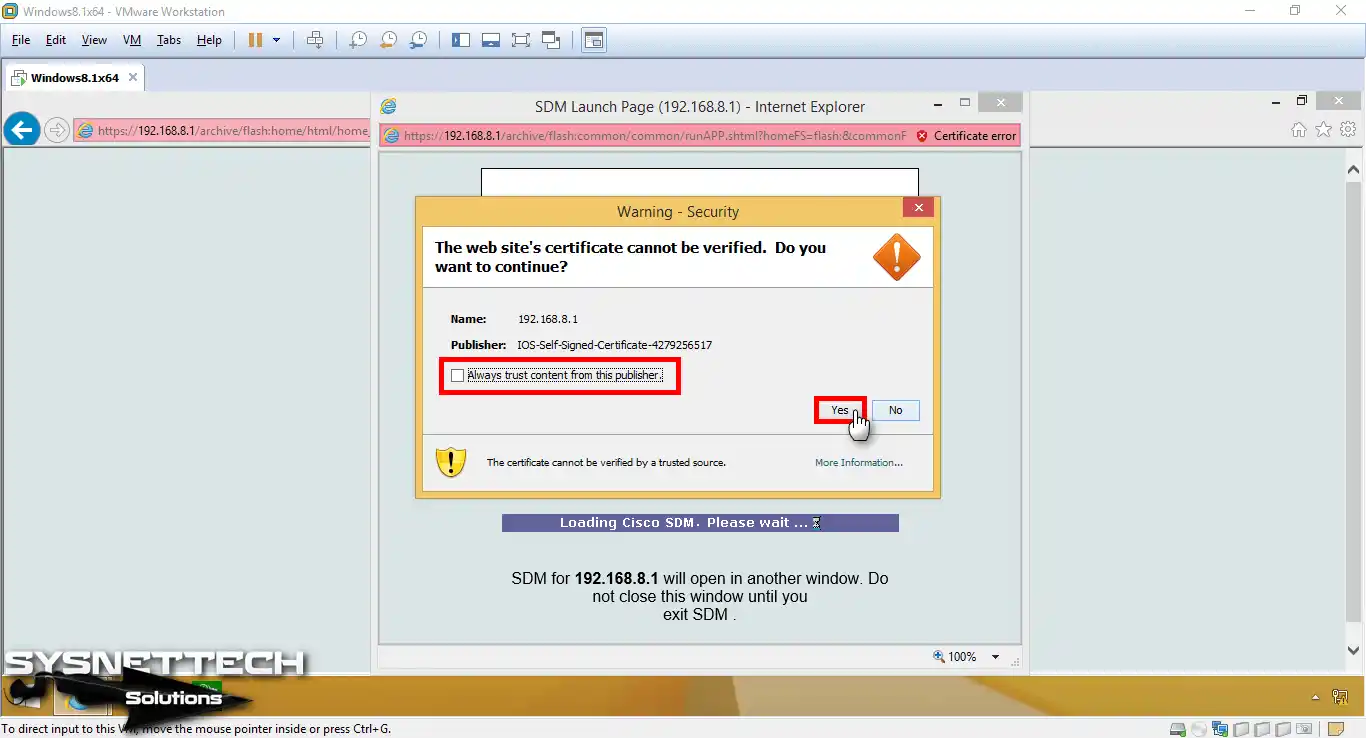
Step 1
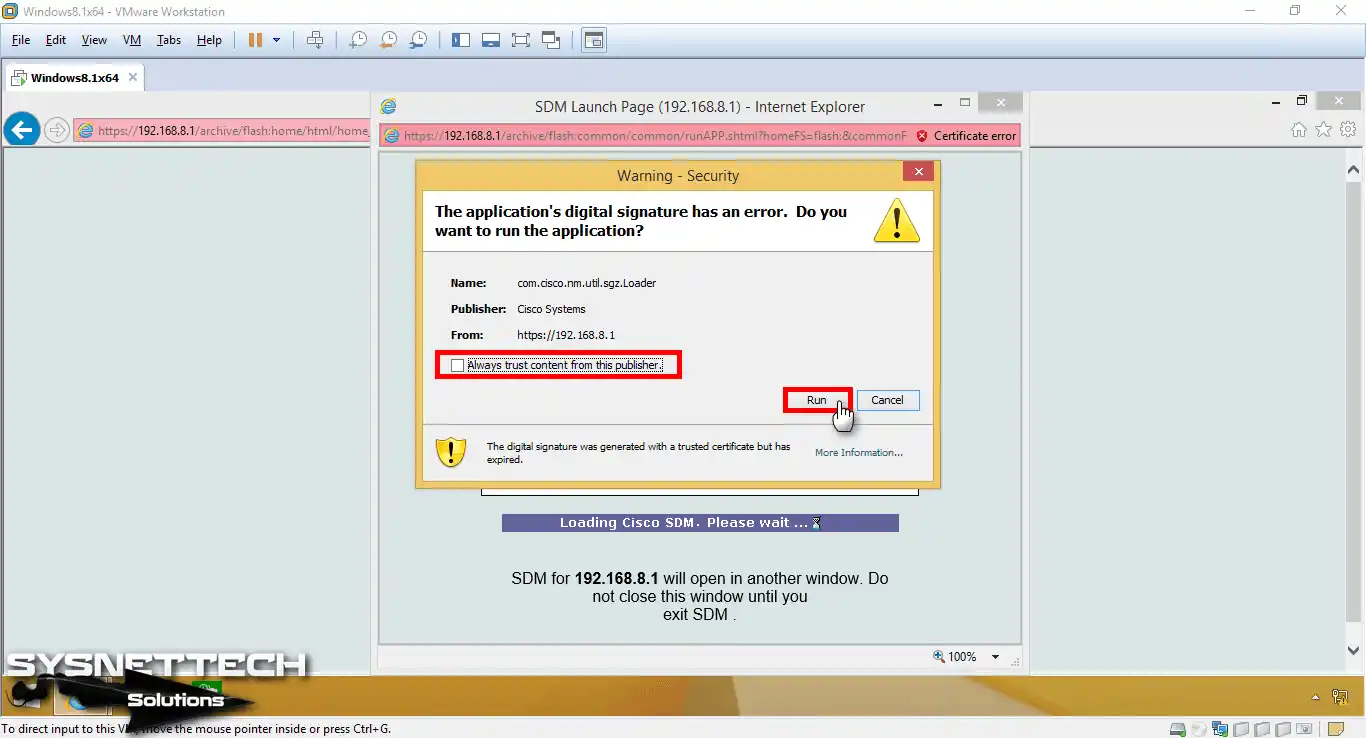
You will get a certificate alert when opening the Router’s control page. To skip this, pick Yes for the “Always trust content from this publisher” choice.
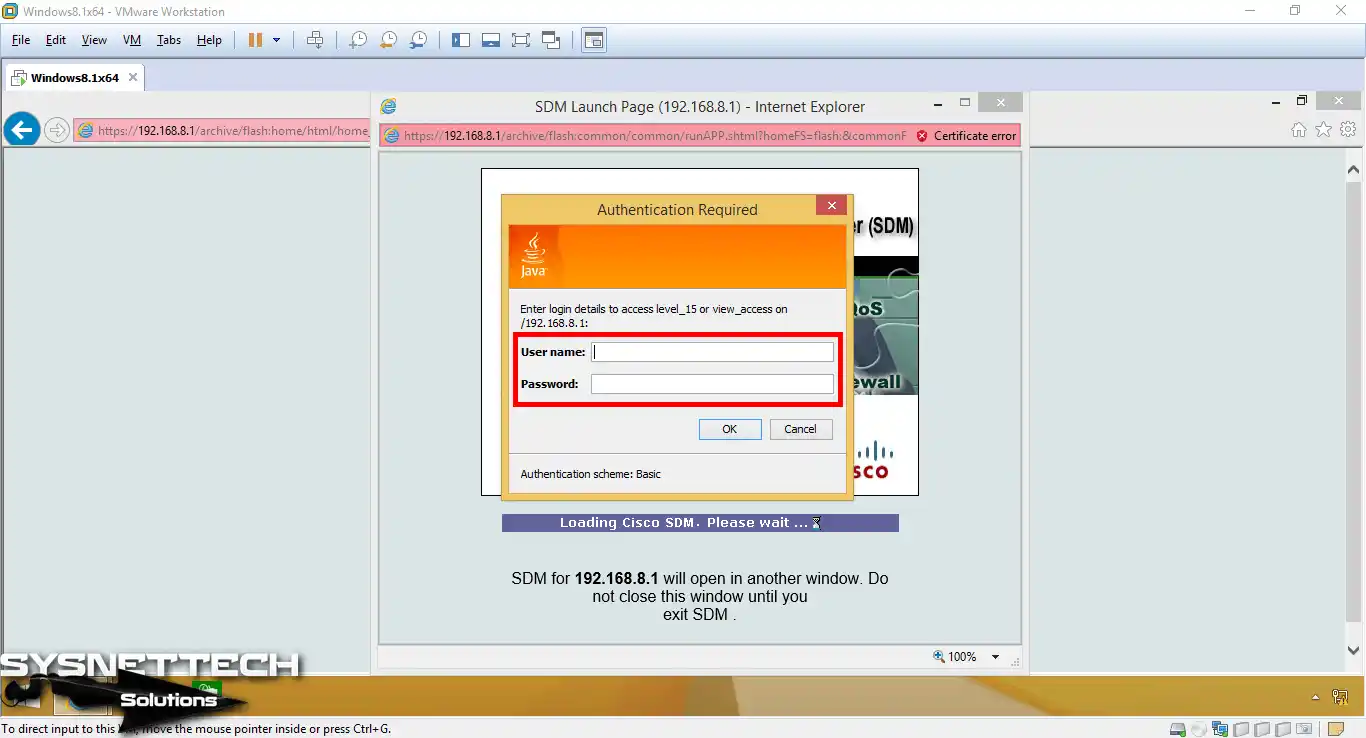
Step 2
You are seeing the Authentication Required screen for Java. Type the account details you made on your Router here.
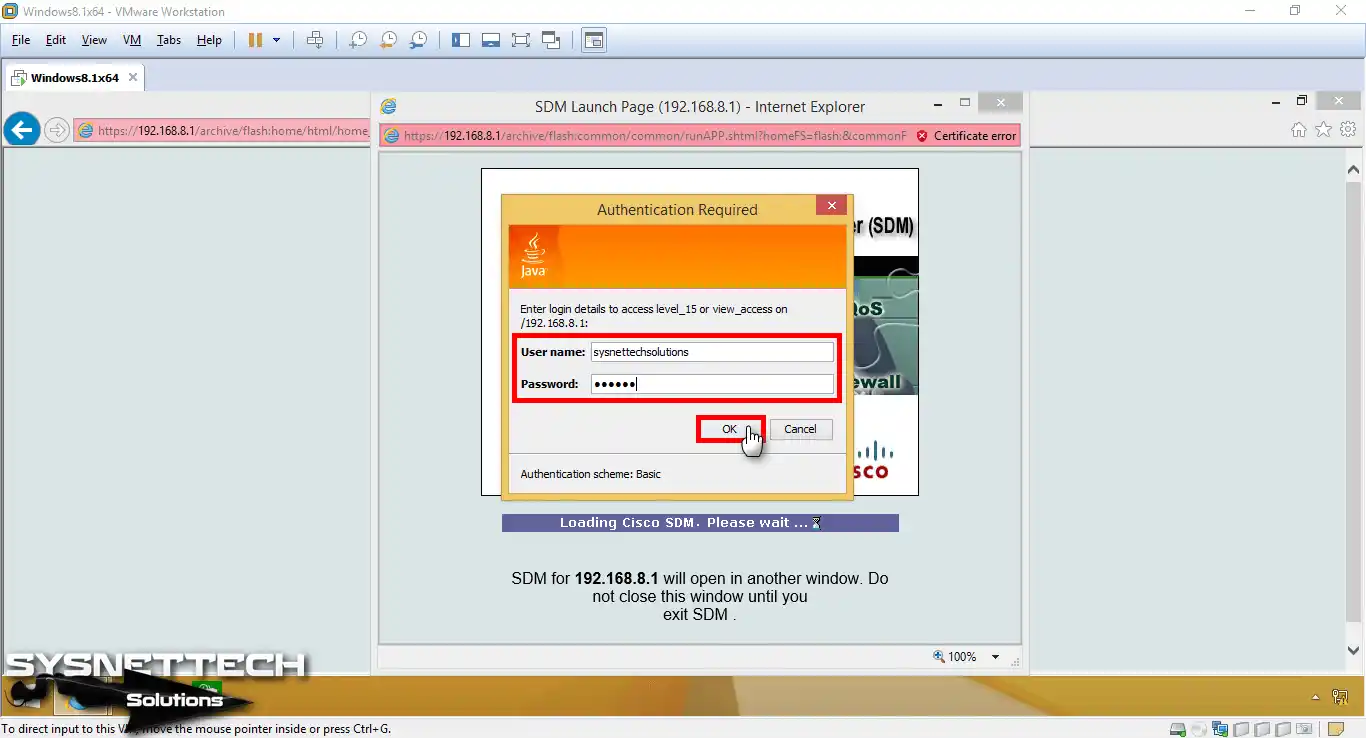
Step 3
Likewise, you might see that I have signed in with the user account I made.
Step 4
In the same error window, recheck the Trust option and click Run.
Step 5
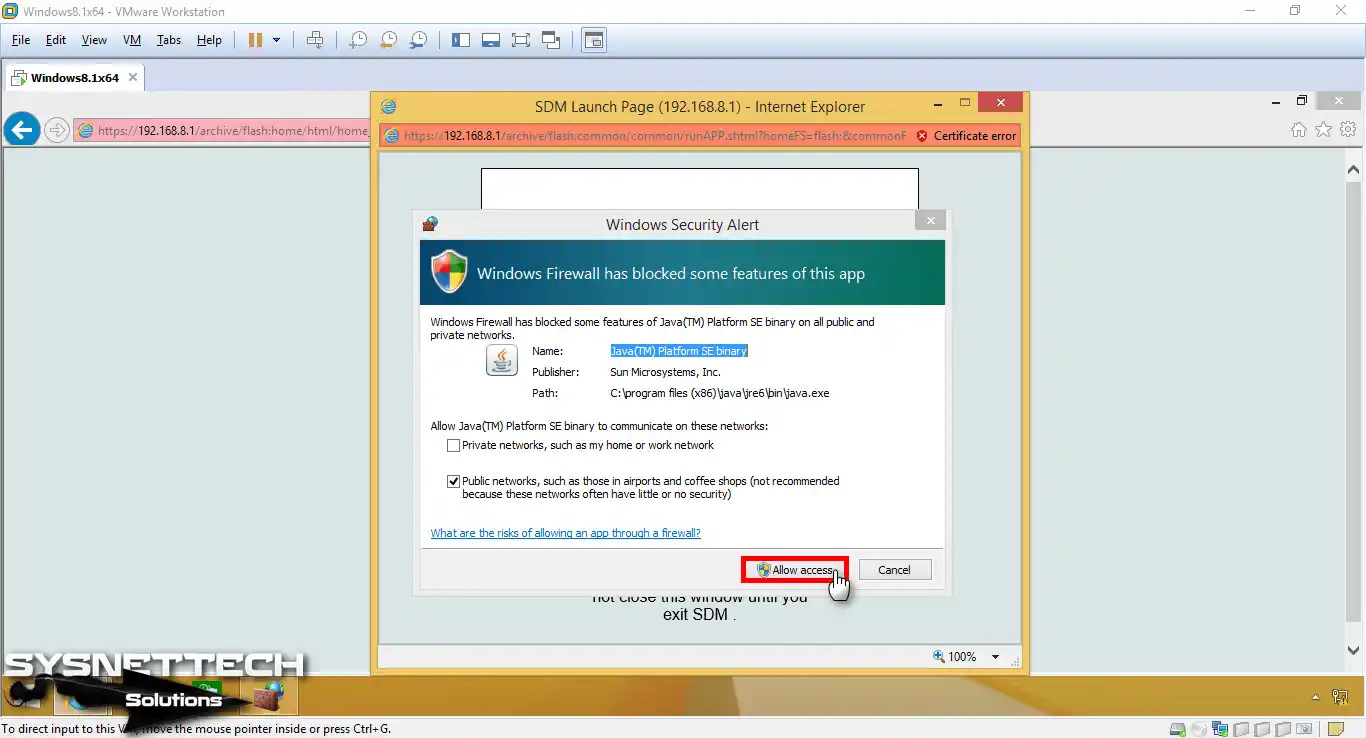
Go ahead with Allow Access in the Windows Security Alert screen.
Step 6
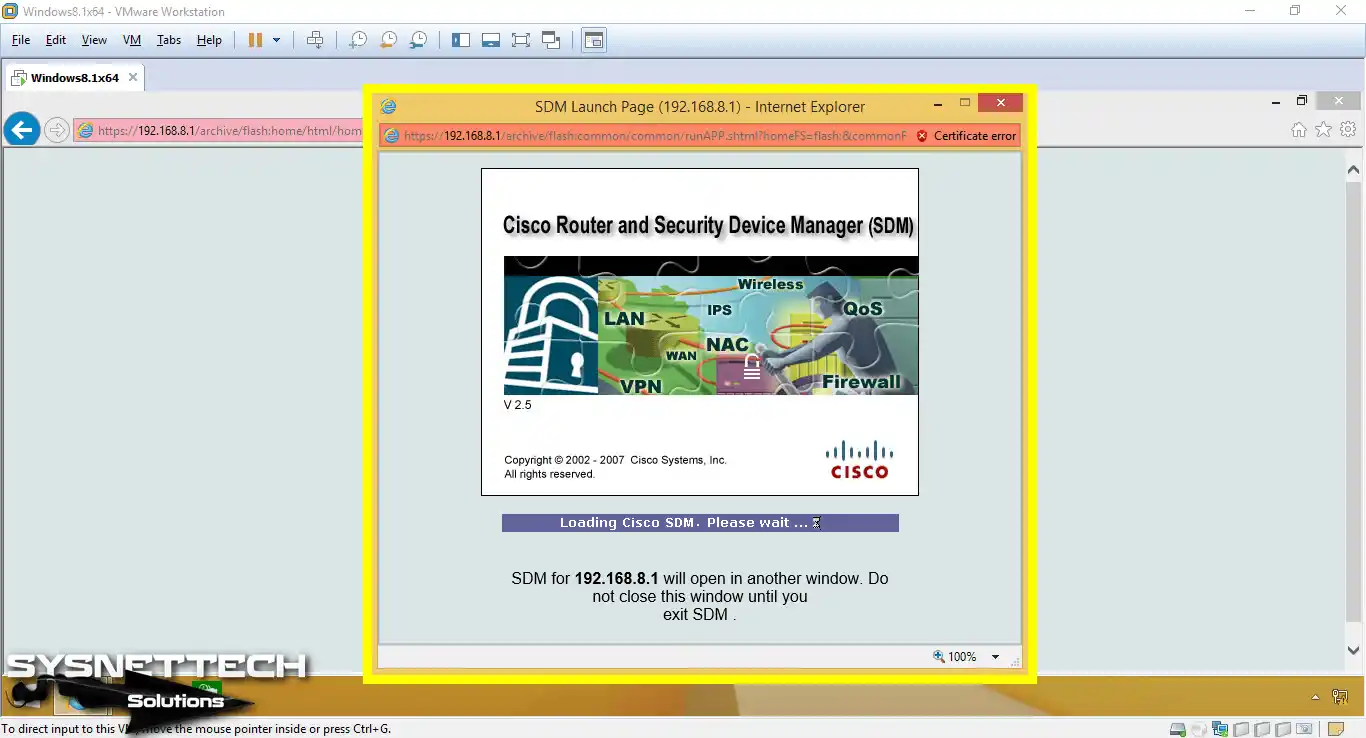
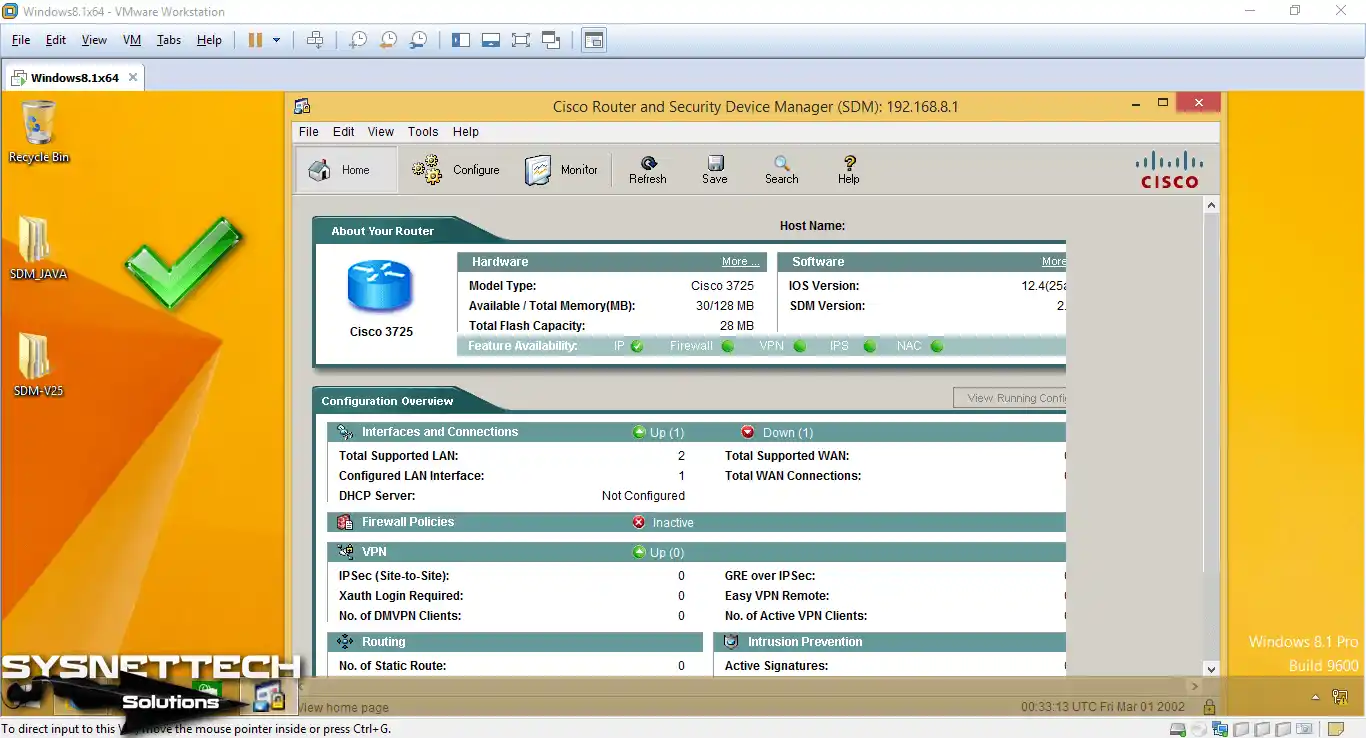
Now, the Cisco Router and Security Device Manager (SDM) are running smoothly!
Step 7
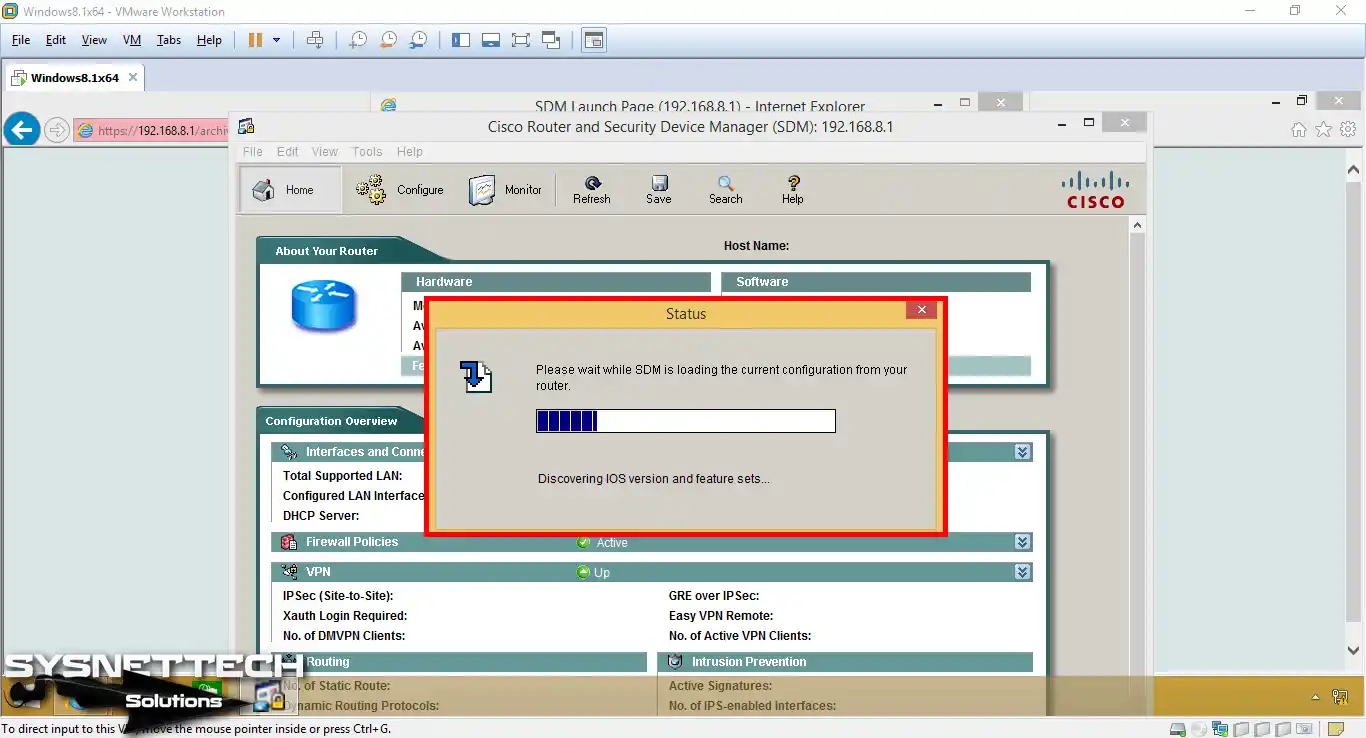
Right now, the SDM program is getting the live setup from the Cisco Router.
Step 8
You can observe that you have successfully installed the SDM software on the Router.
Video
Frequently Asked Questions About Using SDM (FAQ)
- Who uses Cisco SDM?
- What are the benefits of using Security Device Manager?
- What are the system requirements for SDM?
- How do I install SDM?
Conclusion
As you can see, SDM (Security Device Manager) is a helpful tool for Cisco Routers. If you are new or skilled, it greatly helps your networking knowledge.
SDM gives a user time with an easy graphical screen. So, you can turn on most Router features without using CLI text orders. This means your control gets much simpler by skipping hard steps.
Whether you handle simple setups or complex ones, SDM makes work faster. You can easily pick the Express Package or the Full one.
It also makes safety better and gets the most from power with its powerful tools. These parts include VPN setup, firewall control, and network monitoring.

Be the first to share your comment