
In this article, we’ll examine how to configure Virtual Network Editor, which allows you to configure the network settings of virtual machines.
How to Use VMware’s Network Editor to Design More Complex Networks
VM Workstation/Player is a very advanced virtualization program developed by VMware. With the VMware virtualization program, you need to use its tools better to design more advanced network projects.
What is the Virtual Network Editor? It is the VMware network configuration program used to configure the advanced network settings of multiple VMs.
When you install VMware software on your computer, the virtual network card configuration program is also installed. And by default, 3 virtual network adapters are added to the Network Connections section of your computer. These adapters are called VMnet.
The program looks like this:
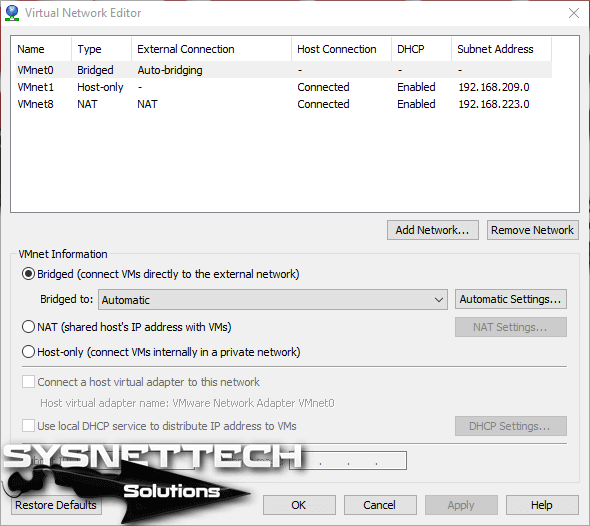
VMware Network Settings
There are 3 options for VMware Workstation network settings. These;
When you create a new virtual machine with VMware, the virtual machine settings are automatically set to NAT. Now, let’s take a step-by-step look at the existing network configuration options.
Bridged (Connect VMs Directly to The External Network)
You can include the machines you are using in the physical network that you created in the VMware Bridged network configuration. For example, if you are using the 192.168.1.0/24 address range when you configure the virtual system as Bridged, the virtual pc will get an automatic IP address from the DHCP server.
If you select Bridged for VMnet on the Network config, you must choose VMnet in the VM.
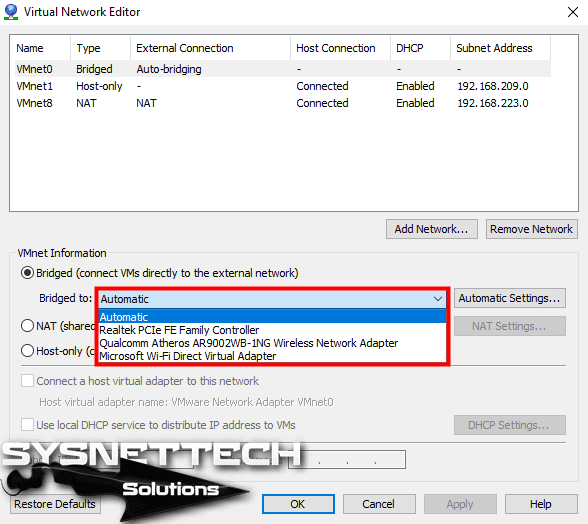
The “Bridged to:” setting refers to the network adapters that are in your physical computer. For example, your laptop computer has an Ethernet and Wifi card. Suppose you automatically configure this option and choose to connect to the 192.168.1.0/24 network with Ethernet. In that case, the program will automatically select Ethernet, and the virtual machines will continue to access the Internet.
In the following image, the editor program shows the existing adapters on your physical computer.
NAT (Shared Host’s IP Address With VMs)
VMware NAT settings are subject to Network Address Translation to connect virtual machines to the Internet. In short, a VM will get a different IP address from your physical (192.168.1.0/24).
When you configure VMnet8 as NAT, you must also select VMnet8 on the machine for network configuration. As a result, the VM will access the Internet via VMnet8.
To configure the port in VMware software, click on the VMnet and then the NAT Settings.
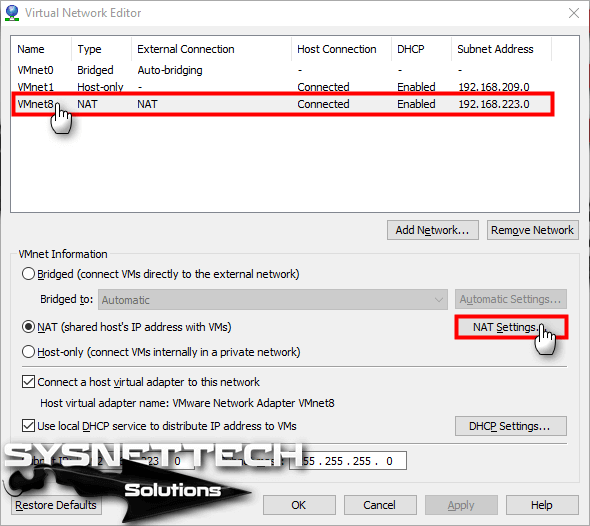
You can forward the port in the NAT Settings window.
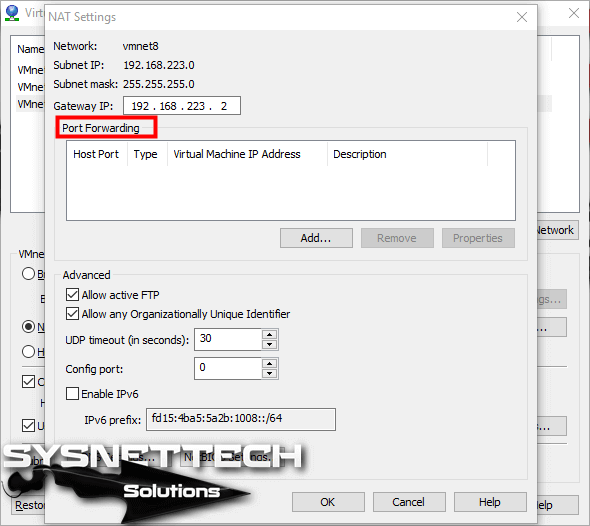
When you click the DHCP Settings button to define a different IP address block for VMnet8 NAT, you can change the block address from the Starting IP Address and Ending IP Address in the opened window.

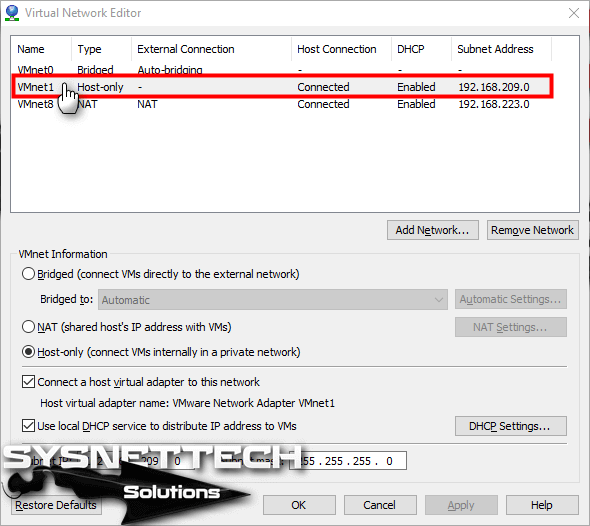
Host-Only (Connect VMs Internally in a Private Network)
A host-only configuration is used to allow VMs to communicate with each other and to include them in the physical network. Host-only configuration is often used for advanced network topologies. For example, you can use the Host-Only configuration to separate machines into different networks to understand better the Cisco Routers with the GNS3 simulator program you used while preparing for Cisco exams.
If you configure the Host-Only option for a particular VMnet on the adapter configuration program, you must also select that VMnet on the VM.
For detailed information about this network type, please visit https://kb.vmware.com/s/article/1018697.
Conclusion
In this article, we have reviewed how to configure the network settings of the VMware virtualization program. In our following articles, we’ll review VMware’s network settings more extensively. Thanks for following us!

2 People Shared Their Experience
Nice content and helpful
Thank you very much for your nice comment.