
Adding a Layer 2 Switch to GNS3 can significantly improve your practice sessions if you prepare for Cisco pass exams. Using a network device such as an L2 Switch involves creating a new project, selecting its type, and configuring its settings. Also, this device lets you connect your virtual computers or other network devices.
After setting up the switch, you can use various switching concepts such as VLAN, STP, and EtherChannel in your topology. In short, you can gain valuable experience and improve your skills before taking the genuine exam by simulating devices used in the real world.
Importance of a Layer 2 Switch in GNS3 Networking
A Layer 2 switch is a network appliance that works at the Data Link layer in the OSI model (Layer 2). This means that it uses MAC addresses to send messages between devices on the network. Primarily, it links devices on the web and helps them talk to each other.
Layer 2 switches are essential parts of today’s computer networks. They make things go fast and prevent the network from getting too busy by sending traffic only to the right places.
Also, L2 devices help network managers split networks and better manage how traffic moves around. They use VLANs (Virtual Local Area Networks) to do this. Without this device, keeping a network stable and working well would be hard.
Using a Layer 2 Switch on GNS3
Once you install GNS3 on your PC, things like Cisco Switch or Router don’t automatically come with it. So, you need to set up these devices yourself.
For instance, if you want to add a Layer 2 Switch into GNS3, you must start by getting the IOS image. After that, you add it from the QEMU part of the program.
If you’re getting ready for Cisco exams, practicing with L2 devices like switches is critical to learning about switching.
When setting up a Layer 2 switch, you might only use some cool things physical devices can do. That’s because some IOS images don’t support every feature.
For instance, after putting in a vIOS Switch image, you can set up things like VLAN, VTP, and STP configurations.
How to Add and Configure an L2 Switch in GNS3
First, click the button below to download the image of Switch (vIOS-L2.vmdk).
1. Add L2 Switch Image to GNS3
Step 1
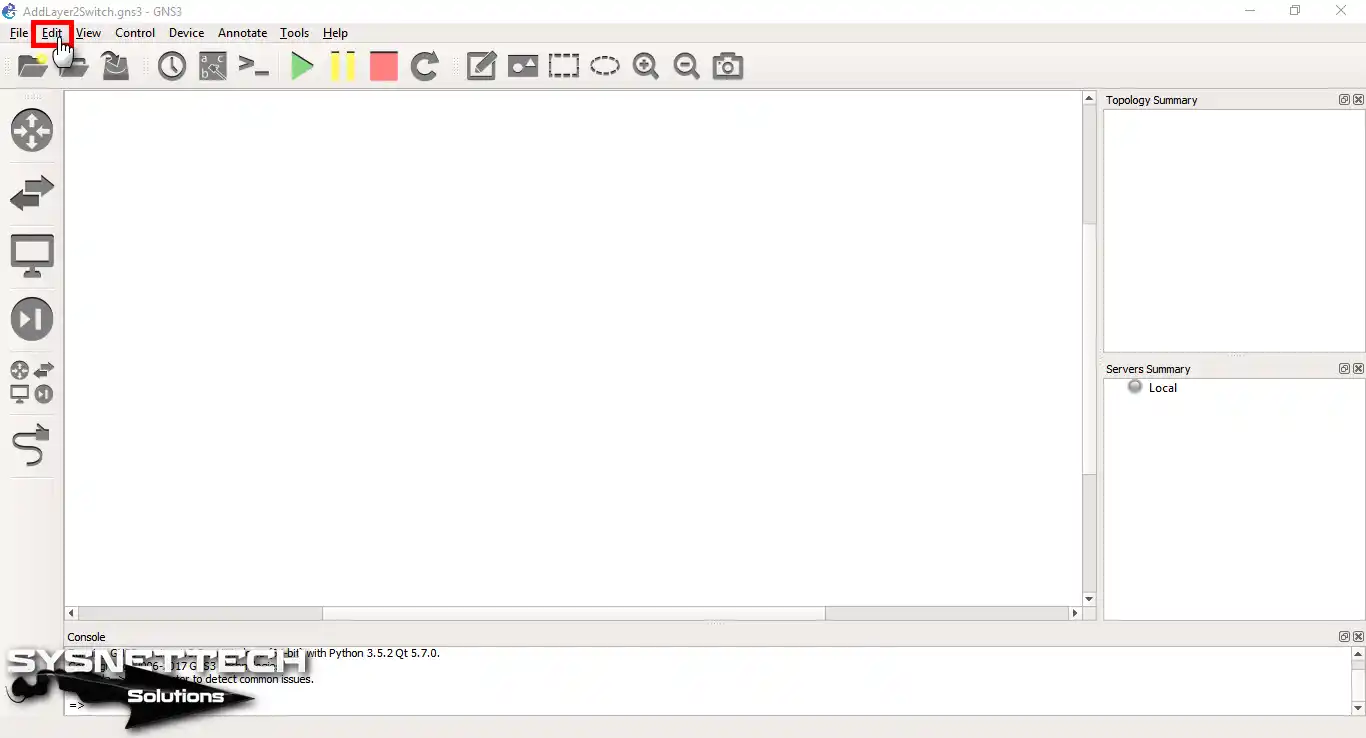
To use the Switch IOS file, first download it and then open the GNS3 emulator program. Once the program is open, click on the Edit button.
Step 2
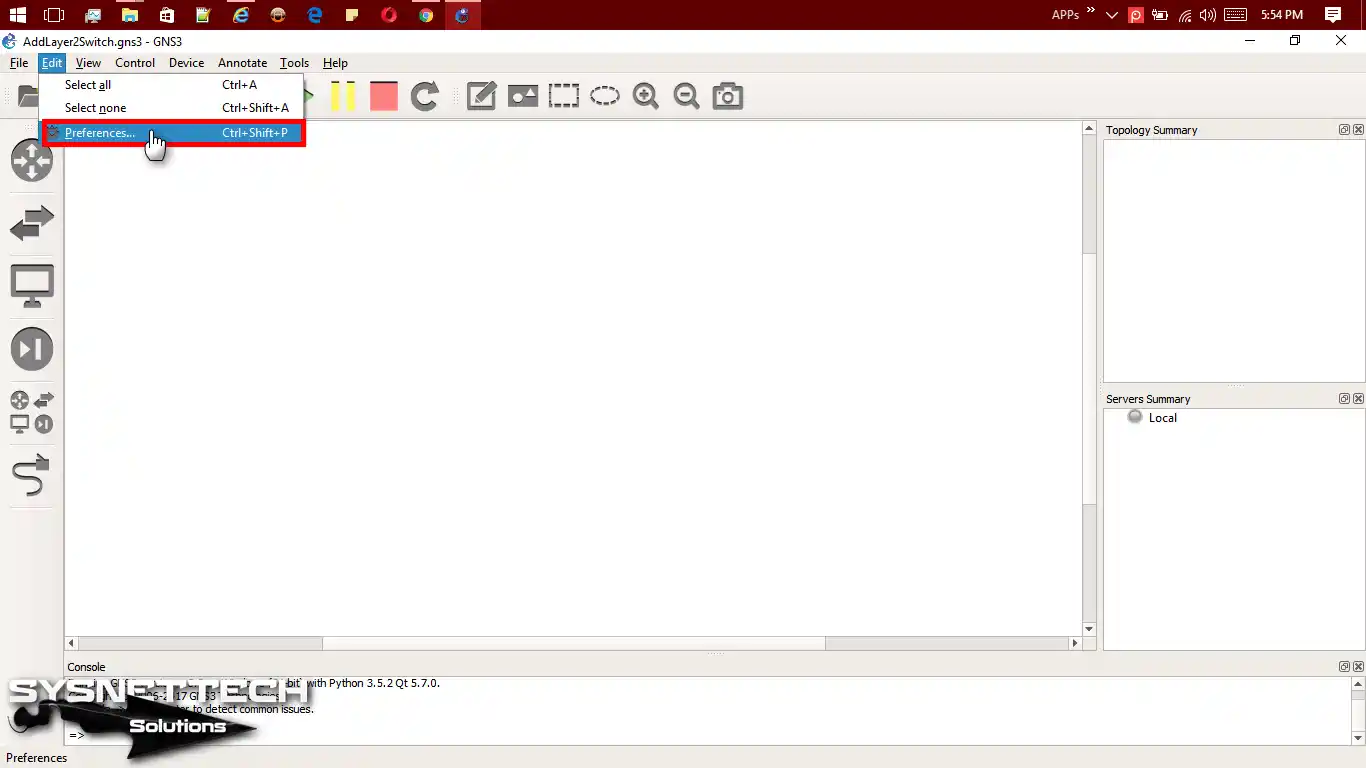
To access the Preferences settings, go to the Edit menu and click on it.
Step 3
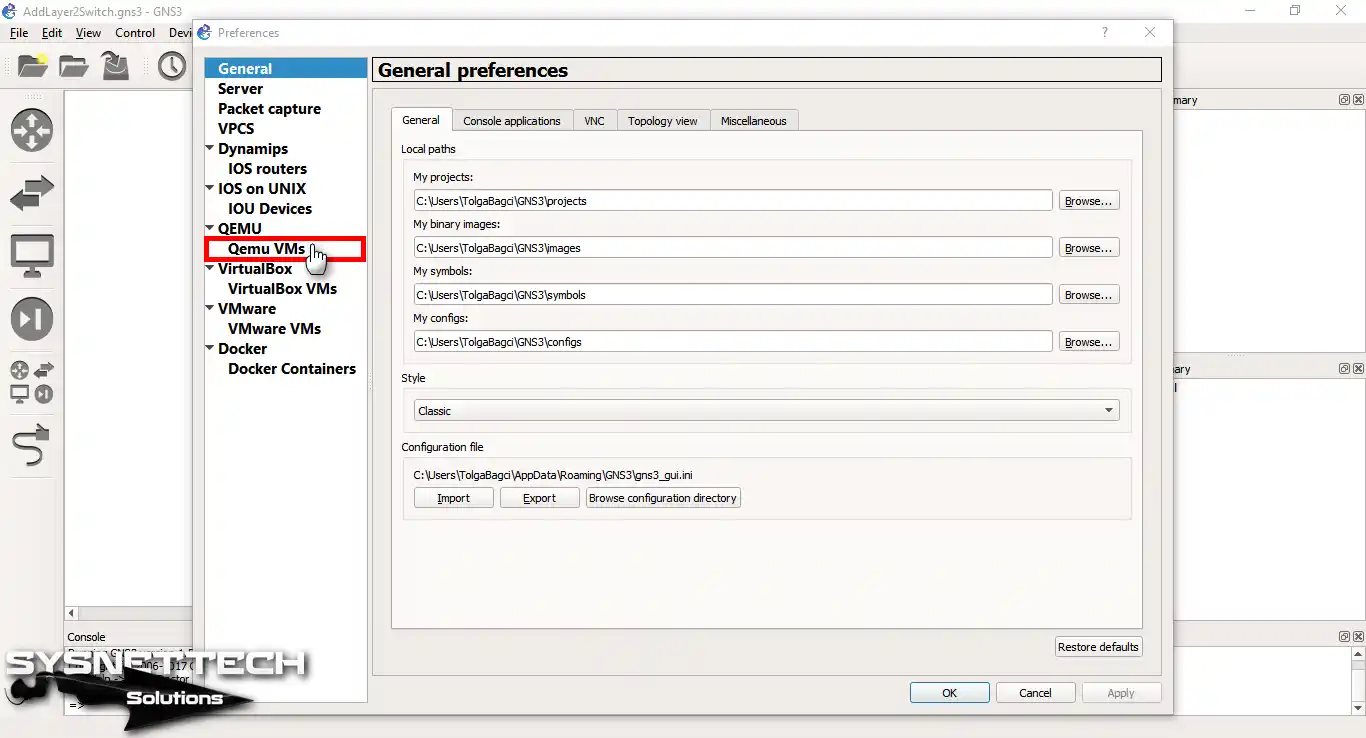
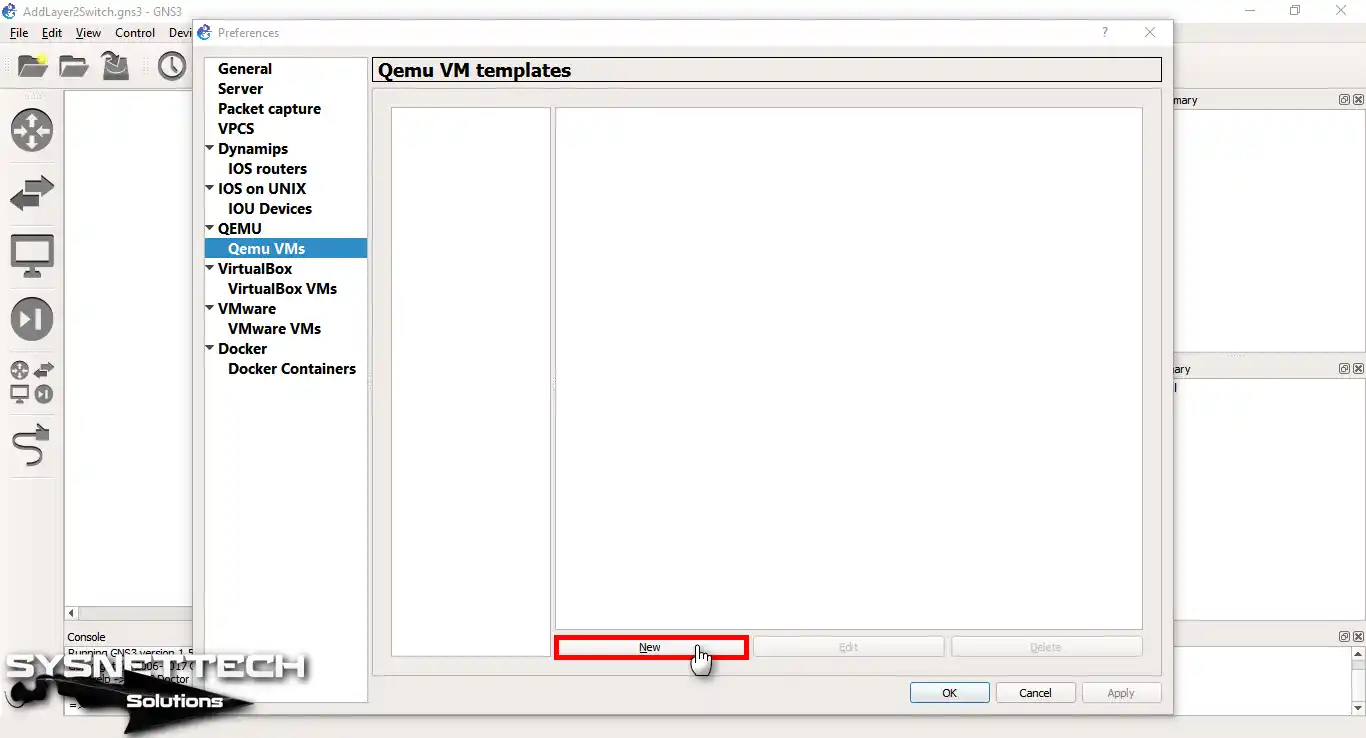
To find QEMU virtual machines in the General Preferences, go to the QEMU tab and pick QEMU VMs.
Step 4
To make a new QEMU virtual machine template, click the New button.
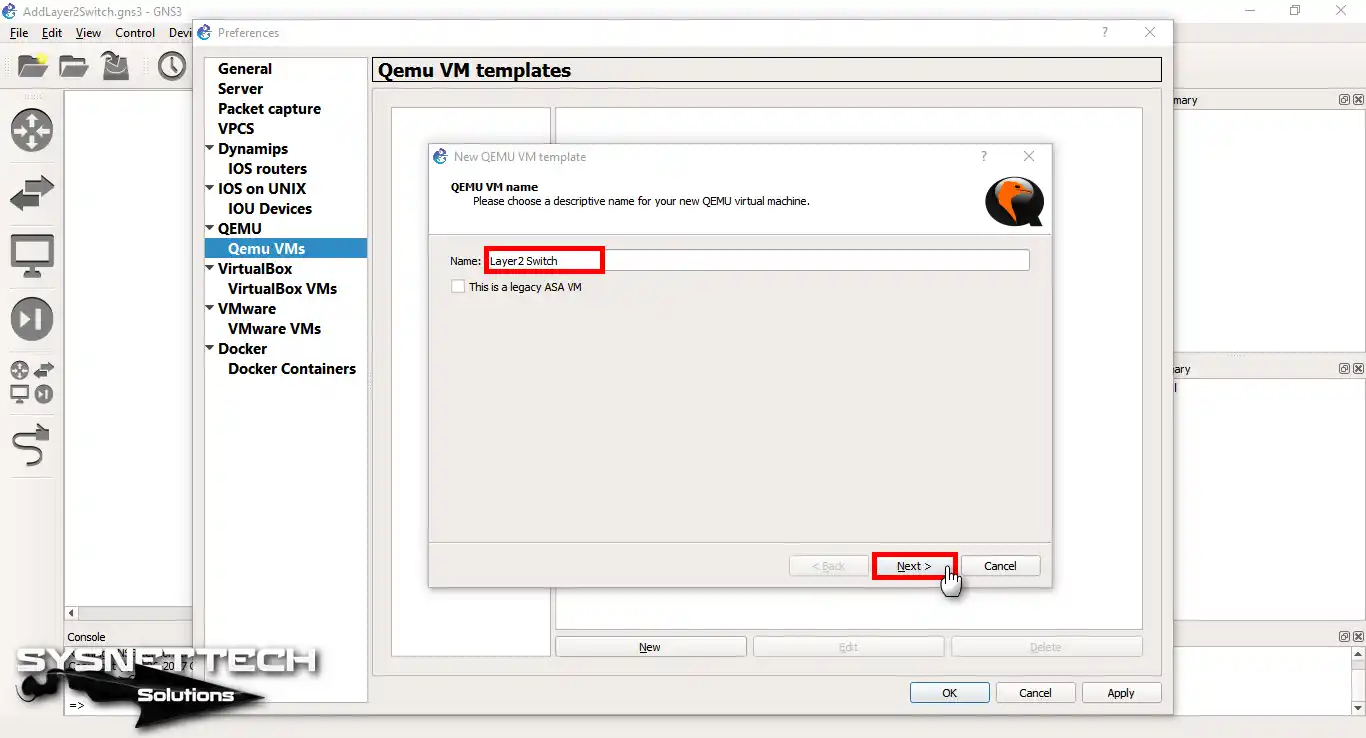
Step 5
Please enter a name for the Layer 2 Switch in the Qemu VM name window.
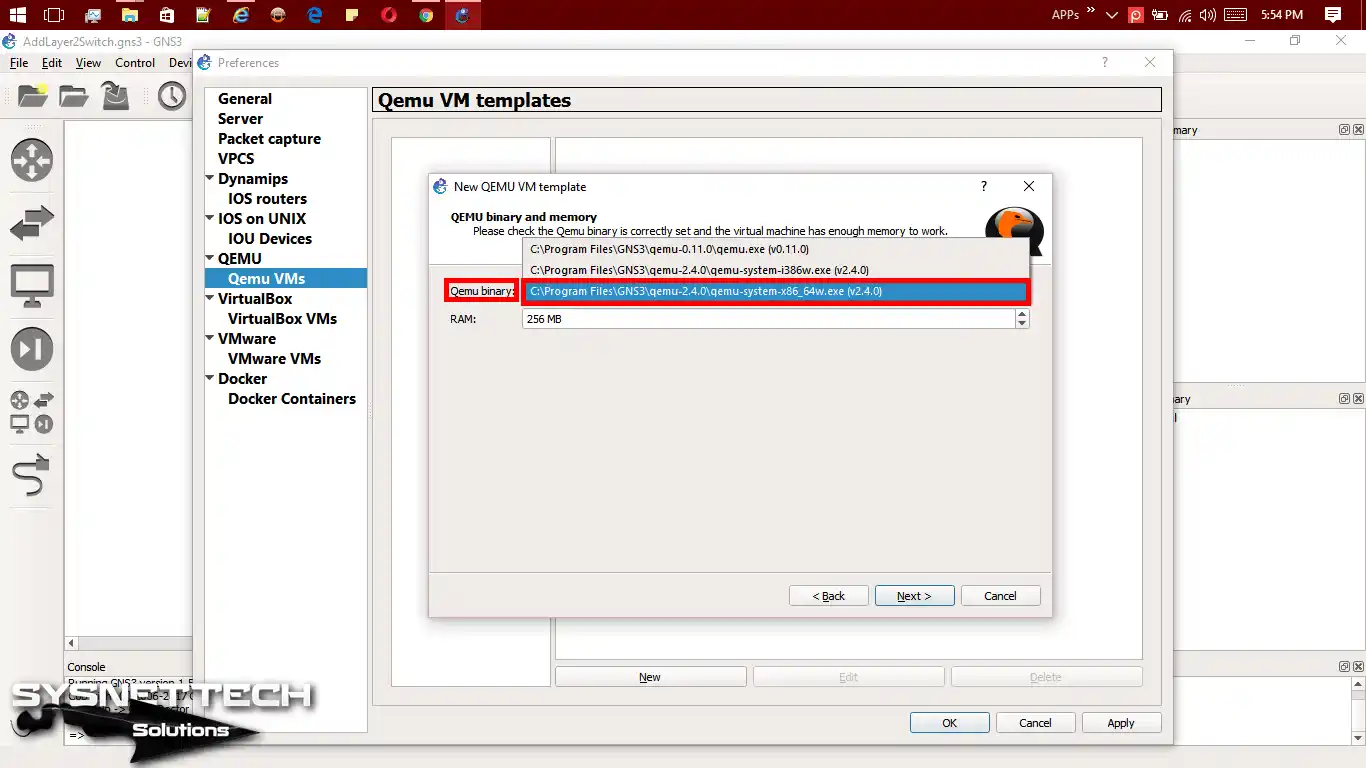
Step 6
In the Qemu settings for the binary and memory, choose options carefully. If your operating system is 64-bit, select the relevant option. Refer to the picture below for guidance.
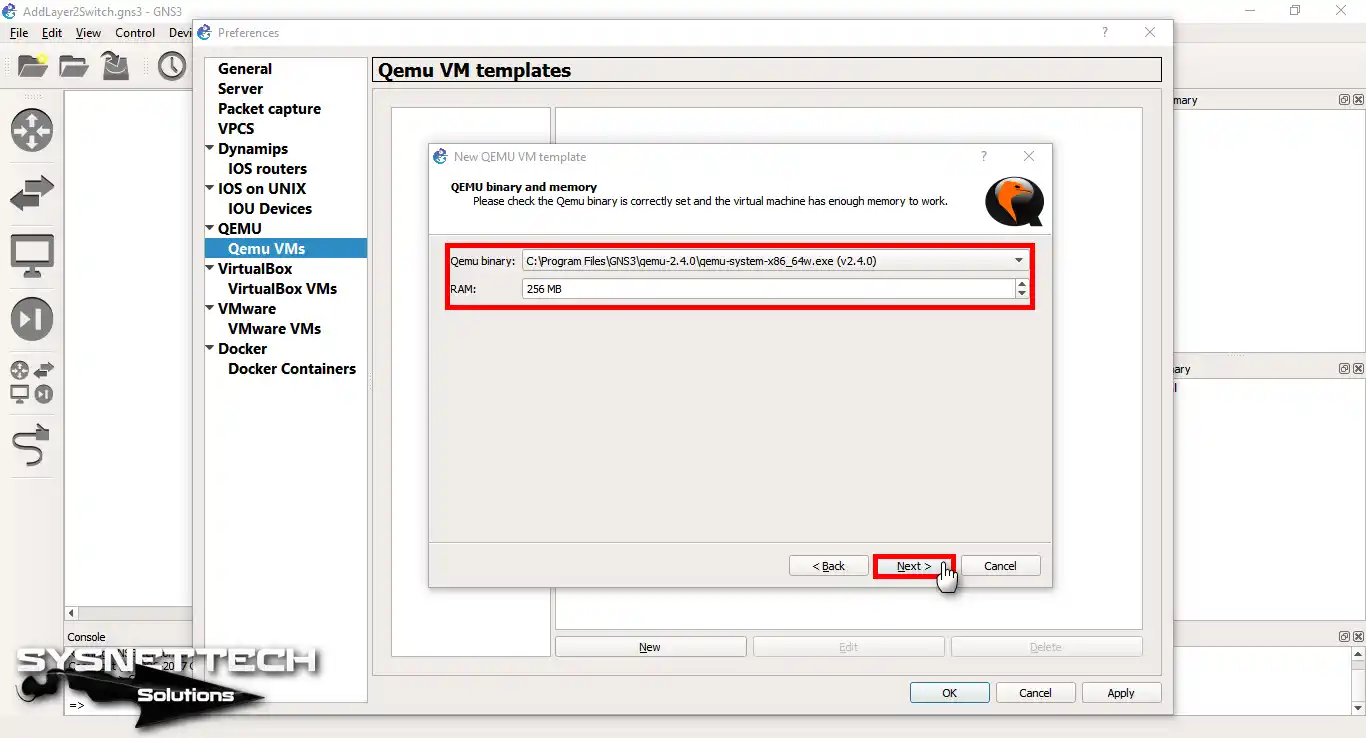
Step 7
Also, set how much RAM the switch should have in this window and click Next.
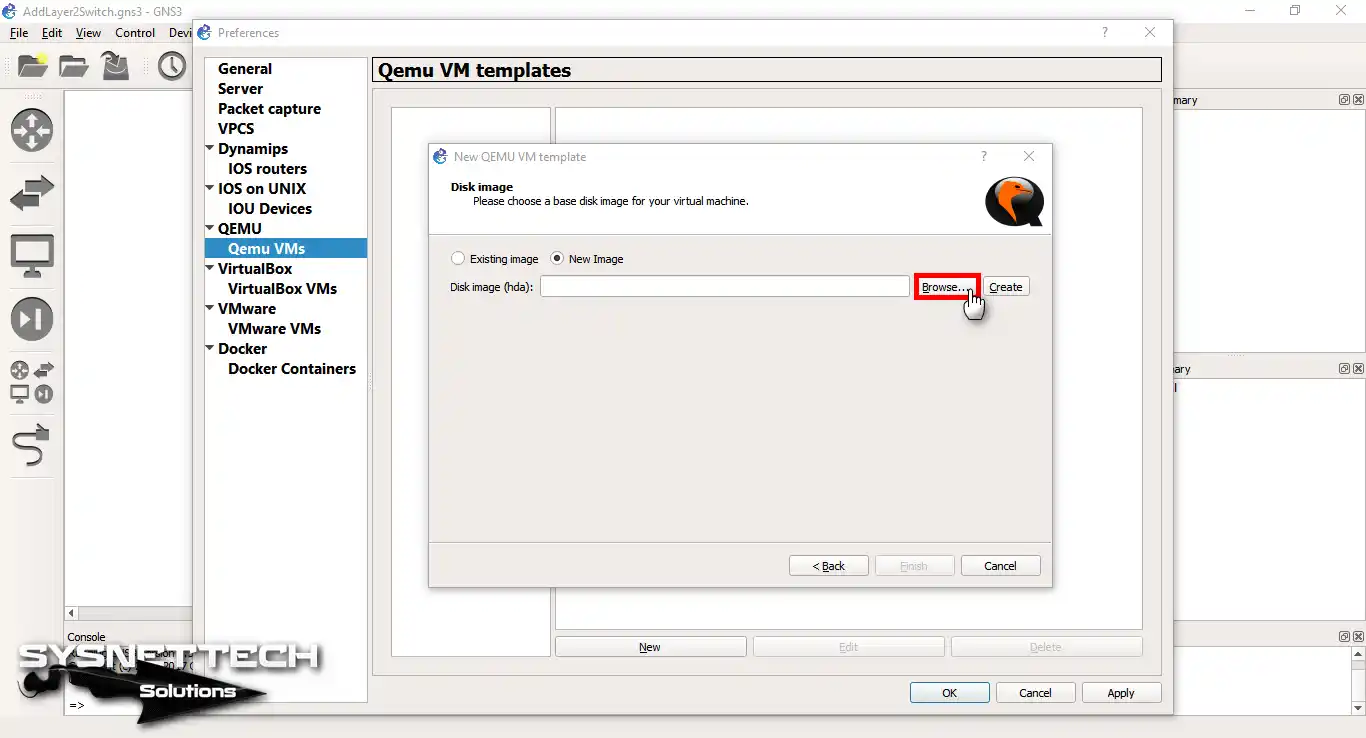
Step 8
To select a new image, click the “New Image” option and then the “Browse” button.
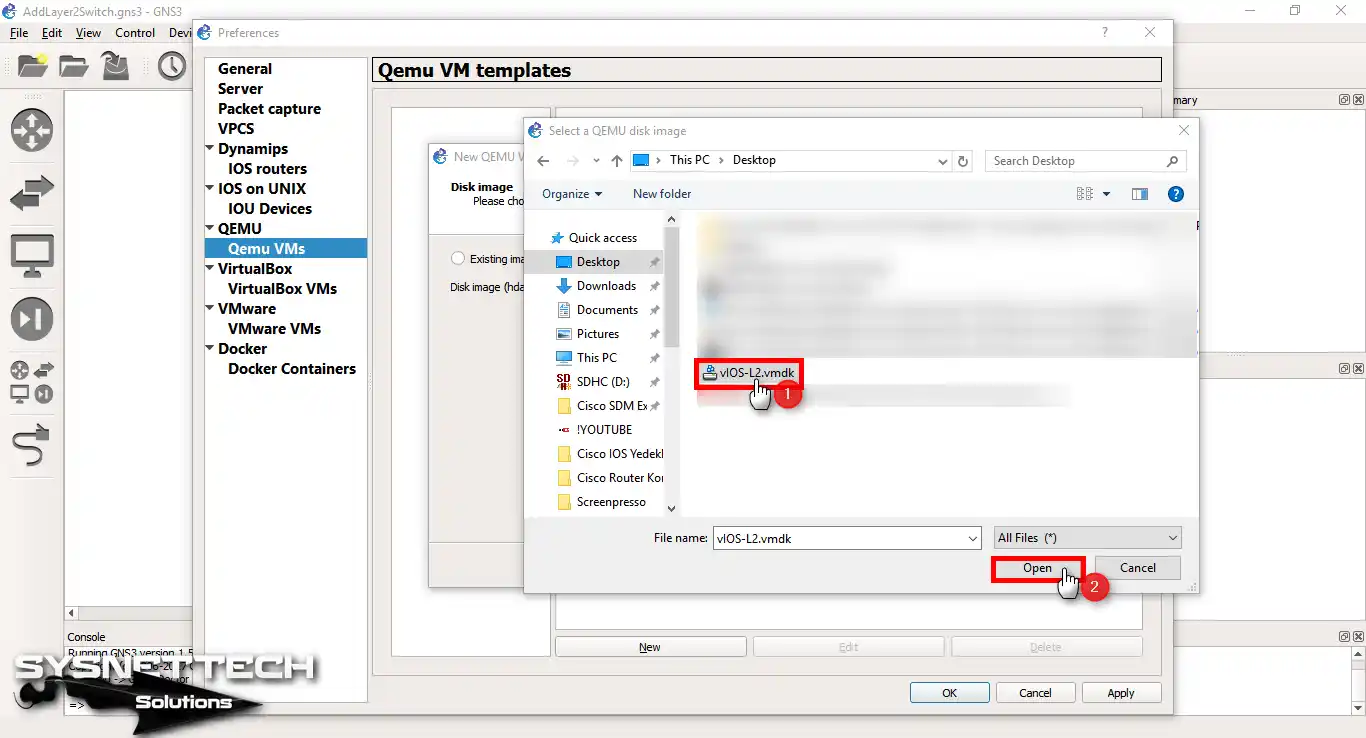
Step 9
Choose the vIOS-L2.vmdk file you downloaded, then click Open in the pop-up window.
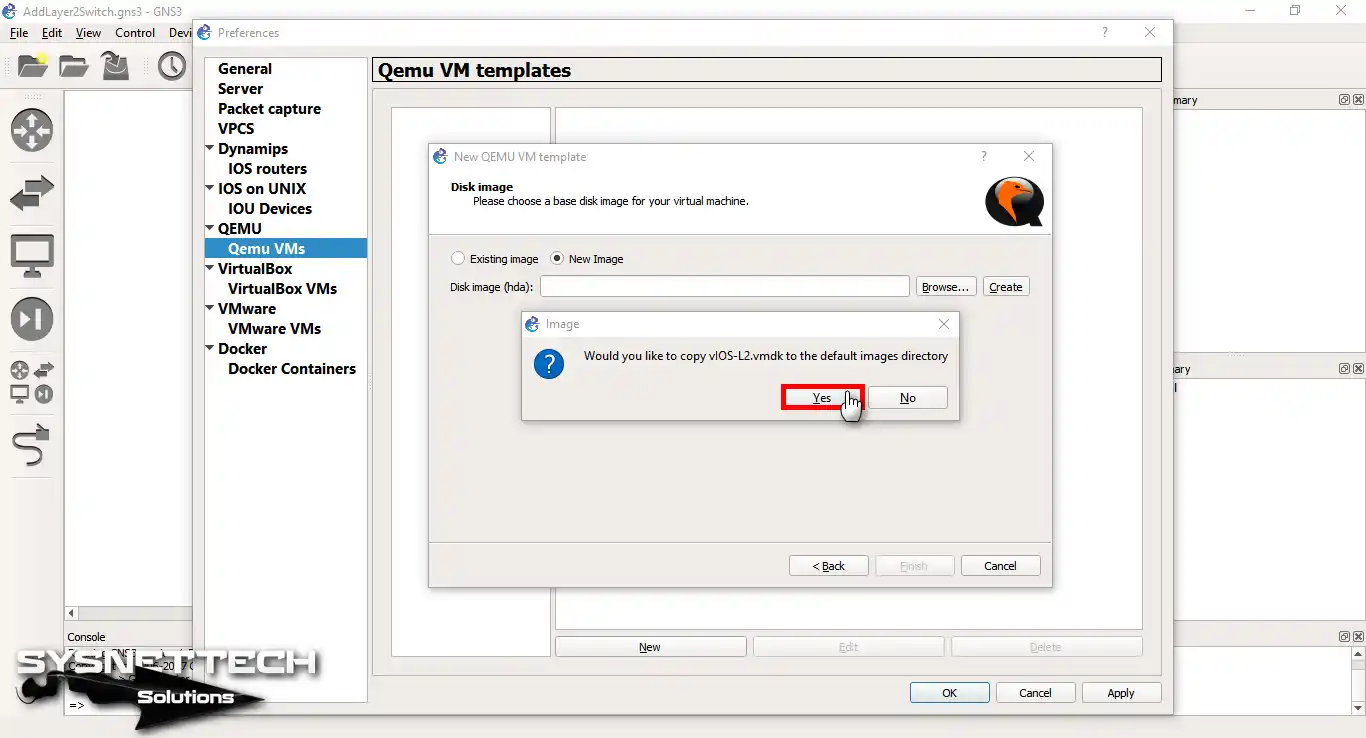
Step 10
Next, confirm the addition by clicking “Yes” to start copying.
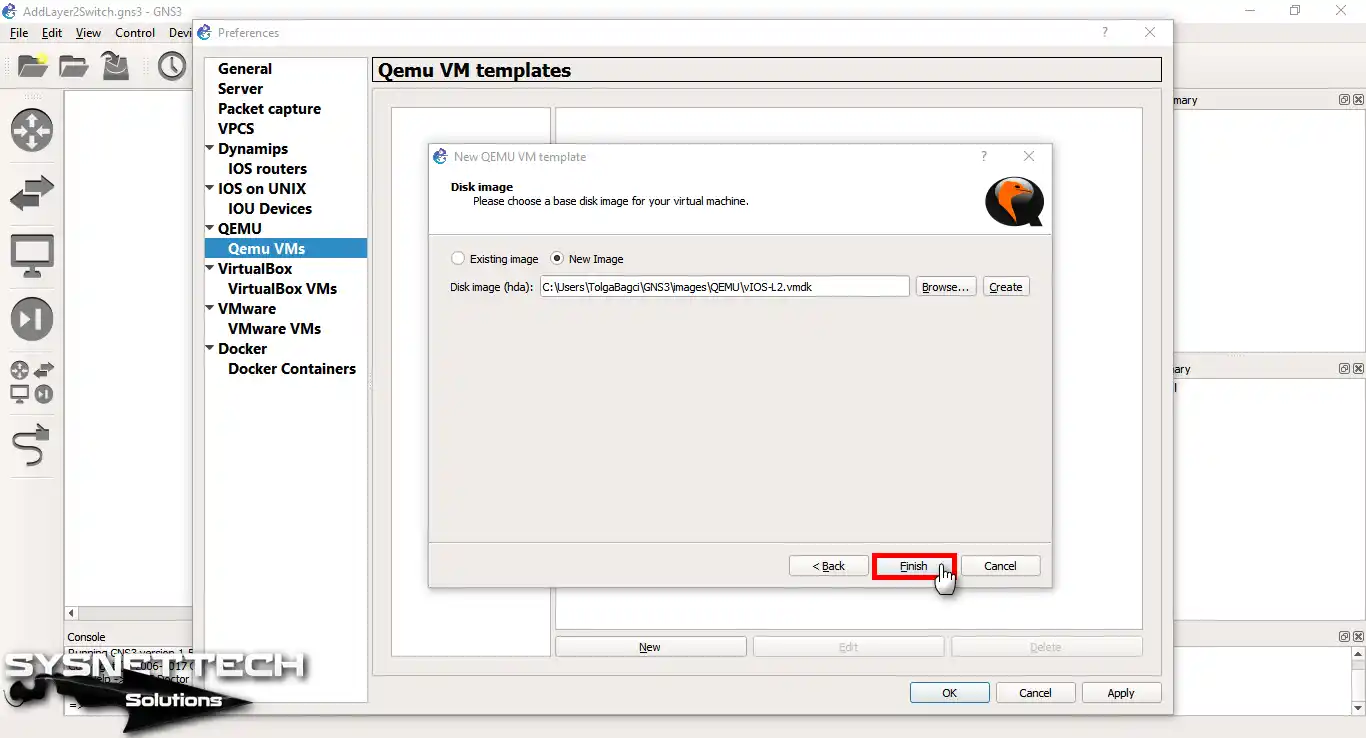
Step 11
Once you have identified the position of the image, click on the “Finish” button.
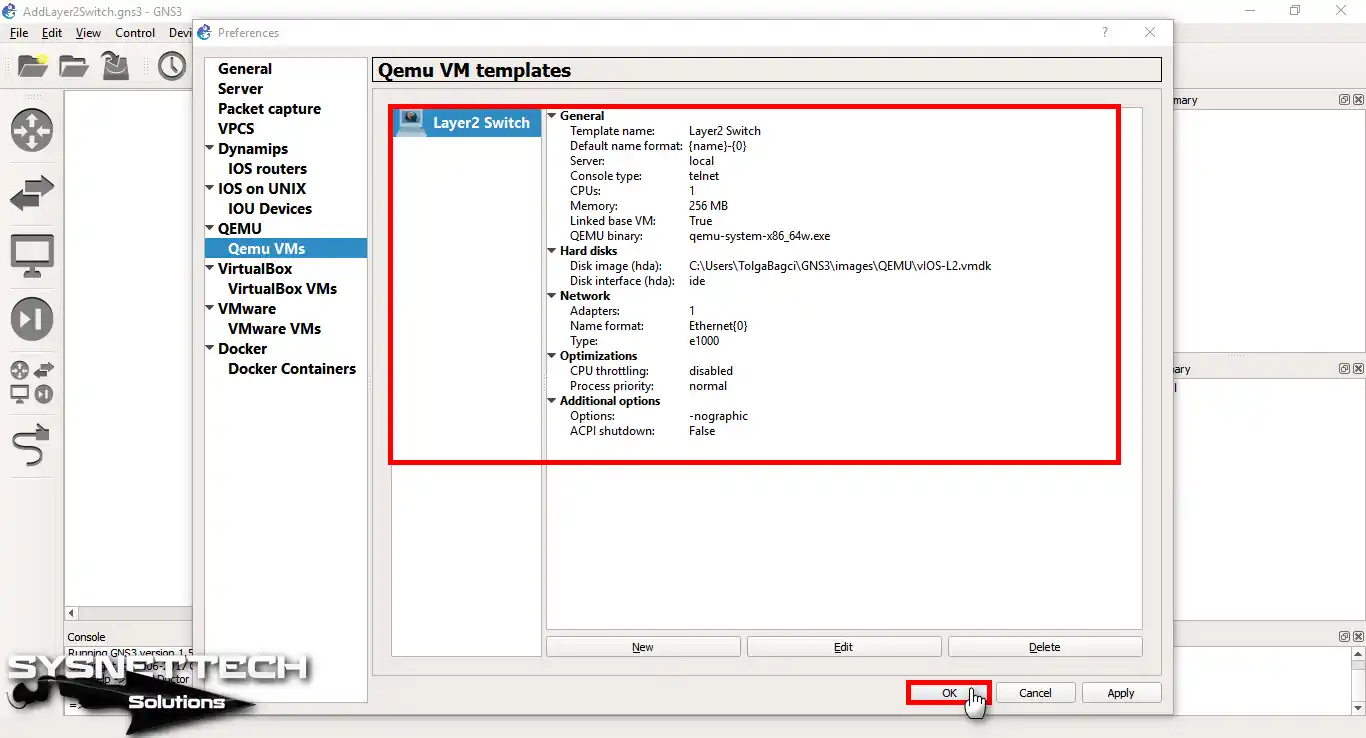
Step 12
The Qemu VM Templates window confirms the successful placement of the Layer 2 Switch.
2. Configure Layer 2 Switch Settings in GNS3
Step 1
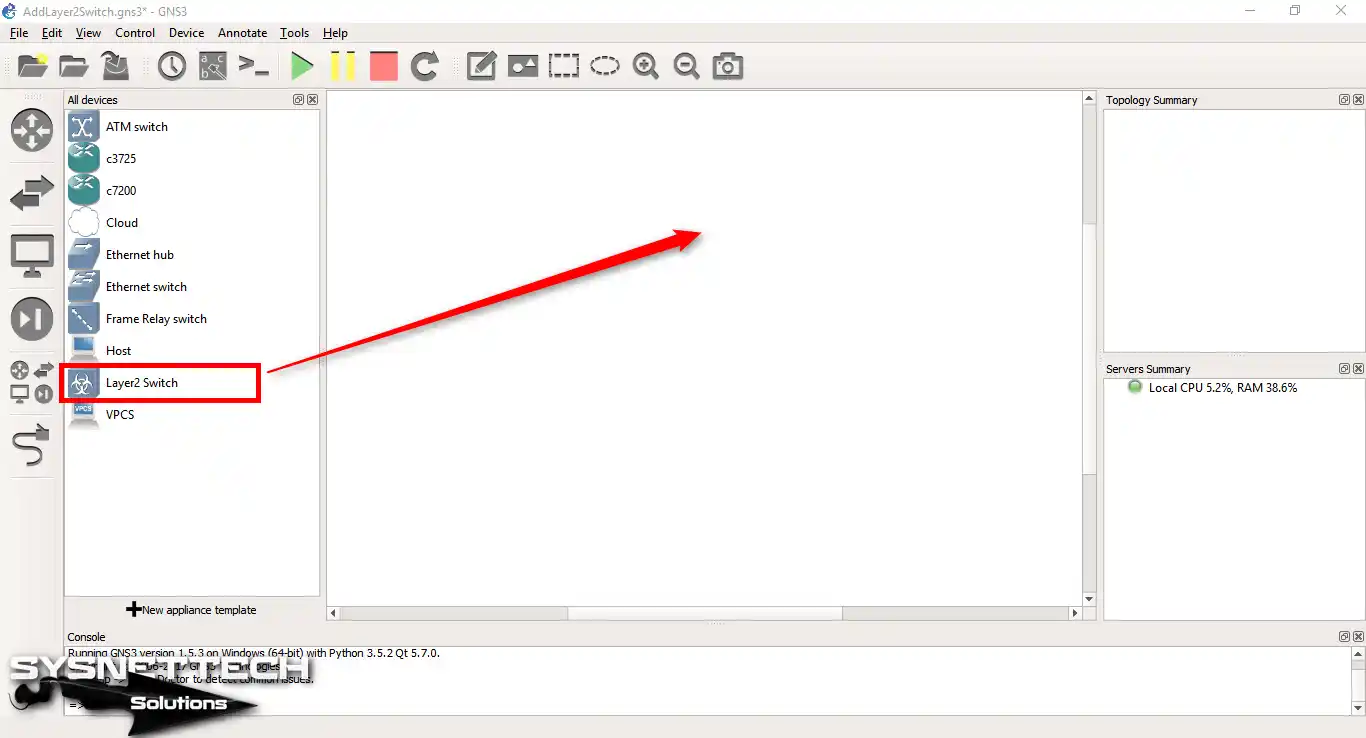
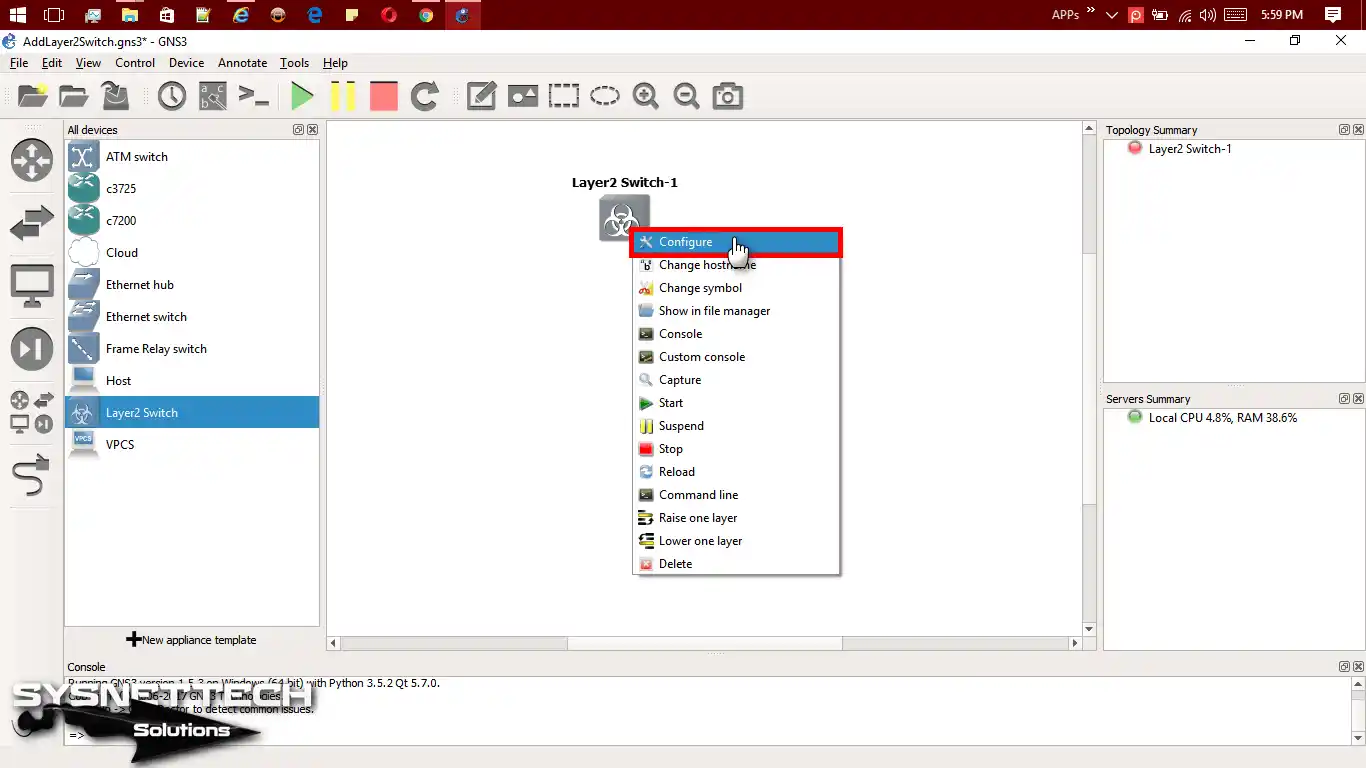
Right-click on the Layer 2 Switch from the Devices section.
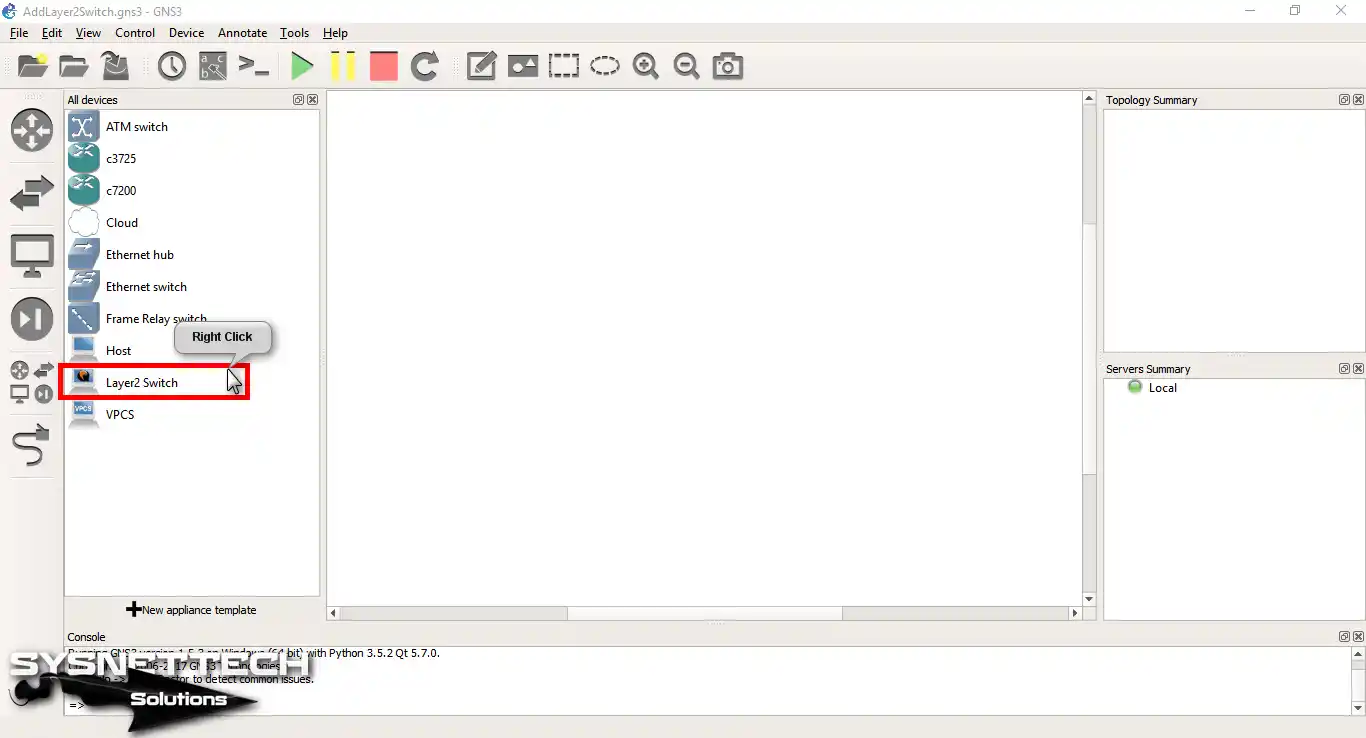
Step 2
Please press the Configure Template button to change the template’s appearance.
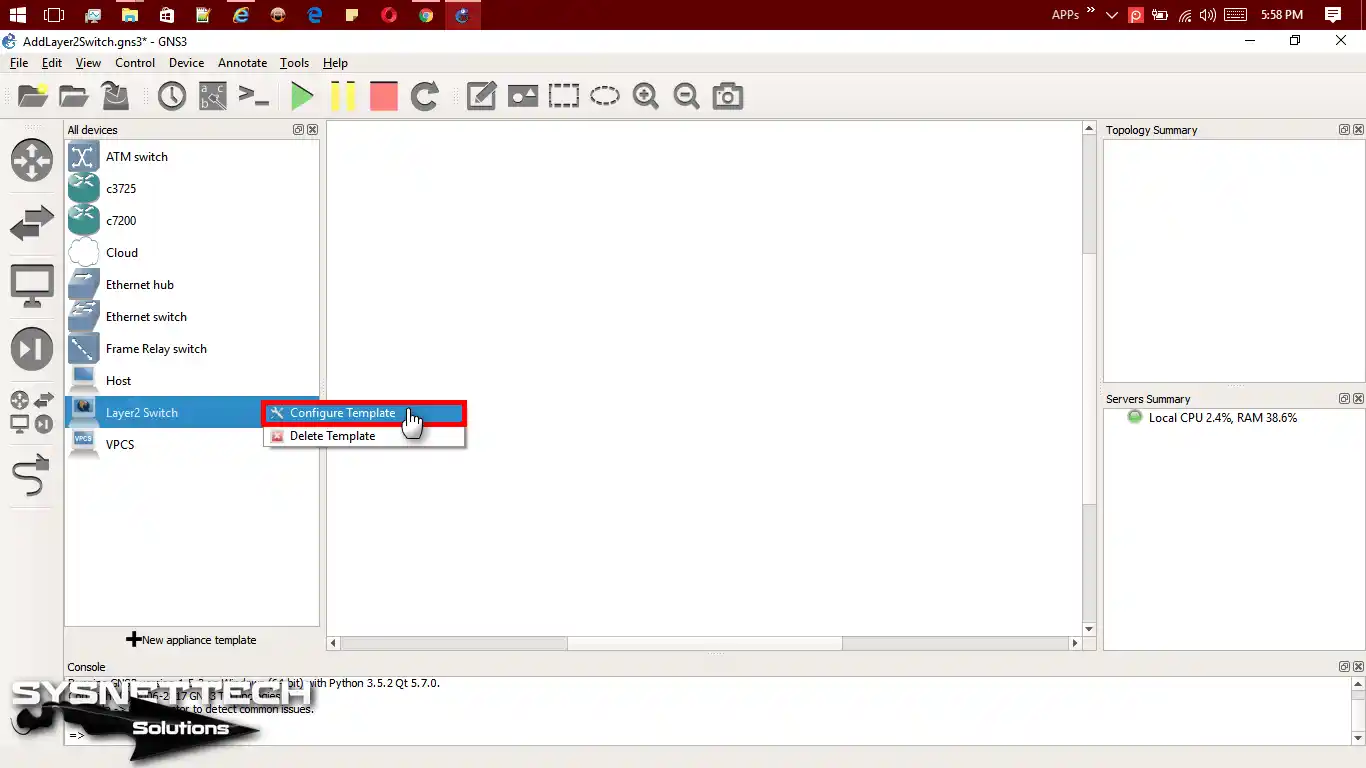
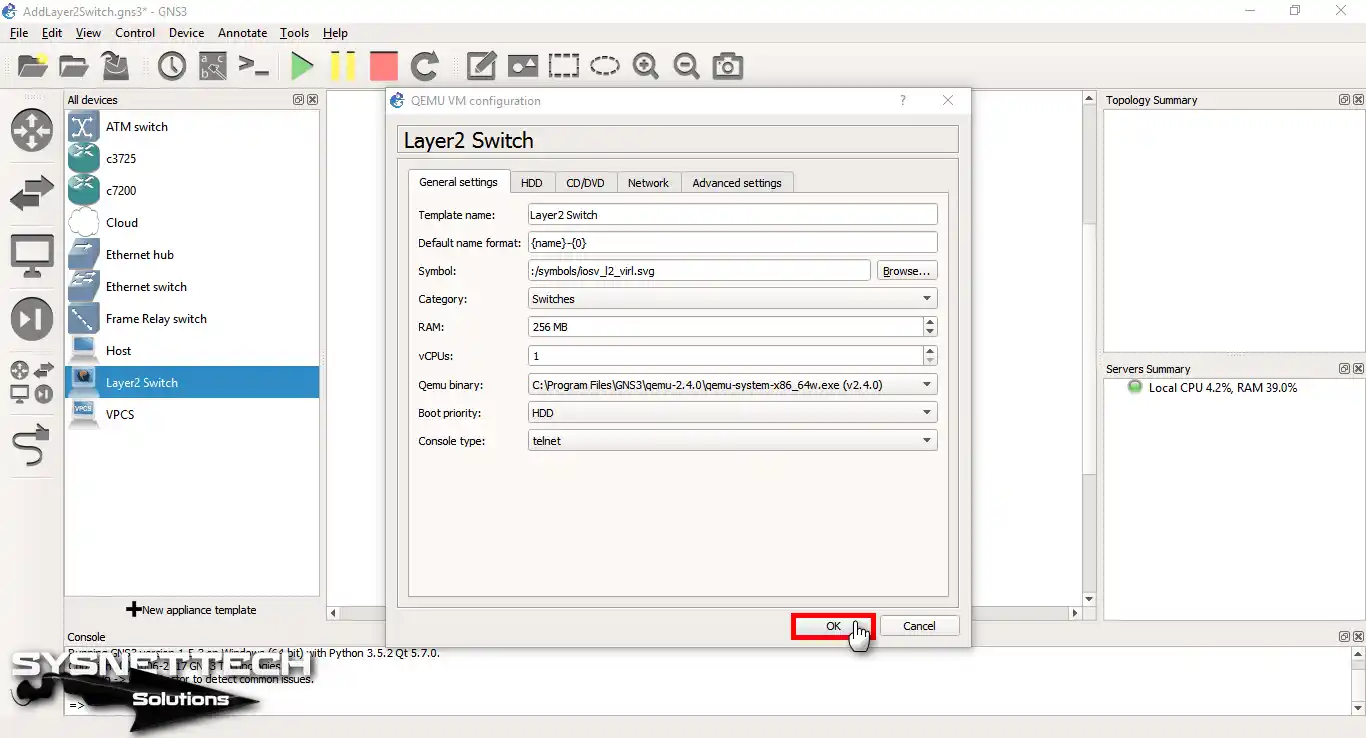
Step 3
To configure the Layer 2 Switch, first open the configuration window. Next, select the ‘Switches’ group from the ‘Category’ menu.

Step 4
To change the Layer 2 Switch’s symbol, click the Browse button.
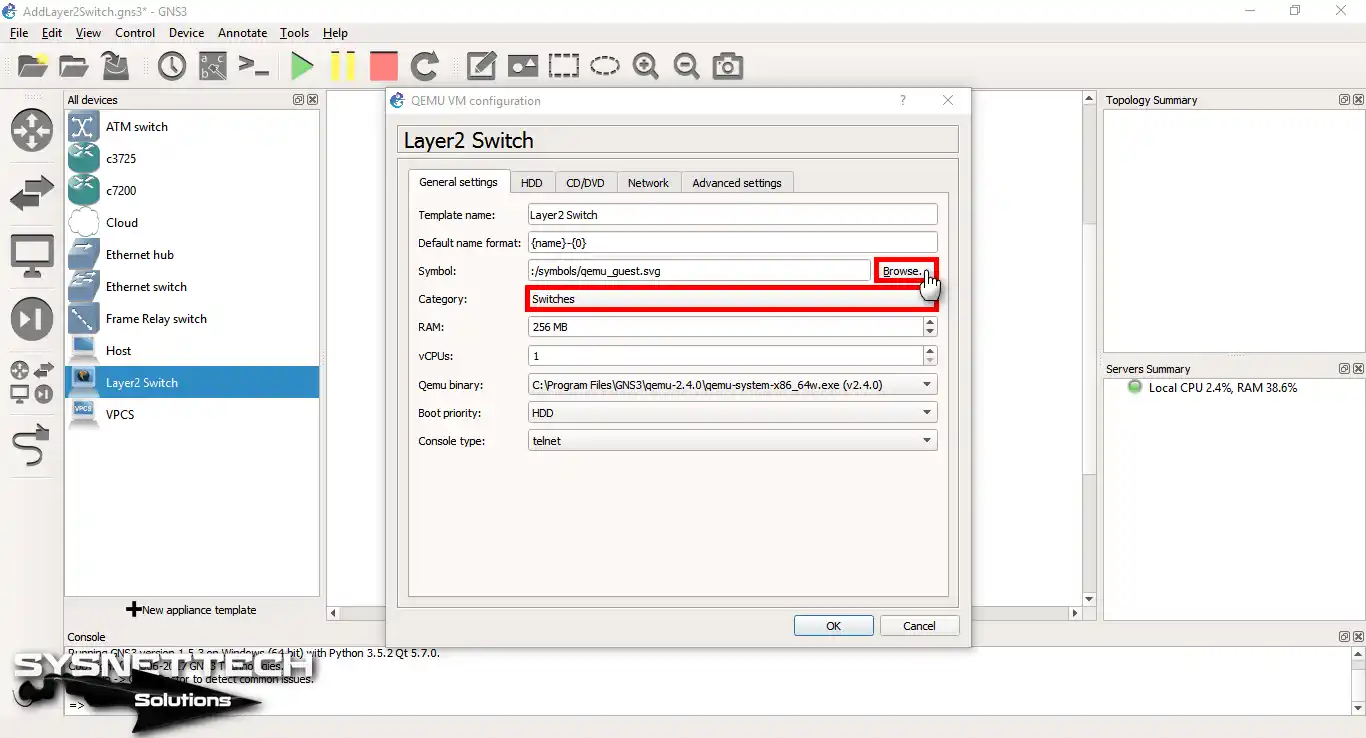
Step 5
To choose a logo, you can refer to the image below.
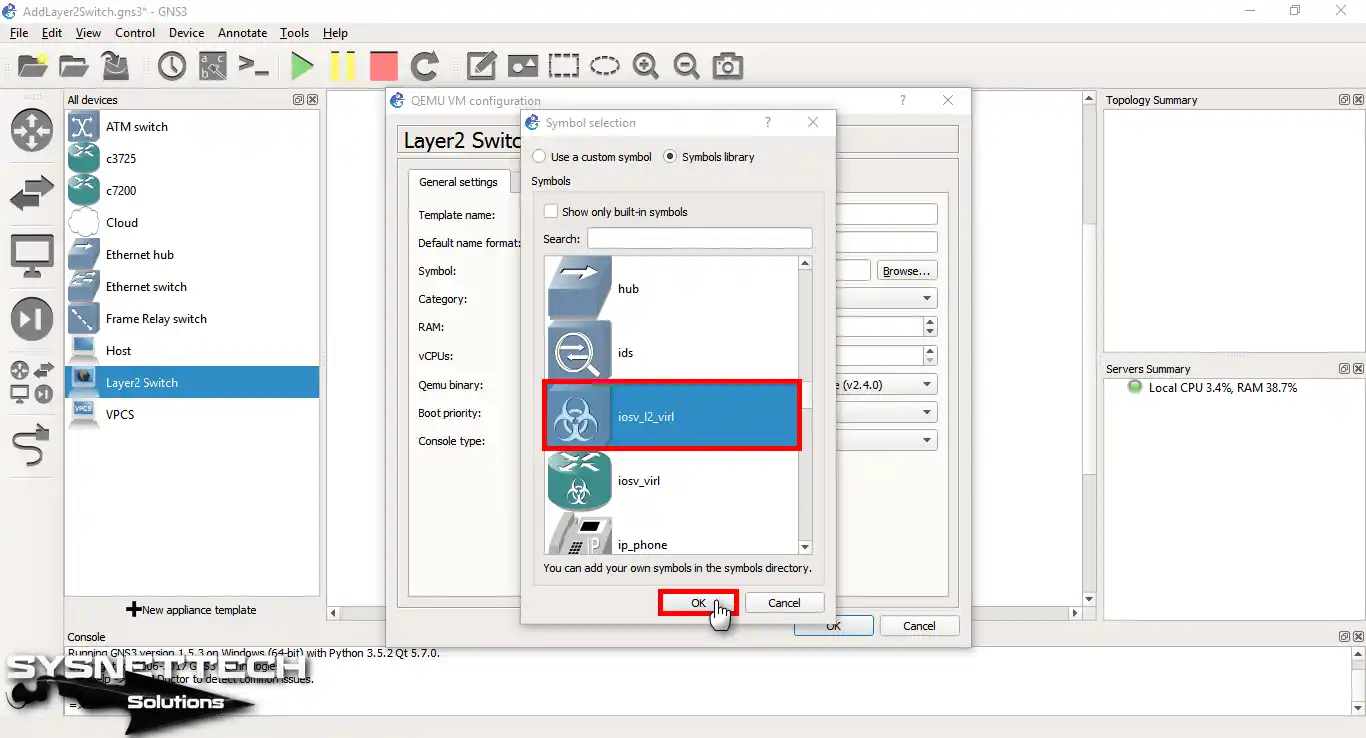
Step 6
Click OK to keep your settings after changing the switch symbol.
3. Add and Use the L2 Switch to Your Project
Step 1
Please drag and drop the “Layer 2 Switch” icon to the workspace.
Step 2
To add the interface to the switch, right-click the Configure button.
Step 3
You can add interfaces to the Switch from the Network tab.

Step 4
Open the CLI prompt by double-clicking the switch. Afterward, check the device status using the ‘show vlan brief‘ command.
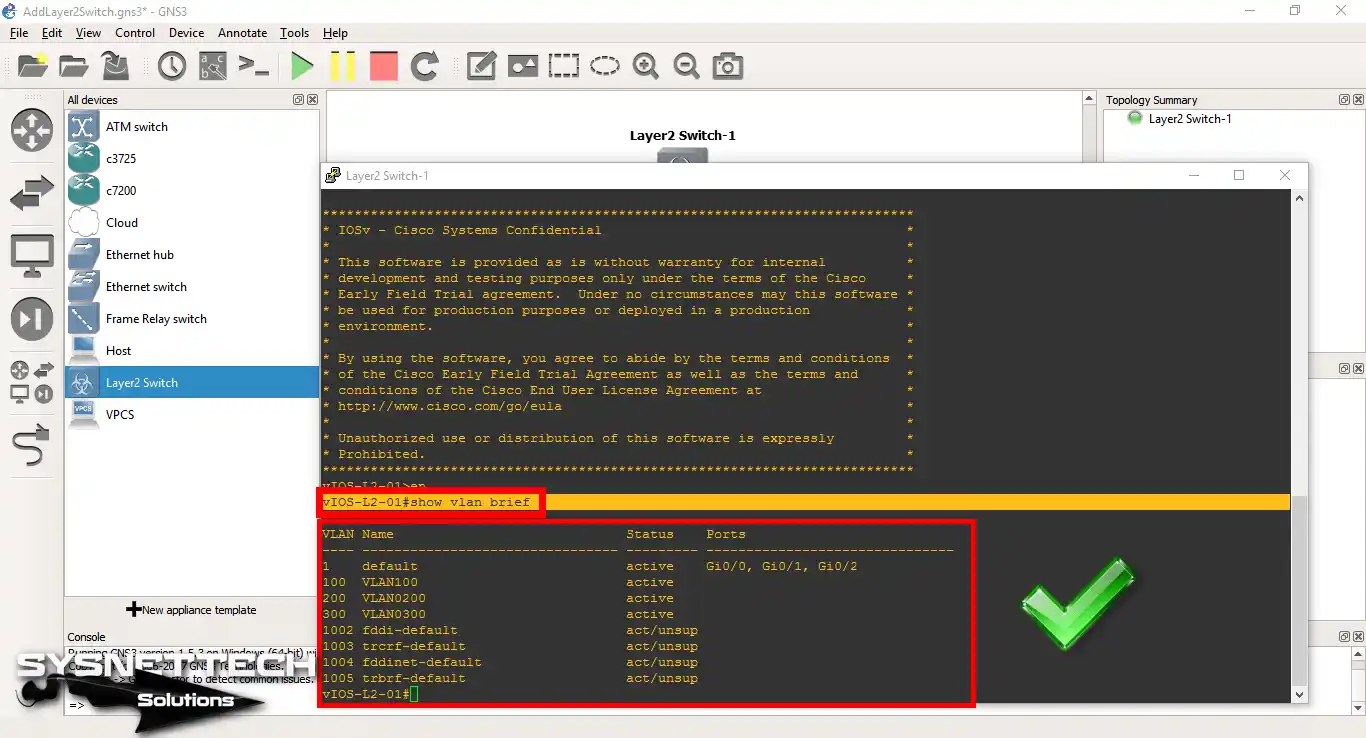
Command Output:
vIOS-L2-01#show vlan

VLAN Name Status Ports
---- -------------------------------- --------- -------------------------------
1 default active Gi0/0, Gi0/1, Gi0/2
100 VLAN100 active
200 VLAN0200 active
300 VLAN0300 active
1002 fddi-default act/unsup
1003 trcrf-default act/unsup
1004 fddinet-default act/unsup
1005 trbrf-default act/unsup

VLAN Type SAID MTU Parent RingNo BridgeNo Stp BrdgMode Trans1 Trans2
---- ----- ---------- ----- ------ ------ -------- ---- -------- ------ ------
1 enet 100001 1500 - - - - - 0 0
100 enet 100100 1500 - - - - - 0 0
200 enet 100200 1500 - - - - - 0 0
300 enet 100300 1500 - - - - - 0 0
1002 fddi 101002 1500 - - - - - 0 0
1003 trcrf 101003 4472 1005 3276 - - srb 0 0
1004 fdnet 101004 1500 - - - ieee - 0 0
1005 trbrf 101005 4472 - - 15 ibm - 0 0
VLAN AREHops STEHops Backup CRF
---- ------- ------- ----------
1003 7 7 off

Primary Secondary Type Ports
------- --------- ----------------- ------------------------------------------

vIOS-L2-01#
Video
Frequently Asked Questions About Switches in GNS3
- Does GNS3 support L2 or other devices?
- How do I add a new Layer 2 network device to GNS3?
- What are the switch types in GNS3?
Conclusion
When preparing for Cisco exams, putting a Layer 2 switch into GNS3 is a big deal. This device lets you pretend to be in different network situations as they happen in real life.
It’s perfect for practicing with VLANs, STP, and EtherChannel. Following the steps in this guide, you can easily add and set up an L2 network device in GNS3. As a result, this boosts your skills and helps you do well in your exams.
You can also use L3 switches to grow your networking skills. They can also do routing, giving you a full view of your network plan. For the steps to follow, see our guide on Adding a Layer 3 Switch to GNS3. By learning both kinds of switches, you will be set to handle any networking task.

39 People Shared Their Experience
funciono correctamente thanks so much
I’m glad to hear that. Thanks for your comment!
Thanks so much! This whole website is so helpful!
You’re welcome. Also, thanks for your comment!
Thanks man 🙂
You’re welcome. Also, thanks for your comment!
Helo there, thanks for the ariticle and the video, I tried all u explained,did it exactly and it didn’t work for me. am using VMware and I downloaded the gns3vm for VMware. so if there is another way to make the switches work I will higly appreciate it
Hello.
After adding vIOS-L2 IOS image, increase the RAM amount of L2 Switch.
Dear Sir
Greetings
Thank you for this excellent work. I really appreciate your efforts and supports available on this website. I followed your instructions to add layer-2-Switch and it worked perfect. There is one small problem. I build a small network in GNS3 with a PC+ Switch+Router. I configure all the three devices and I save the all the configuration. I closed my GNS3 and after sometimes I opened the same file again. I checked the router configuration it was ok. but the configuration from Switch was not there. I checked the console it reload the VLOS-L2 IOS image again and i have to reconfigure the switch. so is there any way that switch keep the configuration!!!
I hope to hear back from you. sorry for lang story.
Regards
Akbar
Thank you very much for your good comment. I will write an article for this problem and link to you.
Hi,
I followed your tutorial to install the Layer 2 switch but I got stuck at the step 13.
I can see my L2 switch on the Qemu VM templates but it doesn’t appear on my devices list on the left windows of GNS3.
Do you have a hint?
Cheers
Patrice
Wonderful! Thank you.
Thank you, thank you for your comment.
Wonderful, what a website it is! This webpage gives valuable data to us, keep it up.
You are a rock star!
Thanks for your comment 🙂
hi buddy,
i just installed the vIOS-L2.rar file on GNS3, the install went ok no errors but the IOS isn’t loading when i console in.
CAN YOU HELP PLEASE
Can you try increasing the RAM of the Switch?
Hi.
Everything fine. The only problem is, no mater how many interfaces I configure, the switch only has one single interface.
Interesting I’ve never encountered such a problem before. Are you sure you have saved your settings? Also, what version of GNS3 are you using?
Thank you, but this isn’t really an L2 switch. I tried to configure the router protocol using it, and it recognized the command.
Yes, you are right! But this is the only ios image file that we can use for free.
I need image iOS gns3 switch layer2. Please
Very helpful. Thank you
thank you so much
have install it but only ethernet0 ports are being shown no ethernet 0/0 port neither the giagabit ports shown
Whenever I add the RAR file downloaded from your link, it installs fine as a Qemu VM. However, when I start the device it states that there is ”no bootable device”. Do you know why this might be? I’m running GNS3 version 2.2.22.
Thanks
Have you tried increasing the RAM of the VM? If you haven’t, increase the RAM size. Also, download the image file again, maybe it was downloaded incorrectly.
The problem is according to you, you uploaded the RAR File.
Unzip the RAR File and pick the “vIOS-L2.vmdk” file
that is the file that is going to run
Hello ,
I followed all steps , but in step #22 , i can’t access SW & SW still is power off despite i power it on & there is a message appears ” HAXM acceleration support is not installed on this host ”
Note : i increase RAM , but no use.
Thanks in advance.
The IOS Image working with me , but only on one Switch , when i connect another Switch , this switch not working and stacks in ” GNU GRUB version 2.00 ” , Anyone can solve this issue , Please ?
Note : i increase RAM , but no use.
for me its showing like this in switch console
GNU GRUB version 2.00
+————————————————————————–+
|IOSv: flash0:vios_l2-adventerprisek9-m (hd0,msdos1) |
| |
| |
| |
| |
| |
| |
| |
| |
| |
| |
+————————————————————————–+
Use the ^ and v keys to select which entry is highlighted.
Press enter to boot the selected OS, `e’ to edit the commands
before booting or `c’ for a command-line. ESC to return
previous menu.
Booted IOSv. Boot args: [/vios_l2-adventerprisek9-m]
Smart Init is enabled
Not enough memory in the system for IO memory
IO memory available 137961004 required 227540992
Memory configuration adjustment:
Image size=108784400, PMem req=163176600, I/O mem=137961004, PMem avail=135980500
IOMEM size chosen (137961004) did not fit in memory (273941504 bytes). Trying again with a smaller IOMEM.
IOMEM size: 68980502 bytes
%Software-forced reload
*Mar 1 00:00:00.000
Request to return (to ROMMON); not supported, reload.
*Mar 1 00:00:00.000
Hello. Can you try increasing the RAM size of the Switch?
Hello Tolga,
This may be on a different question but i work with Cisco 9000 series Switches/Routers and i want to import them into GNS3 to give a more realistic environment. How and if i can how would i? is their some documentation on how i would available?
Hello Tolga,
The download button doesn’t work anymore. It redirects me https://www.sysnettechsolutions.com/en/download-vios-l2-image-for-gns3/
Hi, I checked the link is working.
No switchport command? How to assign VLAN sir?
You rock MANNN!!!!! Thanks!!!
Hi.
thanks for your good points.
but i have a issue .when i want type command for any switch just console box is open but i cant type any things there