

That big box in your office—the photocopier—hides a computer inside. Did you know that? Most people think it is just a simple copier. But what you have is a networked computer. It has a complex hardware design. In fact, many models pack a processor more powerful than your smartphone.
I put together this guide to clear up that mistake. For years, the biggest issue I’ve seen is users taking this device lightly. Especially when it comes to data security, businesses face huge risks. Luckily, with the right knowledge, you can bring those risks to zero.
Today, we’ll talk about the finest details of xerography mechanics. We’ll also cover scenarios of embedded OS hacking. Plus, we’ll list the most current models for 2026. We’ll dig into cost-per-page formulas and leasing traps.
By the end of the article, you’ll choose the right hardware peripheral for your office. You’ll see clearly when to buy and when to lease. What’s more, you’ll learn the scientific facts about toner dust and ozone gas.
What Is a Photocopier? Hardware Definition & Basic Function
In its simplest form, a photocopier transfers a copy of a physical document onto paper. It is an electrostatic hardware peripheral.
The definition sounds simple, but the inside story runs much deeper. The device actually completes optical scanning, electrostatic charging, and thermal fusing steps in milliseconds. It’s a true engineering marvel.
From the outside, you see just a box where paper goes in and out. However, you need to know its hardware anatomy. Only then can you understand what happens inside.
A modern photocopier holds dozens of parts. These include CCD sensors, laser scanning lenses, and the photoreceptor drum.
There is also a fuser unit that works at high heat. All these parts work with millimeter-level precision. Additionally, they reach speeds up to 2 pages per second.
In my personal view, this device is the modern office’s most underrated hero. People grab their morning coffee and hit the copy button.
Yet no one notices the magnitude of the xerography process it completes in seconds. However, from Chester Carlson’s first experiment in 1938 until today, technology has evolved incredibly.
The Difference Between a Photocopier as a Hardware Peripheral and a Computer
Many people never question the difference between this device and a standard desktop computer. Yet both contain a processor, RAM, and storage.
A current photocopier, however, holds far more sensors and actuators. It leaves entry-level laptops behind in this regard. What, then, is the core distinction?
First, a computer is a general-purpose processing unit. You load software on it and run any kind of calculation you want.
In contrast, this device focuses on document duplication and printing. It’s a special system. Moreover, its operating system is embedded, so you can’t change it because the maker optimized the firmware only for the xerography process.
The second big difference shows up in input-output units. Your computer has a mouse, keyboard, and monitor. However, this device has completely different peripherals.
It has an optical scanning unit, paper feed motors, and a heat fixing unit. In other words, your computer processes data. This device, however, interacts with the physical world. Additionally, its built-in storage always saves digital copies of scanned documents.
What Does a Photocopier Do? Its Role in Digital Transformation in 2026
The primary job of this device is, of course, copying documents. However, by 2026, its functionality has spread over a much wider area.
Now these devices work integrated with cloud-based print solutions. What’s more, mobile print integration offers great convenience. You can print a PDF you send from your phone in seconds.
At the same time, modern document copying systems sit at the center of corporate document management. You can scan documents and send them directly to email. In addition, you can convert them into editable text with OCR.
You can even auto-upload to cloud storage spaces. Thus, the photocopier acts as a bridge between the paperless office and digital archiving.
On the other hand, from a security perspective, this device is now as critical as a network server because the system writes every scanned document first to the internal HDD.
If you don’t take the needed measures, your sensitive data could fall into unauthorized hands. Therefore, in 2026, seeing a photocopier as just a copying tool is a big mistake. You must also treat it as a data management terminal.
The History of the Photocopier: From Chester Carlson to AI Evolution
The roots of this technology go back to a small lab in New York in 1938. Chester Carlson, who worked at the patent office, was very tired of copying documents by hand.
He vowed to find a solution. This personal frustration gave birth to modern xerography science. Carlson’s invention would later transform all office culture.
Carlson carried out the first successful experiment on October 22, 1938. He coated a zinc plate with sulfur and charged it with static electricity. Then he shined light on it, creating a hidden image.
He made the image visible with lycopodium powder and transferred it to wax paper. Thus, the world’s first xerographic copy appeared. Despite that, big companies rejected his idea for years.
In 1947, a small firm called Haloid Company bought Carlson’s patent. This firm later changed its name to Xerox Corporation.
The first commercial photocopier model, the Xerox 914, hit the market in 1959. The model was such a huge success that the company turned into a billion-dollar giant within a few years. In fact, back then people used the word Xerox as a synonym for the act of photocopying.
Who Invented the Photocopier and When Was It First Used?
The answer to this question is clear: Chester Carlson. He was a physicist, engineer, and patent agent. Because he constantly dealt with document duplication troubles, he searched for a practical solution.
Aren’t most great inventions born this way? A person’s own struggle becomes the greatest source of motivation. Indeed, Carlson followed the same path.
The first functional prototype worked in 1938. This invention had to wait 21 years to become a commercial product. Giant companies like IBM, General Electric, and RCA rejected Carlson’s idea.
According to them, carbon paper was already good enough, but they were wrong. The first commercial photocopier went on sale in 1959. Xerox exceeded its entire annual sales target in just 6 months.
The most inspiring part of Carlson’s story is that it represents the triumph of persistence. For twenty years, he went door to door and was rejected many times. Yet he didn’t give up.
As a result, modern electrophotography began in that small Astoria lab. Moreover, Carlson was virtuous enough to donate most of his fortune to charity.
From Analog to Digital: The Historical Development of Photocopy Technology
This evolution splits into three main eras. Each era redefined the concept of in-office reproduction. Let’s examine these stages together.
- Analog Era (1960–1990): It used purely optical and mechanical systems. It scanned the document directly with light and projected it onto the drum unit. It performed the scanning from scratch for each copy. Also, these devices were incredibly big and noisy. On the other hand, they were revolutionary for that time.
- Digital Era (1990–2015): CCD sensor technology first converted the document to digital data. This big innovation allowed storing the document in memory. No more rescanning was needed for multiple copies. In other words, digital copy technology multiplied speed and quality. At the same time, network connectivity features spread during this period.
- Smart MFP Era (2016–2026): Now we equip machines with AI algorithms. They can classify documents automatically and optimize image quality. They can even detect security threats. Thanks to the embedded Linux OS, they work like standalone network devices. 2026 AI-powered MFP models also learn your copying habits. They even order toner on their own.
As you can see, this technology has turned from a simple light-reflection system into a smart network terminal. What’s more, this transformation is speeding up. In the next sections, we’ll dive deeper into the hardware reflections of this evolution.
Photocopier Working Principle: The Complete Anatomy of Electrostatic Copying
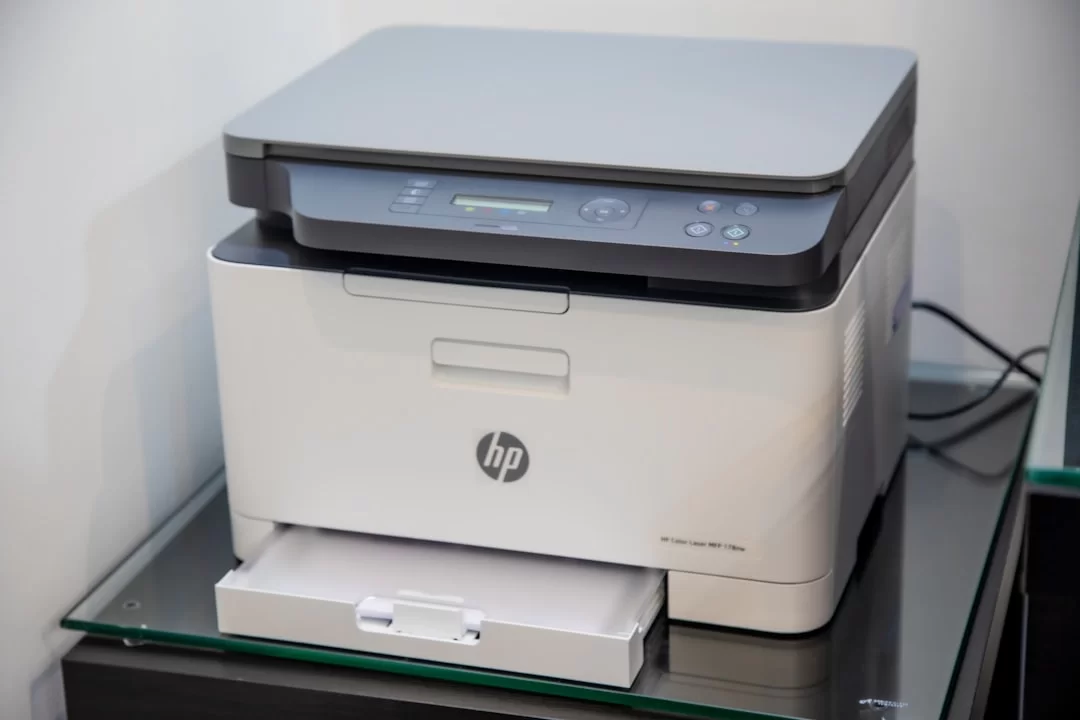
Now let’s move to the most fascinating part. Let’s look at the physics behind the curtain. The heart of this device beats in a process called electrostatic printing.
This process is basically a perfect dance of light, static electricity, and heat. The device repeats this dance in seconds, in full harmony, for each copy.
At the core of the working principle lies photoreceptor surface polarization. A special material is an insulator in the dark and becomes conductive in light. We call this material the drum.
We apply an electrostatic charge to the drum surface with a high-voltage corona wire. Then a laser beam or LED array draws the original document’s image onto the drum. Areas hit by light lose their charge while dark areas keep theirs.
At this point, a pattern we call a “latent hidden image” forms. You can’t see this pattern with the naked eye. However, toner particles stick to this pattern thanks to the balance of positive and negative electrical charges.
Then the paper contacts the drum surface and the toner transfers to the paper. Finally, heat and pressure rollers permanently fix the toner powder onto the paper. That’s how document duplication technology is both simple and complex.
The Step-by-Step Copying Process of a Photocopier
Now let’s explain this fascinating process in six basic steps.
- Charging Step: The corona wire fills the photoreceptor drum surface with a negative charge. A uniform electrostatic field forms across the surface. During this step, the drum stays completely in the dark.
- Laser Exposure Step: The original document’s image falls onto the drum. The system uses a rotating mirror mechanism or an LED array for this. Light-struck areas become conductive and discharge to ground.
- Toner Development and Adhesion Mechanism: The magnetic roller inside the developer unit draws toner particles to the drum surface. Toner sticks only to the dark areas that kept their charge.
- Paper Transfer Mechanics: The paper feed unit brings a blank sheet into contact with the drum. The positively charged transfer corona pulls the toner from the drum onto the paper.
- Fusing Unit (Fuser): The paper passes between rollers at about 400 degrees Fahrenheit. Heat melts the toner powder and pressure embeds it into the paper fibers.
- Cleaning and Preparation: A blade scrapes leftover toner from the drum surface and sends it to the waste toner box. Finally, the system neutralizes the drum surface for the next cycle.
The system repeats these six steps multiple times per second. That’s exactly how an office-type photocopier works. Everything is just an elegant application of the laws of physics. Additionally, don’t forget that a CPU architecture manages this whole process.
How the Photoreceptor Drum and Fuser Unit Work
The drum is the most critical part of the whole system. It consists of a special semiconductor layer coated on an aluminum cylinder. We usually make this layer from organic photoreceptor material.
In the dark, it acts like a perfect insulator and preserves the charge on its surface for hours. However, the moment it meets light, its resistance drops and it becomes conductive. Thus, xerography mechanics rely on this physical property.
We charge, expose, develop, and clean the drum unit once per rotation. Therefore, it makes one full turn for each copy. Drum life typically ranges between 20,000 and 100,000 pages.
When it nears the end of its life, streaks and faint prints start to appear because the delicate coating on the surface wears down over time and loses its uniformity.
The fuser unit, on the other hand, is the final step. The paper squeezed between two rollers is exposed to about 350–430 degrees Fahrenheit heat. Thus, the top roller has a Teflon coating, while the bottom one is a rubber pressure roller.
Toner powder melts at this heat and penetrates the paper fibers. As a result, you get a permanent image that won’t rub off when you run your finger over it.
Fuser failures usually happen from wear on these rollers or a blown heating lamp. The clearest sign is that you can easily wipe the output off with your hand.
Types of Photocopiers: Analog, Digital, and Multifunction Comparison
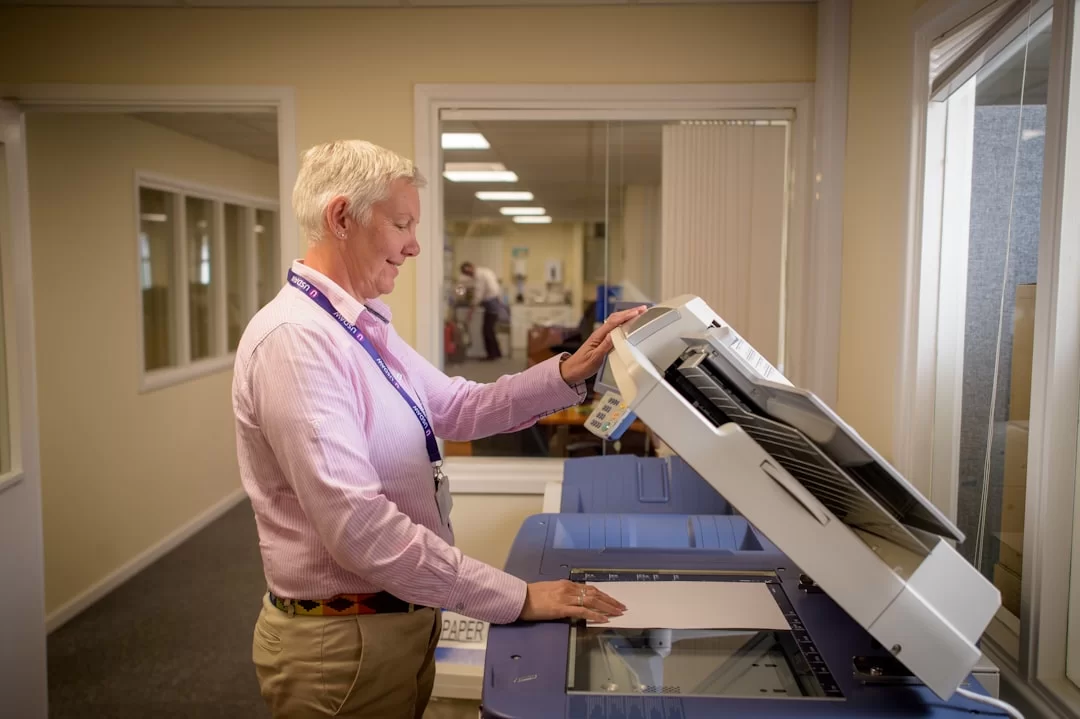
Three main categories appear in the market. Each has its own advantages, disadvantages, and use scenarios.
You need to know these differences clearly to make the right choice. Moreover, we can say that analog technology has now become history. However, it’s still valuable for understanding the principle.
Today, almost every device you encounter uses digital copy technology. Nevertheless, you can still come across analog models on the second-hand market.
Don’t be fooled and go for cheap because these machines support neither network connectivity nor security measures. Besides, finding spare parts is nearly impossible.
Mid-sized and large offices, however, overwhelmingly prefer MFP hardware. These models gather printing, scanning, faxing, and copying functions in a single case.
They also offer advanced document management and security features. Now let’s examine these three categories one by one.
What Is an Analog Photocopier? Working Logic and Its Place Today
These machines work entirely on optical and mechanical principles. They are old-generation devices. They scan the document with a powerful light source. Then they project it directly onto the drum via a lens and mirror system.
Thus, no digital conversion happens in between. The device carries the image entirely through analog optical scanning. Therefore, image quality depends heavily on the cleanliness of the lenses and the alignment of the mirrors.
In an analog photocopier, the scanning process starts from scratch for each copy. This makes multiple copy jobs incredibly slow. Additionally, these devices physically move the lenses.
They zoom in or out this way. That’s why the zoom mechanism works slowly and wears out over time. What’s more, they have no network connectivity or security features at all.
Today, analog technology has become museum-grade. You might see one in a rural stationery shop or a very low-budget business.
My advice is to stay away from these devices because you can’t find spare parts, and even a toner cartridge requires a special order. In short, analog copy technology now lives only in history books.
Differences Between Digital Copying and Multifunction Printer (MFP)
At first glance, these two devices look very similar. Many sellers even market them as if they were the same product. However, there are serious hardware and functional differences.
The basic distinction is this: The digital copy device is designed primarily for copying. However, it also offers printing and scanning features. In contrast, an MFP carries all functions with equal weight. It is a versatile platform.
MFPs generally have higher processing power and memory. They must manage multiple jobs at once. Additionally, MFPs have larger touchscreens and more advanced interfaces.
On the other hand, digital devices focused only on copying stand out. Indeed, they offer higher durability in long, heavy copy jobs because the manufacturer optimized the mechanical parts for this task.
The audit trail difference between a multifunction printer and a photocopier is critical for security. MFPs generally offer more comprehensive unauthorized access logs.
They also support user authorization cards. Enterprise print management services (MPS) integration is also more common on MFPs. The table below summarizes the key differences.
| Feature | Digital Copier | Multifunction Printer (MFP) |
|---|---|---|
| Primary Task | Copying | Multipurpose (Print + Scan + Fax + Copy) |
| Copy Speed (ppm) | Generally higher (40–100+) | Medium-high (20–70) |
| Processor & RAM | Mid-level | High-level |
| Paper Capacity | High (4–6 trays) | Medium-high (2–4 trays) |
| Security Layer | Basic-Medium | Advanced (HDD encryption, card reader) |
| Monthly Print Volume | 50,000 – 300,000 pages | 10,000 – 100,000 pages |
Which product you choose depends entirely on your workload. If you do heavy copying, a digital copy-focused device makes more sense. However, if you want an all-in-one solution for office automation, an MFP is perfect for you.
Hardware Components of a Photocopier: Internal Parts and Their Duties
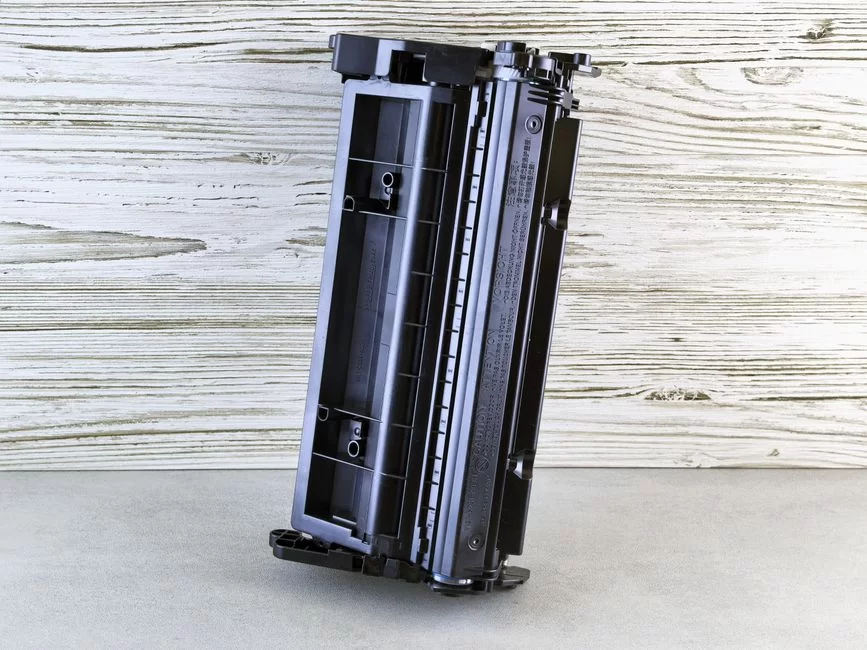
Opening up this device might surprise you. You’ll see dozens of gears, sensors, and circuit boards arranged like a complex clock mechanism.
Each part is an indispensable link in the document duplication chain. Now let’s examine these parts by classification.
We can divide the hardware components into four main groups. These groups consist of optical scanning, image processing, and control teams. Additionally, there are the print engine and paper management groups.
Each group splits into subcomponents within itself. A main control board manages all these systems. This main board is actually a customized photocopier motherboard.
The part users interact with most is the paper feed unit. However, the real magic revolves around the optical scanning unit and the drum. Most people think of the toner cartridge as a consumable.
However, the drum, developer, and fuser must also be replaced over time. With proper maintenance, you can significantly extend the life of these components.
What Does the Photocopier’s Processor, RAM, and Internal Storage (HDD/SSD) Do?
The processor inside a modern photocopier runs all calculations. It works just like the one in your computer. It processes incoming scan data, manages the print queue, and controls network traffic.
In current models, you’ll see dual-core ARM or x86-based processors running at 1.2 GHz. These chips can process millions of pixels per second in real time.
RAM capacity, on the other hand, typically ranges from 1 GB to 4 GB. What does this much RAM do? Imagine you want to print a large PDF file.
The system first loads the file into RAM and processes it page by page. Additionally, multiple print requests coming over the network queue up in RAM.
If the RAM falls short, the machine slows down and even throws errors. We often see this situation especially in busy, network-connected offices.
Let’s move to the most critical component: the internal storage unit—HDD or SSD. Yes, you heard that right. Inside this device, there is a full-fledged hard drive or SSD (faster than HDD).
What’s more, this disk stores a copy of every document scanned or printed. We’ll cover this in detail in the security section.
However, let me say this now: disposing of the device without securely wiping this disk is equivalent to exposing all your company secrets. NVRAM, on the other hand, permanently stores counter data and system settings.
Drum, Toner, and Fuser: The Core Parts of the Print Engine
The print engine is where the xerography process physically happens. This engine consists of three main parts, and each is tightly connected to the others. Now let’s get to know them closely.
- Imaging Drum (Drum Unit): It is an organic photoreceptor layer coated on an aluminum cylinder. When exposed to laser light, it loses its charge and forms the hidden image. Drum life ranges from 20,000 to 100,000 pages, depending on the model. Also, when it starts making lines, it’s time for a change.
- Toner Cartridge: It contains fine carbon powder and polymer particles. The manufacturer has given this powder magnetic properties. With the help of the developer unit, it sticks to the hidden image on the drum. Color machines using the CMYK color model have four separate toner cartridges. On the other hand, black-and-white models use only a single toner.
- Fuser Unit (Heat Fixing Unit): It consists of two heated rollers. The top one is a Teflon-coated heater roller, while the bottom one is a pressure roller. The device melts the toner powder here and permanently fixes it to the paper. Fuser life is generally around 100,000 pages.
If these three parts don’t work in harmony, output quality degrades instantly. Problems like faint output, streaky prints, or smudging toner usually stem from one of these three.
Regular maintenance and using original consumables significantly extend the life of these parts. Additionally, you must empty the waste toner box regularly. Otherwise, the machine stops.
Photocopier Technical Specifications: Speed, Resolution, and Paper Management
The first numbers that catch your eye in the spec sheet are PPM and DPI. These two metrics define the device’s performance character. They are basic parameters. However, they are not enough on their own.
However, you should evaluate monthly print volume and paper capacity. You must also consider side features like page fill rate.
Then there’s the difference between hardware DPI and software DPI. Marketers usually display inflated resolution values with software interpolation.
However, the value that interests you is the optical scan resolution. You should also look at the print engine’s real hardware DPI. Don’t hesitate to press sellers on this.
As of 2026, standards for an office-type photocopier have risen considerably. Moreover, companies now accept 1200 x 1200 DPI resolution as the lower limit. Alongside that, a speed of 40 pages per minute has become standard as well.
Let’s examine these technical details more closely. Let’s talk about how to choose according to your needs. The truth is, the right tech choice can save you hundreds of dollars a year.
What Should the Photocopier Speed (PPM) and Resolution (DPI) Be?
Print speed (PPM) shows how many pages the device can output per minute. For a small office, 20–30 PPM is enough.
However, in a 50-person office, a machine under 40 PPM creates a queue at lunchtime. This directly affects employee productivity. Therefore, speed selection should be directly proportional to office size.
Resolution (DPI), on the other hand, expresses the number of dots per inch. For standard office documents, 600 x 600 DPI is enough.
However, you might prepare documents containing graphics, logos, or fine lines. For such documents, you should prefer 1200 x 1200 DPI.
As image density increases, toner consumption also rises. For that reason, you can save toner by using draft mode on daily text documents.
You can find recommended technical values for different office types in the table below.
| Office Type | Recommended Print Speed (PPM) | Recommended Resolution (DPI) | Monthly Print Volume |
|---|---|---|---|
| Home Office | 15–25 | 600×600 | 500–2,000 |
| Small Office (1-10 people) | 25–35 | 600×600 – 1200×1200 | 2,000–5,000 |
| Medium Office (10-50 people) | 35–50 | 1200×1200 | 5,000–20,000 |
| Corporate / Heavy Use | 50–100+ | 1200×1200 or higher | 20,000+ |
Remember that manufacturers generally calculate the PPM value based on A4 size. Specifically, they base this calculation on a 5% page fill rate.
On fully filled graphic pages, this speed drops noticeably. Additionally, account for speed being halved in duplex printing.
A3/A4 Difference, Duplex Printing, and Automatic Document Feeder (ADF) Features
Standard office documents are in A4 paper size. However, for architecture offices, graphic studios, or map-printing businesses, A3 paper support is a must.
An A3 photocopier lets you easily print your large-format documents. Specifically, these devices focus on pages twice the size of A4. As a result, you print or copy wide-format documents in a practical way.
These machines use a larger drum and wider paper feed unit. Consequently, their price is higher than standard models.
The duplex (double-sided copying) feature cuts paper consumption in half. Thanks to this feature, you save both money and the environment.
In modern machines, the duplex unit comes as standard. Nevertheless, on entry-level home models, this feature may be optional. Be sure to check before buying.
The automatic document feeder (ADF), on the other hand, saves the day in scanning and copying multi-page documents. You place 50 pages in the tray, press the button, and start the process.
Thanks to the ADF, you don’t have to place each page on the glass one by one. Additionally, dual-sided ADF models scan double-sided documents in a single pass. This saves you serious time. On mid-range and high-end machines, this feature is now standard.
Photocopier Connectivity Options: USB, Ethernet, Wi-Fi, and Mobile Printing
Nowadays, no device works as an island on its own. A modern document copying system must be a full member of your office network.
We provide this integration via USB, Ethernet, or Wi-Fi connections. In fact, it’s now possible to get mobile prints with a single tap using NFC.
When choosing a connection, you must never ignore security. For example, a Wi-Fi connection offers convenience. However, if you misconfigure it, you create a network attack surface.
Ethernet (wired connection) is more stable and secure, but it creates cable clutter. In corporate settings, we generally prefer Ethernet. Small offices, on the other hand, love Wi-Fi flexibility. The choice depends on your needs and IT infrastructure.
Additionally, thanks to cloud print integration, you can now send output to your office machine from anywhere in the world. This technology offers incredible flexibility in the remote work era.
However, it brings serious security risks along with it. Configuring Wi-Fi security protocols correctly is vital at this point.
How to Connect a Photocopier to a Computer and Network? Driver Installation Guide
This process is much simpler than you think. If you follow the steps in order, you can complete the connection in five minutes. Here is the method I’ve used for years and never had a problem.
- Choose the connection type: For USB, plug the cable directly into the computer. For Ethernet, connect the machine to the switch. For Wi-Fi, select your network from the device’s control panel and enter the password.
- Set the IP address: Assign a static IP address to the machine for network use. This way, the IP doesn’t change on every reboot and the connection stays stable. You can do this setting through the device’s web interface.
- Install the driver: Download the latest driver from the manufacturer’s official site. Never use the old driver on the CD. Run the installation wizard and select the device found on the network.
- Take a test print: Print a test page. If the output comes out right, the setup is done. Be sure to test the scan function too. Remember that scanning may need a separate driver or software.
Most modern document copying machines are recognized automatically by your operating system. Still, you must install the manufacturer’s special driver package for full-featured use. This package usually contains print, scan, and fax drivers together.
Wi-Fi, NFC, and Using a Photocopier from a Mobile Device
In the mobile age, office equipment has also kept up with the wireless world. You can now print documents from your smartphone with a few taps. Here are the most common wireless usage methods.
- Wi-Fi Direct: The machine creates its own Wi-Fi network. You connect your phone to this network. You don’t need any router. Therefore, it’s ideal for guest users.
- Mobile Print Integration (AirPrint / Mopria): Thanks to Apple AirPrint or Android Mopria protocols, you can print directly without installing a driver. You just need to be on the same network.
- NFC Near Field Communication: You tap your phone on the machine’s NFC tag. Instant pairing happens and document transfer starts.
- Cloud-Based Print Solutions: Google Cloud Print has been replaced by manufacturer-specific cloud services. You can log in to your account and print from anywhere in the world. However, two-factor authentication is a must.
Despite all these conveniences, password-free or default-password Wi-Fi connections carry big risks. Be sure to use WPA3 encryption.
Additionally, separate your guest network from your office network because weak wireless network configuration threatens data security. That’s why you often experience breaches on network-connected photocopiers.
What to Consider When Buying or Leasing a Photocopier (2026 Guide)
The purchase decision isn’t one to make by just looking at the price tag. Let me tell you my personal experience: the money you pay for the device is a small part of the total cost of ownership.
What’s more, the real cost hides in consumables, service, and energy consumption. That’s why you must perform a total cost analysis before deciding.
As of 2026, there are hundreds of models on the market. First, clarify your own needs when making a choice. How many pages do you output per month? Color or black-and-white? Which paper sizes do you use? The answers to these questions will guide you to the right segment.
For corporate purchases, energy efficiency class and environmental sustainability criteria are now mandatory. An ENERGY STAR certified device can save dozens of dollars a year in electricity. Now let’s move to the crucial point: cost calculation.
Photocopier Cost Per Page (CPP) and the Formula
Cost per page (CPP) shows how much a page of output costs you. It’s a critical metric. Buying a device without knowing this value is like buying a car without looking at the price tag. It leaves you stranded. Luckily, CPP calculation is extremely simple.
The basic formula is: CPP = (Toner Price / Toner Life) + (Drum Price / Drum Life) + Paper Cost.
Suppose the toner is $15 and prints 5,000 pages. The drum is $24 and lasts 50,000 pages. Paper costs $0.005 per sheet. In this case, CPP = (15/5000) + (24/50000) + 0.005 = 0.003 + 0.00048 + 0.005 = $0.00848. Therefore, one page costs you about 0.85 cents.
Note this about the formula: Manufacturers base toner life on a 5% page fill rate. If you print fully filled pages, toner life drops to half or even a third.
For a realistic CPP calculation, you must consider your own printing habits. You can see sample CPP values for different models in the table below.
| Device Type | Toner Price | Toner Life (Pages) | Drum Life (Pages) | Approximate CPP (USD) |
|---|---|---|---|---|
| Home Black & White | $7.50 | 1,500 | 10,000 | $0.009 – $0.011 |
| Office Black & White | $18 | 10,000 | 60,000 | $0.002 – $0.004 |
| Color MFP | $60 (4 x $15) | 5,000 (CMYK) | 30,000 | $0.015 – $0.024 |
As you can see, the cost per page is much lower on office-type machines. For this reason, when recommending a photocopier for home, I always suggest laser-based models. Even though the initial investment seems high, it protects your wallet in the long run.
Leasing or Buying? Lease Contract Traps and Click Charge Detail
This question is a common dilemma, especially for SMEs. The answer depends entirely on your usage intensity.
If you output over 3,000 pages a month, leasing is generally more advantageous. At low volumes, buying wins. However, both options have pros and cons.
Among the advantages of leasing are low initial cost, regular maintenance, and service. In return, leasing contracts often include traps.
For example, in the click charge billing model, you pay a high fee for each extra page. Additionally, if you want to back out before the contract term ends, you face heavy penalty clauses.
Buying, on the other hand, gives you full ownership and freedom. However, you become responsible for all maintenance and consumable costs. Additionally, when the device breaks down, service waiting time can disrupt your workflow.
Based on my personal experience, I say: if you have a reliable local service network, buy; if not, lease. However, be sure to show the leasing contract to a lawyer before signing.
In leasing contracts, you often encounter hidden click charge increases. Additionally, companies add automatic renewal clauses to the contract.
Data Security: The Hidden Danger & Measures You Must Take
Let’s get to the darkest and least known part: data security. For most people, this device is an innocent piece of office equipment.
They can’t even imagine it contains a hard drive. However, the truth is otherwise. A corporate photocopier produces digital copies of hundreds of sensitive documents every day. It’s a complete data warehouse.
In 2010, CBS television examined the hard drives of used photocopiers. The results were shocking. In randomly purchased devices, they found police records, medical reports, and bank account summaries. Even state secrets were there.
However, regulations tightened after this event, but the risk did not completely disappear because many businesses are still not conscious enough about this.
GDPR (and similar laws) imposes serious obligations on businesses in this regard. In case of a data leak, administrative fines can reach hundreds of thousands of dollars.
Thus, securing your devices is not just a technical necessity. It is also a legal obligation. How will you ensure this security?
Understanding the working principle of scanner helps you identify the breakpoints in the data flow.
What Does the Hard Drive Inside a Photocopier Record and How Is It Wiped?
The internal HDD or SSD stores all temporary and permanent data needed for the device to function. However, the scary part is that you can never see this drive.
While the machine runs normally, it quietly accumulates data. What exactly does the system record?
- Scanned Documents: The complete digital copy of every document you place on the glass or send through the ADF.
- Print Jobs: The image data of every print job you send from your computer.
- Fax Logs: Digital copies and communication records of incoming and outgoing faxes.
- Email Address Book: The email addresses you save for scan sending.
- System Logs: Unauthorized access logs, error records, and user activity reports.
A simple format or factory reset is absolutely not enough to wipe this data.
You can think of it just like your computer. Indeed, you can easily recover deleted files with data recovery software. For true security, you must apply these steps.
- Start the overwrite process: Find the HDD Data Overwrite option in the device’s service menu. This process writes random data to the disk, making old records unrecoverable.
- Activate the disk encryption module: If possible, buy the hardware hard drive encryption option when purchasing the device. This module automatically encrypts all data written to the disk.
- Physically remove and destroy the disk before scrapping the device: This is the safest method. Remove the disk and physically break it or drill through it.
- Establish an IT audit protocol: Periodically check your devices’ security logs and monitor suspicious activities.
Can the Embedded Operating System Be Hacked? Network Security and Enterprise Solutions
Yes, it can be hacked. Moreover, the scary scenarios on the internet are unfortunately not exaggerated. A modern document copying machine runs on embedded Linux or a custom RTOS.
This operating system can also contain security holes, just like the one on your computer, because manufacturers generally focus on selling hardware, so software security takes a back seat.
The most common attack vector is unauthorized access over the network. If you don’t change default admin passwords, an attacker can easily enter the device’s web interface.
From there, they can leak scanned documents. They can change network scanning settings and even add the device to their botnet. Control panel hacking cases are much more common than thought.
What should you do? Here is the answer to how you ensure data security in an enterprise environment:
- Change all default passwords: Update everything, including the admin panel, SNMP community string, and service menu passwords.
- Apply network isolation: Separate the device from the main office network using a VLAN. Allow only authorized users to access this VLAN.
- Don’t skip firmware updates: Regularly install the security patches released by the manufacturer. Outdated device firmware is an open invitation.
- Use secure pull printing: With this method, the system prints a document only when you come to the device and authenticate. It’s ideal especially for sensitive documents.
- Integrate biometric authentication: Use fingerprint or face recognition to allow only authorized personnel to use the device.
Is the Photocopier Harmful to Health? Ozone Gas, Toner Dust, and Scientific Facts

One of the urban legends on the internet is that these devices seriously harm health. You’ve probably heard many stories about ozone gas and toner particles.
How much of these claims is real, and how much is exaggeration? Let’s clarify this issue in the light of scientific data.
First, I should say this: a modern photocopier is subject to strict international standards. Independent organizations audit the ozone emission standard and particle emission limits.
Old-generation analog machines were more problematic in this regard. However, today’s devices are much safer. Still, in a room with insufficient ventilation, this device can pose a risk. In fact, the same danger applies to every running electronic device.
Now let’s address the two most frequently asked about topics. Let’s examine the ozone gas and toner dust claims with scientific evidence.
Ozone Gas Emission and How Office Ventilation Should Be
Ozone gas is a natural byproduct that appears during corona wire charging. High-voltage electrical discharge breaks apart oxygen molecules in the air and forms ozone.
At high concentration, this gas can irritate the respiratory tract and cause headaches. However, the critical point here is the phrase “high concentration.”
We equip modern devices with ozone filters. These filters turn ozone molecules back into oxygen. The ozone emission of an ENERGY STAR certified device is far below OSHA’s set limit of 0.1 ppm.
In normal office conditions, you have no valid reason to worry about ozone gas harm. However, if multiple machines run in a small, windowless room with poor ventilation, the situation changes.
The answer to how office ventilation should be for a photocopier is simple. Place the device where there is direct airflow.
Refresh the room air completely at least 2–3 times per hour. If there’s no central ventilation, use an air purifier. These measures help not only with ozone but also with general particle exposure.
Toner Particle Inhalation Risk: Does It Really Cause Cancer?
This claim has been circulating for years and scares people unnecessarily. Let’s clarify this issue with scientific research.
Toner powder basically consists of substances like carbon, polymer resin, and iron oxide. These particles are very fine. They are about 5–10 microns in diameter and can reach the lungs when inhaled. However, the label “carcinogenic” is too ambitious here.
The International Agency for Research on Cancer (IARC) has placed toner powder in the Group 3 category. That means we cannot classify it as carcinogenic to humans.
This classification is the same category as coffee or aloe vera. The risk of inhaling toner particles, of course, exists. Especially during toner replacement, if a dust cloud forms, the risk increases.
This risk manifests more as temporary respiratory irritation rather than cancer. People with chronic obstructive pulmonary disease or asthma may be more sensitive.
To protect your health, be sure to use a mask and gloves during toner replacement. Don’t shake or squeeze the cartridge. Never sweep spilled toner powder with a broom; it disperses the particles into the air.
Instead, wipe with a damp cloth or use a special toner vacuum cleaner. Additionally, prevent toner leaks by having the device maintained regularly.
That is the answer to whether photocopier toner powder is harmful: harmless with correct use, irritating with incorrect use.
Photocopier Energy Consumption, Environmental Impact, and Saving Methods
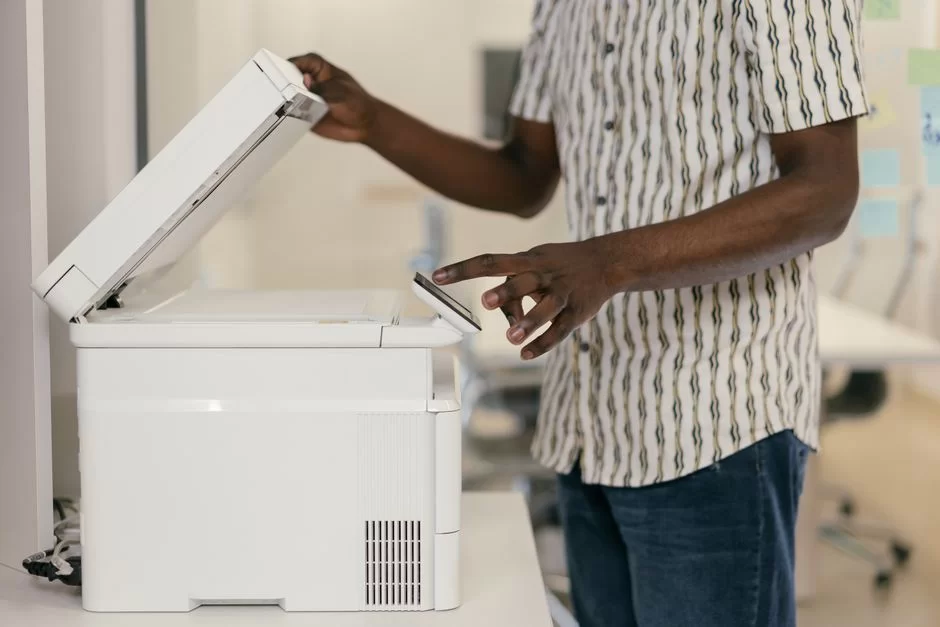
These devices are one of the most energy-hungry consumers in the office. Especially old models can consume as much electricity as a refrigerator when left on continuously.
Luckily, technology advanced in this area too. New-generation machines consume near-zero energy in sleep mode. Still, lowering your energy bill is entirely in your hands.
Choosing a photocopier with a high energy efficiency class provides serious savings in the long run.
An A+++ class device consumes less electricity per year than a C class model. When this difference reflects on the bill, it amounts to a non-negligible figure. Moreover, it’s the right choice for environmental sustainability.
Now let’s examine this energy topic and the carbon footprint in more detail.
How Much Energy Does a Photocopier Consume? Tips for Saving
A medium-sized office model draws between 500 and 1,500 watts in active use. In sleep mode, this value drops to 2–5 watts. What can you do? Here are my golden tips for energy saving.
- Shorten the sleep mode time: Set the device to enter sleep mode after 5 minutes of inactivity. The default is usually 30 minutes, which is too long.
- Make duplex printing the default: Cut paper consumption in half to protect both nature and your wallet. This setting also indirectly lowers energy consumption.
- Use draft mode: Choose draft mode for internal reference documents or preview prints. This mode uses less toner.
- Activate the weekend scheduler: Use the timer that ensures the device turns off completely on weekends and during nighttime hours.
- Prefer ENERGY STAR certified models: If you’re making a new purchase, be sure to go for devices with this certification.
Carbon Footprint and Sustainable Photocopier Use
Every page you print releases carbon into the atmosphere. When paper production, toner manufacturing, and energy consumption combine, you create a serious ecological footprint.
However, minimizing this impact is in your hands. The answer to how to reduce a photocopier’s carbon footprint lies in smart usage habits.
First, make it a habit to use recycled paper. Additionally, participate in toner cartridge recycling programs.
Most major manufacturers take back used cartridges for free and refill them. This circular economy model significantly reduces waste. Thanks to cloud-based copying and digital archiving, you can avoid producing unnecessary printouts.
If your business has sustainability goals, report your annual print volume regularly. You can start by setting a 5% reduction target each month.
Urge your employees to ask, “Does it really need to be printed?” Trust me, reading on screen is often enough.
Photocopier Maintenance, Troubleshooting & Common Problems
Regular maintenance can double this device’s lifespan. It also minimizes work stoppages caused by breakdowns.
Personally, I have a simple maintenance routine I’ve followed for years. Thanks to this routine, my devices never break down unexpectedly. Now I’ll share this experience with you.
First, cleaning is the most important step. Wipe the glass surface every day. Clean the ADF rollers once a month. Paper dust is the biggest enemy of these machines.
Over time, it sticks to the rollers and causes paper jam issues. Clean toner spills immediately. If this dust gets into the gears, it can damage the mechanical parts.
Now let’s focus on the most common problems and their solutions.
Why Does a Photocopier Make Lines, Give Faint Prints, or Jam Paper?
These three problems make up 80% of service calls. Luckily, most of their solutions are simple, and even you can handle them. Let’s diagnose each one separately.
- Vertical lines: Usually caused by a scratched drum unit or dirty corona wire. Replace the drum or clean the corona wire according to the manufacturer’s instructions.
- Horizontal lines: A sign of toner buildup or wear on the fuser rollers. It means it’s time to replace the fuser unit.
- Faint output: Caused by low toner, a drum reaching end of life, or a weakened transfer corona. First check the toner, then review the drum and corona settings.
- Gray background: Appears when the waste toner box is full or the drum cleaning blade is worn. Empty or replace the waste box.
- Paper jam problem: The most common issue. Usually caused by damp paper, wrong tray settings, or wear on the feed rollers. Store paper in a dry place and clean the rollers regularly.
If you’re curious about photocopier error codes, each manufacturer uses its own code system.
For example, the C-XXX series usually indicates critical errors requiring service. In contrast, the E-XXXX series points to errors solvable by user intervention. The device’s user manual contains the full list of these codes.
How to Change Toner, Drum Life, and Maintenance Kits
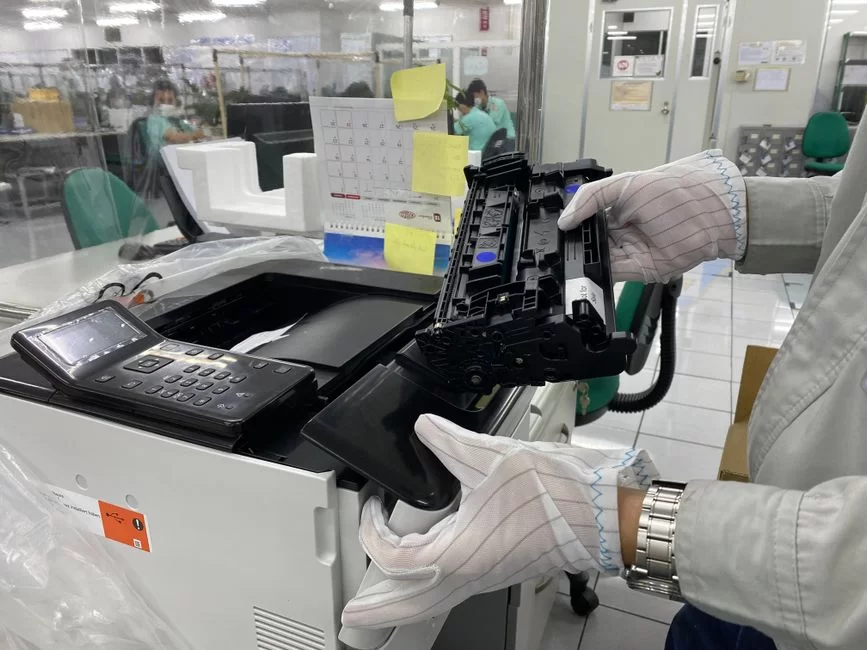
Toner replacement is the most frequent maintenance task you’ll do. Luckily, thanks to the modern cartridge system, this process is extremely simple. Here is the step-by-step toner replacement guide.
- Buy the right toner model: Compatible or equivalent toners are cheap in the short term but shorten drum life. Use original toner cartridges if possible.
- Open the front cover: On most models, you open the front cover to access the toner compartment. Additionally, open the cover slowly and without forcing it.
- Remove the old cartridge: Grip the cartridge by the handle and pull it straight out. If the waste toner box system is integrated, remove that too.
- Prepare the new cartridge: Remove the protective tape and plastic locks. Hold the cartridge horizontally and gently shake it a few times. This ensures the toner powder spreads evenly.
- Insert the new cartridge: Push it into place, making sure it sits on the rails. You should hear a click. Then close the cover.
- Reset the counter: On some models, a maintenance kit reset operation is required. For this, find the Toner Reset or similar option in the device’s menu.
The manufacturer usually specifies drum life. On black-and-white machines, it lasts 20,000–60,000 pages, and on color models, 30,000–100,000 pages. Don’t postpone when the drum replacement light comes on.
A worn drum increases toner consumption and degrades output quality. When planning your annual maintenance cost budget, be sure to factor in drum and fuser replacement periods.
If you’re making a service agreement or maintenance contract, make sure the replacement of these parts is covered.
Is It Okay to Buy a Second-Hand Photocopier? Advantages, Risks & Checklist
When the budget is tight, the second-hand market looks tempting. Indeed, you can find very good machines at half, even a third of the new price. However, this market is also very risky.
You must know about data security and spare part availability. Otherwise, you can get into serious trouble.
The second-hand / refurbished device economy is a smart investment if done right. For example, a corporate device whose lease period has expired has low mileage and is well-maintained. Such devices offer performance no different from new.
However, a machine you’ll buy from a private party with an unclear history is a complete unknown. That’s why we must examine step by step what to look for when buying a second-hand device.
What to Look for When Buying a Second-Hand Photocopier? Beware of Data Leaks!
The biggest risk in the second-hand market is unknowingly becoming an accomplice to data theft. As I mentioned before, these devices store all scanned documents on the internal HDD.
If the previous owner didn’t wipe this drive, you can access all their confidential information. This situation is unethical and can create legal liability. Here is my checklist for a safe purchase.
- Ask for the meter report: The total print count shows the device’s actual mileage. Under 100,000 is good; over 500,000 is risky.
- Check the maintenance history: Has it been serviced regularly? Which parts were replaced? Ask for the invoices.
- Get a test print: Print completely black, completely white, and mixed-content test pages. There should be no lines, fading, or background dirt.
- Question hard drive security: Ask the seller if the drive was wiped. If possible, do an HDD Format or Data Overwrite operation from the service menu yourself.
- Reset network settings: Return the device to factory settings and rebuild all network configuration from scratch.
- Inspect for physical damage: Body cracks, broken trays, or a burning smell are signs of serious problems.
Should I beware of data leaks when buying a second-hand copier? The answer is definitely yes. In fact, this is a more important criterion than price.
The Difference Between Refurbished Devices and Second-Hand
These two concepts are often confused, but there are serious differences. A second-hand device is a machine bought as-is from its owner.
It goes through no inspection, has no warranty, and its condition is uncertain. The manufacturer or authorized service, on the other hand, refurbishes the device from top to bottom.
In the refurbishment process, we replace all worn parts, reset the drum and fuser, update the software, and securely wipe the hard drive.
Often, we even install a new HDD. Finally, we put the device through factory tests and offer it for sale with a 6–12 month warranty. In other words, a refurbished product is close to new performance.
What’s more, it is 30–40% cheaper than the new price. If your budget doesn’t stretch to new, definitely prefer refurbished over second-hand. This choice will provide you with serious comfort regarding second-hand hardware security.
Photocopier Trends in 2026 and the Best Brands
2026 has been a year of significant transformations in the office automation hardware sector. AI, cloud computing, and cybersecurity have now become integral parts of these devices. What innovations stand out this year? Let’s take a look together.
The biggest trend is undoubtedly the spread of AI-powered MFP models. These devices not only make copies but also understand, classify, and integrate documents into your workflow.
For example, when you scan an invoice, AI automatically parses the amount, tax number, and date. At the same time, it transfers the data to your accounting software. This is a revolutionary feature that eliminates the need for manual data entry.
Additionally, remote device management solutions have now become standard. IT departments monitor all office equipment from a single panel and track toner levels.
Thus, they can detect failures in advance. As a result, service calls decrease and machine downtime drops to a minimum.
What Are the 2026 AI-Powered Multifunction Printers?
AI-powered MFPs offer much more than traditional devices. These machines contain powerful NPU (Neural Processing Unit) chips inside.
These chips perform image processing and natural language processing tasks locally. Moreover, they don’t need the cloud. What does this give you? Speed and privacy. Your data never leaves the device.
If you ask what the 2026 AI-powered multifunction printers are, the standout models are: Xerox ConnectKey, Canon imageRUNNER ADVANCE DX, Ricoh IM C series, and HP LaserJet Enterprise Flow.
The common feature of these devices is that they contain self-learning algorithms. These systems analyze your printing habits and predict frequently used settings.
What’s more, they automatically order toner. Additionally, they can detect suspicious network activities and isolate themselves.
Which Are the Best Photocopier Brands? (2026 Updated List)
There are dozens of brands on the market, but not all are of the same quality. Here are the best photocopier brands as of 2026 and their standout features.
| Brand | Strength | Standout Series | Target Audience |
|---|---|---|---|
| Xerox | Inventor of xerography, superior print quality | VersaLink, AltaLink | Mid-sized and large offices |
| Canon | Color consistency and optical excellence | imageRUNNER ADVANCE | Graphic and design offices |
| Ricoh | Robust build, low CPP, and comprehensive MPS solutions | IM C Series | Enterprise and heavy use |
| Konica Minolta | Security features and industrial durability | bizhub i-Series | Security-focused institutions |
| HP | User-friendly interface and wide service network | LaserJet Enterprise MFP | SMEs and home-office |
| Kyocera | Long-life drum and low total cost of ownership | TASKalfa Series | Cost-focused businesses |
The answer to which brand is good for a photocopier varies according to your needs. If color quality is important, Canon stands out.
If security is your priority, you can choose Konica Minolta; if you seek low cost, pick Kyocera. On the other hand, Xerox is still the industry leader with its historical heritage and innovation power.
Further Reading and Authoritative Sources
If you want to deepen the topics in this guide, you can examine the resources below because all of these sources are top-level authorities in their field.
- NIST SP 800-88: This is the official guide published by the U.S. National Institute of Standards and Technology. It covers media sanitization and data security. It explains how to securely wipe HDDs in devices.
- OSHA Indoor Air Quality Standards: These are the official occupational health and safety standards that set limits for ozone and particle exposure in the office environment.
- ENERGY STAR Imaging Equipment: The energy efficiency class and current certified product list for photocopiers.
10 Critical Questions About Your Office’s Most Mysterious Hero
What is the hardware difference between a photocopier and a printer?
Does a photocopier cause cancer? Is that real?
Does the photocopier’s hard drive store documents? How is it wiped?
Why does a photocopier make lines or produce faint output?
Which is more advantageous, leasing or buying?
Can the photocopier’s embedded operating system be hacked?
Is ozone gas harmful to health?
What is the difference between an analog and a digital photocopier?
How long is drum life?
How do you save energy on a photocopier?
Conclusion: Choosing the Right Photocopier and Using It Safely
At the end of this comprehensive journey, I hope your perspective on this device has completely changed. Now you know what goes on inside that box standing in front of you.
What’s more, you’ve learned the risks it harbors and the advantages it will provide you with. Knowledge is the greatest power, and you are now equipped.
Don’t rush when making a choice. Analyze your needs correctly, calculate the cost per page, and scrutinize the leasing contract. No matter which model you get, configure the data security settings from day one.
On the other hand, changing default passwords is the simplest life-saving step. Additionally, don’t neglect regular maintenance; this both extends the device’s life and protects office health.
Remember, buying a photocopier is not just buying hardware. At the same time, you’re buying a security protocol, a cost plan, and an efficiency strategy.

Be the first to share your comment