

Your office laser printer hums quietly. Yet inside, it is a complex electrostatic factory. Each page involves a hidden dance of physics and chemistry. Light, powder, and heat merge in milliseconds. The process etches crisp text and sharp graphics onto paper. At its core lies Xerography.
Xerography forms the base of a global industry that prints trillions of pages. Surprisingly, this tech was born in a humble New York kitchen in 1938. Chester Carlson, a patent attorney, grew tired of copying carbon copies. His home experiments ignited the modern office revolution. Xerography is the product of that grit and genius.
So why does Xerography still matter so much? Nearly every laser printer and copier today runs on the same principle. Hardware parts change and makers update software. However, the core electrophotographic process remains robust. In this sense, Xerography is a timeless engineering marvel.
This guide covers every detail from toner chemistry to fuser faults. Additionally, we will explore thoroughly how Xerography fits within the hardware world. Our goal is to provide a comprehensive reference.
Let us start with the basic definition. Then we will peel back the layers of this remarkable print engine. Your Xerography journey begins now!
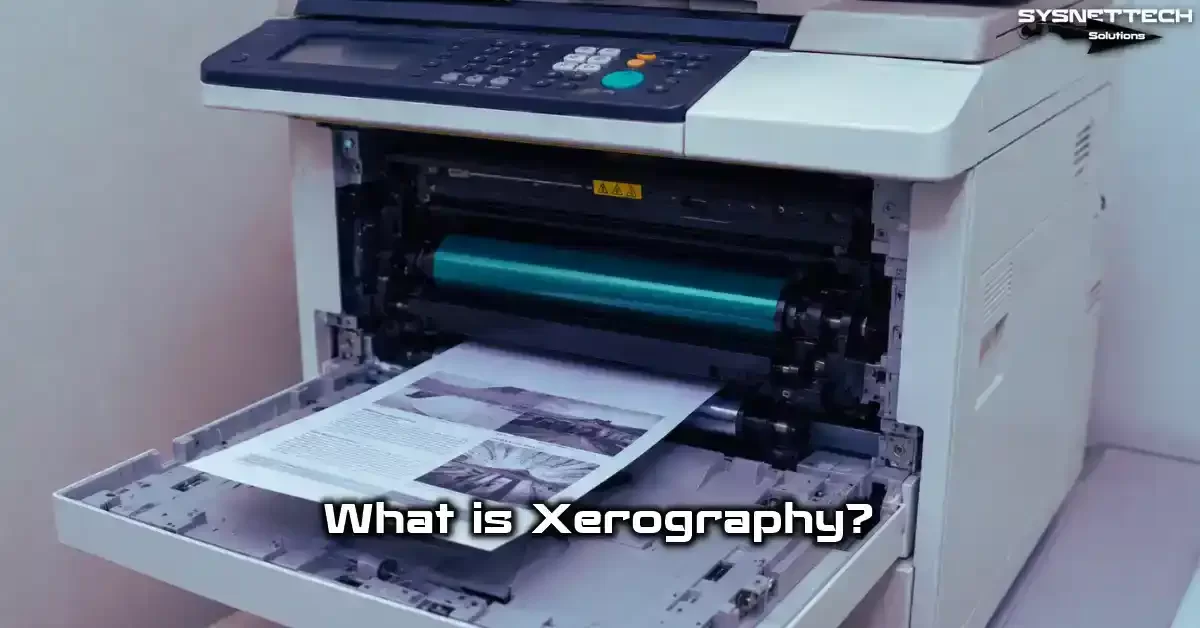
What Is Xerography? A Short Definition & Core Principle
Xerography is a dry printing technology that uses electrostatic charge and light. It forms a latent image on a light-sensitive surface called a photoreceptor.
Then it transfers that image to paper using toner powder. In the last step, heat and pressure fix it in place. Xerography essentially comprises these four steps.
Unlike traditional printing, you do not use a physical mold here. Likewise, liquid ink is never used. Only static charge, a laser beam, and dry toner do the work.
As a result, you achieve very fast and smooth printing. Thanks to these traits, Xerography holds a critical role among office hardware devices.
What Does Xerography Mean? A Journey from Word Roots to Technology
The word Xerography comes from Greek roots. “Xeros” means dry and “graphein” means to write. We can translate its full meaning as “dry writing.”
Interestingly, this name perfectly captures the essence of the process. Traditional printing uses liquid ink. Here, completely dry toner takes over. The term Xerography highlights that exact difference.
Chester Carlson made the name “Xerography” official during his 1938 patent filing. He also thought about using “electrophotography” as a backup.
Still, “Xerography” stuck because it was memorable and described the process well. Over the years, it became a generic term for the whole sector.
Today the word Xerography connotes copiers for most people. Yet electrophotography covers a much wider hardware family.
This family spans from laser printers to digital presses. It forms the backbone of modern office technology. Xerography deserves close study for this very scope.
Xerography’s Place in Hardware: Not Just Copying, But a Print Engine
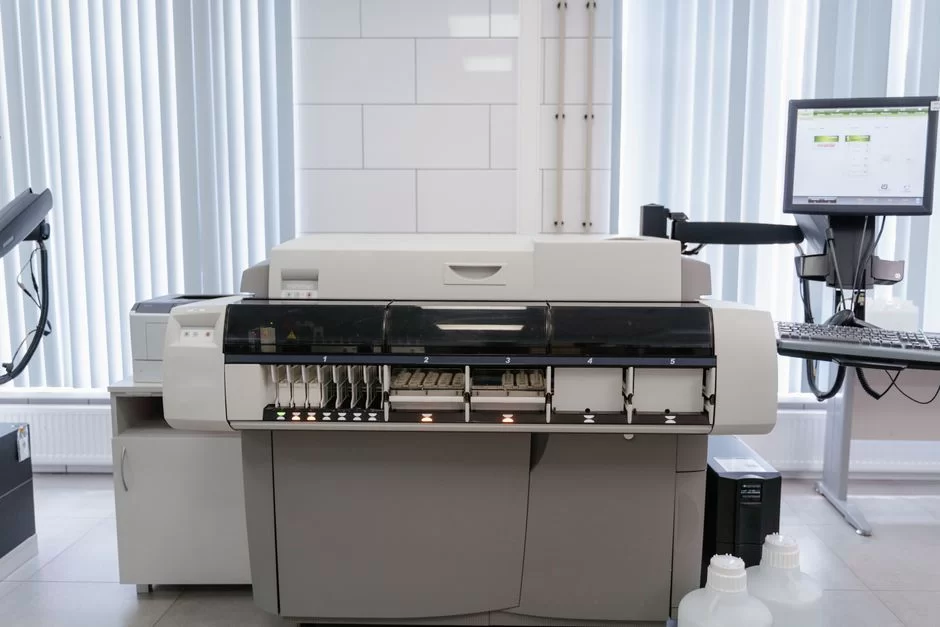
Limiting Xerography to just photocopying is a significant misconception. This process actually works as a full print engine.
Laser printers, multi-function devices, and even some presses use the same six stages. So Xerography is the universal backbone of the reprography world. It runs silently every time you print.
From a hardware engineering view, each layer of this engine needs its own skill set. A corona wire or charge roller handles the charging step.
For exposure, engineers use a laser scanning unit (LSU) or LED print head. Each part communicates with the next in milliseconds. This sync lets Xerography deliver flawless results.
In the computer hardware world, laser printer models stand out thanks to this engine. Additionally, they are much faster than inkjet rivals.
Moreover, toner-based printing does not smudge or fade like water-based ink. That is why it is ideal for archive-quality documents. You can use Xerography and electrophotography as synonyms here.
From Chester Carlson to the Digital Age: The History of Xerography
The Xerography story is shaped by one man’s determination. Chester Carlson worked as a patent attorney in New York in the 1930s.
Copying handwritten patent papers took hours. This dull routine pushed him toward a bold idea. Could you transfer an image using static charge?
Many people thought this idea was unconventional. In fact, Carlson knocked on doors for twenty full years.
Giants like General Electric, IBM, and RCA all declined. IBM’s rejection of Xerography is a famous moment. Reading that decision today still surprises people.
Who Invented Xerography? The Inspiring Story of Chester Carlson
Chester Carlson made the first electrophotographic copy on October 22, 1938. He worked in his small lab in Queens with his assistant Otto Kornei.
They coated a hand-made zinc plate with sulfur. This created a crude photoreceptor drum. Next, they rubbed the plate with a cotton cloth to charge it. That simple setup saw the birth of modern Xerography.
Carlson wrote “10-22-38 Astoria” on a glass slide. He exposed it onto the plate with a strong lamp. Then he dusted the surface with lycopodium powder. The writing appeared like magic.
He transferred the powder to wax paper and fixed it with heat.

The world’s first xerographic copy was born this way. Today the Smithsonian Institution displays that historic document. In short, Xerography officially originated through this test.
But this success did not open doors right away. Over 20 firms rejected his invention. Finally, he signed a deal with Battelle Memorial Institute in 1944.
Here he built a team to make Xerography a product. The major turning point came in 1947. He signed a license deal with Haloid Company.
From the Xerox 914 to Digital Laser Printers
Haloid Company changed its name to Xerox Corporation in 1961. Soon after, it launched the Xerox 914 model. This device was a true revolution in office technology history.
It could print seven pages per minute. The machine was also remarkably easy to use. Moreover, it was the first product sold with the slogan “press the button, get the copy.” So Xerography reached the masses through this machine.
The Xerox 914 was so successful that company revenue reached billions of dollars within a few years. Then the team set up Xerox PARC (Palo Alto Research Center).
This lab laid the groundwork for the GUI, Ethernet, and the laser printer. Digital Xerography also emerged inside this research hub.
The first laser printer prototype ran at PARC in 1971. But true market success came through Canon and HP LaserJet models.
Canon built a compact laser scanning unit (LSU) in the 1980s. HP then transformed office workflows with its LaserJet line. Quietly, they laid the Information Age’s foundation through Xerography.
How Does a Xerographic Print Engine Work? A Hardware Analysis of the Six Steps
You can break the xerographic print process into six core stages. These steps are charge, exposure, development, transfer, fusing, and cleaning.
Each one is a marvel of hardware engineering on its own. Moreover, the whole loop finishes in seconds. Xerography is the flawless blend of these six steps.
Now let’s examine each stage in detail. I will detail which parts play a role in each. I will also share the most common faults I see.
This way you can grasp both the theory and the hands-on side. Knowing these steps is essential for learning Xerography.
1. The Charge Stage: Hardware Gap Between Corona Wire and Charge Roller
The charge stage is the first and most critical step in Xerography. Here, the system coats the photoreceptor drum surface with an even electric charge.
The drum and corona wire activate at this point. The device covers the surface with thousands of volts. Xerography cannot work without this charge.
Older devices used a corona wire. This thin wire ionizes the air around it under high voltage. The ions settle on the drum surface and spread the charge evenly.
However, corona wires get dirty over time and cause uneven charge issues. That is why Xerography hardware keeps evolving.
Today’s devices use a charge roller instead. The gap between corona wire and charge roller manifests in evenness and ease of maintenance.
The roller touches the drum directly and charges it with far more control. Also, ozone output is much lower compared to a corona wire. This stands as a key advantage for modern Xerography systems.
2. The Exposure Stage: Laser Scanning Unit (LSU) and LED Print Head
The exposure stage functions as the brain of the Xerography print engine. Here, a laser beam or LED print head draws the image onto the drum.
Charge drains away where light hits and the spot becomes conductive. Dark areas that get no light stay charged. Xerography builds images through this contrast.
The laser scanning unit (LSU) uses a spinning mirror to sweep the laser across the drum. This mechanism is incredibly precise and positions at the micron level.
An LED print head, on the other hand, uses a fixed row of thousands of tiny LEDs. This reduces moving parts and increases durability. So Xerography can work with either method.
At the end of exposure, a latent image forms on the drum surface. You cannot see it with the naked eye. We call this structure the latent image. It acts as a template that will pull toner particles in the next steps.
The Write-Black and Write-White method is relevant here. The laser decides whether to draw the areas that print or the blank spaces.
3. Development & 4. Transfer: The Physics of Toner and Drum Interaction
The development stage is where the latent image meets toner. A magnetic brush spins inside the developer unit and carries toner particles.
Toner grains stick to the charged spots on the drum through electrostatic pull. A doctor blade scrapes off extra toner and keeps the layer even. At this point, Xerography materializes.
The question of what toner does in Xerography becomes clear now. Toner is a special powder mix of polymer and pigment. It adheres to the charged spots on the light-sensitive surface. Positive areas pull in the negative toner particles and hold them.
During transfer, the paper passes under the drum and the transfer unit activates. A transfer roller applies a strong opposite charge to the paper.
As a result, toner particles jump from the drum to the paper. Electrostatic pull once again plays the primary role here. Everything moves along the paper path with millimeter precision.
5. The Fusing Stage: Heat and Pressure Mechanics of the Fuser Unit
The fusing stage is where xerographic print becomes permanent. A fuser (heater unit) has two rollers: a heated top roller and a pressure roller below.
Fuser unit heat usually runs between 180 and 220 degrees Celsius (356–428 °F). Manufacturers adjust this heat based on toner particle size and chemical makeup. The device cannot complete the Xerography process without this heat.
Paper passes between these two rollers while the toner melts into the paper fibers. The fusing roller performs its function at this point. Then the printer locks the image onto the sheet through the optimal combination of heat and pressure.
Paper is still warm as it leaves the fuser. This explains why paper comes out hot from a laser printer.
Modern devices use fast-heat fusers and induction heating technology. Thanks to this, wait times drop to mere seconds.
Also, Energy Star certified models reduce power consumption in standby mode. Xerography thus becomes far more efficient.
6. Cleaning and Waste Handling: Hardware Longevity
The cleaning stage is often ignored but it is vital. After transfer, leftover toner particles stay on the drum. A cleaning unit scrapes them off.
These leftovers accumulate in the waste toner box. If you do not empty it often, print quality drops and drum life shrinks. The Xerography loop restarts with cleaning.
Users tend to skip waste toner box care, mainly in busy office settings. Yet a full waste bin can leak and foul the whole paper path.
The result is unwanted gray smudges on page backs. A professional print management tool can remind you of these care intervals. That is why Xerography upkeep needs discipline.
The question of how to recycle toner waste is also gaining importance. Major manufacturers offer closed-loop recycling plans.
They collect used cartridges, sort them, and feed them back into production. This protects the environment and cuts raw material costs. Xerography and green goals meet in this way.
Analog & Digital Xerography: The Hardware Evolution
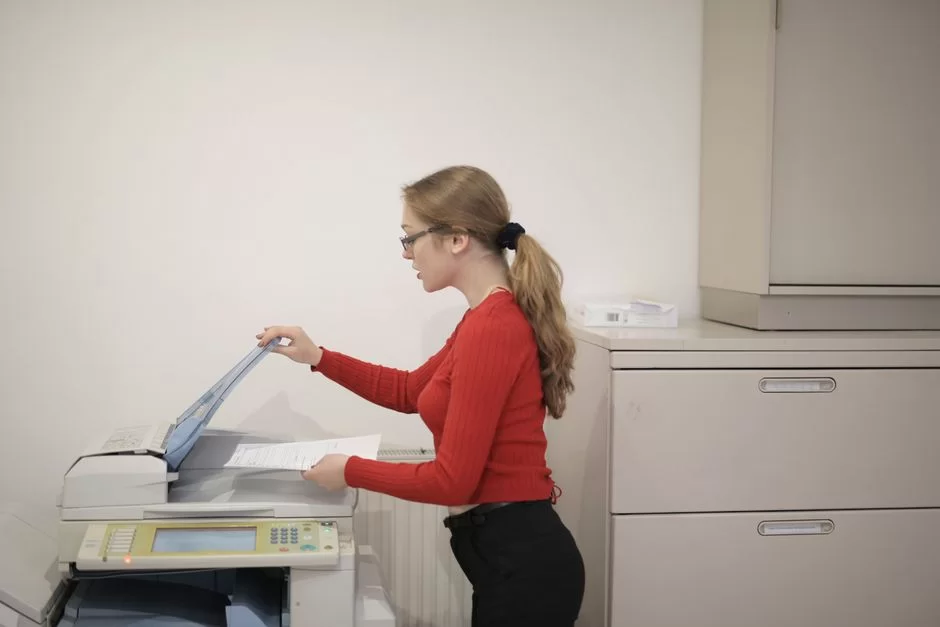
Analog Xerography shines the original document right onto the drum through a lens system. This method relies entirely on optical scanning and mirrors.
Image quality depends on clean, well-aligned lenses. Also, you cannot process or adjust the image digitally here. Xerography in this form is limited but still striking.
Digital Xerography first scans the image and turns it into numeric data. A CCD sensor or CIS scanner reads the document. Then the formatter board processes this data.
Next, the laser scanning unit (LSU) turns the digital signal back into light. This allows contrast adjustments, sharpness fixes, and color correction. Xerography leaped into a new age with this digital shift.
If you ask what digital Xerography does, the answer lies in its range. One device works as a copier, printer, and scanner.
Moreover, memory and a processor let you queue complex jobs. Analog machines lack this kind of flexibility. Xerography was reborn through this shift.
CCD Sensor and Laser Scanning Unit: Two Generations of Image Processing
Image capture in analog systems relies fully on optical lenses and mirrors. The device shines a strong light on the document. Then it sends the reflection straight to the drum.
The process is fast, but you cannot change the image. Also, you must place the document physically on the glass. Xerography in this state is quite simple.
Digital systems use a CCD sensor instead. A scan bar moves over the document and turns each point into pixels. The processor on the formatter board handles this data and writes it to RAM. After that, the laser scanning unit (LSU) reads the digital data and exposes the drum.
The most critical difference between the two is resolution and repeatability. Digital Xerography offers 1200 dpi and higher print resolution.
Moreover, you can copy the same document many times without rescanning. Analog machines must optically scan for each copy. This speeds up mechanical wear.
Core Parts of Xerographic Hardware: An In-Depth Look
Laser printer hardware parts each belong to their own branch of engineering. Knowing these parts gives you a significant advantage when fixing issues. It is also critical for selecting the right supplies. Now let’s examine each part one by one.
A laser printer’s core consists of the toner cartridge, photoreceptor drum, fuser unit, and transfer roller. The laser scanning unit, paper feed system, and formatter board also round out the process.
When each part works in sync with the others, you get flawless prints. The harmony of Xerography parts is essential.
Toner Cartridge and Chemistry: Ground Toner vs Chemical (Polymerized) Toner
The toner cartridge is the fuel tank of the Xerography print engine. Inside lies a fine dust we call dry toner. But not all toner is the same.
The distinction between chemical toner and ground toner directly shapes your print quality. Knowing this distinction gives you a cost-per-page advantage.
Manufacturers produce ground toner by crushing large blocks with machines. The particles have sharp, uneven edges.
Size distribution is wide and ranges from 8 to 12 microns. For this reason, it does not fully cling to the drum and prints show slight roughness. So Xerography quality depends on the toner type.
Manufacturers produce polymerized toner through a chemical process. This toner has round, smooth particles. Toner particle size is quite small and even at 5 to 7 microns.
The result is finer detail and the advantage of a lower melting point. It also uses less energy. Low-melt toner mainly extends fuser life. This is the ideal toner for Xerography.
Let’s break down toner from a chemical perspective. It is a mix of polyester resin, carbon-based powder, wax, and charge control agents. Carbon-based powder gives the black color.
Wax makes it stick to paper more easily and adds gloss. For color toners, manufacturers use organic dyes as pigment.
| Feature | Ground Toner | Chemical (Polymerized) Toner |
|---|---|---|
| Particle Shape | Uneven, angular | Round, smooth |
| Particle Size | 8-12 microns | 5-7 microns |
| Print Quality | Medium | High |
| Melting Point | High | Low |
| Energy Use | More | Less |
| Drum Wear | More | Less |
| Cost | Low | Medium-High |
Photoreceptor Drum Types: Selenium, Organic, and Amorphous Silicon
The photoreceptor drum is the most critical part of Xerography. This roller has a light-sensitive surface. The photoconductive material acts like an insulator in the dark and a conductor in light.
Without this unique photoconductivity property, xerographic printing cannot happen. Xerography takes shape on this drum.
We can group photoreceptor drum types into three main categories. Manufacturers no longer produce first-gen selenium drums due to high toxicity and cost.
You will find second-gen organic photoconductor (OPC) drums most widely today. They are light, cheap, and eco-friendly. However, they scratch easily. This is the most popular choice for Xerography.
The third gen is the amorphous silicon drum. Its incredibly hard surface offers a life of up to 500,000 pages. You select this for high-volume business printers for that reason.
But its cost is quite high compared to an OPC drum. How do you know when drum life ends? When you see vertical lines or repeating spots, it is time to swap.
| Drum Type | Material | Life (Pages) | Cost | Use Case |
|---|---|---|---|---|
| Selenium | Selenium alloy | 50,000 – 100,000 | Very High | Old-gen, out of production |
| OPC (Organic) | Organic photoconductor | 15,000 – 50,000 | Low | Home and office printers |
| Amorphous Silicon | Silicon-based coat | 300,000 – 500,000+ | High | Business print centers |
Fuser Unit and Transfer Roller: The Parts That Etch Print into Paper
The fuser unit heat and pressure truly etch xerographic print into the paper. The top roller has a Teflon coat and holds a halogen lamp or induction heating coil.
In addition, the bottom roller is a silicone-coated pressure roller. If you ask how toner sticks to the paper, this duo shows the answer physically. Xerography ends with this unit.
I hear the question of how to spot a fuser fault frequently in the field. The clearest sign is toner that rubs off when you swipe the print with your finger.
Also, wavy shadows, uneven shine, or burn marks are warning signs. The reason toner falls off the paper is always a fuser fault.
The transfer roller is the unit that moves toner from the drum to the paper. Over time, toner and paper dust build up on its surface. If you learn how to clean the transfer roller, you maintain print quality.
You can wipe it gently with a soft cloth and isopropyl alcohol. But you must strictly avoid harsh cleaners. Xerography care requires this gentle approach.
Xerographic Hardware Architecture for Professional Workflows: Formatter, RAM, and CPU
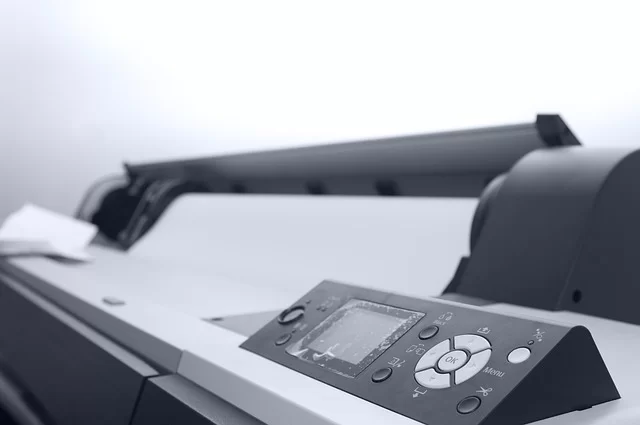
A modern laser printer is not just mechanical parts. It houses a full computer inside. The formatter board is the motherboard of this embedded computer.
It holds a CPU, RAM, flash memory, and connection ports. Print management software runs on this hardware. So Xerography is now deeply woven with software.
The processor reads incoming data and builds the page image. RAM stores this image for a short time. RAM capacity becomes critical when printing large, complex PDF files.
When memory runs low, the printer generates an error or rejects the job. In short, the working principle of RAM is the same inside a printer.
Business models need extra processing power for duplex units and finishing options. Special processors handle tasks like stapling, hole punching, or booklet making.
That is why professional print engines pack more powerful hardware than most desktop PCs. Xerography architecture is complex for this reason.
Printer Control Languages (PCL, PostScript) and Hardware Interaction
A printer control language forms the common language between your PC and the Xerography print engine. The two most common standards are PCL (Printer Command Language) and PostScript.
HP built PCL and you mainly use it in office settings. It uses fewer resources and runs fast. Additionally, Xerography works well with PCL.
PostScript is a page description language built by Adobe. You select it for graphic and desktop publishing work. It handles vector art and fonts flawlessly. Yet reading PostScript needs a strong CPU and plenty of RAM.
The processor on the formatter board reads these languages and turns them into dot patterns. This shift produces the signal needed for the laser scanning unit (LSU). So hardware and software integrate seamlessly at this point. Selecting the right hardware parts directly shapes your print speed.
Laser, LED, and Inkjet Printers: How Does Xerography Compare?
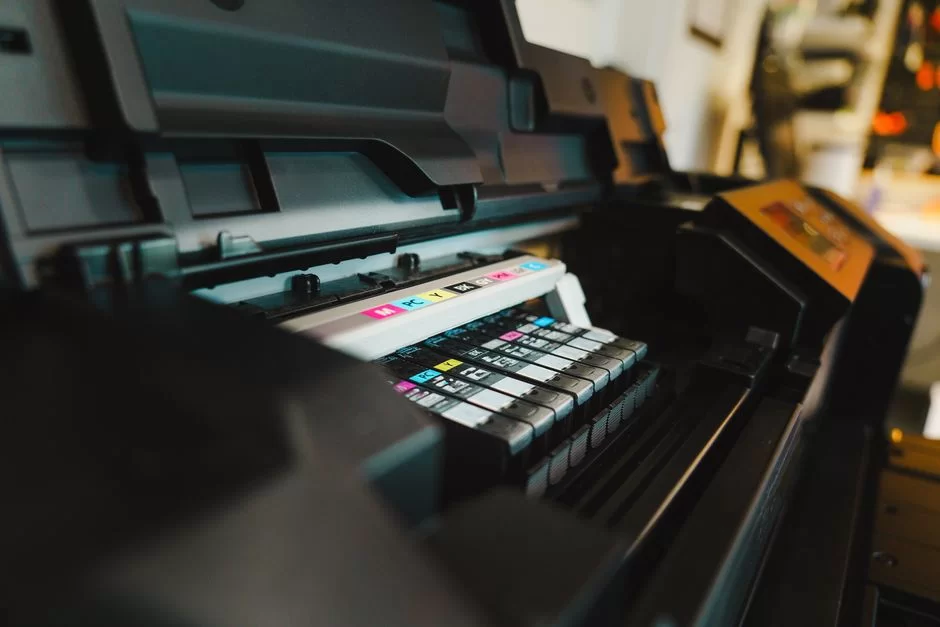
Comparing Xerography with inkjet printing forms the basis of purchasing decisions. These two technologies run on entirely different physical principles.
One uses dry toner and heat while the other uses liquid ink and spray heads. Results and costs differ significantly. Xerography often wins this comparison.
The difference between a copier and a laser printer is more about function. At their core, both use the same electrophotographic engine.
But a copier relies on an optical scanning system while a laser printer gets digital data from a PC. Multi-function printer models merge both into one body. Frankly, Xerography is their shared base.
LED Printer vs Laser Printer: Two Exposure Systems for the Same Engine
Technical discussions often debate LED vs laser printer comparisons. Both use a Xerography print engine. The core difference appears only at the exposure stage.
A laser printer uses a spinning mirror and a single laser beam. An LED printer uses a fixed LED array instead. This way, Xerography can work through either path.
An LED print head has no moving parts. So the risk of mechanical faults decreases. Also, its compact build shrinks the printer’s size.
Still, the laser scanning unit (LSU) maintains an advantage in optical precision. At 2400 dpi and above, the laser’s edge becomes clear. Laser precision is critical for Xerography.
Conversely, LED printers use less power and run more quietly. Their upkeep costs also tend to be lower.
Today, manufacturers like OKI and Brother are rapidly advancing LED technology. Each system can win based on your use case.
| Criteria | Laser Printer | LED Printer |
|---|---|---|
| Exposure Method | Spinning mirror + laser | Fixed LED array |
| Moving Parts | Yes (mirror motor) | None |
| Max Resolution | 2400+ dpi | 1200 dpi |
| Noise Level | Medium | Low |
| Energy Use | Medium | Low |
| Mechanical Toughness | Medium | High |
| Upkeep Cost | Medium | Low |
Xerography vs Inkjet: Cost Per Page and Hardware Life Analysis
The question of toner versus liquid ink difference lies at the heart of cost analysis. Inkjet printers push liquid ink through tiny spray nozzles.
These nozzles clog over time and cleaning cycles waste ink. Toner-based printing never encounters this kind of issue. That is why Xerography is more reliable.
| Criteria | Xerography (Laser/LED) | Inkjet |
|---|---|---|
| Print Tech | Dry toner, heat and pressure | Liquid ink spray |
| Cost Per Page (Black) | $0.02 – $0.05 | $0.05 – $0.15 |
| Cost Per Page (Color) | $0.08 – $0.20 | $0.15 – $0.40 |
| Monthly Print Volume | 2,000 – 50,000+ pages | 200 – 2,000 pages |
| First Page Out Time | 5 – 10 seconds | 8 – 20 seconds |
| Cartridge Shelf Life | 24 – 36 months (powder won’t dry) | 12 – 24 months (ink dries out) |
| Hardware Life | 100,000 – 500,000+ pages | 30,000 – 60,000 pages |
The table above provides a clear view of Xerography advantages and drawbacks. Toner-based printing holds a significant advantage in high-volume work.
However, for low-volume and sporadic use, inkjet devices have an advantage in upfront cost. Still, when you calculate total cost of ownership, a laser printer comes out ahead in most cases.
Among Xerography drawbacks, we can list high initial cost and ozone output. Also, color laser printers lag behind inkjet rivals for photo prints. Do not decide before you fully assess your print needs.
Health, Environment, and Sustainability: The Hidden Side of Xerographic Hardware

Health effects concern users just as much as Xerographic hardware faults do. Machines that print hundreds of pages a day in offices affect the air.
Is toner dust harmful to health? Researchers have studied this for years. Likewise, laser printer ozone gas output remains a concern. Knowing these topics matters when you use Xerography.
In this section, I will present the facts backed by science. We will set fear-based rumors aside and talk about real, measurable risks. We will also look at fixes like HEPA-filter laser printer models.
Are Laser Printers Really Harmful to Health? The Truth About Ozone and PM2.5
Does a copier produce ozone? The short answer is yes. A corona wire ionizes air under high voltage and releases ozone gas.
But modern Xerography devices have an ozone filter that turns this gas back into oxygen. When you replace filters on time, ozone output stays well below safe limits. Xerography health risk is thus kept low.
PM2.5 ultra-fine dust printer output is a more debated topic. Some studies show indoor particle levels rising during heavy print runs.
These particles are a mix of toner dust and paper fibers. Still, the values we measure in normal office conditions sit well below WHO limits.
Even so, taking precautions is wise. I suggest extra filtering mainly for staff with asthma or breathing issues.
HEPA-filter laser printer models are the safest choice here. Also, you should place the printer at least 6 feet from your work desk.
HEPA-Filter Laser Printers and Eco-Friendly Hardware Options
Environmental awareness pushes manufacturers toward cleaner Xerography technology. New models come with built-in ozone filters and particle traps as standard. Here are the features you should look for in eco-friendly hardware choices:
- Built-in HEPA filter: Catches 99.97% of particles at 0.3 microns and above. It is also ideal for allergy-prone users.
- Energy Star certification: Uses just 1–2 watts in standby mode. This can save up to 30% on your yearly power bill.
- Chemical toner use: Low-melt toner lets the fuser run at a lower heat. So energy use and carbon footprint both drop.
- Closed-loop recycling: Major manufacturers pick up used cartridges for free and feed them back into production.
- Duplex unit: Cuts paper use by up to 50%. This directly helps protect forest resources.
- Low-melt toner: Lowers fuser heat by 20–30 °C and saves energy.
Devices that meet these criteria protect your office hardware budget. On the other hand, you also meet your environmental responsibilities.
You can also track eco labels like Blue Angel and EPEAT. Outside groups audit these certifications and they are trusted. Xerography and green technology can exist side by side.
Common Xerographic Hardware Faults and a Practical Repair Guide

The Xerographic hardware faults I encounter most often stem from simple care gaps. Users replace the toner but forget the drum. The fuser life ends but they ignore the signs.
The waste toner box overflows yet no one empties it. As a result, one small issue escalates into a chain of faults. That is why Xerography upkeep needs both discipline and know-how.
Now I will share the most common issues and their solutions based on years of hands-on work. This guide lets you do your own troubleshooting before calling a technician. But you must follow the safety rules.
How to Spot a Fuser Fault and Quick Solutions
The answer I give to how to spot a fuser fault can be valuable. The most basic check is to see if toner rubs off the paper.
Run your finger lightly over the print. If toner smears or lifts with friction, the fuser is definitely faulty. Xerography print quality declines this way.
Another sign is repeating wavy shadows on the page. These shadows indicate wear or grime buildup on the fuser roller.
Also, if paper crumples or jams at the fuser exit, the pressure balance is incorrect. Fuser and thermistor checks become critical at this stage.
As a short-term solution, you can try raising fuser heat one notch from the printer menu. Using thicker paper also helps toner stick better.
But these measures only delay the need for replacement. You must call an authorized technician for a fuser replacement. Printer fuser replacement cost ranges from $50 to $300 based on the model. Yet Xerography repair requires expert assistance.
Drum Life and Replacement Time: Signs and Common Myths
Many misconceptions circulate about how to tell drum life is over. Some users think they only need to replace the drum when toner runs out.
But the drum unit has its own wear cycle. An average OPC drum lasts between 15,000 and 50,000 pages. So Xerography drums need regular checks.
These signs indicate that replacement is needed: vertical lines, repeating dots, faint print, and gray tones in the background.
Also, clicking sounds from the laser printer roller drum mechanism act as a warning. When you see any of these signs, check the drum.
A common myth says you can leave the drum exposed to light. An organic photoconductor drum sustains permanent damage when it meets sunlight or strong man-made light.
So never leave the drum out in the open for long. Work quickly during a replacement. Once you pull the new drum from its bag, install it right away. A Xerography drum is light-sensitive.
Selecting the Right Xerographic Hardware: A Buying Guide (2026)
The market is saturated with dozens of models and brands. If you make the wrong choice, you will struggle with high cost-per-page for years.
Now I will share the criteria for selecting the best Xerography-based device for your use case. My aim is to provide you with objective data, not marketing claims.
First, ask yourself these questions: How many pages do I print each month? Do I truly need color print? Must my prints be archive-grade? The answers will guide you directly to the right model.
Hardware Rules for Home, Office, and Business Use
Requirements differ significantly based on scale. For a home user, small size and quiet operation take priority. For a business user, speed and durability are critical. Here are the core criteria I set for three use cases:
- Home Use (200–500 pages/month): A compact LED printer or entry laser printer fits best. Watch the energy use watt figure. Select models with a fast-heat fuser and Wi-Fi. Print resolution of 600×600 dpi is enough.
- Small Office (1,000–5,000 pages/month): A multi-function printer (scanner, copier, fax) is essential. An automatic document feeder and duplex unit save time. Look for models with a low cost per page.
- Business (10,000+ pages/month): Select high-capacity toner and an amorphous silicon drum. You need print management software for user-based limits and reports. Induction heating and low-melt toner save energy. Also, do not skip the service and maintenance agreement negotiations.
| Use Type | Suggested Monthly Volume | Ideal Drum Type | Fuser Tech | Connection |
|---|---|---|---|---|
| Home | 200-500 pages | OPC | Halogen heated | Wi-Fi, USB |
| Small Office | 1,000-5,000 pages | OPC | Fast-heat | Ethernet, Wi-Fi |
| Business | 10,000+ pages | Amorphous Silicon | Induction heating | Ethernet, Cloud |
Total Cost of Ownership (TCO) Calculation: The Hidden Costs of Going Cheap
Total cost of ownership calculation is the backbone of purchasing decisions. Many users just look at the device price tag and overlook long-term costs.
Yet over three years of use, supplies and energy costs can multiply the device price. Here is a real-world TCO breakdown:
| Cost Item | Entry Laser | Mid-Range Laser | Business Laser |
|---|---|---|---|
| Device Price (USD) | $150 – $300 | $500 – $1,200 | $2,000 – $8,000 |
| Monthly Toner Cost (3,000 pages) | $90 – $150 | $60 – $100 | $30 – $60 |
| Drum Swap Cycle | 12,000 pages | 25,000 pages | 100,000+ pages |
| Drum Swap Cost | $60 – $120 | $100 – $200 | $300 – $600 |
| Yearly Energy Use (kWh) | 30 – 50 | 50 – 80 | 80 – 150 |
| 3-Year Total TCO | $1,200 – $1,800 | $1,500 – $2,500 | $3,000 – $5,000 |
| Real Cost Per Page | $0.04 – $0.06 | $0.02 – $0.04 | $0.01 – $0.02 |
As you can see, buying an inexpensive device often costs more in the end. When you calculate cost-per-page, always include toner, drum, and energy.
Also, third-party solutions like chip resetting and cartridge refilling put your warranty at risk. Official supplies are always the safest and longest-lasting choice.
Selecting quality supplies for electrostatic printing technology devices extends your print engine’s life.
This choice mainly impacts the corona wire/charge roller and photoreceptor drum. Low-grade toner both scratches the drum and clogs the fuser unit. Thus, do not incur significant costs while attempting to save. Supply your Xerography device with quality supplies.
The Future of Xerography & Rising Hardware Trends
The digital transformation is reshaping Xerography hardware as well. Plus, the paperless office slogan has circulated for years. But the truth moves the other way.
Global print volume grows steadily each year. However, what people expect from devices is fundamentally changing. Xerography is quickly keeping pace.
Today, AI-backed print management software gains prominence. Besides that, we see more ideas like predictive care and zero-touch service.
Moreover, environmental regulations are pressuring manufacturers on ozone output and energy use. This push opens the door for cleaner and smarter hardware.
Smart and Connected Hardware: Cloud and IoT Integration
A modern Xerography printer is no longer a stand-alone box. It has become a self-monitoring node thanks to IoT sensors.
It reports fuser unit heat, drum wear level, and toner level to the cloud in real time. This way, the service team intervenes before an issue develops.
Cloud links let you print straight from Google Drive or SharePoint. You can also safely print jobs sent from mobile devices.
NFC and QR code user checks keep data safe, mainly in business settings. Document scanning solutions are a key piece of this puzzle too.
AI-based image processing adjusts print quality in real time. It spots paper type, sets toner density, and even darkens faint text on its own.
Soon we will see fully autonomous print engines that place their own supply orders and schedule maintenance appointments. Xerography and AI are evolving as one.
Further Reading on Xerography
I suggest the trusted sources below for those who want to explore in more depth the topics I covered here:
- Wikipedia’s source: Gives a broad overview of Xerography inventor Chester Carlson and the tech’s history.
- ISO/IEC 19752:2025 standard: The latest global standard for measuring laser printer and office gear performance. It also defines toner yield and cost-per-page method.
- US EPA Indoor Air Quality page: This page looks at how office gear affects indoor air. It also shares science-backed data on ozone, particle matter, and VOC output.
The Top 10 Frequently Asked Questions About Xerography Printing Technology
What is Xerography and what does it mean?
Do laser printers use Xerography technology?
What is the hardware difference between a copier and a laser printer?
Why does paper come out hot from a laser printer?
Is toner dust harmful to health or risky to breathe in?
How do I know when the drum life is over and must I replace it?
What is the difference between chemical (polymerized) toner and normal toner?
Why does a copier or laser printer smell like ozone?
Does chip resetting and refilling cartridges harm printer hardware?
What is the Xerox 914 and why is it so important?
Conclusion: The Past, Present, and Future of Xerographic Hardware Technology
The journey from Chester Carlson’s humble New York kitchen to today is truly remarkable. Electrophotography was born from simple wonder. It grew into a cornerstone of the Information Age.
Your office laser printer today is a version of that first successful experiment, refined billions of times over.
Xerography continues to evolve. Chemical toners, amorphous silicon drums, and induction-heated fuser units push the limits.
Also, environmentally friendly materials and smart connection features make this technology more sustainable. That is why Xerography holds promise for the future.
I hope the hardware knowledge and field notes I shared in this guide illuminate your understanding. Whether you are a home user or a business IT chief, grasping electrostatic print principles provides an advantage.
This way you run your equipment far more smoothly. With the right device choice and regular care, you can print trouble-free for years.
Do not forget that this quiet office device is a remarkable combination of physics and chemistry. Each printed page involves a hidden electro-optical dance.
Now you know the inner workings of that process. I wish you smarter use of your print engine. May you enjoy quality prints with Xerography.

Be the first to share your comment