

Your drive suddenly stopped opening. You click the volume in File Explorer. Windows gives you a cold warning: “You need to format the disk before you can use it.” Right at that moment, your heart stops. Years of photos, vital work files, projects… All of it is in danger. Do not panic. In this article, I will explain the RAW disk recovery process in the finest detail. I will share my real field notes with you.
First of all, you should know this: RAW is not a file system. RAW is an error state that means Windows cannot read the file system on the drive. So in truth, your data is often right there. The operating system just does not know how to reach it. Therefore, if you follow the right steps, your chance of recovering your data is quite high.
In this guide, I will not just give you theory. I will tell you real field scenarios and also show you which tool to use in which case. On top of that, I will share which mistakes will wipe your data for good.
If you are ready, let us start this journey together. Our goal is clear: make your storage usable again without losing data. Remember, RAW is not the end — it is a problem you can solve with the right approach. Just take the first steps the right way. Also, never write to the original drive.
What is a RAW Disk? Why is Recovery Critical?
When a drive shows up as RAW, it means the file system on that volume is no longer recognized. Normally, a drive holds a file system like NTFS, FAT32, or exFAT. The operating system reads that structure to reach your files. But when this structure breaks, Windows writes “RAW” on the disk management screen.
In this state, the disk manager sees the unit and shows its size correctly. Yet you cannot reach the data inside. When you double-click the volume in File Explorer, you get an error message. Or the system throws a format warning right away. At this point, RAW disk recovery steps in.
What Is a RAW Disk?
By the strict technical definition, RAW is not a file system type. RAW is how the operating system says, “I cannot read the file system on this drive.” So the unit is physically there and its sectors are readable. However, the key metadata fields of the NTFS or FAT32 structure are broken.
This metadata covers structures like the MFT (Master File Table), the boot sector, or the partition table. When these structures take damage, Windows cannot tell where files start or end. As a result, it labels the volume as RAW. So RAW is not a disease — it is a symptom.
So what exactly is the link between a RAW disk and lost data? In truth, your files usually remain on the drive in physical form. Only the road map to them is lost. That is why good RAW disk recovery tools focus on rebuilding that road map. At the same time, they scan the files as raw data.
The RAW disk idea is not limited to hard drives. USB sticks, SD cards, external drives, and even SSDs can throw a RAW error. Each one has different recovery dynamics. For example, on SSDs, the TRIM feature can wipe deleted data for good in a short time.
Therefore, when you encounter a RAW disk, the first thing you must do is stop using the storage entirely. Do not write new data on it. Do not run any repair command on the unit, because these steps write over sectors you could still save. That makes the case worse.
The Link Between a RAW Disk and Lost Data
Understanding the link between a RAW disk and data loss lets you make the right call in the moment of panic. When a drive goes RAW, Windows tells you the files are lost. Yet that does not always reflect the truth. In most logical RAW cases, the files remain right in place.
Think of it like this: you have a library, and all the books sit on the shelves. But the catalog system has completely broken down. The list showing which book sits on which shelf is lost. That is exactly what a RAW state looks like. The books — meaning your data — are there. But the catalog — meaning the file system structure — is broken.
How Data Recovery Software Handles RAW Disks
From that image, I can tell you data recovery software takes two main paths. The first path tries to rebuild the broken catalog structure, meaning the MFT or boot sector. The second path ignores the catalog entirely. Then it tries to spot the books — the files — one by one.
We call that second method “file signature recovery” or “deep scan.” This method hunts for the start and end signature that each file type has. For example, JPEG files start with FF D8 FF. PDF files start with %PDF. The tool scans the surface sector by sector to catch these marks.
So in a RAW recovery, the biggest factor that lifts your odds is picking the right method. If you can partly save the file system structure, a fast scan may be enough. Yet if the structure has fully crashed, a deep scan becomes a must.
All in all, the question of whether data on a RAW disk is lost has no clean answer. The answer depends on the type of damage and the physical health of the unit. So you must judge each RAW case on its own. Also, you must not rush your decisions.
Why Does a RAW Disk Happen? Physical & Logical Causes
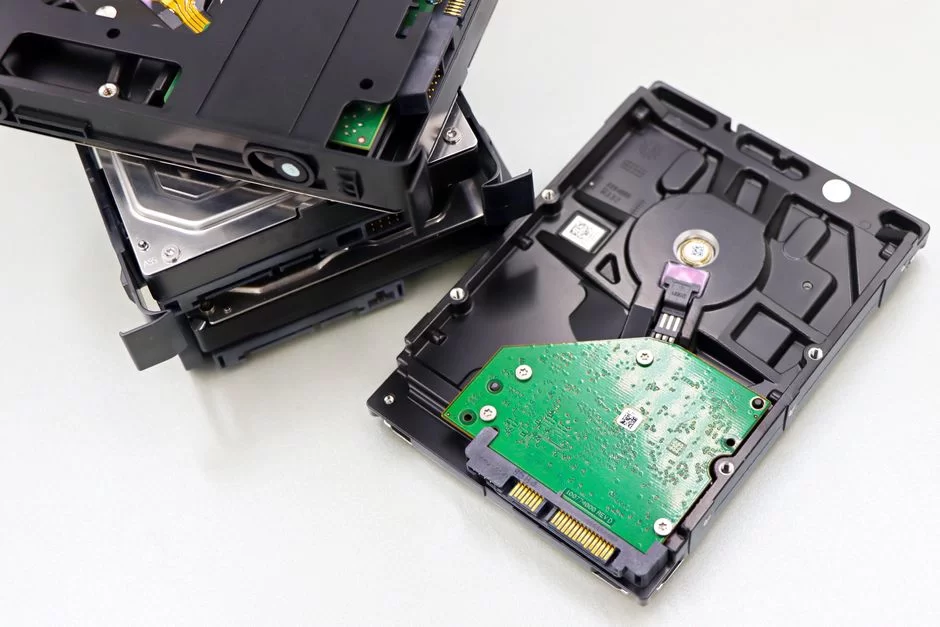
More than one cause can be behind a drive becoming RAW. We can group these causes under two main categories: logical causes and physical causes. Logical causes stem from software corruption, while physical causes point to hardware faults.
Getting that split right determines the recovery path you will take. In a logical case, your chance with software is high. Yet if a physical fault is at play, you must not step in yourself. In that case, you should call an expert data recovery lab.
Logical Causes: Power Loss, Sudden Eject, Virus, Software Error
Logical RAW errors are cases where the unit is physically sound but the file system structure is broken. In these cases, your chance of recovery is quite high. Here are the logical causes I encounter most often:
- Sudden power loss: When the power dies while the PC runs, the data you were writing is left half-written. This state can break key fields like the MFT or boot sector.
- Pulling the drive without a safe eject: You pull USB and external drives in particular without using the “Safely Remove” step. In that case, yanking the cable breaks the file system.
- Virus and ransomware attacks: Malware aims at the MBR or partition table. These strikes can turn the unit RAW. Ransomware then locks your files with encryption to block access.
- Failed software update or install: Crashes during Windows updates can break the file system. Faulty partition tools cause the same harm.
- Wrong disk management steps: Running the diskpart clean command on the wrong volume can cause a RAW error. Assigning the wrong drive letter brings the same trouble.
These causes share one trait: the unit stays physically sound. So in these cases, your chance with data recovery software is high. Yet the first rule still holds: do not write to the original drive.
A case I encounter often in logical RAW issues looks like this: the user gets a “D drive is RAW” alert. They format in a panic. Then they want to rescue their data, but it is now too late. Yet had they run a data recovery tool before the format, they could have reached most of the files.
Physical Causes: Bad Sector, Head Crash, Motor Failure, Power Spike
Physical RAW errors are faults that happen in the hardware parts of the unit. In these cases, software recovery methods usually do not work. Sometimes they can even make the case worse. Here are the most common physical causes:
- Bad sector: There are areas on the surface that you cannot read or write. If these sectors land on key file system areas, the unit goes RAW.
- Head crash: The read head touches the platter and scratches the magnetic surface. In that state, the drive makes a clicking noise. Each power-on causes more damage.
- Motor failure: The motor that spins the drive stops working. The unit never spins or spins intermittently. In that case, you cannot reach the data on the platters.
- Power spike or lightning strike: Sudden voltage swings can burn the drive’s circuit board (PCB). A PCB fault stops the system from seeing the unit at all.
- USB bridge board fault: On external drives, a broken USB-to-SATA board can make the volume show up as RAW. In truth, the drive is sound.
Telling physical and logical causes apart determines the path you take. If the unit makes odd noises, never spins, or does not show up in BIOS settings, the fault is likely physical. In that case, you should get expert help instead of trying a rescue on your own.
Is a RAW Disk Physical or Logical? A 30-Second Diagnosis Tree
When you encounter a RAW disk, making the right call in the first 30 seconds is vital, because one wrong step can wipe the data you could still save. In this part, I will give you a step-by-step diagnosis flow.
By following this tree, you will quickly tell if the fault on your drive is physical or logical. Keep in mind, the more accurate the call, the higher the success rate.
Step 1: Listen to the Drive — What Do Clicks, Whines, and Silence Mean?
The first step in diagnosis is to listen to the unit. Hook the drive to the PC and listen closely. The sounds it makes give you key hints about the fault type.
- Clicking: This usually points to a head crash or a read head fault. The drive tries to read the platter but fails. Then it keeps pulling the head back. In that case, shut it down now.
- Whining (spinning): The unit spins but the read head may not touch the platter. The motor runs, yet the system cannot read the data. This too is a physical fault.
- Silence: If the unit makes no sound at all, the motor is dead or has no power. That points to a PCB fault or motor fault.
- Erratic spin: The unit spins, then stops, then spins. This state usually points to a controller or firmware fault.
If any odd sound comes from the unit, stop — do not read the rest of this diagnosis. Shut it down and call an expert data recovery lab. In that case, the best move is to hand the storage to skilled specialists as soon as you can.
Step 2: Read the SMART Data — 05, C5, C6, C7 Values
If no odd sound comes from the unit, the next step is to read the SMART data. SMART (Self-Monitoring, Analysis and Reporting Technology) is a system that automatically tracks the health of drives. This data holds key facts about the physical state of the storage.
To read SMART data, you can use tools like CrystalDiskInfo, HD Tune, or the maker’s own app. Here are the key values you must watch:
| SMART ID | Feature | Key Threshold | Meaning |
|---|---|---|---|
| 05 | Reallocated Sectors Count | > 0 | Count of remapped sectors. Bad sectors moved to spare areas. |
| C5 | Current Pending Sector Count | > 0 | Doubtful sectors waiting for a read. High risk of data loss. |
| C6 | Offline Uncorrectable | > 0 | Sectors you cannot fix. Sectors that throw read/write errors. |
| C7 | UltraDMA CRC Error Count | High | Data cable or link issues. Usually caused by the cable. |
If the 05, C5, or C6 values sit above zero, the unit holds bad sectors. If these sectors land on key file system areas, the volume may have gone RAW. Yet that does not mean the drive is fully dead.
The key thing is to track whether the count of these sectors keeps climbing. If it keeps climbing, the unit is at the end of its life. In that case, rescue your data at once and swap the drive. If the count stays flat and low, your chance with software recovery is high.
Step 3: The Decision Point — Software or Lab?
Once you finish the first two steps, you reach a decision point. If no sound comes from the unit and the SMART values look fairly good, you can move on with software recovery methods. Yet if you see physical signs, the lab path is a must.
The table below sums up which path to take in which case:
| Case | Sign | Suggested Path | Chance of Success |
|---|---|---|---|
| Logical RAW | No sound, good SMART, drive shows up | Software recovery | 80–95% |
| Bad sector | SMART 05/C5/C6 rising, slowdown | Image first, then software | 50–80% |
| Head crash | Clicking, drive not seen | Clean room lab | 70–90% (with donor) |
| Motor failure | Never spins, no sound | Clean room, platter swap | Varies by case |
| PCB fault | No power, no heat | PCB swap or ROM transfer | 60–85% |
| Firmware fault | Drive shows up but shows 0 MB, RAW | Expert firmware repair | 50–75% |
By looking at this table, you can judge your own case. If more than one sign shows up, base your call on the worst case and get expert help. Remember, data recovery is not a race. Taking the right steps matters far more than taking fast steps.
RAW Disk Recovery: Data Rescue Steps Before Formatting
In the RAW recovery process, the most vital rule is to never write to the original drive. Any step that breaks this rule cuts the data you could still save. In this part, we will walk through data rescue steps before a format, one by one.
The core logic of the process is this: first take a one-to-one copy (an image) of the drive. Then do all rescue steps on that image. Store the original unit in a safe place. This approach does not risk the original drive. It also gives you endless attempts.
Why Image First? The Don’t-Write-to-the-Original Protocol
Imaging means building a one-to-one, sector-by-sector copy of the RAW drive. This copy matches the original in size and holds all sectors. Imaging is the top step in the data rescue process.
So why does it matter so much? Because RAW drives can lose all function at any moment. On units with bad sectors in particular, each read attempt can cause more damage. Once you take an image, you no longer need the original drive. You do all rescue steps on the image.
Also, imaging gives you the freedom to try and test. You can try different tools, or use different scan modes. If the image breaks, you take a fresh image from the original drive. You never risk the original unit at all.
For imaging, you need a target drive with more room than the data on your unit. For example, you may want to image a 1 TB drive. In that case, you need another drive with at least 1 TB of free space. The image file can have a .dd, .img, or .raw extension.
At this point, the idea of “recovery through a clone” comes in. A clone is the copy you get when you write the image to a real drive. An image is a file, while a clone is a drive. Both methods shield the original unit. Which one you pick depends on the equipment you own.
Sector-Level Cloning: Byte-to-Byte Imaging With ddrescue and HDDSuperClone
For sector-level cloning, the most trusted tools are ddrescue and HDDSuperClone. These tools skip bad sectors in a smart way and try to pull the maximum amount of data from the unit. Both tools run on Linux and both are free.
ddrescue is part of the GNU project and is quite strong. It builds a map file as it reads the drive. This map logs which sectors were read and which failed. If the task stops midway, it can resume from where it left off.
Here are the imaging steps with ddrescue:
- Build a Linux Live USB (Ubuntu, SystemRescue, and so on) and boot the system from that USB.
- Hook the RAW drive and the target drive to the system. Name the units with the
lsblkcommand. - Open a terminal and run this command:
sudo ddrescue -d -r3 /dev/sdX /dev/sdY rescue.map - Here
/dev/sdXstands for the RAW drive,/dev/sdYthe target drive, andrescue.mapthe map file. - When the task ends, the target unit becomes a one-to-one copy of the original.
HDDSuperClone, in turn, is a tool built for very bad drives in particular. It uses more aggressive skip plans than ddrescue. It also clones in a safe way without a hardware write blocker.
Both tools are great at sector-level imaging. Which one you pick depends on how bad your drive is. On lightly damaged units, ddrescue is enough, while on very bad drives, HDDSuperClone may give a better result.
Data Recovery From the Image: TestDisk, PhotoRec, and DiskDrill Compared
After imaging, the next step is to pull data from that image. At this stage, different tools have different strengths. Here is a comparison of the three most popular tools:
| Feature | TestDisk | PhotoRec | DiskDrill |
|---|---|---|---|
| Main Use | Partition recovery, boot sector repair | File signature recovery (deep scan) | General data recovery |
| UI | Text-based, complex | Text-based, simple | Graphic, user-friendly |
| Price | Free | Free | Paid (has trial) |
| File System Support | NTFS, FAT, exFAT, ext2/3/4 | Based on file signatures (all) | NTFS, FAT, exFAT, HFS+, APFS |
| Ease of Use | Low (needs tech skill) | Medium | High |
| Best Case | Finding lost partitions | Broken file system | General users |
TestDisk is an expert at partition table repair and MFT rebuild in particular. It is ideal for finding lost partitions and rewriting the boot sector. Yet its text-based UI calls for technical skill.
PhotoRec ignores the file system structure entirely. It scans the surface sector by sector and hunts for known file marks. This method works even if the file system has fully crashed. Yet file names and folder trees get lost.
DiskDrill, in turn, stands out with its graphic UI and ease of use. It holds both fast and deep scan modes. Yet its free build has a rescue cap. Pro use calls for a paid license.
Whichever tool you pick, keep this in mind: run all these tools on the image file. Do not touch the original drive. This is both a safe and a professional move.
Repairing a RAW Disk With Windows Tools: Built-In Fixes
Windows ships a few built-in tools to deal with RAW drives. Yet these tools are limited and do not work in every case. Still, they are worth trying, because these tools fix some simple RAW cases with ease.
Now, I will tell you what you can do with Windows’s own tools. Yet let me say up front: if your data matters, always take an image before you use these tools, because these tools write to the storage and can bring results you cannot undo.
CHKDSK on a RAW Disk: Why It Fails and What to Use Instead
CHKDSK (Check Disk) is the built-in tool Windows uses to scan and fix disk errors. It normally runs on NTFS and FAT32 file systems. Yet when a drive goes RAW, CHKDSK usually throws this error: “CHKDSK is not available for RAW drives.”
So why does CHKDSK fail on a RAW disk? CHKDSK needs to read the file system structure on the volume. On a RAW unit, it cannot read that structure, so CHKDSK does not know what to fix. This is not an error — it is the expected behavior.
Some sources tell you to run CHKDSK on a RAW disk. Yet I do not advise that, because CHKDSK may sometimes format the RAW drive or drop the partition instead of fixing it. That can wipe your chance of recovery entirely.
chkdsk /f or chkdsk /r on a RAW drive. These commands change the file system structure and can make you lose your data for good. Use CHKDSK only after you fix the storage and rescue your data.So what works as an option for a RAW disk? The answer is plain: data recovery tools. These tools can scan the surface without needing to read the file system structure. That way, they reach your data. Once you rescue your data, you can run CHKDSK and make the storage usable again.
Fixing a RAW Disk With Diskpart: clean, create partition, format
Diskpart is a strong command-line disk tool in Windows. You can use it to build a RAW drive from scratch. Yet this step wipes all data on the unit. So before you use diskpart, you must have rescued your data.
Here are the RAW drive repair steps with diskpart:
- Open Command Prompt as admin and type
diskpart. - List the units with the
list diskcommand. Name the RAW drive by its number. - Pick the RAW unit with the
select disk Xcommand (X is the drive number). - Wipe all partitions and data on the storage with the
cleancommand. - Build a fresh primary partition with the
create partition primarycommand. - Format the partition as NTFS with the
format fs=ntfs quickcommand. - Assign a drive letter with the
assign letter=Ecommand and exit withexit.
These steps make the unit usable once more. Yet keep in mind, this is drive repair, not data recovery. If you have not yet rescued your data, do not use diskpart. Follow the order: data recovery first, repair after.
RAW Disk Recovery With PowerShell and WinRE
Windows Recovery Environment (WinRE) lets you do disk tasks even when the system will not boot. If your system volume went RAW and Windows will not load, WinRE can be a lifesaver.
To reach WinRE, press F8 or Shift+F8 while the PC starts. From the menu that opens, follow “Troubleshoot” > “Advanced Options” > “Command Prompt.” There you can do storage tasks with command-line tools.
You can also use PowerShell in the RAW disk recovery process. For example, you can use the manage-bde command to rescue a BitLocker-encrypted drive. Also, the repair-bde tool helps you unlock an encrypted RAW unit.
repair-bde C: D: -rp 123456-789012-345678-901234-567890-123456-789012-345678 -lf E:\repair.logIn this command, C: stands for the encrypted RAW drive and D: for the target drive. The -rp flag names the 48-digit BitLocker recovery key, and -lf names the log file. This task copies the encrypted data to another unit.
WinRE and PowerShell are true lifesavers, above all when the system volume goes RAW. Yet before you use these tools, you must have a backup plan, because one wrong command can make the case worse.
BitLocker-Encrypted RAW Disk Recovery: An Extra Layer
BitLocker is Windows’s disk encryption tool. When you encrypt a drive with BitLocker, the system shields the data with the AES algorithm. Yet if this storage goes RAW, the case grows more complex, because you must solve both the encryption layer and the RAW error at the same time.
When a BitLocker-encrypted unit goes RAW, it shows up as “RAW” on the Windows disk management screen. Yet that does not mean the data is lost. Only the file system structure is broken. The system cannot run the unlock step.
repair-bde tool. This case shows you can rescue encrypted RAW drives too, with the right tools.Finding and Backing Up the BitLocker Recovery Key
The first step in rescuing a BitLocker-encrypted RAW disk is to find the recovery key. Without this key, you cannot reach your data. The recovery key is a 48-digit number string.
You can find your BitLocker recovery key in these spots:
- Your Microsoft Account: You can reach your BitLocker recovery keys at account.microsoft.com/devices/recoverykey.
- Azure Active Directory: On work accounts, Azure AD stores the recovery key.
- Printed copy: The paper copy you were asked to print when BitLocker was turned on.
- USB stick: You may have saved the key to a USB during BitLocker setup.
- Active Directory: On domain-joined PCs, AD stores the recovery key.
Once you find the recovery key, back it up in a safe spot. You can write the key on paper and store it in a safe. You can also keep it in an encrypted file. Losing the key means you can never reach your data again.
Rescuing an Encrypted RAW Disk With the repair-bde Tool
repair-bde is Microsoft’s BitLocker repair tool. Even if an encrypted unit has gone RAW, it can copy the data to another drive with the recovery key. This tool runs from the command line and is quite strong.
Steps to use repair-bde:
- Open Command Prompt as admin.
- Run this command:
repair-bde C: D: -rk E:\RecoveryKey.txt -lf F:\repair.log - Here C: is the encrypted RAW drive, D: the target drive, -rk the recovery key file, and -lf the log file.
- When the task ends, you can reach the data on the D: volume.
The repair-bde tool is the most trusted fix for encrypted RAW drives. Yet before you use this tool, always make a backup, because if an odd error pops up during the task, your data can be harmed.
If repair-bde fails, you must call an expert data recovery lab. BitLocker-encrypted RAW drives are cases that need skill. Trying to solve them alone can make you lose your data for good.
SSD and NVMe RAW Disk Recovery: How They Differ From HDDs
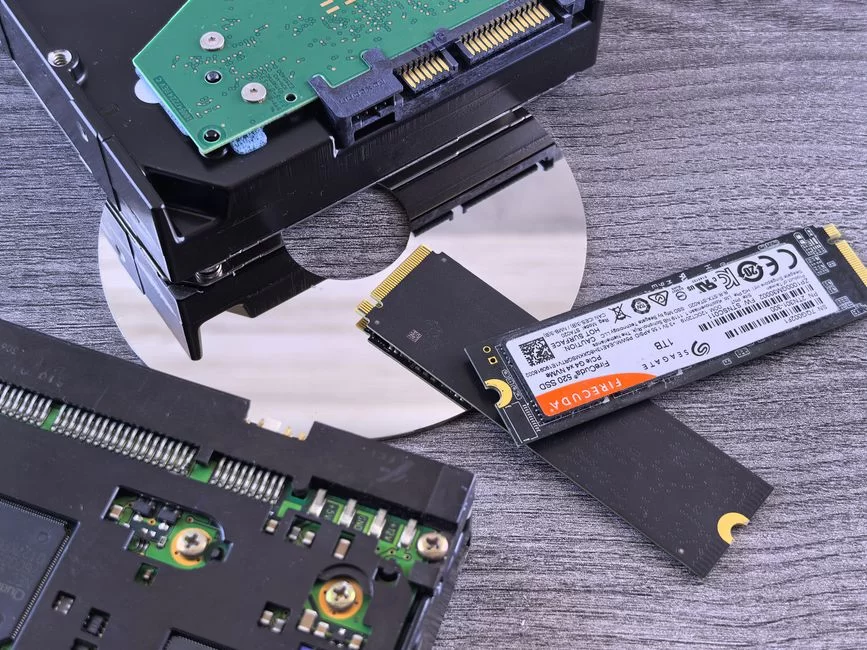
SSDs and NVMe drives use technology that is totally unlike HDDs. These gaps shape the recovery process right away. HDDs write data to magnetic platters. In contrast, SSDs write data to NAND flash chips.
This technology gap calls for different recovery plans. For example, on HDDs you can use software methods to fix bad sectors. Yet on SSDs, that is usually not possible, because SSDs pack a complex controller and firmware inside.
How SSD TRIM and Wear Leveling Affect Recovery
TRIM is a feature used to keep SSD speed up. When a file gets deleted, the operating system tells the SSD those blocks are no longer in use. The SSD controller then clears those blocks. This step makes deleted data vanish for good in a short time.
This state is a real drawback for data recovery. On HDDs, you can rescue files you deleted until you write new data over them. Yet on SSDs with TRIM on, deleted files can vanish in minutes. So on SSDs, your chance of recovery is lower than on HDDs.
But here is the good news: in a RAW error state, TRIM usually turns off. Because the operating system cannot read the file system, it does not know which blocks are free. So the operating system cannot send the TRIM command. That lifts your chance of recovery in a RAW error state.
Wear leveling, in turn, spreads data across different blocks to extend SSD life. This state makes files physically split. Data recovery tools can struggle to stitch these split files back together. That is why deep scans on SSDs are trickier than on HDDs.
What to Do on SSD Controller and Firmware Faults
One of the faults SSDs encounter most is a controller fault. The SSD controller links the NAND chips and the operating system. When the controller breaks, the unit is either unseen or shows up as RAW.
A firmware fault, in turn, is a break in the software inside the SSD. In that state, you see the drive. Yet the system shows 0 MB of space or tags the unit as RAW. Firmware faults are a common issue on some SSD models in particular.
On a controller or firmware fault, users can do very little alone, because these faults need special equipment and software. For example, you may need to pull the NAND chips and read them in a separate reader.
SSD data recovery is far trickier than HDD data recovery. So if your SSD throws a RAW error and your data matters, I strongly advise you to get expert help. Attempts you make on your own can cut your chance of success.
RAW External Disk Recovery: USB, Thunderbolt, and Power Issues
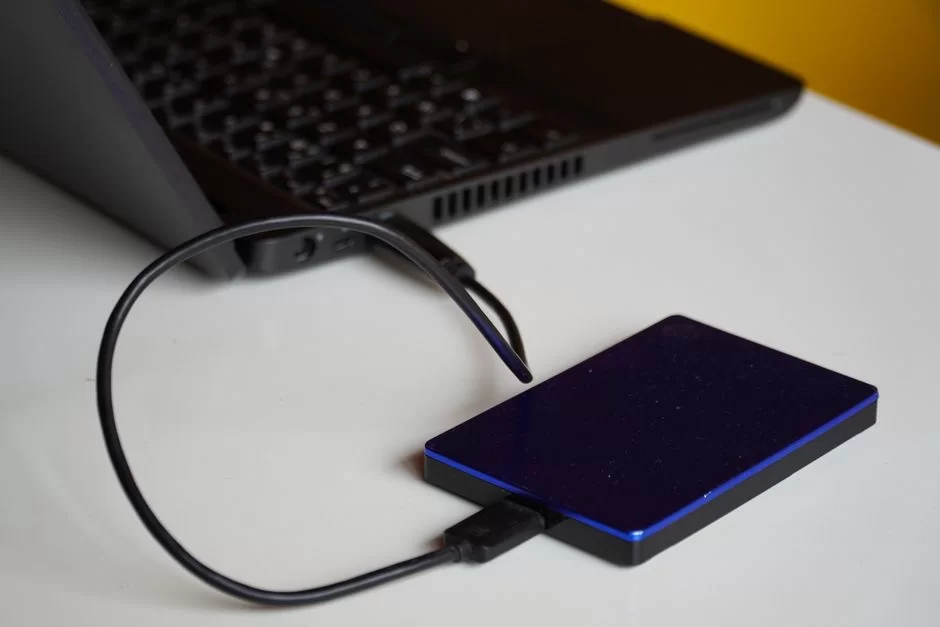
External drives are the devices where RAW errors show up most, because users plug and unplug these devices all the time and carry them around. What’s more, they sometimes pull the units from the PC in an unsafe way. Now, let us tackle RAW issues on external drives and their fixes.
External drives have two main sources of RAW error: the drive itself and the USB bridge board. Sometimes the unit is sound but the bridge board has failed. In that case, the volume shows up as RAW. Other times the storage is truly damaged.
Is It a USB Bridge Board Fault, or Is the Disk RAW?
When an external drive shows up as RAW, the first thing you must do is bypass the bridge board. That is, hook the unit directly to the PC with a SATA link. If the drive works fine when linked directly, the fault sits in the bridge board.
- Take the external drive out of its case. Makers usually hold the unit with a few screws.
- Pull out the drive inside (a 2.5″ or 3.5″ HDD/SSD).
- Link the storage directly to a SATA-USB adapter or the SATA port on a desktop PC.
- If the unit shows up this way, the fault sits in the USB bridge board. You just need a fresh case or adapter.
- If the drive still shows up as RAW, the fault sits in the storage itself. Move on to the data recovery steps.
This test can save you time and money. Many external drive RAW errors in fact stem from a simple bridge board fault. You do not need to swap the unit.
External Disk Power Shortage and Cable Issues
Another common cause of RAW errors on external drives is a lack of power. 3.5″ external units in particular do not work properly when they get too little power. This state leads to file system damage and a RAW error.
- Weak power adapter: Do not use adapters that fail to meet the volts and amps your drive needs.
- Weak USB port: Some USB ports cannot supply the power an external drive needs. If you use a USB hub in particular, pick one with its own power source.
- Cheap USB cable: Cheap or damaged cables cause errors in data flow. Use short, high-grade cables.
- Loose link: If you do not seat the cable tightly, you get drops during data flow. That leads to file system damage.
- Overheating: External units heat up when they run for a long time. Too much heat can harm the electronic parts.
To head off these issues, always eject your external drive with the safe eject step. Do not yank the cable while the unit runs. Also, store the drive in a cool, dry spot.
RAW Disk Recovery Software or a Data Recovery Lab?
When you encounter a RAW disk, you have two paths. You can rescue it on your own with software. Or you can call an expert data recovery lab. This decision depends on the value of your data, the state of the drive, and your budget.
In this part, I will weigh the pros and cons of both paths in a fair way. That way, you can make the call that fits your case best.
Recovery With Software: When Is It Safe?
RAW disk recovery with software is safe and effective in certain cases. If your unit has no physical fault, you can rescue your data with software methods. Here are the cases where software recovery fits:
| Case | Software Recovery | Expert Help |
|---|---|---|
| RAW after a sudden power loss | ✅ Fits | Not needed |
| RAW after an accidental format | ✅ Fits | Not needed |
| Virus-caused RAW | ✅ Fits (clean first) | Advised |
| Bad sector (a few) | ⚠️ Risky | Advised |
| Clicking noise | ❌ Never | Must |
| Motor dead | ❌ Never | Must |
| BitLocker + RAW | ⚠️ Only with repair-bde | Advised |
When you do software recovery, the top thing to watch is not to write to the original drive. Install the data recovery tool on a sound drive. Run the rescue on the image file. Also save the rescued data to another unit.
The market holds many RAW disk recovery tools. EaseUS Data Recovery Wizard, Disk Drill, R-Studio, DiskGenius, and PhotoRec are the most popular ones. Each one has strengths and weaknesses. Which tool you pick depends on your needs and your budget.
Data Recovery Lab Picking Rules: Clean Room, Privacy, No Recovery No Fee
Your unit may develop a physical fault. Plus, a software rescue may fail. In that case, you should call an expert data recovery lab. Yet picking the right lab shapes your chance of success right away.
Here are the rules you must follow when you pick a data recovery lab in the US:
- Clean room cert: For physically faulty drives, an ISO 5 Class 100 or ISO 14644 clean room is a must. Work done in labs without a cert harms your storage for good.
- Privacy compliance: If your data holds personal info, the lab must follow privacy rules. They should hold a privacy notice, a privacy policy, and a recovery deal.
- No Recovery No Fee: Many trusted labs charge no fee if they cannot rescue your data. This shows the lab trusts its own work.
- Success rate: Ask about the lab’s past success rates and references. Steer clear of shops that promise a fake 100% success.
- Price clarity: Pricing shifts by fault type. Labs should give the first check for free. Plus, you should only get the firm price after the check.
- Donor drive policy: Physical faults may need a donor unit. Learn the lab’s policy on donor sourcing.
- Contact and reports: Pick a lab that gives you updates through the process and is easy to reach.
What You Can and Cannot Do Yourself on a Physical Fault
When you encounter a physically faulty drive, what can you do alone? Here is a clear list for you:
✅ What you can do:
- Pull the unit from the PC in a safe way and never power it on again.
- Put the storage in an anti-static bag to shield it from static shock.
- Shield the drive from bumps and too much heat.
- Call an expert data recovery lab.
- Tell the lab the history of the unit (drop, water, noise, and so on).
❌ What you cannot do:
- Open the drive and touch the platters.
- Try to swap the head on your own.
- Bake the unit or freeze it.
- Keep powering the storage on and off to see “if it heals.”
- Shake the drive or hit it while it runs.
- Expose it to magnetic fields.
Sticking to this list lifts the chance your data survives. You especially cannot fix a physically faulty unit at home. These attempts only cause more damage.
After RAW Disk Recovery: Should We Reuse the Disk?
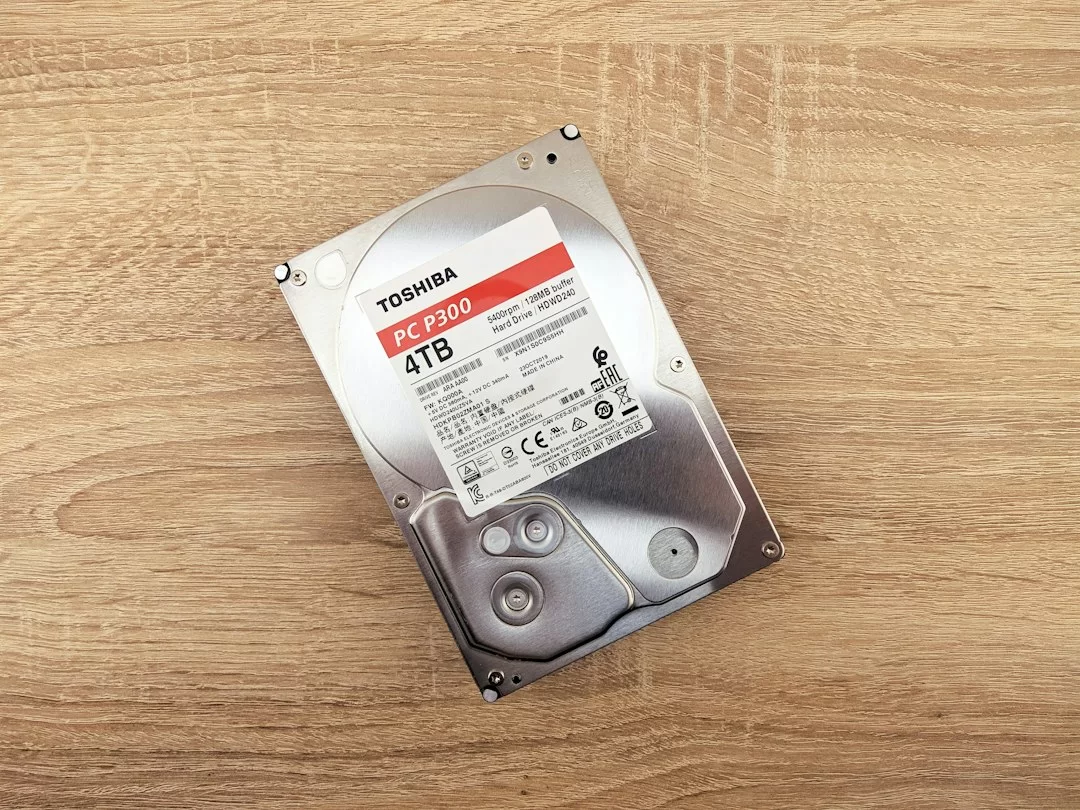
Once you rescue your data, the next step is to decide what to do with the unit. Should you reuse the drive? Or should you swap it? This decision depends on the health of the storage.
If the RAW error came from a logical cause and unit health is good, you can fix the drive and reuse it. Yet if a physical fault is at play, a swap is a must.
SMART Check and Disk Health Review After Recovery
Once you rescue your data, always check the health of your unit. This check determines whether you can reuse the drive. SMART data guides you here.
- Read SMART data with CrystalDiskInfo or a similar tool.
- Check the 05, C5, and C6 values. If they sit above zero, bad sectors are present.
- Watch how these values shift over time. If they climb, the unit is at the end of its life.
- Look at the C7 value. If it is high, swap the data cable or link.
- Scan the surface to map the bad sectors.
- Test the read/write speeds of the drive. If you see odd slowdowns, stay alert.
- Check the unit temperature. Too much heat cuts life short.
- Based on these checks, decide if you can reuse the storage.
If the unit health is bad, do not use the drive to store key data again. You might use it as a second backup unit. Yet never trust your key data to this storage.
Preventing RAW Disks With the 3-2-1 Backup Plan
To never face a RAW disk issue again, you must have a solid backup plan. The 3-2-1 backup plan, the gold rule of the field, guides you here.
The 3-2-1 rule means this:
- 3 copies: You must hold at least three copies of your data.
- 2 different media: Store these copies on at least two media (for example, an external drive + the cloud).
- 1 off-site: You must keep at least one copy in a place that is physically separate.
This plan shields you from both hardware faults and natural disasters. For example, you can keep one copy on your PC. You can store one copy on your external unit and another on a cloud backup service.
You can ease this process with auto backup tools. For example, Windows File History or Mac Time Machine helps you. Plus, you can pick tools like Acronis, Veeam, or Backblaze.
Keep in mind, a backup does not just head off data loss. It also lets you reach your data fast when you encounter issues like a RAW disk. Backup is the top part of the data recovery process.
RAW Disk Recovery: Advanced Tech Sources and Expert Guides
The RAW disk issue brings a risk of data loss. At the same time, you can steer the process in a safe way with the right technical sources. Also, following expert guides is vital.
- Microsoft Learn – ReFSUtil Command Reference: This official doc lays out the syntax and flags of the ReFSUtil tool in full. It also walks through repair of broken ReFS structures and data recovery cases.
- Microsoft Learn – chkdsk Command Reference: This page lists all the flags and use modes of the chkdsk command in an official way. It also spells out the points you must watch when you scan broken file systems.
- TechTarget – Managing Disk Partitions With Diskpart: This technical piece lays out the partition create, extend, and delete traits of the Diskpart tool. Plus, it walks through its repair traits for broken setups with examples.
FAQ About RAW Disks
Is data on a RAW disk lost?
How long does disk recovery take?
Is recovery paid, or is there a free path?
How do I turn a RAW disk into NTFS (without a format)?
Why does chkdsk not work on a RAW disk?
How do I rescue a BitLocker disk?
Which recovery tool is best?
Is there a recovery guarantee?
What should I watch when I pick recovery software?
Is a RAW disk a physical fault?
Conclusion: The Right Plan for RAW Disk Recovery
The RAW disk recovery process calls for patience and the right steps. Panicking and rushing your decisions makes the job hard. Plus, if you use the wrong tools, you can lose data you could still save.
Keep in mind: a RAW disk does not mean your data is gone. With the right plan, you can rescue most of your data. Just take the first steps the right way.
Emergency Checklist: What to Do in the First 30 Minutes
When you encounter a RAW disk, here is what you must do in the first 30 minutes:
- Stop using the drive at once. Do not write anything to it.
- Listen to the unit. Check for clicks, whines, or odd sounds.
- Shut the storage down if you hear sound. Get expert help.
- If there is no sound, read the SMART data. Check the 05, C5, and C6 values.
- If the SMART values look bad, get expert help before imaging.
- If the SMART values look good, image first. Use ddrescue or HDDSuperClone.
- Run data recovery software on the image. Try TestDisk, PhotoRec, or DiskDrill.
- Save the rescued data to another drive. Never save it to the original unit.
- Check the data. Confirm the rescued files open.
- Repair or swap the unit. Rebuild the storage with diskpart or Disk Management.
Preventive Steps: How to Never Face RAW Again
Here are the steps you must take to never face a RAW disk issue again:
- Always eject the unit in a safe way. Never skip the “Safely Remove” step.
- Use a UPS against sudden power loss. This is especially important on desktop PCs.
- Use a trusted antivirus tool. Head off virus-caused RAW errors.
- Check SMART on a set schedule. Track unit health.
- Use the 3-2-1 backup plan. Back up your data on a set schedule.
- Use a good power adapter and cable. This is especially important on external units.
- Shield the storage from physical bumps. Use an anti-static bag when you carry it.
- Track drive life. Think about swapping units past the 5-year mark.
By taking these steps, you can cut the odds of a RAW disk issue by a wide margin. Remember, data recovery is the last resort. The real key is to head off data loss.

4 People Shared Their Experience
When I try your chkdsk x: /R … I get the following error:
The type of the file system is RAW,
CHKDSK is not available for RAW drives.
Not sure what I’m doing wrong or what you’ve described wrong, but on Windows 10 x64 it doesn’t work on RAW. It did, however start originally on that drive and during the recovery the drive ended up in RAW format – was NTFS before… so chkdsk has messed it up and now it’s refusing to access it 🙁
Hello. I think you made a mistake somewhere and now you cannot access the data on your disk.
Try to repair your disk on another computer. If chkdsk still does not work, convert your disk to NTFS with diskpart.
If your data on your disk is not important to you, format it and test its health after making it workable again. For example, you can use the HDD Tune program for this process.
Hello. In first trying to use command chkdsk H:/R after 4 hours repairing my Partition, i got unknown error in stage 3 idk why.
I start command second time, and after 9 hours i get SUCCESSFULL recovered my NTFS partition completely. After this i check SMART of this disk, and this disk is necessary to change. Now i copy my all files to new Disk.
Thank You very much !!! I get back my all files again and this give me a chance to move my files. Thank You Again !
Regards Kasia W.
I used this command chkdsk E:/R
the system gave me this message:
C:\WINDOWS\system32>chkdsk k:/R
The type of the file system is RAW.
CHKDSK is not available for RAW drives.