
In this article, we will examine how to install a clean Microsoft Windows 10 step by step on a new PC / Laptop.

How to Install Windows 10 Enterprise 1809 LTSC
Windows 10 is an operating system designed and developed by Microsoft for personal computers, tablets, and embedded devices. Windows 10 was the first release after the Windows 8 operating system.
Let’s examine the basic system requirements before starting to install it.
What are Windows 10 Versions?
You can review the Windows 10 versions in the following table.
- Home Version
- Home N Version
- Home Single Language Version
- Pro Version
- Pro N Version
- Enterprise Version
- Enterprise N Version
- Enterprise LTSB Version
- Enterprise LTSB N Version
- Enterprise LTSC Version
- Enterprise LTSC N Version
- Education Version
- Education N Version
- Mobile Version
- Mobile Enterprise Version
What are Windows 10 Build Versions?
You can review the Windows 10 build versions in the following table.
Which is the Latest Windows 10 Version?
The latest version of Windows is Windows 2004, released on May 27, 2020. The latest Build version is 19041.388.
How to Build Windows 10 on a Laptop or Desktop Computer
To install Windows 10 cleanly on the computer you buy or on the computer you use, you first need the ISO file.
After downloading the ISO, you will need a Flash Memory of 8 GB minimum. You must burn the operating system that you downloaded to your computer into a Bootable Flash Memory.
You can download the Windows operating system using Microsoft’s Media Creation Tool and prepare a Bootable Flash Memory. You can also burn a Windows ISO file to Flash Memory using a tool such as Rufus.
You do not need to have Flash Memory for it. Otherwise, you can install it on your computer’s CD/DVD drive. For example, you can burn the Windows ISO file you downloaded to a DVD using a program such as Nero and start the installation.
How to Configure Windows 10 Enterprise
Before you begin the installation step by step, prepare a Bootable Flash Memory using Microsoft’s Media Creation Tool. You can download only Home and Pro versions of Windows to your computer using the Media Creation Tool.
Download the Windows 10 Enterprise LTSC ISO file that we published in the previous article to your computer and print the ISO file to Flash Memory.
Steps:
Then, follow the steps below to install the Windows 10 operating system step by step on a PC.
Step 1
Restart your computer after creating a USB media for a UEFI-supported setup. While the computer is restarting, press the key on the keyboard (Del + F2 + F11 + F12 + ESC + F10) to switch to the BIOS configuration screen.
On the BIOS configuration screen of your computer, go to the Boot settings and then configure the following settings to enable the UEFI option.
Note: Don’t forget to save your settings!
- OS Type: Windows UEFI Mode
- Secure Boot State: Enabled
- Fast Boot: Disabled
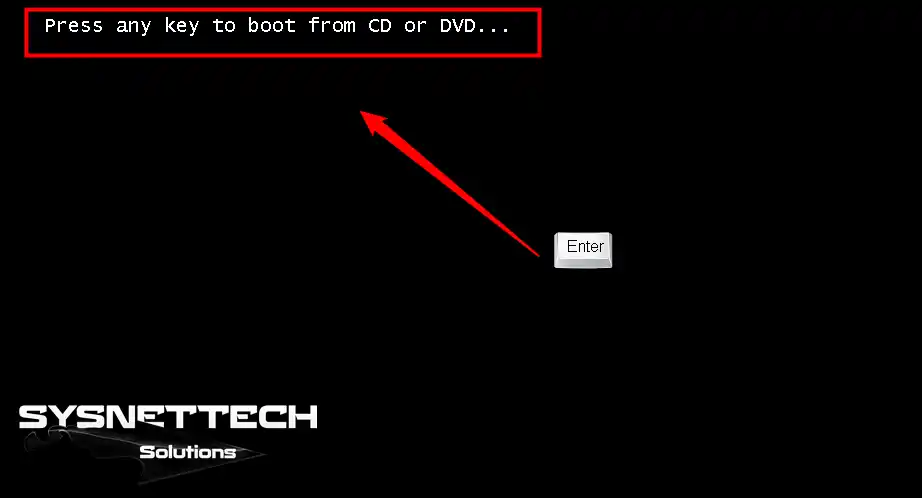
After configuring the settings for Windows 10 UEFI installation, insert your Flash Memory/DVD installation media into your computer and restart your computer.
After you see the message in the picture below, press any key on your keyboard to start the installation.
Step 2
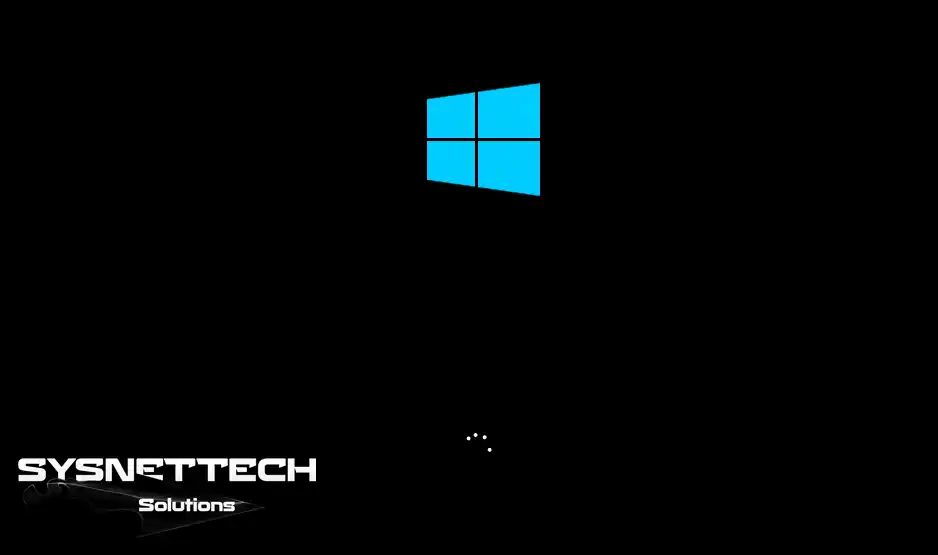
We are preparing the installation of the Microsoft Windows 10 operating system.
Step 3
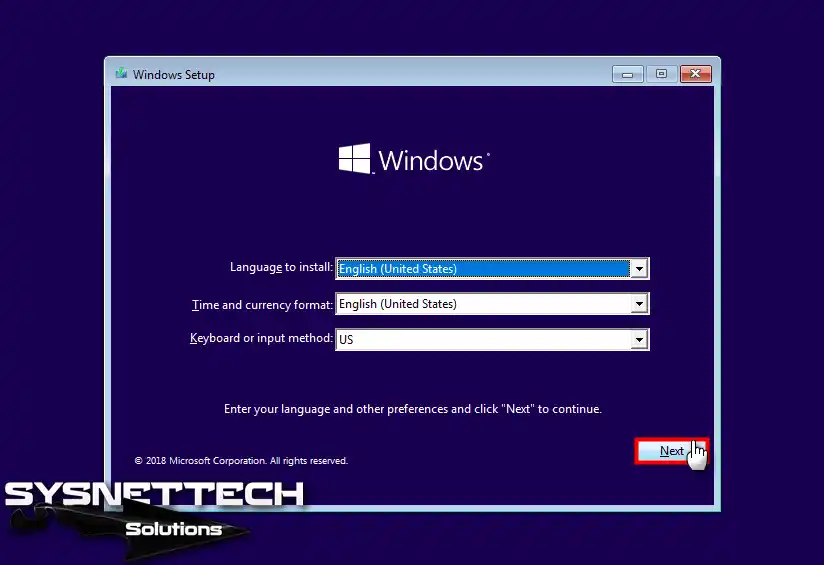
In the Windows Setup window, configure the display language, time, and currency, as well as your keyboard layout. Then click Next.
If you want to use Windows in a different language, you can configure your system language in this step.
Step 4
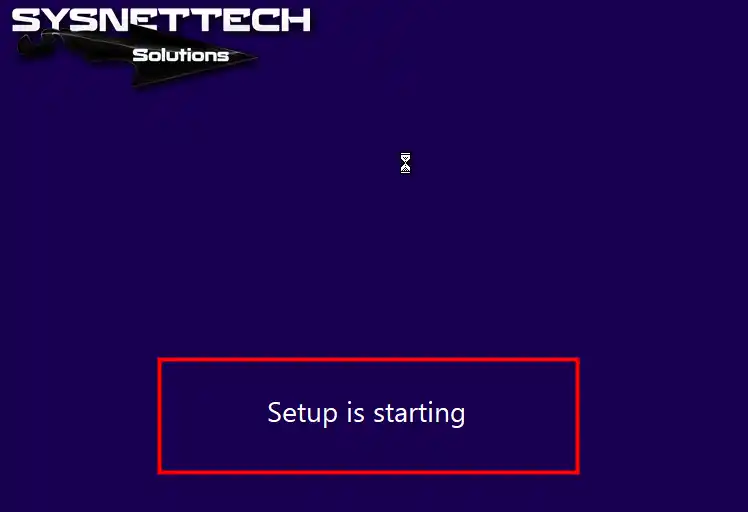
Click Install Now to start the system setup.

Step 5
Wait while your computer is starting Windows, and do not turn off your computer!
Step 6
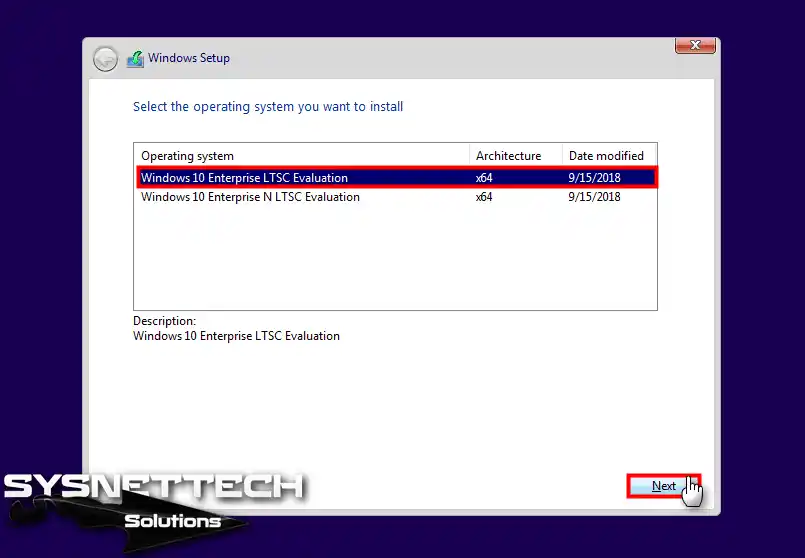
You will see the versions in the Select operating system window that you want to install. In this article, we will not install a Windows 10 Home or Pro version, so there are no options in the following window.
Select the Enterprise LTSC version and click Next.
Step 7
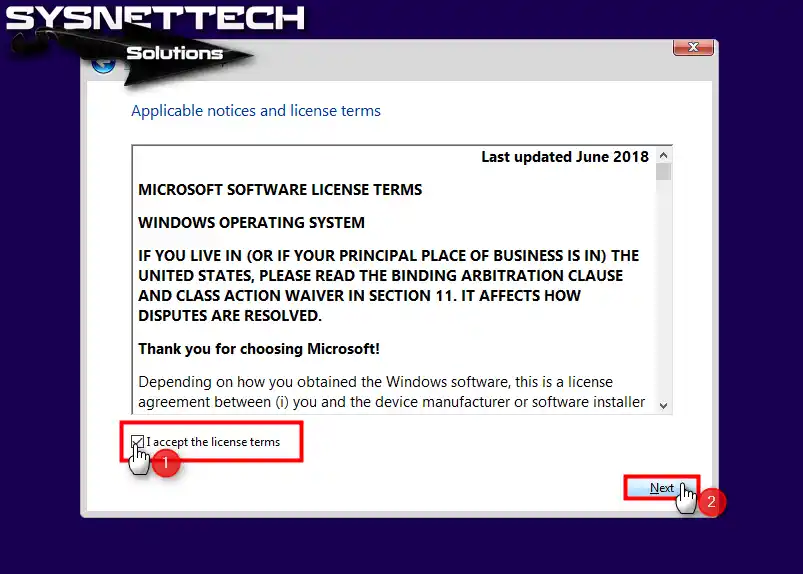
To accept the Win 10 license agreement, select I accept the license terms and then click Next.
Step 8
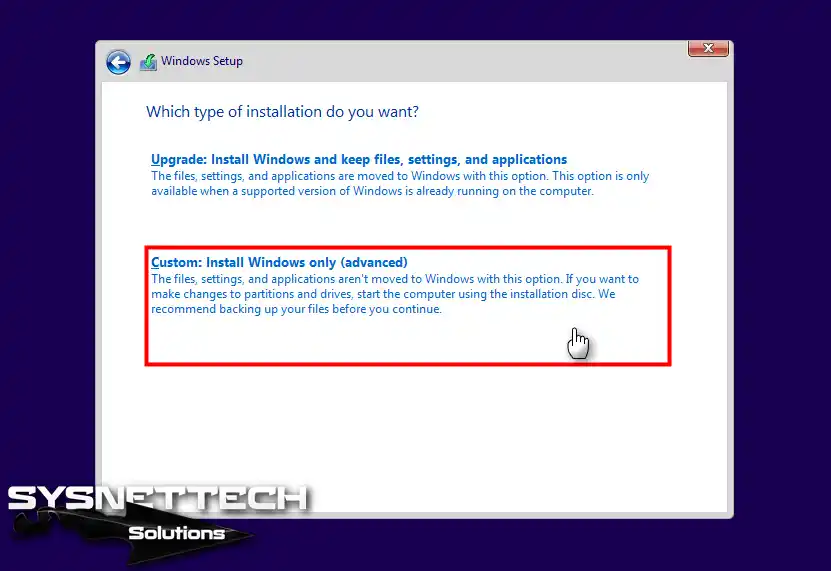
If you want to install Windows on the system you are using (Windows 7, 8, 8.1), you can do this either from scratch or by upgrading.
To install a clean Win 10, click Custom: Install Windows only (advanced).
Step 9
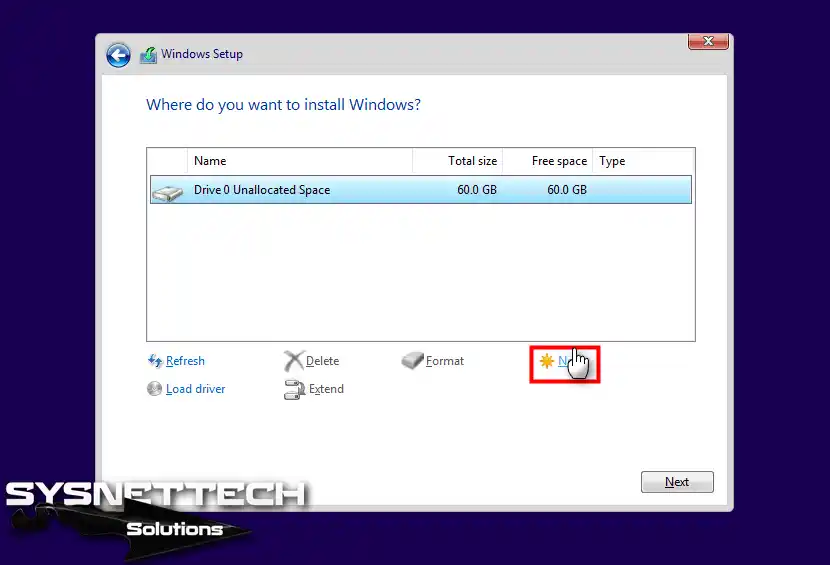
You will see your hard disk or SSD disk inserted into your computer. To configure the disk you want, click on it and then click New.
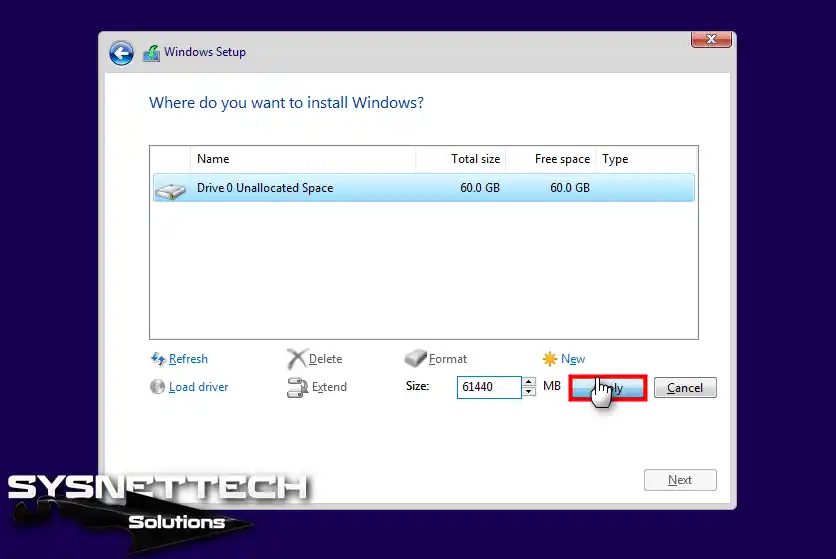
Step 10
If you want to use the entire area of your disk, click on the Apply button without making any changes to the Size section. If you don’t want to use all of the disk space, you can type the size you want to separate in Size for Windows setup and create a new Partition.
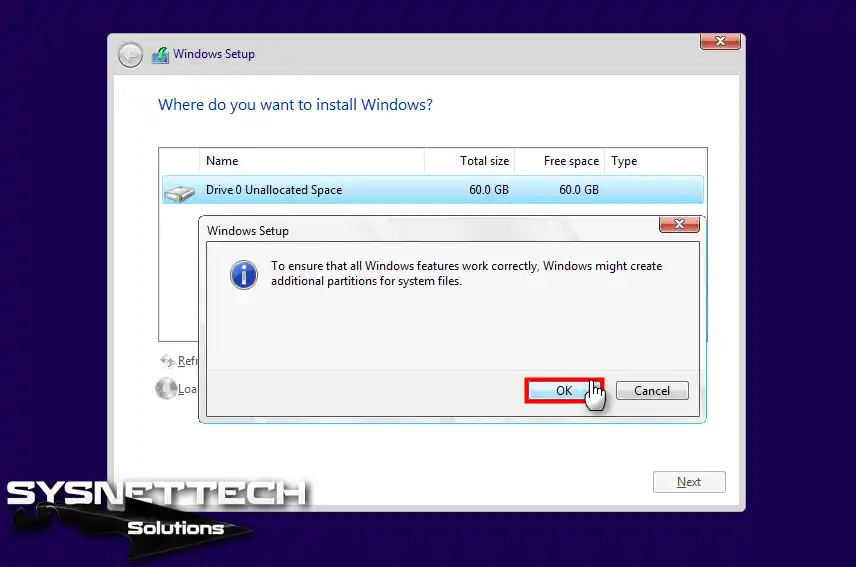
Step 11
Click OK in the “to ensure that all Windows features work correctly” window.
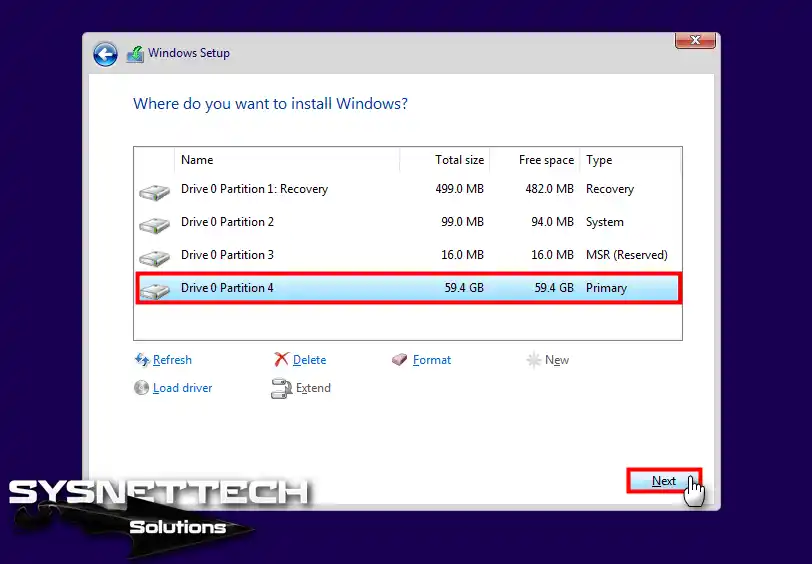
Step 12
After clicking the OK button, you will create Partitions as below on your hard drive for Windows UEFI setup.
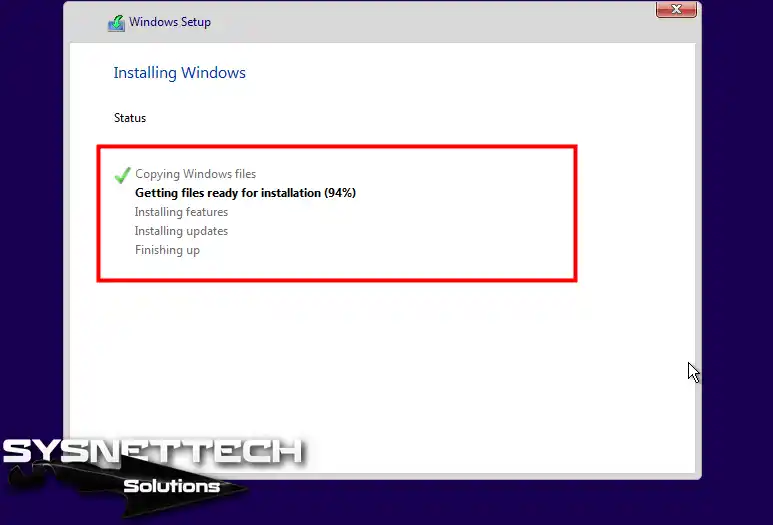
Step 13
We are preparing files for the installation of the Microsoft Windows operating system.
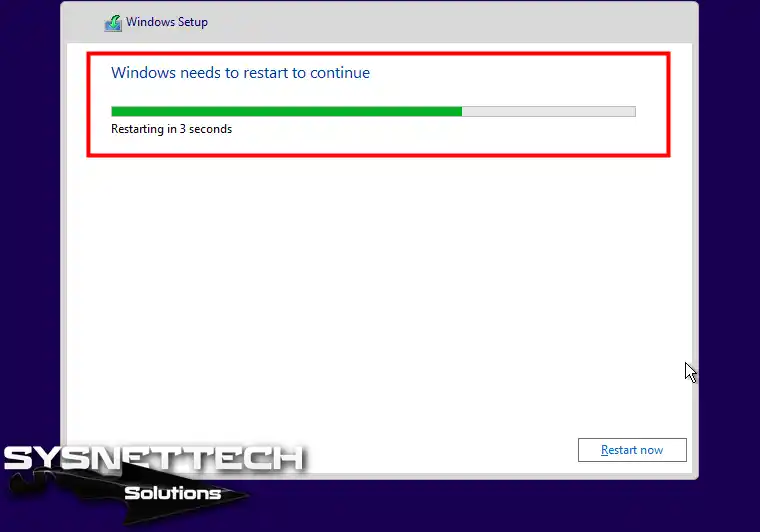
Step 14
The setup wizard will reboot your system after copying the necessary files for Windows. If you do not want to wait for the restart time, you can click the Restart Now button.
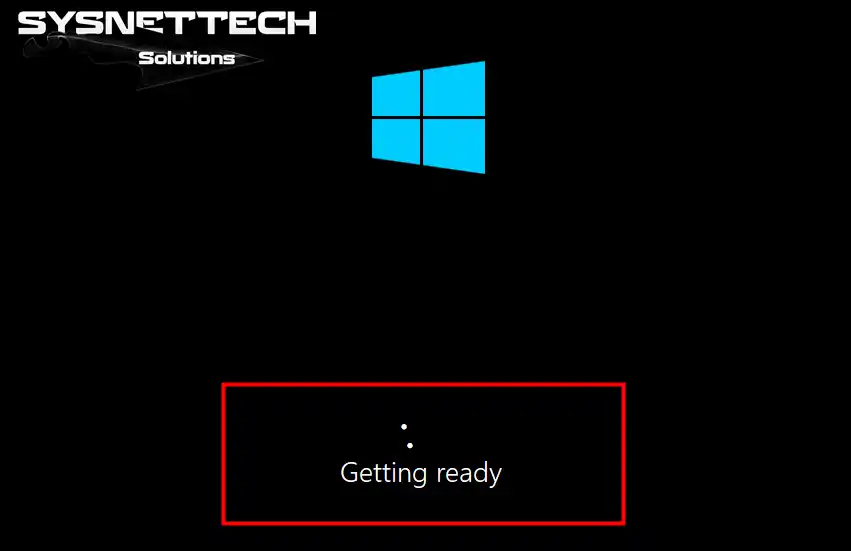
Step 15
Preparing Microsoft Windows 10.
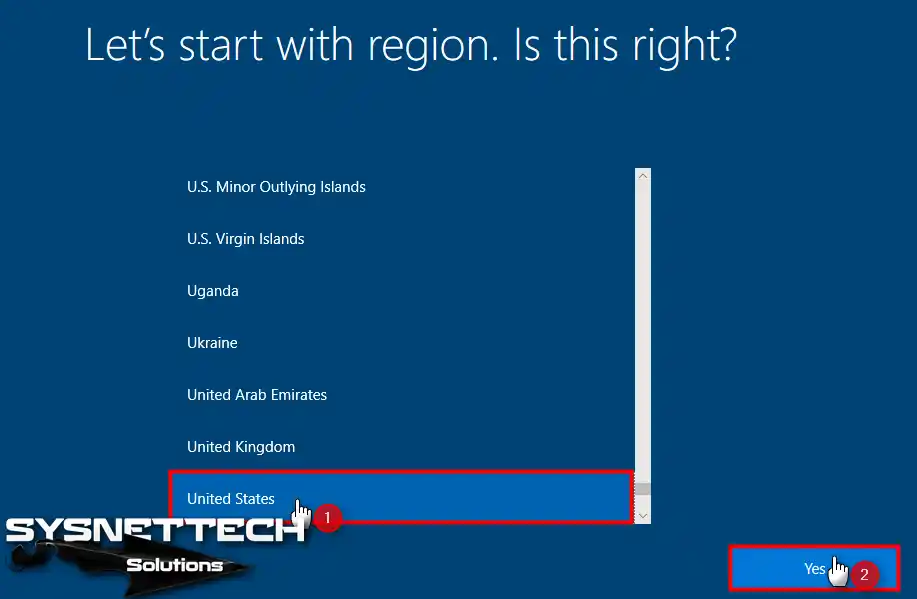
Step 16
Select the location where you live and click Yes.
Step 17
Select your keyboard layout and click Yes.

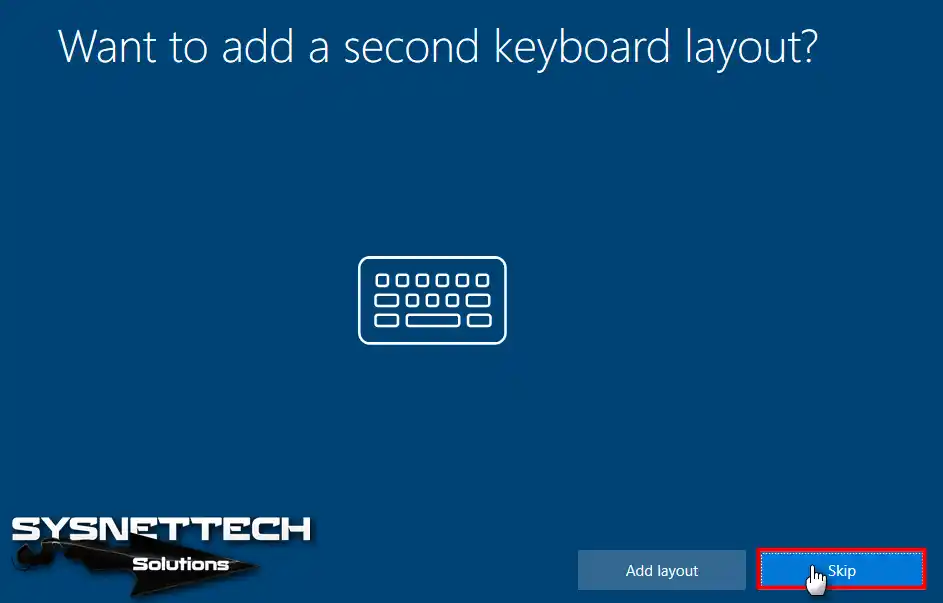
Step 18
In the “Want to add a second keyboard layout?” window, click on the Skip button.
Step 19
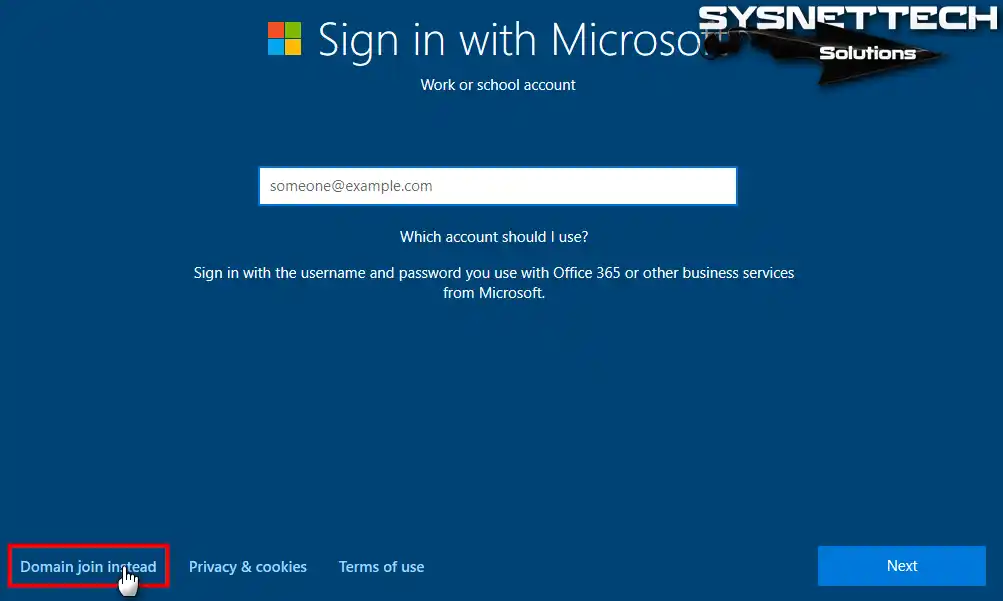
In this step, you can sign in to Microsoft. If you have a Microsoft account, you can sign in to this window. Or, if you want to set up a local account, click Domain join instead.
Step 20
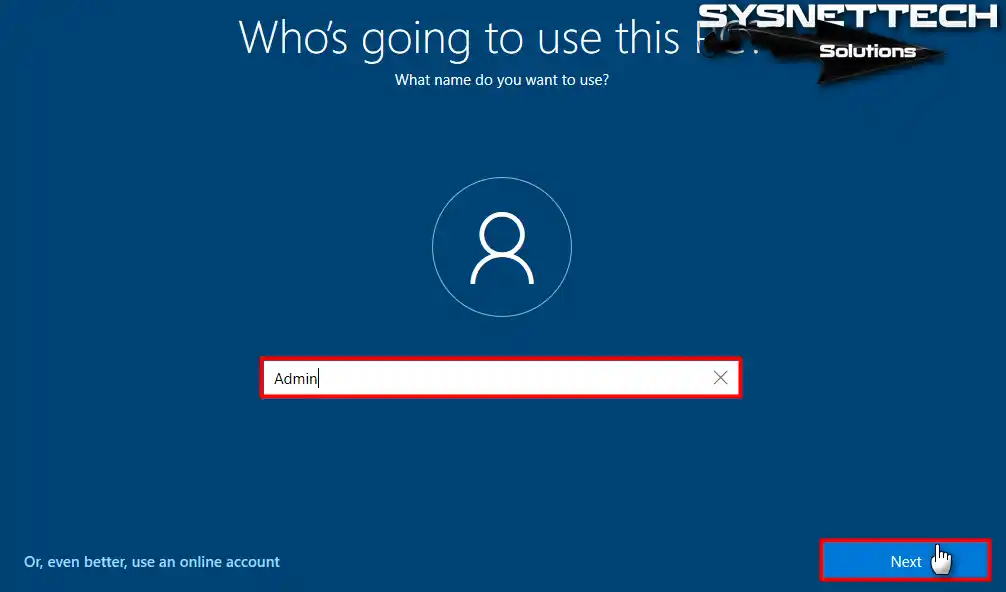
Type your Win10 user name and click Next.
Step 21
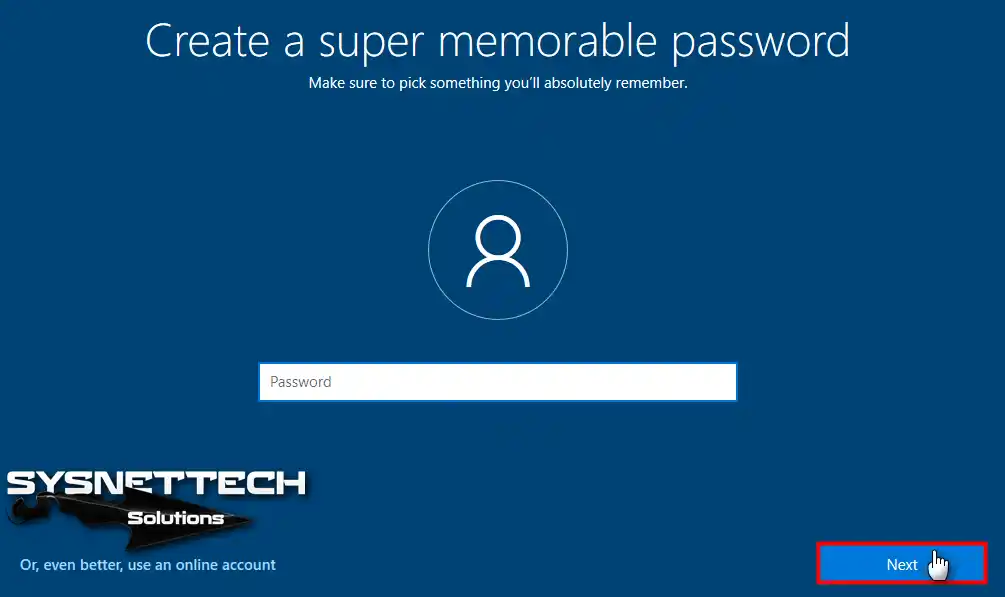
If you wish to set a password to remember, enter your password and click Next. If you do not want to assign a password to your Windows operating system, leave the box blank and click Next.
Step 22
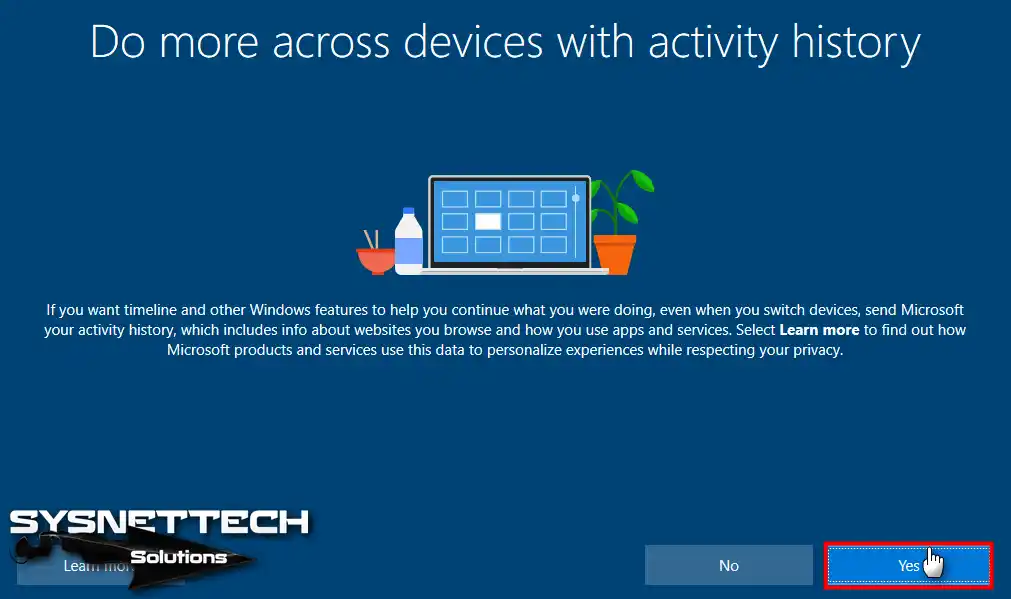
If you want to send your user data to Microsoft, click Yes.
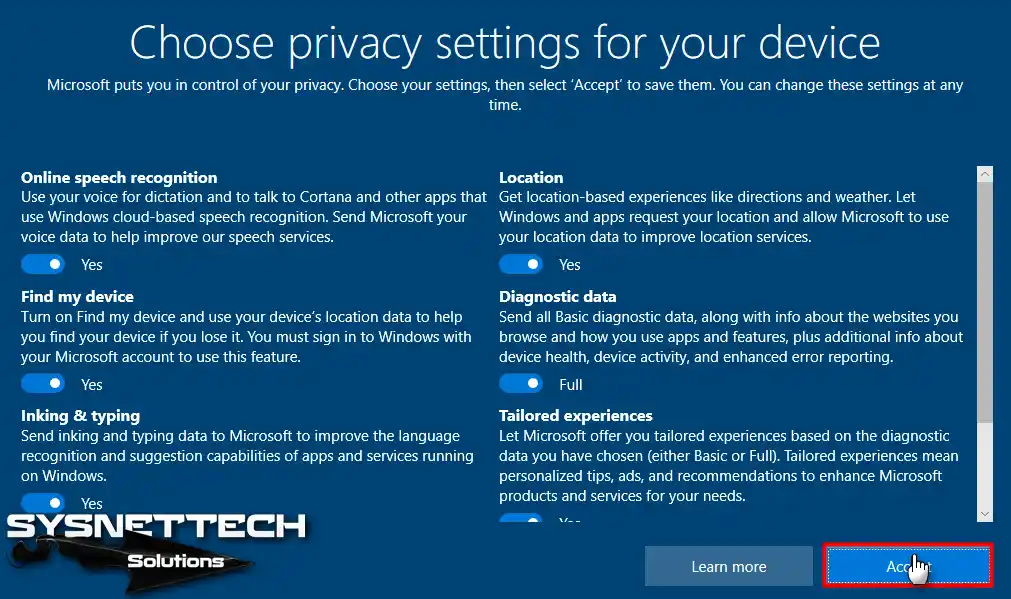
Step 23
Read your computer’s privacy setting descriptions carefully and make a decision. After configuring the privacy settings, click on the Accept button.
Step 24
Preparing your Windows 10 desktop…

Step 25
You have completed the Windows 10 installation steps on a desktop/laptop! You can find out the features of your system by clicking on the Right Key on this PC and clicking on Properties.

Video
Conclusion
In this article, we have talked about Windows 10 system requirements, versions, and build versions. Then, we prepared the installation media to make a clean Windows 10 UEFI installation on a PC / Laptop. Thanks for following us!

Be the first to share your comment