
Want to install and use Windows 8 or 8.1 on your computer using a bootable USB stick? If so, in this article, we will provide you with step-by-step instructions on how to install Windows 8 UEFI on your PC with a USB memory stick.
So you can create an ISO file on a USB 3.0/3.1 flash drive using Rufus. Afterward, you will be able to install this operating system on your computer easily. Let’s install Microsoft OS 8!
How to Install Windows 8/8.1 with a Bootable Flash Disk
First of all, let’s say that you do not have a CD/DVD device on your desktop or laptop. In this case, you need to prepare a Bootable Flash Memory to install Windows 8.1.
Nowadays, many people, including me, use USB Flash Memory for system installations.
When you buy a new computer, you may want to install a clean Windows 8/8.1 UEFI. Since this is the purpose of this guide, you must first download the original ISO file from Archive.org. Next, you need to burn the ISO file on a USB 3.0/3.1 flash disk to prepare the installation media.
So, we use a program called Rufus to burn an ISO file to flash memory. The Rufus program is quite popular, and I use it extensively myself. Its developers are constantly updating it, and it provides improved compatibility with newer systems.
In short, Rufus software supports many systems. You can even easily prepare Linux installation media.
Before installation, it is helpful to review the version 8.1 hardware requirements. The minimum and recommended system requirements to have this system are as follows:
What are the Minimum and Recommended Requirements for Windows 8 and 8.1?
Minimum Hardware Values:
| CPU | Among the technical specifications of your system, an Intel Celeron CPU with a processing speed of 1 GHz is sufficient. If you prefer AMD, you should have Athlon MP. |
| GPU | For graphics, you must have an AMD Radeon X600 Series card or NVIDIA GeForce 210. |
| RAM & Storage | 1 GB of RAM is actually sufficient for system memory. Additionally, you must have a 16 GB hard drive for storage. |
Recommended Hardware Values:
| Processor | Your computer must have an Intel-based Core 2 Duo E4400 2.0GHz to ensure smooth performance. If it’s AMD, an Athlon 64 X2 Dual Core 4200+ processor would also work. |
| Display Card | If you are going to use any software or game, you should not experience any graphics errors or delays. So it should be a “MORE CURRENT” graphics card than the AMD Radeon HD 2400 Series or the NVIDIA GeForce 210. |
| RAM | Additionally, you need higher-capacity RAM for your needs and the ability to work efficiently. For this reason, it would be better if your PC had the recommended 4 or 8 GB RAM. |
| Storage | It would be best if you had “HIGHER” hard disk space than 16 GB to install and use things on your system. |
If you meet the required hardware requirements, be sure to back up your data on your computer before starting the installation process!
In our previous easy-step guides, we installed Windows XP, 7, and 10 on clean PCs. If you want to examine them more closely and install them on your device, you can take a look at these:
- How to Install Windows 10 Step-by-Step
- How to Install Windows 7 Step-by-Step
- How to Install Windows XP Step-by-Step
Preparing Installation Media with Rufus
Now, download the Rufus program I mentioned to your computer. Then, open Rufus by running it as an administrator. Then, plug your USB Flash Memory into a 3.x supported port of your PC. Additionally, you can also use the USB 2.0 port, but ISO burning takes a long time. For this reason, it takes a lot of time to install the system on your PC.
If you have decided, select the drive letter of your USB disk from the Device section in the Rufus interface.
To install UEFI, all you have to do is select GPT. To do this, in the Partition Scheme and Target System Type section, select the GPT Partition Scheme for the UEFI option. If you want, you can also choose MBR, which is a more secure method, instead of UEFI. It’s a choice up to you!
Finally, you need to burn the Windows 8 & 8.1 ISO file that you downloaded to your computer. To do this, click on the DVD icon in Rufus and select the file. Immediately afterward, click Start to burn the image to Flash Memory.
How to Install Windows 8.1 UEFI on a PC/Laptop
You have prepared the Windows 8 installation media. Now, all you have to do is boot your PC from your USB disk. Therefore, you need to enter the BIOS to access the Removable Device settings.
Log in to BIOS to view BIOS settings. Then, configure the USB memory you inserted into your computer as the 1st Device from the Boot options.
NOTE: If you are going to install it on a desktop PC, the key to enter the BIOS menu is usually DEL. If you are going to install it on your laptop, we typically access the boot settings with F12, F11, F10, or ESC.
Steps:
Then, follow the steps below to run and install Windows 8 on your computer step by step.
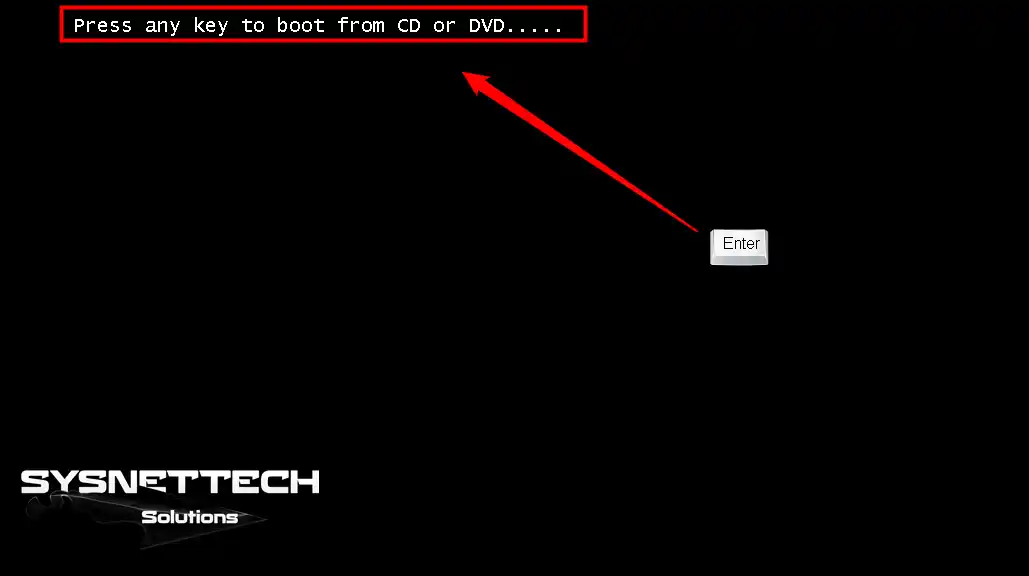
Step 1
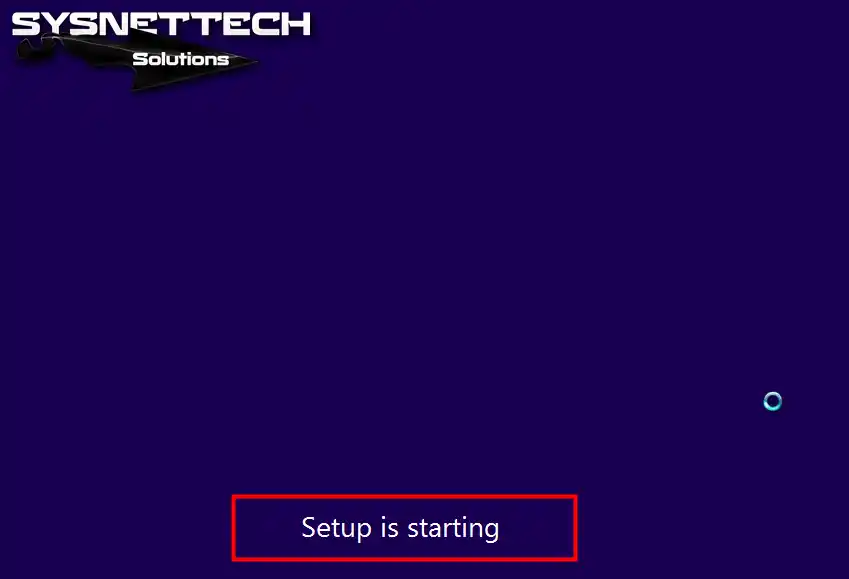
After restarting your host computer, you will see a screen like the image below. This is the Press any key to boot from CD or DVD warning. Therefore, after seeing this, press any key on your keyboard to start the Installation.
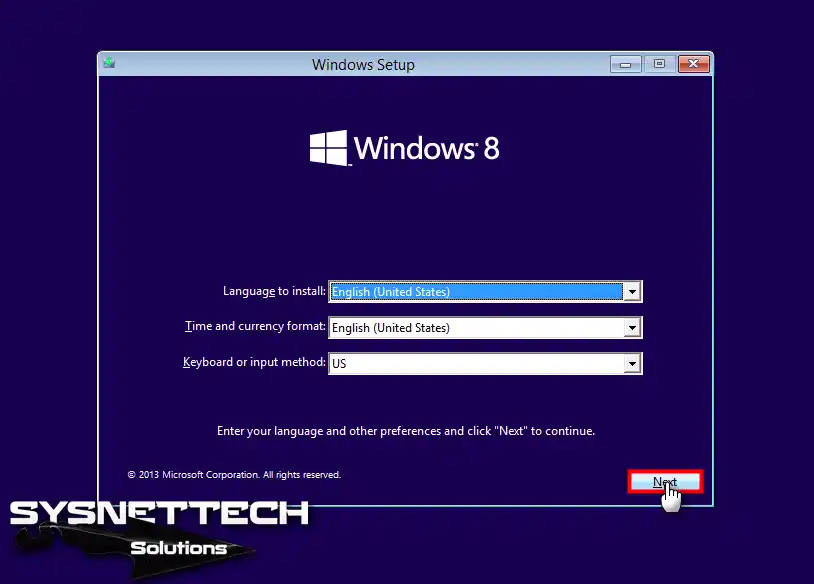
Step 2
You will open the Win8 installation wizard. So, on the first screen, set your system display language, time zone, and keyboard and click Next.
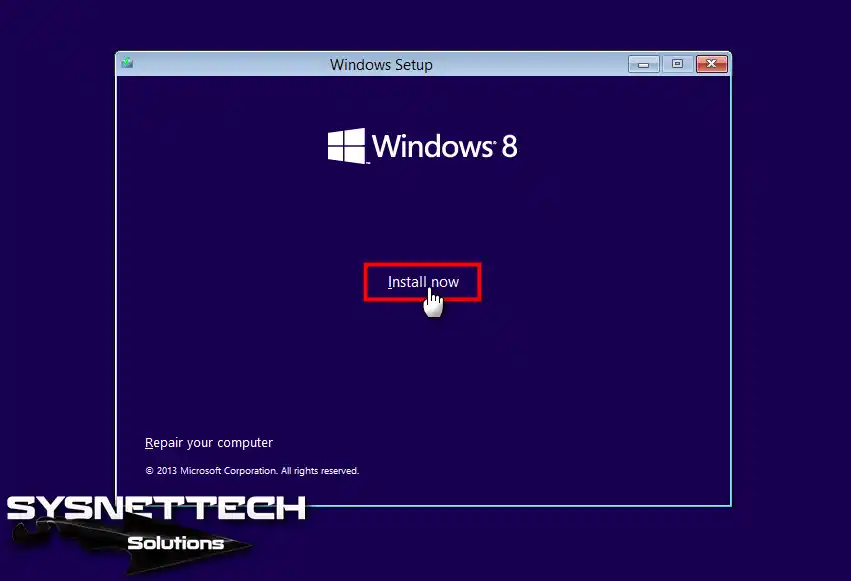
Step 3
Now, on this screen, you need to start the installation of 8 and 8.1. To do this, click Install Now, which is the only button on the screen.
Step 4
As soon as you click the button, the OS installation will start on your PC.
Step 5
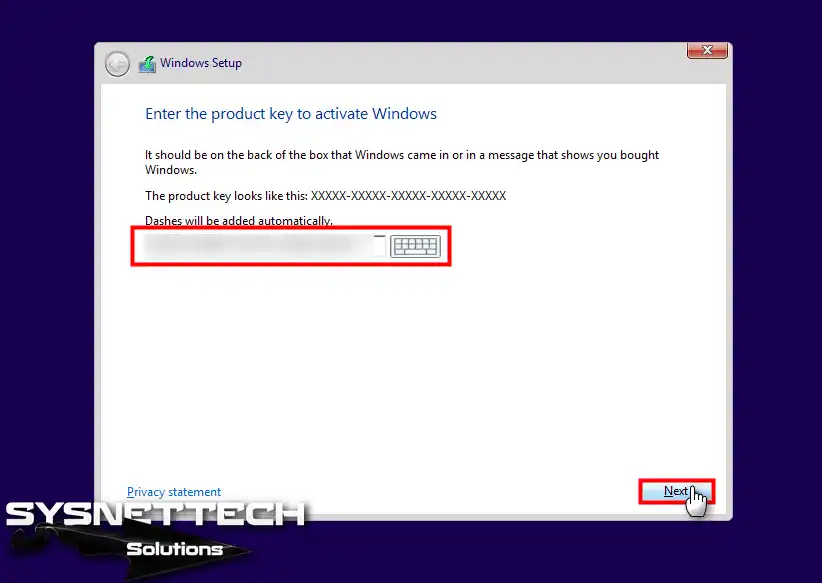
You need to enter the Windows 8 license key in the Windows Setup window. If you still need to, you can continue directly with Next.
Step 6
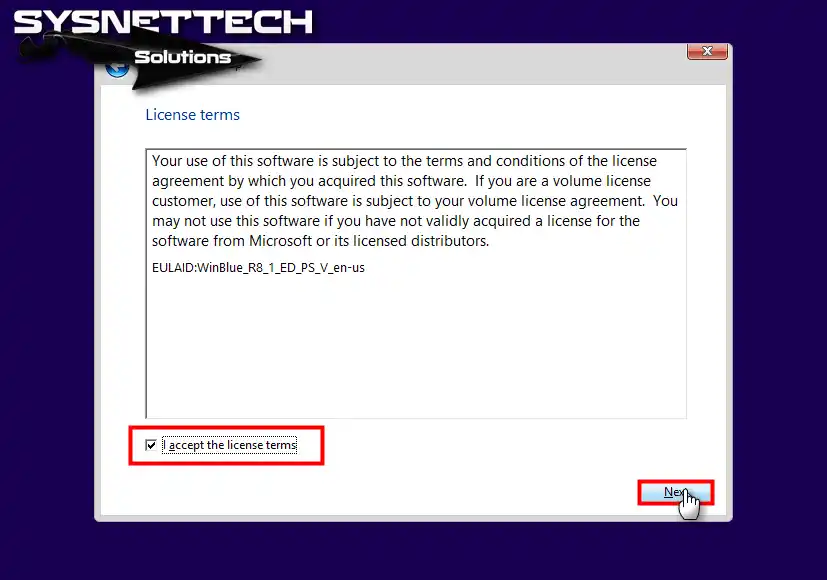
After reading the Windows 8.1 license agreement, you must accept it. Otherwise, you cannot install it because you have to proceed through the wizard. To do this, select I accept the license terms and click Next.
Step 7
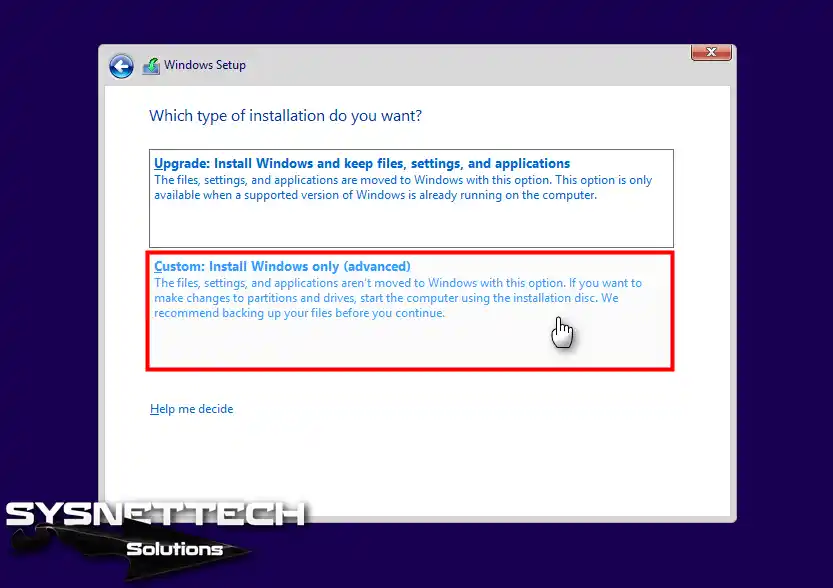
Since you will be installing the system from scratch on a clean disk, you will make the disk settings yourself. So, proceed here by clicking Custom: Install Windows only (advanced).
Step 8
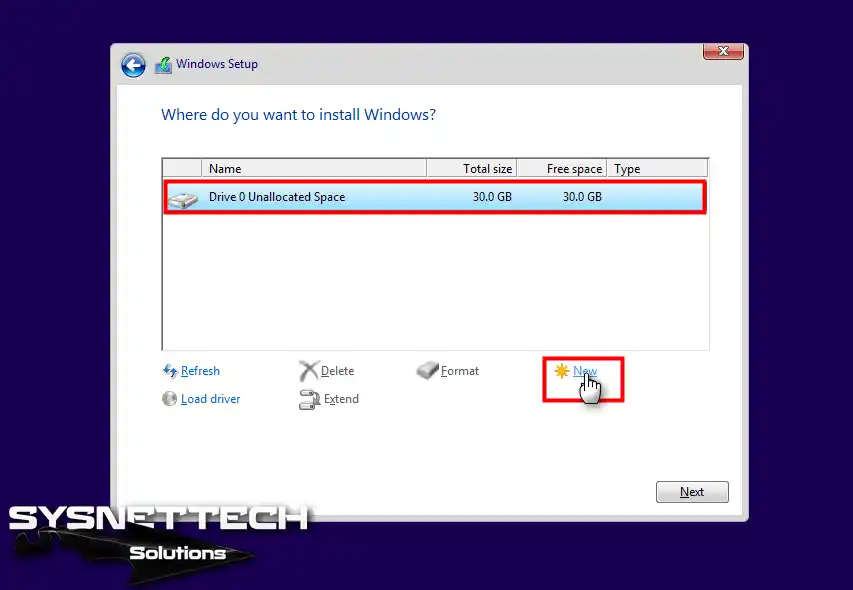
Yes, you see the disk configuration! Now, you will configure your computer’s hard disk. Since you will be doing a clean UEFI installation, you should format the entire disk.
Afterward, click New on Drive 0 Unallocated Space on your disk.
Step 9
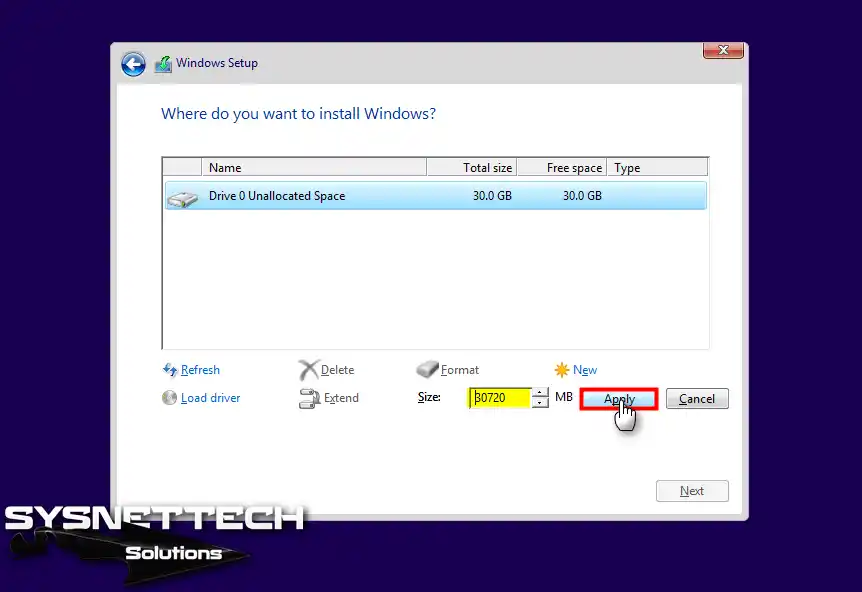
I assume you want to use the entire disk in the installation. At this point, I click Apply, leaving the value in the Size section by default. You decide, but in general, using all of these is suitable for performance.
Step 10
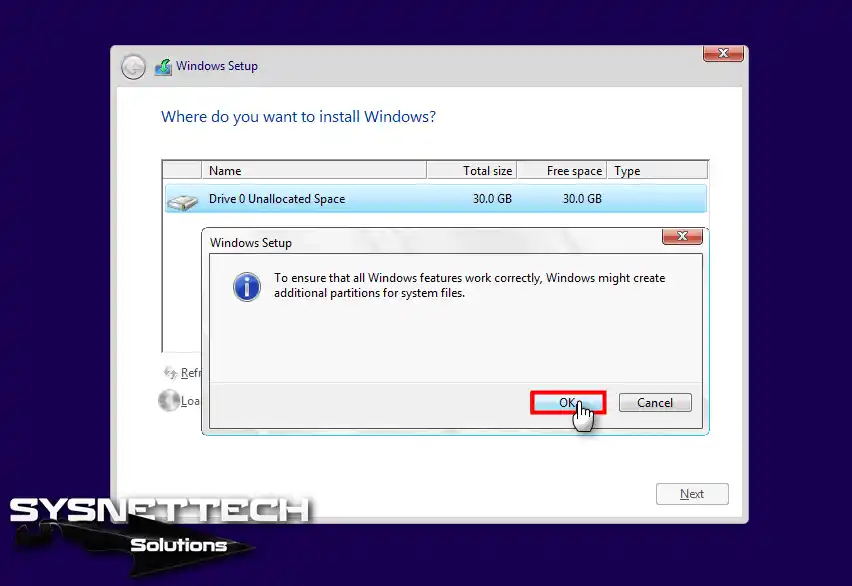
After proceeding, you will see the info window. Here, the wizard tells you to create extra areas for Windows 8 setup. Thus, select OK to skip this.
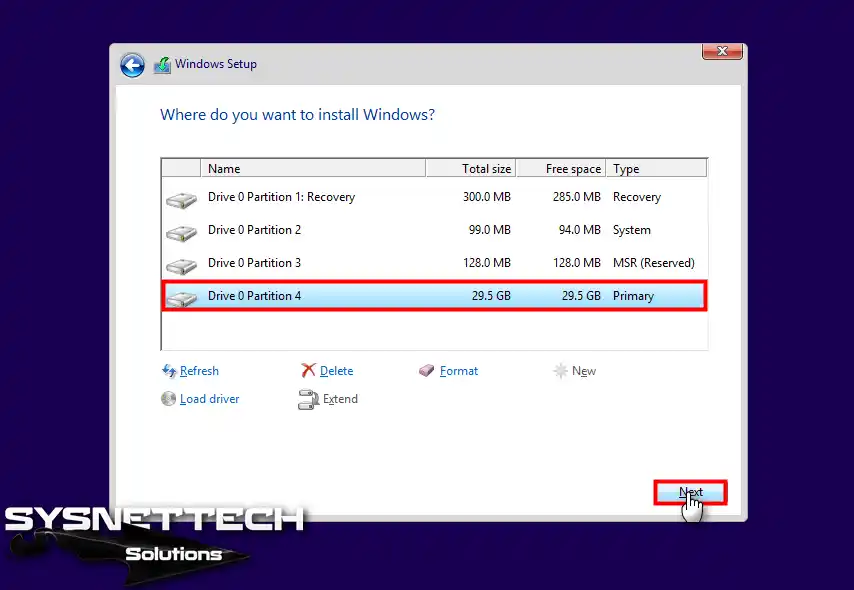
Step 11
In the image below, you can see that the wizard creates four partitions on the disk for UEFI installation. Now, here, I select Drive 0 Partition 4 / Drive 0 Partition 4. So, since I will install the system in this section, I choose it and click Next.
Step 12
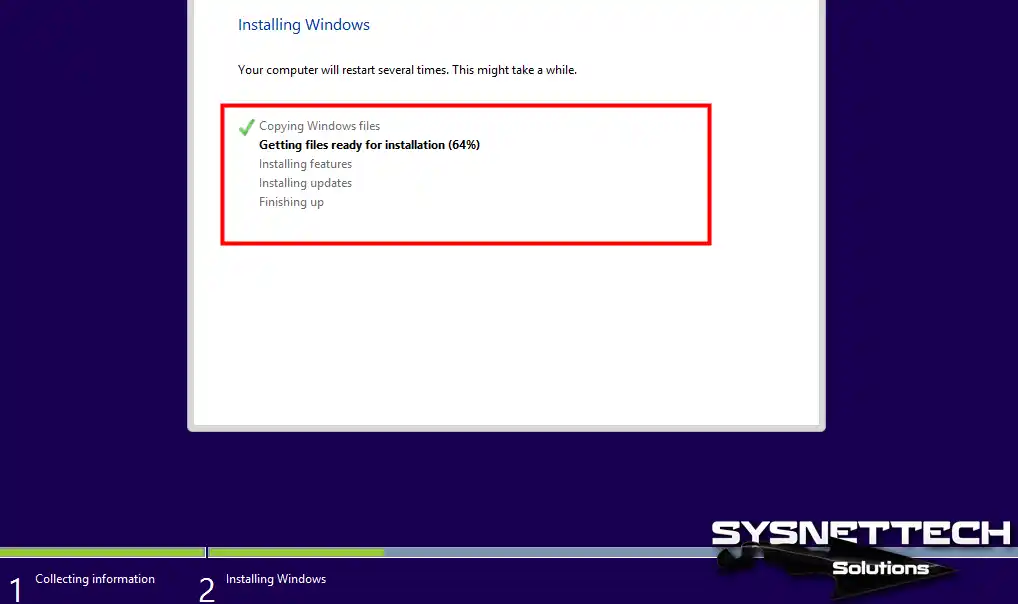
The installation wizard will copy the critical files for Win8. This process takes time, depending on the hardware power of your PC. Thus, please be patient!
Step 13
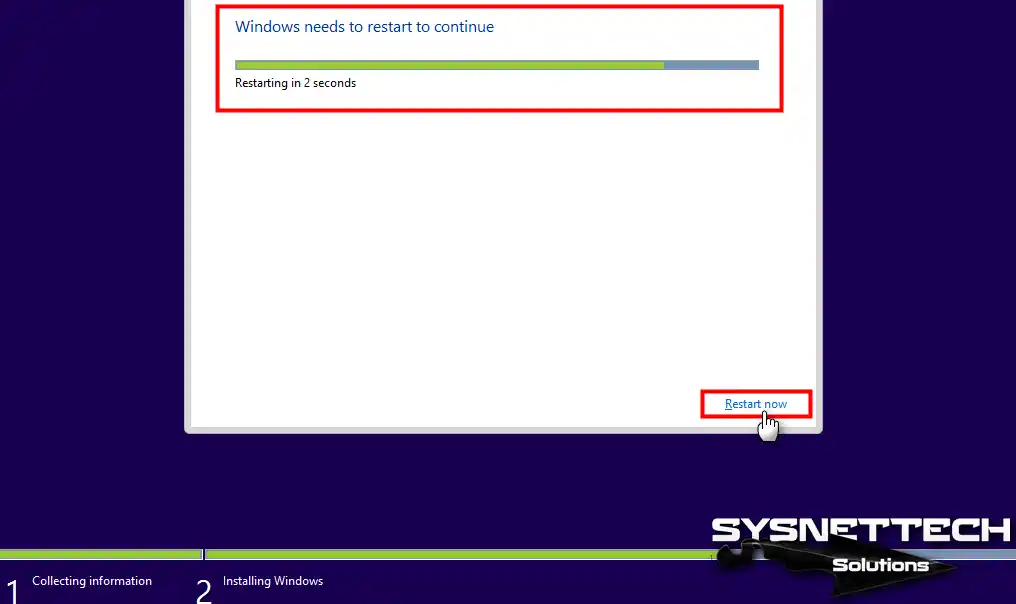
As soon as the wizard copies the necessary files, it will reboot your PC in seconds. If you do not want to wait for this period, click Restart Now.
Step 14
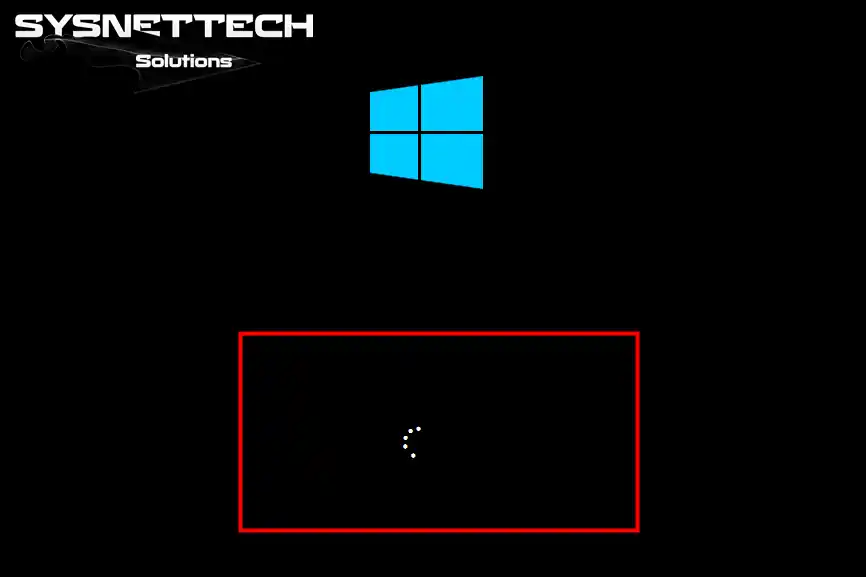
Your Windows 8 operating system restarts to prepare for the first setup.
Step 15
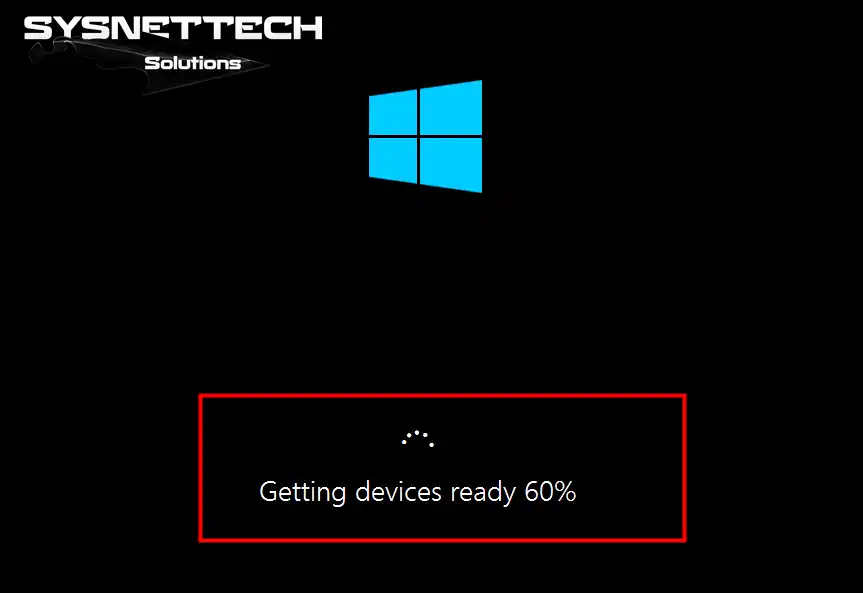
Now, wait while the wizard introduces your PC’s hardware devices to the OS.
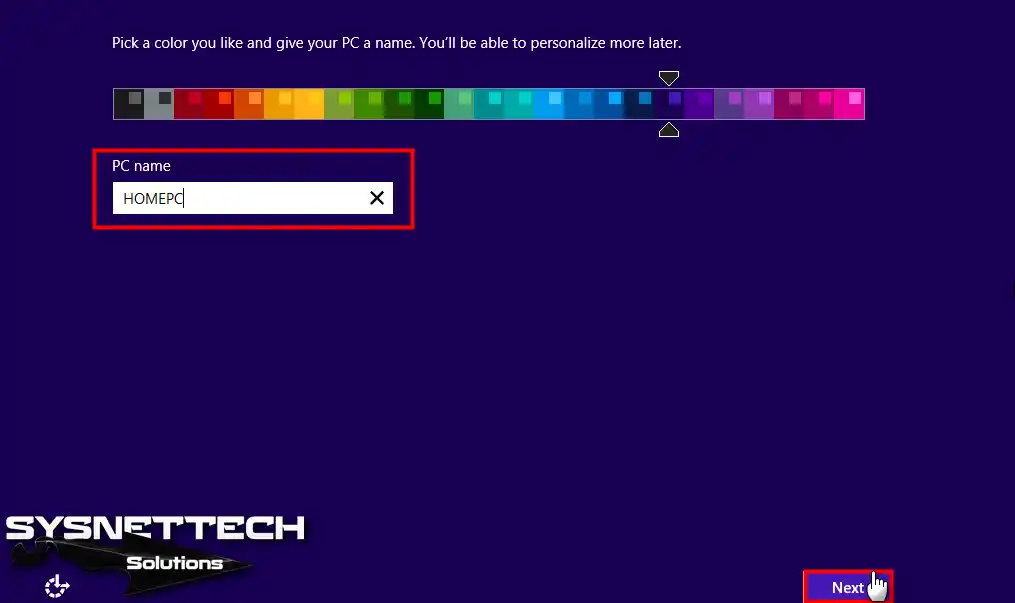
Step 16
Type a name of your choice on your computer. Then, configure the color for your system as follows.
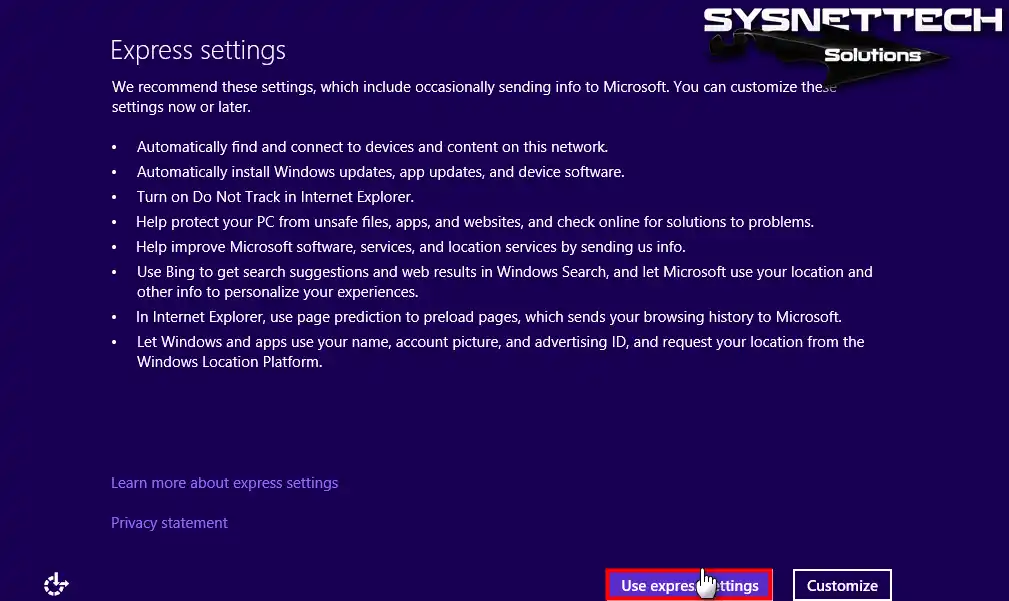
Step 17
On the Express Settings screen, you will see many options. For example, these are things like Bing, Search, and location services. If you want to configure them in more detail, click Customize.
However, the method I generally prefer is to click the Use button. So, choose the option that suits you and move forward.
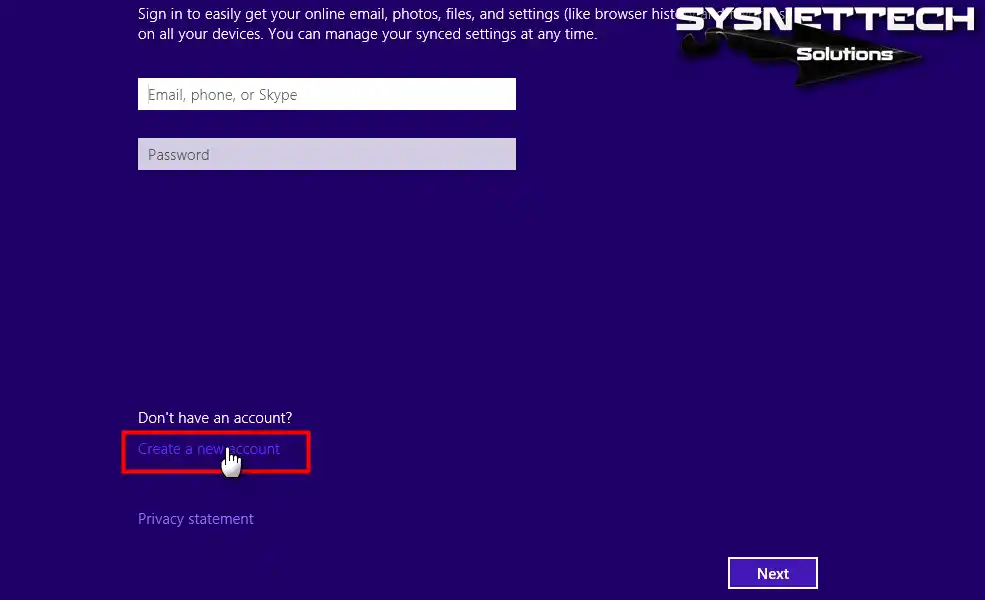
Step 18
On the next screen, you will see Microsoft account settings. If you have Internet access, you can sign in with your Microsoft account. This all depends on personal preference. For example, I proceed without typing my login information.
In fact, the only benefit of this will be that our data will be synchronized on Microsoft servers.
In this case, if you do not have an account, still click Create a new account.
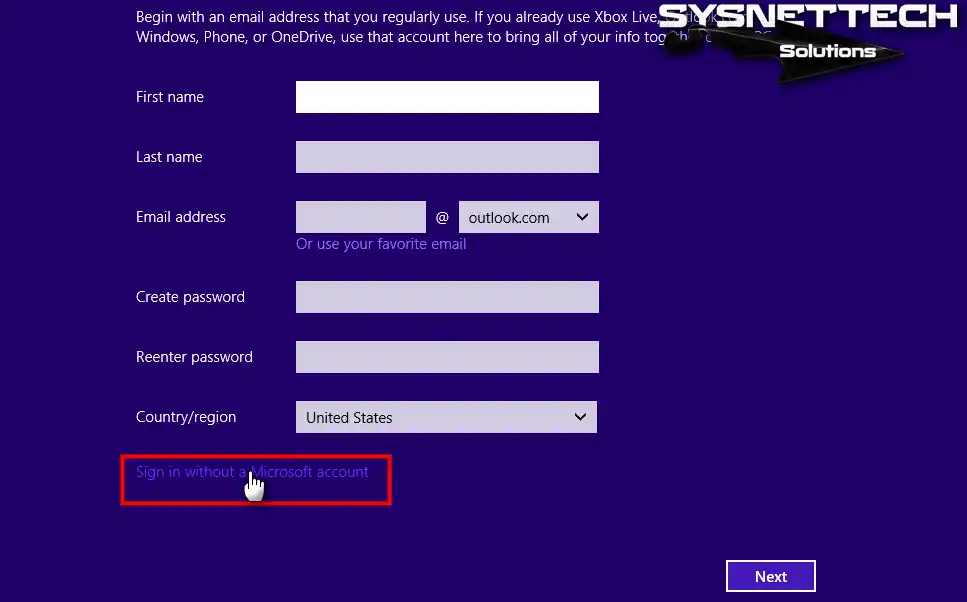
Step 19
You can create your new Microsoft account at this stage. However, if you are not connected to the Internet or do not want to log in, that’s okay. Then, hit Sign in without a Microsoft account.
Step 20
Now, at this stage, determine and write the name of the user account on your system. Also, you may require a password for your PC. So, after making the necessary settings, press Finish.
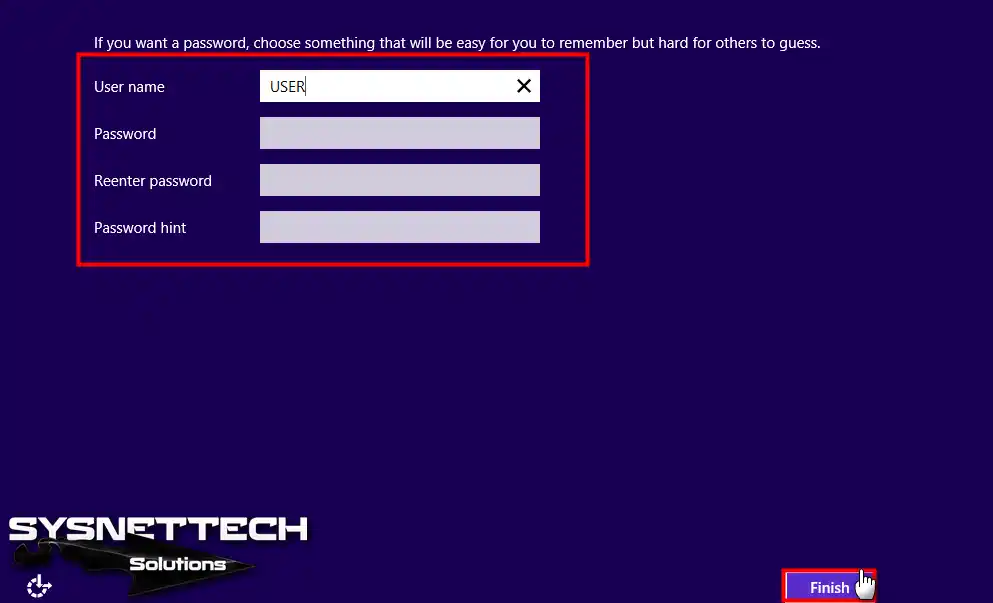
Step 21
At last, the wizard will put apps on your Microsoft operating system.
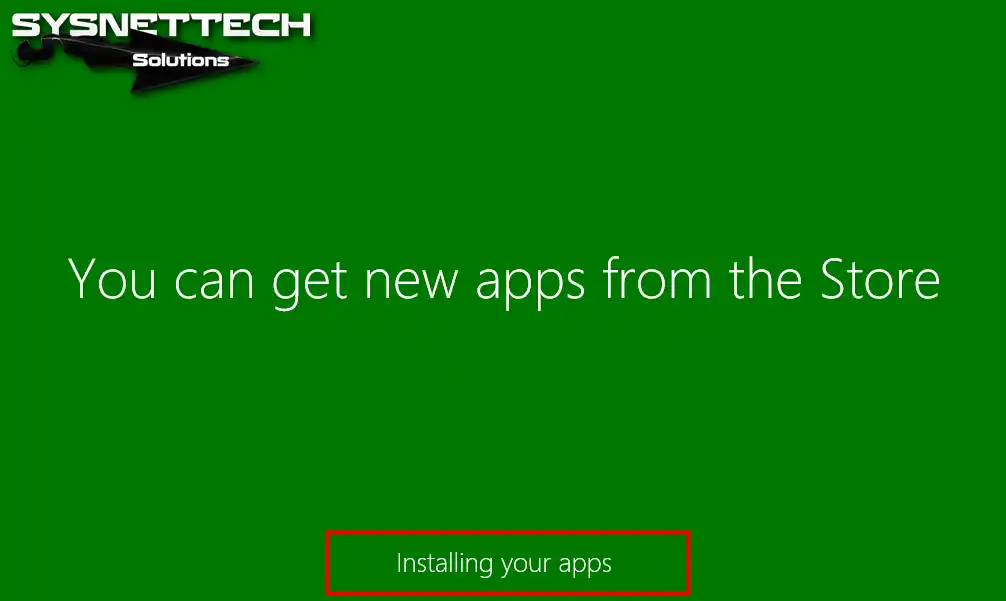
Step 22
Congratulations! You have installed Windows 8.1 from scratch on your desktop/laptop device with a USB flash!
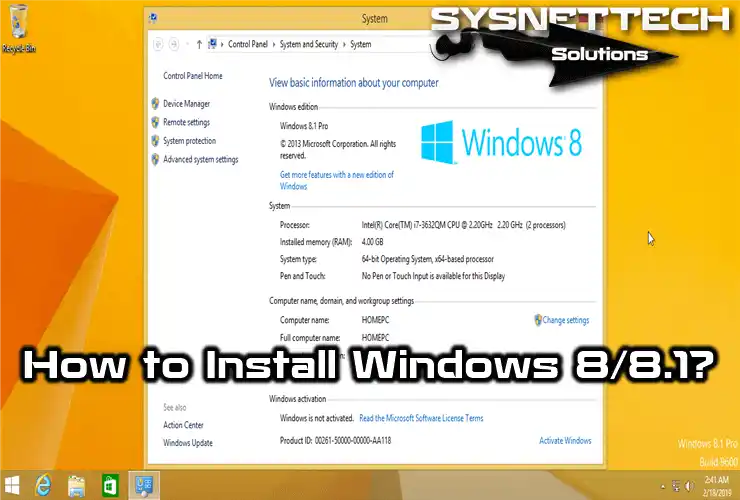
Now, to find out the system properties, click on the Start menu. Immediately afterward, right-click on My Computer and click Properties. You will be able to check your system version when you see the screen, as shown in the image below.

Frequently Asked Questions (FAQ) About Windows 8
- How to install Windows 8 OS without a CD or DVD?
- How can I reinstall Windows 8 without a CD, DVD, or USB?
- Can I run Windows 8 without activating it?
Conclusion
In this article, we examined how to install a clean setup of Windows 8 or 8.1 on a new PC. After installing your system, all you have to do is download the Drivers.
It’s okay if you don’t know how to accomplish it. Just visit hardware manufacturer websites. Then, download and install your drivers from the Support section for each of your parts. You can also try setting up the latest drivers via Update!

1 Reader Comment
Wonderful post!
Thank you very much!