
Changing the language on your Windows 10 or 11 helps you use it better. Because you can see, use, and feel the system more clearly.
Maybe you’ve moved to a new country. Or perhaps you want to improve your language skills. Or maybe you simply prefer a different language. Whatever your reason, Windows 10 has you covered. Changing both the system and display languages is very simple.
But moving through the settings can be hard. This is very true for people who do not know the screen.
In this guide, I’ll help you seamlessly change your Windows 10 language. I will show you each step you need. This way, you can make your screen fit what you like. Now, let’s explore how to make these changes together!
How to Change the System Display Language of Windows 10 OS
Changing the system tongue is very easy. But the Windows 10 Settings screen can be a little tricky. This is most true when changing the show language.
First, there’s an essential step before adding a language pack. You need to ensure that the Update service is running in your services. This tool is key to putting in tongue packs correctly.
To see the Update tool, press Windows Key + R. Then, in the Run box, type services.msc and press Enter.
In the Services window, find the Update server. Double-click it, and you should see “Running” in the Service Status field.
If the Windows Update tool is not on, you must turn this tool to Automatic.
How to Add a New Language Pack on your Windows 10 Computer
Verify that the service is OK. Then, to change your OS locale, you first need to open Settings. To do this, click on the Win Key and type Settings in the search field, then find the task and run it.
To make its settings, follow the steps below.
Step 1
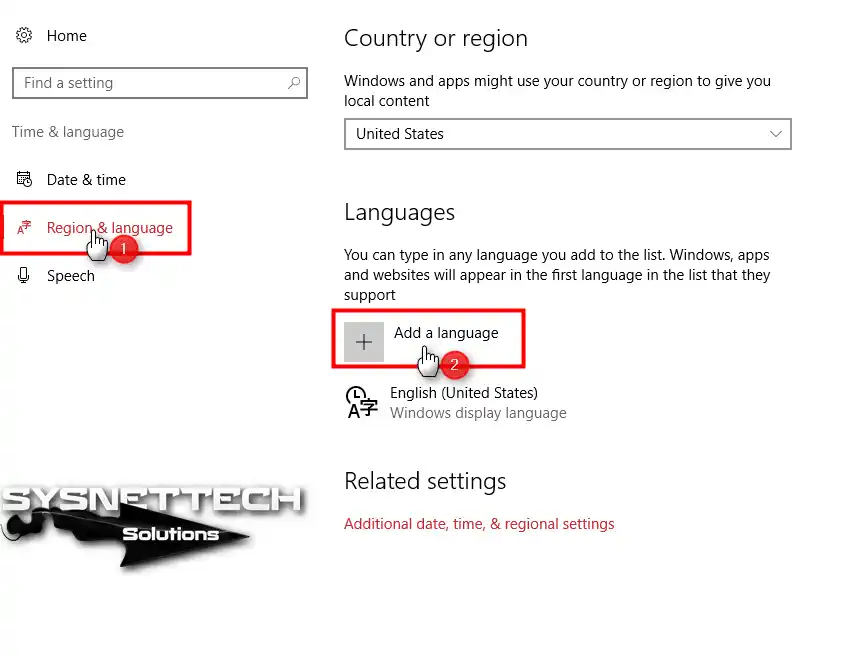
Open your system’s Settings and go Home > “Time & Language” > “Region & Language”. Click “Add a Language” in the section to add the package you wish to use.
Step 2
As soon as you press the Add button, you will see multiple options. Now, type the display package you want to use in the search box and select it.
If the area talk for your picked pack shows here, choose the place you live in—like English (USA) or English (CA).

Step 3
After configuring the vocabulary you want, click the Set as Default button.
Next, you need to download the system locale you configured from the Internet. First, select Additional date, time, & regional settings.

Step 4
In the Clock and Region window, continue with the related option.

Step 5
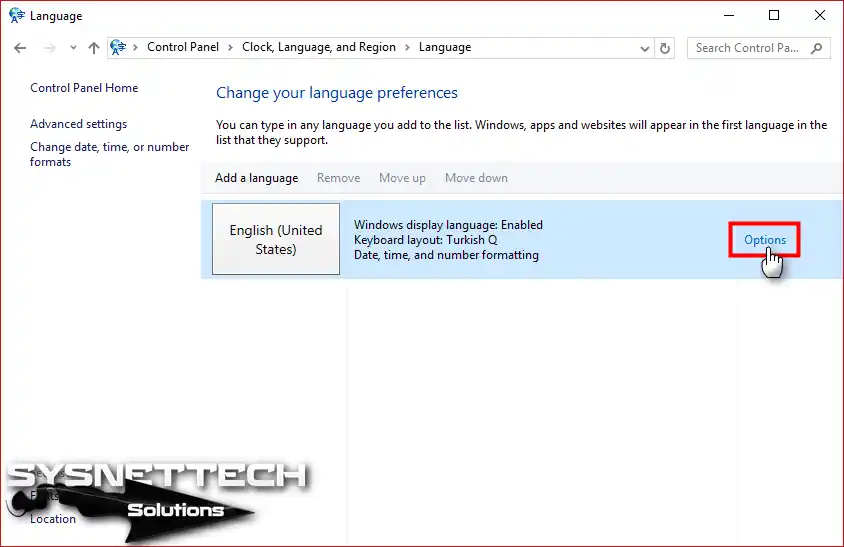
In the Change Your Preferences window, click Options.
Step 6
After clicking on Options, the service will run and start downloading the selected package, as you can see in the image below.
At this time, your system will get the pack. After the download completes, restart your computer, and you will see that your place language is new.

How to Download and Install the System Locale Pack ⇒ Video
If you want to know how to change your system tongue, watch the video below. Also, if you’re going to support us, you can subscribe to our YouTube channel!
What Should I Do If the Language Pack I Want to Install Isn’t Available?
If the system doesn’t list the speech pack you want to install, don’t worry. First, there are a few steps you can take to resolve this issue.
Step 1
First, ensure your Windows 10 version is up to date. Sometimes, new language choices need the latest updates to work.
Step 2
To do this, start by opening Settings. Next, pick “Update & Security” and then look for updates, and add the newest updates. This will let you get the speech you want.
Step 3
If the language is still missing after you update, check the help page from Microsoft. They usually give extra details and files to get. Also, you might not reach these files straight from your settings.
Step 4
Or, you can use Windows PowerShell. First, look for “PowerShell” in the Start menu. Then, right-click the result and last, pick “Run as Administrator.”
Step 5
Next, add the speech pack you need. For example, you can use the command “Add-WindowsCapability -Online -Name Language.Basic~~~(lang code)”. This command will help you install the desired tongue. The “lang code” here is a code specific to the jargon you want to install.
Add-WindowsCapability -Online -Name Language.Basic~~~(lang code)Step 6
There are other choices if your wanted tongue is not there. For one, you can look for tongue packs from different makers. But, you must be safe when using these, as they can bring danger and fit problems.
Step 7
But you should always be very safe. Be sure you get files from good places. So, there are also group picks that fit what you need.
As a last try, if these fixes fail, call Microsoft help. They can give clear steps and help you get a good answer.
Frequently Asked Questions (FAQ)
- What is System Locale?
- How can I change the language of my OS to English?
- Can I change the Windows lang pack without reinstalling it?
Conclusion
First, there are two requirements for changing the Windows 10 language. First, the Update Service must be running. Second, you should check that you are connected to the Internet.
These steps are needed to change from a tongue to English. This also works to change from English to another tongue.
All in all, changing the language in Windows 10 or 11 is a simple process. Plus, the change you make will significantly improve your PC experience.
Whether you are in a new place or learning a new language, or perhaps you want to use a different thing. So, no matter why, I know this guide will help you a lot. With the steps I have shared, you can move through the settings easily.
Remember, first you need to make sure your update server is working. Then, follow the steps I provided to add the tongue pack you want. These two key components will ensure your process runs smoothly.
If you have any problems, you should look for new updates. You should also ask for more help if you need it. Then, use your new speech choices. This will make Windows feel like it is made just for you.

Be the first to share your comment