
Do you need help installing Windows XP on your computer? Installing it might seem tricky, but don’t worry! With a bit of know-how and tolerance, you can do it! We’ll show you each step so you can run it on your physical PC using a USB flash drive.
Before we start, it’s essential to know that users don’t use this legacy operating system much anymore. Thus, it might only work with some of the new stuff you have. Plus, Microsoft doesn’t help with it anymore. So, you won’t get any updates to keep it safe. But we highly recommend you switch to a newer system if you can.
Why Do They Still Want to Install Windows XP?
First things first, Microsoft doesn’t help with Windows XP anymore. The company stopped supporting this system in 2014. So, it’s a bad idea to keep utilizing it. Thus, we suggest using a newer version of Windows instead.
However, some people still like using this old system because it brings back memories. That’s why we started this easy guide for you.
Even though Microsoft Windows XP is old, some machines need it. For example, in a factory, some machines only work with this system.
So, the software made for those machines only works with Windows XP. If you need to use those machines, it’s best to use XP. But if you connect to the Internet, your computer might catch viruses more easily.
In simple words, you can install Windows XP Professional on your old or new computer. You can also use a Flash Drive to do it. Also, if you have a CD or DVD of XP, there’s another way you can do it.
Checking if Your Computer Can Run XP
Before you start installing Windows XP, make sure your computer has the stuff it needs. So, here’s what you’ll need at least:
- It would be best if you had a Pentium processor that’s at least 233 megahertz (MHz) or faster.
- We suggest having at least 64 megabytes (MB) of RAM, but it’s better if you have 128 MB or more. Also, try to have around 1 gigabyte (GB) or 2 GB of storage space. These are the basics you’ll need.
- You’ll need at least 1.5 gigabytes (GB) of space on your hard disk. But if you plan to do a lot of stuff, it’s better to have more space.
- If you’re using an older computer, you’ll need a CD-ROM or DVD-ROM drive. But you can also install it using a USB flash drive.
- Of course, you’ll need a keyboard to type and a mouse to click around.
Getting a USB Ready for Windows XP Professional
To set things up, you’ll need a Flash drive with at least 4 gigabytes (GB) of space and a program called Rufus. So, Rufus helps make stuff like this for both old and new systems.
In simple terms, you can make a Windows installation thingy with Rufus. In short, it’s just a simple program to use.
If you follow the steps here, you can install other versions of Windows XP on your computer in the same way.
Steps:
Step 1
First, download Rufus, a program to make USB installation media, from here. It’s easier to get the Portable version, like in the picture below. Then, stick your USB thing into one of the slots on your desktop or laptop.
At this point, make sure you don’t have any important stuff on your USB. When you prepare the things with Rufus, it will erase everything on it.

Step 2
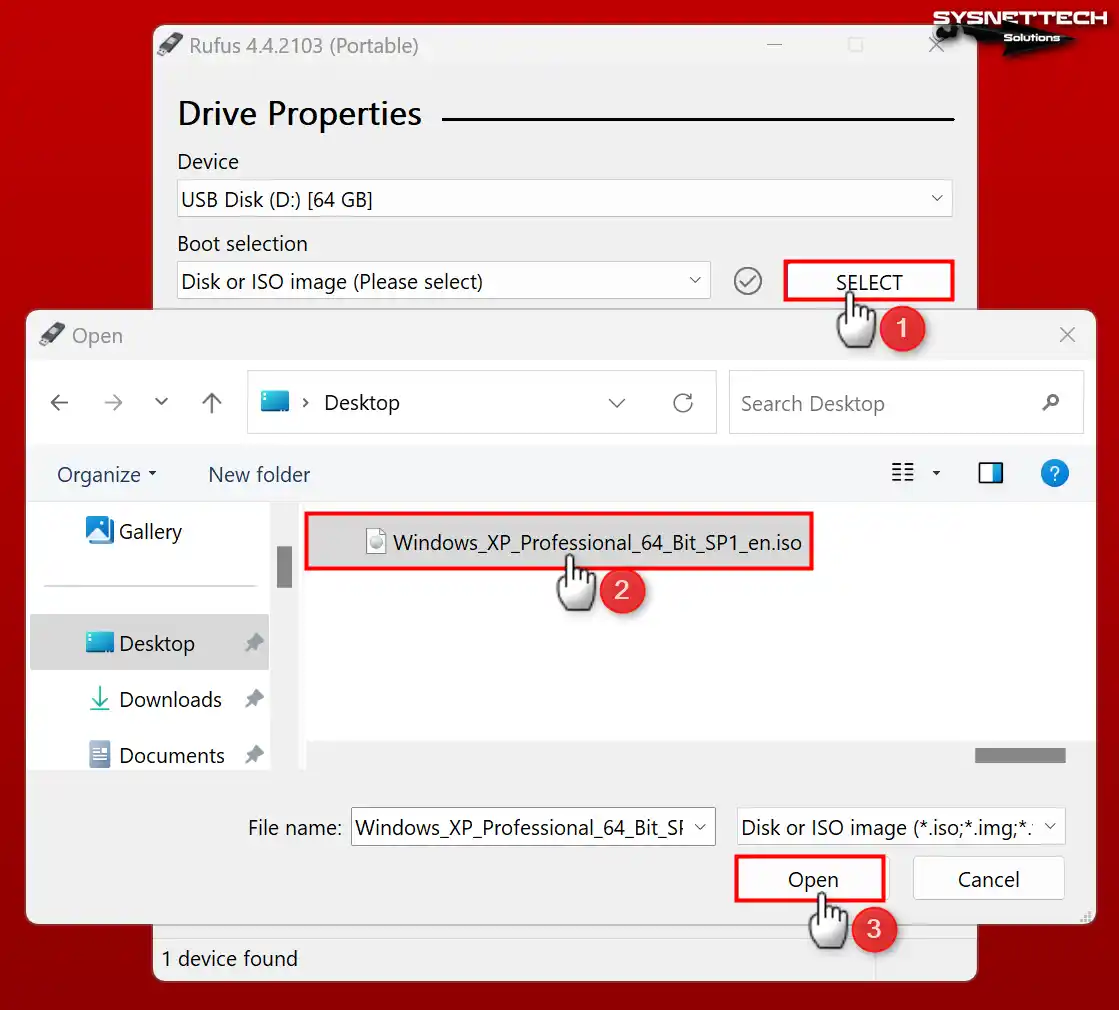
If you see a screen asking to update Rufus when you open it, go ahead and do the update. If not, click “No” and keep going with the version you have.
Since it’s a portable version, you can open it right away without needing to install it. Now, click on SELECT, as you see in the picture below. Then, choose the Windows XP ISO file you got in the window that pops up.
Step 3
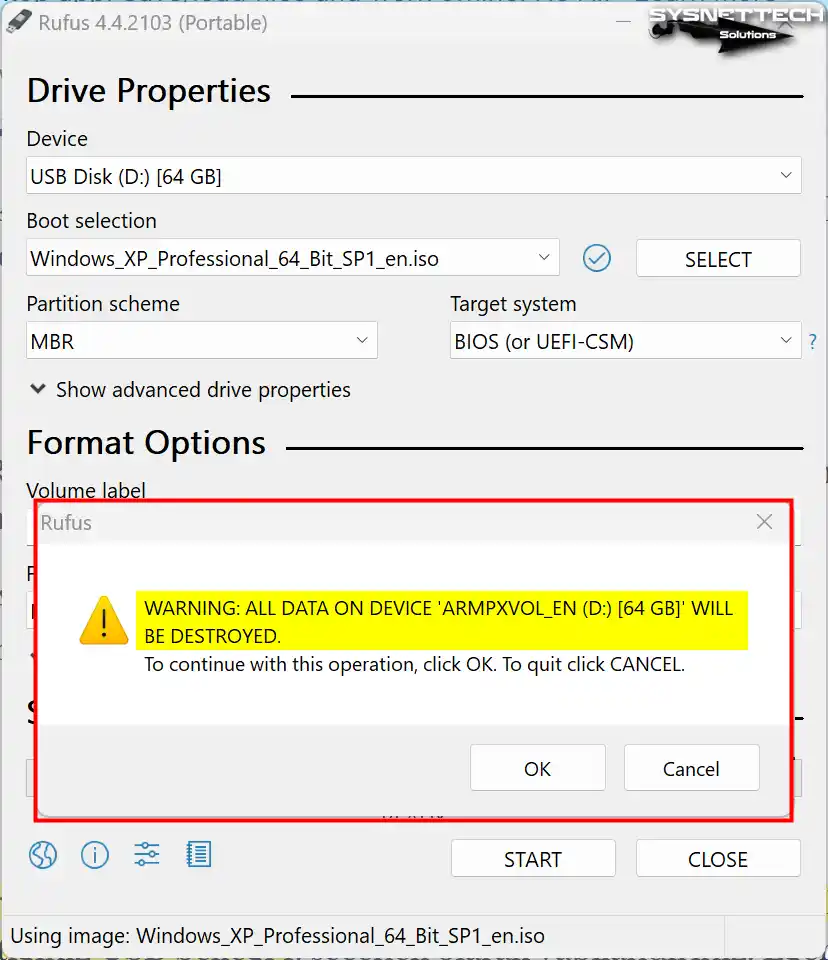
Check that MBR is in the Partition Scheme section. Also, make sure the Target System value is BIOS.
Now, if everything is OK, you can begin burning the ISO file to your USB with START. Yet, when you click on this button, the wizard will tell you that it will delete all the things on your disk. Meanwhile, recheck your disk and click OK.
Step 4
After Rufus writes the ISO file on your USB flash drive, you’ll see a message that says “READY.” Now, you can close the program and move on to the next steps for installation.

Booting Your Computer from Your Windows XP USB
Once you’ve got the USB ready to go, you need to start up your PC with it. To do this, you’ll have to open the BIOS settings. You can accomplish this by pressing the DEL key on your keyboard. But it might be different depending on who made your motherboard.
But, if you are using a laptop, it will be one of the F2, F10, F12, or ESC keys. As a result, once you enter the SETUP interface, you will see the Boot option. From there, you need to choose the disk from which you will boot your PC. So, bring your bootable USB flash memory to the first row and save the settings.
But, if your computer does not start from a USB, the hard drive setting may be the reason. So, go to the hard drive settings and pick your USB disk as the main one. Then, you can restart your computer, and it should boot up from the USB.
How to Install and Run Windows XP on a Computer Step by Step
So far, you have prepared a USB flash memory media and then booted your PC with it. Now it’s time to install Windows XP!
If you are someone who knows these things, the steps on the installation screen are easy for you. Yet, it is still a good thing to review each step. After all, years later, young people may wonder what such old systems were like.
Now, follow the steps below to install Windows XP Professional on your computer.
Steps:
Step 1
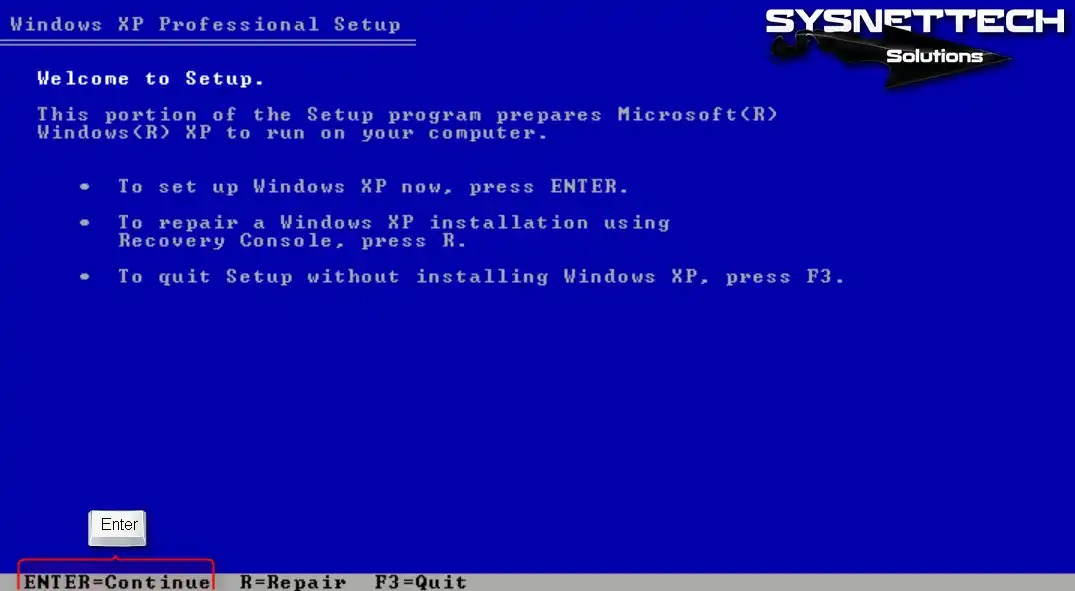
Start up your PC using your Flash drive. Meanwhile, you’ll see the Windows XP Professional installation wizard. Here, just hit Enter to keep going with the installation. Also, if you want to repair your system, you can press the R key here, as Microsoft says.
Step 2
Now, if you want to install this old system from scratch, you must sign the license agreement. As in the image below, the white text on the blue screen contains Microsoft rules. To quickly read and accept these texts, continue by pressing F8.

Step 3
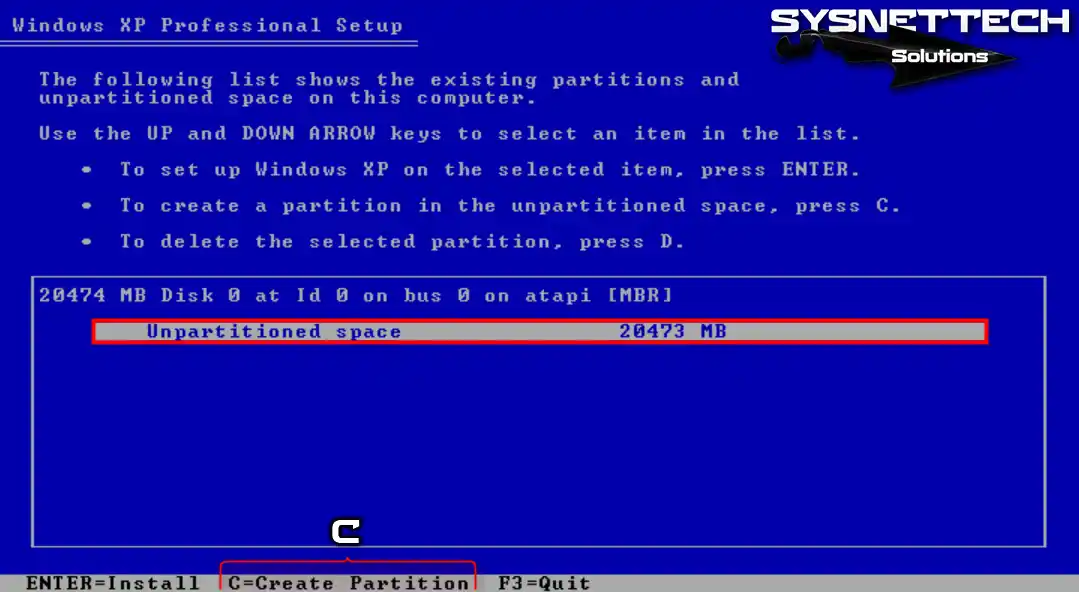
You’ll see the disks or disks that are on your computer like this. Now, you have to set up the partitions on the disk.
Say you’ve got a 500-gigabyte (GB) regular hard drive. In this case, you can set up a 100 GB partition on your disk as the C: drive. Then, you can use the rest of the space for backups if you want. But you can also use the whole disk as the C drive if you prefer.
If you decide to use the whole disk now, you can always divide it into parts later. For this guide, we’ll use the entire disk because we’re installing a fresh operating system.
So, just hit C to move forward and create the partition.
Step 4
After pressing C, you can set up the size of the disk now. If your computer is small, use up all the space. Then, hit Enter to finish setting up the partition.
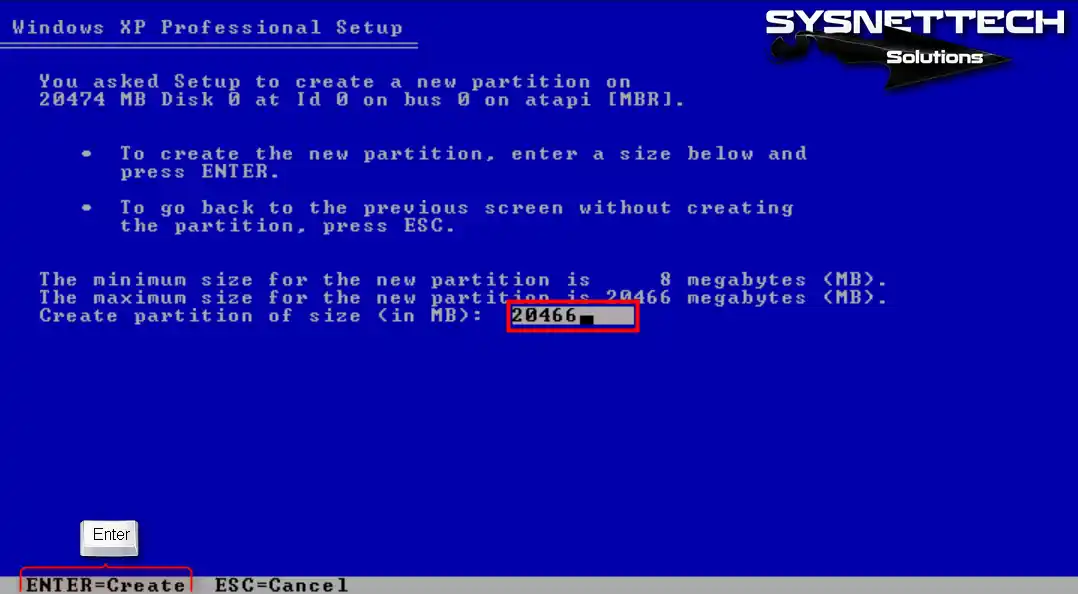
Step 5
According to our guide, we created a new 20 GB partition for Windows XP. Now, press Enter on the C: drive to start the installation.
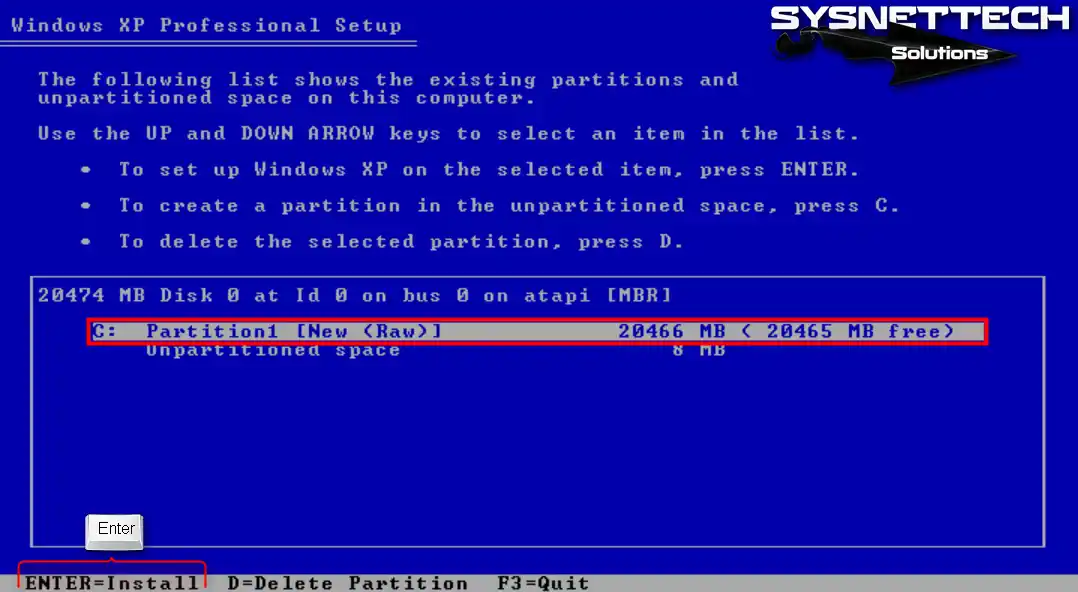
Step 6
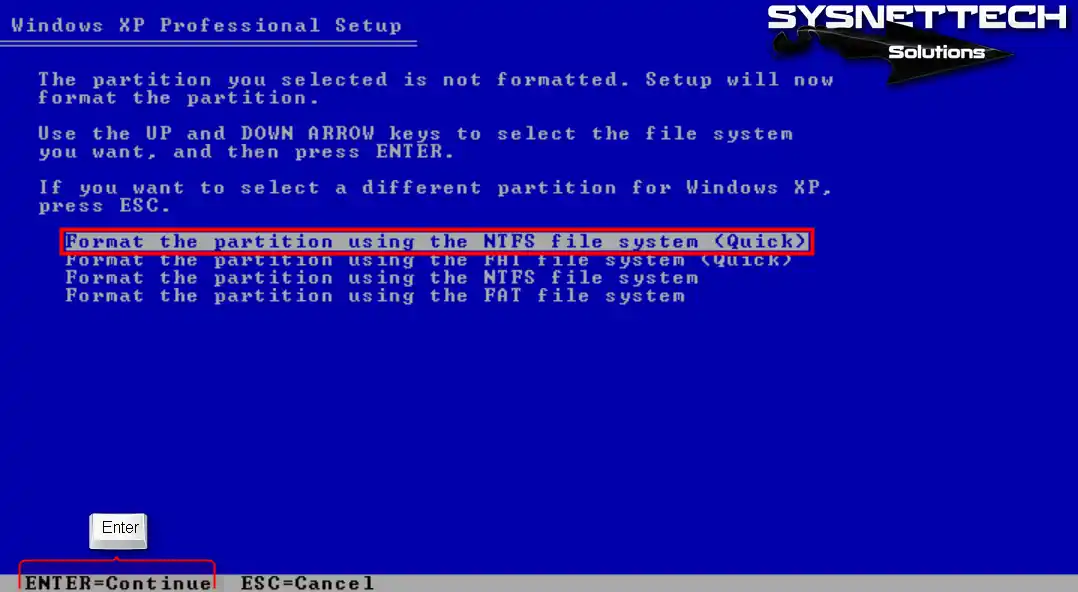
Since the partition you selected is unformatted, you need to format the disk for installation. But you will see two different file types here: NTFS and FAT. For Windows XP, these can be confusing. In summary, let’s briefly explain what they are.
- NTFS: NTFS is more dependable and robust. Thus, it keeps your files and folders safer and has tools to fix errors. Plus, it can handle bigger storage spaces.
- FAT: It’s the format that older Windows versions like Windows 95 or 98 usually use. But it’s simpler than NTFS. But because of that, it doesn’t have as many features. It can’t control who gets to see what, and it’s not as good at fixing errors.
So, pick NTFS for better performance and security with Windows XP. But when would you use FAT? If your computer is ancient and not very powerful, FAT is better for it.
So, are you going with NTFS? If yes, hit Enter on “Format the partition using the NTFS file system (Quick)” and keep going.
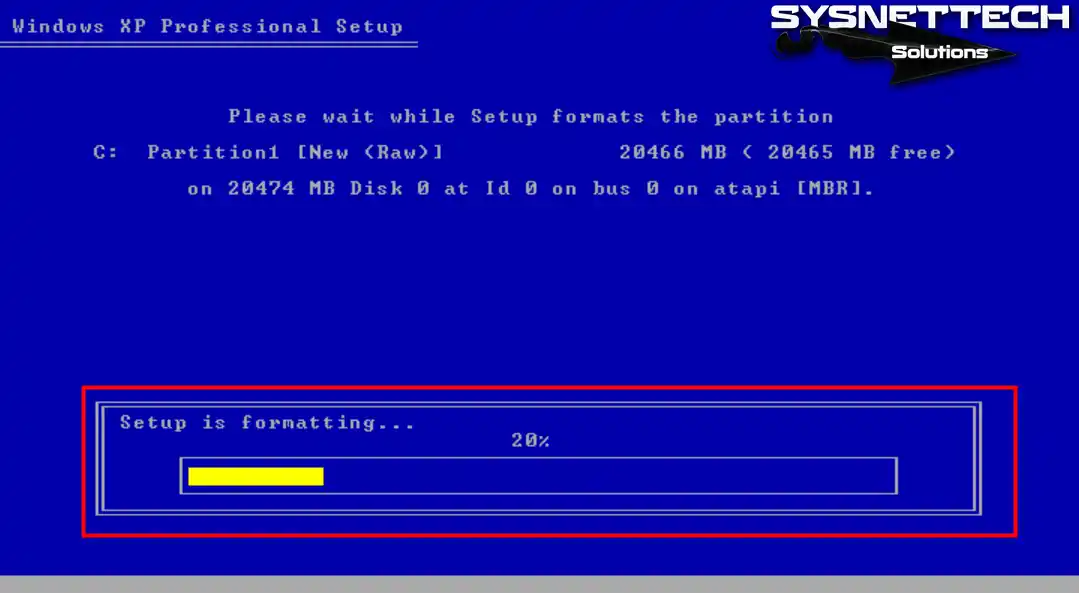
Step 7
Now, the XP setup wizard will format your disk with the file system you picked. This could take a while, depending on how fast and healthy your disk is. But since you chose the Quick option, you will complete it faster.
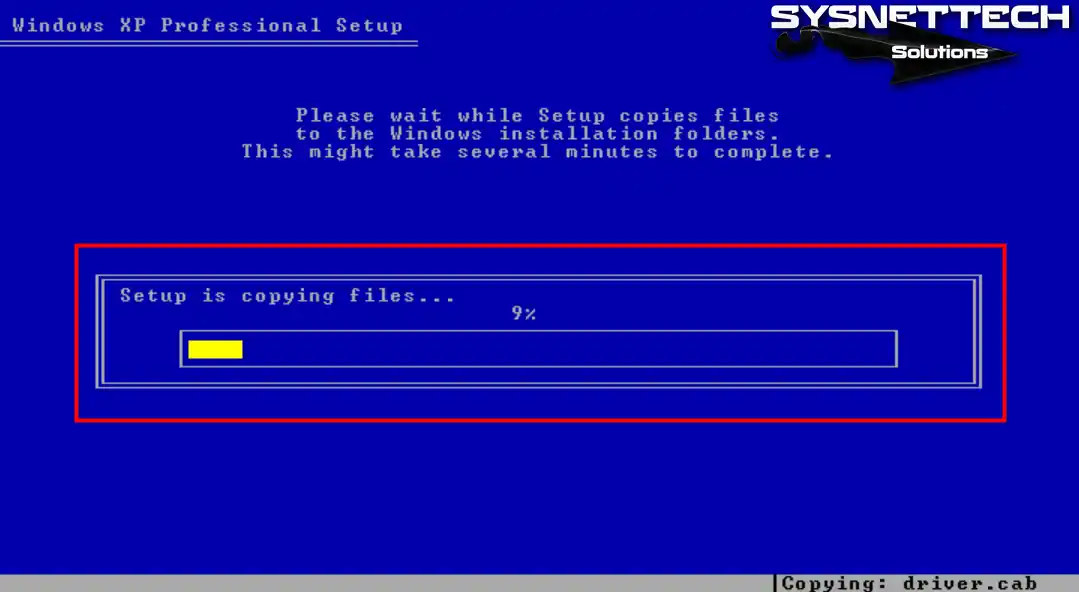
Step 8
As soon as the wizard completes the disk formatting, Windows XP will copy the system files. In this case, do not take any action on your PC and wait.
Step 9
The wizard will restart your PC as soon as it copies the files for the XP software. If you do not want to wait until the specified time, press Enter directly.

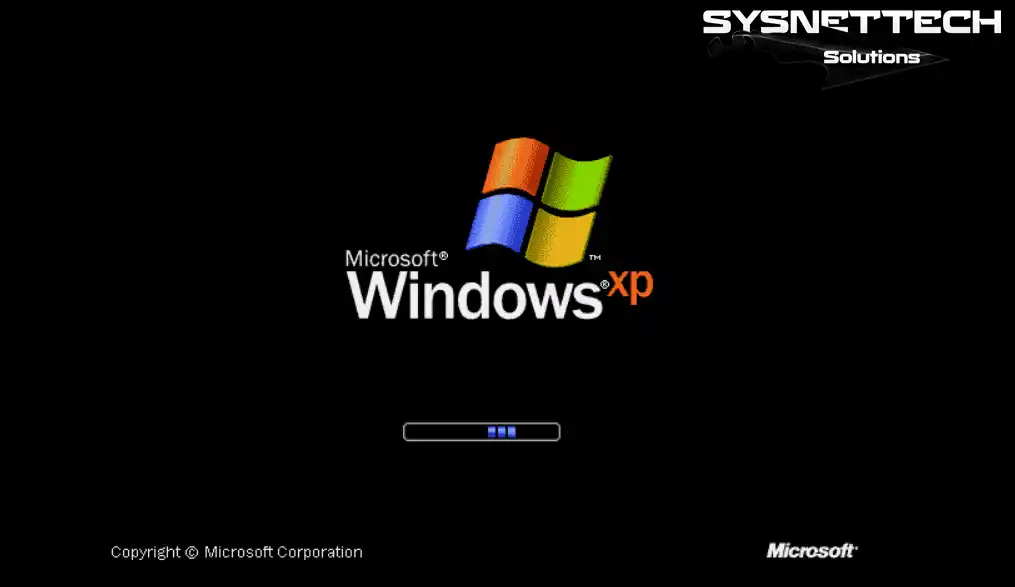
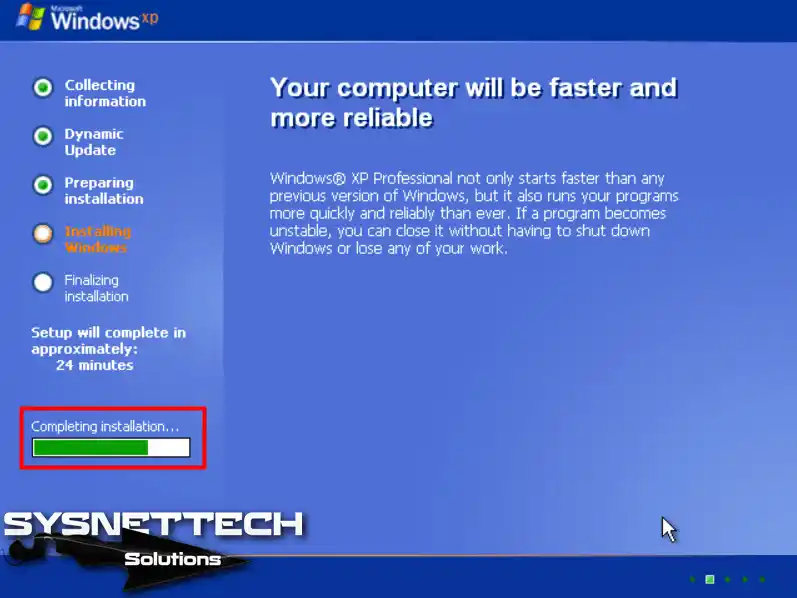
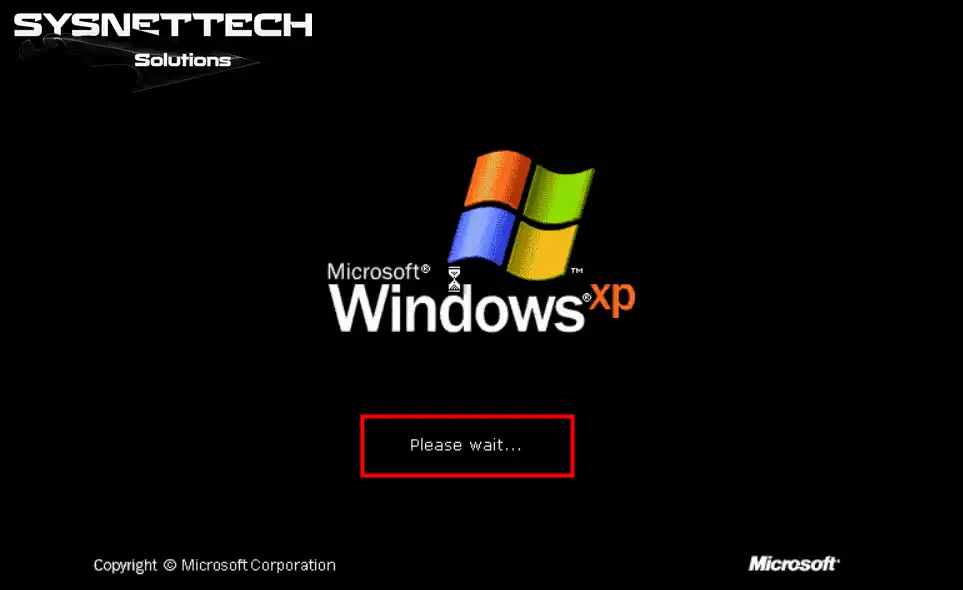
Step 10
Now, you’ll see the Microsoft Windows XP logo! Just hang tight while your operating system starts up for the first time after installation.
Getting Windows XP Ready for the First Time
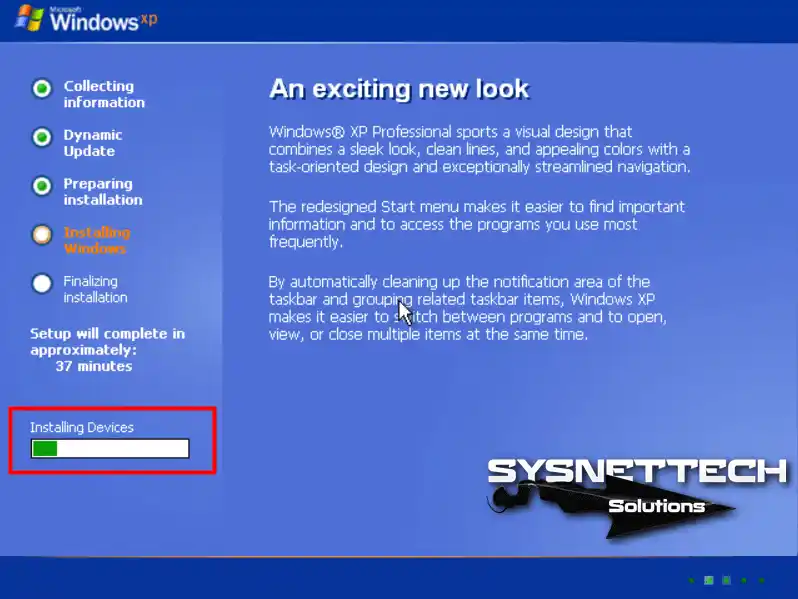
Step 1
After dealing with stuff like setting up the disk partitions, you’ll come to the first installation screen of XP. When you see “Installing Devices” on this screen, hang tight for a moment.
Step 2
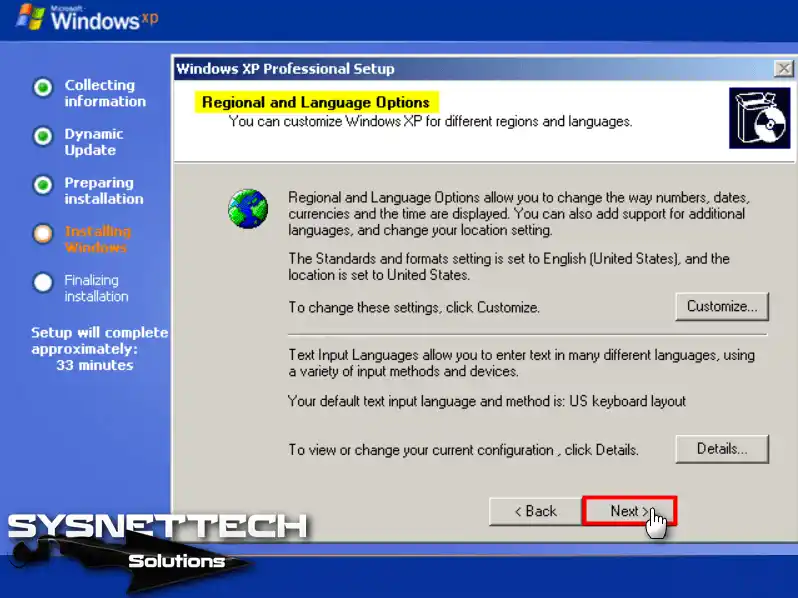
The Regional and Language Options window will pop up. Click Customize to pick or change where you live. Then, click Next once you’ve made the changes you need.
Step 3
In the “Personalize Your Software” window, you need to type in a name for your XP system. Just type in a username and organization name, then click Next.

Step 4
In the “Computer Name and Administrator Password” area, give your PC a name. If you want to set an admin password, type it in and confirm it.

Step 5
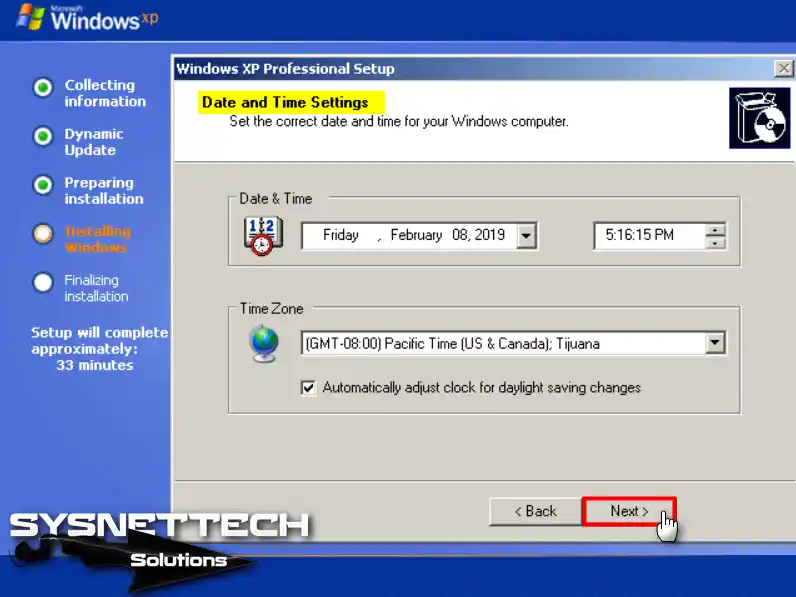
In the “Date and Time Settings” window, pick the time zone where you live, and then click Next.
Step 6
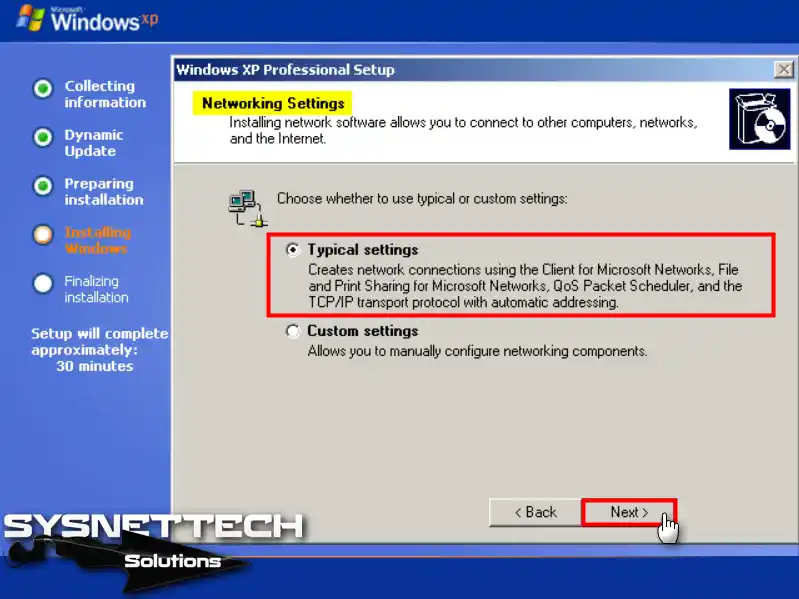
In the “Networking Settings” window, the default option is “Typical Settings.” You can choose “Custom” to set up network stuff yourself. But most people choose the default option.
Step 7
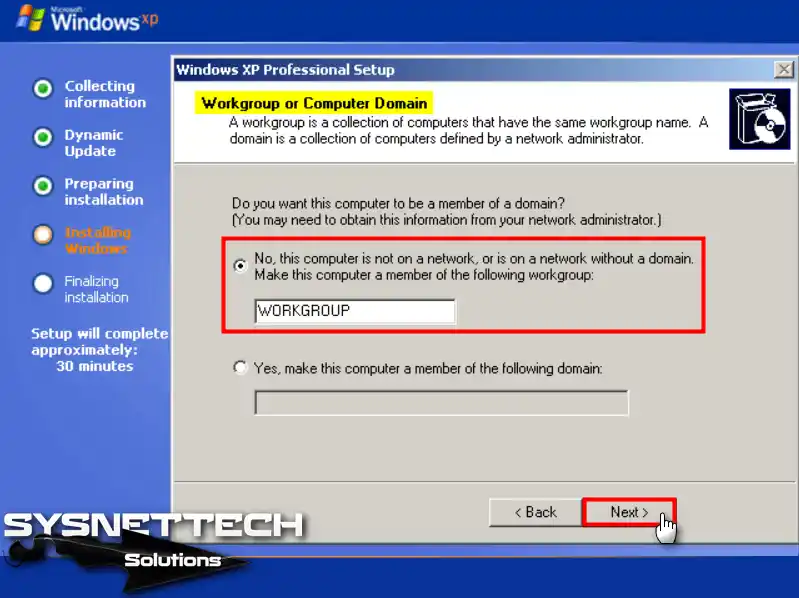
In the “Workgroup or Computer Domain” window, go with the first option. But let’s say there’s an Active Directory service in your network. If you want your PC to be part of that domain, choose the second option.
In short, if you are going to use the computer on which you installed Windows XP for personal purposes only. In this case, select Workgroup as regular users do.
Step 8
Your Windows XP system keeps on installing from where it stopped before.
Step 9
After you’ve set everything up, the wizard will restart your computer once more. Then, it’ll get your desktop ready for you to use.
Step 10
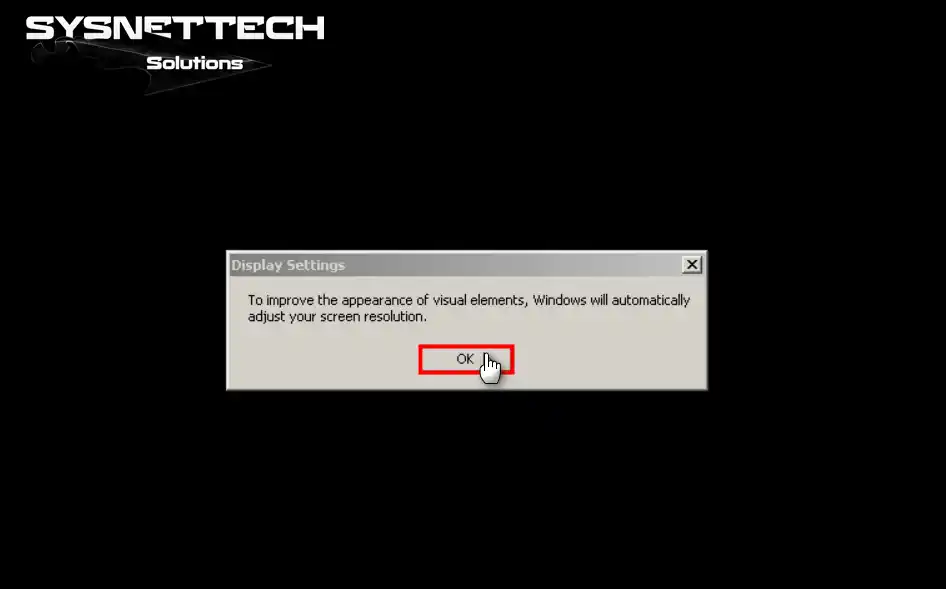
When you start your computer for the first time after installing it, you’ll see it turn on. If you come across the Display Settings window, click OK to keep going.
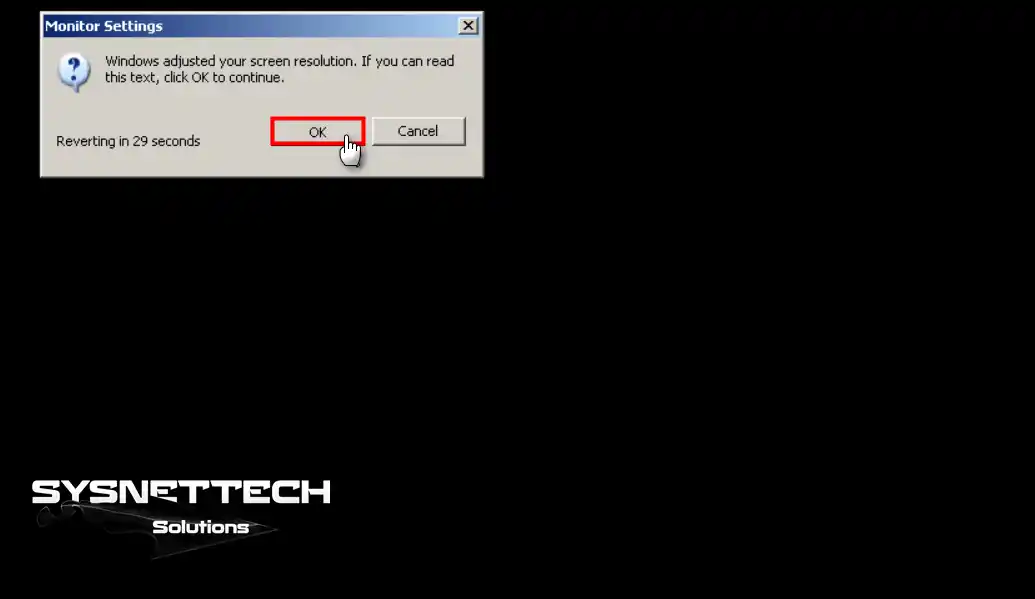
Step 11
Monitor Settings (Monitör Ayarları) penceresinde de OK’a tıklayarak devam edin.
Step 12
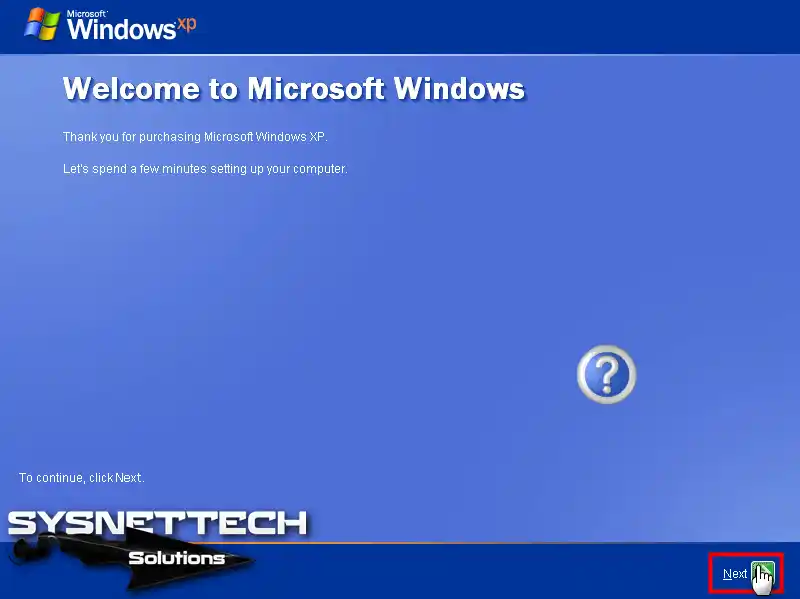
You’ll see a thank you message in the Welcome to Microsoft Windows window. Now, click Next to set up Windows eXPerience Professional some more.
Step 13
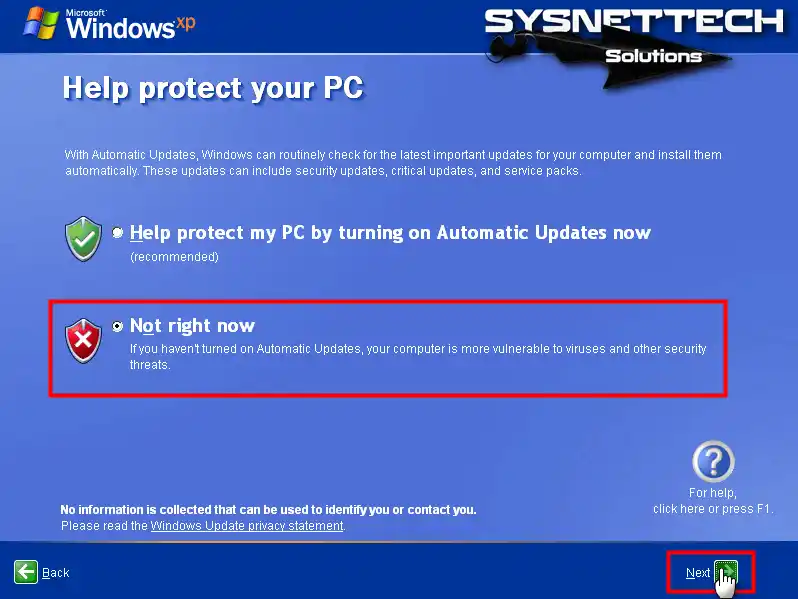
You need to agree to get updates from Microsoft. Even though it’s an old system, we suggest you turn this on. So, in the Help Protect Your PC window, choose the option with the green icon.
If you want to set up security settings in more detail later, choose Not Right Now.
Step 14
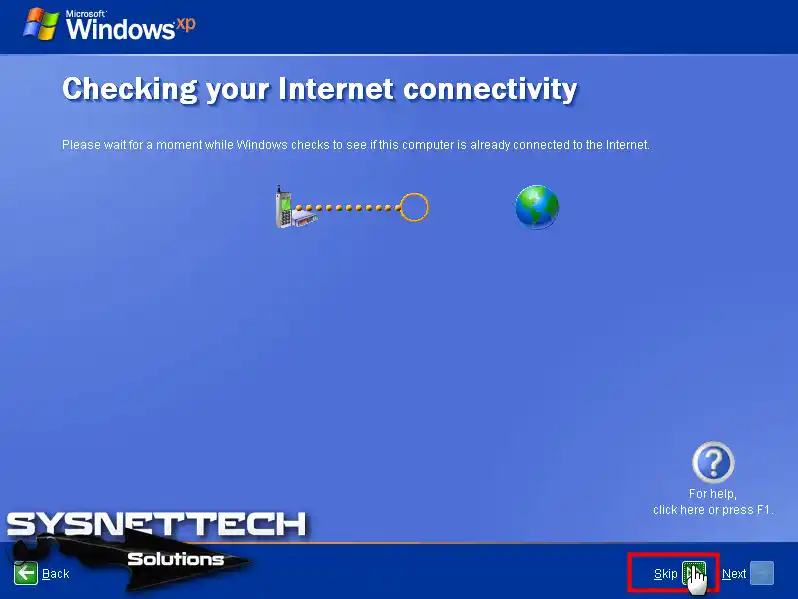
Connect your Windows eXPerience PC to the Internet. If you want to avoid going through the audit, click the Skip button.
Step 15
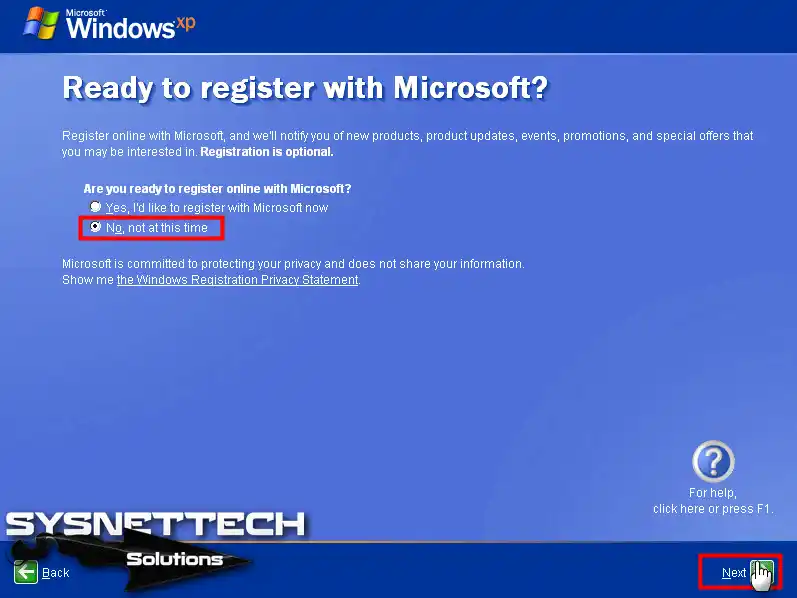
In the Microsoft registration window, choose No, not at this time, to keep going.
Step 16
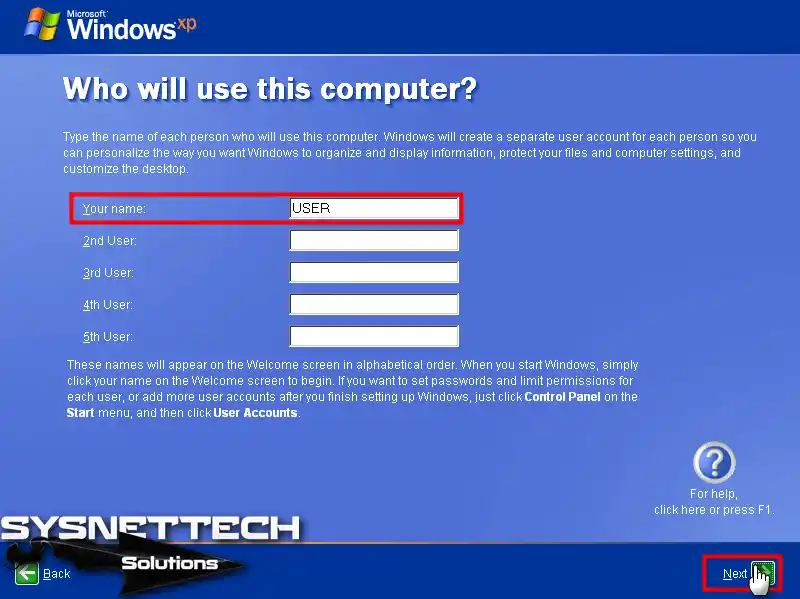
Keep going by typing your username in the Who Will Use This Computer window.
Step 17
Microsoft thanks you for using the classic Windows system. Now, after you’ve set everything up, click Finish to finish installing.

Step 18
Before you get to see Microsoft XP’s excellent desktop, you’ll see the Welcome screen.

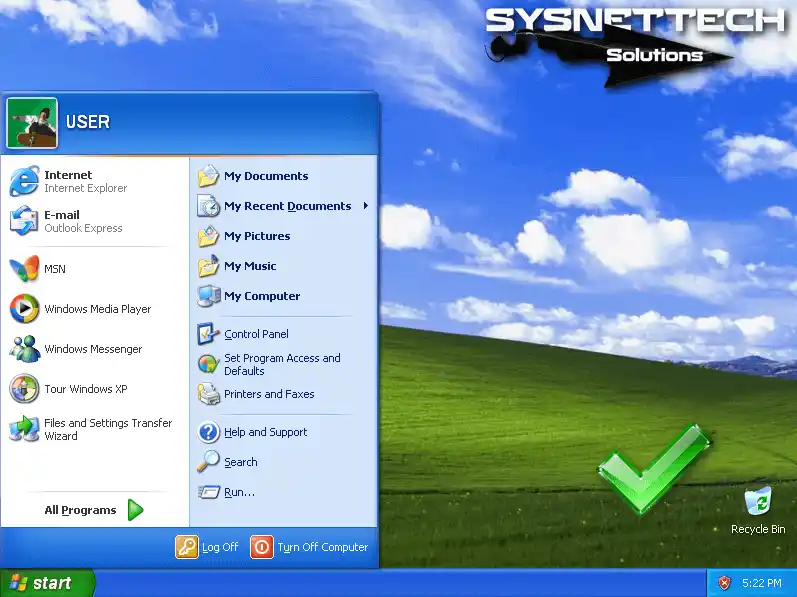
Step 19
In the last step, you’ll see the desktop of this old and unsupported operating system with green pastures and blue skies. So, you’ve installed XP on your computer step by step using a flash drive!
Install Drivers and Software for Your PC
You have installed Windows XP on your PC via USB. Now, it’s time for the most critical process! You need to install drivers and software for your computer’s hardware and peripherals. For example, these are your graphics card, sound card, network card, or other drivers that are not automatically detected.
So, these drivers differ based on the brand and model of your computer. Usually, when you buy it, the Driver CDs are in the box. In short, you can install the drivers using this media.
But if you can’t find a driver’s CD for your hardware, you should check the motherboard manufacturer’s website, for instance.
Let’s say the brand of your motherboard hardware is Lenovo. If so, go to Lenovo’s official website. Then, write your motherboard model and find the support page. From there, you can download all the drivers by selecting the XP-related system type.
Once you’ve got all the drivers set up, install your favorite programs. If everything works well, you’re good to go with your nostalgic XP system!
Frequently Asked Questions (FAQ)
- What are the lowest requirements to install Windows XP?
- Can I install this system on a PC running Windows 7 and above?
- Do I need to activate it after installation?
- How do I install device drivers after installing XP?
Conclusion
In this guide, we looked at how to install Windows XP on a computer step by step using a USB drive without needing a CD. Once you’ve finished installing, the next step is to install the drivers for your computer’s hardware. After that, you are ready to use your computer as soon as you complete this process!

1 Reader Comment
WINDOWS XP