In this article, we will examine how to run and configure the GNS3 VM, which helps to prepare for Cisco exams more professionally in macOS 12 Monterey operating system on an Apple Mac computer.

How to Install GNS3 VM (Server) on macOS 12 Monterey
When you run a Cisco Router or Switch on GNS3, the performance of your computer is seriously reduced. Therefore, when you design more advanced network topologies, you may encounter performance problems as each device running will put an additional load on your host’s processor.
The main purpose of using a GNS3 VM is to minimize performance issues. When you add the Router IOS image after connecting the GNS3 and GNS3 VM, the image is uploaded to the server and run from there. As a result, you will be able to create more specific network designs and gain more performance gains.
Before you can use the GNS3 VM on your Mac, you must have a virtualization program installed on your computer. You can use VMware Fusion or Oracle VM VirtualBox to configure the GNS3 VM on your macOS system.
Requirements
Before starting to configure the GNS3 VM, install the necessary programs from the links listed below.
How to Download and Install GNS3 VM
By downloading the GNS3 VM.ova file from the GNS3 official website to your computer, you can easily import it with the virtualization program you have installed.
Step 1
To download the GNS3 VM, visit this link and click “Download the GNS3 VM” at the bottom of the download page.

Step 2
On the page where virtualization programs are listed, click the Download button next to VMware Workstation and Fusion.

Step 3
After downloading the archived GNS3 VM file to your Mac, go to Downloads and double click on it to extract the archived file to the folder.

Step 4
After extracting the zip file to the folder, the contents of the GNS3 VM folder will be as follows.

Step 5
Open your VMware Fusion software and click File / Import from the tool menu.

Step 6
In the Choose an Existing Virtual Machine window, click the Choose File button to specify the location of the OVF file.

Step 7
Go to Downloads and select the GNS3 VM.ovf file in the GNS3 VM folder and click Open.

Step 8
After adding the GNS3 VM, click Continue and allow the Fusion software to access the Downloads folder.

Step 9
Specify the location of the GNS3 Server virtual machine and click Save.

Step 10
Wait while the GNS3 VM virtual machine is imported into Fusion.

Step 11
After the import process is completed, you can see the information about the virtual machine in the Finish window. Click Customize Settings to make some changes in GNS3 Server.

Step 12
Click Advanced in the GNS3 Server settings.

Step 13
Disable Side Channel Mitigations and change the Troubleshooting property to None to make the GNS3 server work better.

Step 14
In the Processors and Memory settings, configure the RAM size and number of virtual cores according to the performance of your host computer.

Step 15
Run the GNS3 VM virtual server.

Step 16
After the GNS3 VM is turned on, you can see the server version or virtualization platform information on the software’s screen. You can use the IP address to launch Web-Ui so that you can access the server from a web browser on your computer.

How to Connect GNS3 to GNS3 VM
You can connect to the server via Web-Ui and create your projects without integrating the GNS3 VM into your GNS3 software. However, we recommend that you use this method as it will be more efficient to connect to the server via GNS3.
Step 1
Click Help / Setup Wizard from the GNS3 tool menu.

Step 2
Select Run appliances in a virtual machine in the setup wizard and click Next.

Step 3
Leave the GNS3 local server settings as default and click Next.

Step 4
After the connection to the local GNS3 server is successful, click Next again.

Step 5
To activate the GNS3 VM, select the program installed on your system for the Virtualization Software and click Next after changing the vCPU value and RAM size according to the hardware features of your host computer.

Step 6
In the Servers Summary section, you can see that the GNS3 VM is started automatically. After checking the information in the GNS3 Virtual Machine summary window, click the Finish button.

How to Add a Cisco Router
After downloading a Cisco Router IOS image to your computer from the link in the requirements list, you can easily add it to your GNS3 server.
Step 1
Click Preferences from the GNS3 tool menu to open the IOS image attachment wizard.

Step 2
In the New IOS Router Template window, select Run this IOS router on the GNS3 VM and click Next.

Step 3
In the IOS Image window, click Browse to specify the location of the IOS image you downloaded to your Mac.

Step 4
Go to the Downloads folder and select c7200-adventerprisek9-mz.152-4.M7.bin and open it.

Step 5
Click Yes in the question asked to decompress the IOS image.

Step 6
Wait while the Cisco Router IOS image is uploaded to GNS3 Server.

Step 7
After copying the IOS image to the server, click Next again.

Step 8
You can change the name of the Router IOS image or edit its platform. If you add the same image again, do not forget to change the Router Name.

Step 9
You can increase the memory size according to the hardware features of your host so that the Router you have added will work more stable on your computer. The default memory size for the c7200 IOS image is 512 MB.

Step 10
If you want to add a serial interface or gigabit interface to the Router you have added, you can add those interfaces to the empty slots in the network adapters window.

Step 11
In order not to use 100% of your Mac’s processor, you need to set an Idle-PC value. The simulator software automatically determines this value according to your computer’s specifications.
Click the Idle-PC Finder button to find a suitable Idle-PC value for the Router c7200, and after the appropriate value is found, click Finish to close the window.

Step 12
When you check the information of the image you added in the IOS Router Templates section, you can see that the Server value is GNS3 VM.

How to Create a New Project
After installing GNS3 VM on your macOS system and adding an IOS image to the server, you can test the Router device you added by creating a new project.
Step 1
Configure the name and location of the project in the window that opens after clicking the New Project icon in GNS3.

Step 2
After adding a c7200 Router to the project, select the GNS3 VM in the server selection window while adding the VPCS device.

Step 3
After running all devices, open the console by double-clicking on R1, and execute the commands below to assign the IP address to the interface connected to the VPCS.
R1# conf t
R1(config)# interface fastethernet 0/0
R1(config)# ip address 192.168.1.100 255.255.255.0
R1(config)# no shutdown
Step 4
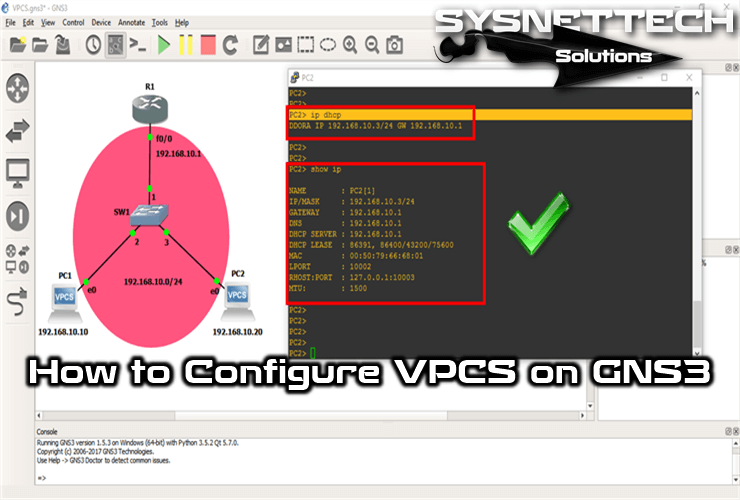
In order to assign an IP address to the VPCS device, execute the following command in the console window and check with the show ip command.
PC1> ip 192.168.1.200/24
PC1> show ip
Step 5
You can see that the connection between the two devices is successful when you ping from R1 to VPCS.

Video
Installing Old Versions
Related Articles
♦ How to Upgrade GNS3 VM
♦ How to Configure VLAN
♦ How to Configure EIGRP
♦ How to Configure OSPF
♦ How to Configure RIP

TolgaBagci
Hi, I'm Tolga, a computer expert with 20 years of experience. I help fix computer issues with things like hardware, systems, networks, virtualization, servers, and operating systems. Check out my website for helpful info, and feel free to ask me anything. Keep yourself in the loop about the newest technologies!
however VM needs to be enabled
Thank you.
You’re welcome!
Hello Tolga, is this process supported on apple silicon macs? Because I don’t see any `import` option under the file of VMware fusion menu as you listed above. Or if you’ve any updated steps.
I haven’t encountered any issues or received any feedback on silicon Macs. If I have time I will test it and type to you.
This is a fabulous post. Many thanks for posting it!
This is certainly a outstanding blog post. Thanks
for sharing it!
No its not working on M1/M2 Macs.
always return the following error:
“This virtual machine cannot be powered on because it requires the X86 machine architecture, which is incompatible with this Arm machine architecture host.”
Get stuck….. it’s a pity someone pay 1500 to 2500 euros and cannot run a simple vm….