
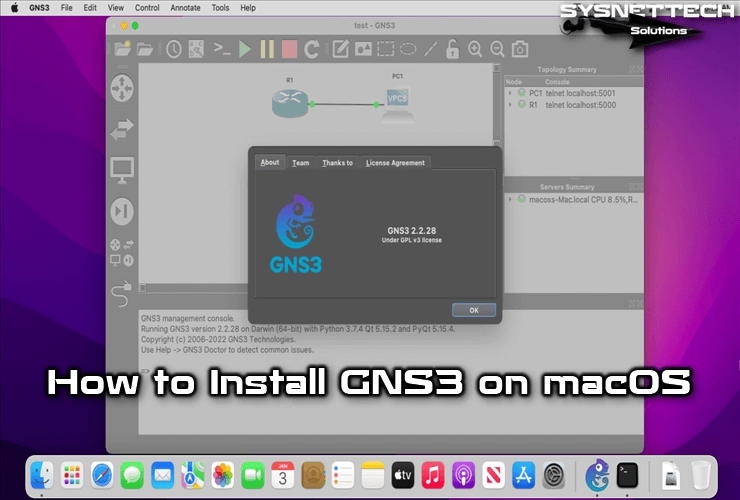
Are you running macOS 14 Sonoma on your Mac PC and want to install GNS3? Then, let’s welcome you to our professional guide and start installing GNS3.
First of all, I want to give you some information: network engineers, students preparing for Cisco exams, or anyone can use GNS3. In this article, I will tell you everything from downloading and installing the software to adding Cisco IOS.
How to Set Up and Use GNS3 on macOS 14 Sonoma
GNS3 IOS emulator is a network simulator program that is often used by network engineers or students preparing for Cisco exams. This software is a mighty LAN simulator program compared to others, and it is entirely free.
You can use the GNS3 network simulator program on Windows and Linux operating systems, as well as on your Mac computer. If you are using the Windows operating system, you can install GNS3 on your computer by visiting our GNS3 installation guide.
After installing the network simulator program on your computer, you can start preparing for your exams by creating LAN topologies and integrating IOS images of devices such as Cisco Routers and Switches into the program.
How to Download and Install GNS3
To download the GNS3 software from the official website, you must first create a new subscription to the developer’s website. If you have an account, you can download this software for Windows, Linux, and Mac after logging in to the website.
Step 1
Visit the GNS3 website and hit the Free Download button on its homepage.

Step 2
You need an account to download the GNS3 software and join the community. If you have created a new account before, hit Login.

Step 3
After typing your e-mail address and password, press Login.

Step 4
Press the Download button again for the Mac version on the Download page, and after downloading the DMG file, hit on it and mount it to the system.

Step 5
After mounting the DMG file, copy this program by dragging and dropping it into Applications.

Step 6
Wait while the emulator software is copied to Applications.

Step 7
After copying GNS3, open the applications and run them.

Step 8
Once the program is verified, you can open it on your MacOS system.

Step 9
uBridge needs root permission to interact with LAN interfaces. All admin users on your system will be able to read packages on these interfaces. Select “Yes” in the pop-up screen to grant uBridge access.
Next, type your macOS user password to allow osascript to make changes while configuring the necessary settings.

Step 10
After the network simulator program is opened, select the Run appliances on my local computer option in the Setup Wizard area.

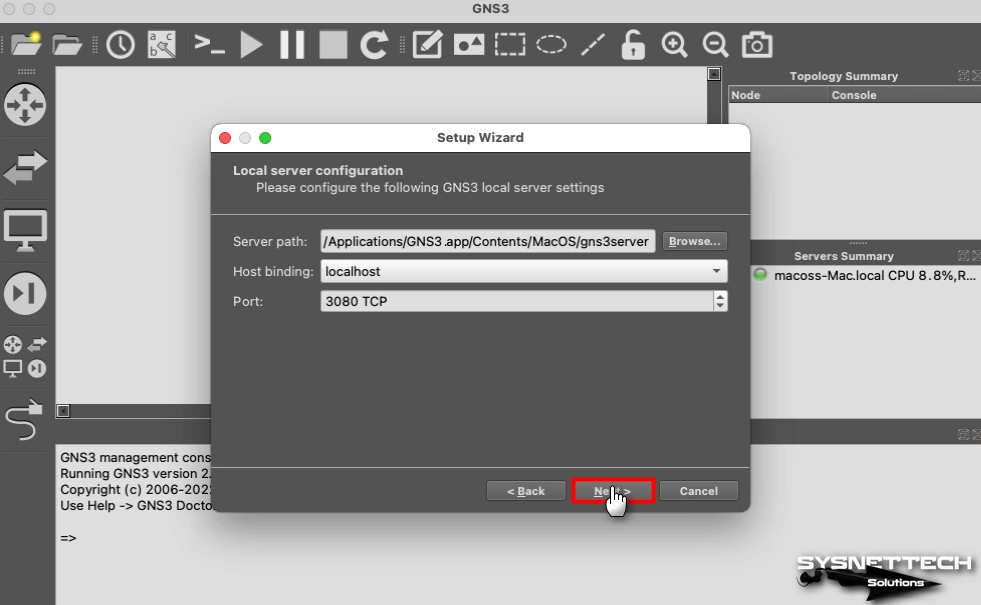
Step 11
In the Local Server Configuration area, leave the server’s location, host binding value, and Port number at the default values.
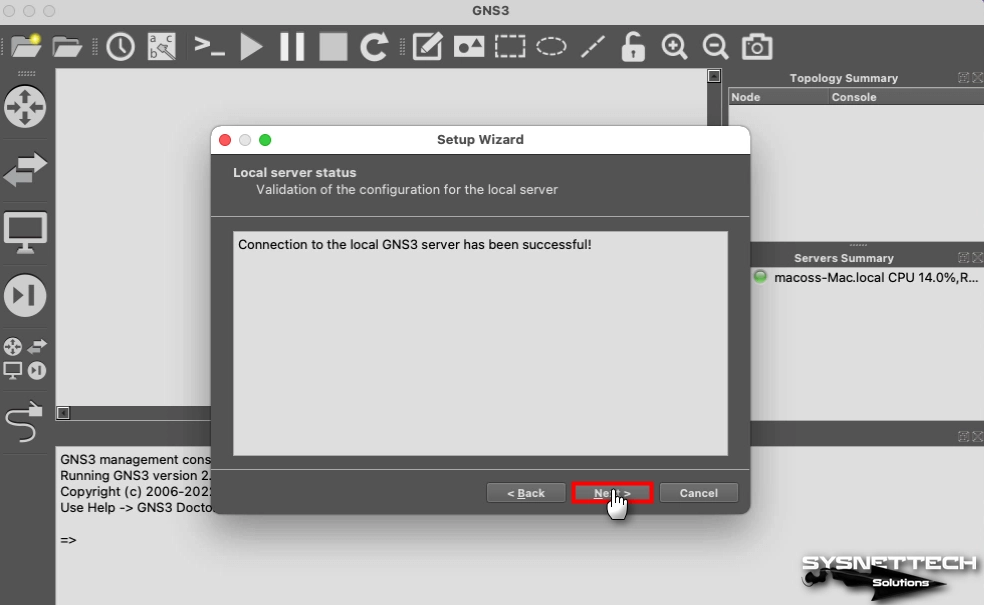
Step 12
In the Local Server Status screen, check that the connection to the local GNS3 Server is successful.
Step 13
Finally, check the settings in the Summary screen and hit Finish.

How to Add Cisco IOS to macOS
After installing GNS3 on macOS, you need to add a Router ISO image that you downloaded to your computer because these images are not integrated into the program.
Step 1
To add Router IOS, you need to open the program’s settings, so hit GNS3 / Preferences.

Step 2
In the Preferences section, under Dynamips, select IOS Routers and then choose the New button.

Step 3
Click Browse to add a routing device in the New IOS Router Template window.

Step 4
Choose an IOS image that you have downloaded to your Mac PC.

Step 5
Hit Yes to decompress the selected IOS image and wait.

Step 6
After verifying the location of the routing device’s image, hit Next.

Step 7
In the Name and Platform window, leave the Router’s name, platform, and chassis settings at the default settings and press Next.

Step 8
Set the minimum amount of memory you want to allocate to IOS in the Memory window. If you set the memory value too low or too high, you may reduce the performance of your host computer or cause the Router to run slower. Therefore, leave the memory value at the default value set by the program and press Next.

Step 9
In the LAN Adapters window, you can add the interfaces you want to the Router’s empty slots. By default, only the C7200-IO-FE (FastEthernet) interface is available.

Step 10
In the Idle-PC window, you must specify a Router value to prevent 100% use of your host computer’s processor. Click the Idle-PC Finder button to set a value for the IOS you added and wait for the process to complete. Then, after a suitable value is found, click OK and click Finish to close the adding IOS window.

Step 11
After checking the information on the C7200 IOS image you added to the Router Templates window, click OK.

How to Create a New Project in macOS
After adding the Router image to your emulator software, you can create a LAN topology by creating a new project by adding the Router or other components to your project.
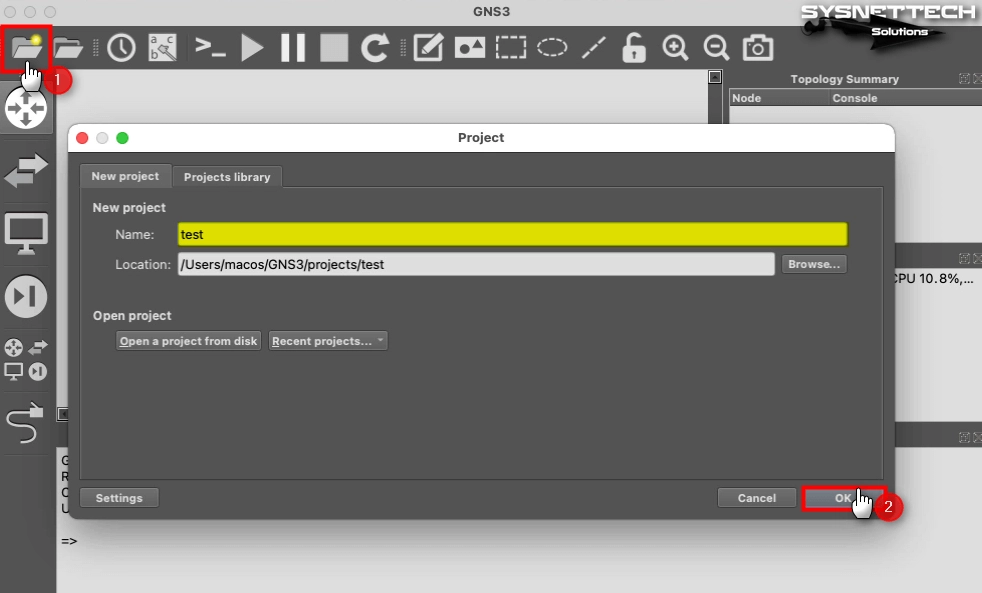
Step 1
After clicking New Project from the tool menu, type a project name in the Project window that opens and click OK after configuring the location you want to save.
Step 2
Drag and drop the Router c7200 you added from the Devices panel to the workspace.

Step 3
Also, add one VPCS device and connect it to the Router.

Step 4
Click the green arrow as shown below and then click Yes to start all devices.

Step 5
After running all devices, open the console by double-clicking on Router R1 and assign an IP address to the FastEthernet interface.
R1# conft
R1(config)# interface fastethernet 192.168.1.100 255.255.255.0
R1(config)# no shutdown
Step 6
To give the VPCS device a new IP address, execute the commands below on the console and then test the connection by pinging the R1’s FastEthernet interface.
PC1> ip 192.168.1.200/24
Step 7
You can see that the connection between the two devices is OK when you execute the ping 192.168.1.200 command on the console to ping the VPCS from Router R1.

Step 8
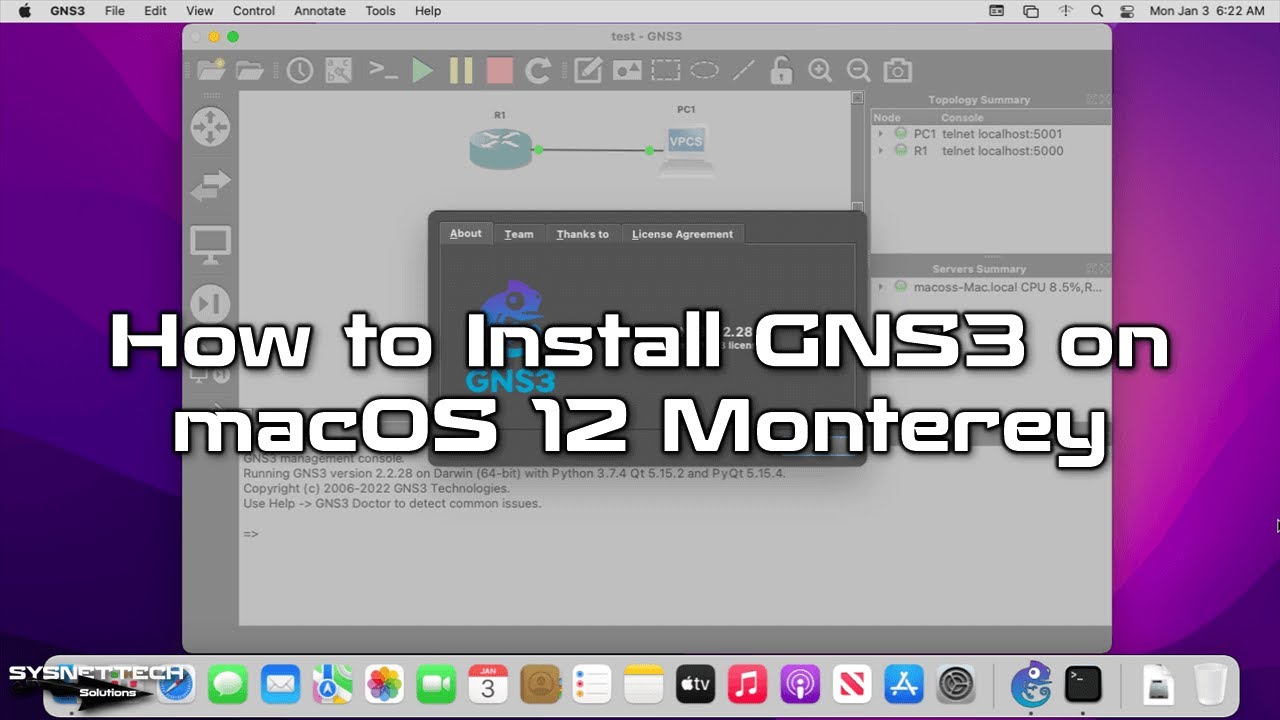
After creating and testing a simple project in the emulator, you can check the version of the program from the About section.

How to Completely Uninstall GNS3 on a macOS PC
When you need to uninstall GNS3 software from your Mac, you must first back up your projects and the images you have added. After this process, you can expand the disk space of your computer by completely removing it from your system.
Steps:
Step 1
Open Applications, right-click on GNS3, then click Move to Trash. Do not forget to empty the trash after deleting it.

Step 2
After removing it from your macOS system, residual files may remain on your system, so you can open the terminal on your system and use the mdfind gns3 command to find and delete these files.
mdfind gns3
sudo rm -rf '/Users/macOS/GNS3'
Video
Installing Old Versions
| Version | YouTube Video | Slide |
|---|---|---|
| macOS Monterey (NEW) | Watch | – |
| macOS Mojave | Watch | View |
| macOS High Sierra | Watch | View |
| macOS Sierra | Watch | View |
Conclusion
As a result, you can prepare for Cisco exams with GNS3 on your macOS 14 Sonoma device. In addition, this network emulator program is perfect for networking engineers and students.
You can easily install this simulator on your Mac by following the screenshots I created in this article. In addition, you can integrate Cisco IOS images and create LAN topologies.
Compared to its alternatives, GNS3 provides you with a whole LAN experience. Thus, you can provide hands-on learning in a virtual environment. Plus, it offers many opportunities for experimentation.

1 Reader Comment
sir please help me
I am unable to add my router