
You may need to upgrade your GNS3 VM Server to a newer version on VMware. So you can do this without any problems during your update process. The process is straightforward and doesn’t require you to download and install a new version. Instead, you can modernize your existing server to the latest version.
You can access the latest features by updating your GNS3 server to the newest version. So, you get the bug fixes that were fixed in the previous version. Additionally, you still have all the settings you currently have on the server.
These can be your Cisco IOS images or saved GNS3 projects. So, you are unlikely to lose your existing work or data. So, this process means you don’t have to worry.
Why is Optimizing GNS3 VM to the Latest Version Important?
It’s crucial to update your GNS3 VM, whether it’s on VMware or VirtualBox, to the newest version. This is important because the updates usually fix essential problems. Or it makes the Cisco devices in your VM work better.
When you’re working on big projects, make sure your system is safe by using the newest versions. This is super important, especially if you’re turning a regular network into a virtual one with important info.
Also, bad people might try to take advantage of problems in older GNS3 server versions. That’s why the folks who make it always fix those issues with security patches. So, it’s crucial to protect your virtual machine from online dangers, too.
Making your GNS3 VM server better not only keeps things safe but also lets you learn new ways to build networks. The extra cool features help you make more complicated networks.
If you want to use Cisco and other devices in the program really well, it’s super important to upgrade your GNS3 VM server. In a nutshell, upgrading is vital for better virtualization.
Preparations for GNS3 VM Update
Before you do the upgrade, take a look at the VM’s network settings. It’s super important to make sure it’s nicely connected to the Internet. So, make sure to set up the network adapters correctly.
It’s also a good idea to test the connection by pinging the GNS3 server. Thus, you can make sure that the virtual computer can access the Internet without any problems. Then, you are ready to resume the update.
We recommend that you first back up any errors by taking snapshots on your old server. If you need to learn how to get a Snapshot on VMware or VirtualBox, you can find our articles on the links below.
- VMware Snapshot
- VirtualBox Snapshot
Sometimes it is better to start over from nothing instead of just updating. To fix all problems with things not working together, you should remove the current VM. Then, follow the steps to add the new GNS3 VM image on your system.
How to Upgrade GNS3 VM Latest Version Step by Step
By following these stages, you can easily update your GNS3 VM Server to the latest version, continue using your existing Cisco IOS images, and save GNS3 projects without any issues.
Steps:
Step 1
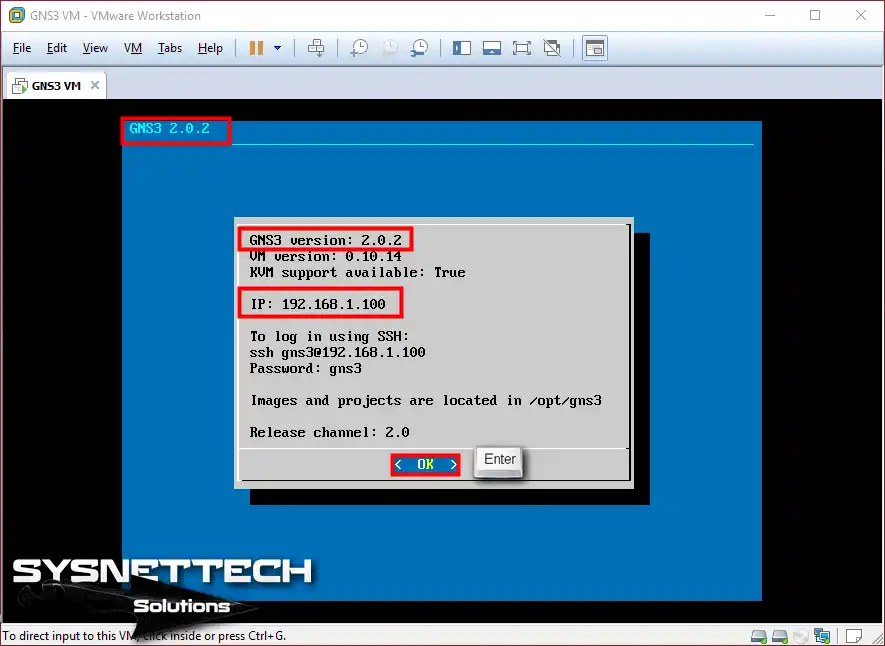
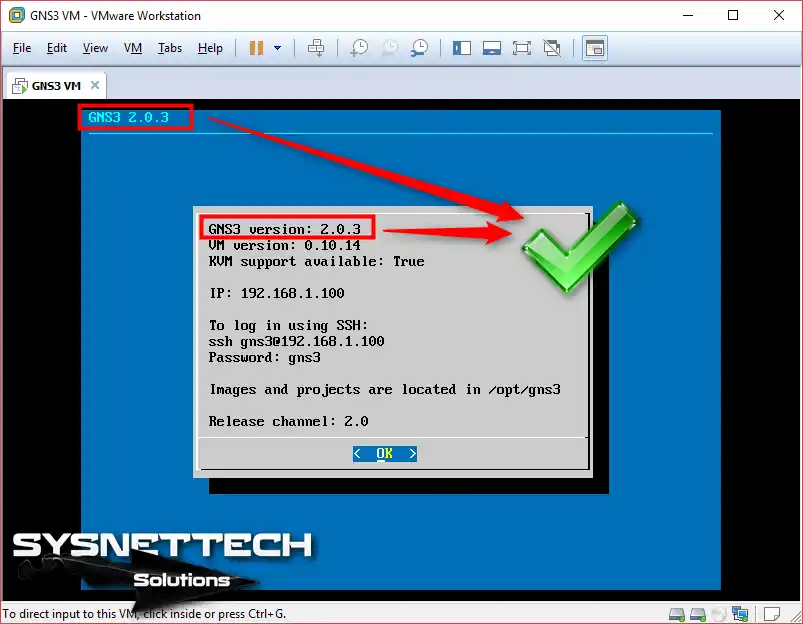
After you set up the GNS3 VM Server in VMware Workstation, it’s essential to make sure there aren’t any older versions still hanging around. Look at the top part of the screen to check for any old versions.
Once you’re sure there are none, go ahead and confidently click on the “OK” button to finish the check.
Step 2
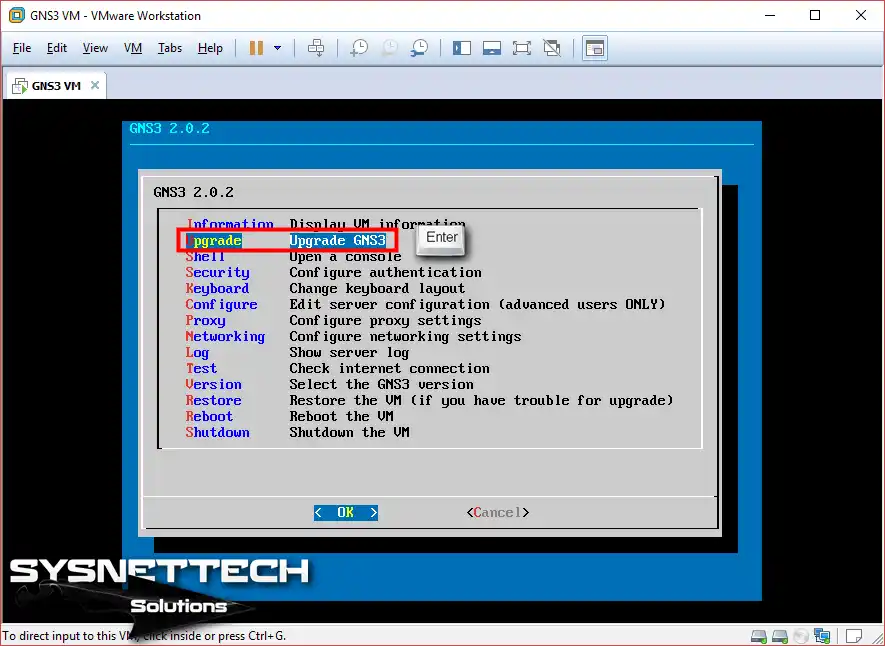
To update your system, you need to open the Settings window first.
Once the window is open, navigate to the Upgrade option and press the Enter key on your keyboard to initiate the process.
Step 3
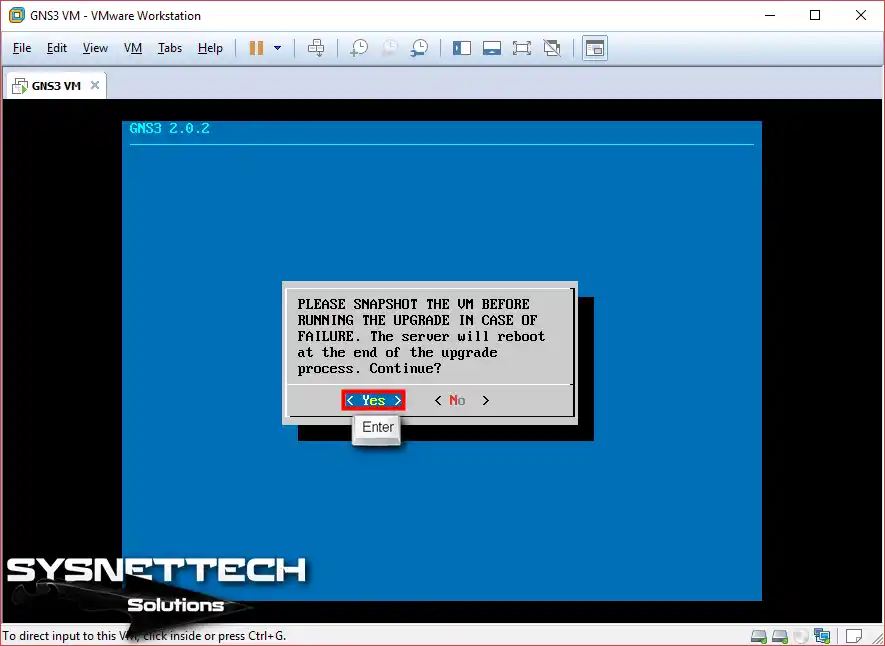
As we mentioned earlier, it’s an excellent idea to take snapshots of the system before starting the update.
But if you want to go ahead without doing that, you can choose “Yes” to proceed.
If you see odd errors while updating, the problem is usually because of simple settings. You need to check your VMware network setup again from the beginning. I suggest you look at the right guide to finish the basic GNS3 VM setup.
Step 4
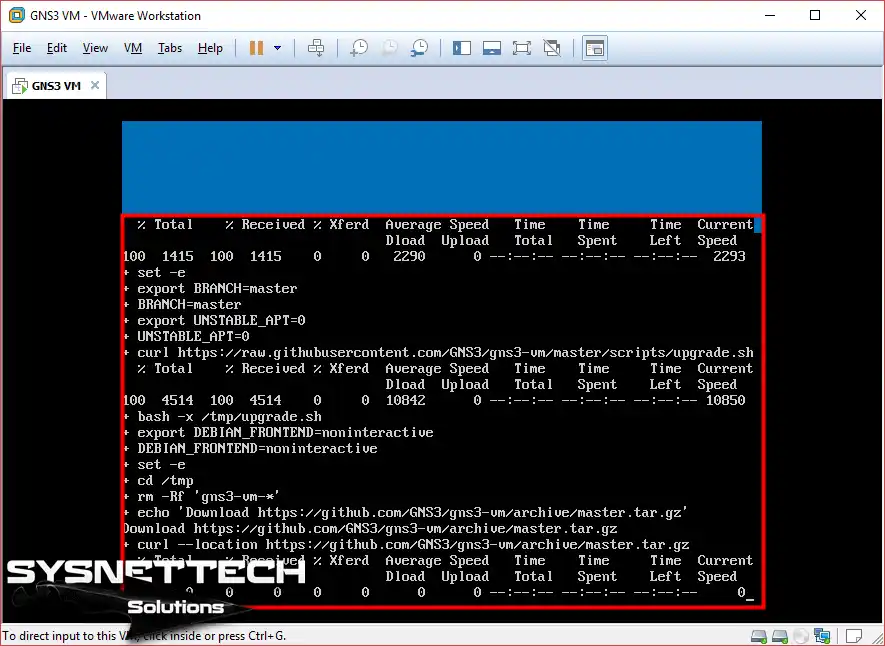
GNS3 VM upgrade has begun.
Step 5
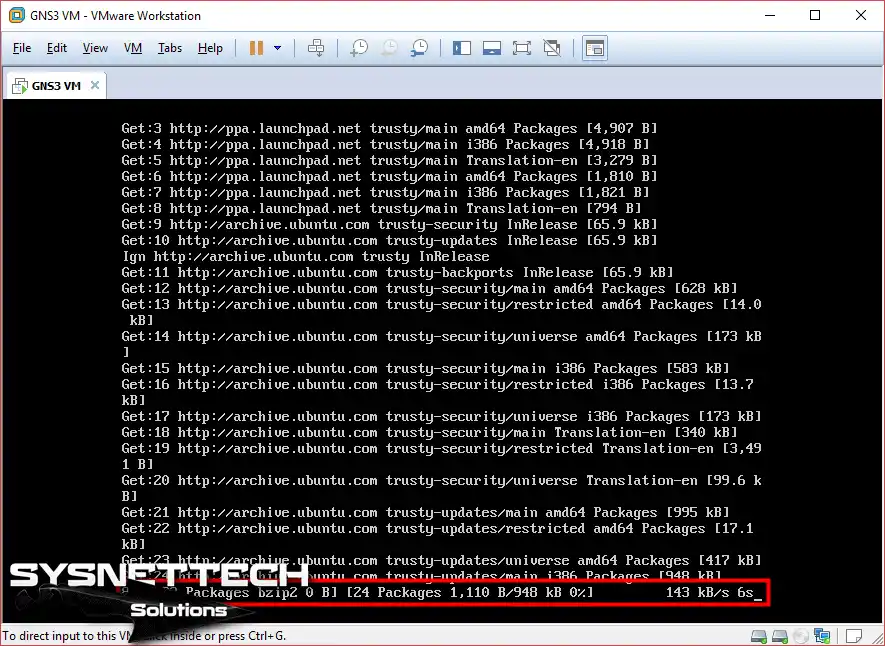
The system is now getting the files it needs to move up to the new version from the Internet.
Step 6
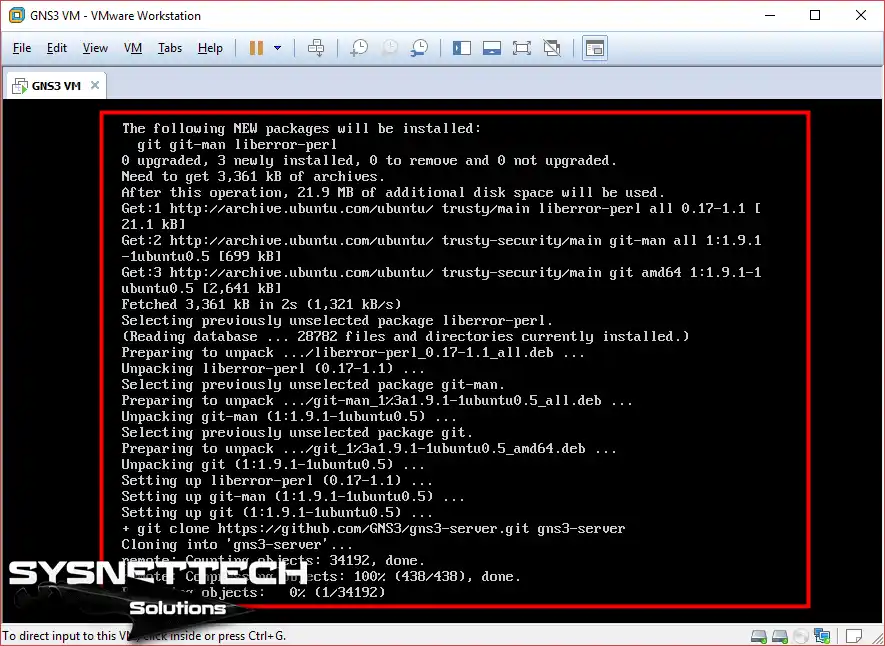
Right now, we’re unpacking different packages and moving on to install them on the system.
Step 7
The server will restart after completing the update. Then, the operating system will begin the startup sequence.
Step 8
Good news! You have upgraded the GNS3 Server to the newest version.
Now, you can enjoy the latest components and improvements that come with the update.
Video
Frequently Asked Questions About the Update Process (FAQ)
- Why should I upgrade my GNS3 VM?
- How often should I update my GNS3 VM?
- What should I do before upgrading my GNS3 VM?
- Can I update my VM while running projects?
- How can I revert to a previous edition of the GNS3 VM?
Conclusion
You must always keep your GNS3 VM server updated. This lets you use the newest tools. It makes sure your system works its best and stays safe.
Technology changes, and so does network simulation. By often updating your VM, you protect your work and settings.
Also, you will give yourself tools for complex network tasks. If you are new or an expert, updating your GNS3 VM is essential.
This can create a better and safer network for you. So, be active in your method. Welcome the good changes in each new version. In short, this will improve your learning and your project work.
Also, you tested the connection before the update. But what if the connection drops after that? That is where the main problem shows up.
Usually, you need to set up a special link to connect between the virtual simulator and the physical adapters. Let me give you a simple example: if the connection point does not match right, the server cannot download the update. Setting this link up right from the start will save you a lot of trouble.

1 Reader Comment
Thanks for the information, but you neglected to answer THE most important question about upgrading to the latest version… WHY?!?