

In the hardware world, hidden technology surrounds you all the time. Its name is infrared. Quietly, it works on your motherboard’s CIR header. It also works in your processor’s thermal paste. Additionally, it works in your Windows Hello camera.
As a system builder for years, I’ll be blunt. Most users never fully grasp this technology’s basics. However, once you truly understand it, your view of hardware transforms.
Today, I’ll cover all the details. We’ll start with thermal radiation physics. Then we’ll move to the IrDA pin on motherboards. I’ll share projects and solutions I’ve used in the field. Also, we’ll look at the current state of this technology in 2026. Rich content awaits you. It spans from old laptop repairs to Arduino circuits.
Are you an overclocker mapping thermal profiles in a case? Perhaps you want to connect an old IrDA port to a modern device. You may wonder how Windows Hello works in total darkness.
You’ll get excited diving into thermal imaging and microbolometers. After all, infrared technology isn’t just sci-fi movie material. Today, you can build an IR receiver circuit with a maker kit. So, let’s start without further ado.
What Is Infrared? Basic Definition and Physical Principles
Infrared technology is a form of energy. Specifically, it sits in the electromagnetic spectrum. It lies just below visible light. Its wavelength ranges from roughly 780 nm to 1 mm.
This range is too long for human eyes. Yet your skin feels this radiation as warmth. That’s why you often encounter it daily.
In hardware, it plays a very different role. You find it everywhere. It appears in everything from a tiny optical port on a motherboard to a large thermal camera.
So how can you use it in so many different areas? The answer is simple: because this technology is ideal for both data transmission and temperature sensing. Additionally, it provides contactless data transfer. I have experienced this versatility firsthand for years.
Infrared Region in the Electromagnetic Spectrum and Wavelength Ranges
Now let’s get somewhat more technical. The electromagnetic spectrum is a vast scale. Gamma rays sit at one end. Radio waves sit at the other. Our topic lies between them.
It sits right below visible red light. So, what’s the infrared wavelength in nm? The answer is clear: it starts at 780 nm and reaches up to 1 mm.
We break this range into sub-bands per IEEE standards. Near IR covers 780 nm to 1400 nm. Specifically, you often use 850 nm and 940 nm for internal case lighting.
Also, you use them in IR illuminator solutions. Mid IR spans 1400 nm to 3000 nm. Far IR starts at 3000 nm and extends to 1 mm. Thermal cameras use exactly this far IR band.
The infrared frequency range varies from about 300 GHz to 430 THz. This vast frequency spectrum offers remarkable flexibility for signal modulation.
However, handling every frequency in hardware is difficult. Therefore, we typically use specific carrier frequency values in consumer electronics and CIR headers.
In fact, a 38 kHz modulation frequency has become standard for computer remote receivers.
Blackbody Radiation and Thermal Radiation: How Does Infrared Occur?
Thermal radiation always excites me. After all, every object in the universe emits thermal radiation. You need only a temperature above absolute zero.
We call this blackbody radiation. An absolute blackbody is an idealized concept. Yet, many materials in the real world act similarly. Even your PC’s processor, graphics card, and RAM radiate constantly.
First, the Stefan-Boltzmann Law determines the total radiation power. As temperature rises, emitted energy increases with the fourth power. Meanwhile, Wien’s Displacement Law shows how peak wavelength shifts with temperature.
Both physical principles form the base of all contactless temperature measurement devices. Therefore, it doesn’t matter if you use a handheld IR thermometer or a high-end profiler. They all rely on the same basic physics.
In fact, radiant heat transfer is important for computer cooling too. Yet, most people only see cooling as convection and conduction.
However, high-temperature parts also emit a significant amount of radiant energy. That energy strikes other parts inside the case and raises the overall temperature.
Thus, good case airflow design reduces this effect. I always focus on this detail when building PCs.
Infrared Sensor Types and Working Principles
Now I’ll break down the most common sensor types. These sensors are commonly used in smart homes.
Moreover, they appear in security hardware and computer peripherals. Each type has its own logic. Some detect heat signatures. Others measure reflected signals. Therefore, understanding this difference is vital for hardware selection.
You mainly encounter two main types. Active ones have their own IR light source. Additionally, they evaluate the reflected signal.
Passive ones only detect natural thermal radiation. In particular, pyroelectric sensor-based systems are unrivaled for motion detection.
On the other hand, photodiode sensor solutions are prominent in data communication. They also succeed in object detection applications. I have personally used both types in countless projects.
| Sensor Type | Working Principle | Hardware Application |
|---|---|---|
| Active (IR LED + Photodetector) | Generates its own signal and measures reflection | Motherboard IrDA data transfer, case door obstacle detection |
| Passive (PIR) | Detects ambient heat change | Case perimeter motion sensor, monitor presence detection |
| Thermal Camera (Microbolometer) | Creates a heat map | Processor VRM hotspot analysis, M.2 SSD thermal throttling detection |
Active vs Passive Infrared Sensors: PIR, IR LED, and Photodetector
So many people confuse these two sensor types. Yet, the difference is as different as night and day. Active sensors consist of an IR transmitter and receiver pair.
The transmitter sends steady or pulsed signals. Then, the receiver checks the reflection or break. Optical communications and light barriers use this principle.
In contrast, passive systems are an entirely different matter. A PIR sensor, or pyroelectric sensor, detects ambient heat changes. It has no signal source of its own.
This sensor detects the change caused by a warm object entering its field of view. For example, the human body at about 98.6°F is clearly warmer than the room. You use this difference when installing a PIR motion sensor alarm.
Difference Between Thermal Camera and Infrared Sensor: Microbolometer Technology
Now we reach the most fascinating part. Many people get confused about thermal cameras versus infrared. However, I have a great analogy to explain the difference.
A simple PIR sensor or photodiode only measures signal presence or strength. Meanwhile, a thermal camera outputs a full heat map. It’s like hearing one note versus the whole orchestra.
The magic behind this map is an imaging sensor called a microbolometer. It consists of tiny pixels. Those pixels absorb incoming thermal radiation and change temperature.
Each pixel’s resistance changes with heat. The system reads this change and converts it via digital signal processing. Consequently, a colorful thermal profile appears. It’s truly remarkable.
Infrared Use in Computer Hardware: IrDA, CIR, and Motherboard Integration
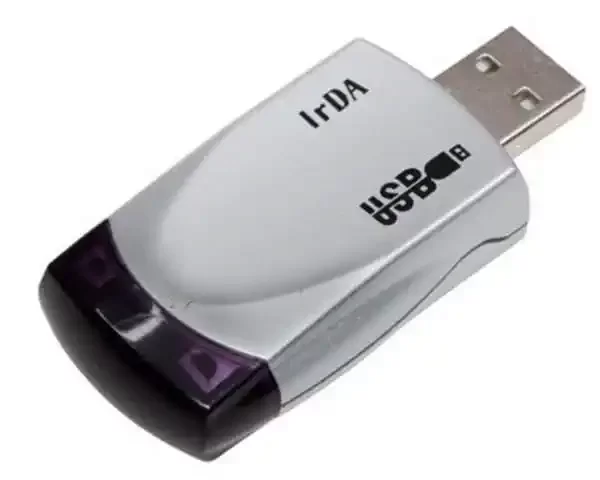
Diving into computers, the details become more specific. From the late ’90s to the mid-2000s, the IrDA port was essential on laptops.
At that time, the Bluetooth connection was still in its infancy. Wi-Fi technology wasn’t as widespread as today. Thus, this technology was a great solution for short-range data transfer. Today, the situation has changed. Yet, we still see traces of this legacy on our motherboards.
There’s a connector you often see on motherboards. It’s called CIR, or Consumer IR. Specifically, this pin is reserved for infrared links. It typically sits near the front panel audio and USB headers.
If you wonder about the CIR pin, the answer is simple. This pin lets you connect an external IR receiver directly to the motherboard. As a result, you can power your PC on and off with a remote.
- IrDA port: Found on older motherboard rear panels, provides up to 4 Mbps data communication.
- CIR header: Internal connector on the motherboard for connecting an external remote receiver.
- USB IrDA adapter: Adds external infrared capability to a modern motherboard.
What Is an IrDA Port, What Does It Do on a Computer? SIR, MIR, FIR Speeds
Hardware fans often ask about IrDA ports. This port is a data communication interface standardized by the Infrared Data Association.
It essentially uses an optical diode pair. An IR LED sends the signal. A phototransistor receiver receives the signal from the other side. All this happens in half-duplex mode. Therefore, you cannot transmit and receive at the same time.
| IrDA Standard | Max Speed | Range | Usage Period |
|---|---|---|---|
| SIR (Serial IR) | 115.2 kbps | 1 meter | 1994-1998 |
| MIR (Medium IR) | 1.152 Mbps | 1 meter | 1998-2000 |
| FIR (Fast IrDA) | 4 Mbps | 1 meter | 2000-2005 |
| VFIR (Very Fast IrDA) | 16 Mbps | 1 meter | Limited use |
In fact, the IrDA protocol stack has a well-organized architecture. At the bottom sits the physical layer. It handles optical signal transmission and reception.
Above that, the IrLAP link layer sits. It handles error correction and device discovery. Further up, you have upper protocols like IrLMP and Tiny TP.
Motherboard Pin (CIR) and Connection Diagram: Step-by-Step Setup
Now let’s get to the most practical part. You want to connect an external receiver module using the CIR header on the motherboard. This process is much easier than you think.
You need a 4-pin or 6-pin IR receiver module. Additionally, check your motherboard manual. Pin layouts vary by brand.
- Find the CIR header: It’s usually in the bottom-left corner of the motherboard, near the front panel connectors.
- Identify the pins: Locate VCC (+5V), GND (ground), IRRX (receive data), and IRTX (transmit data).
- Connect the receiver module: Connect the DATA leg to the motherboard’s IRRX pin. Connect VCC to +5V and GND to ground.
- Configure BIOS: Enable the IR port under “Integrated Peripherals.”
Thermal Analysis in Computer Components: Hotspot Detection with Infrared
Now I’ll cover one of my favorite subjects. You use a thermal camera to detect hotspots. In fact, for hardware enthusiasts, it’s like an X-ray machine.
As a result, you see all weak points instantly. Which heatsink contacts well? Which VRM is overloaded? Is the thermal paste applied evenly? All these answers hide in a one-minute thermal scan.
Whenever I build a new system, I always do thermal profiling. Consequently, I’ve spotted many issues early.
For example, last month I checked a delidded CPU with a thermal camera. I noticed liquid metal had spilled over the edges. It posed a short circuit risk, impossible to see with the naked eye.
Processor, Graphics Card, and VRM Temperature Measurement: Thermal Profiling with Infrared
In fact, measuring CPU temperature with infrared gives far more detail than software sensors. Software just provides an average per core.
A thermal camera shows the temperature distribution across the whole IHS. Consequently, you instantly detect contact imbalances. If one side is hot and the other cold, you have a mounting issue.
Similarly, you analyze graphics card thermal profiles. In addition to the GPU core, scan the VRAM and VRM components too.
In particular, GDDR6X memory runs incredibly hot under load. The thermal pad transfers this heat to the cooler. However, if the pad is low quality or doesn’t make proper contact, temperatures easily exceed 100°C. Thermal imaging reveals this issue instantly.
M.2 SSD Thermal Throttling and RAM Module Temperature Monitoring
Detecting M.2 SSD thermal throttling with IR is an important topic. PCIe Gen 5 SSDs achieve remarkable speeds. However, this speed comes with significant heat output.
Specifically, when the controller chip exceeds 70°C, thermal throttling begins. Speed drops rapidly. Only a thermal camera can show this clearly.
Therefore, I install passive coolers on all my NVMe SSDs. I even added a small fan to some. If you choose the wrong SSD pad thickness, the cooler won’t make full contact.
In fact, when you check with a thermal camera, you instantly spot mounting errors. In my experience, they are the top cause of thermal problems.
| Component | Normal Operating Temp | Danger Threshold | Cooling Suggestion |
|---|---|---|---|
| M.2 Gen 5 SSD | 45-65°C | 75°C+ | Active fan cooler |
| DDR5 RAM (PMIC) | 40-55°C | 70°C+ | Case airflow |
| GPU VRAM (GDDR6X) | 70-90°C | 105°C+ | Quality thermal pad |
Wireless Data Communication with Infrared: IrDA, Bluetooth, and Wi-Fi Comparison
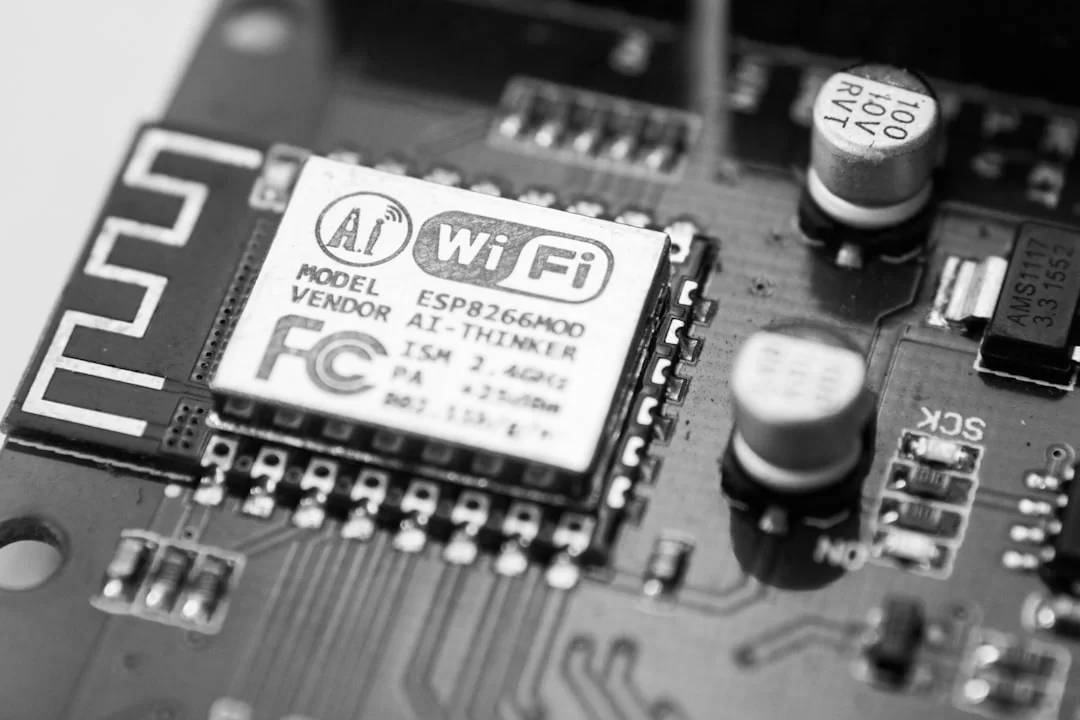
Now let’s examine the wireless side. When you compare IR to Bluetooth, you see interesting results. Both have unique advantages. Disadvantages exist as well.
This technology works at light speed. Bluetooth uses radio waves. That’s the fundamental difference. What does this mean in practice? Let’s examine together.
As a result, this optical method is more secure because of its line-of-sight requirement. The signal can’t pass through walls. That trait gives a significant advantage in military and industrial uses.
Bluetooth can go through walls. Consequently, it’s more practical for daily use. Yet, this creates a security risk.
| Feature | IrDA (Infrared) | Bluetooth 5.0 | Wi-Fi 6E |
|---|---|---|---|
| Range | 1-2 meters | 240 meters (theoretical) | 50 meters |
| Max Speed | 16 Mbps (VFIR) | 2 Mbps | 9.6 Gbps |
| Line of Sight | Required | Not needed | Not needed |
| Security | Very high | High | Medium |
Infrared File Transfer Speed, Range, and Security Risks
Users of older equipment wonder about IR file transfer speed. In SIR mode, you get 115.2 kbps. FIR mode reaches 4 Mbps. VFIR offers 16 Mbps in theory.
However, these speeds are extremely low today. Compared to USB 3.0, USB greatly exceeds it with 5 Gbps.
IR communication range is typically 1–2 meters. However, some high-power transmitters can reach 10 meters.
However, as distance increases, signal quality drops. Optical noise increases. If the receiver isn’t sensitive enough, packets are lost.
Infrared Headphones, Mouse, and Keyboard: Audio Latency, Battery Life, and Connection Issues
When you compare IR and Bluetooth mice, you see notable differences. IR mice usually have lower latency. They have no pairing process. They work instantly after plugging in.
However, the line-of-sight requirement is inconvenient. Even a coffee cup on your desk can block the signal. Bluetooth mice are much more flexible in this regard. In fact, IR mice excel in battery life. They only send signals when moving.
However, Bluetooth mice keep the link alive by constant packet exchange. That shortens battery life. My old IR mouse lasted nearly a year on one AAA battery. Today’s Bluetooth ones need new batteries in weeks or months.
Windows Hello and Infrared Biometric Security Hardware
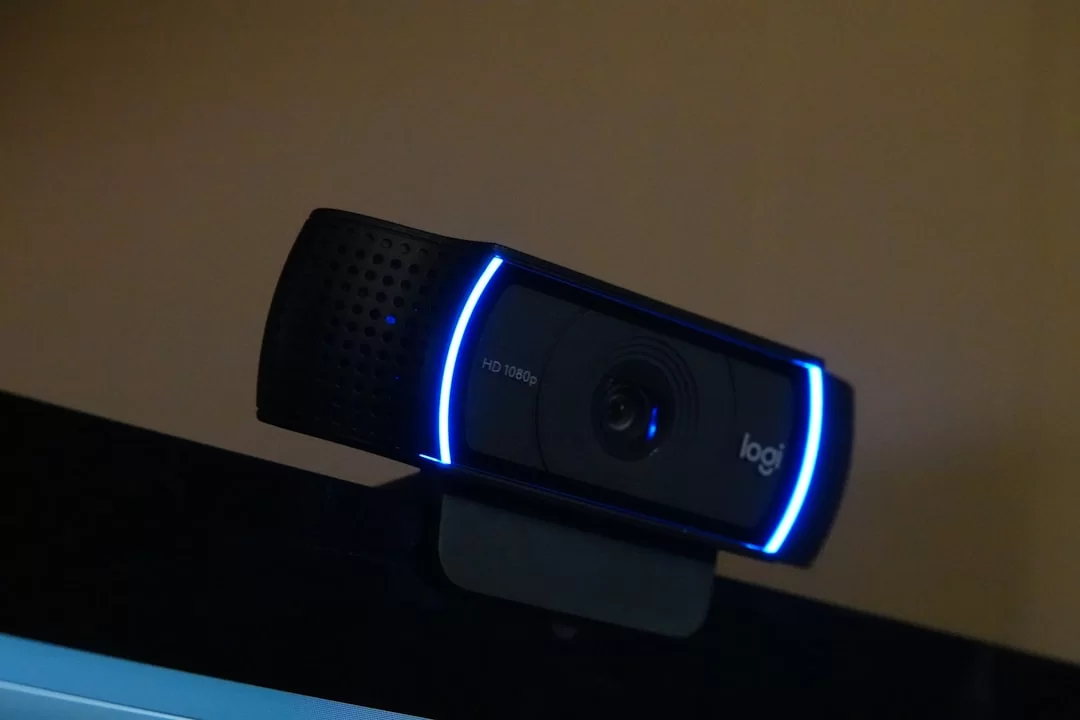
First, Windows Hello is a prime example of modern PC security. It lets you sign in with a fingerprint, face, or PIN.
Meanwhile, the face recognition hardware relies heavily on IR technology. Setting up a Windows Hello IR camera adds a tiny 3D scanner to your PC. It’s not a regular webcam. It includes a depth sensor and IR projector.
How does the system work? First, the active IR projector beams thousands of invisible dots onto your face.
It analyzes the dot pattern to create a 3D map of your face. Then it compares this map with your stored profile. If the match succeeds, the session opens instantly. The whole process happens in under a second.
Windows Hello IR Camera Requirements and How It Works in the Dark
First, Windows Hello IR camera requirements are specific. A standard webcam won’t work.
Specifically, you need an Intel RealSense, Kinect-like, or certified third-party IR camera.
These cameras include an IR sensor in addition to the standard RGB sensor. Additionally, an IR laser projector is also present. Some models even include a thermoelectric cooler.
How does Windows Hello work in the dark? Here, the power of IR technology becomes apparent. An RGB camera can’t see anything in the dark.
However, for an IR camera, ambient light doesn’t matter. It includes its own light source. The projector beams IR onto your face. The sensor picks up the reflection. Consequently, face recognition works perfectly in total darkness.
Active Infrared Projector and Anti-Spoofing Mechanism
In fact, the active IR projector is the heart of facial recognition. It projects thousands of laser dots at your face. Those dots deform based on your face’s topography.
The depth-sensing camera analyzes this deformation. As a result, a 3D model of your face forms. You can’t fool this model with a flat photo, because a photo lacks depth information.
Consequently, the anti-spoofing mechanism activates. It performs liveness detection. It checks blinking, micro-expressions, and skin texture.
Some advanced systems even map your face’s temperature. They use an infrared thermal camera for this. A photo or silicone mask can’t pass these tests. Thus, biometric security reaches a very high level.
Infrared Hardware Issues and Solution Guide: Windows 10, 11, and BIOS Settings
You installed the hardware, but it won’t work. I’ve lost count of how many times this happens. The ‘IrDA port not working’ error is a frustrating issue for old hardware users. Luckily, the fix is usually simple.
First, you should identify the source of the problem. Is the hardware connection faulty? Is the driver missing? Or is the BIOS setting disabled? With a systematic approach, you can solve all issues.
In fact, based on my field observations, 80% of issues are software-related. Even with correct wiring, if the OS doesn’t recognize it, nothing works.
Windows updates can sometimes disable old drivers. Consequently, you see a yellow mark in Device Manager. Therefore, finding the right driver is enough.
IrDA Driver Installation on Windows 11 and Windows 10 and Recognition in Device Manager
Now let me explain driver installation step by step. First, right-click the Start menu and select ‘Device Manager.’ In the window that opens, enable the ‘Show hidden devices’ option.
Then look for the ‘Infrared devices’ heading in the list. If a device is listed under this heading, the hardware is recognized. If there’s a yellow exclamation mark, you have a driver problem.
- First, open Device Manager: Right-click the Start menu and choose it.
- Next, show hidden devices: Enable it from the View menu.
- Then, find the IR device: Search for the “Infrared devices” category.
- Finally, update the driver: If a yellow mark appears, right-click and update.
Infrared Hardware Conflict (IRQ) and Data Transfer Dropout Solution
First, hardware conflicts are extremely frustrating. To fix an IR hardware IRQ conflict, locate the source.
Next, go to the conflicting device’s properties in Device Manager. On the Resources tab, you can see its IRQ. Also, check for conflicts. If two devices share the same IRQ, the system becomes unstable. Therefore, try changing the IRQ of one device via BIOS.
Next, go to BIOS IrDA settings. Switch IRQ assignment to manual. Select a value that doesn’t conflict. IRQ 3 or 4 usually work. Save, exit, and reboot.
Also, electromagnetic interference is a major cause of IR data dropouts. Power cables, fan motors, and motherboard traces can all produce noise.
As a result, this noise reaches the receiver as optical noise. Shielding may be needed. Wrapping the module with a ferrite bead is a simple fix.
Hardware Archaeology: Traces of Infrared Technology in Old Laptops and PCs
Now let me take you on a nostalgic journey. You remember laptops produced in the 1990s and 2000s. Moreover, almost all of these devices had a small, dark red window.
That window was the IrDA port. At that time, it was the main wireless transfer method. Bluetooth wasn’t common yet. Wi-Fi was a luxury.
Therefore, we relied on this window to transfer phone contacts. Also, we sent small files or business card information from here.
The question of whether an old laptop IR port can talk to a modern phone never dies. The answer is theoretically yes. However, in practice, the situation is complicated.
Most modern smartphones lack IrDA support. Bluetooth, NFC, and Wi-Fi Direct replaced it. Still, you can communicate with some old Nokia, Sony Ericsson, or Palm devices.
Can an Old Laptop Infrared Port Communicate with a Modern Phone? USB IrDA Adapter Solution
Now, let’s continue with a practical scenario. You have an old ThinkPad. You want to send a file from this device to a modern Android phone. A direct connection isn’t possible.
This is because modern phones lack an IrDA receiver. However, you can overcome this by purchasing a USB IrDA adapter. You just need to plug the adapter into the phone’s USB-C port. Of course, you must ensure your phone supports USB OTG.
Can you plug a USB IR adapter into a desktop? The answer is yes. Using a USB-UIRT or similar, you add IR to your desktop.
Fortunately, Windows usually auto-detects the adapter. If not, follow the driver steps I shared. Soon, your system is IR-ready.
Motherboard Rear Panel Port and Laptop IrDA Eye Repair
Eventually, the rear panel optical port can develop issues. Here are the most common ones:
- Physical damage: The port’s plastic cover can break. Additionally, the phototransistor receiver inside can shift out of place.
- Oxidation: In humid environments, contacts oxidize. As a result, conductivity is lost.
- Dust accumulation: Dust filling the port blocks the optical signal.
- Solder crack: Solder joints on the motherboard traces can crack over time.
First, repairing a laptop’s IrDA eye is more delicate. You need to open the case. Then locate the tiny IR module on the board.
They usually solder this module to the edge of the motherboard. First, check if the module is intact. Moreover, you can measure the resistance with a multimeter.
HTPC Remote Integration with USB-UIRT and EventGhost
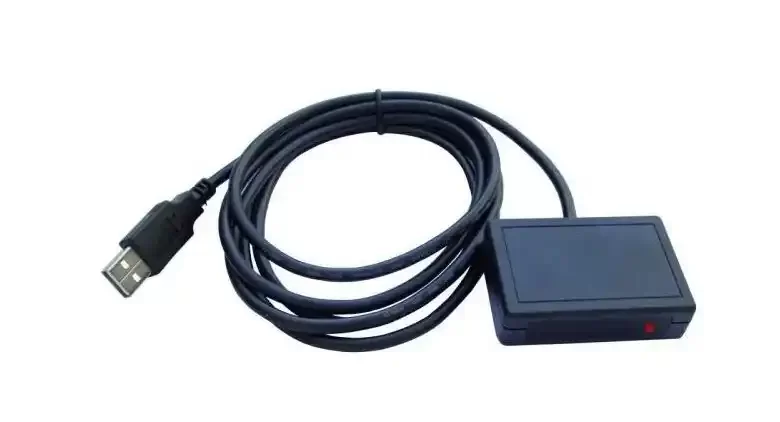
Now let’s turn to one of the most enjoyable topics. By installing an HTPC IR remote receiver, you can turn your computer into a full-fledged media center.
USB-UIRT (Universal Infrared Receiver/Transmitter) is tailor-made for this job. This device both receives and transmits IR signals. Thus, it controls not only the computer but also other devices like your TV and sound system.
First, connect the USB-UIRT to your computer. Windows will recognize it automatically. Then download and install the EventGhost software for the USB IR receiver.
Next, after opening EventGhost, activate the USB-UIRT plugin. You’ll then see incoming remote signals.
Infrared Sensor Applications in Arduino and Maker Projects
First, when you enter the maker world, one of the first sensors you meet is the IR sensor. Using it with Arduino is both fun and educational.
For example, you can build an Arduino IR receiver/transmitter project. This helps you learn basic electronics. You just need an Arduino Uno, an IR receiver module, an IR LED, a few resistors, and a breadboard.
Additionally, you can create smart home-PC integration with an IR sensor. Send sensor data from Arduino to your computer via serial.
A Python script running on the computer processes this data. As a result, you can detect room motion and automatically turn on your monitor. You can also control a slideshow with hand gestures. The limit is your imagination.
Turning a Computer On and Off with an Infrared Sensor: Relay and IR Receiver Circuit
For example, this project is a favorite. You can remotely control your PC’s power with an IR sensor and relay. Let me explain step by step.
First, gather the materials. An Arduino Nano, a 5V relay module, and an IR receiver (TSOP38238) are enough. You also need two 10K resistors and some jumper wires. Additionally, you’ll need to locate the power switch pins on your motherboard.
- First, build the circuit: Connect the IR receiver’s DATA leg to Arduino pin 2. Connect the relay control leg to pin 7.
- Next, connect relay contacts: Connect the normally open contacts in parallel to the motherboard’s power switch pins.
- Then, write the code: Read the signal using the IRremote library. On a specific button press, trigger the relay for 500ms.
- Finally, set up a shutdown macro: If the same signal comes again, trigger the relay for 5 seconds. This way, you force a shutdown.
IR Obstacle Detection Sensor and Computer Fan Control
For instance, this project suits case modders perfectly. An IR obstacle sensor detects if the case door is open.
Additionally, you can automatically adjust fan speed based on ambient temperature. When you control computer fans with an IR sensor, fan speed increases as temperature rises. Thus, you get a system that is both quiet and cool.
First, mount the IR obstacle detection sensor. It consists of an IR LED and a phototransistor receiver.
Specifically, when the case door is closed, the LED beam reflects off it to the receiver. Opening the door cuts the beam. Arduino detects this break. Then it triggers an alarm via a relay or MOSFET. It can also turn on an LED. It’s a simple, effective security measure.
Health Effects, Safety, and Future Trends of Infrared Technology
Of course, like any technology, we need to discuss health and safety. Much false information circulates.
I hear ‘Is infrared harmful?’ often. The answer is clear. Low-intensity IR radiation is harmless. It is not ionizing radiation. It doesn’t cause DNA damage. However, high-intensity laser diode sources pose a risk to the eyes.
Additionally, we need to address IR heater risks properly. Prolonged close use can dry and irritate skin.
However, under normal use, they are safe. The key is to follow the safety distance specified by the manufacturer. Additionally, be careful about reflected rays. Shiny surfaces can bounce radiation in unexpected directions.
Infrared Heater Harms and Laser Diode Eye Safety
For instance, laser diode eye safety is crucial. High-power IR lasers can permanently damage the retina. The key danger: IR light is invisible, so the blink reflex fails.
With visible light, you automatically close your eyes when a laser is directed at your eyes. However, an IR laser doesn’t trigger this reflex. Therefore, you must always use protective goggles when working with IR lasers.
The Future of Infrared in Computer Hardware: LiFi, Optical Data Bus, and Quantum Sensors
Meanwhile, the future holds exciting developments. LiFi IR communication is positioning itself as a rival to Wi-Fi. LiFi transmits data via light modulation. Its theoretical speed exceeds 100 Gbps.
Moreover, it creates no electromagnetic interference. It’s ideal for hospitals, aircraft cabins, and nuclear facilities. This technology is still in its infancy. However, commercial products have started entering the market as of 2026.
In contrast, quantum infrared sensors usher in a new era. They can detect even a single photon. They achieve sensitivity levels unreachable by traditional photodetectors.
Thus, imaging becomes possible even at incredibly low light levels. The concept of optical data bus is also re-emerging. Data transfer over copper traces has hit physical limits. Optical interconnects solve this problem at the root.
In-Depth Resources on Infrared Hardware
- Wikipedia – Infrared: Presents the basic physical properties of infrared radiation in an encyclopedic style, from its place in the electromagnetic spectrum to its historical development.
- ScienceDirect – Infrared Radiation: This article addresses the physical generation of infrared radiation. It also comprehensively covers its propagation in the atmosphere and detection with detectors.
- MDPI Photonics – Advances in Infrared Detectors: Examines the role of next-generation infrared detectors in artificial intelligence and edge computing systems through an academic study.
- EmbeddedWiki – IR Beacon Click Evaluation Kit: This evaluation kit explains the integration of high-speed infrared transmitter diodes with microcontrollers. In addition, it presents all technical details with circuit diagrams and code examples.
- GitHub – CH32V003 USB IR Receiver: This open-source hardware project transfers infrared remote control signals to computer input via USB.
FAQ About Infrared and IrDA Technology
What is infrared and how does it work?
What is the infrared wavelength in nm?
Is infrared radiation harmful?
How to test infrared with a phone camera?
What is an IrDA port and what does it do on a computer?
How to install IrDA drivers on Windows 11?
Is data transfer with infrared secure?
What is the difference between a thermal camera and a regular camera?
What is the difference between active and passive infrared sensors?
Can an old laptop infrared port communicate with modern devices?
Conclusion: The Place and Importance of Infrared Technology in the Hardware World
In conclusion, I hope I’ve clearly shown how deep and versatile IR technology is. The journey starts with physics.
Then it extends to Arduino projects, revealing hardware’s diversity. We’ve talked about everything from Windows Hello to the LiFi future.
You may not see infrared technology with your eyes. However, it quietly operates at your PC’s most vital spots.
In fact, this spectrum from thermal management to biometric security shows engineering elegance. We see it in data communications and maker projects. Therefore, apply what you learned to your own projects.
First, remember that practice is the best teacher. Grab an Arduino kit. Pick up some sensors. Draw a schematic and start soldering. Don’t fear mistakes.
Throughout my career, I learned the most from my mistakes. Now it’s your turn. There’s still so much to discover in the fascinating world of hardware.

Be the first to share your comment