
In this article, we will examine how to set up and configure openSUSE Leap 15 (15.4) using a bootable USB flash drive on a desktop or laptop computer.
How to Set Up openSUSE Leap 15 (15.4) on a PC
Another Linux distribution, such as Ubuntu and Linux Mint, is openSUSE, a community-based project sponsored by the SUSE company.
openSUSE Linux is available in two variants, Leap and Tumbleweed. The Leap version is Stable, while Tumbleweed is a type that gets fast updates, carries a risk in terms of system stability, and is adapted to the latest technology.
The version number of Tumbleweed does not change like other distributions after system development or optimization, such as Leap. Once you have installed this version on your computer, you can keep your system up-to-date by constantly getting new updates.
If you want to install a stable and consistent distribution on your computer or server, you should choose the Leap version. Therefore, if you want to test new software developments or the projects you are working on, the Tumbleweed version will be suitable for you.
How to Download openSUSE Leap ISO and Prepare USB Installation Media
The latest version of SUSE (Leap 15.4) was released on June 8, 2022. Version 15.4 includes Xfce 4.16, KDE Plasma 5.24, MATE 1.26, Deepin 20.3, and GNOME 41, the current desktop environments, and includes many new features such as the latest Linux Kernel. You can visit the SUSE webpage to review all the innovations and features of Leap 15.4.
Step 1
We recommend that you download the openSUSE Leap 15.4 ISO file from the official website, as image files downloaded via other websites may not be safe and consistent. Visit the SUSE resource to download the latest Leap image file.
You will see both variants on the SUSE homepage; here, in the Leap section, click the “Install Leap” button.

Step 2
On the download website, click the Download button in the Offline Image section under the “Intel or AMD 64-bit desktops, laptops, and servers (x86_64)” heading.

Step 3
To prepare a bootable flash drive, download and open Rufus. After clicking the SELECT button, select the openSUSE ISO file you downloaded to your PC and add it.
Additionally, you can choose MBR or GPT installation type from the Partition Scheme.

Step 4
After adding the ISO file, click the START button and then confirm the use of Image Mode in the pop-ups. Confirm the deletion of all content on your USB disk and the burning of new files.

Step 5
When the USB installation media you prepared with Rufus is ready, remove your USB from your PC and plug it into the PC you will install.

How to Install openSUSE Step-by-Step
After downloading the ISO file and preparing the bootable USB installation media, you can now start installing the SUSE Linux distribution on your computer.
Steps:
Step 1
After burning the openSUSE image file to your USB, open the Boot screen according to the brand and model of the computer you are using. Then, boot your system from your flash memory and press Enter in the Installation option on the SUSE boot screen that opens.

Step 2
Wait while the fundamental drivers of the SUSE system are loaded.

Step 3
On the Language, Keyboard, and License Agreement screen, after the network settings, device configuration, and current hardware information are automatically determined by the setup wizard, click Next.

Step 4
Select the system display language in which you want to use the SUSE system, select your PC’s current keyboard layout, and then click Next after reading the license terms.

Step 5
After the installation wizard delves into your system, it will ask if you want to edit Online Repositories addresses before launching the software manager. If you have an internet connection, click Yes to add the online repo addresses and continue.

Step 6
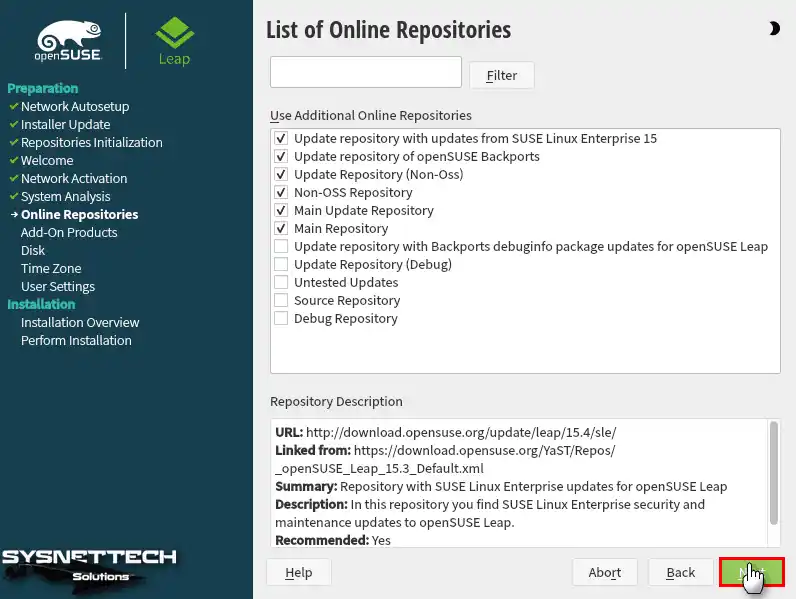
Check and edit the online repository addresses of openSUSE, then click Next.
Step 7
Wait while the SUSE repo addresses are being written to your system.

Step 8
During installation, you need to choose one of the desktop environments: KDE Plasma, GNOME, or Xfce. You can select one of the listed desktop types based on your personal opinion and experience.
Picking a desktop look and feel can be confusing. openSUSE gives you plenty of choice in this area. But perhaps what you are looking for is the core idea of a different version.
For those thinking about moving to Linux Mint, I should mention one point. Mint’s Cinnamon look quickly fits your usual desktop habits. Setup is also just as easy as Leap’s.

Step 9
If you are installing from scratch on your PC, you can leave the disk partition settings at default. If you have advanced Linux knowledge, you can view the settings by clicking Expert Partitioner.

Step 10
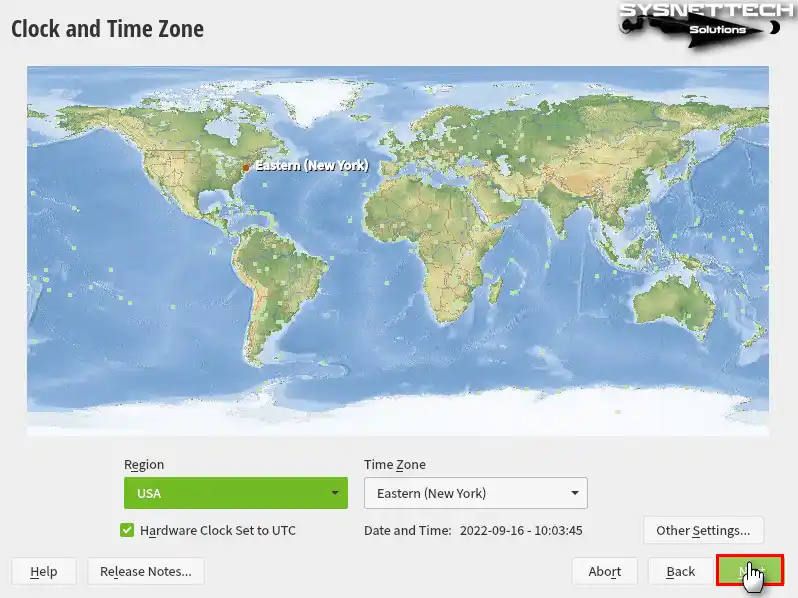
Configure the time settings of your Linux system according to the location where you live, and select the country where you live for the time zone.
Step 11
Type your full name for the Local User account, set the Username to log in to the system, and create a simple or strong system password.
If you create a simple user password, a window will open like the image below, and you will need to confirm the user’s use of the simple password.

Step 12
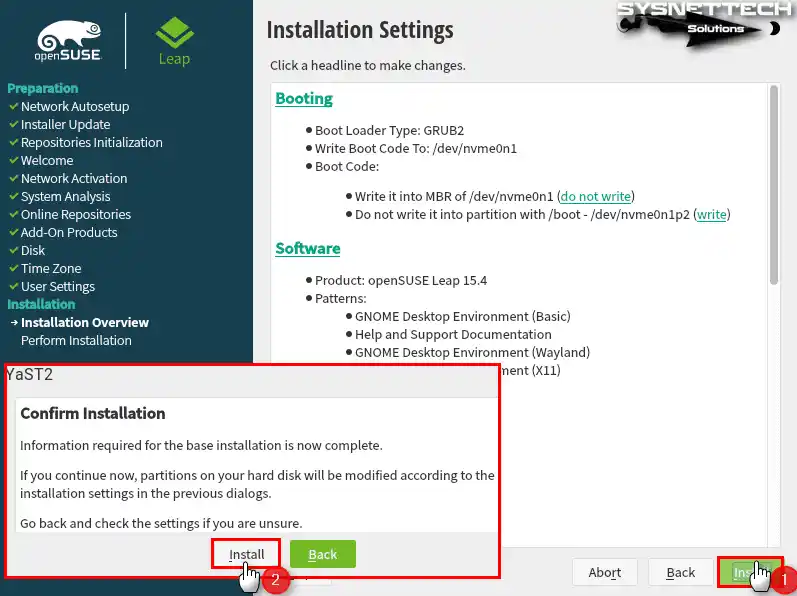
Review the installation settings, and if there is something you want to do, you can go back and make changes. After completing all the settings, click the Install button to start the system installation and confirm the operation.
Step 13
Wait while openSUSE is installed on your computer, and this may take time, depending on your PC’s performance.

Step 14
After installing openSUSE on your Desktop PC and Laptop, reboot to log in to your system.

Step 15
When your SUSE system restarts, press Enter in the first option in the boot menu.

Step 16
When openSUSE Leap opens, you will be greeted with the GNOME desktop environment. In the Welcome window, you can quickly access resources related to the Linux distribution or choose to close this window at the next boot.
We have finished setting up openSUSE. Well done! Perhaps you would like to try different versions in the Linux world. You might have a question, especially if you are interested in security testing.
For those curious about the current setup steps of Kali Linux, we have prepared a detailed guide. I especially suggest looking at the small tips in the part on making a lasting USB drive.

Video
Installing Old Versions
Your openSUSE system is now ready. Next, you need to install the applications. Some of your tasks may still require Windows-specific software.
Based on my experience, I can say that running Windows software with Wine in openSUSE is much more practical than you might think. By following the steps provided, you can easily install your favorite programs.

Be the first to share your comment