
In this guide, I will tell you how to install Kali Linux 2024 on a PC using a USB flash drive. First of all, Kali OS is a Debian-based distribution developed by Offensive Security. It also has free tools for penetration testing and network security.
The new version of this excellent operating system, 2024, offers us new features and improvements. In addition, there are visual changes to the shell command prompt. Plus, it includes an improved interface for a better user experience. Please continue to review our step-by-step guide to learn how to install Kali OS on your computer from scratch!
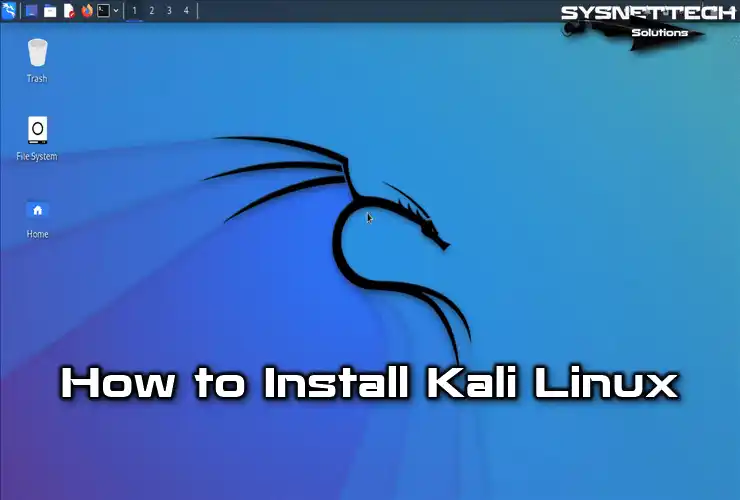
How to Install Kali Linux 2024 on Desktop & Laptop Using USB Flash Drive
Kali Linux is a Debian-based Linux distribution developed by Offensive Security. This system includes many free tools for penetration testing and network vulnerability detection.
Offensive Security released its first version of 2024, 2024.1, on February 28, which includes new features and improvements. This version contains noticeable visual changes, such as new backgrounds for the desktop and a new login and start screen.
What’s New in Kali Linux 2024?
The main innovations of Kali OS 2024 are:
- It includes new visual theme changes in the boot menu and login screen.
- The shell command prompt has been further improved for better readability.
- It includes a new interface, including Kali’s documentation and tools, which provides a better look and search experience as the default homepage in Chromium and Firefox web browsers.
- With the offline installation media called Kali-Linux-Everything ISO, many predefined tools can be downloaded without an Internet connection. Since the size of this ISO file is approximately 10 GB, it is more suitable for use in educational institutions in remote locations where Internet connection is weak.
You can learn more about other improvements by visiting Kali’s article.
System Requirements
There are things you need to consider before installing Kali Linux 2024 Operating System on a PC. In particular, you should look at the hardware and system requirements of your host computer. For example, the minimum standards for the 2024 version are:
- CPU: For best performance, you should use a processor with at least 1GHz speed. However, for better speed, I definitely recommend a multi-core processor.
- RAM: For general OS performance, having at least 2GB RAM is enough. However, for better, having 4GB or 8GB memory would be great.
- Storage: Make sure that your PC hard disk drive has at least 20GB of free space to store your files and applications.
- Graphics: Our system can have a high-end graphics card like AMD, NVIDIA, and Intel. However, while a minimum of 1GB is enough, I recommend having 6 & 8GB of graphics memory for Kali performance.
- Network Interface Card (NIC): You should be careful about the network interface card you choose for Kali. Primarily, this OS does not support some WiFi cards.
How to Download and Install Kali Linux OS from Scratch
First, after downloading the Kali ISO file, prepare a bootable Flash Memory with Rufus. Then, you need to start your computer with this installation media.
However, you can also try virtual machines before the physical installation. For example, you can create a new virtual machine using a virtualization program such as VMware or VirtualBox. In this way, you can experience Kali without risk.
Steps:
Step 1
To download the Kali ISO file, visit the official website. Click the “Download” area on the home page. Thus, you can easily download the installation media to your PC.

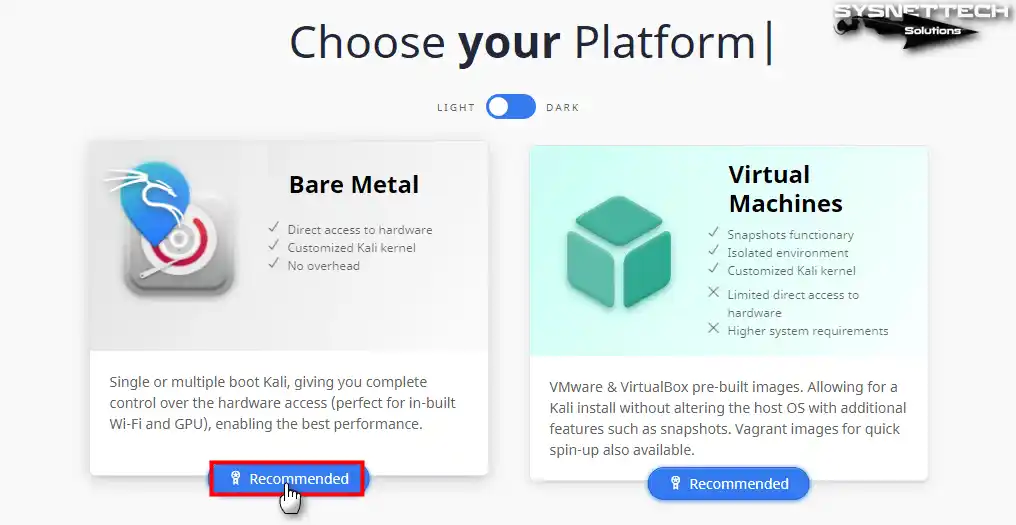
Step 2
You can check out the updated download page on the Kali website. You can also choose an installation media according to your personal preference. If you plan to install it on a physical computer, you should click on the Bare Metal platform.
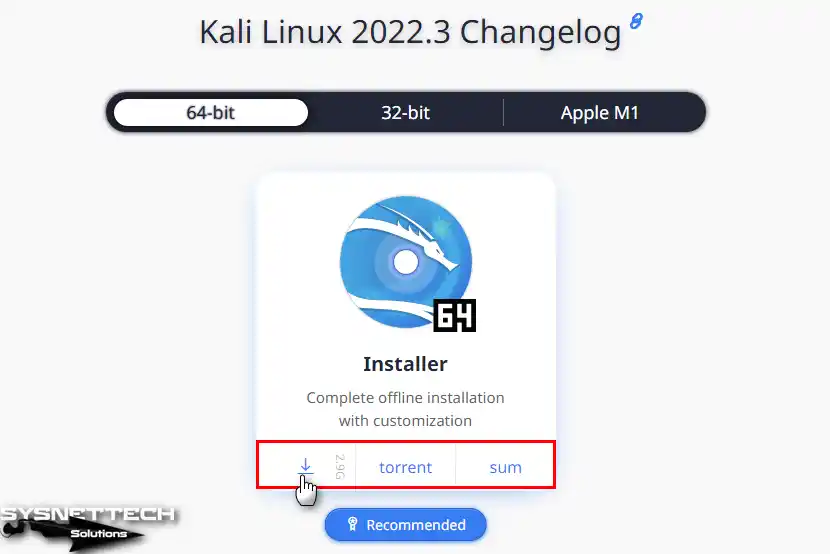
Step 3
Click on the download icon, as seen in the image below. Also, download the ISO file of the Kali 2024 64-bit version.
Step 4
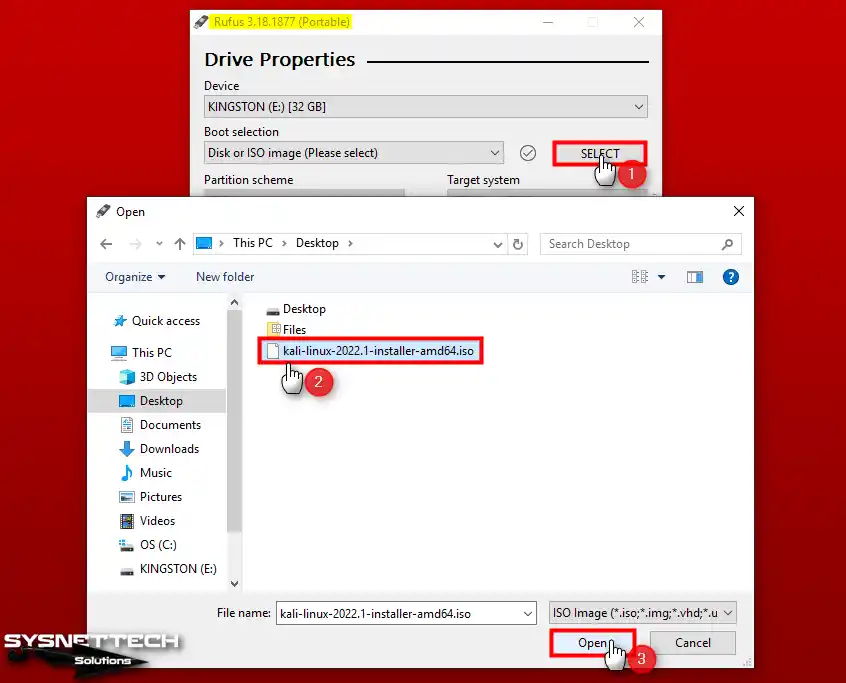
After downloading the ISO file, download and install the Rufus program. Also, if you want to use Rufus as a portable version, download it from the relevant page. Afterward, you can start the process by running the program.
Insert an empty USB flash stick into your computer and run the Rufus Portable version. Also, make sure that the Boot Selection option is “Disk or ISO Image.” Then, click the SELECT button and add the ISO image you downloaded.
Step 5
After adding the Kali ISO image, select BIOS or UEFI installation. Also, the Partition Scheme setting is set to MBR by default.
If you prefer UEFI installation, set the Target System to UEFI only. Additionally, change the Partition Scheme to GPT. Finally, check the settings and click the START button.
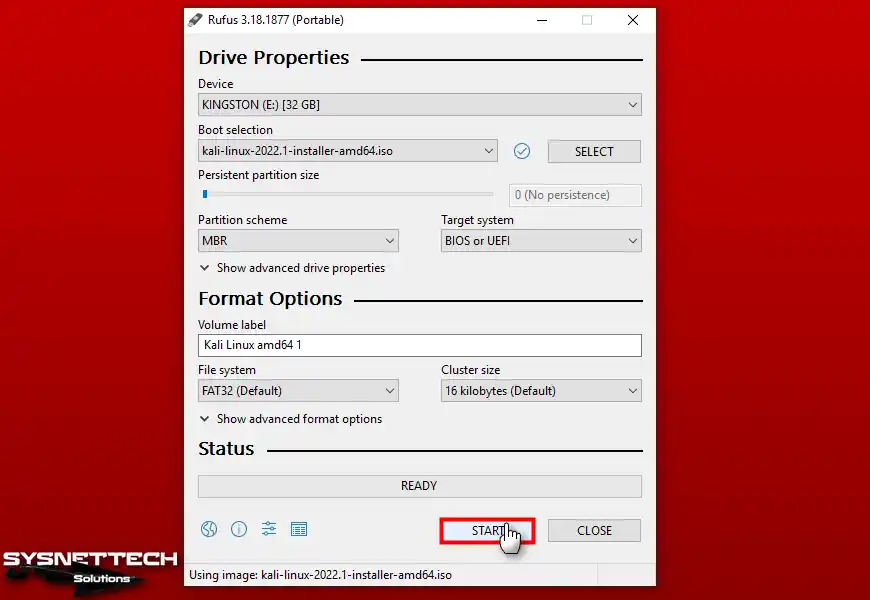
Step 6
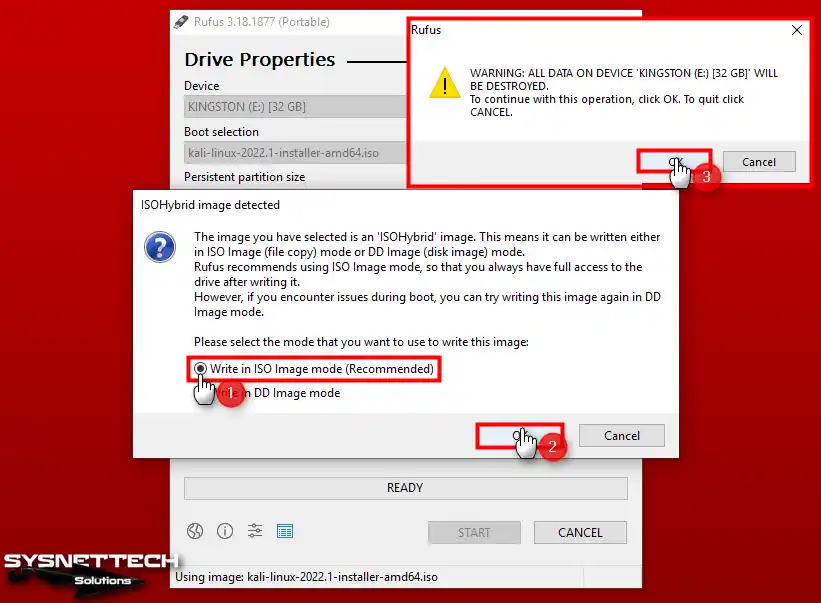
After clicking the START button, the ISOHybrid information window will open. In this window, you can choose to burn the installation media in ISO or DD (Disk Image) mode.
The default and recommended option will be ISO Image Mode. Leave this option and click the OK button. Also, confirm that all data on your USB disk will be deleted.
Step 7
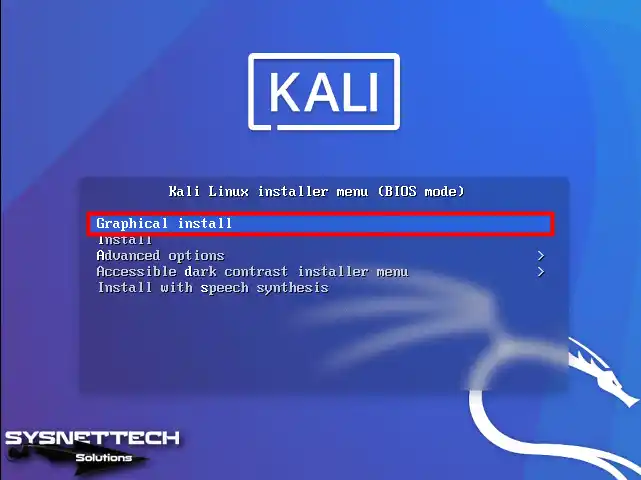
After burning the ISO image to USB, restart your computer. Enter BIOS settings on the boot screen. Then, configure the primary boot device to be USB. In the final step, restart your computer again.
When you boot your computer with the USB installation media, you will see a screen. This screen will be the Installer Menu (BIOS Mode). In this menu, go to Graphical Install and press Enter.
Step 8
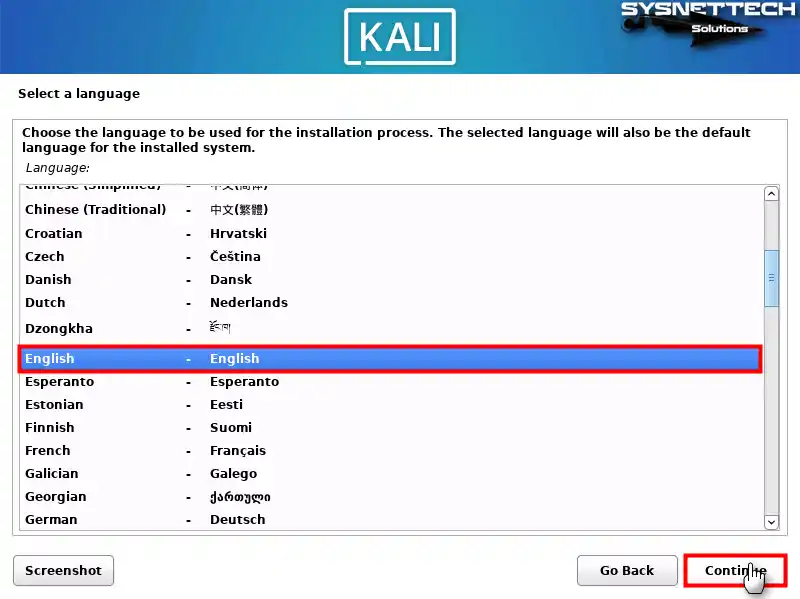
While installing your Kali system, you will be asked to choose your preferred display language. After selecting your preferred language, click the Continue button to continue with the installation.
Step 9
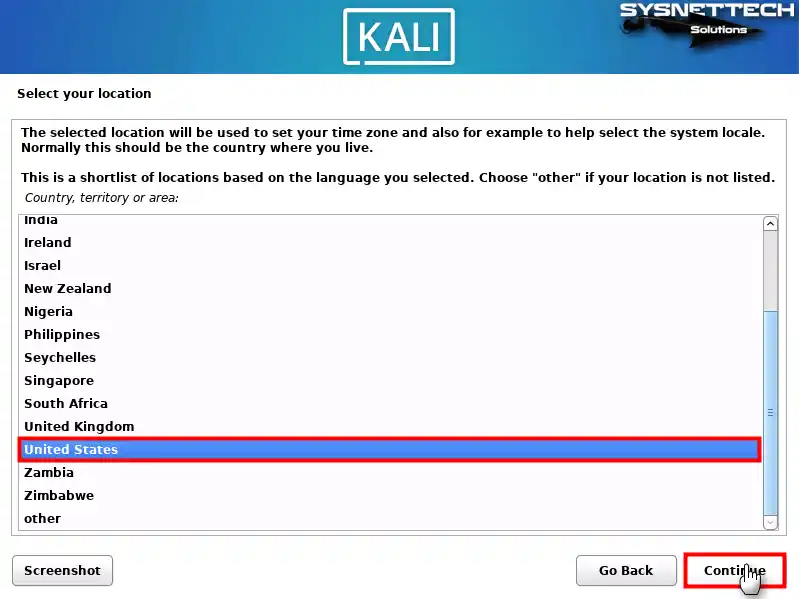
After selecting the system language, you will see the list of available locations. Select your country from here and then click Continue.
Step 10
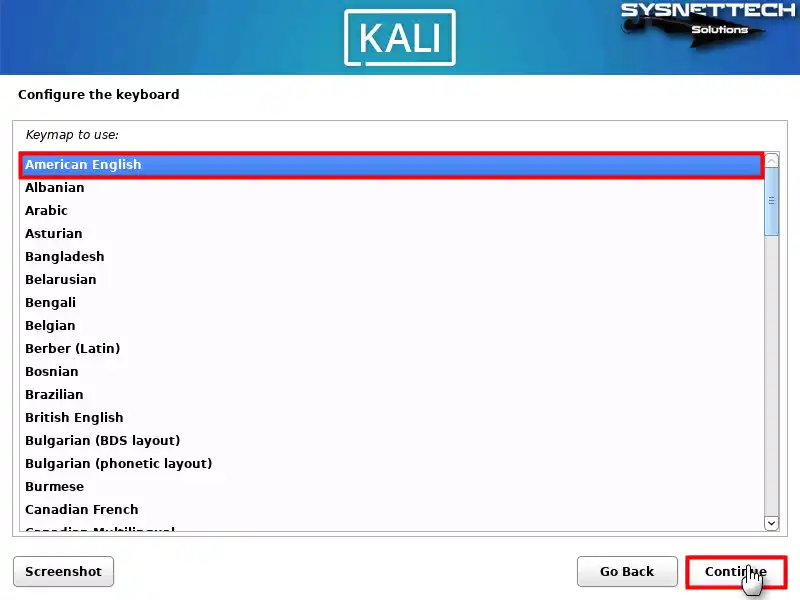
Please select a keyboard layout that matches the physical keyboard on your computer. Then, click Continue to continue the installation process where you left off.
Step 11
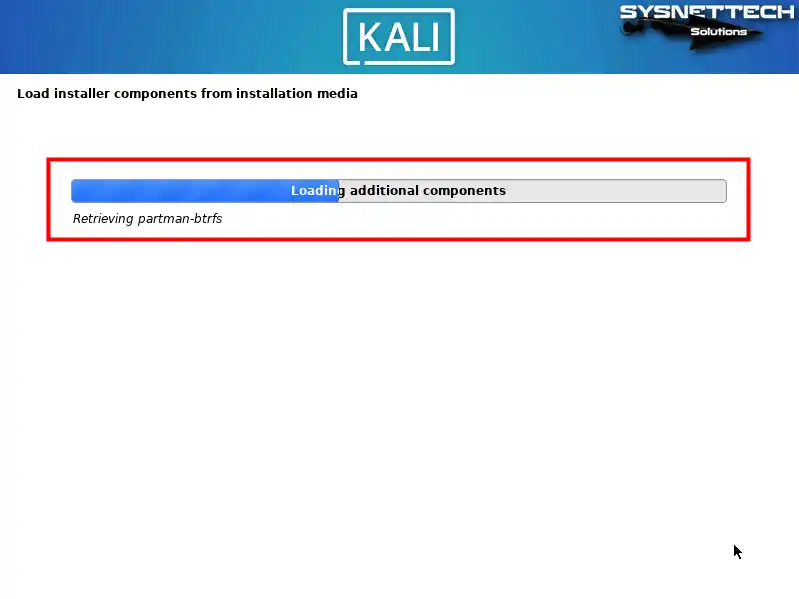
Please wait while the wizard installs the required additional components from the installation media. Once you complete this process, the system installation will continue.
Step 12
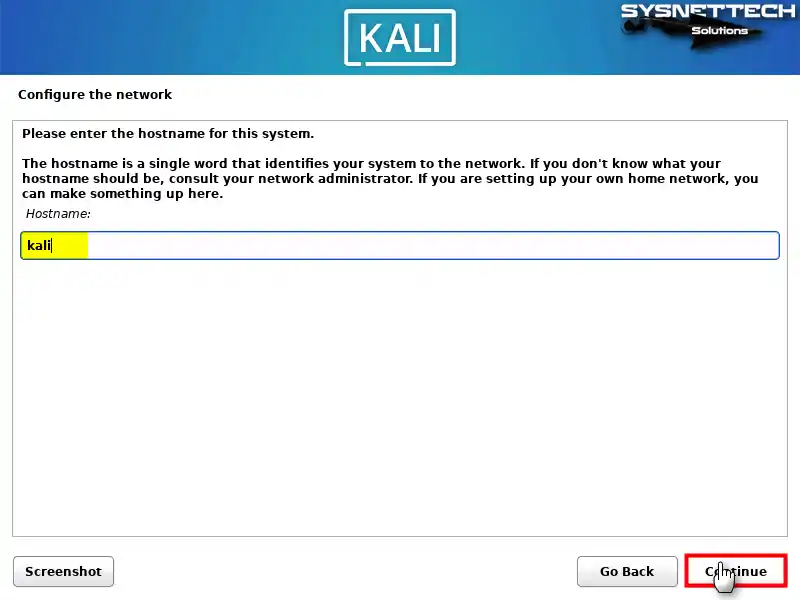
Type a hostname to identify your system on your local network. Then, confirm adding your system to the network by clicking the Continue button.
Step 13
If you have created a home network, all of your computers need to be on the same network. This will allow your appliances to communicate with each other. However, if your PC is not connected to a network, leave the domain name section blank.

Step 14
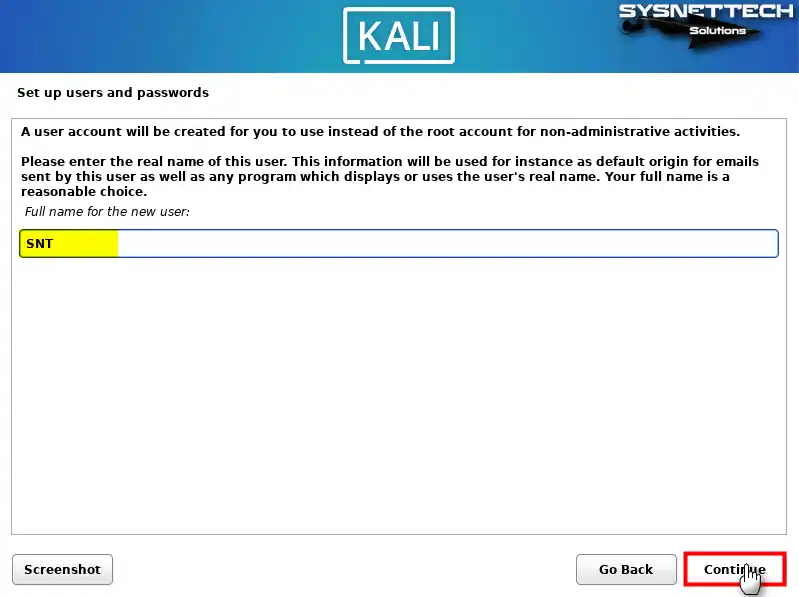
You must create a user account for non-administrative operations, so please type your real name and press Continue.
Step 15
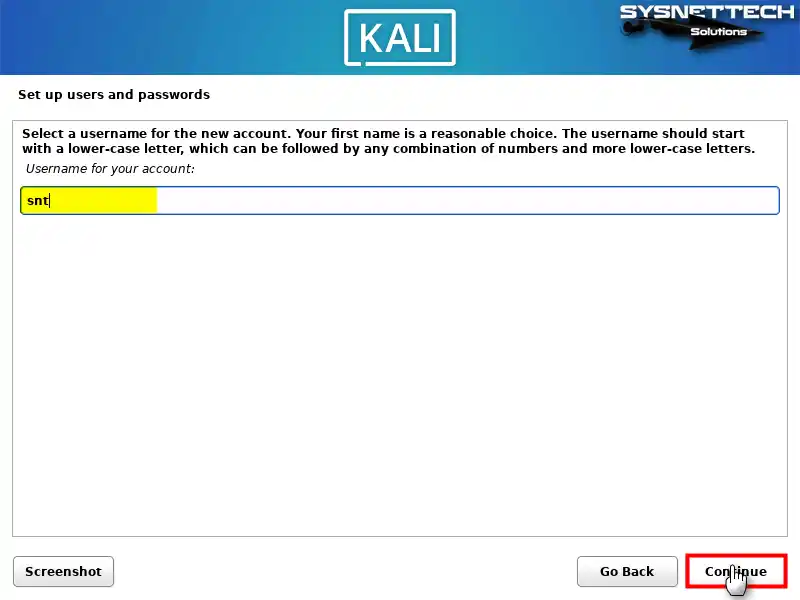
Please enter a unique username using only lowercase letters. Your username is essential in identifying your account, so once you have entered it in the relevant field, click Continue to continue.
Step 16
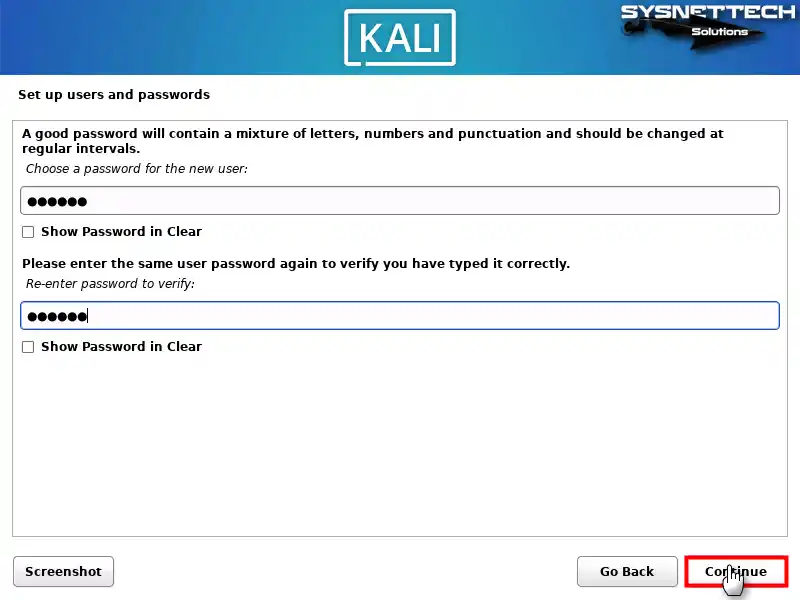
Please create a strong password for your user account. However, do not forget to include uppercase and lowercase letters as well as numbers when making your password.
Step 17
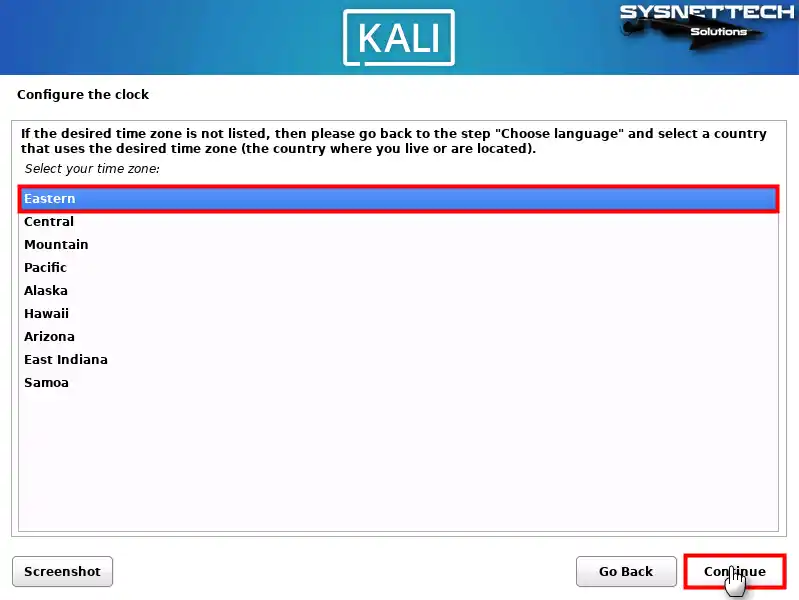
You need to set your system time correctly. Therefore, please select the time zone of the country in which you reside. Moreover, if you choose the correct one, it will make your time management more effortless.
Step 18
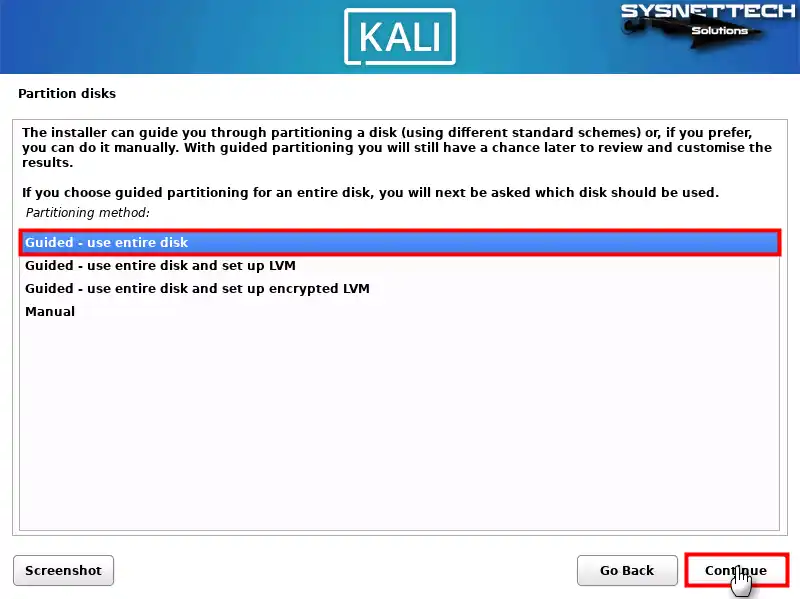
When installing Kali Linux, select the “Guided – Use Entire Disk” option. If you choose this, the wizard will automatically partition your disk during the installation process.
So, after making this selection, proceed with Continue to start the installation.
Step 19
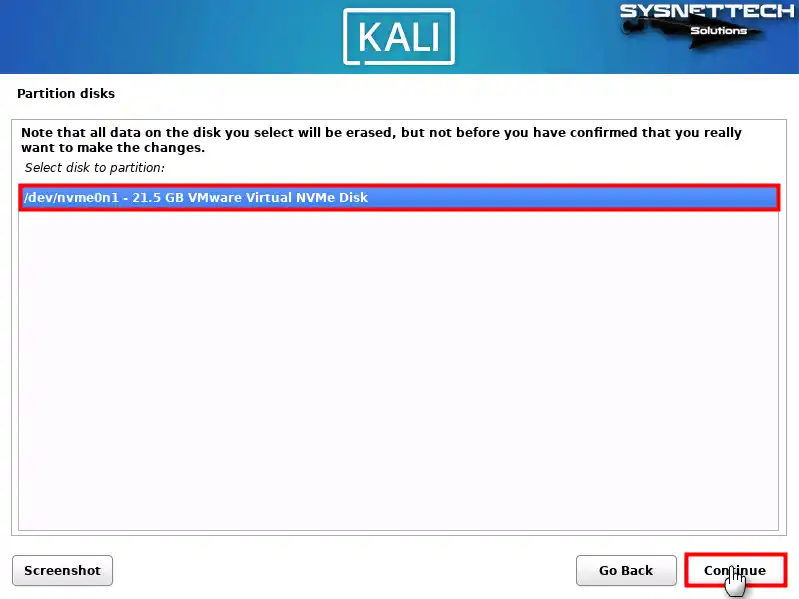
Since you will be installing Kali Linux, select one of the disks on your PC and then continue the installation process.
Step 20
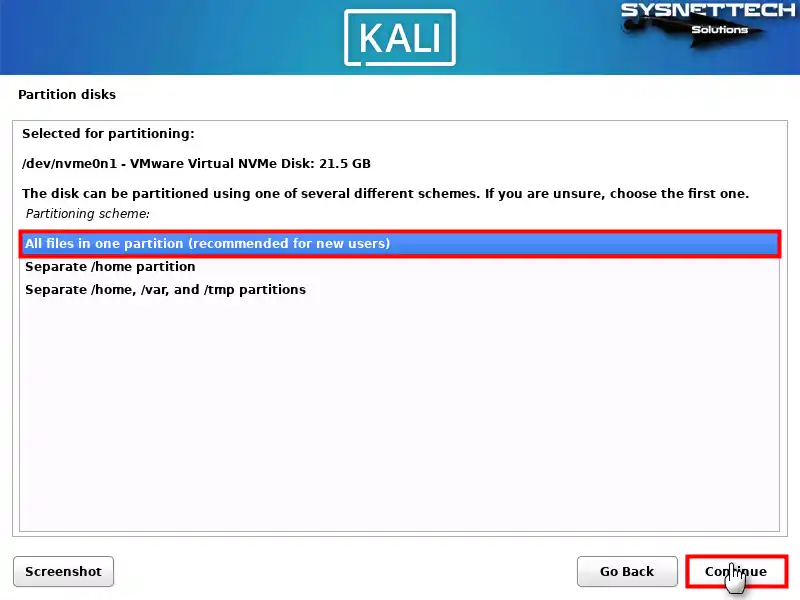
For new users or a clean system installation, select “All Files In One Partition.” Additionally, you can also check out other options for more advanced disk partitioning here. This way, you can create a configuration that suits your needs.
Step 21
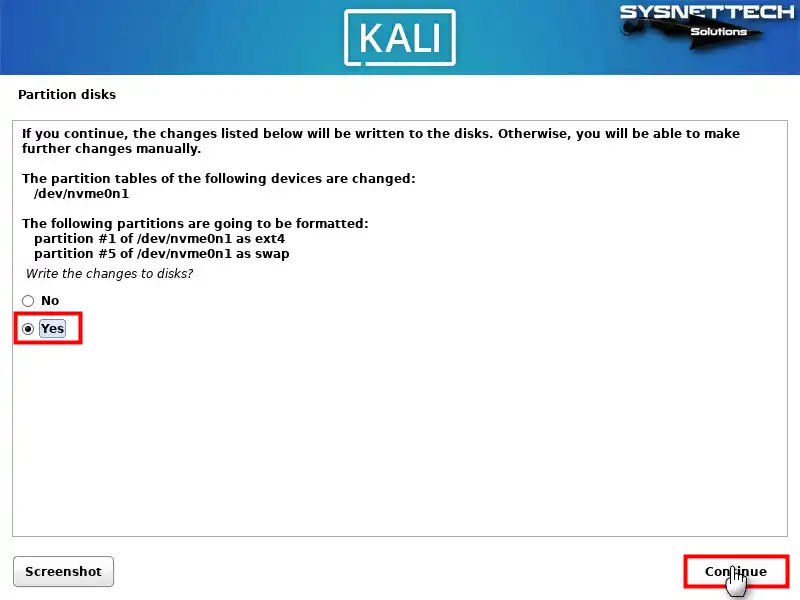
Click the Continue button to finish partitioning the disk. This Step allows you to confirm the writing of changes to the disk. Also, this will continue the installation process.

Step 22
After checking the automatic partitions, select “Yes”. This will confirm that you want to write the changes to the disk. Then, complete the process to proceed with the installation of your system.
Step 23
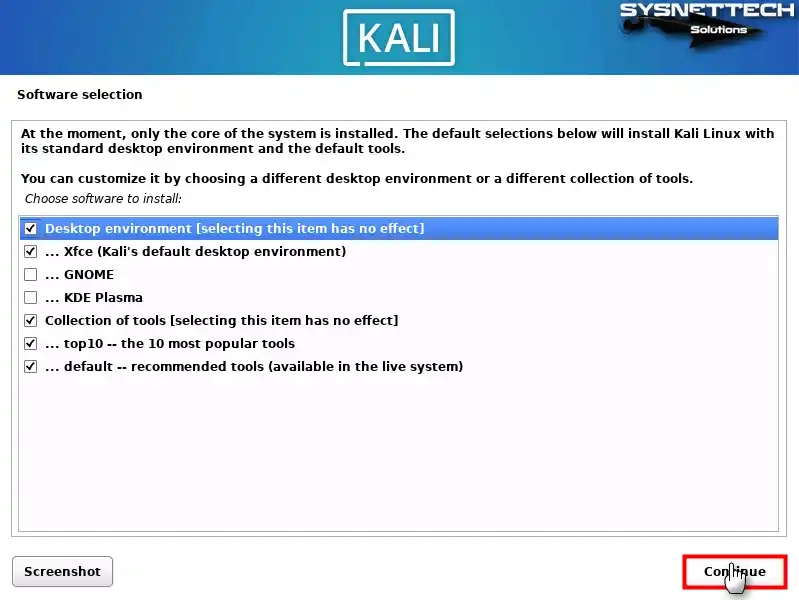
If you want to install the standard desktop environment, leave the settings as default in the Software Selection step. Additionally, confirm the installation of the default tools. Then, follow the steps needed to continue.
Step 24
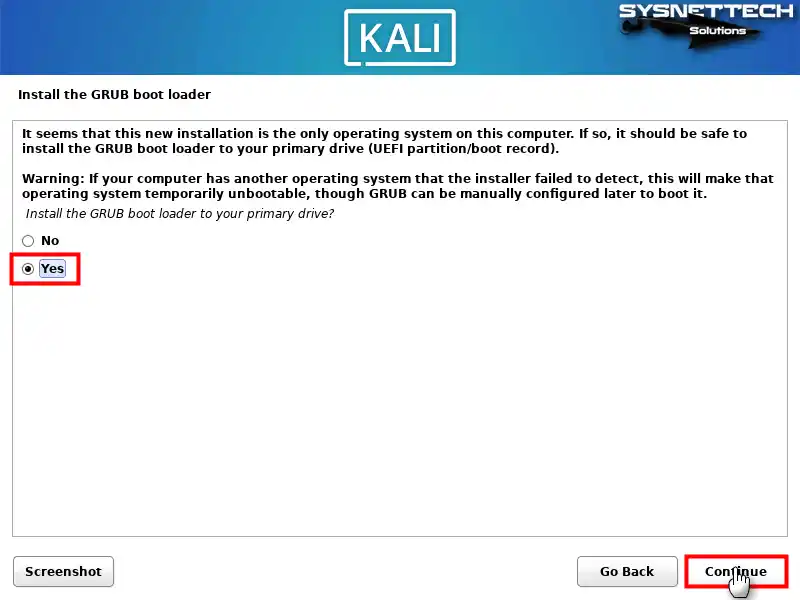
Select the primary partition to install GRUB Boot Loader. To do this, check the “Yes” option. After that, press Continue to make your system work properly.
Step 25
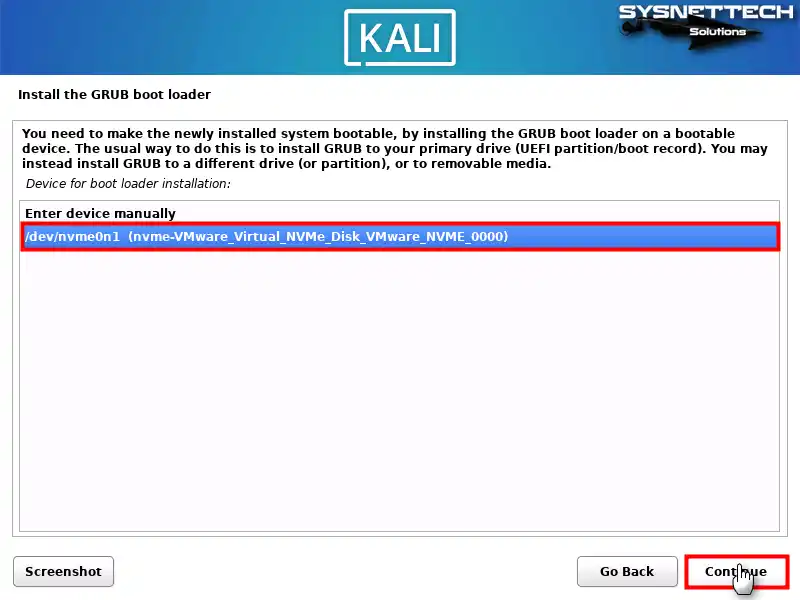
Install GRUB Boot Loader to make the newly installed system bootable. To do this, you need to select your bootable disk. However, if you have additional disks that you use as storage on your PC, do not select those disks.
Step 26
After installing Kali OS with a USB stick, remove your media from your PC. Then restart your PC to ensure that the system works correctly. After this step, your Kali OS will be ready to use.

Step 27
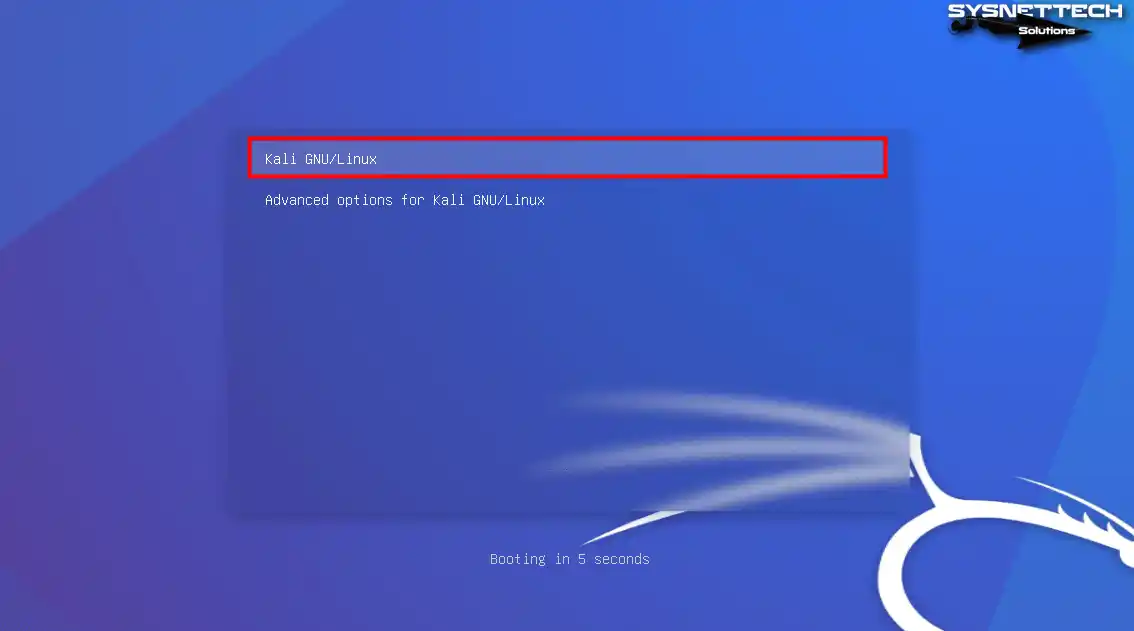
After rebooting your Kali PC, you will see the GRUB menu. In this menu, find the Kali GNU/Linux option. Then, highlight it and press Enter to boot your system.
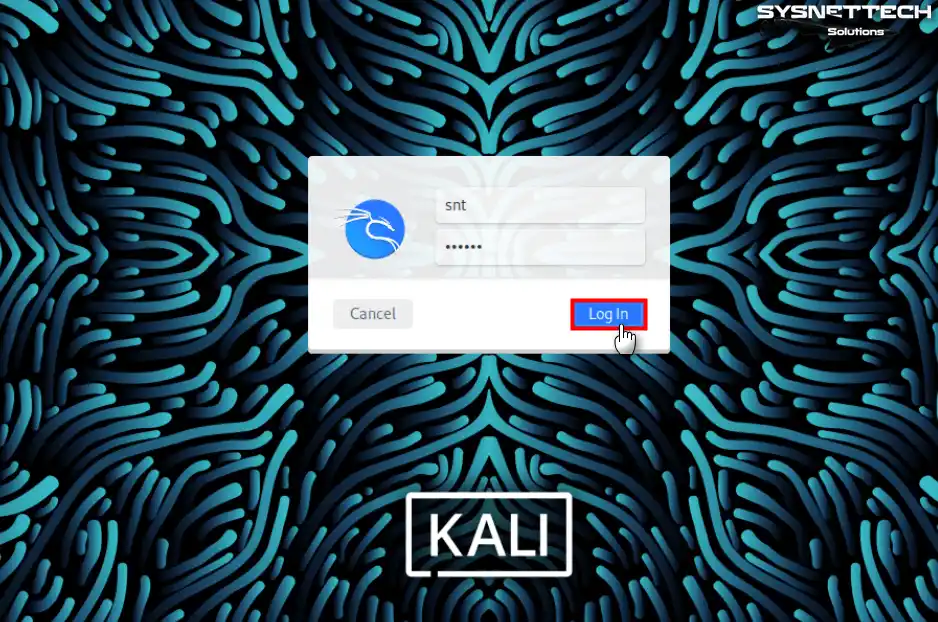
Step 28
After you type in the name of the user account you created, enter your password. Finally, click the “Log In” button. This will log you into your account.
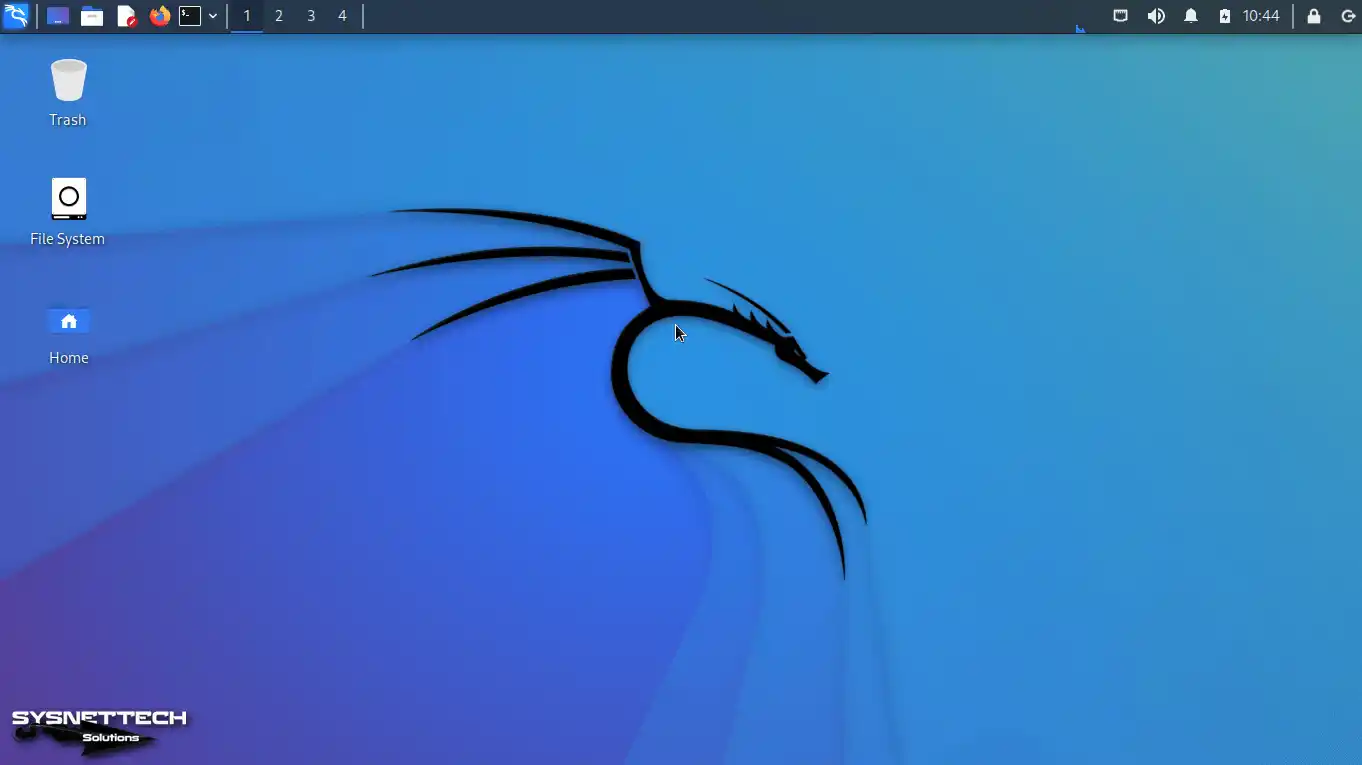
Step 29
After logging in, you will see the Kali 2024 desktop environment, as shown in the image below. Now, you can start exploring your new interface and Kali functionality!
Step 30
After everything, open the terminal to check your Kali OS version. Then, you will be able to see your OS information by executing the command lsb_release -a.
lsb_release -a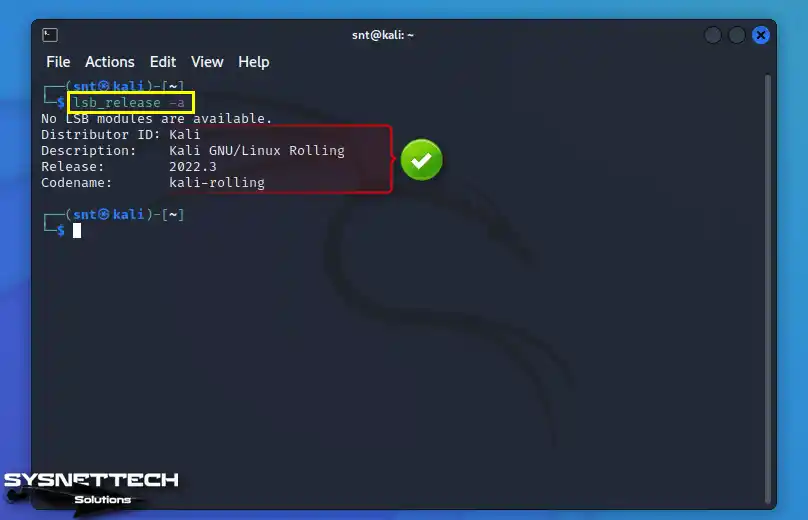
Video

Frequently Asked Questions (FAQ)
- Is it legal to use Kali Linux?
- How do I create a bootable Kali USB drive?
- How do I boot from a USB stick?
- Can I install Kali from USB to hard drive?
Conclusion
As a result, you can easily install Kali Linux 2024 on your PC. The easiest way to do this is to prepare a USB memory stick. If you own a CD/DVD drive, you can also burn an ISO image to these media and install it. As a result, you will have a robust system for network security testing and discovery on your computer.
Plus, whether you install it via USB or in a virtual machine, both options are possible. Therefore, the Kali operating system is suitable for both beginners and experienced professionals. With its new features and improvements, the 2024 version provides an improved user experience. It also offers various tools for cybersecurity. In short, using this OS is an excellent choice to improve your skills in this field.

1 Reader Comment
Thank you!