
This article will examine how to create and configure an internal virtual switch to enable the running of virtual machines wholly isolated from a physical network with Hyper-V Manager, an excellent virtualization solution used in Windows 10 or Windows 11 operating systems.
How to Create an Internal Network on Hyper-V
The main reason for using an Internal network in the Hyper-V Manager virtualization program is to ensure that the virtual machines are entirely independent of the physical network and only communicate with the host computer.
Creating an Internal Switch with Hyper-V is very simple. Before making this network structure, you can take a look at our article, Create External Virtual Switch.
To better understand the Internal network using Hyper-V, create two virtual machines and follow the steps in this article. Ping between virtual machines will be successful, and Ping will also be available on the physical computer’s network card.
How to Configure an Internal Network
Here are the steps to configure the Internal Switch with Hyper-V on the Windows 10/11 operating system:
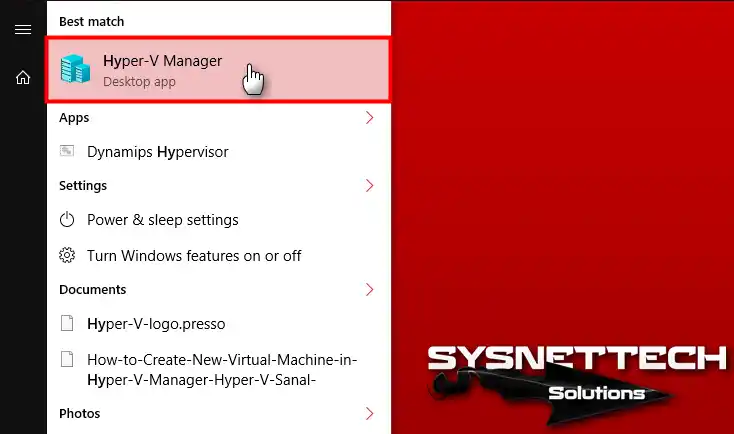
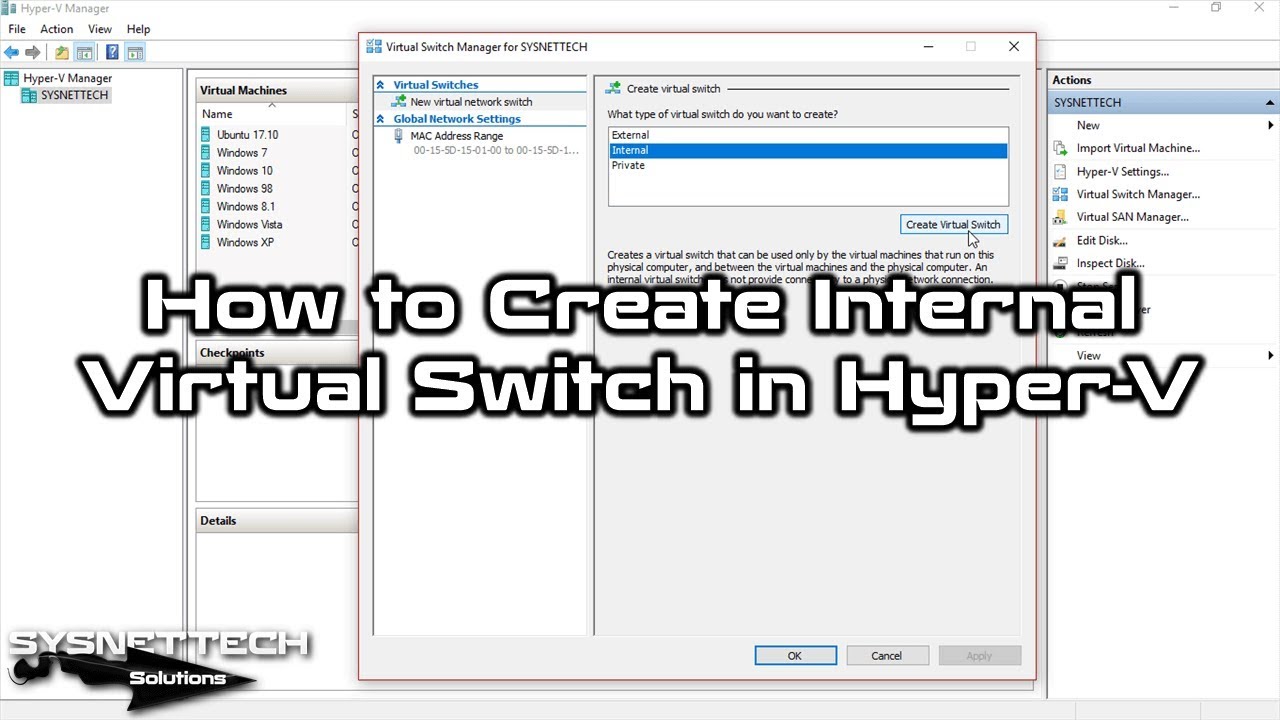
Step 1
First, run Hyper-V Manager from the Windows menu.
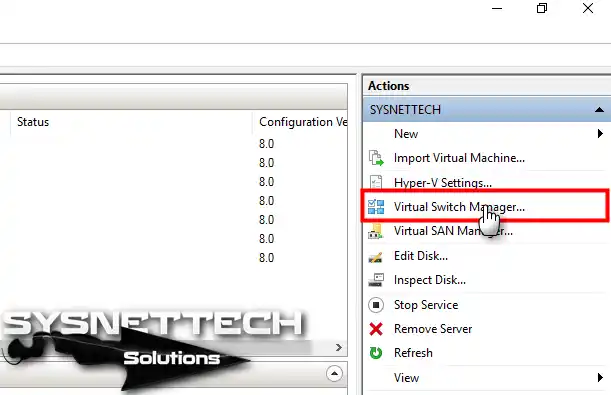
Step 2
From the Actions panel, click the Virtual Switch Manager option.
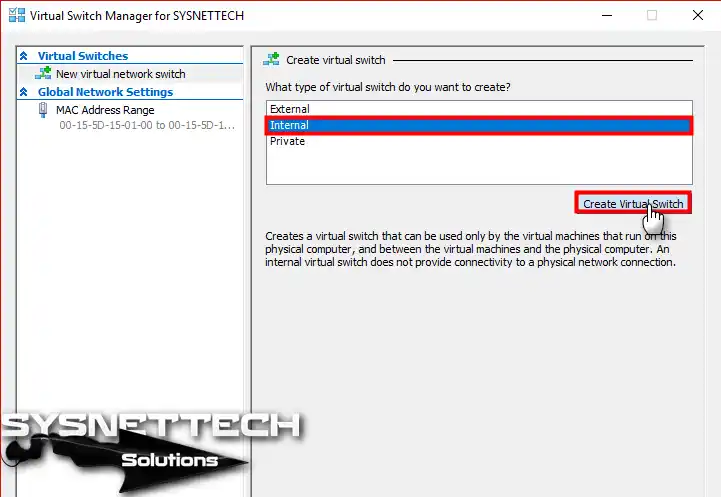
Step 3
In the Switch Manager window, select the Internal network and click the Create Virtual Switch button.
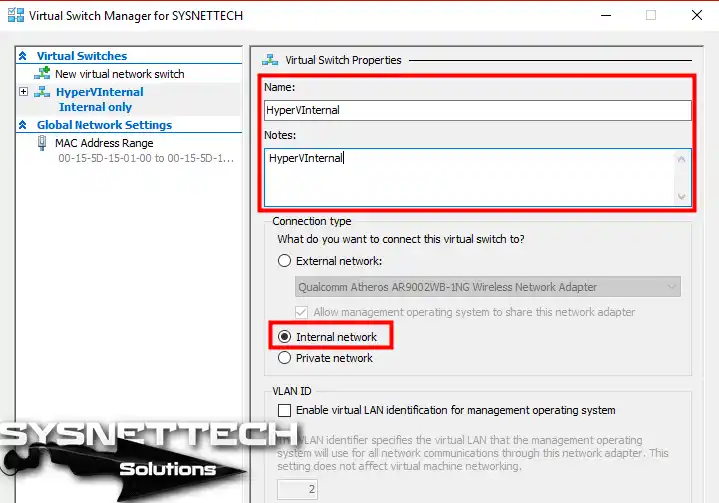
Step 4
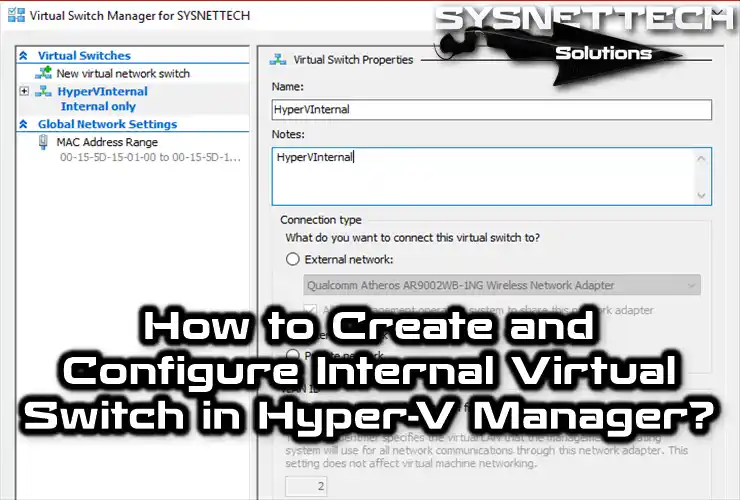
Type a name for the Internal Switch and click the OK button.
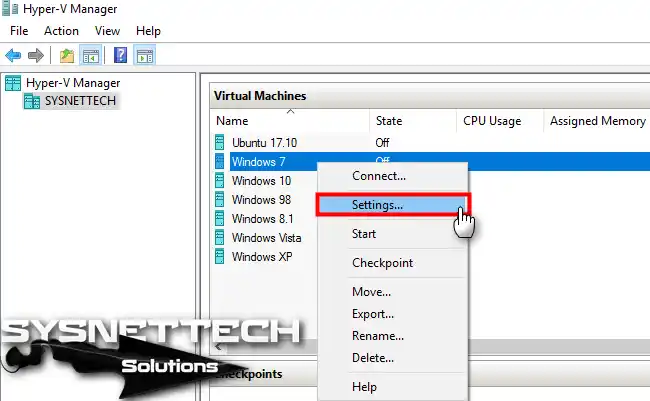
Step 5
To configure the settings of a virtual pc installed on Hyper-V, you need to open its settings window within the Hyper-V Manager. For example, you can access the settings by clicking the Right Button / Settings on the Windows 7 virtual machine.
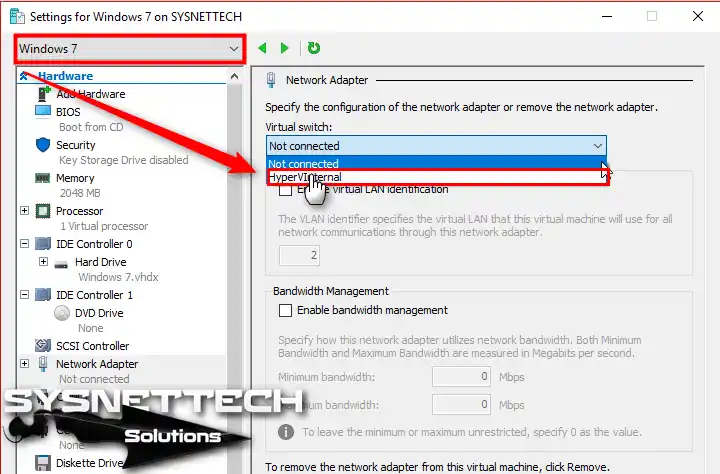
Step 6
Click Network Adapter in the left panel, select the HyperVInternal you created from the Virtual Switch setting, and click OK.
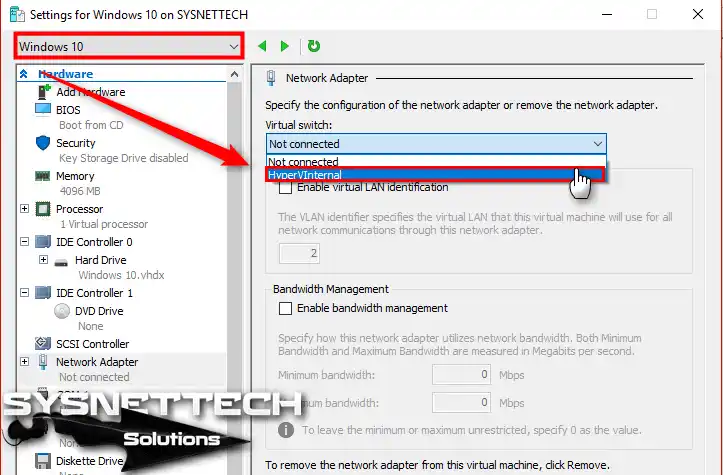
Step 7
Configure a second virtual machine configuration to test the network structure. Select HyperVInternal for Windows 10 as below and click OK.
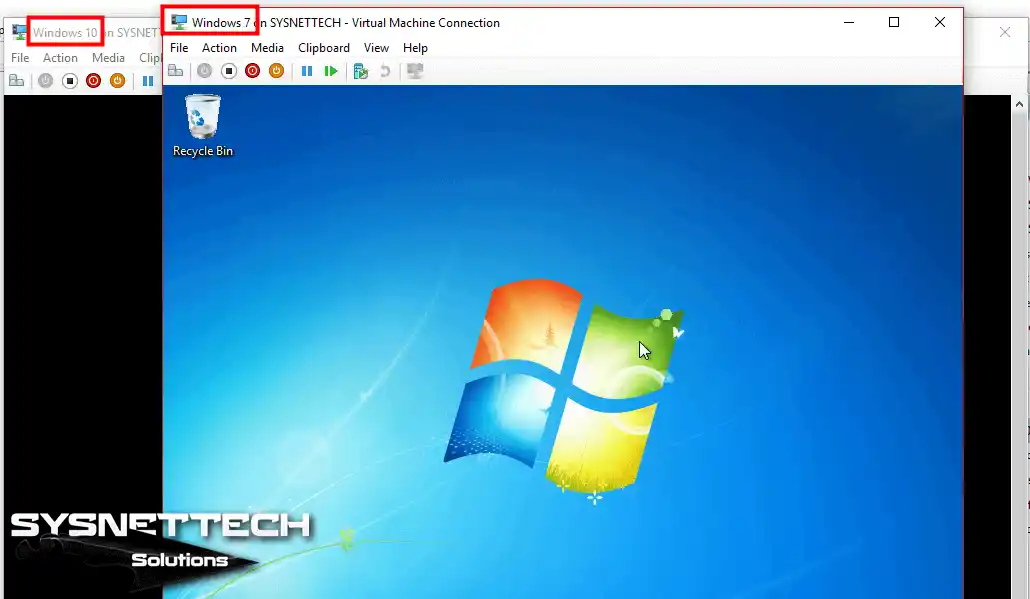
Step 8
Run the Windows 7 and Windows 10 virtual machines.
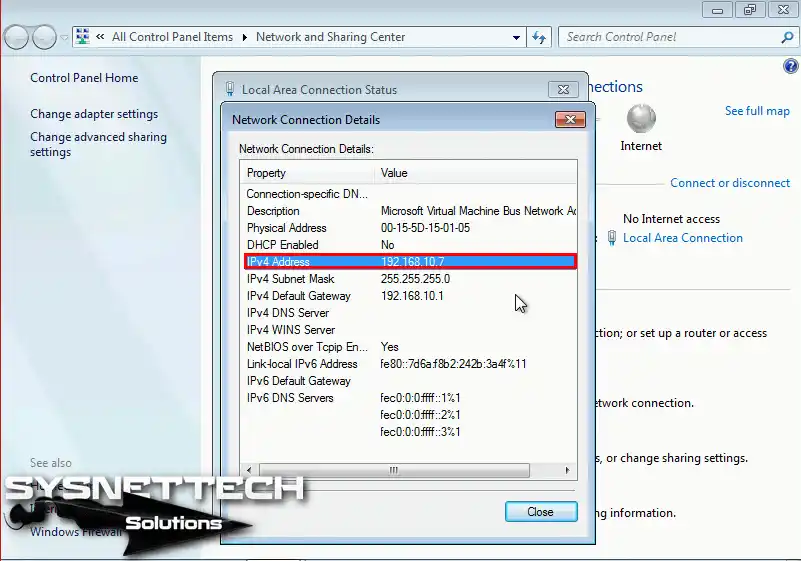
Step 9
Configure the Windows 7 network adapter IP settings as follows.
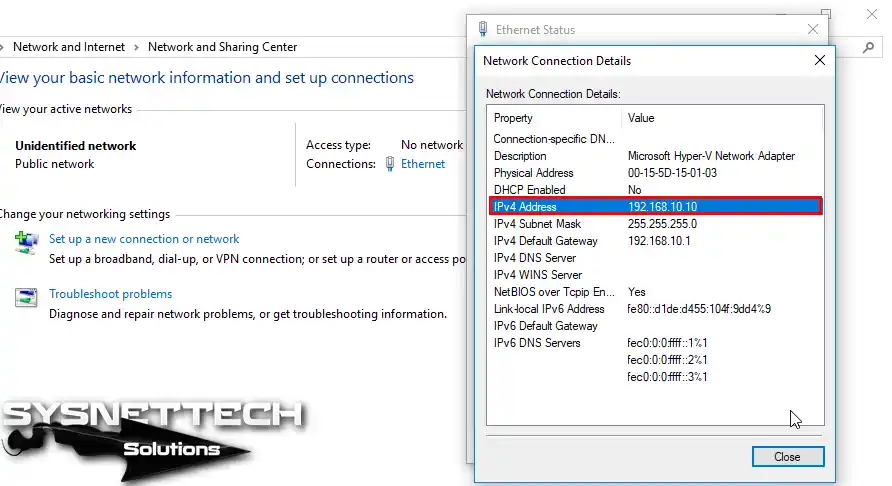
Step 10
Configure the Windows 10 virtual machine IP settings as follows.
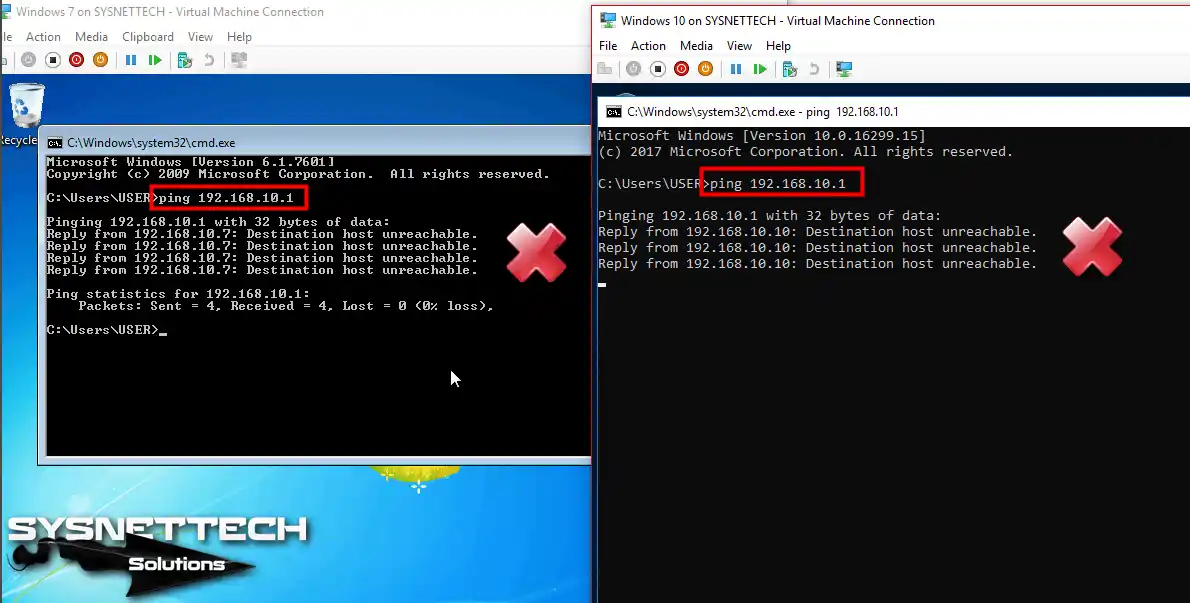
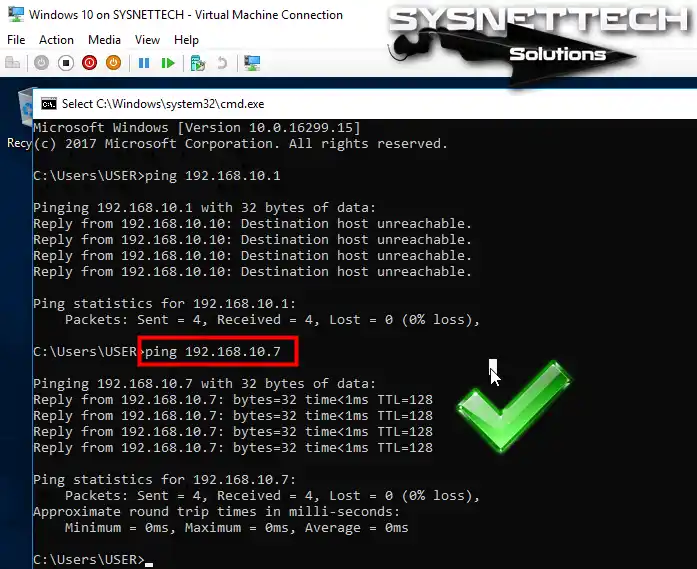
Step 11
To test the network connection, ping the default gateway of 192.168.10.1 from the virtual appliances. The ping operation will fail, as shown in the following image.
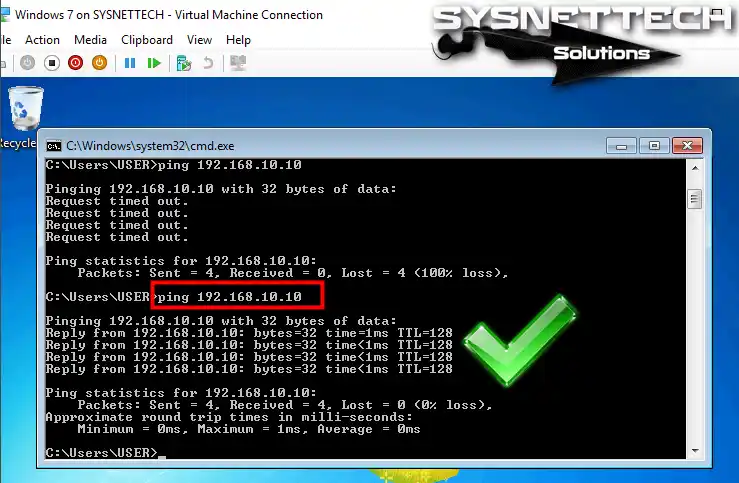
Step 12
Ping from Windows 7 to Windows 10 virtual machine will be successful.
Step 13
Pinging from Windows 10 to Windows 7 machines will be successful as follows.
Step 14
The reason for the failed result when pinging the default gateways of the virtual machines is the absence of a configured Internet Network Switch on your physical computer.
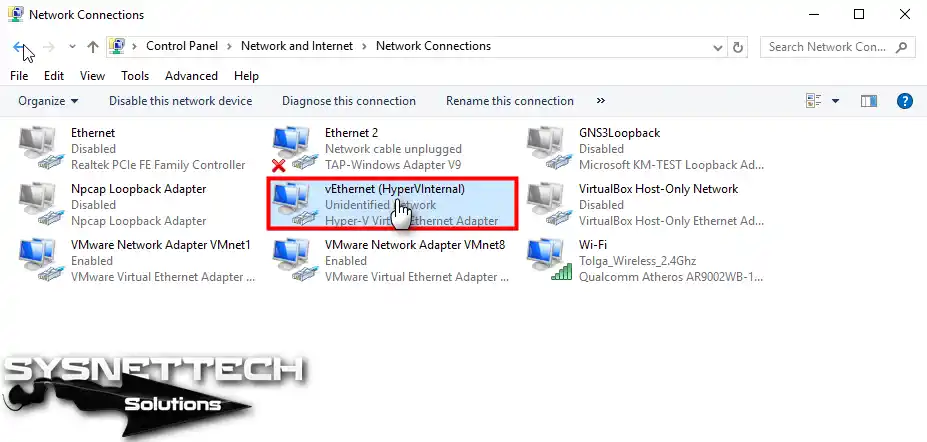
Step 15
Configure the vEthernet IP configuration and click OK to save the settings.

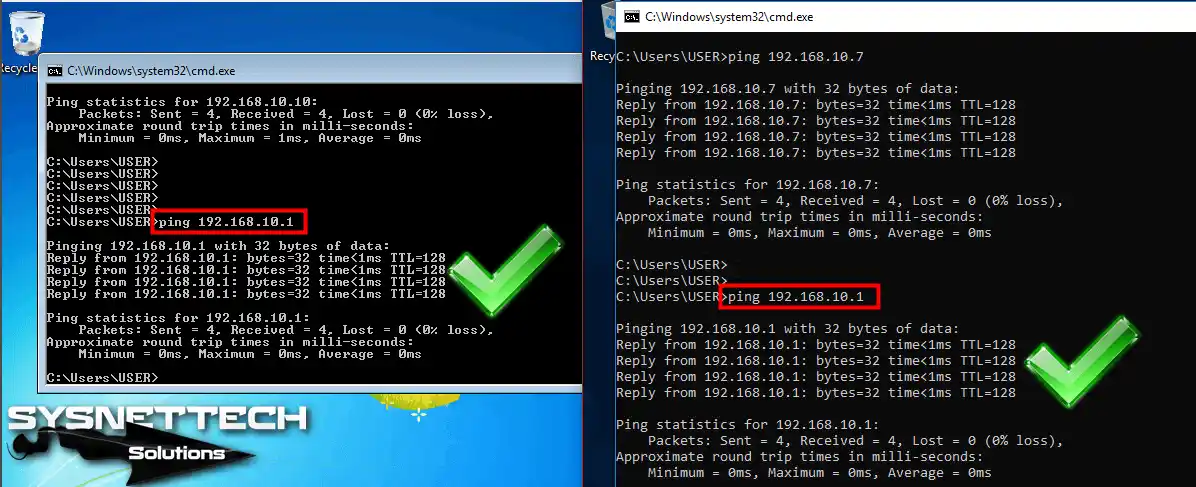
Step 16
Finally, the network connection can be tested by pinging the virtual machines to the default gateway. The image below illustrates that pinging the IP address 192.168.10.1 from Windows 7 and Windows 10 guest machines is successful.
Hyper-V Internal Network Configuration ⇒ Video
You can watch the video below to perform the Internal network configuration steps using Hyper-V and subscribe to our YouTube channel to support us!
Conclusion
In this article, we have created an Internal Virtual Switch and examined how virtual machines communicate in this network structure. In short, with this type of network, virtual machines operate independently of the physical network. Also, virtual machines can only access the physical device. Thanks for following us!

1 Reader Comment
Thank you . helpfull