
This guide shows how to connect your virtual machines on Hyper-V to the Internet or your own network. You can easily make and manage your virtual machines using Hyper-V in Windows 11 and 10. Because of this, it is critical to know how to manage your VM connections.
I will also show you how to disconnect your virtual machines from the network when needed. We will look at essential settings, check virtual switches, and adjust adapter options.
By following our guide, you will learn the basic information. You will also build the skills to manage network connections well. In the end, I want to help you make wise choices for your logical LAN.
How to Connect the VM to the Internet on Hyper-V
First, after you set up a virtual machine (VM) on Hyper-V, your first step is to make a Network Adapter. For this task, you should, of course, use its own tool, the Virtual Switch Manager.
The Switch Manager is used to connect your virtual machines to real networks. You also need it to make the network work.
After you make the Network Adapter, you need to connect it to your VM. This will create a LAN link and let your VM talk to other computers on the same LAN. You can choose to connect only to nearby or to the whole Internet; it is your decision.
The Hyper-V switch manager lets you do many different things. For instance, you can set up other arrangements based on your network’s topology.
Now, there are two main ways to give your guest machine an Internet connection. But we use each way for a different reason.
1. Adding a Single External Virtual Switch
This method lets you connect your guest machine straight to the outside network. As a result, you can access the Internet and communicate with other machines on your LAN.
Let’s say you want your VM to behave like a physical machine on the LAN. At this point, I recommend using this method with an external switch when necessary.
2. Adding Both Internal and External Switches
In fact, this method gives you flexible connections. The Internal Virtual Switch lets virtual machines on the same PC talk to each other.
It also lets them talk to the main computer. The External Virtual Switch makes an Internet connection possible. By using this method, you make sure your guest machine can reach the Internet.
Additionally, you can also contact other VMs or the host computer. I suggest using this setup for complicated LANs, like ones for testing and development.
In our guide, I will use the second method I mentioned. This way, we will be able to connect our Hyper-V system to the Internet.
If you follow the steps I have given, you can get the proper setup.
How to Create an Internal & External Virtual Switch on Hyper-V
To set up the Internet for your Hyper-V virtual machine, follow the steps below.
1. Open HyperV’s Switch Manager
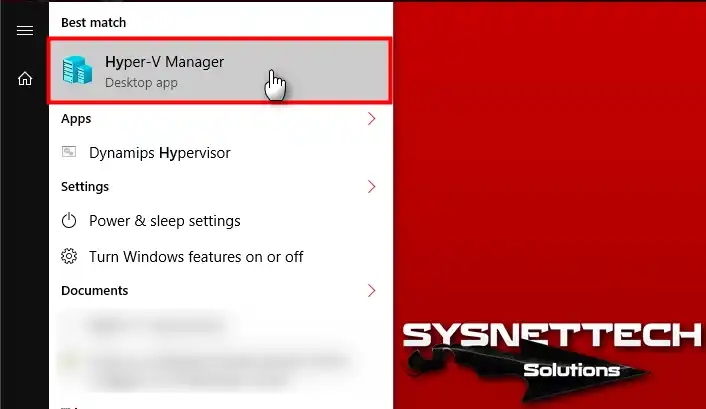
Step 1
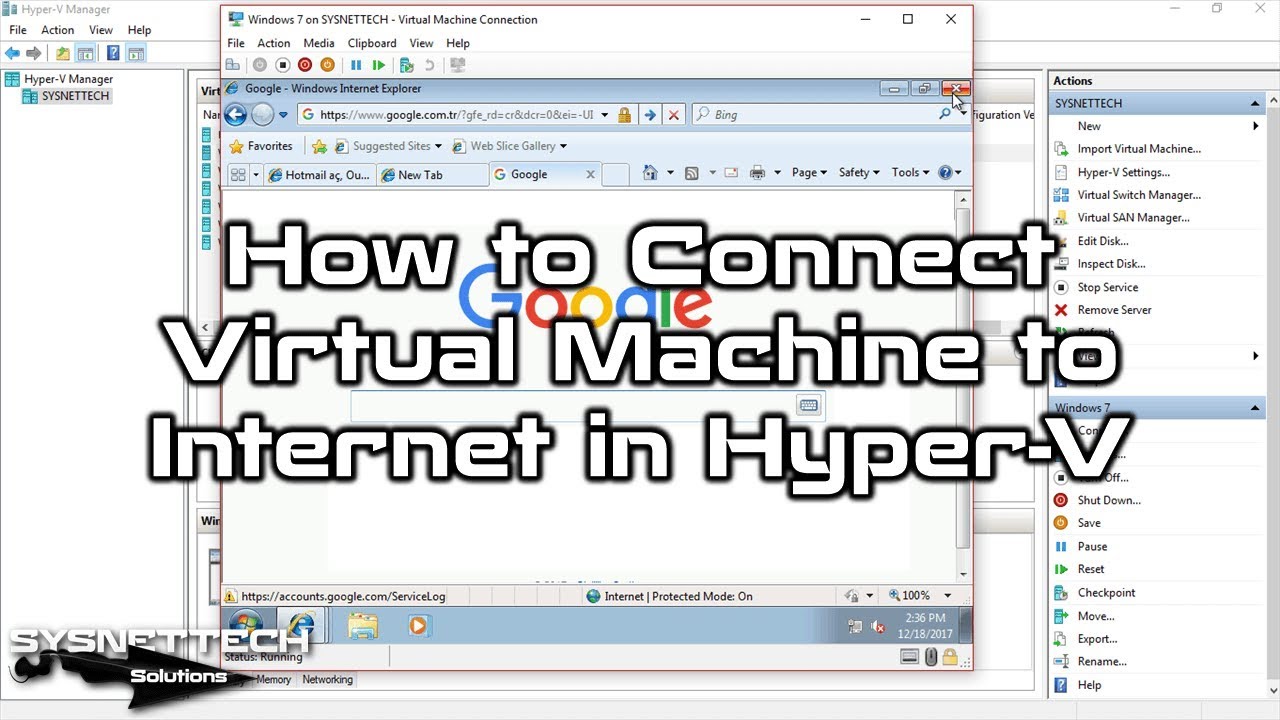
To launch Hyper-V Manager, first open the Windows search bar. Then type “Hyper-V Manager” into the search box. Finally, click on the result to run the program.
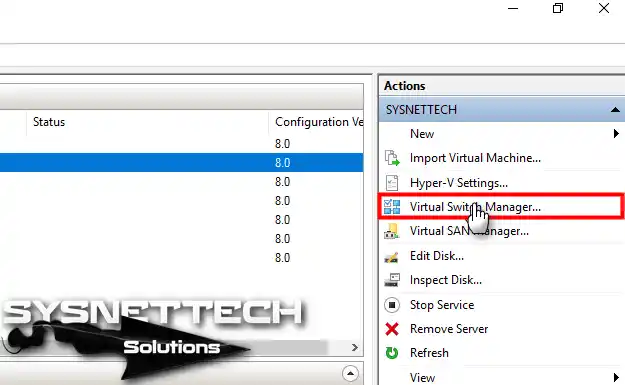
Step 2
First, locate the Actions panel. Then, click on the Switch Manager option here. As a result, you will have followed the steps shown in the image below.
2. Create an Internal Switch
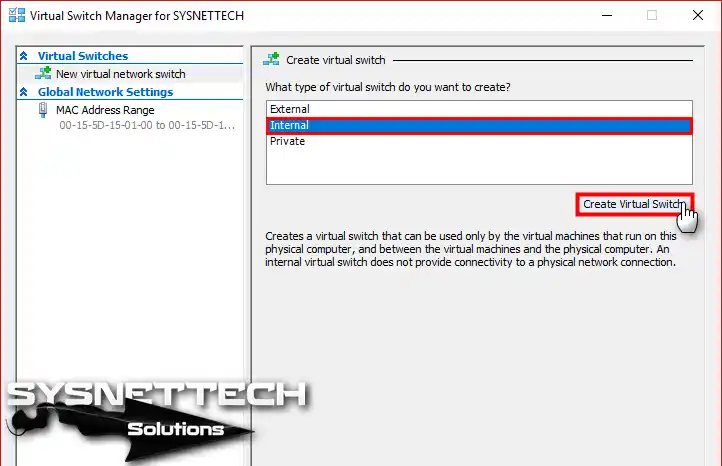
Step 1
This is where you configure the network adapter settings for the Hyper-V program. You can see in the image below that I haven’t added any vSwitches.
Therefore, select Internal to add a new vSwitch here. Then, press Create Virtual Switch.
Step 2
On the vSwitch Properties screen, you will see the Name & Notes options. Here, enter a name for the Internal switch you are creating. If necessary, you can add a note in the relevant box.
Also, be sure to pick “Internal” in the part where you choose the connection type.

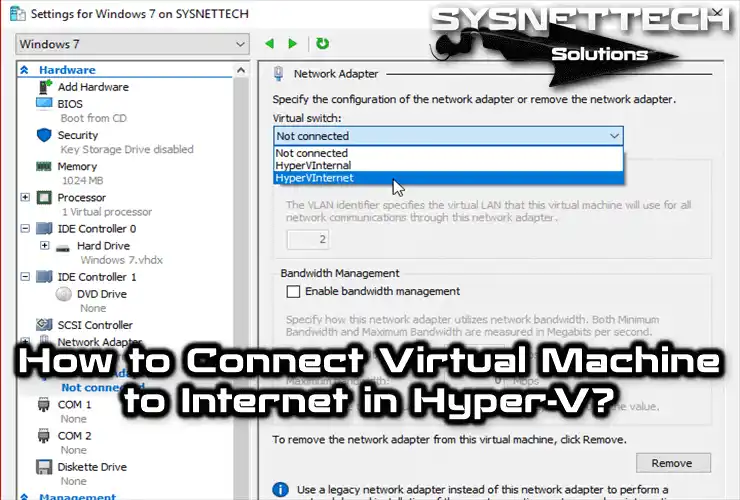
3. Configure the VM’s Network Adapter
Step 1
Now, you need to add the Internal key you created to any VM you choose. So, for example, I’m selecting the Windows 7 VM I set up earlier.
Open the settings for your Hyper-V guest machine and go to the Network Adapter section. From here, choose the Internal Switch you made before.
When you finish selecting, click OK to save your choice. This will successfully integrate the network adapter. Plus, it will also give you a better connection and more features.

Step 2
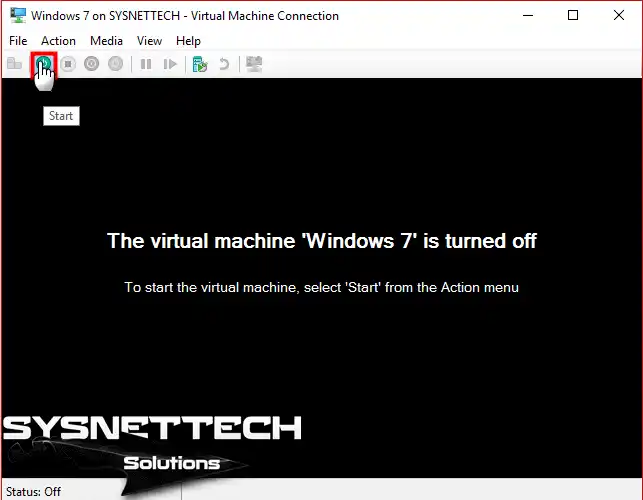
If everything is OK, connect to your Windows virtual machine and then start it.
Step 3
While your guest OS is booting, you need to take a step. First, find the vEthernet card on your main computer.
Hyper-V makes this logical network card. Because of this, you need to set up its TCP/IP settings. Finally, make a change like the one shown in the picture below.
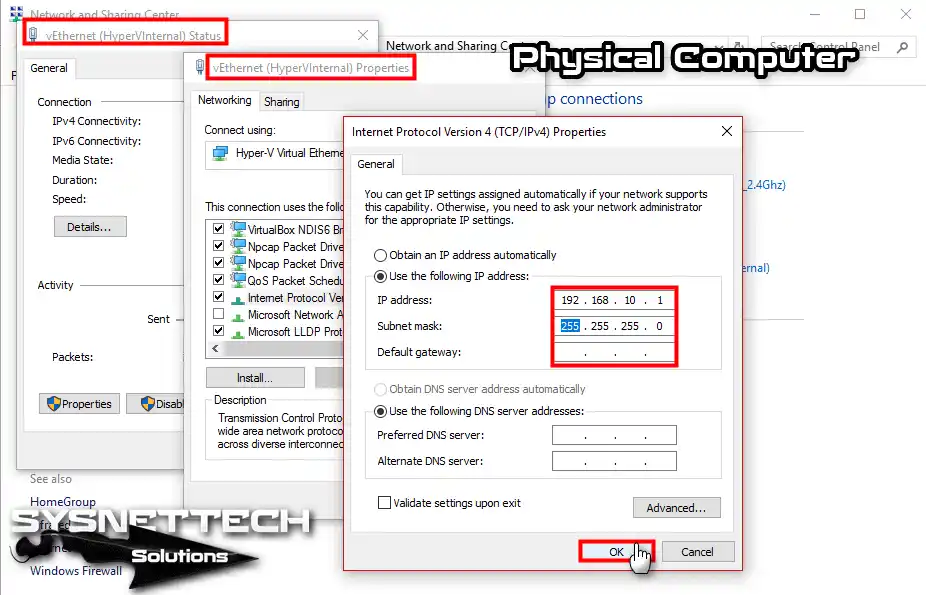
Step 4
To configure your Windows 7 virtual machine’s TCP/IP settings, please see the image below. As in the previous step, assign an IP address from the 192.168.10.0/24 network.

Step 5
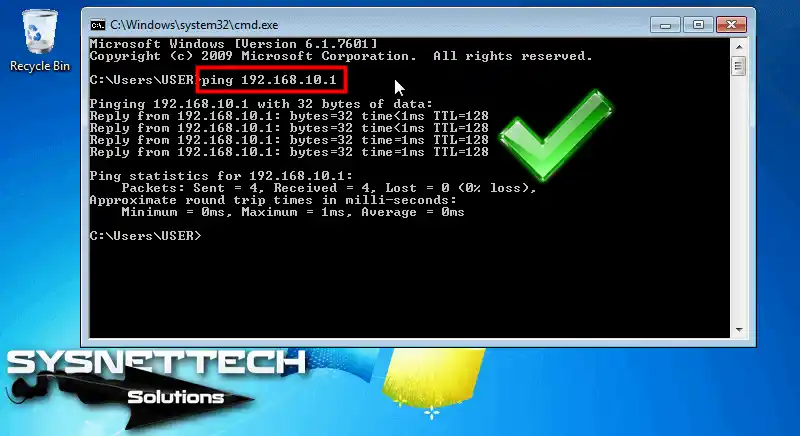
After configuring the IP address, first ping the default gateway (192.168.10.1) from your VM. If the process is successful, as shown in the image below, the Internal method is complete.
Connect Your VM to Your Physical Network with an External Switch
Step 1
In steps 1 through 9, we configured an Internal Switch. This shows you how to connect an internal virtual machine to the Internet. As a result, you will complete your network connection.
In this step, we will add an External Switch to the internal virtual machine. Next, we will associate it directly with our adapter.
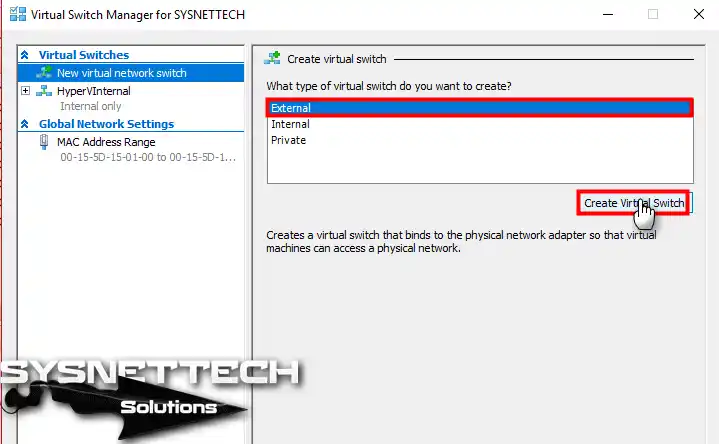
In the same way, inside the Switch Manager, pick the External choice like you see below, and then click Create vSwitch.
Step 2
Choose a name for your External Switch. Don’t forget to fill in the description as well. Most importantly, pick the LAN card on your main computer that links to the Internet. Doing this will make sure you have a smooth outside connection.

Step 3
Open your Windows 7 machine’s settings again. Next, select the Add Hardware option. Now, add a new Network Adapter here.
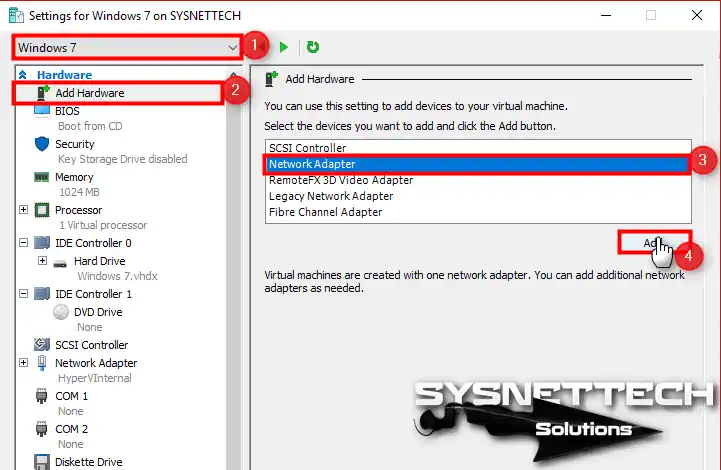
Step 4
Connect the External Switch you made to your Windows VM’s adapter.

Step 5
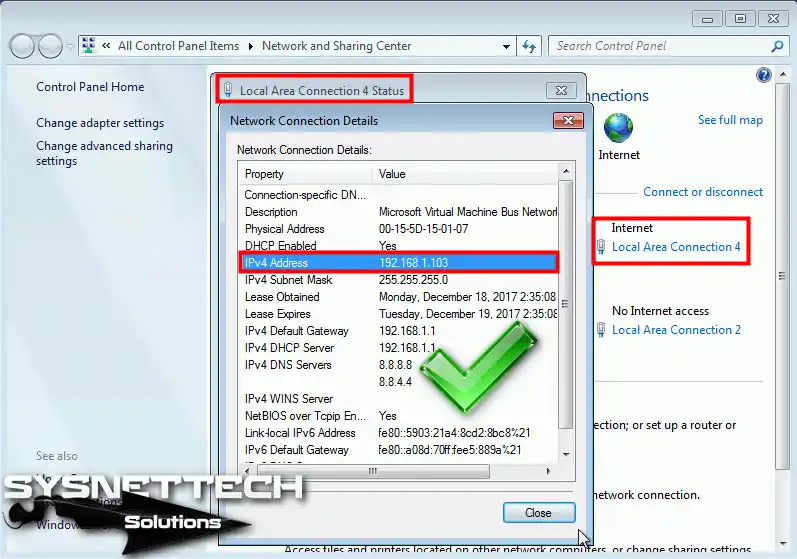
Check the network settings of your Hyper-V guest system. First, it should obtain an IP address from your local network, as shown in the image.
But if it does not get an IP address on its own, something is wrong. In this case, you may need to check your DHCP settings.
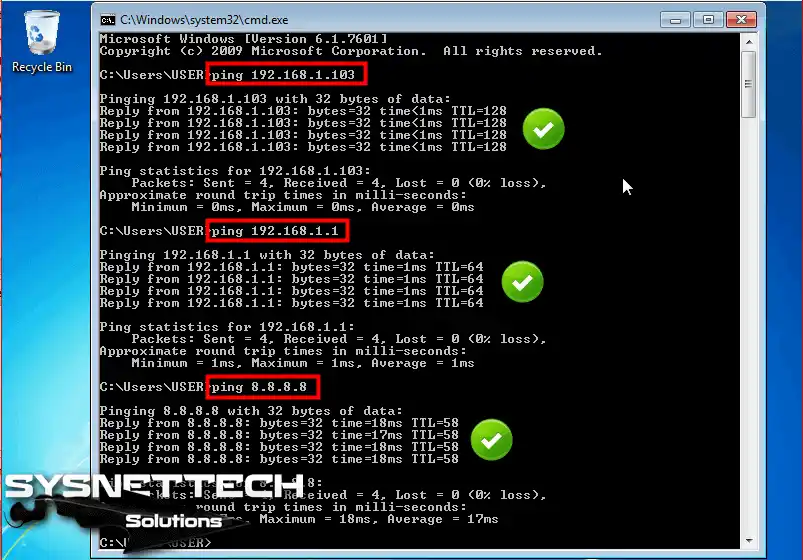
Step 6
Run CMD in your Windows 7 virtual machine. Then, ping your modem IP address. Then, test the Google DNS server. This way, you can check your Internet connection.
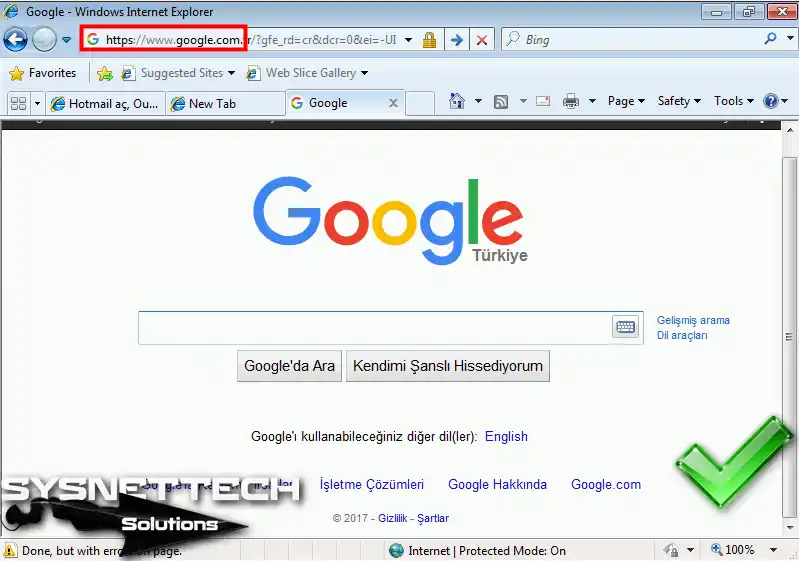
Step 7
Now, open any web browser on your Hyper-V system and try to visit a website. Thus, you will give a visual check of your connection.
How to Configure Internet Settings in Hyper-V ⇒ Video
You can also look at our YouTube video on how to share Internet access with your virtual PC in Hyper-V. I will walk you through each step of the setup and the required settings.
For more helpful guides on Hyper-V, think about subscribing to our YouTube channel. This way, you easily find the information you are looking for!
Frequently Asked Questions (FAQ) About VM Internet Sharing
- What do I need to connect my Hyper-V VM to the Internet?
- The VM is not connecting to the Internet. What should I check?
- Can I use NAT for VMs in Hyper-V?
New-VMSwitch -SwitchName "NATSwitch" -SwitchType InternalNew-NetIPAddress -IPAddress 192.168.100.1 -PrefixLength 24 -InterfaceAlias "vEthernet (NATSwitch)"New-NetNat -Name "NATNetwork" -InternalIPInterfaceAddressPrefix 192.168.100.0/24Conclusion
In short, connecting your Hyper-V virtual machines to the Internet is very important. So, this helps you get the most out of your VMs.
With our guide, you have learned how to set up both internal and external virtual switches. This allows the virtual machines and your main computer to talk to each other easily.
Your goal may be a simple setup, or you may need a complex network for testing. A good setup makes your virtual machines work much better.
If you set up these network connections well, your system will work better. It also makes handling resources much simpler. A good LAN connection helps you reach your virtualization goals.
Furthermore, I should mention that there is also a Private Switch feature. With this, you can create an isolated network between your VMs and build an OS independent of your host. For detailed information, see our guide on “Creating a Private Switch in Hyper-V.” This lets you make a safe space for tasks that need a separate network.

4 People Shared Their Experience
I followed the steps but ping fails. I am running hyperventilate in Windows 10 and guest is server 2012 r2.
I am curious how you would have multiple VMs to the switch while acquiring unique IP addresses from your DHCP/Router to access the internet. I am stumped on this currently.
Hello, AaronW!
By simply adding “External Switch” to your VMs in Hyper-V, you can get them all on the Internet. In short, you have to follow after Step 10.
If you want to try different network scenarios, you must add Internal Switch. For example, you can add 2 NICs to a server and enable the IP Routing service and then connect two different IP blocks (192.168.10.0/24 – 192.168.20.0/24) with each other.
I’ve created 3 VMs using hyper-V. I made 1 the Domain Controller. Then I added the other 2 as a member on the same domain using “Ncpa.cpl” and “Sysdm.cpl”. In other words, I placed all 3 under same subnet mask. Then I followed these steps; created the External Switch and still have zero internet access. Any clue as to why?