
In this article, I showed step by step how to make a Bridged network connection in VMware Workstation. I also showed how to use this network easily in virtual machines. Since I explained each step in a simple way, you can connect your machines to the outside network.
Also, since it is important to set it up right, I suggest writing down the settings you need. Plus, if you want to build more advanced virtual networks, you need to understand this network setup well.
How to Enable Bridged Networking in VMware Workstation & Player
After creating a virtual machine with VMware, we need to connect it to the Internet. For this, we need to set up VMware’s Virtual Network Editor software.
So, what is a Bridged network connection in VMware? This type of network connects the virtual machine to the real network using the host computer’s network adapter.
Especially when we set up a VM with VMware, the default network settings are NAT. In short, the program initially configures the guest machine as a NAT. In some cases, we may need to assign an IP address from our local modem. Especially, the VM receives an IP address from the DHCP server. But it will be different from the address block of our physical network.
Even if you set up your virtual system as NAT, you can easily access the Internet. In such a case, you can also communicate with your physical computer. Thus, you may want the VM to get its IP from the local DHCP server.
With the Bridged network setup, you can give the VM an IP address from the physical device’s DHCP. That is, you just set the VMnet connection type to bridge mode by using the Virtual Network Editor.
How to Use the Bridge Networking in a Virtual Machine
If VMware’s Bridged network is not working and you have Internet problems, the solution is simple. You can fix your virtual PC’s LAN connection by following the steps below.
Step 1
When you set up VMware Workstation, the Virtual Network Editor program has default settings. You can see these settings in the SS below as proof.
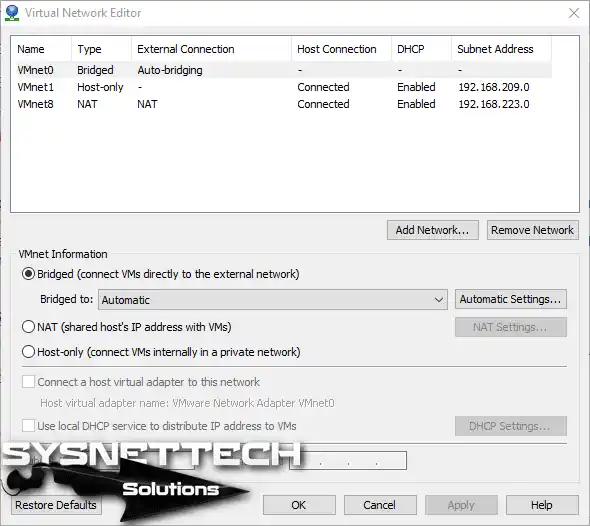
In the Virtual Network Editor program, there is a “Type” option in the VMnet0 section. Here you can see that the “Bridged” mode is active. VMnet0 acts as a bridge between the physical computer and the virtual computer. Briefly, this adapter is the default setting for VMnet0.
In the “Bridged to” option, when Auto-Bridging is on, you switch between network cards. In fact, you are choosing to make the network connection somewhat automatic.
Step 2
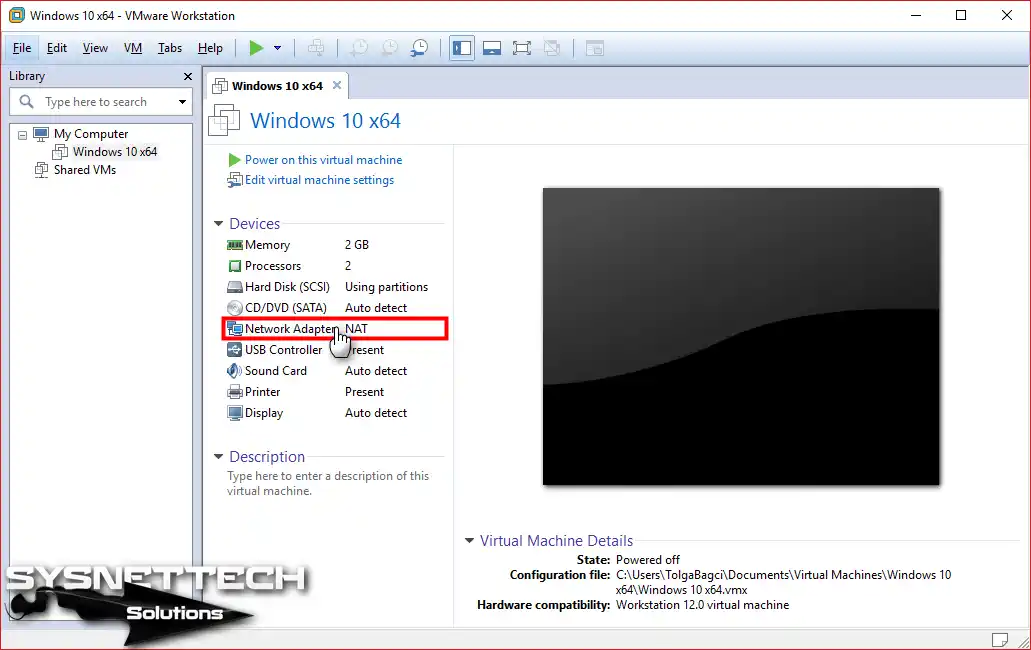
First, open your Workstation Pro app. Then, I assume you want to configure the Windows 10 VM as a bridged network. In this case, let’s click on the Network Adapter option.
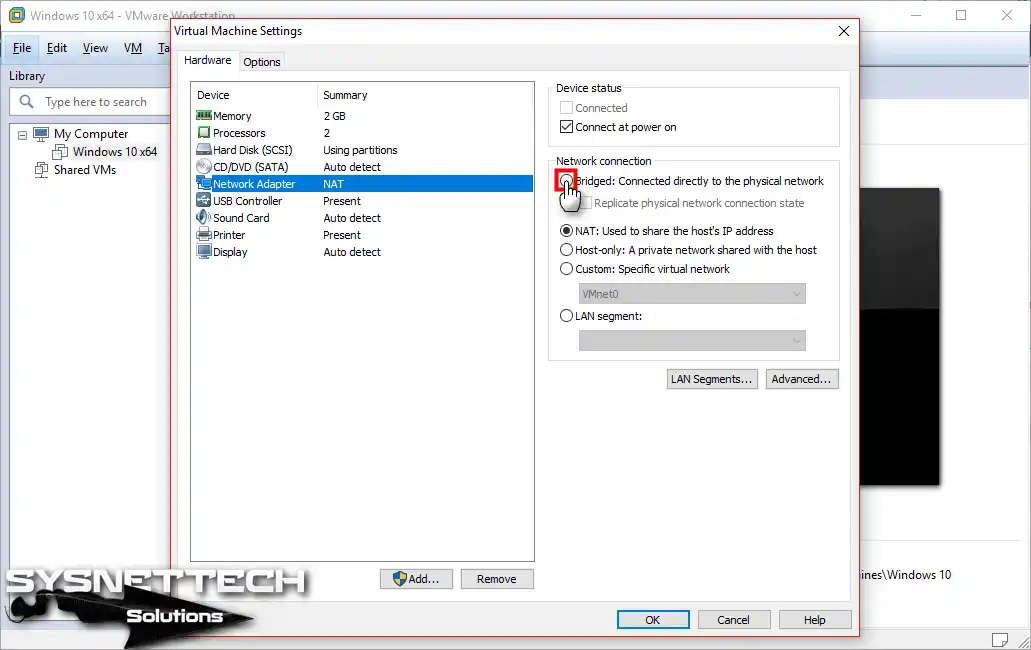
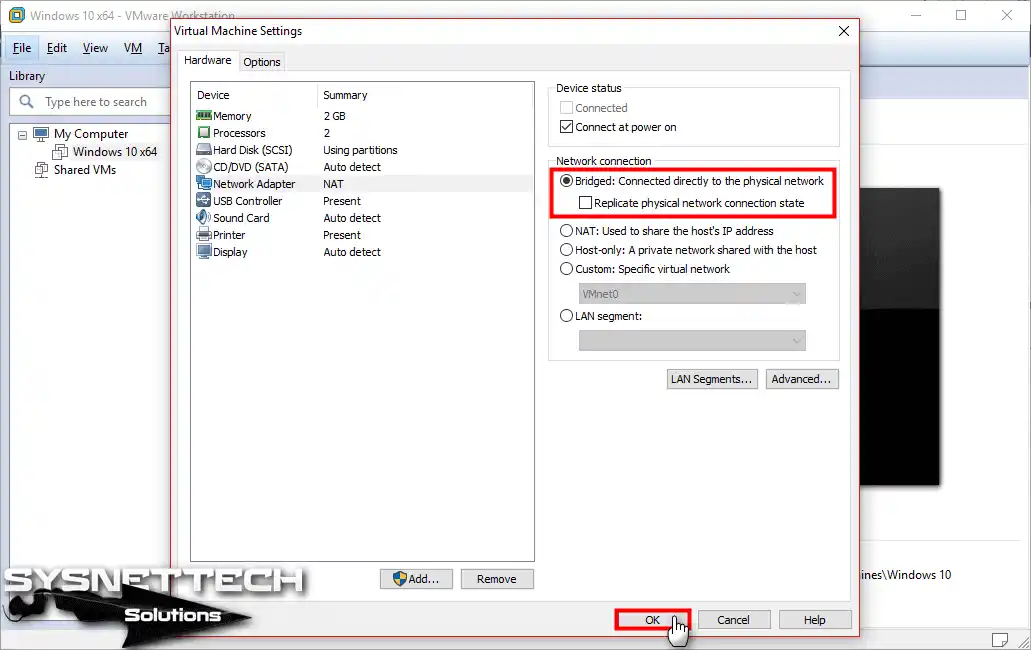
Step 3
Now, open the Virtual Machine Settings window. Next, click on the Network Adapter option. Finally, check the option that says “Bridged: Connected directly to the physical network.”
Step 4
After selecting the Bridge network setting option, click OK.
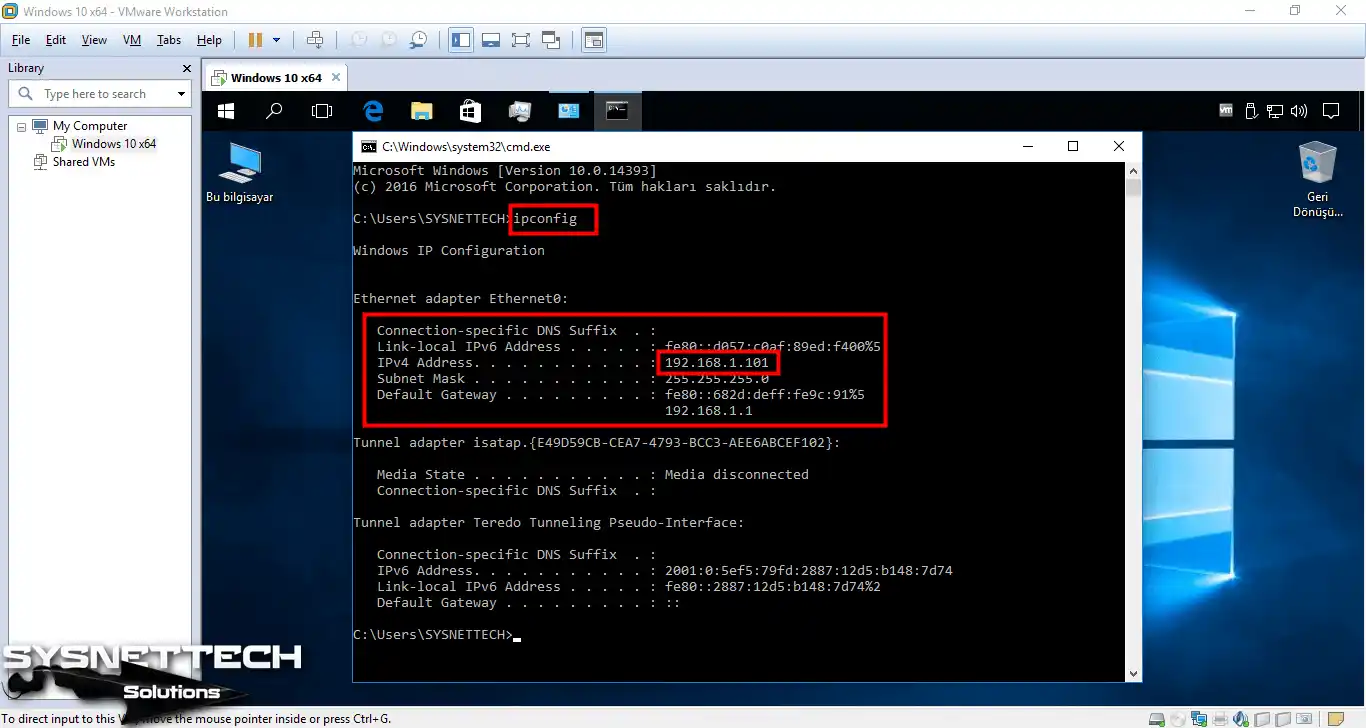
Checking the IP of the VM
Now I suggest that you restart the Windows VM (do this in every setting). Then, let’s check what kind of IP address it got. Let’s use the ipconfig command in the Command Prompt (CMD) screen. At this point, you can verify if the PC has obtained an IP from the physical LAN.
After setting up the bridged network, open an Internet browser. If it works, it means your virtual PC got an IP from the physical network.
Also, type “ping www.google.com” in the Command Prompt (CMD) window. In this way, you can check without a browser whether the VM is accessible.
You can refer to the Broadcom resource to get more information about Bridged networking.
Conclusion
In summary, I showed you the Bridged connection in Workstation and Player. Also, if you have chosen ‘Bridged’ in the editor, do not forget a detail. You need to select the same network in the virtual machine. In other words, you should use Bridged or the VMnet you specified.

1 Reader Comment
nice work , thanks for sharing