
In this article, we will utilize a virtual machine running on VMware Workstation or Player to access the Internet via a NAT configuration.

How to Configure NAT on VMware Workstation Pro
First of all, let’s talk briefly about what NAT is. NAT converts the IP addresses on the LAN to a single global IP address, allowing PCs on the network to connect to the Internet. After installing the VMware Workstation virtualization program on Windows 10 or Linux, the network settings of the newly created virtual machine are configured for NAT networking.
The NAT setting is the first configuration that is automatically applied after the virtual machine is set up. In short, when you install a new virtual machine in VMware, the NAT setting for the new virtual machine is automatically set by the Virtual Network Editor.
How to Use a NAT Network on a Virtual Machine
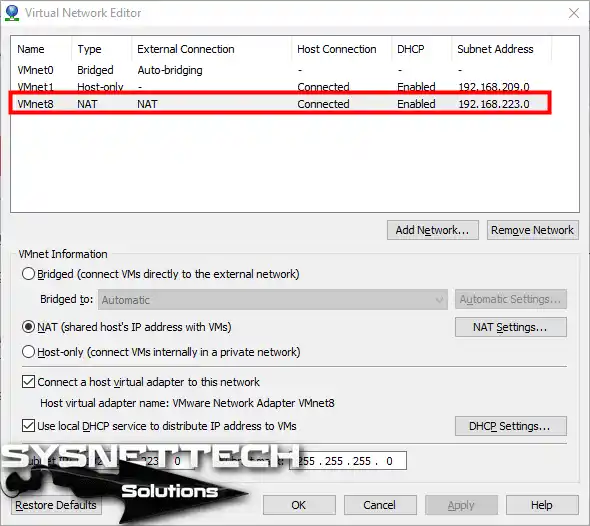
By default, the NAT settings on the Network Editor program are as follows. You can verify that VMnet8 is configured as a NAT network by referring to the following image.
After creating VMnet8 using the Virtual Network Editor in the virtualization software, follow the steps below to configure the Network Address Translation (NAT) settings on the virtual machine.
Step 1
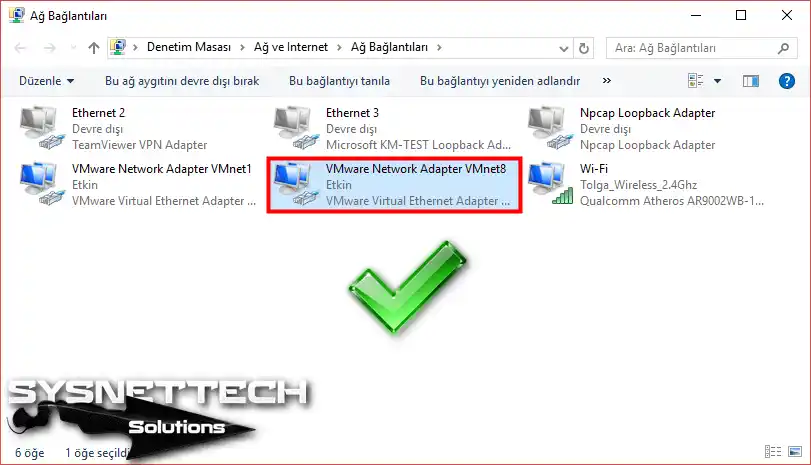
After you have installed VMware Workstation, you will see VMnets listed in the Network Connections window of your computer, as shown in the following image.
You can examine the virtual network adapter defined for VMnet8, which is configured by default on the Virtual Network Editor, from the following display.
Step 2
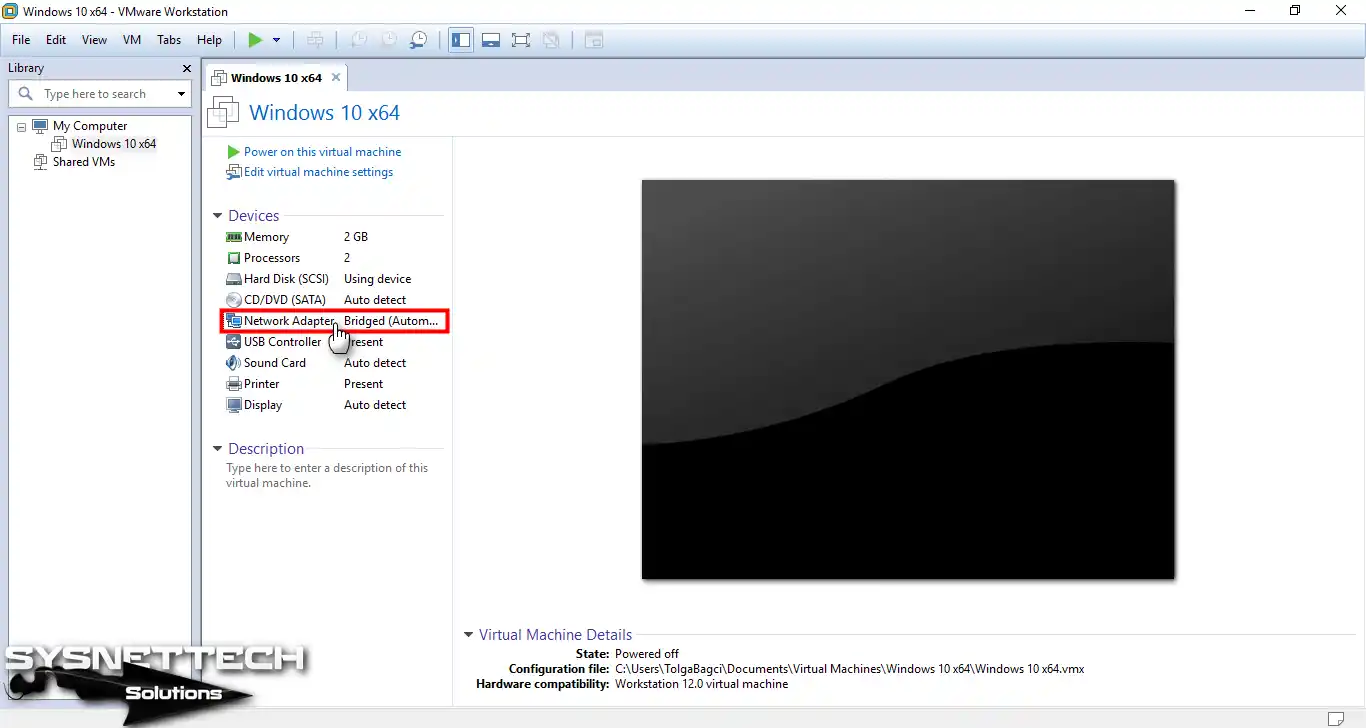
You must also enable VMnet / NAT on the virtual machine that you configured in VMware’s Virtual Network Editor. Now, open the VMware program and click on Network Adapter to configure the network connection of a virtual machine.
Step 3
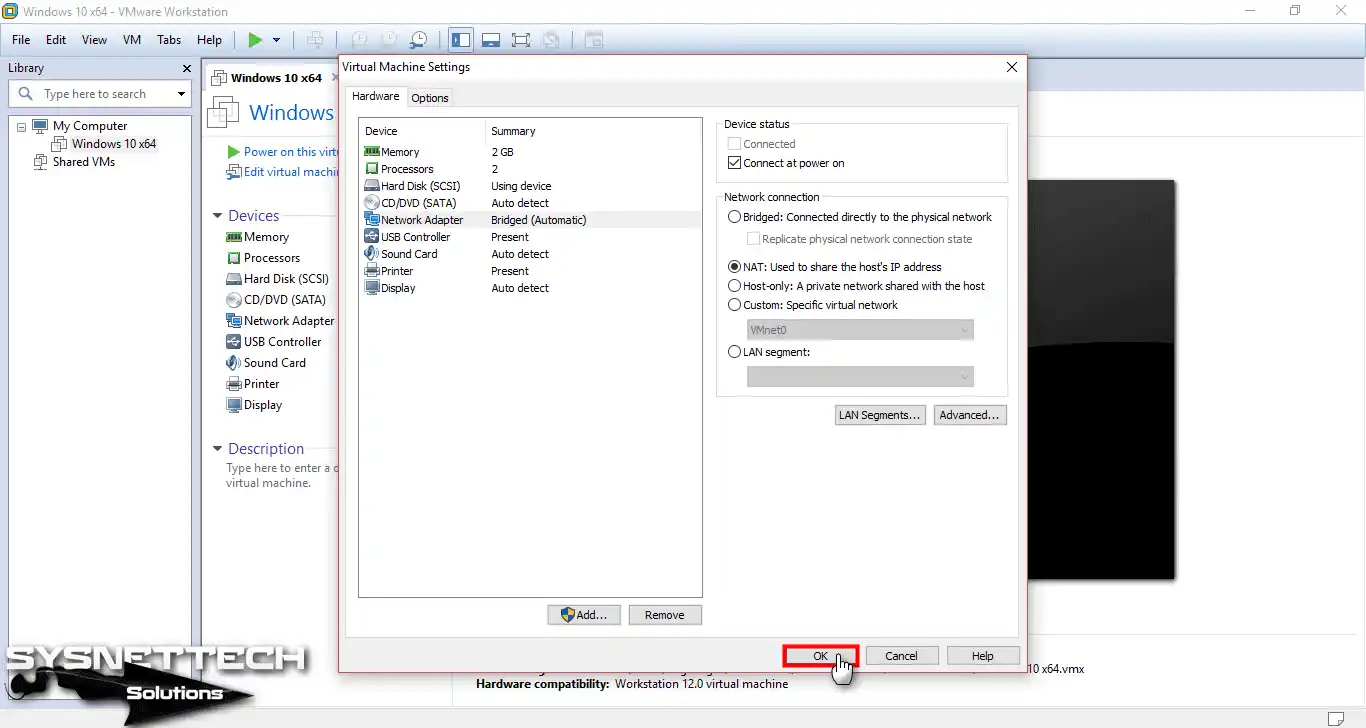
After the Virtual Machine Settings window opens, select the “NAT: Used to share the host’s IP address” option for the network connection of the Windows 10 virtual machine as follows.

Step 4
Once you have selected the NAT option, click the OK button to close the window.
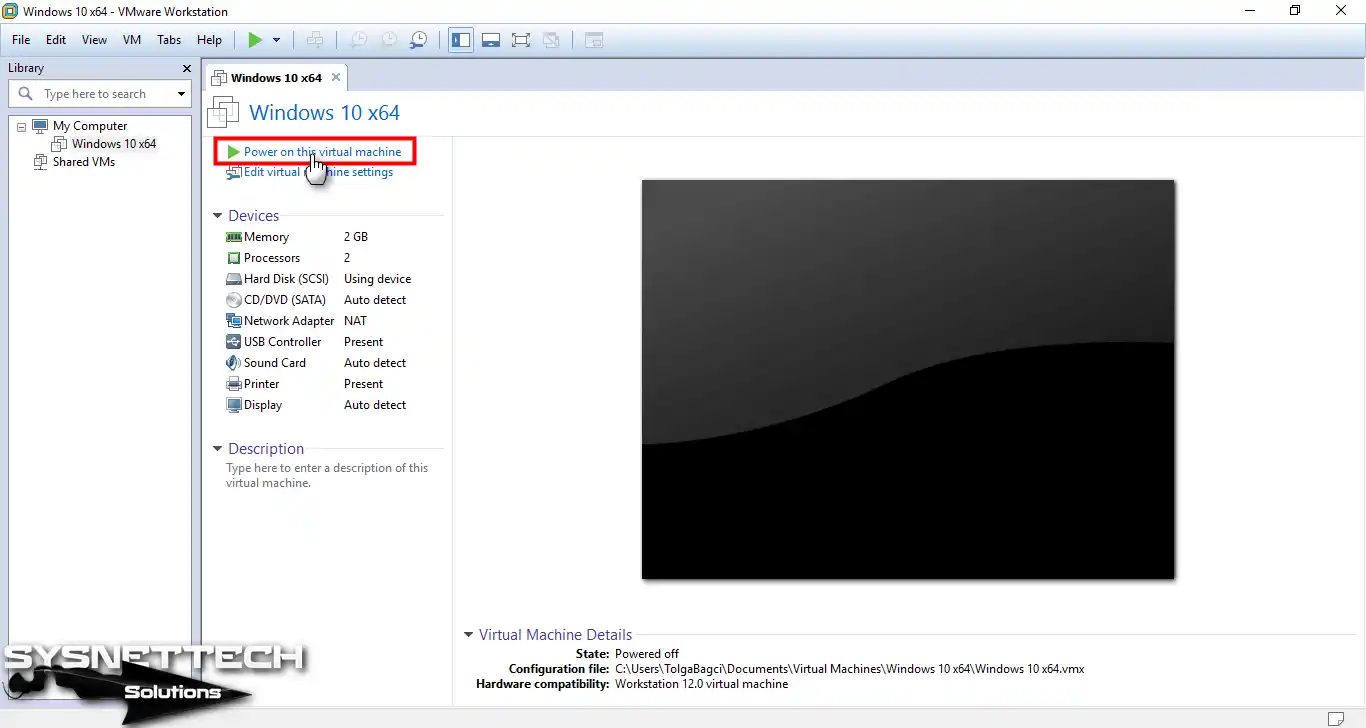
Step 5
Now, run the virtual PC by clicking the “Power on this virtual machine” button.
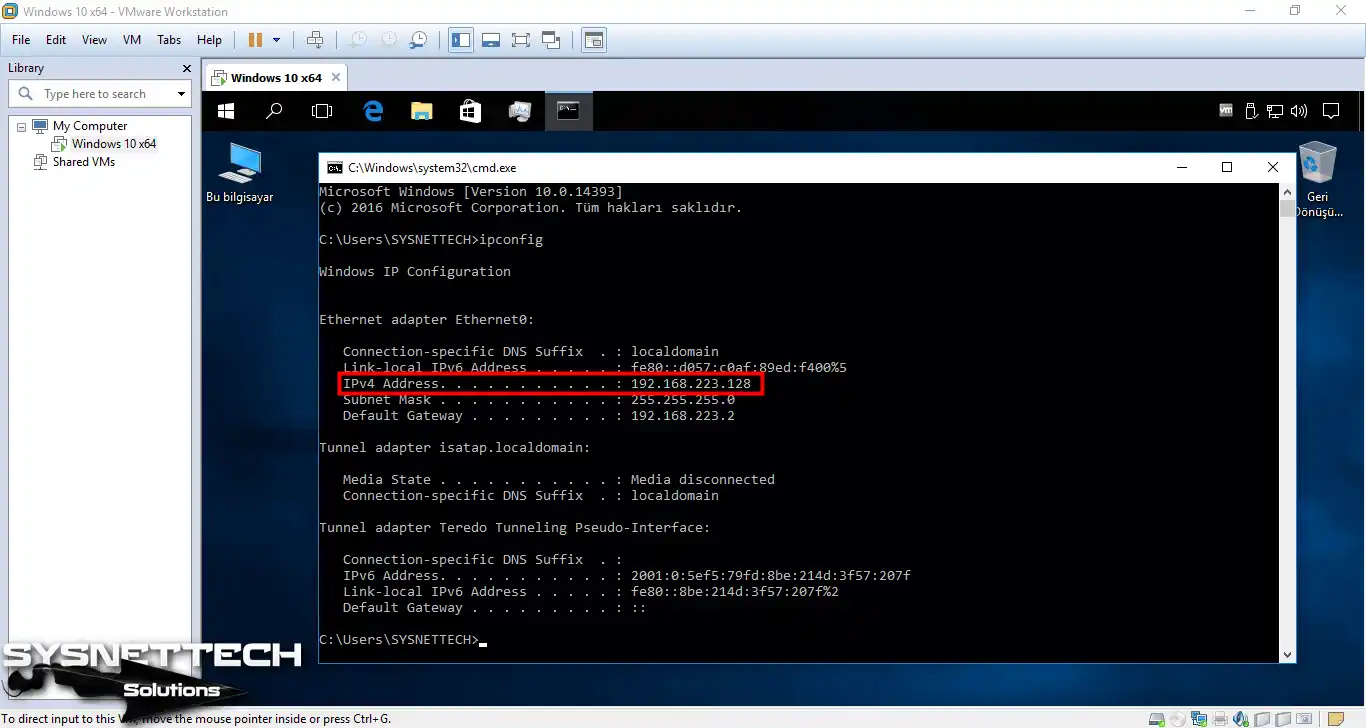
Step 6
After running the Windows 10 virtual machine, press the Windows Key + R to open the Command Prompt and check the IP address that the virtual machine received.
After opening the Command Prompt (CMD), you can check the IP address of the virtual machine by running the ipconfig command. The IP address block of the virtual machine is 192.168.223.0/24. You can change the IP address block from the Virtual Network Editor.
Step 7
After you configure the network settings of the virtual machine as NAT, you can use an Internet browser to check the Internet connection, or you can test the connection by pinging a website from the Command Prompt.
Conclusion
In this article, we have reviewed step by step how to configure a NAT network connection using the Virtual Network Editor program on VM Workstation. Remember that you need to create a VMnet Bridged for the VMnet NAT you created on the Virtual Network Editor. Thanks for following us!

1 Reader Comment
Oi. Meu notebook é Windows 7 Professional, depois de já ter sido W7 original, W10, e agora W7 novamente. E nesses dias, após iniciar, está aparecendo a mensagem: VMWare Nat Service parou de funcionar/ Fechar o programa. Porém, tudo funciona normalmente. Devo realizar algum procedimento ou deixar como está?