

In this guide, you’ll learn how to set up LAN Segment settings. We’ll show each step for virtual machines in VMware Workstation.
Configuring LAN Segment in VMware Workstation
In previous guides, we set up Bridged, Host-Only, NAT, and Custom Specific Virtual Network settings. Next, we’ll look at this feature in VMware Pro. Also, we’ll see what it does.
What is this feature in VMware? It’s a private group for virtual machines. With it, VMs don’t get IP addresses from a local DHCP server.
When you use this virtual setup, the VM gets an IP via APIPA. APIPA stands for Automatic Private Internet Protocol Addressing. So the machine gets an address from the 169.254.0.0/16 block.
VMware Workstation 8 and earlier versions called this structure Team. However, new versions renamed it.
In this setup, all VMs get IPs from the 169.254.0.0/16 block. Additionally, they never get IP addresses from a DHCP server.
For more information on APIPA, you can read this Microsoft article.
Creating a Private VLAN in VMware and Adding VMs to the Same Group
Set up two virtual machines in VMware Workstation as Client1 and Client2. Then add both VMs to the same group. Follow these steps in order.
Step 1
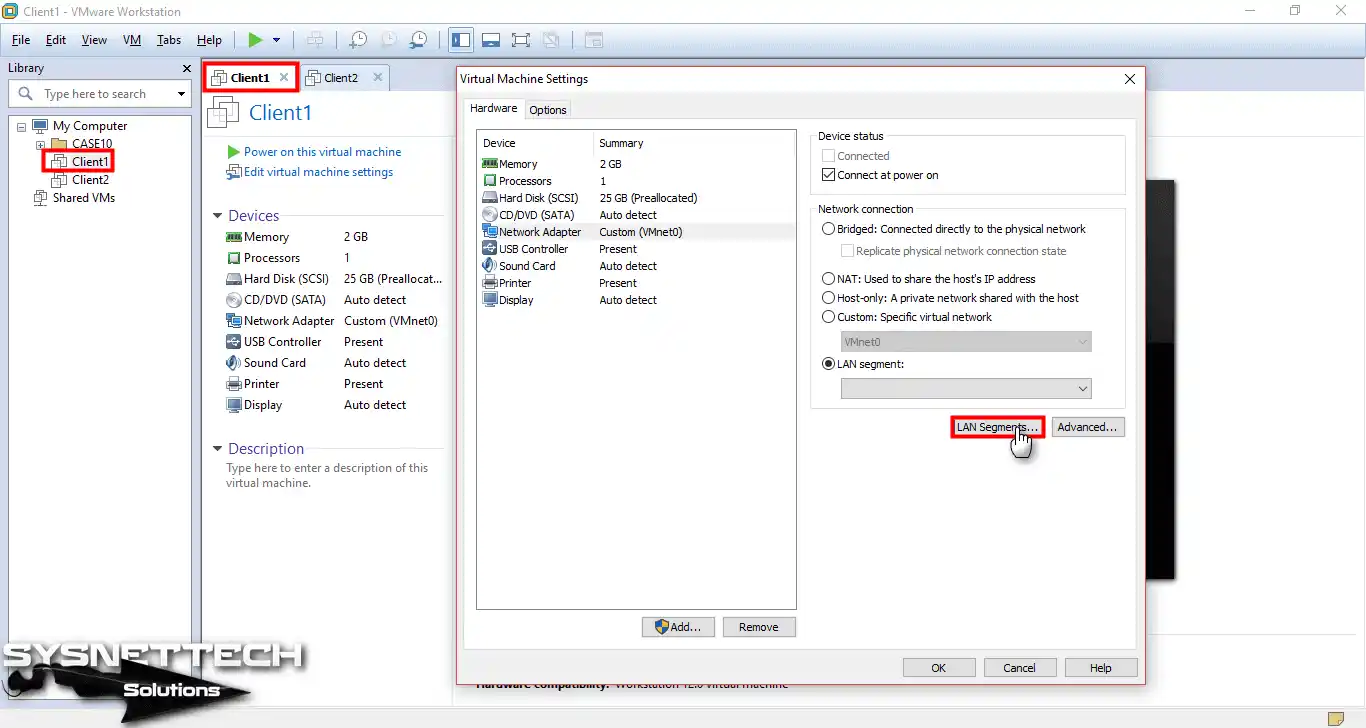
To add VMs to the same group, create a new Segment. Open the Client1 virtual machine. Then click the Network Adapter option. In Virtual Machine Settings, check the LAN Segment option.

Step 2
After you check it, click the “LAN Segments…” button.
Step 3
In the Global Settings window, press the Add button.

Step 4
When you click Add, VMware creates the Segment1 group. Then click the Rename button to change the group’s name.
After you rename the new local group to Local, click OK to close the window.

Step 5
This time, you can see the Local group in the drop-down menu.

Step 6
Select Local and click the OK button.

Step 7
As the image below shows, Client1 VM now belongs to LAN Segment / Local.
You don’t need to create a new Segment for Client2 VM. Instead, add Client2 VM to the Local group. Just select Local from the adapter settings.

Adding the Second VM and Testing the Setup
Step 1
After you create this setup in VMware Workstation, run Client1 and Client2 VMs. You can check Client1’s APIPA IP address in the image below.

Step 2
The IP address that Client2 VM got looks like this.

Step 3
In this setup, VMs in the same group can talk to each other. Now, ping Client2 from Client1 VM to check the link.
If the ping fails, turn off Windows Firewall.

Step 4
Similarly, ping Client1 from Client2 VM and test the link.

Step 5
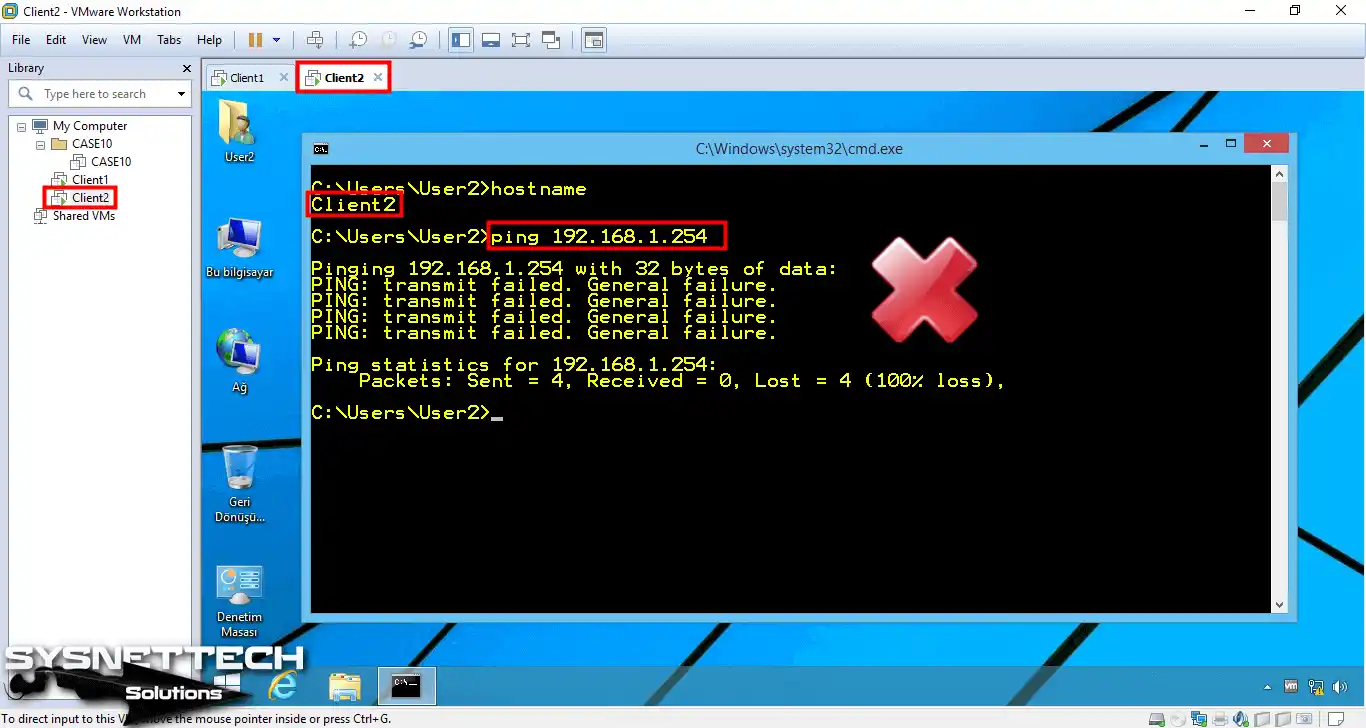
In this setup, VMs can never access the physical LAN. Ping your 192.168.1.0/24 physical LAN from Client1 VM and check the result.

Step 6
Similarly, ping your physical LAN from Client2 VM to check connectivity.
Assigning Manual IP Addresses to VMs and Testing the Setup
VMs in the same Segment can get IPs on their own via APIPA. However, you can assign manual IP addresses to VMs in the group.
After assigning manual IPs, test the link. Follow these steps in order.
Step 1
To assign a manual IP to Client1 VM, open Network and Sharing Center. Then click the Ethernet adapter. Assign Client1 the IP 192.168.10.10 from the 192.168.10.0/24 range.

Step 2
Similarly, assign Client2 VM an IP from the 192.168.10.0/24 range. Client2’s IP address is 192.168.10.20.

Step 3
After assigning manual IPs, check that the link works, as shown in the image below. Once you finish these steps, you can build more advanced topologies with private groups. This way, you can improve and test your skills.

Six Questions About LAN Segment
What’s the difference between this feature and Host-Only? Aren’t both closed to the outside?
Why do machines get 169.254.x.x IPs? Is this normal?
Can I assign manual IPs to VMs? For example, something like 192.168.1.x?
Can I access a printer or server on the physical LAN?
What did older versions use instead? What was the Team structure?
I can’t ping in this setup. Windows Firewall is off, but the problem persists. What should I do?
Conclusion
In this guide, we covered setup steps for VMs in VMware Workstation/Player. Additionally, you can create more advanced designs with this virtual feature. Thanks for following us!

Be the first to share your comment