
Making and using Snapshots is great for VMware Workstation Pro and Player. This feature is beneficial for virtual machines running on your host system.
While working on a task, you can quickly back up the current state of your VM. This way, you can easily revert to the prior state in case of a possible error. In this article, I will explain the process of creating, restoring, and deleting Snapshots.
How to Take & Use Snapshot on VMware Workstation 17 Pro
One of the best parts of the VMware Workstation program is the Snapshot feature.
This feature lets you go back to an earlier time on the virtual machine. Also, this helps you fix future errors very fast. So you can bring your system back to its good state more easily. In these cases, you can solve problems in just seconds.
You can think of the VMware Snapshot method as the System Restore tool in Windows. You can also use System Restore for Windows running on a virtual machine. However, checking the current state is faster with VMware software.
Let’s say you made a restore point on your virtual PC. You can easily undo anything you do later (like installing an Office program). So, I can say this quick backup feature is like a “System Restore” tool on VMware.
The newest version of the Workstation program is 17 Pro. Suppose you have not added this great virtualization software to your PC before. In that case, you can check our article on installing VMware Workstation.
Taking a Snapshot in a Virtual Machine on VMware Workstation
We briefly talked about what Snapshot is in VMware. Now let’s create a restore point for the Virtual Machine (VM) running in Workstation & Player versions.
Step 1
After making a new virtual machine with the VMware app, you installed a fresh Windows 10. Of course, you also set up the needed VM Tools.
I recommend that you make a clean backup by taking a snapshot of your Windows 10 virtual machine.
Because if something goes wrong on the virtual computer, you don’t need to install the system again. Also, you can quickly go back to the first clean setup. In short, this saves time and makes things easier. So, you keep your virtual PC system stable.
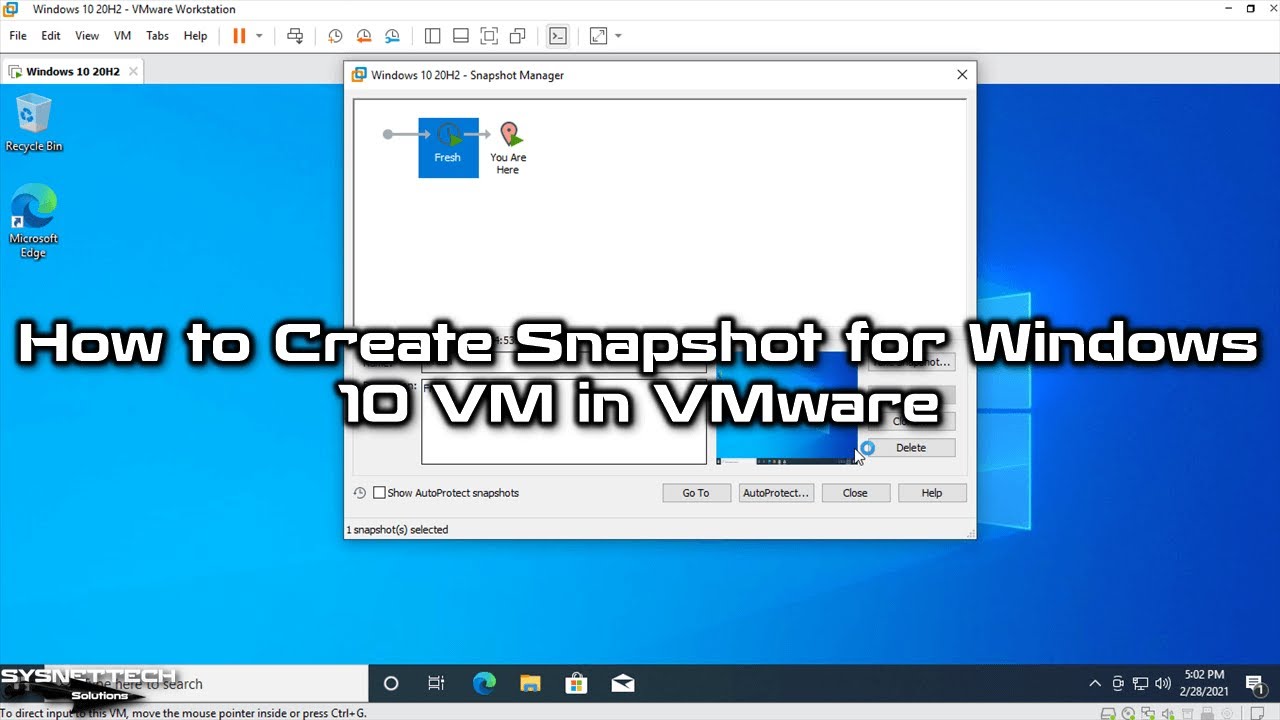
Now, click the blue icon to make a checkpoint for the VM. You can also use the Snapshot > Snapshot Manager option in the VM menu. Clearly, you can start this process with either method.

Step 2
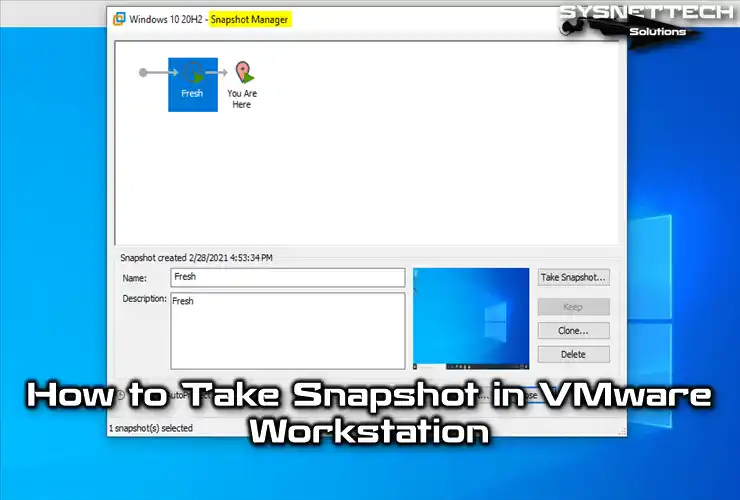
You have opened Snapshot Manager in your Workstation VM software. Now, the action you will take here is to click the Take Snapshot button.

Step 3
When you start to take the current state of the virtual computer, you will save the current state of your system. You will also be able to see these settings in the installation location of the VM. In the place I mentioned, you can find the VMEM and VMSN files.
Now, on the screen below, type a name and description for the current status of your VM.
I suggest you write the necessary explanations here. This will help you understand what you are doing better later. So, fill in the fields and click Take Snapshot.

Step 4
Wait while the VMware program creates a clean backup of your VM.

Step 5
You have finished the snapshot process. After that, you can find the two files I mentioned in the installation location.
- VMEM: This file gets created whenever you take a checkpoint or if the VM is in a suspended state.
- VMSN: This file is for the memory status of the VM.

Making Changes to the VM After Backup
Step 1
Let’s learn how snapshots work! For this example, we can download Notepad++ to see how to make changes to the system.

Step 2
Once you install the Notepad app, feel free to create a shortcut right on your desktop. The purpose of creating a shortcut is to change your system. That is, it means checking if the file is still on the desktop after the restore.

Step 3
You have installed Notepad++ on your virtual computer. Next, right-click the Start and select Apps & Features from the available options.
The purpose of this is to check how many applications are installed on the system, as shown in the image below.

How to Restore a Snapshot in VMware
Step 1
By following the steps above, you have created a checkpoint of the VM. Later, you made many changes to the system or faced system errors.
If you want to go back to the first clean installation, you can restore the backup of the machine.
Now, open Snapshot Manager again. Then, this time, choose the backup you made and click the Go To button.

Step 2
As soon as you click the Go To button, you will see a message. This message is: “By restoring this snapshot, the current state will be lost. Do you want to restore (the Name of the Snapshot)?”
In this step, click Yes to start the virtual computer restore process.

Step 3
Wait while it restores the current state of your virtual PC.

Step 4
You have finished the restore process for the guest machine. After that, when you go back to the backup you made, open Apps & Features again. Then, check the number of applications you have installed.
You can make sure that Notepad++ is no longer installed and that you have reverted to the previous state.

How to Delete a Snapshot on VMware Workstation
Multiple snapshots that you create can take up a lot of space on the host disk. Therefore, you may need to delete unnecessary backups from time to time.
If you delete records via the Manager, you will also delete them from your disk. However, of course, you cannot undo this process, so you need to be very careful.
Steps:
Step 1
Now, while your virtual PC is open, open the Manager again. Then, select the state you want to delete and click Delete on the right.

Step 2
You will delete the registry files associated with your VM and clean up your host’s disk.

Step 3
Open the current status manager screen again. Make sure the status you had before is not here.

Step 4
I said earlier that the files will also be deleted from your host’s disk. To check if they are deleted, go to your VM’s location. Look for the VMEM and VMSN files there.

Video
Backup Process in Old Versions
Snapshot usage is the same in VMware Pro software versions 12, 14, 15, or 16. For a rapid backup option in earlier versions, refer to the list below.
| Workstation Pro | YouTube Video | Slide |
|---|---|---|
| 12 Pro | Watch | View |
| 14/15 Pro | Watch | View |
| 16 Pro | Watch | – |
Frequently Asked Questions (FAQ)
- What is a snapshot in VMware Workstation?
- Why should I use snapshots?
- Can I have more than one backup?
- What happens to the virtual machine when I take a snapshot?
Conclusion
In conclusion, the Snapshot feature in VMware Workstation Pro gives us great help. With it, we can manage our virtual machines on Windows 11 & 10, Linux, or macOS platforms.
With our easy guide, you have learned how to quickly backup or restore a VM. This way, you can reduce errors that might happen in your virtual environment.
In short, snapshots make it much easier to go back to a previous state while also making things work faster. Hence, they are suitable for users of all skill levels.

Be the first to share your comment