
In this article, we will examine how to run Windows 95 on a new virtual machine using VMware Fusion 12 Pro in macOS operating system on an Apple Mac computer.

How to Set Up Windows 95 on macOS / Mac using VMware Fusion 12 Pro
Microsoft ended the main support of the Windows 95 operating system, which is released to its users on August 24, 1995, on December 31, 2000, and ended its extended support on December 31, 2001.
The Windows 95 operating system was Microsoft’s most successful attempt. Improved over its predecessor Windows 3.1 system, its biggest features were a better user interface and support for more simplified plug-and-play devices.
Other features include 32 Bit architecture and support for long filenames. The start menu and taskbar were developed for the first time with this operating system.
You need a maximum RAM size of 480 MB for Windows 95 to run properly on a physical computer.
If you have a Mac computer, you may not be able to run Windows 95 on next-generation hardware. However, you can run this old system on a virtual machine by using the VMware Fusion virtualization software developed by VMware for macOS systems.
How to Create a New Virtual Machine for Windows 95
After installing the Fusion software on your Mac, you can create a new virtual computer and install either old or new Windows operating systems.
Step 1
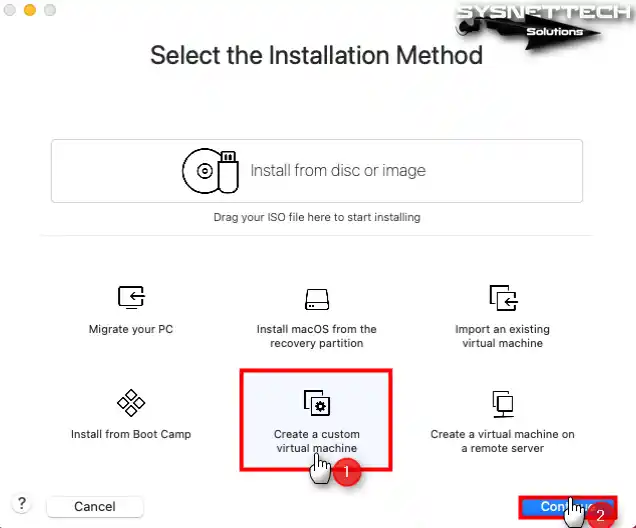
Select Create a custom virtual machine from the virtual machine installation methods and click the Continue button.
Step 2
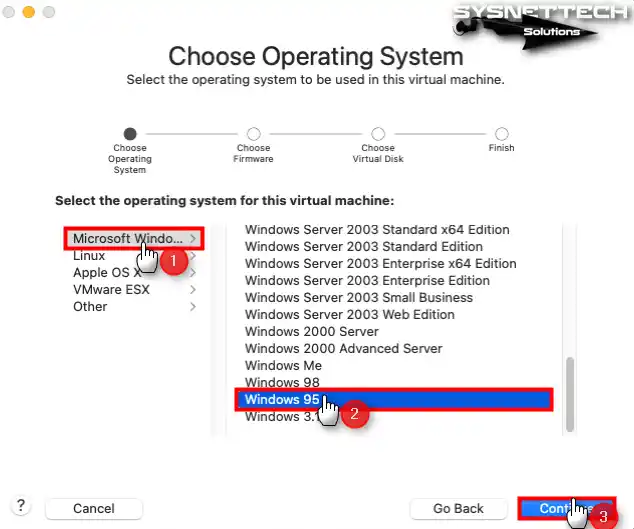
Select Microsoft Windows / Windows 95 system in the Guest operating system selection window and click Continue again.
Step 3
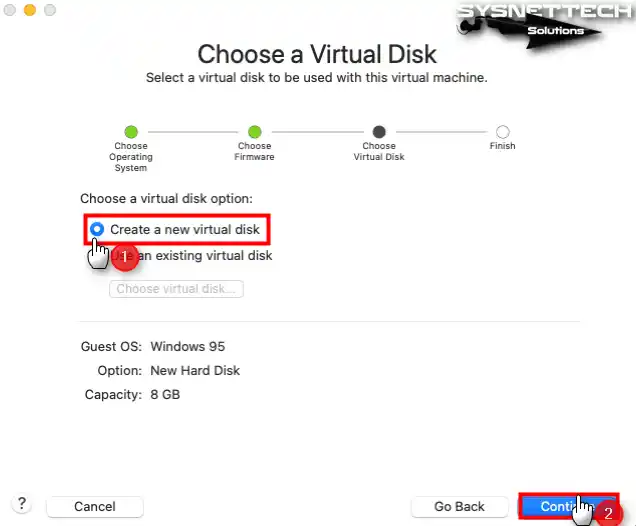
Since you will be installing Windows 95 from scratch, you need to create a new virtual disk. Therefore, continue with the Create a new virtual disk option selected by default.
If you have a virtual disk file of a system you have previously installed, you need to add the virtual disk file after selecting the Use an existing virtual disk option.
Step 4
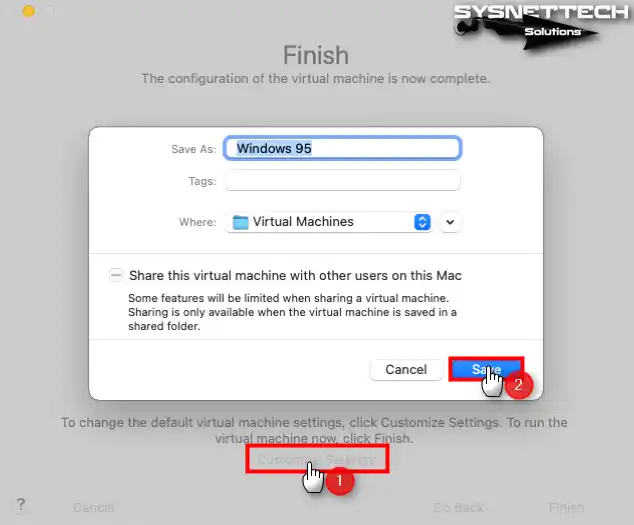
After clicking Customize Settings in the window showing the summary information of the Windows 95 virtual machine, click the Save button to confirm the default installation location.
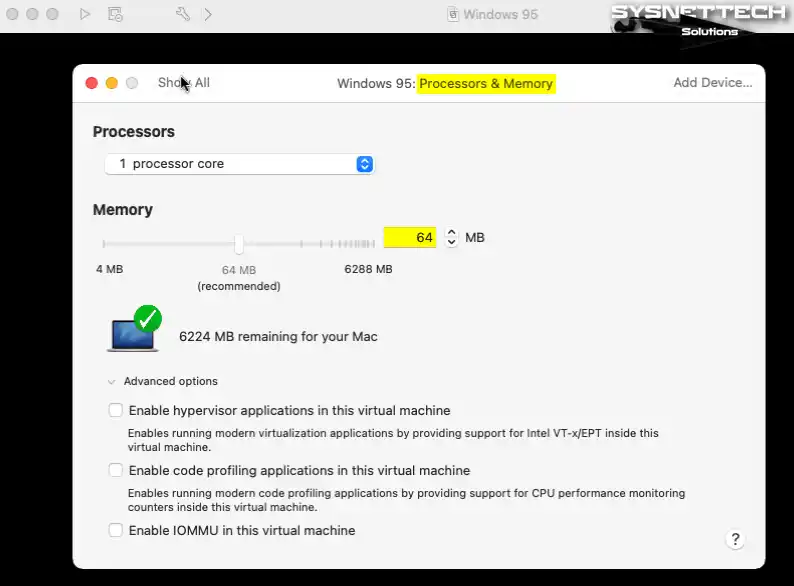
Step 5
When the settings of the Windows 95 guest machine are opened, click Processors & Memory and configure the memory size as 64 MB.
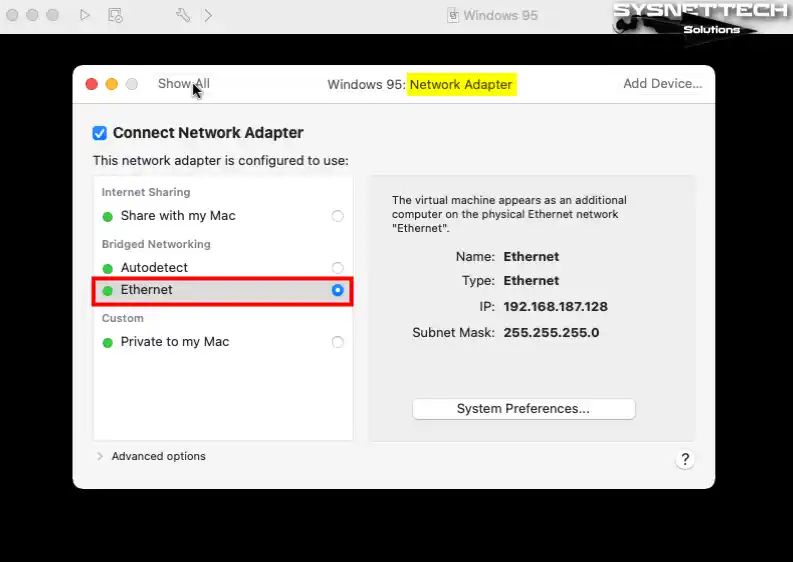
Step 6
Select the Ethernet network if you want to assign an IP address to the guest machine from the DHCP server in your local network.
Step 7
Set the virtual disk size of the Windows 95 guest machine to 3 GB and click the Apply button.

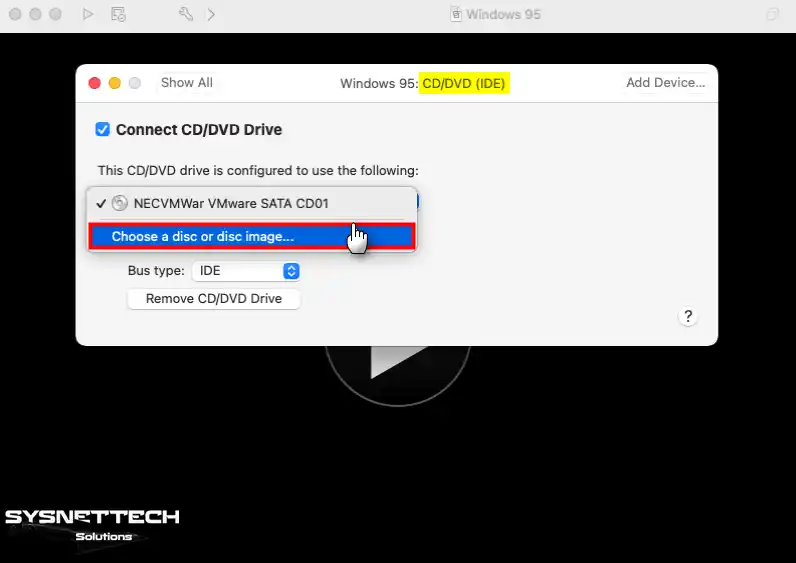
Step 8
To add a Windows 95 ISO file to the guest machine, open the CD/DVD device settings and click Choose a disc or disc image from the drop-down list.
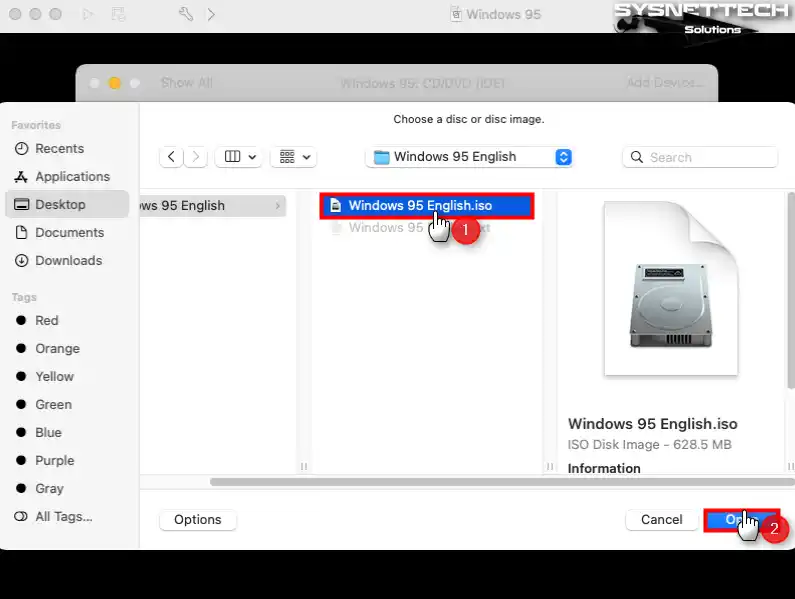
Step 9
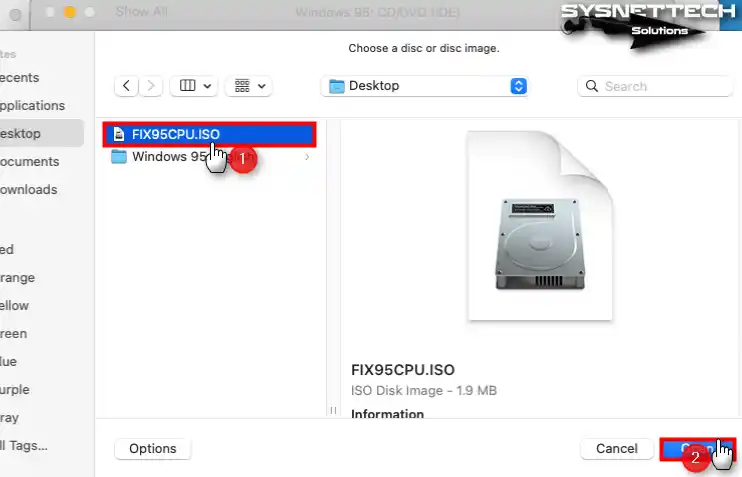
In the window that opens, select the Windows 95 ISO file you downloaded to your computer from the table below the article and click Open.
Step 10
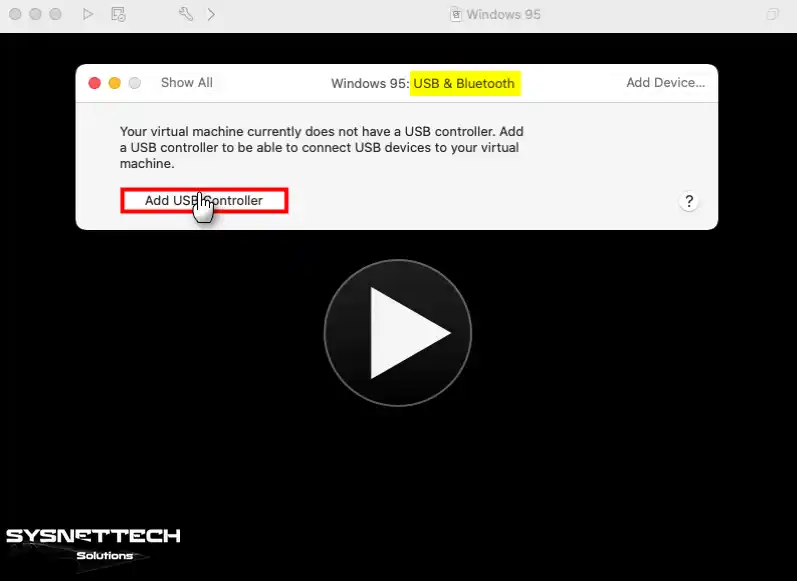
If you want to use your USB flash memory or storage device on the guest machine, click Add USB Controller in USB & Bluetooth settings.
Step 11
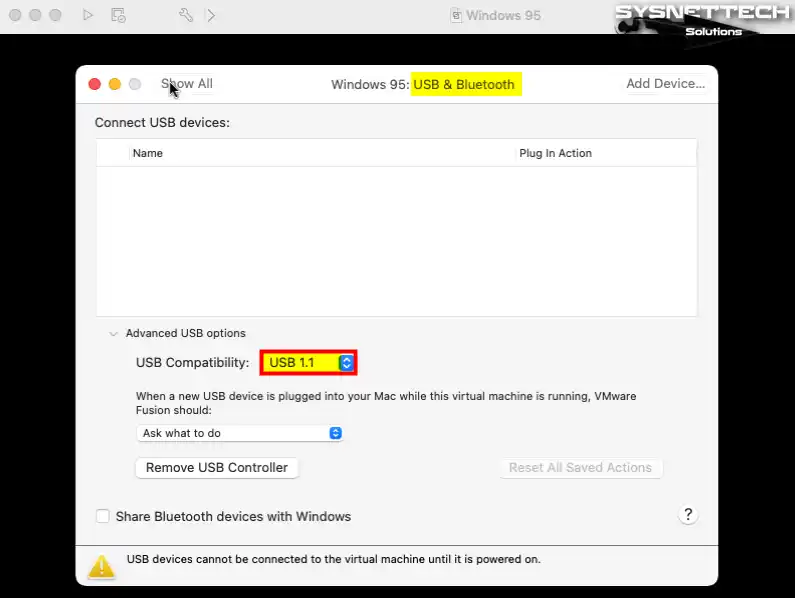
After adding the USB Controller, change the compatibility setting to USB 1.1.
Step 12
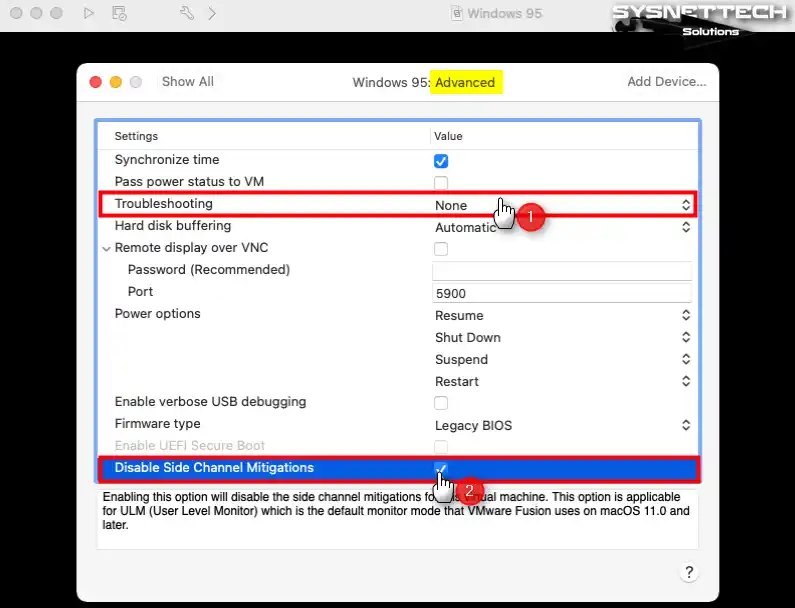
In order to increase the performance of the virtual computer, change the Troubleshooting setting to None in the advanced settings and disable the Side Channel Mitigations feature.
Step 13
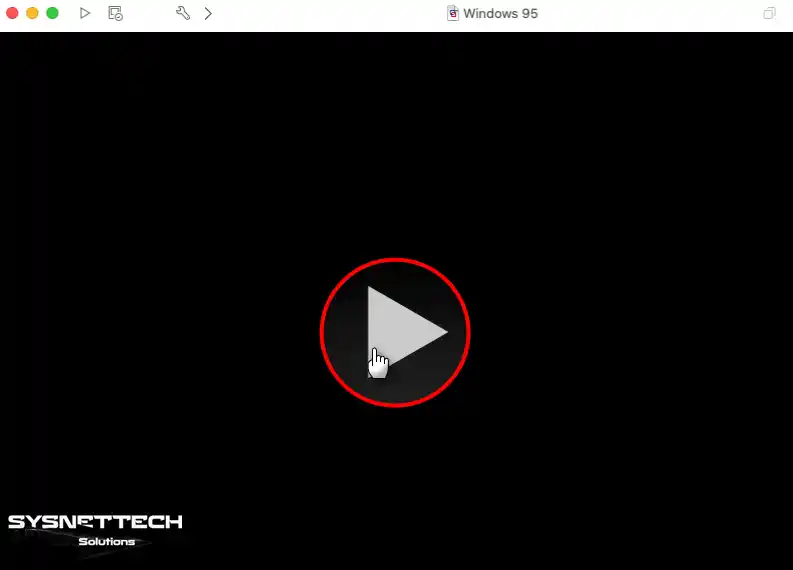
After making the settings of the Windows 95 virtual computer, run it for installation.
How to Install Windows 95 on macOS
After configuring the settings of the Guest operating system correctly, you can continue as if you were installing on a physical computer after running the system.
Step 1
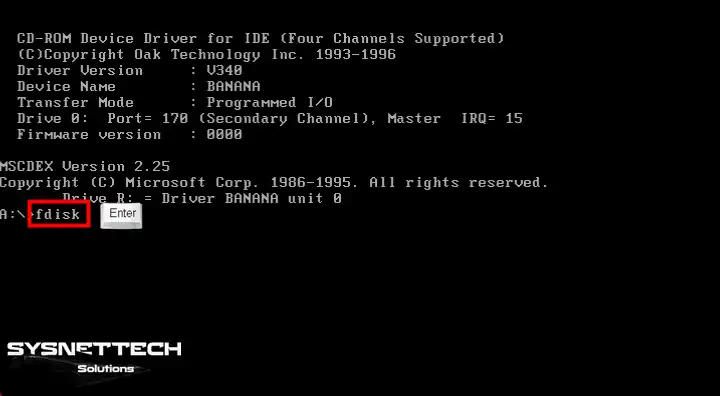
After running your Windows 95 virtual system, type the FDISK command on the boot screen and press Enter.
Step 2
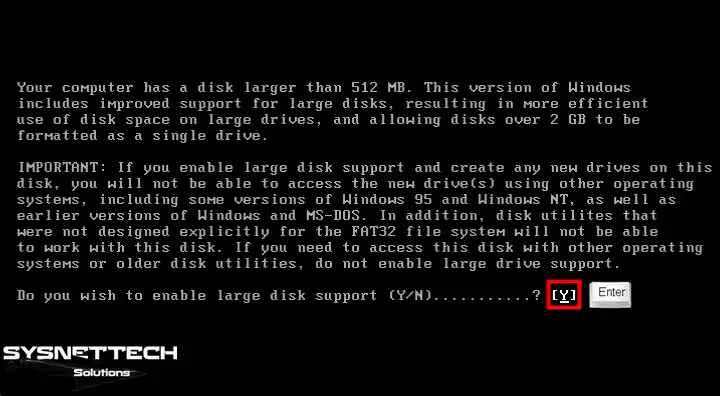
Since you have set the size of the virtual disk to 3 GB, answer the relevant question with Y to enable large disk usage and press Enter.
Step 3
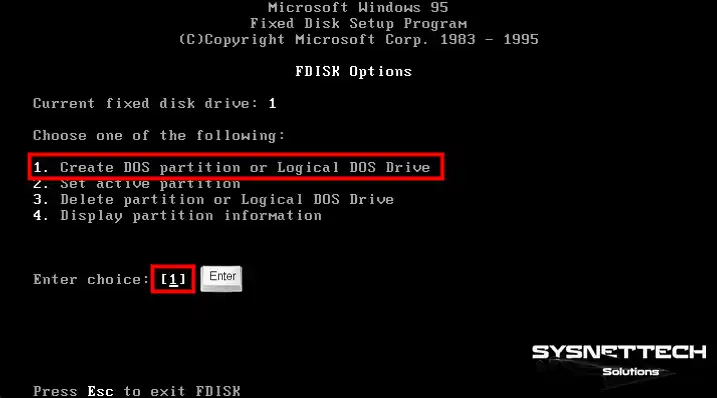
Press Enter on the first option, Create DOS Partition or Logical DOS Drive, on the FDISK Options screen.
Step 4
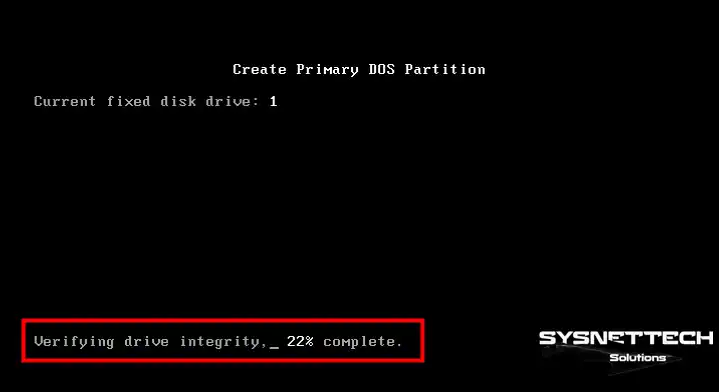
After creating a new partition on the virtual disk, press Enter again in the first option, Create Primary DOS Partition, to set it as the primary volume.

Step 5
Wait while the integrity of the virtual disk is verified.
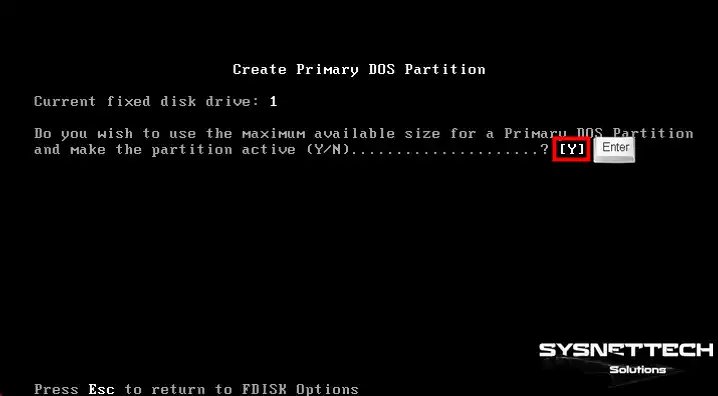
Step 6
Press Y to use the available disk space for the primary partition and activate the volume, then press Enter.
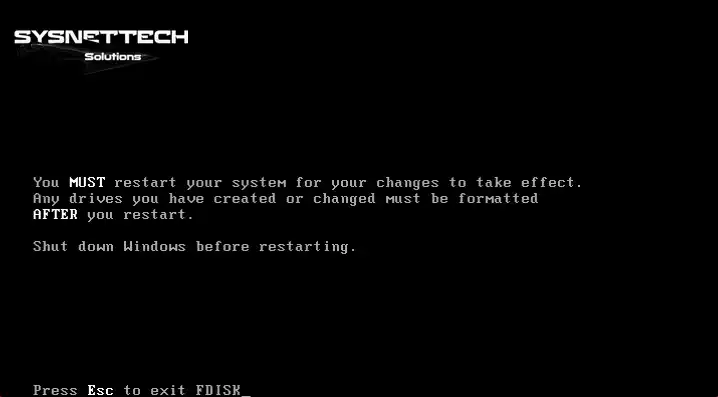
Step 7
After creating and configuring a new partition on the virtual disk, close the Fdisk tool and restart your virtual computer.
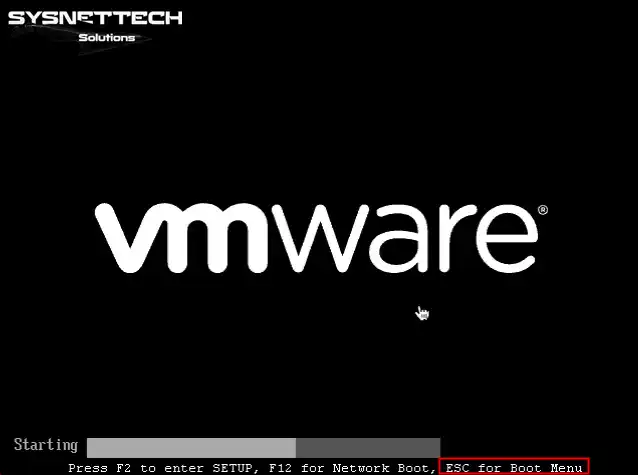
Step 8
In VMware Fusion software, you need to open the Boot Menu to boot your guest machine from the ISO file again. Therefore, press ESC while your virtual system is booting to open the Boot Menu.
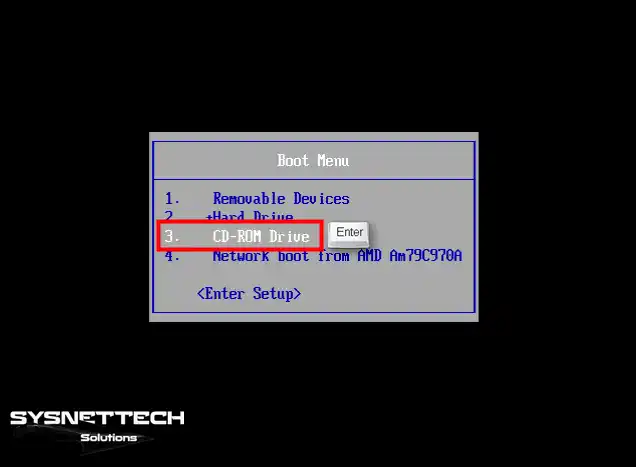
Step 9
On the Boot Menu screen, select CD-ROM Drive using the arrow keys of your keyboard and press Enter.
Step 10
After booting your virtual PC with the ISO file again, execute the format C: command on the A:\ volume and format the C drive.
format C:
Step 11
If you want to specify a new volume label for the C drive, you can specify it in the Volume Label section. You can press Enter to confirm the C drive without the volume label.
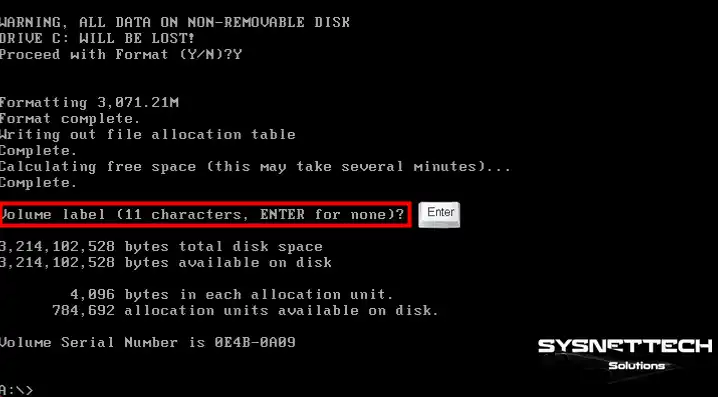
Step 12
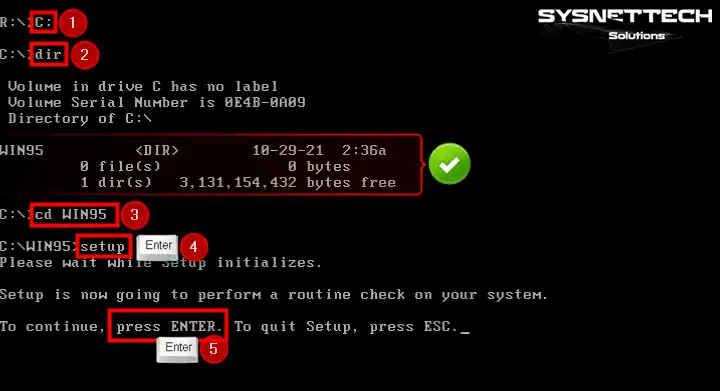
To copy the Windows 95 installation files, you need to switch to the C drive and create a new folder. After switching to the C drive as in the image below, create a new folder named WIN95 with the mkdir command.
Then switch to the drive where the ISO file is mounted and execute the “copy R:\WIN95\*.* C:\WIN95” command to copy the installation files to the WIN95 folder you created.
C:
mkdir WIN95
R:
copy R:\WIN95\*.* C:\WIN95

Step 13
After copying the system files, go to the WIN95 folder on the C drive and execute the setup command in the WIN95 directory to start the Windows installation.
C:
cd WIN95
setup
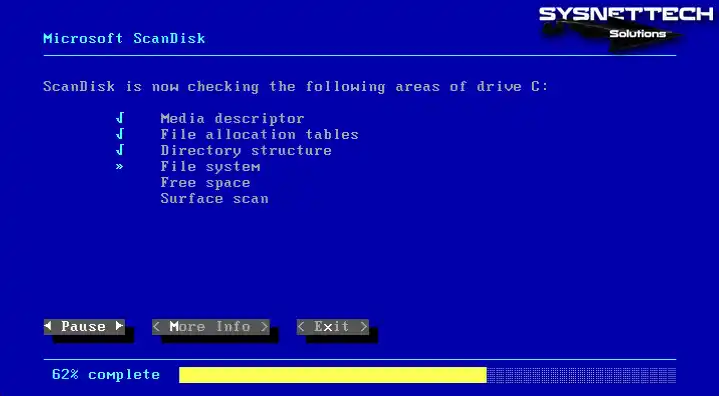
Step 14
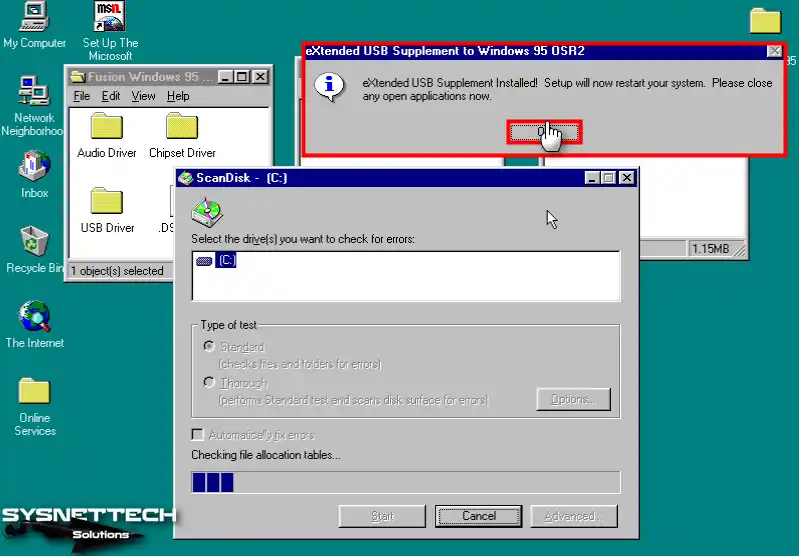
Before the Windows installation, the Microsoft ScanDisk tool will open and check the file structure on the C drive.
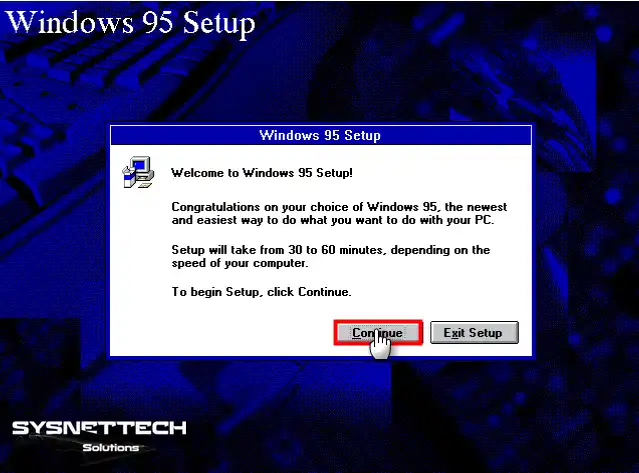
Step 15
After the file system is checked, click Continue on the Windows 95 Setup screen.
Step 16
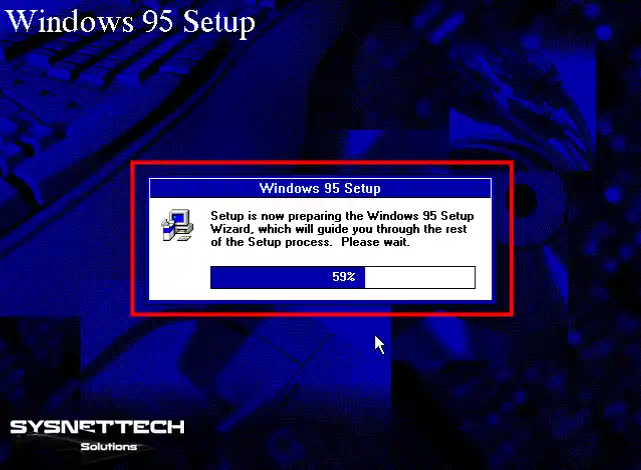
Wait while Setup prepares the setup wizard for Windows.
Step 17
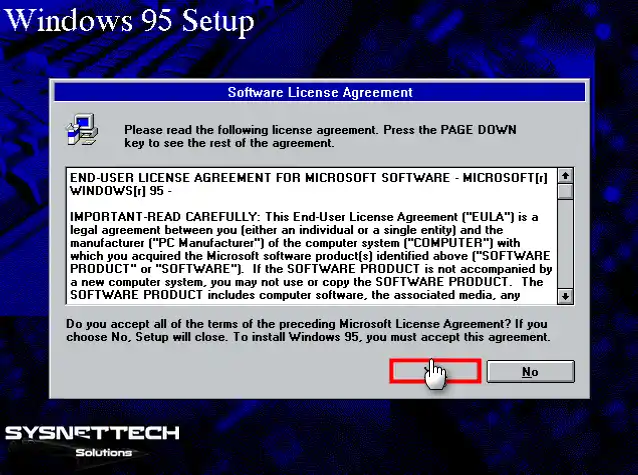
After reading the Microsoft Windows 95 license agreement, click Yes to accept and continue.
Step 18
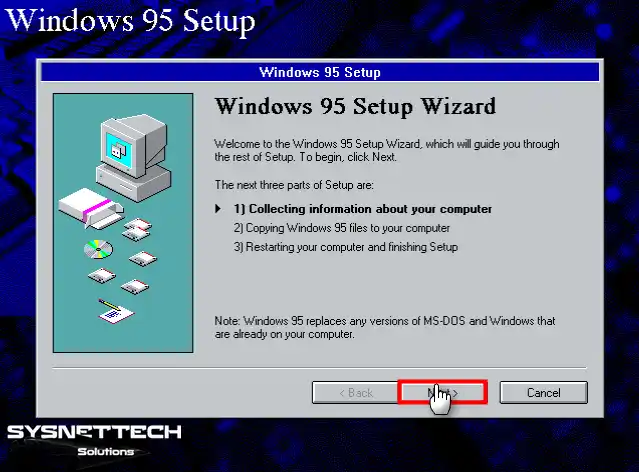
In the first stage of the setup wizard, information about your virtual computer will be collected.
Step 19
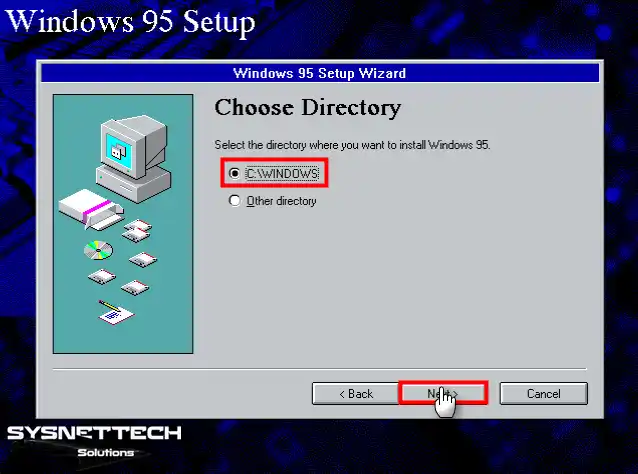
If you want to install Windows 95 in a location other than the C directory, you can change the location from the Other Directory. Since it is recommended to install Windows operating systems in the default C:\WINDOWS directory, click Next directly in this window.
Step 20
Wait while checking for sufficient disk space to install Windows 95.

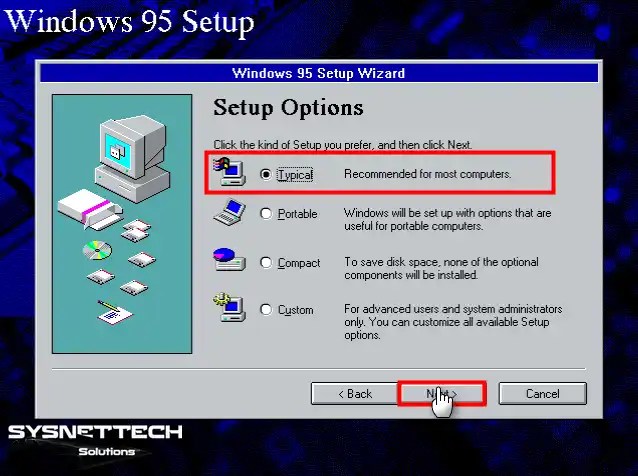
Step 21
Proceed with Typical, which is selected by default in the installation options.
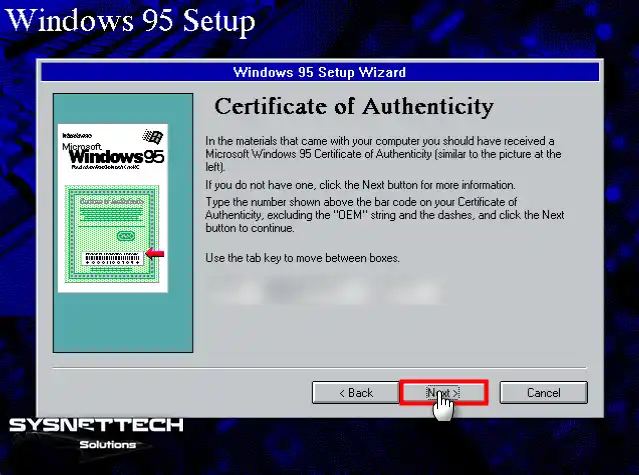
Step 22
Type the product key of your Microsoft Windows 95 operating system and click Next.
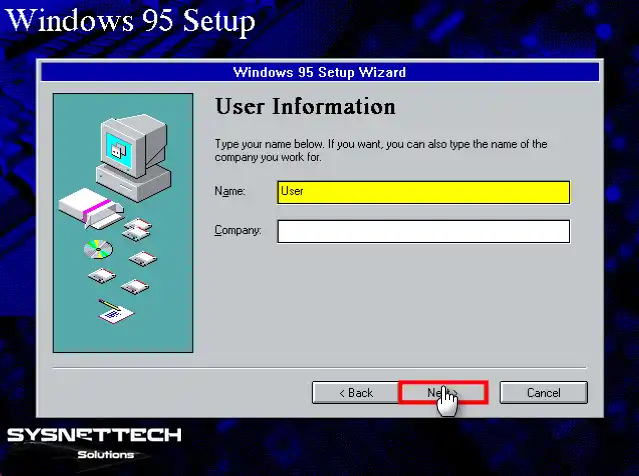
Step 23
Type a username for your Windows 95 virtual operating system.
Step 24
If you want the setup wizard to scan for hardware on your virtual computer, select the devices in the list and click Next.

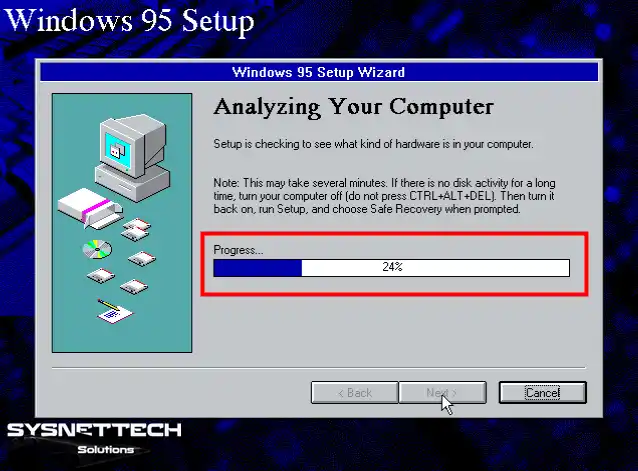
Step 25
Wait while the setup wizard analyzes the hardware on your guest machine.
Step 26
Choose to install the most common components for your virtual system and continue.

Step 27
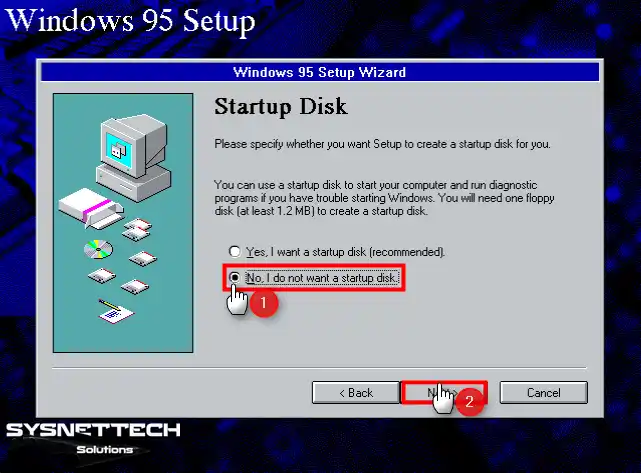
You can create a Startup Disk that will make it easier for you to repair potential system errors you encounter while using Windows. However, there is no need to create a Startup Disk on the virtual computer. So select “No, I do not want a startup disk” and click Next.
Step 28
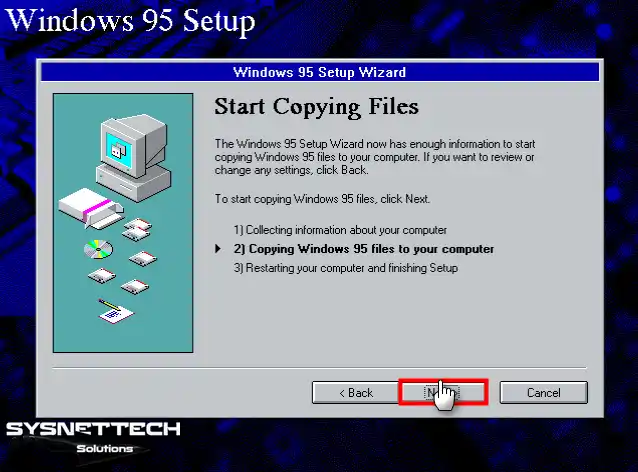
In the second step of the setup wizard, the system files will be copied to the local virtual disk.
Step 29
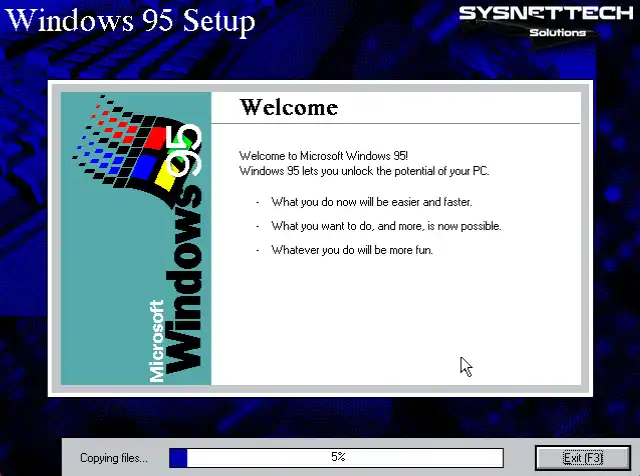
Wait while Windows 95 is being installed on your virtual computer.
Step 30
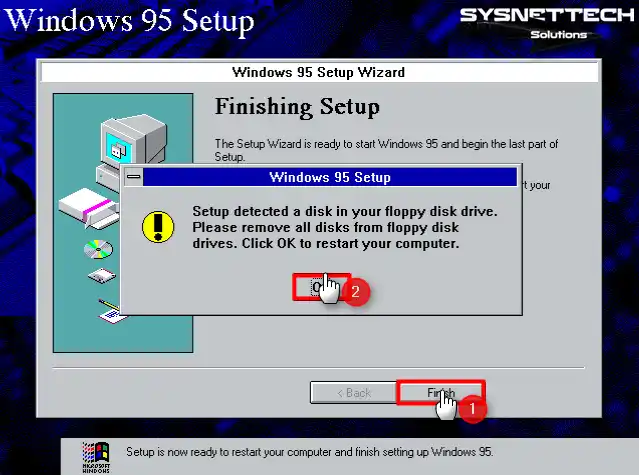
Click OK to confirm removing the floppy device from the guest machine after system setup.
Step 31
Wait while your Windows 95 virtual computer is getting ready to run for the first time.
Step 32
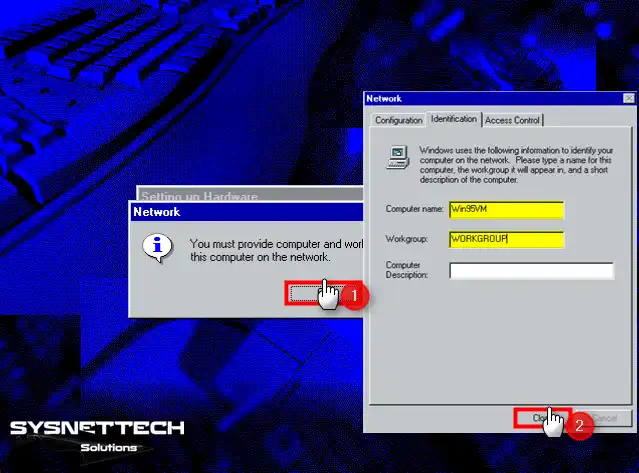
Type the computer name and workgroup name so that you can use your guest machine in the local network.
Step 33
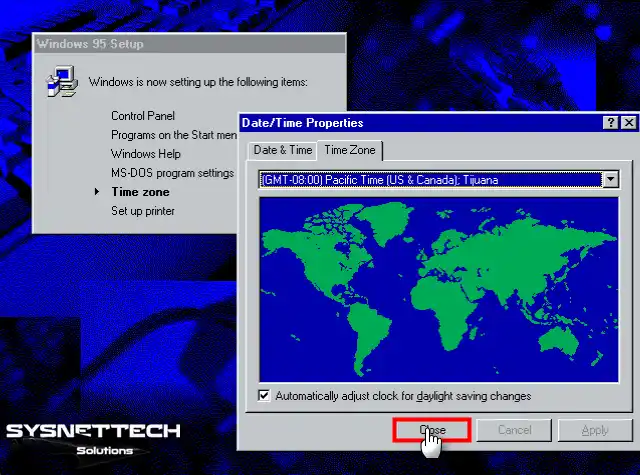
While configuring the control panel settings and the programs in the start menu in the setup wizard, configure your date and time settings according to the region you live in.
Step 34
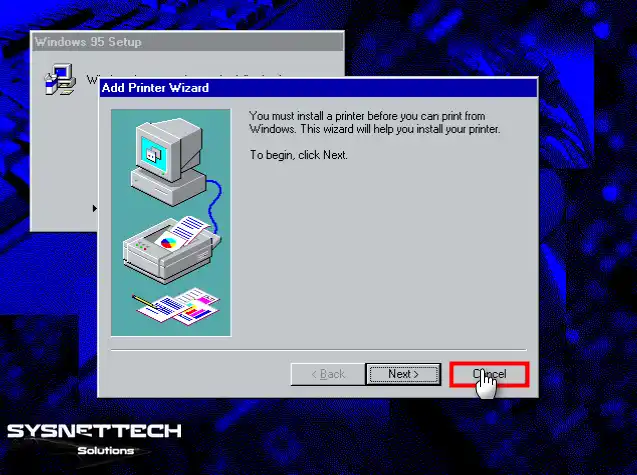
Close the add printer wizard and continue.
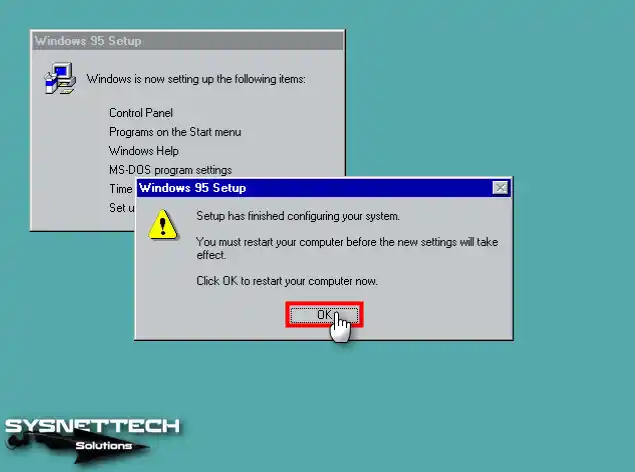
Step 35
After the setup wizard completes configuring your virtual system, click OK and restart your system.
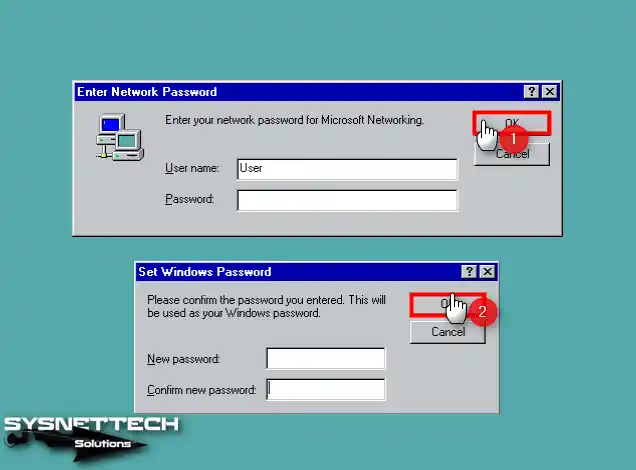
Step 36
When your virtual system restarts, type your created username and click OK. Then click OK in the Windows Password window without typing any password.
Step 37
When your virtual computer is turned on, the desktop view of your Windows 95 operating system will be as follows.

How to Install VMware Tools
After installing Windows 95 with VMware Fusion on macOS, you need to install VMware Tools in order to increase the performance of your guest system, fix the screen resolution, or transfer files between your host and your VM by drag-and-drop.
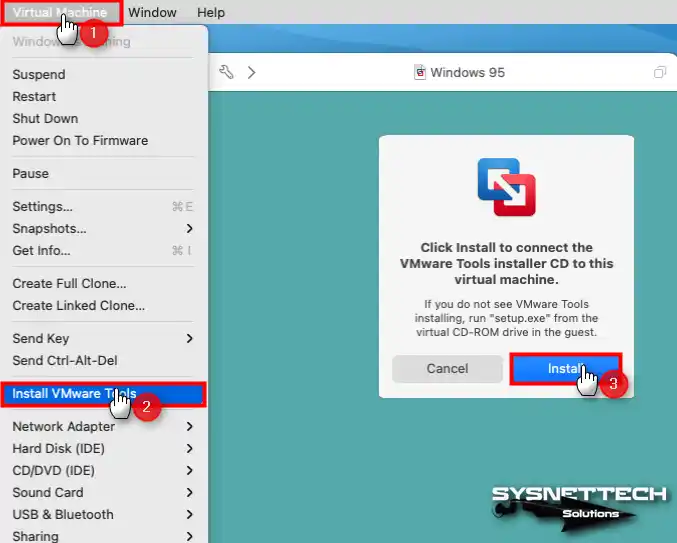
Step 1
While your virtual machine is running, click Virtual Machine / Install VMware Tools in the tool menu of the Fusion software.
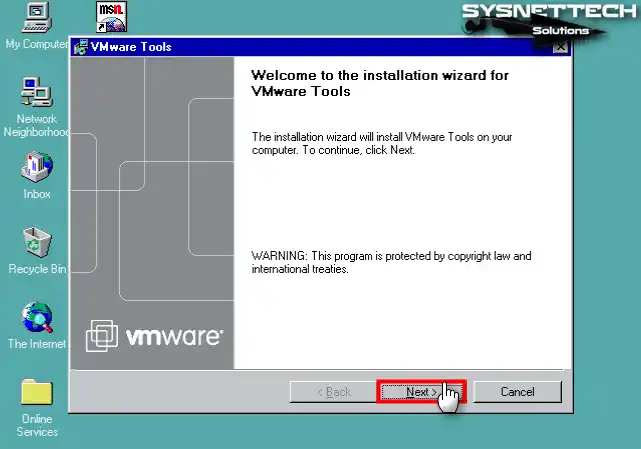
Step 2
When the VMware Tools installation wizard opens, click Next to continue.
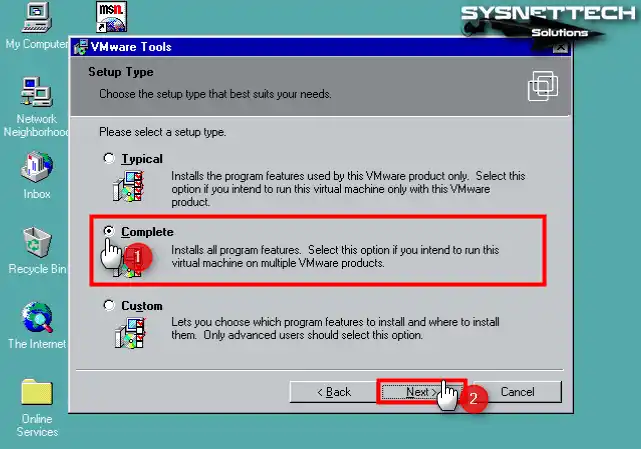
Step 3
When you select Complete in the installation options, you can use the virtual PC you created with other products of VMware.
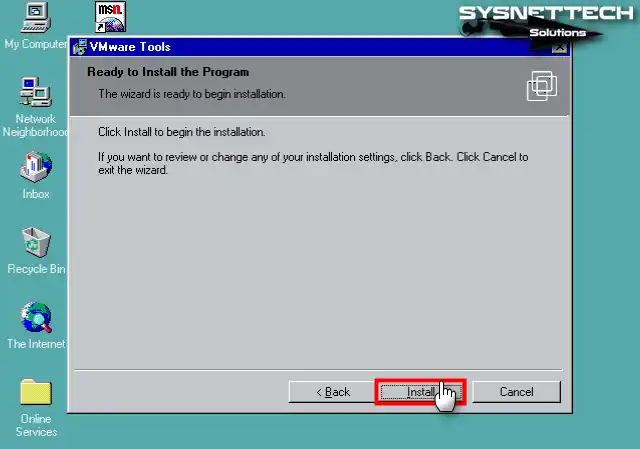
Step 4
Click Install to start installing the virtual machine drivers.
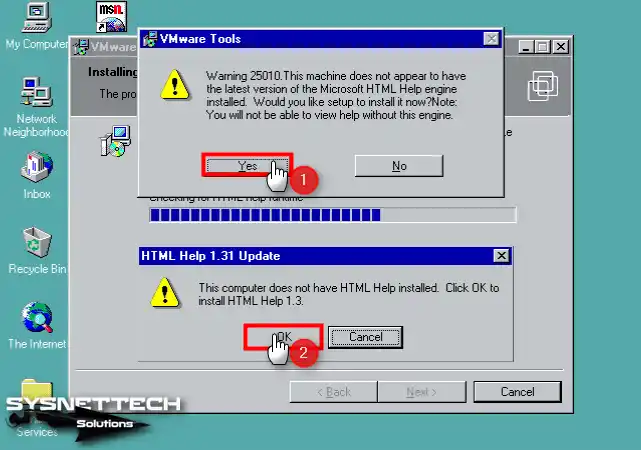
Step 5
Click Yes when you encounter the Warning 25010 error during installation, and then confirm installing the HTML Help update.
Step 6
Click OK in the warning window prompting you to manually install the SVGA driver at the final stage of VMware Tools installation.

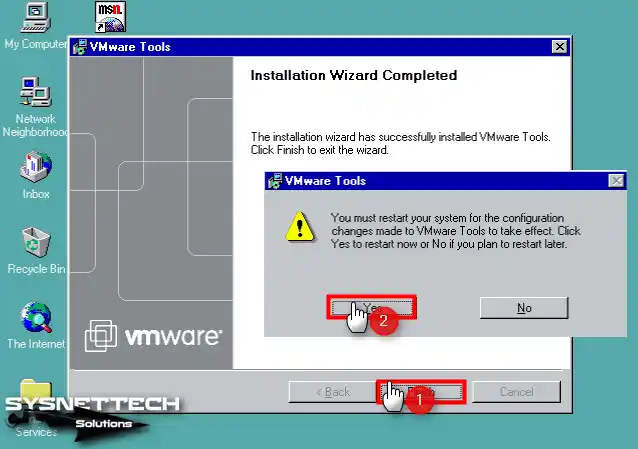
Step 7
After installing VMware Tools, restart your guest virtual system.
Step 8
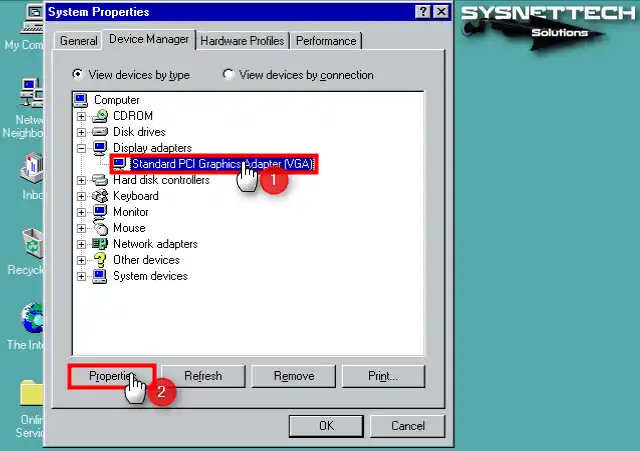
When your guest system opens, right-click on My Computer and then click System Properties. Click Device Manager and expand the Display Adapters list to display the drivers for the virtual machine in the System Properties window.
To install the display driver of the virtual machine, select the Standard PCI Graphics Adapter (VGA) driver and then click Properties.
Step 9
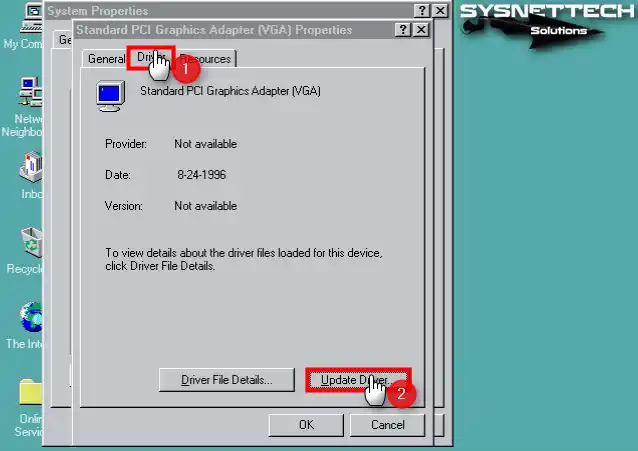
When the properties of the display adapter are opened, click the Update Driver button.
Step 10
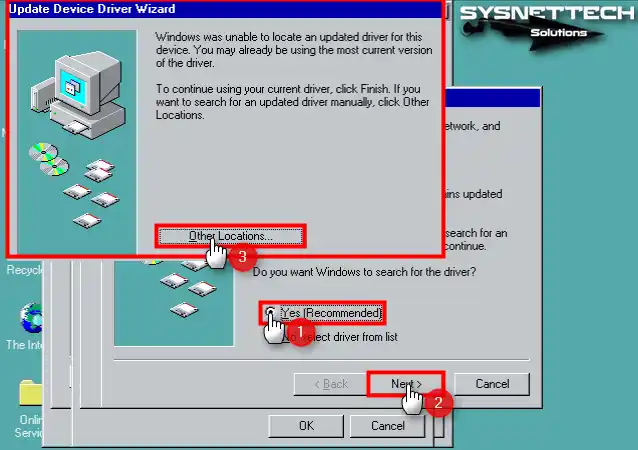
With the recommended installation method selected in the driver update wizard, click Next and then click Other Locations.
Step 11
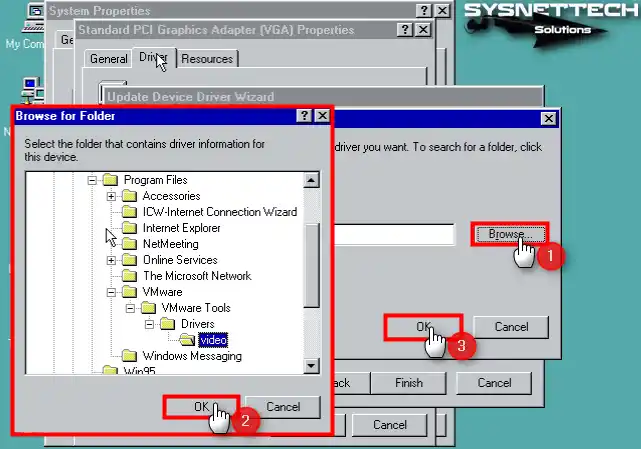
Click Browse to specify the location of the display adapter driver, then select C:\Program Files\VMware\VMware Tools\Drivers\video and continue.
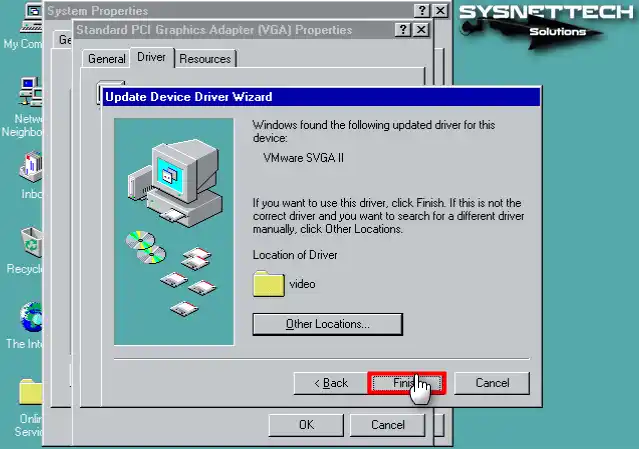
Step 12
After Windows finds the display driver, click Finish to complete the installation.
Step 13
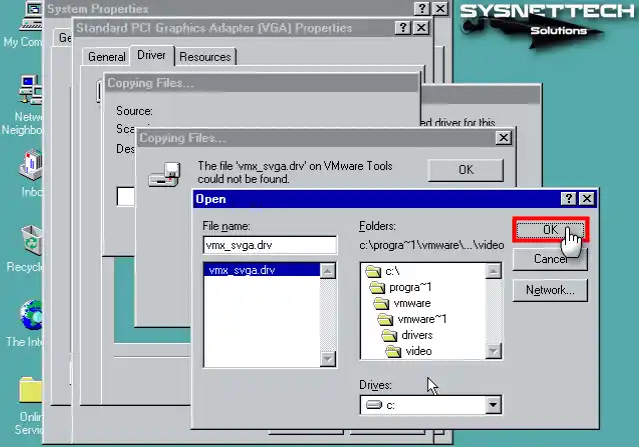
Specify the location of the vmx_svga.drv file while copying the driver files and continue.
Step 14
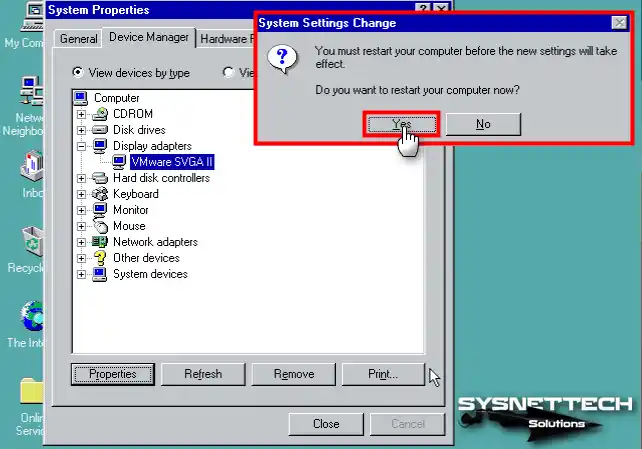
After installing the display adapter driver of your Windows 95 guest system, restart your virtual system.
Step 15
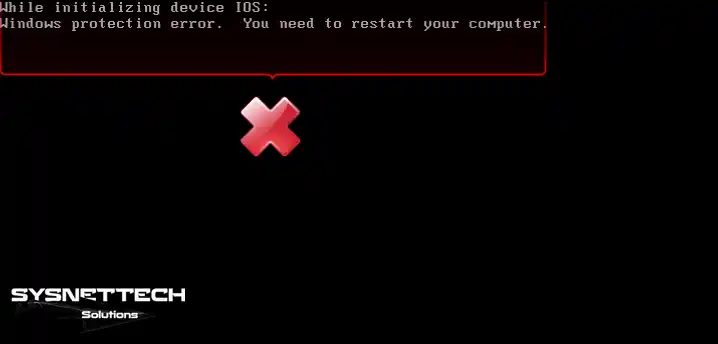
You may receive a Windows Protection Error while your virtual system is restarting. To resolve this error, download the FIX95CPU.ISO file from the table at the bottom of the article to your computer.
Step 16
Add the FIX95CPU.ISO file to your virtual computer.
Step 17
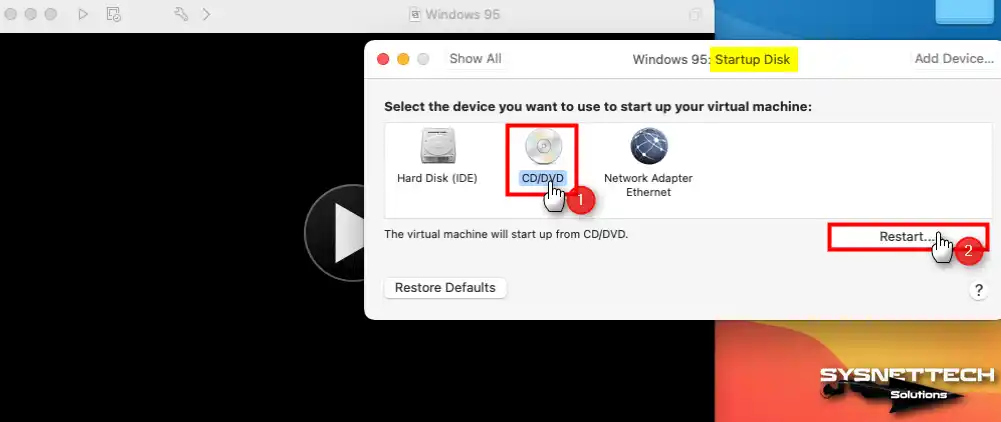
To boot your guest machine from the CD/DVD device, click Startup Disk in the settings, then select the device and click the Restart button.
Step 18
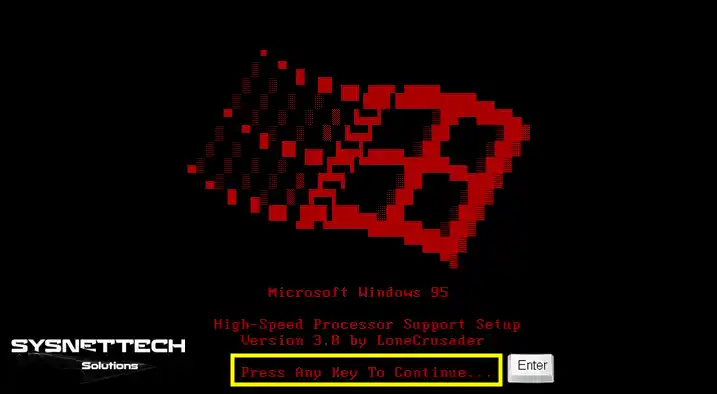
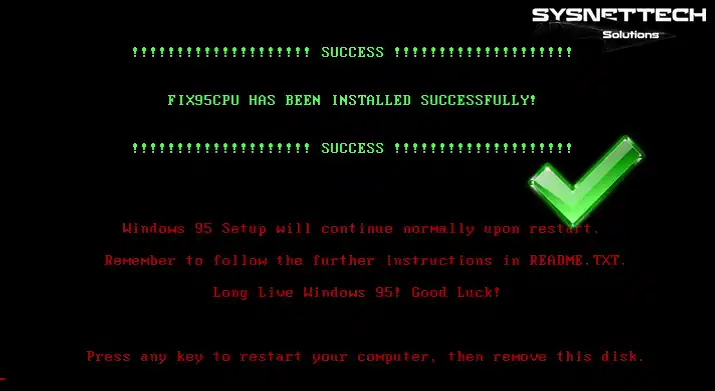
After booting your virtual system with High-Speed Processor Support Setup Version 3.0 by LoneCrusader software, press any key on your keyboard.
Step 19
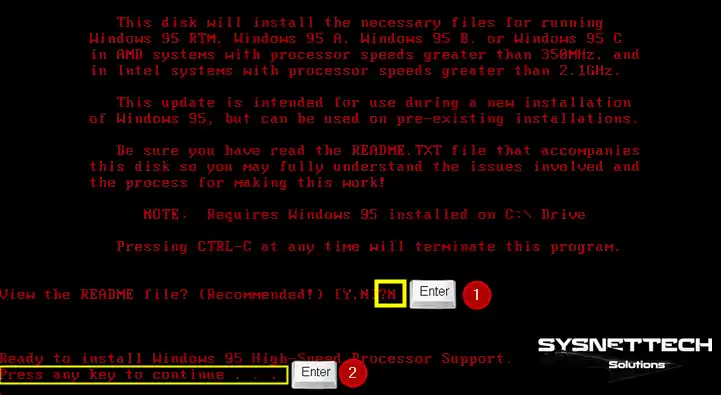
Press N to skip reading the readme file, and then press any key to install CPU support.
Step 20
After the FIX95CPU is successfully installed, boot your virtual system from your disk this time.
Step 21
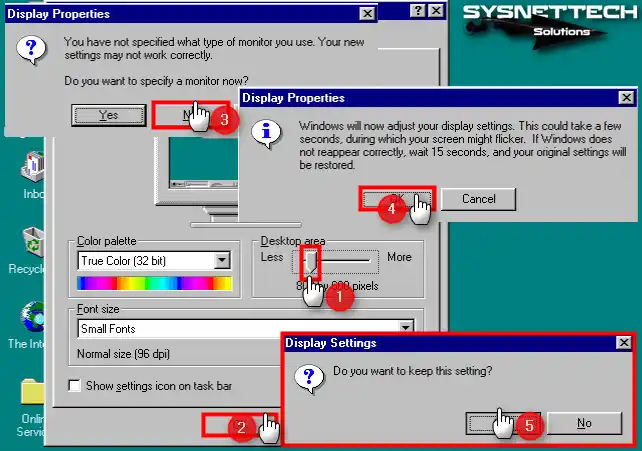
When your Windows 95 PC boots up, you can change your system’s screen resolution and the color bit in the display properties.
Step 22
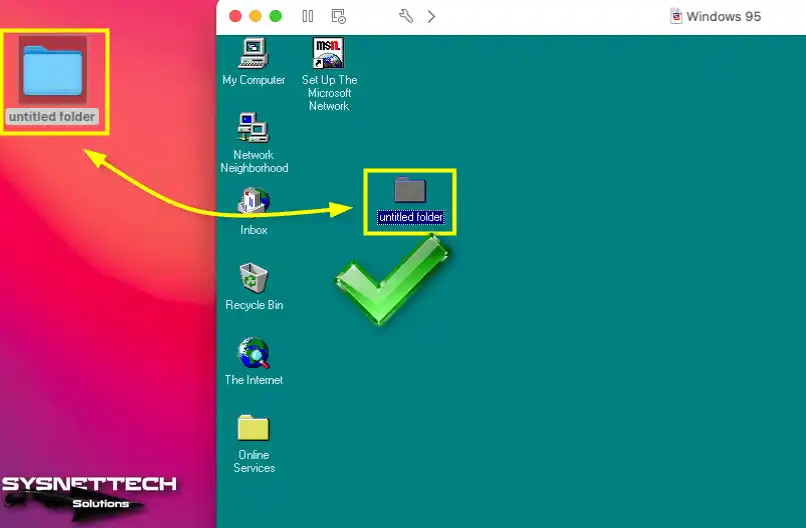
After installing VMware Tools and manually installing the display adapter, you can drag and drop files between your Mac and guest machine.
Step 23
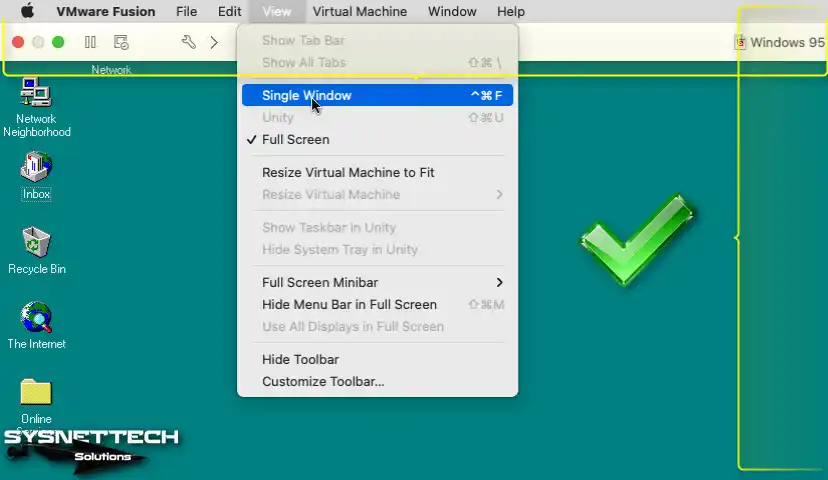
You can also fit your virtual computer to full-screen resolution.
How to Configure and Test Internet Connection
You may need an Internet connection in guest operating systems that you have installed on your Mac computer. Therefore, you may need to configure your local network settings according to the version of the operating system you are running.
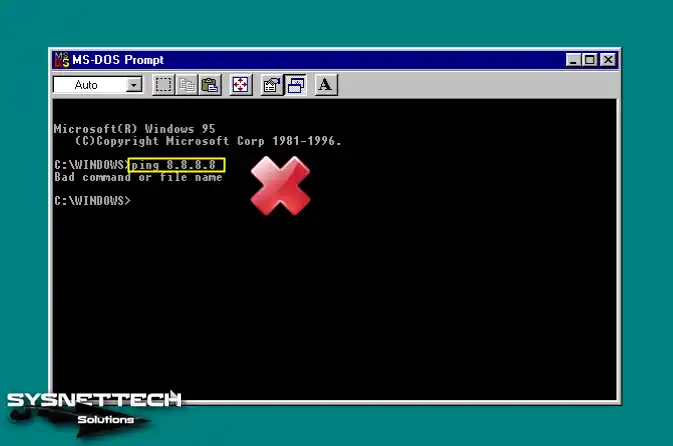
Step 1
In Windows 95, open MS-DOS Prompt from the Start menu and try to ping Google servers by executing the ping 8.8.8.8 command. If you get a ping error as in the image below, you need to install the TCP/IP protocol on your system.
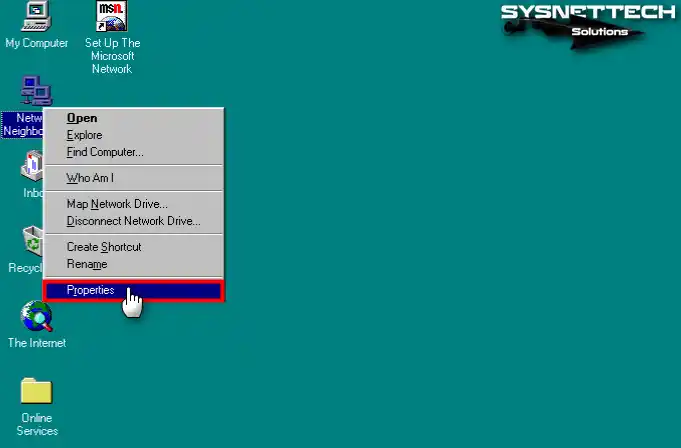
Step 2
To install the TCP/IP protocol, right-click on Network Neighbors and click Properties.
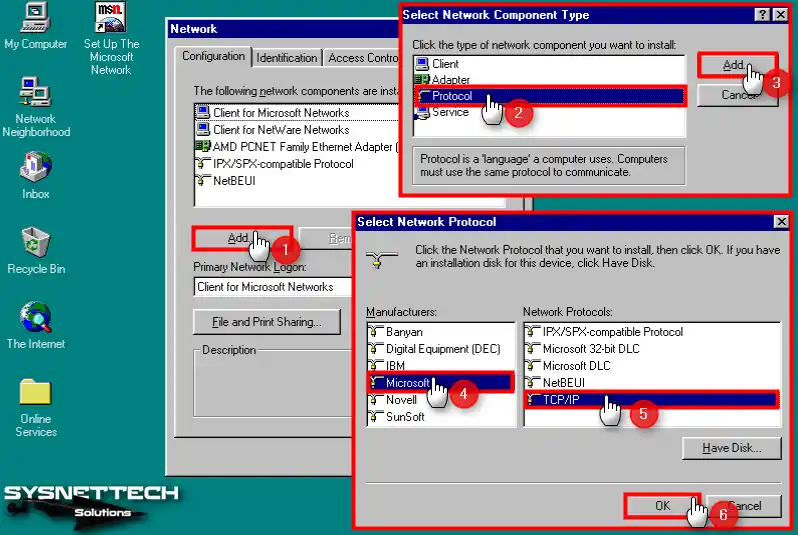
Step 3
After clicking Add in the Network window containing the network adapters, the network component selection window will open. Select Protocol in the list of network components and after clicking Add again, select Microsoft / TCP/IP in the network protocol selection window and click OK.
Step 4
After adding TCP/IP, restart your virtual system and try to ping Google servers again, this time you will be able to see that your network connection is OK.

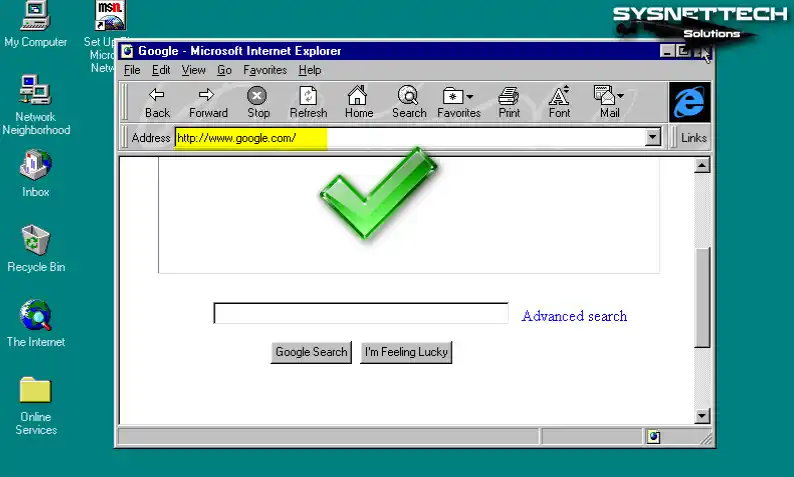
Step 5
After testing your network connection, you can open The Internet and check your connection by visiting the Google homepage.
How to Install Audio Driver
Of course, you will not be able to hear system sounds if you do not install the driver for the audio device on your virtual computer. Therefore, you must install the driver for the audio device of your Windows 95 system.
Step 1
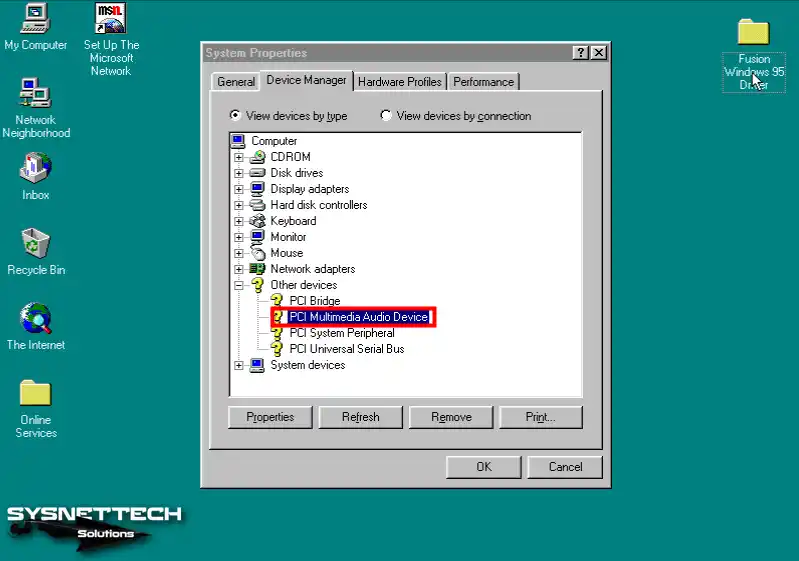
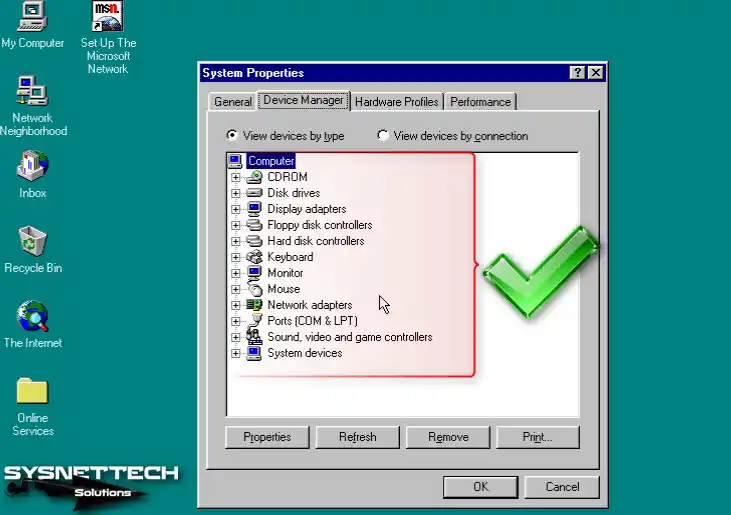
When you open System Properties, you can see the drivers that are not installed on your system in the Device Manager tab. Here you will be able to hear the system sounds when you install the driver for the PCI Multimedia Audio Device.
Step 2
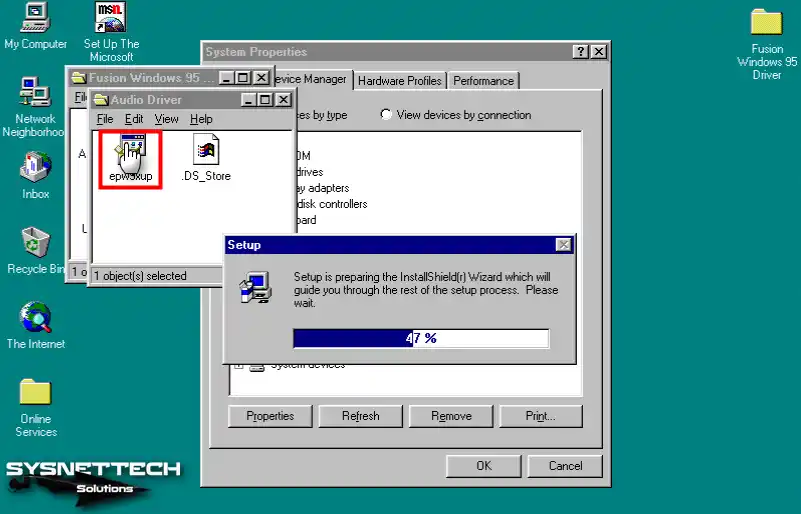
After copying the Audio driver you downloaded to your computer from the table at the bottom of the article to your virtual machine, run the epw9xup setup file.
Step 3
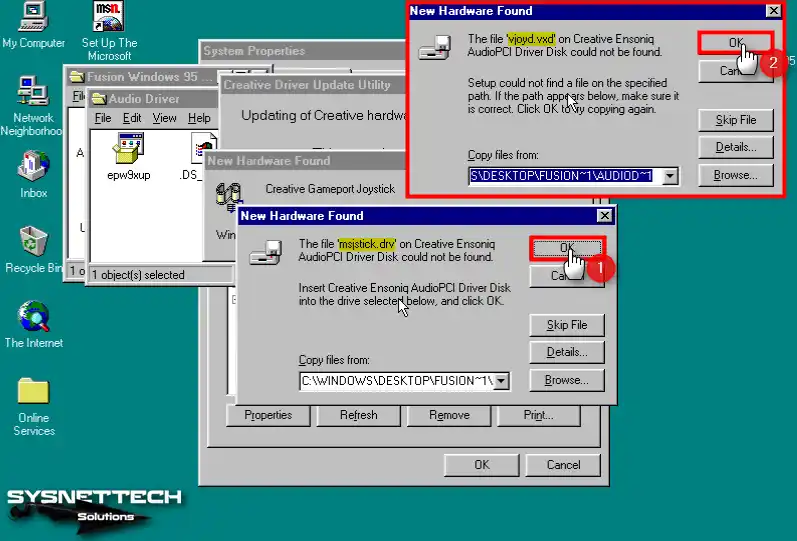
If you get msjstick.drv and vjoyd.vxd errors during Audio Driver installation, specify the location of the driver folder, and complete the installation.
Step 4
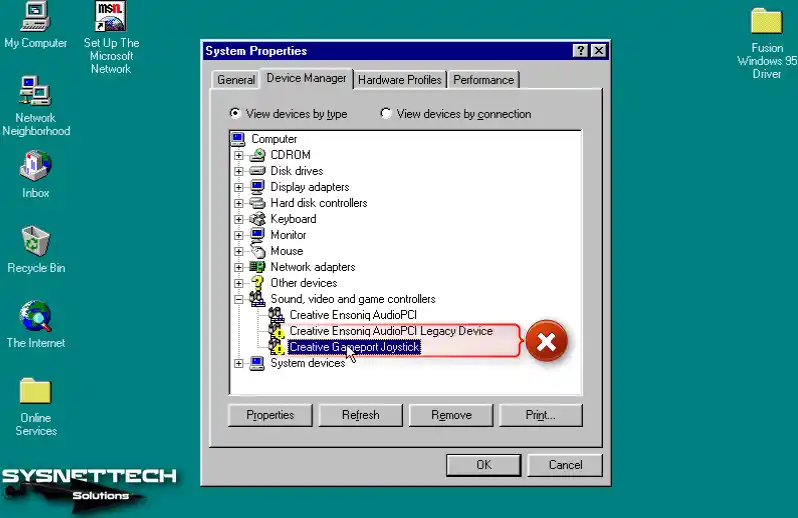
After installing Creative Ensoniq AudioPCI, you will see a yellow exclamation point in the device manager that both devices are not fully installed. To fix these problems you need to edit the vmx file of the guest machine. So shut down your virtual system.
- Creative Ensoniq AudioPCI Legacy Device
- Creative Gameport Joystick
Step 5
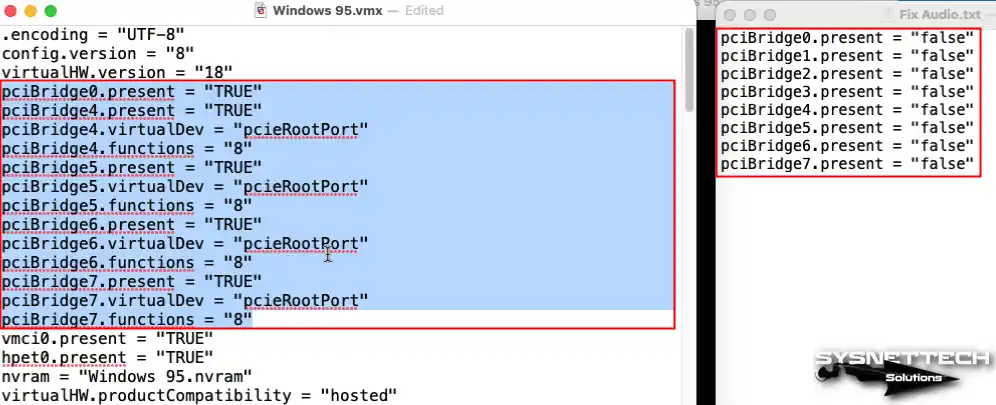
Open the Windows 95.vmx file with the text editor and select the values below.
- pciBridge0.present = “TRUE”
- pciBridge4.present = “TRUE”
- pciBridge0.virtualDev = “pciRootPort”
- pciBridge4.functions = “8”
- pciBridge5.present = “TRUE”
- pciBridge5.virtualDev = “pciRootPort”
- pciBridge5.functions = “8”
- pciBridge6.present = “TRUE”
- pciBridge6.virtualDev = “pciRootPort”
- pciBridge6.functions = “8”
- pciBridge7.present = “TRUE”
- pciBridge7.virtualDev = “pciRootPort”
- pciBridge7.functions = “8”
Step 6
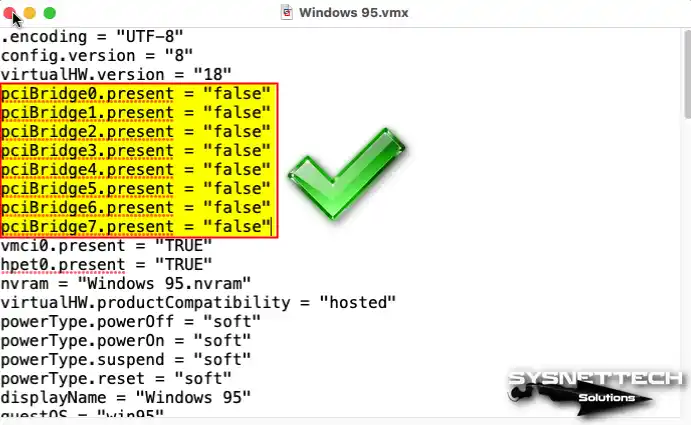
Replace the selected values with the values below and then save the vmx file.
- pciBridge0.present = “false”
- pciBridge1.present = “false”
- pciBridge2.present = “false”
- pciBridge3.present = “false”
- pciBridge4.present = “false”
- pciBridge5.present = “false”
- pciBridge6.present = “false”
- pciBridge7.present = “false”
Step 7
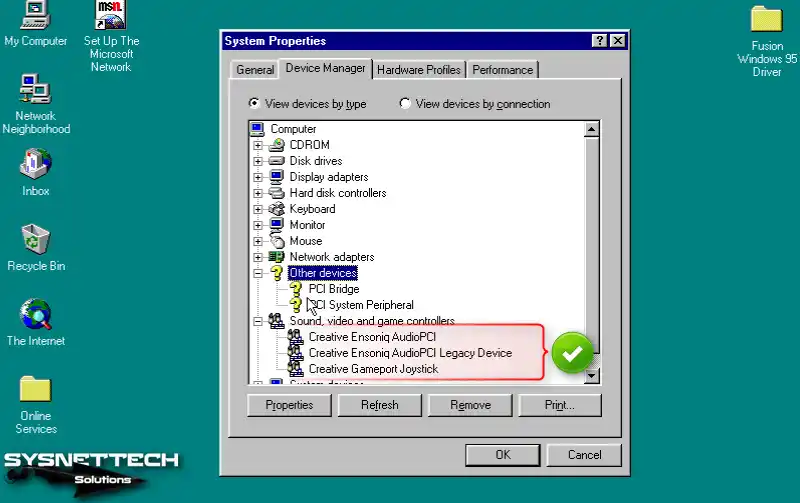
After running your Windows 95 virtual system again, you can see that the devices under Sound, video and game controllers are working fine.
How to Install Chipset Driver
In order to activate the PCI Bridge device you see in device management on your guest machine, you need to install the Chipset driver.
Step 1
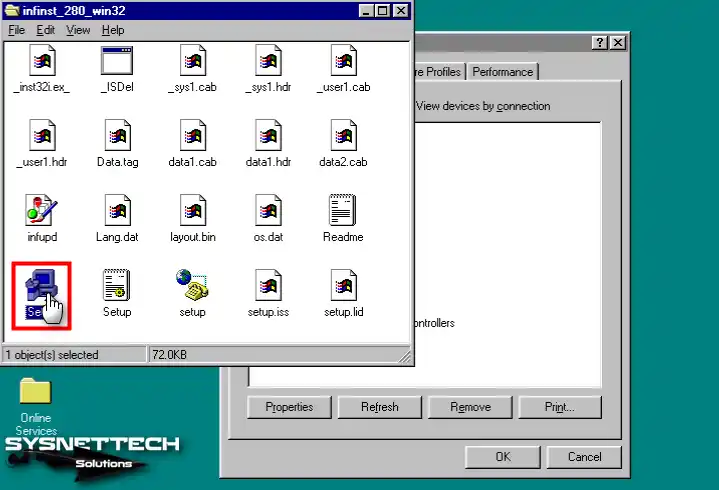
Copy the Chipset (infinst_280_win32) folder that you downloaded to your computer from the table at the bottom of the article to your virtual PC, and then run the Setup file in the folder.
Step 2
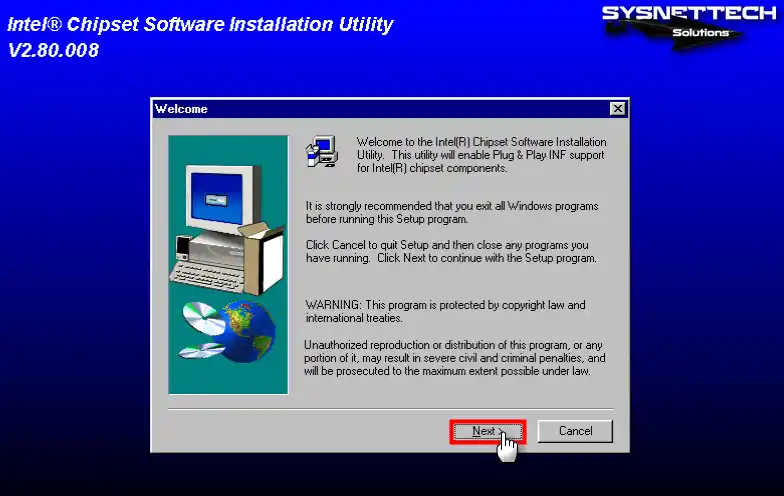
Click Next in the Intel Chipset Software Installation Utility V2.80.008 installation wizard.
Step 3
Click Yes to read and accept the license terms of the chipset software.

Step 4
After reading the Readme file, click Next and continue.

Step 5
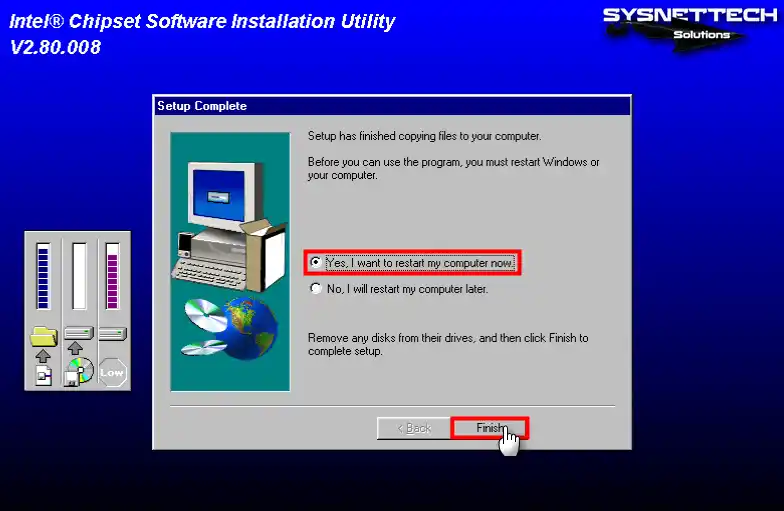
After installing the chipset driver, restart your virtual system for the changes to take effect.
How to Install System Drivers
To install the driver for the PCI System Peripheral device on your Windows 95 guest operating system, you need to change the hardware compatibility of your VM.
Step 1
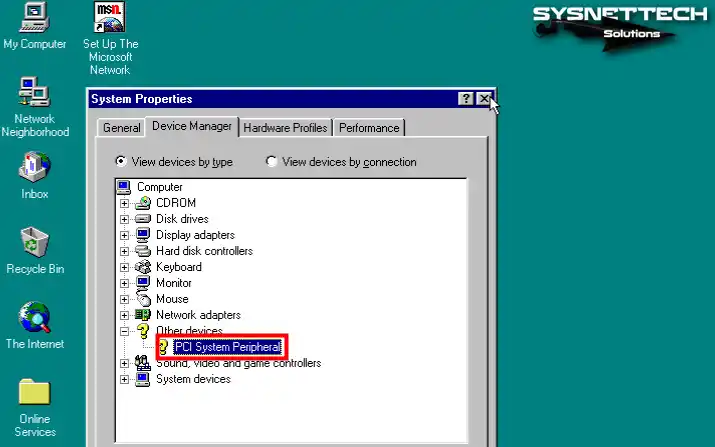
When you check the device manager on your guest system, you can see that the PCI System Peripheral device is not installed.
Step 2
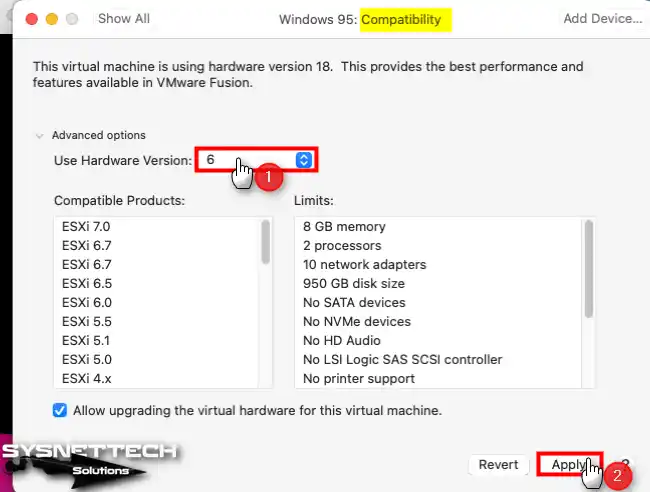
After shutting down your virtual computer, open the Compatibility settings in your VM’s settings and change the value of 18 in Hardware Version to 6, and save the setting.
Step 3
When you run your virtual computer again, you can see that the system drivers are installed without any problems.
How to Install USB Driver
Another way to transfer files between your Mac and guest machine is to use a USB flash drive or external HDD or SSD storage device. However, before you can use USB devices in Windows 95, you must enable the device and install the storage drivers.
Step 1
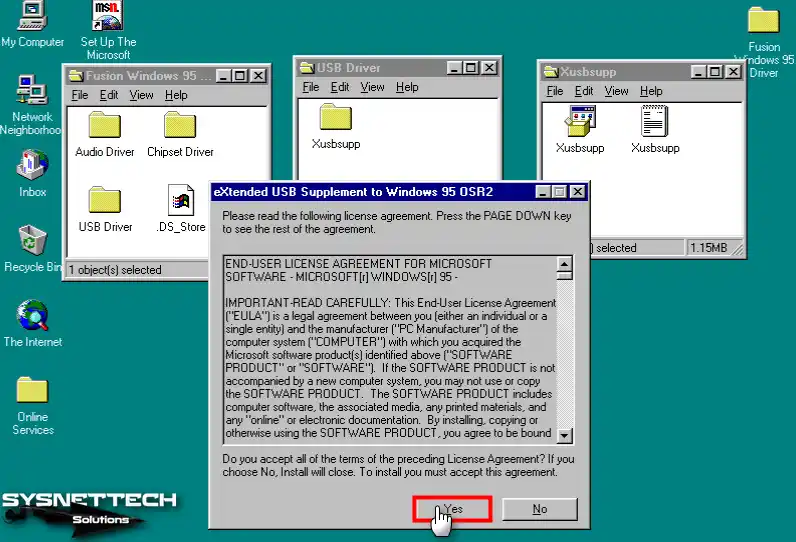
Copy the USB Driver folder you downloaded to your Mac from the table at the bottom of the article to your virtual system. Double-click the Xusbsupp setup file in the USB Driver/Xusbsupp folder and start the installation.
In the question window Do you want to install the eXtended USB Supplement on your system, click the Yes button.

Step 2
You can click the Page Down button to see the full eXtended USB Supplement license agreement or you can click the Yes button again to accept all the license terms.
Step 3
After installing the eXtended USB Supplement, click OK and restart your system.
Step 4
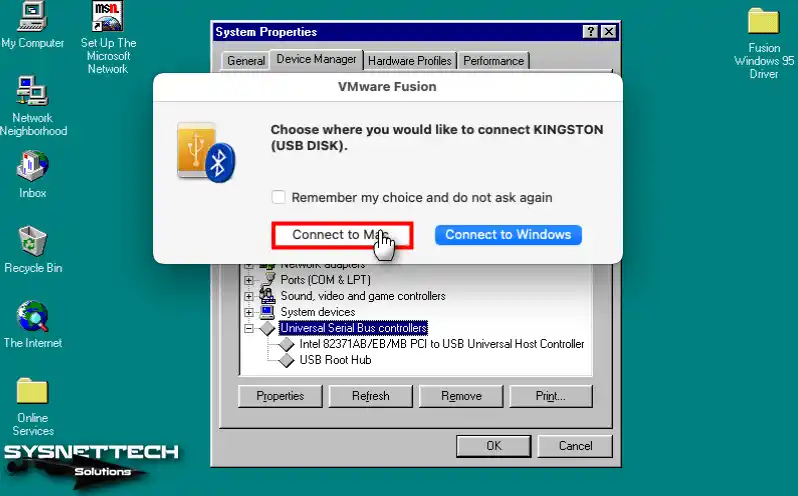
Insert a flash disk into the USB 2.0 port of your Mac computer and click “Connect to Mac” in the pop-up window.
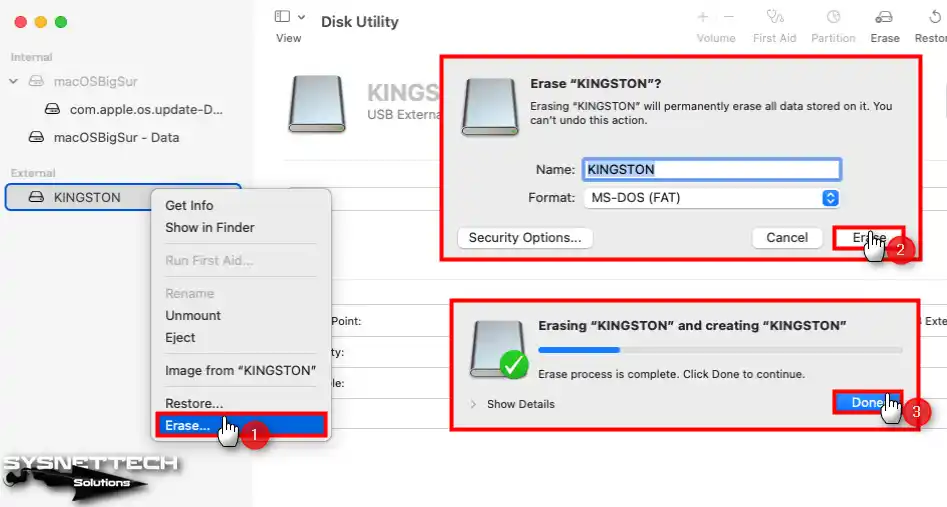
Step 5
Open Disk Utility and change the file format of your flash disk to MS-DOS (FAT) and format it.
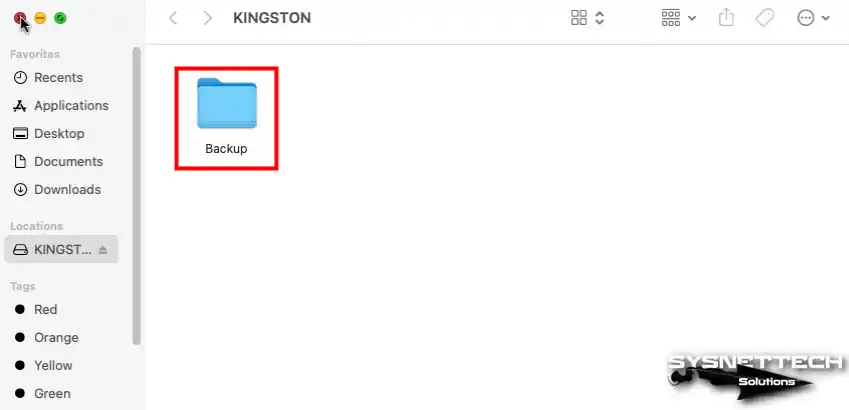
Step 6
Create a new folder called Backup on your flash drive.
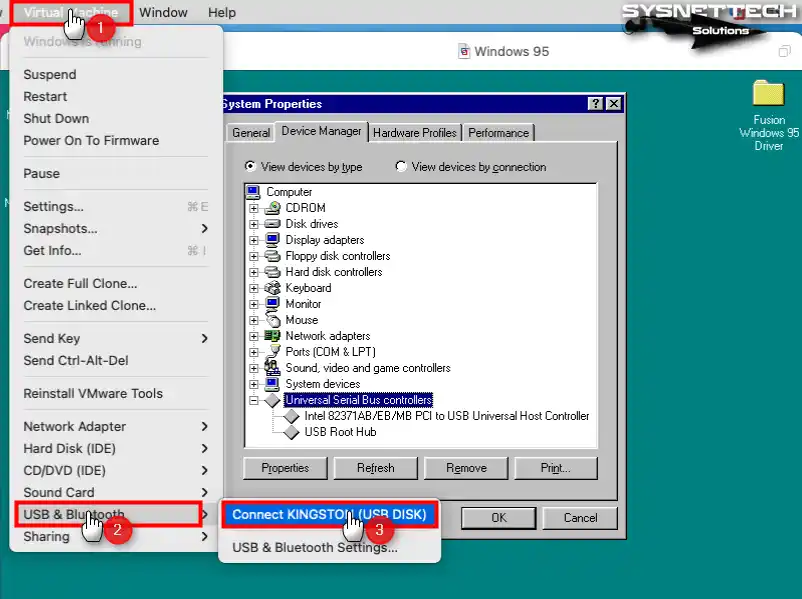
Step 7
Click Virtual Machine / USB & Bluetooth / Connect (Name of Your USB) in the Fusion tool menu to connect your flash drive to the VM.
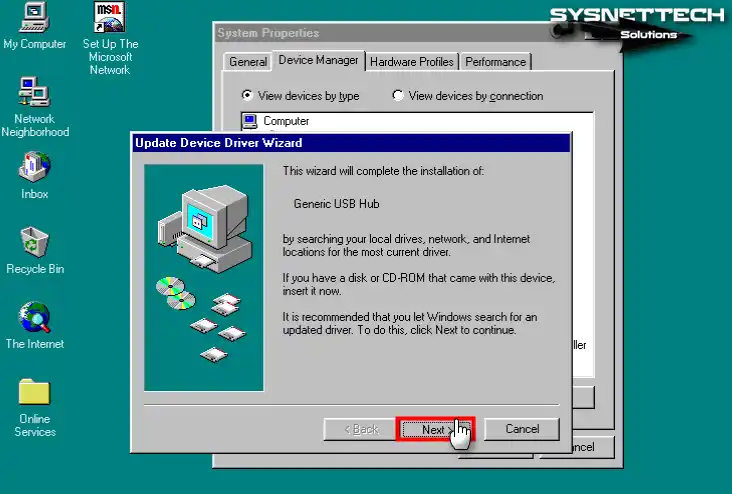
Step 8
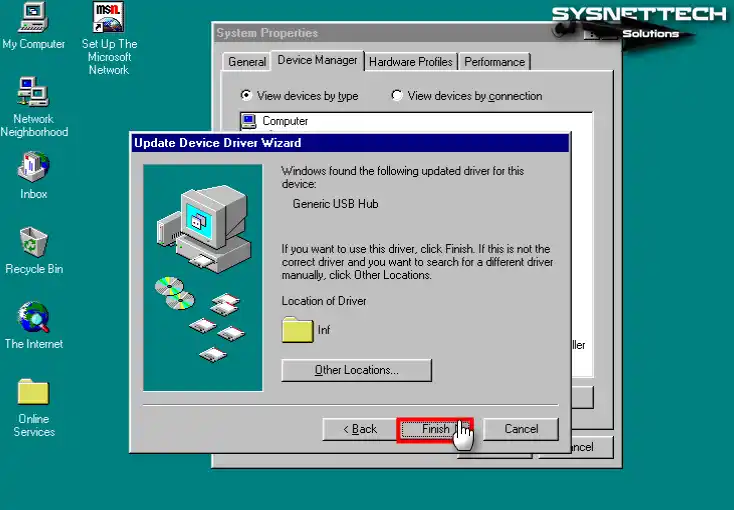
When the driver update wizard automatically opens, click Next to install the Generic USB Hub driver.
Step 9
After the driver for the Generic USB Hub device is found, click Finish.
Step 10
In the same way, install the driver for the Generic USB Mass Storage Class Device.

Step 11
After installing the USB driver on your Windows 95 system, restart your system.
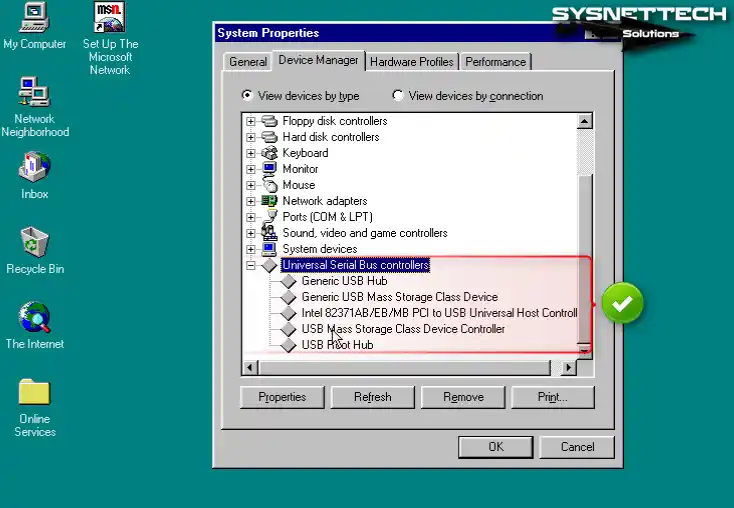
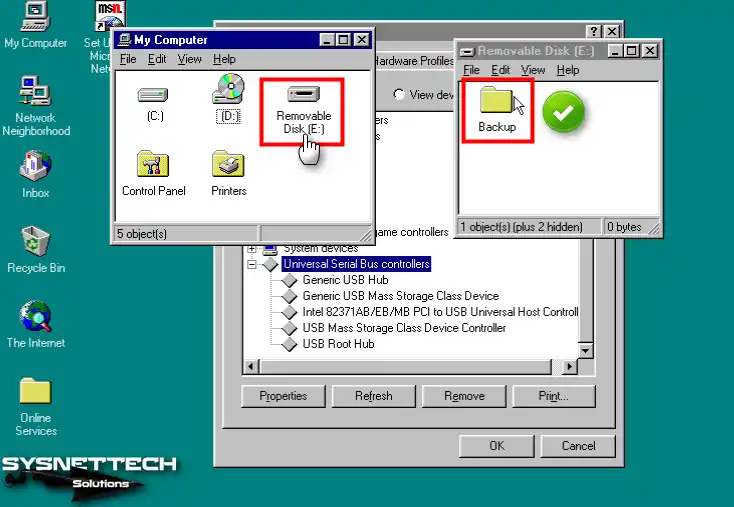
Step 12
When your system boots up, open My Computer and click Removable Disk and view the contents of your USB disk.
Video

1 Reader Comment
What happened to all the file links? Can you reshare them? Thanks