
In this comprehensive guide, I will show you the process of creating and managing snapshots in VMware Fusion Pro on your macOS PC.
First, let me briefly talk about snapshots, which are an essential feature for backing up guest operating systems in virtual machines. In short, it allows you to capture the current state of your system and quickly return to this state when necessary.
For example, whether you’re using Windows, Linux, or macOS on your guest VMs. You can prevent possible errors by taking a snapshot before taking serious action. Understanding how to use them will help you maintain system stability.
But you cannot use this feature if you do not already have a virtual machine. Knowing the steps to create a virtual computer from the beginning is very important.
How to Create Snapshots on Fusion 12 Pro on macOS
You can use the snapshot feature to quickly save the instantaneous state of your virtual machines that you have created with Fusion, the virtualization application developed for the macOS operating system.
Thanks to this great feature, you can save the instant state of your Windows 10 system that you have installed cleanly, and then quickly undo the changes you have made on your guest system and have a clean system again.
You can create multiple backups using a snapshot on your Mac computer and test the difference between versions of a program you developed by configuring each backup with a different name.
Another good way to make a backup is to create a full copy of the virtual machine. Cloning lets you test different situations at the same time. The truth is, this method gives you both a way to go back and a separate place to work. I especially like using these two things together when testing software.
Another example is that you can take a clean backup beforehand to prevent errors and incompatibilities that may occur when a system update comes to a Windows or Linux system.
How Long Does It Take to Create or Restore a Snapshot?
Creating or restoring snapshots in VMware Fusion 12 Pro generally depends on the disk size of your virtual system. So, it is about the size of the data that the software needs to process while you are restoring your data. In summary, the duration of these processes can vary from a few seconds to a few minutes.
The period when you create a backup also takes time, depending on the memory and disk status of your VM. The duration of this process depends on the amount of memory you have allocated to the VM and the available disk I/O operations.
If you restore the backup, it involves reverting the VM’s state to a previous point in time. The time it takes for this process to restore also varies. In short, it depends on factors such as the size of its data and the configuration of the virtual machine.
You should also know that you cannot use a VM temporarily while backing it up on Fusion. Therefore, I recommend that you perform these operations when the VM is turned off. Moreover, I recommend that you plan it at a time that will not affect your important work.
Factors Affecting Snapshot Duration
As I said, the duration of this process depends on the configurations of the virtual operating system. However, this is not always the case because the performance of your host PC is also important.
| Factor | Explanation | Effect on Time |
|---|---|---|
| Disk Size | The larger the disk size of the virtual machine, the longer the snapshot and restore times. | Large disk sizes take longer. |
| Disc Type | It explains the use of SSD (Solid State Drive) or HDD (Hard Disk Drive). However, SSDs are faster. Also, if you have an NVMe disk, the time is reduced to the maximum extent. | Using an SSD shortens the time. NVMe makes it even shorter. |
| Memory (RAM) | It is the amount of memory of the virtual machine and the host computer. More memory provides faster processing. In particular, newer technologies like DDR5 shorten the time. | More RAM shortens the time. |
| CPU Power | It refers to the processing power of the host computer. More powerful CPUs process faster. | A powerful CPU shortens the time. |
| Virtual Machine Status | It refers to the current state of the virtual machine (running, suspended, closed). The running machine may take more time when taking backups. | Running a VM takes longer. |
| Change Amount | It describes the amount of data saved/modified when taking or restoring a backup. | More changes take longer. |
| Disk I/O Speed | It explains disk input/output (I/O) speeds. Faster disks provide faster backups. | High I/O speeds reduce time. |
| Network connection | If you perform the backup over the network (for example, backing up to a remote server), network speed will be affected. | A slow network connection increases the time. |
How to Back Up a Virtual Machine with a Snapshot on macOS
We recommend you use the snapshot feature after a clean installation when you want to back up the Windows, Linux, or macOS operating systems you have installed on your virtual machines.
Therefore, after performing system updates on your guest system or a software-related error, you can quickly fix it.
To implement all of this, the software must be installed on your system. We have a step-by-step guide on how to install Fusion Pro on your Mac.
Steps:
Step 1
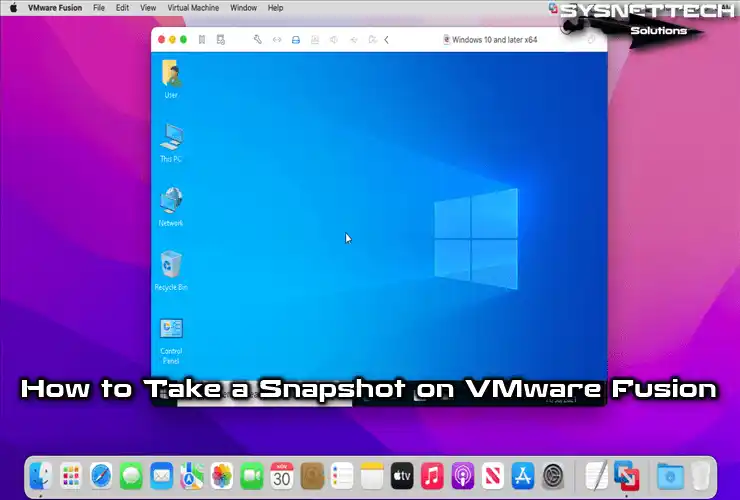
After running your Guest operating system, click the Snapshot icon in the Fusion tool menu.

Step 2
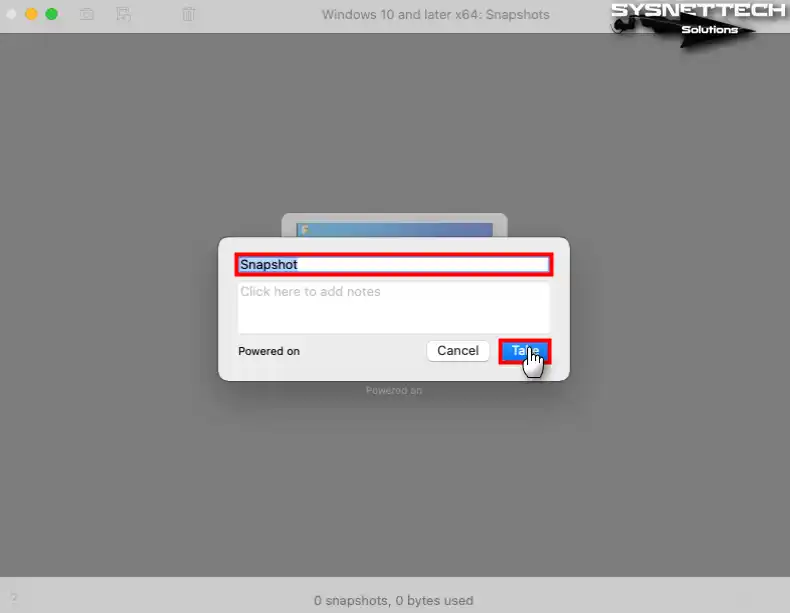
To save the current state of the Windows 10 virtual system, right-click on the virtual machine in the Snapshots window and click Take Snapshot.
NOTE: To make your backup plan work, you first need to create a clean Windows 10 setup. Without a properly set up virtual machine, the snapshot itself is almost useless.

Step 3
After typing a name and description for the backup of your guest machine, click the Take button.
Step 4
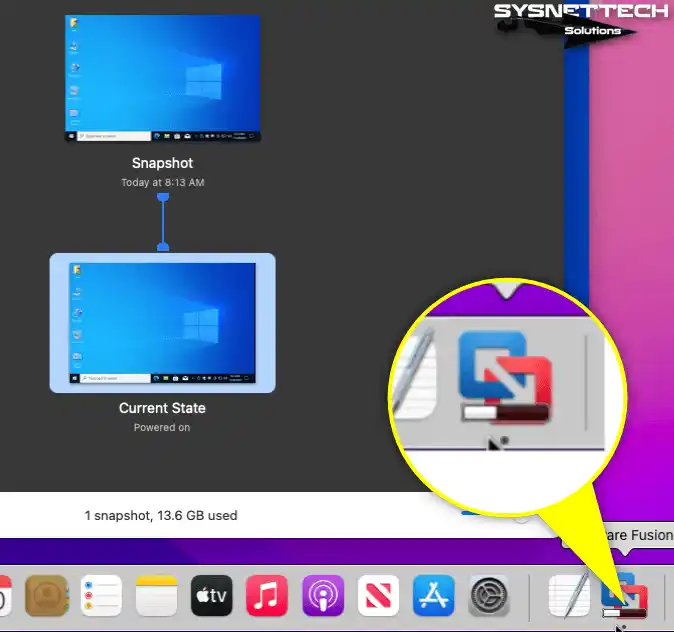
Wait while the current state of your virtual operating system is being saved. You can see the current backup progress from the progress bar under the Fusion icon in the Dock.
Step 5
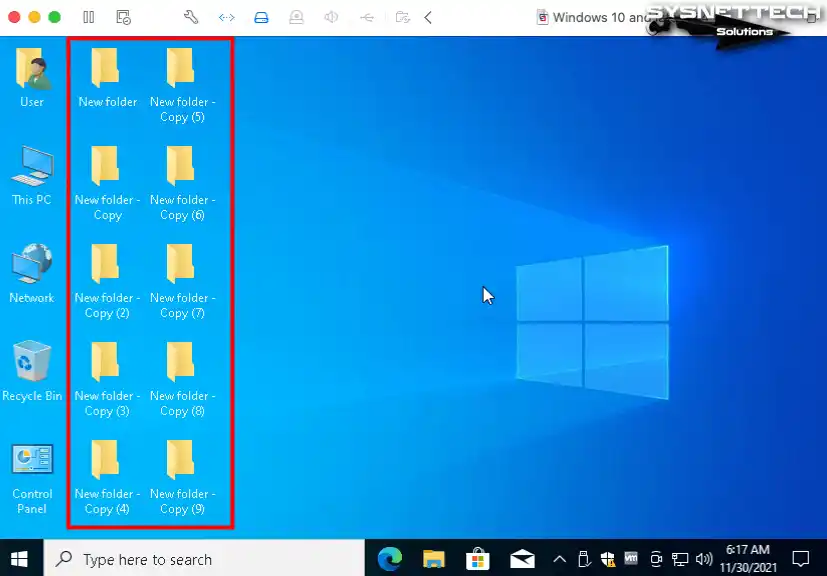
After backing up your clean, installed virtual system, create multiple new folders on the desktop or install any program.
Step 6
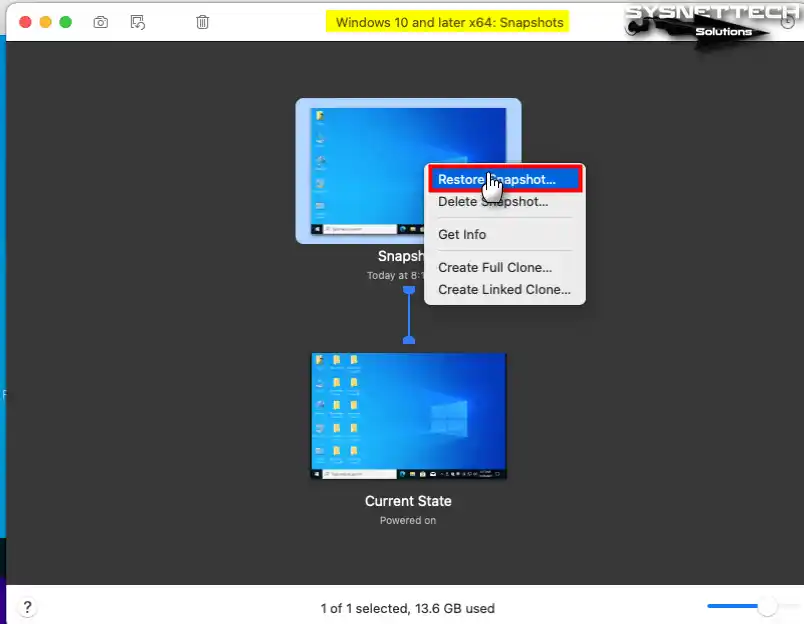
To undo the changes you have made on your Windows 10 guest machine, open Snapshots, right-click on the backup you have created, and then click Restore Snapshot from the options that appear.
Step 7
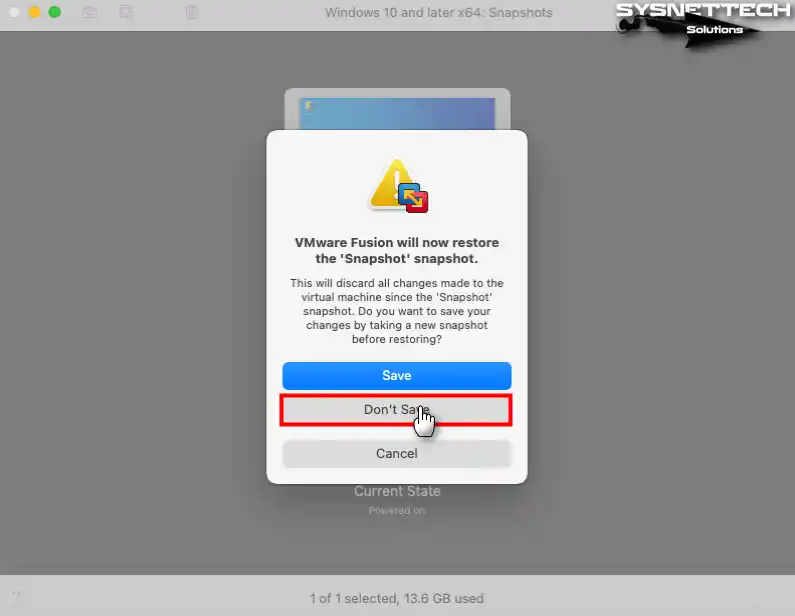
Before you start restoring the Snapshot, you will be asked if you want to save the changes you have made after backing up your virtual system. If you are testing a significant change, you can save existing transactions for later analysis.
But if what you do on the guest machine doesn’t matter to you, you’d better choose not to save the current changes. Therefore, click on the Don’t Save button in the warning window that opens, and continue.
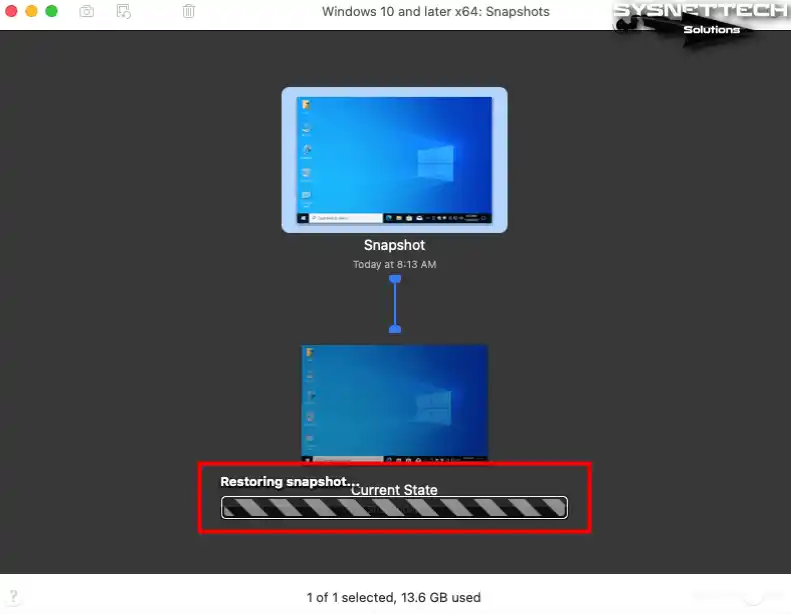
Step 8
Wait while the snapshot you took is being restored.
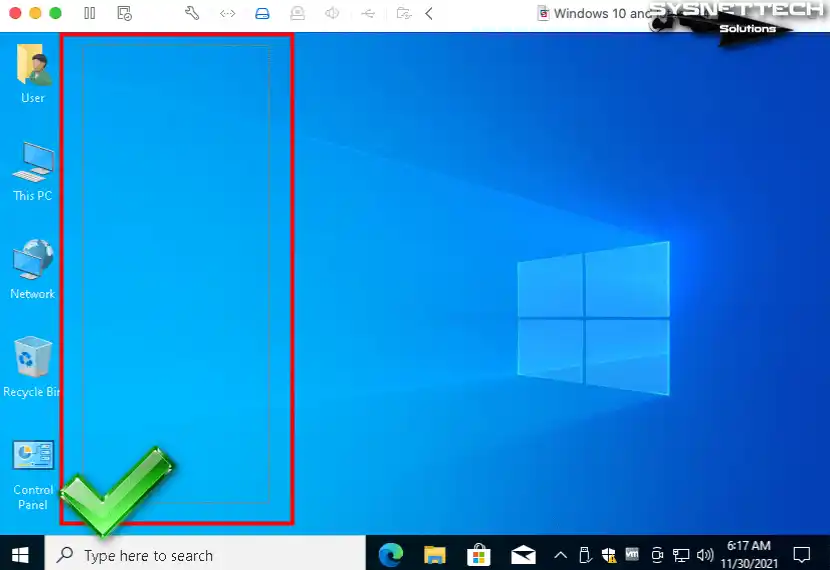
Step 9
After restoring the previous snapshot of your guest machine, you can see that all the changes you have made in your virtual operating system return to the default state.
How to Delete a Snapshot
After taking a snapshot with Fusion on macOS, if you don’t need the snapshots for your guest machines, you can delete them in order not to fill the storage space of your host computer with unnecessary backup files.
Step 1
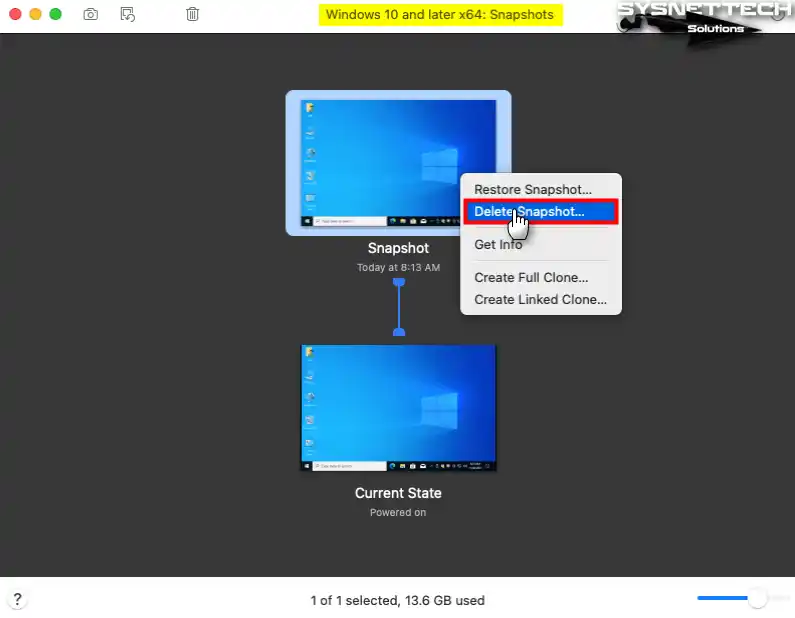
In the same way, open the Snapshot manager again, right-click on the backup you have taken, and click Delete Snapshot from the options that open.
Step 2
When you start deleting, click the Delete button in the warning window. The warning tells you that the virtual machine’s current state won’t be saved, and you can’t undo this action.

Step 3
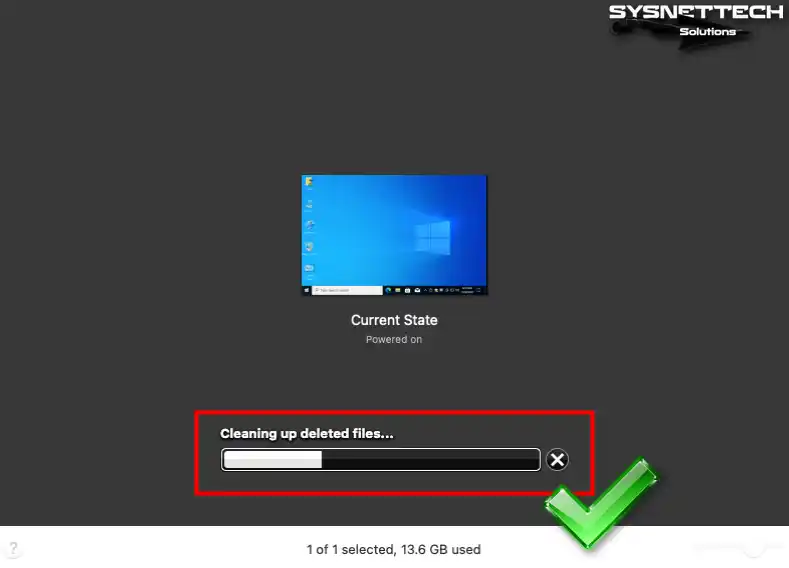
Wait while the deleted snapshot files are cleaned from your host disk. After this step, you will have successfully deleted the backup you created for your virtual system.
Video
Everything You Wanted to Know About Virtual Snapshots on macOS
My virtual machine crashed right in the middle of work. Is the snapshot feature really reliable or is it risky?
My computer has an NVMe SSD, but restoring a backup still slows down sometimes. What could be the reason?
Can I copy these backup files I took in Fusion to an external disk and use them on another Mac?
I am about to do an important update on my virtual Windows. Should I delete the backup after it is done?
I pressed the Delete button while the virtual machine was running. An ‘irreversible’ warning appeared. Will my files be deleted?
My host performance drops when I use Fusion on my Mac. Could snapshot be the culprit?
Conclusion
As a result, you can create snapshots in VMware Fusion 12 Pro on your Mac PC. In this way, you can quickly back up your systems and prevent possible problems. In this way, in addition to saving time, you can focus better on your work.
Understanding how to create, manage, and delete snapshots is essential in maintaining the stability of your guest systems. You can easily explore different configurations using this feature of Fusion software. By managing your snapshot strategy well, you can work with complex virtual environments with more peace of mind.

Be the first to share your comment