
In this article, we will examine the steps to expand/increase the disk capacity/size of a virtual machine installed on the VMware Workstation.
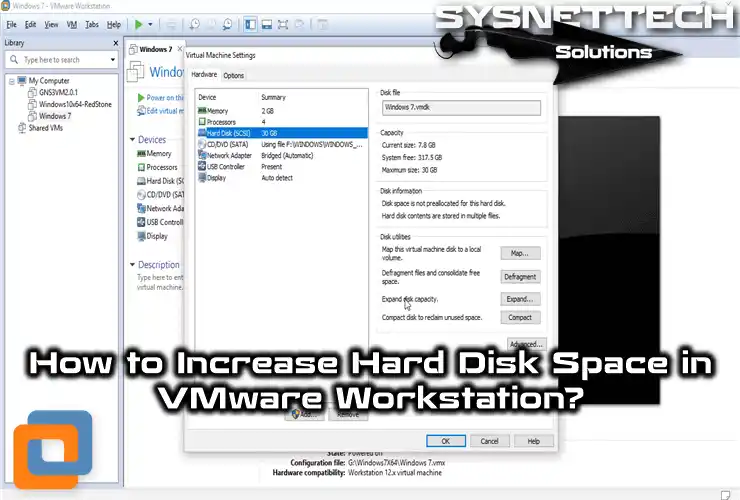
How to Increase Hard Disk Space of a Virtual Machine on VM Workstation/Player
Users with advanced computer knowledge are familiar with the VMware Workstation virtualization program. You may need to increase the hard disk size of virtual machines installed on VMware Workstation when you need them.
It is a straightforward process to increase the disk size of the virtual machine installed on the VMware Workstation virtualization program. In our previous articles, we examined how to clone a VM and how to snapshot a VM.
In this article, we will take steps to increase the disk size in VMware. On Windows, Linux, and macOS operating systems installed on VMware software, HDD expansion can be done quickly.
Before expanding the C: drive of the virtual machine, VMware must not have a Snapshot. If you have previously received a Snapshot, you must delete it from the Snapshot Manager.
How to Configure Virtual Machine Disk Size on VMware Workstation 12/14/15
In all versions of VM Workstation, the steps for increasing disk space are the same. Follow the steps below in order to improve the C: drive area of your VM.
You can find the download link for VMware Workstation for your Windows computer in the related article.
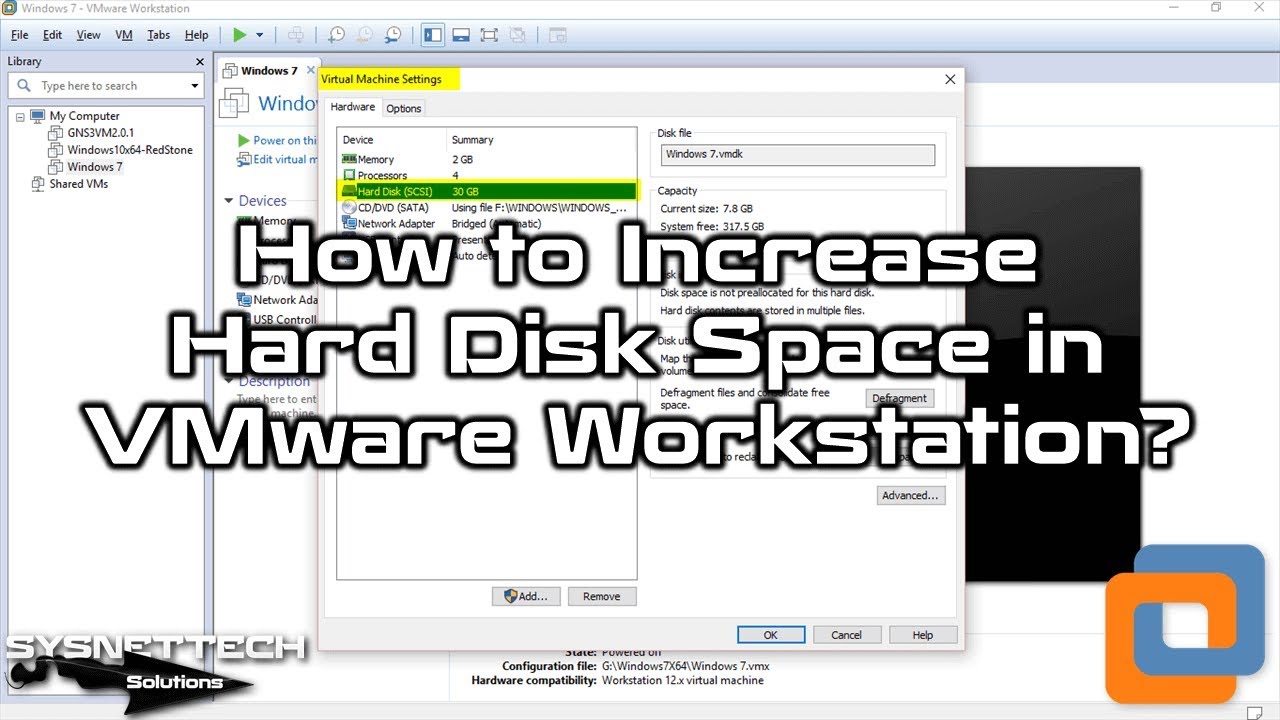
Step 1
After running the VMware Workstation, open the virtual machine where you want to expand the HDD. Then click on the Hard Disk option, as in the image below.
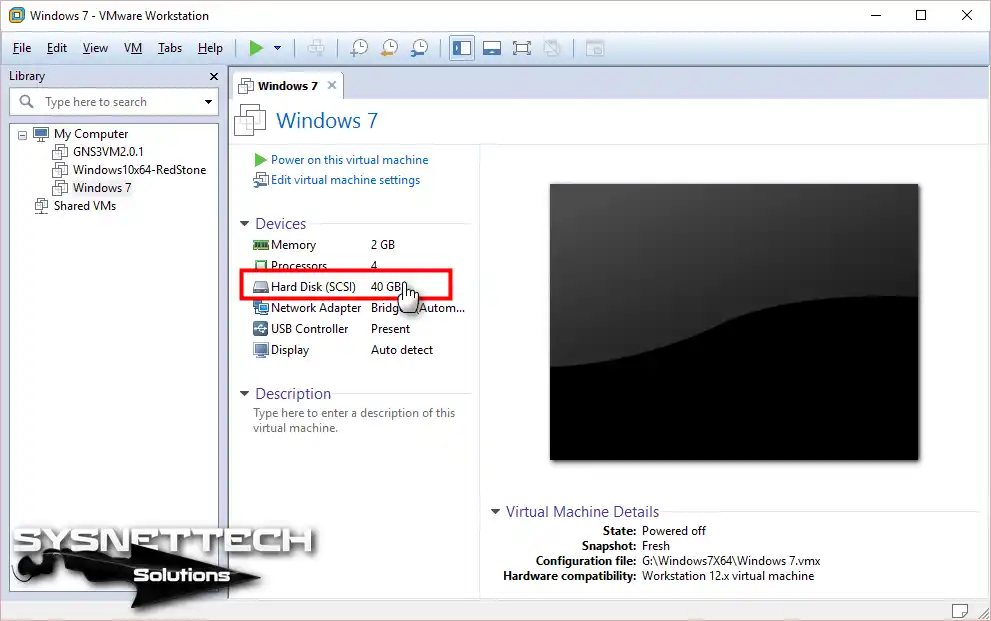
Step 2
In the Virtual Machine Settings, click the Expand button.

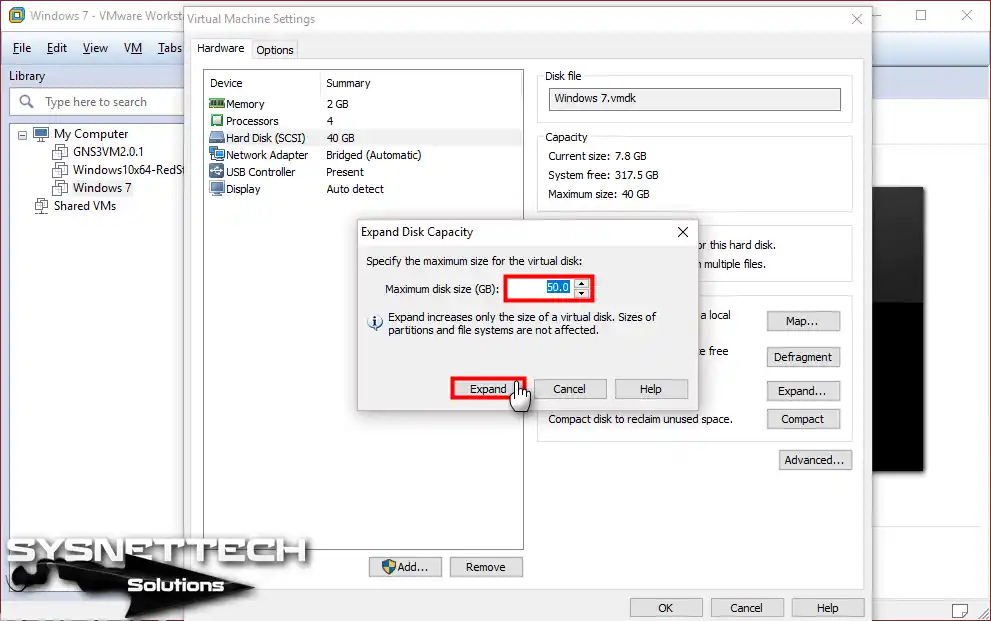
Step 3
In the Expand Disk Capacity window, type the amount in Maximum Disk Size (GB) if you want to increase the size of the virtual machine’s C: drive.

Step 4
After specifying the size amount, click the Expand button.
Step 5
We are expanding the virtual HDD of the VMware virtual machine.

Step 6
The expansion of VMware disk capacity has been completed successfully. The warning in the image below tells us to set the HDD for the operating system. Now click OK to continue.

Step 7
Click the OK button to save the setting.

Step 8
Start the virtual machine.

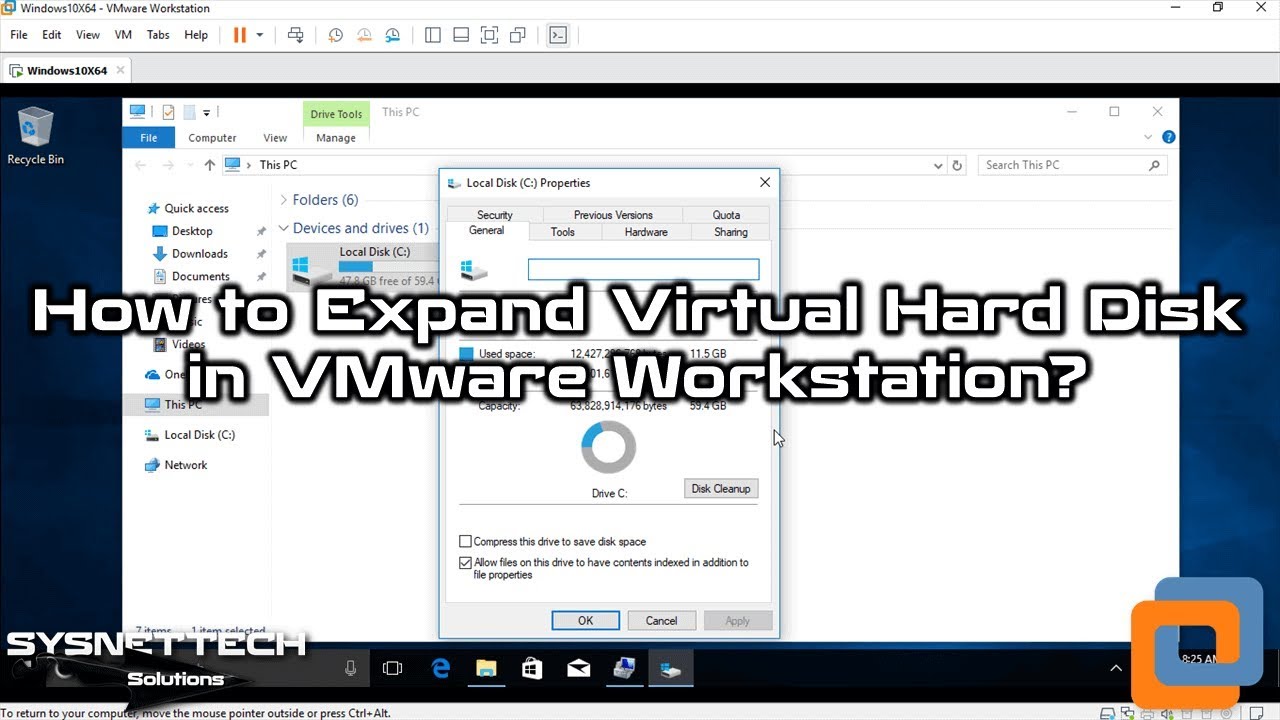
Step 9
On My Computer, you can see that the size does not increase on the C: drive. That’s why you need to open Disk Management.

Step 10
Click the Right Button / Manage button on my computer.

Step 11
Click Disk Management and then right-click on the (C:) drive.

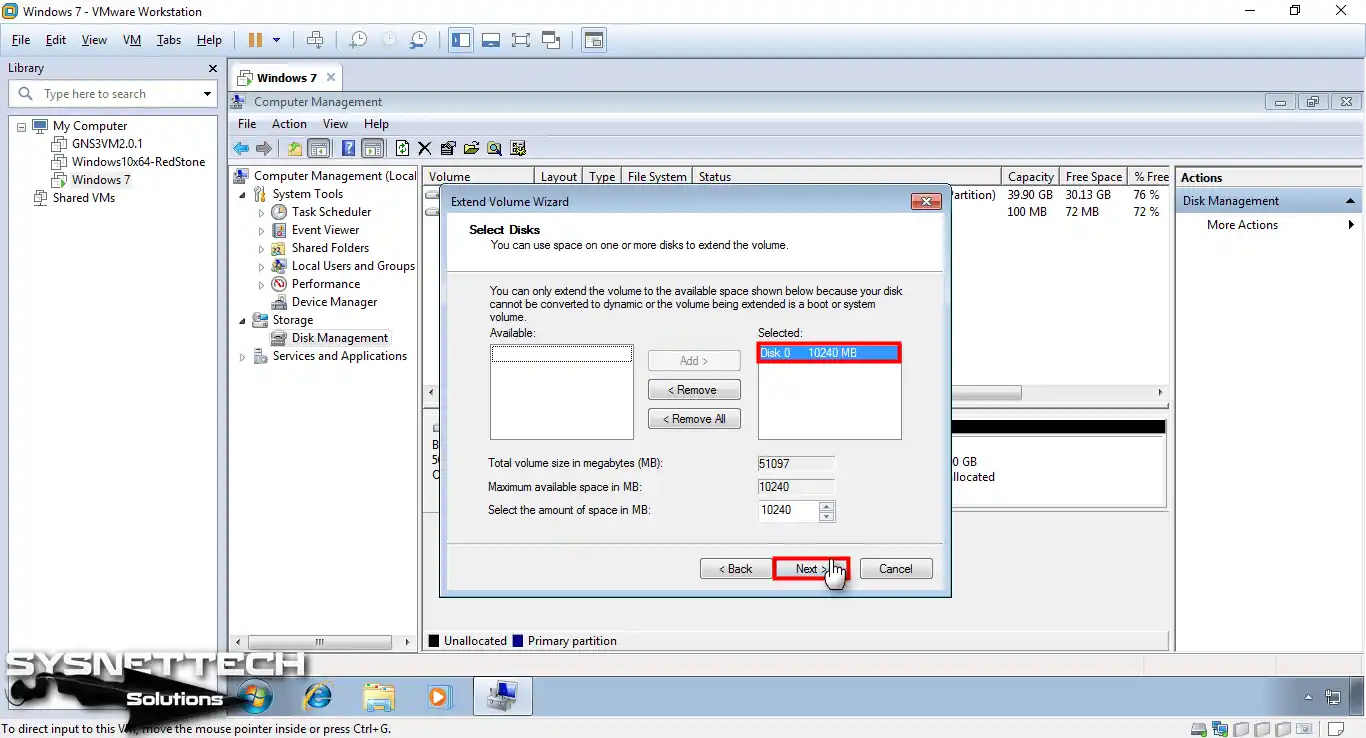
Step 12
In the window that opens, click Extend Volume.

Step 13
The Wizard window is opened. Continue by pressing the Next button.

Step 14
On the Selected tab, you can see the amount of HDD that you can increase. Select Disk 0 to continue.
Step 15
After increasing the disk size of the virtual machine on the VM, click Finish.

Step 16
As you can see in the image below, the process of increasing disk size has been completed successfully.

Step 17
You can check the C: drive in the following image, which has expanded.

Video 1
You can watch the video below to configure the C: drive size of a virtual machine running on a VM Workstation, and you can also subscribe to our YouTube channel to support us.
Video 2
You can watch the video below to increase the HDD size of a Windows 10 virtual machine running on a VM Workstation!
Things That Stick in Your Mind When Expanding Your Virtual Machine Disk
Is there something I must delete before increasing disk space in VMware?
In which versions of VMware Workstation does disk expansion work the same way?
I increased the disk size but the C drive still looks the same inside Windows. Where did I go wrong?
Does the virtual machine being turned on cause problems during disk expansion?
Are the same steps valid for virtual machines running Linux or macOS?
Does expanding the virtual disk really take up that much space on my physical computer?
Conclusion
In this article, we have examined step by step how to increase the disk size of a virtual machine in the VM Workstation virtualization program installed on a Windows 10 PC.
The only thing you should remember when increasing the HDD size is that you need to delete the Snapshot of the virtual machine.

3 People Shared Their Experience
Perfect!!
Hi
many thanks for your great post & help in above post, very usefull sir;
BR
You’re welcome!