
Have trouble adjusting the screen resolution of a Windows 95, 98, or 2000 virtual machine with Oracle VM VirtualBox installed on a modern operating system? Don’t worry. In this article, I will show you how you can adjust the screen resolution quality with SciTech Display Doctor software.
Whether you are running Windows 10 & 11, Linux, or macOS, you may experience display issues for Windows 95 & 98 virtual machines. In fact, this may not be a problem in other virtualization software. However, if you are using these old Microsoft systems with VirtualBox, you may experience difficulties!
How to Adjust Windows 95 / 98 Virtual Machine Display Settings and Screen Resolution
You may encounter some unsupported features when you install old Windows operating systems on your computer with the Oracle VM VirtualBox virtualization program. One of these features is the screen resolution problem.
You will get an error when installing Guest Additions after installing Windows 95 or 98 with Oracle software. This is because there is no such support for older Windows systems. You will have trouble changing the resolution of your virtual device.
Moreover, you can effortlessly modify the screen resolution and enhance the image quality by utilizing specific third-party applications.
You can professionally install old operating systems on virtual machines with Oracle by visiting the links below.
- Installing Windows 95 with VirtualBox
- Installing Windows 98 with VirtualBox
- Installing Windows 2000 with VirtualBox
- Installing Windows Millennium with VirtualBox
How to Install the Display Driver for Windows 95 or 98
Suppose you run the Microsoft Windows 95 operating system on a virtual PC. In that case, you can install the display driver using a 3rd party software, SciTech Display Doctor, when you have screen resolution problems.
Download the SciTech Display Doctor software to your computer by clicking the button below, and you can see the ISO file after extracting the archived file to the folder.
Step 1
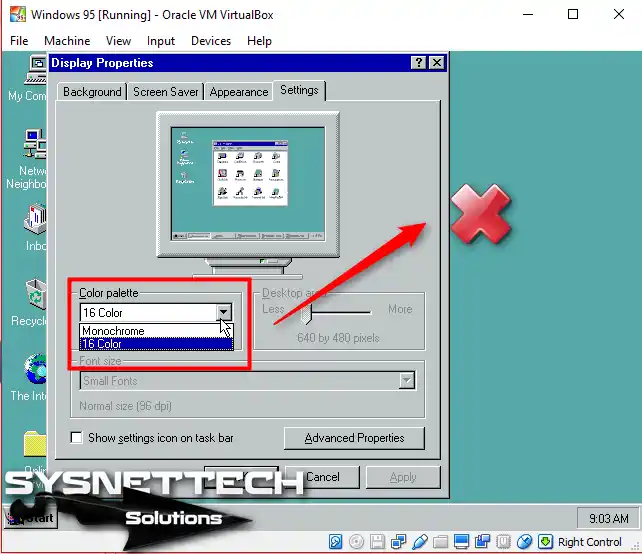
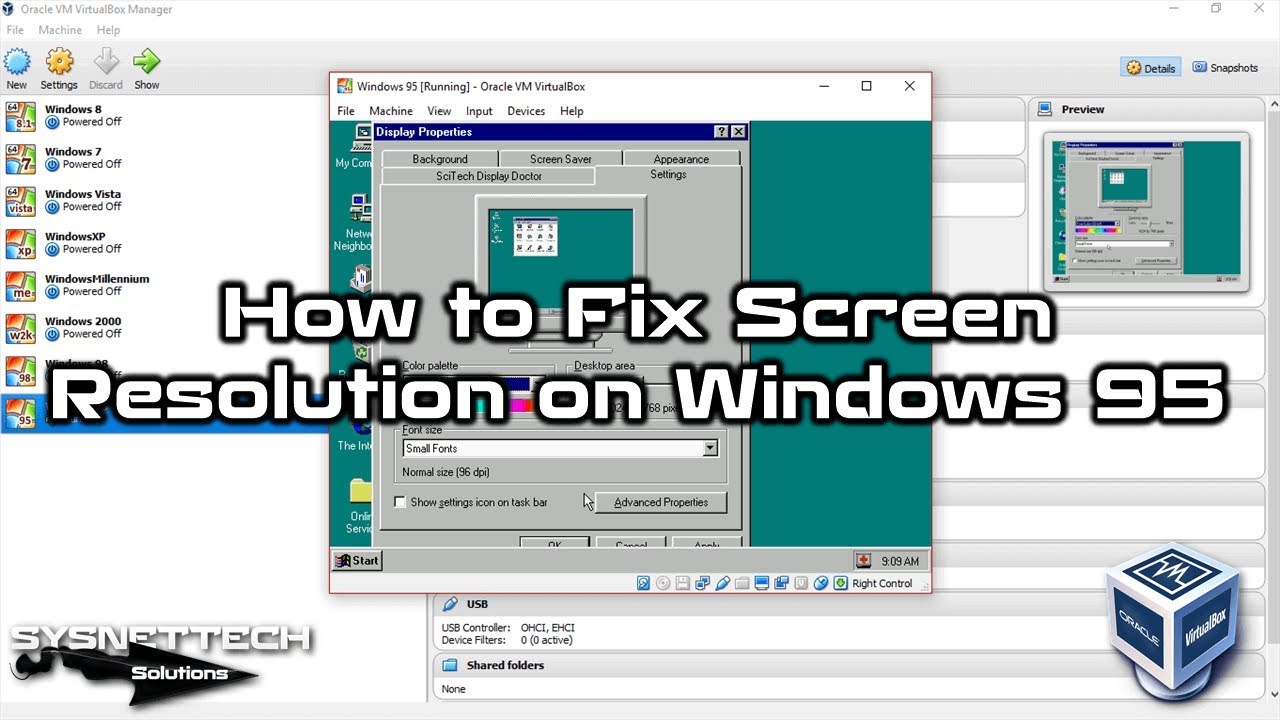
After running the Windows 95 virtual machine, when you open the Display Properties setting window, you will see only two options in the Color Palette section, as in the image below.
For the screen quality to be better, the options here must have a 32-bit color setting, and the Desktop Area must be adjustable to change the resolution.
Step 2
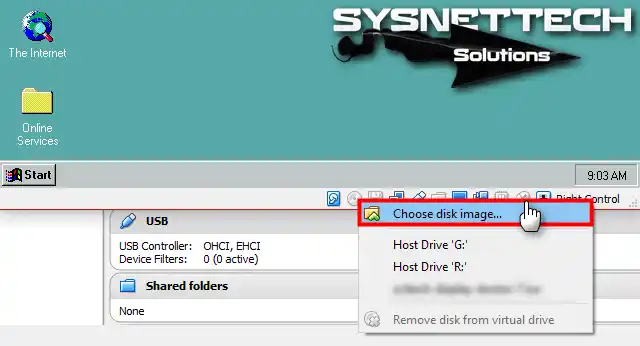
To add the ISO file of the downloaded software to the guest machine, click the CD/DVD symbol and click Choose Disk Image from the options that appear.
Step 3
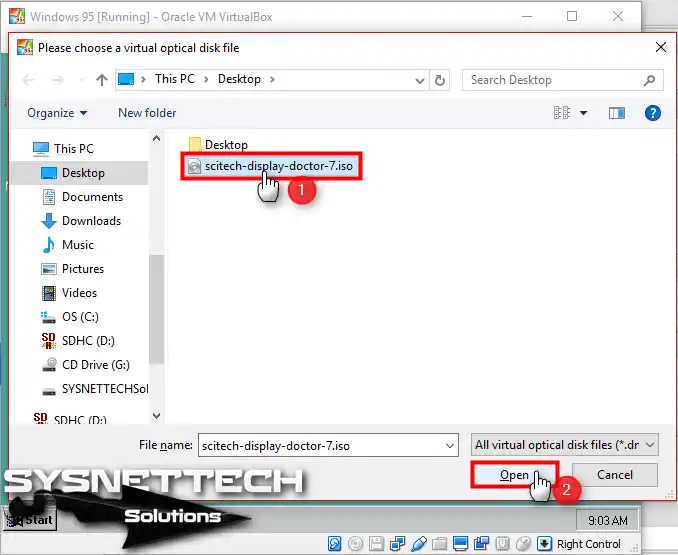
Select the Scitech Display Doctor 7 ISO file from the downloaded location and click the Open button.
Step 4
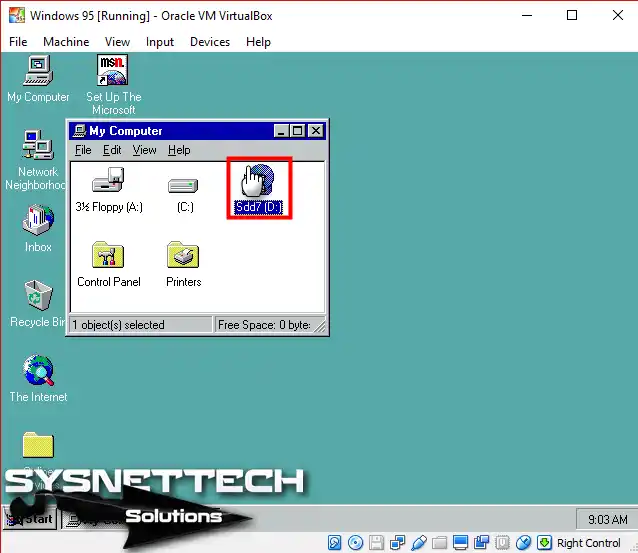
After adding the image file, open My Computer and double-click to view the image named Sdd7.
Step 5
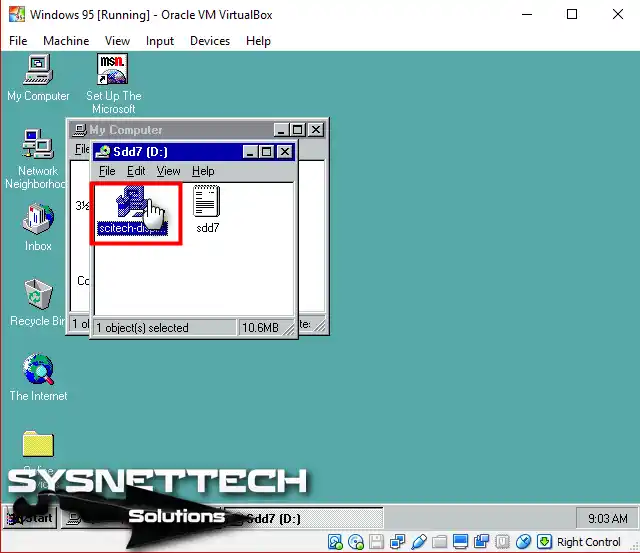
Double-click the scitech-display.exe file in the sdd7 image.
Step 6
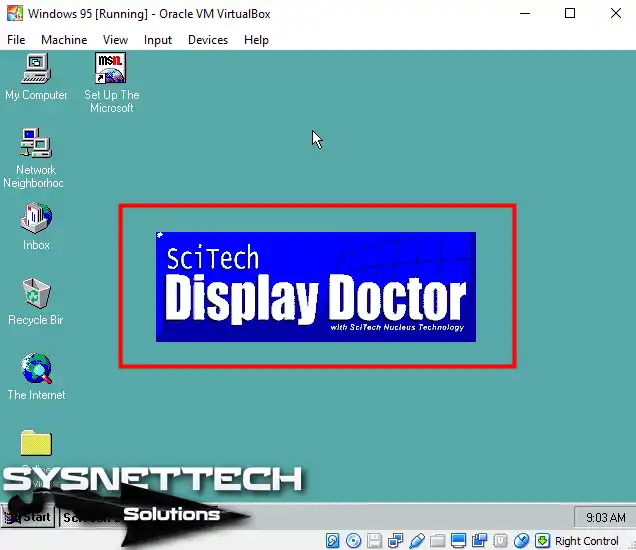
Wait while the SciTech Display Doctor program opens for installation.
Step 7
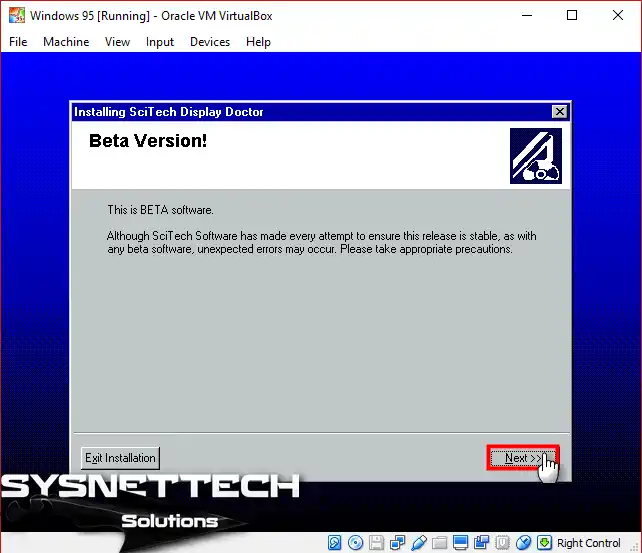
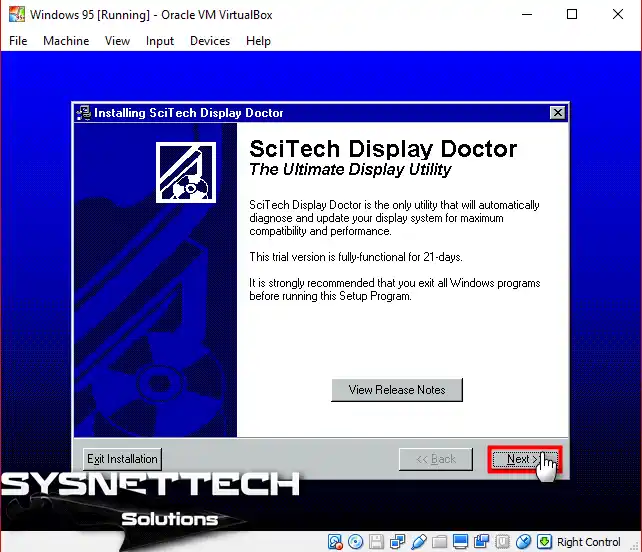
When the SciTech wizard starts, click the Next button in the window that states that the software is in beta.
Step 8
The SciTech program offers a 21-day trial version, and once this period expires, access to the program may be restricted. However, you can acquire the complete version from various online platforms.
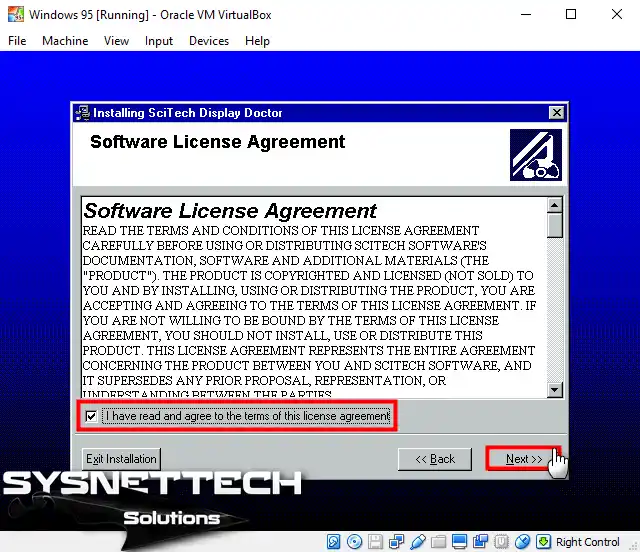
Step 9
Please read the full text of the SciTech Display Doctor license agreement, accept it, and click Next.
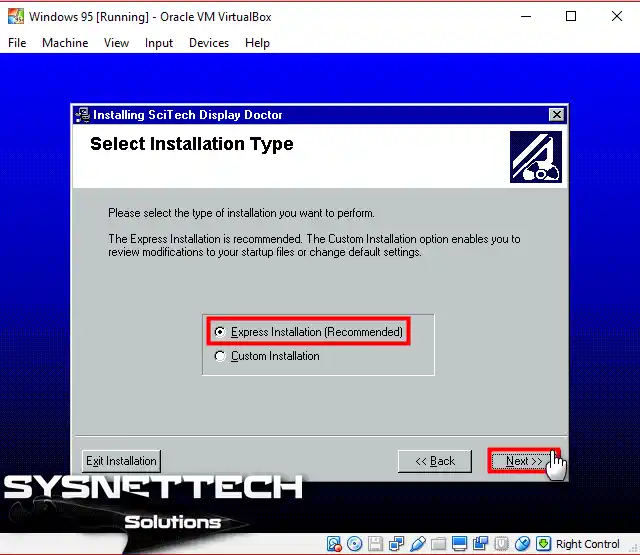
Step 10
Select Express Installation and click Next again.
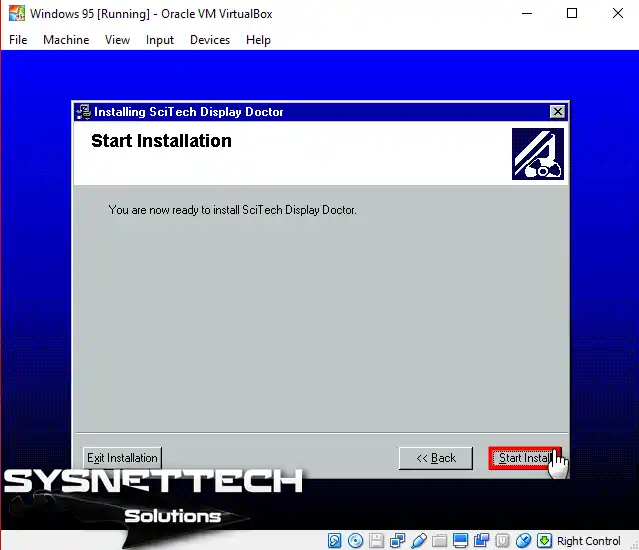
Step 11
Kindly click the ‘Start Install’ option to commence the installation process.
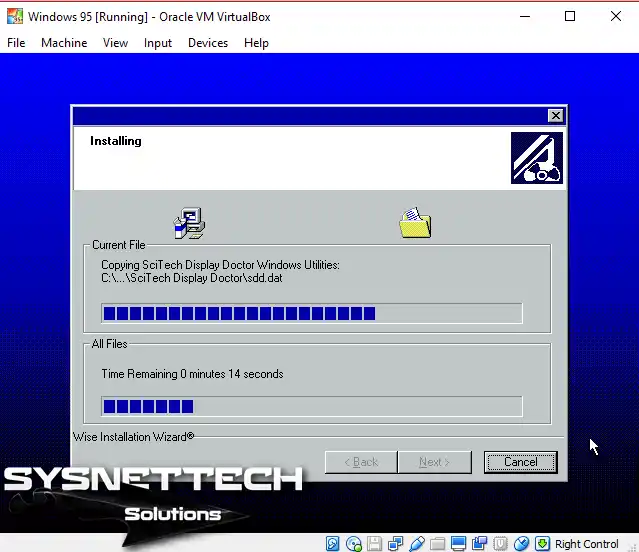
Step 12
Wait while the SciTech Display Doctor 7 program is installed on your Windows 95 virtual computer.
Step 13
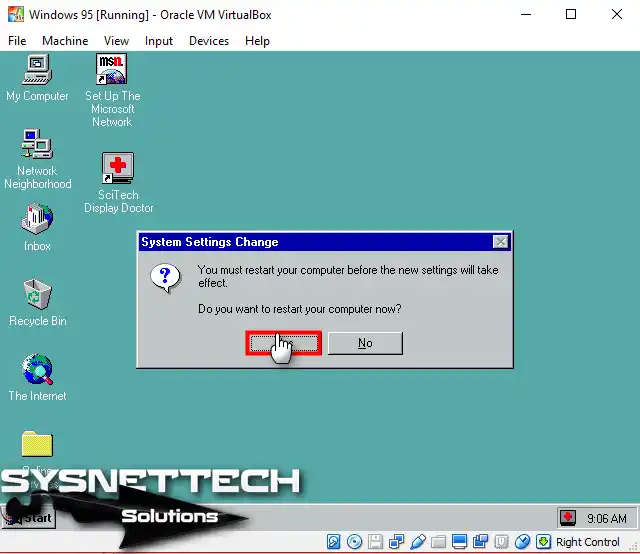
After completing the installation of the SciTech software, confirm restarting your system.

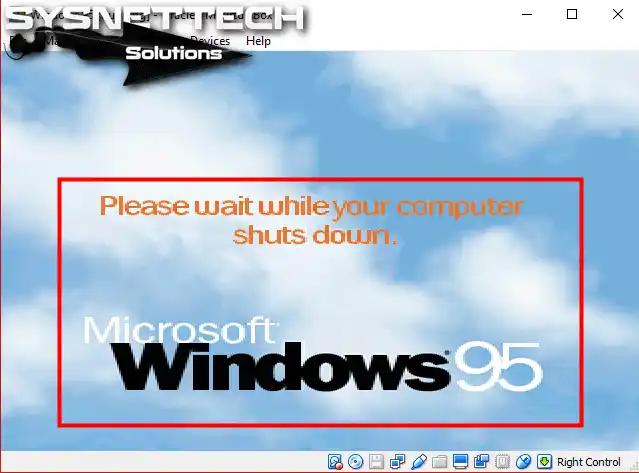
Step 14
Wait while Microsoft Windows 95 restarts for the changes to take effect.
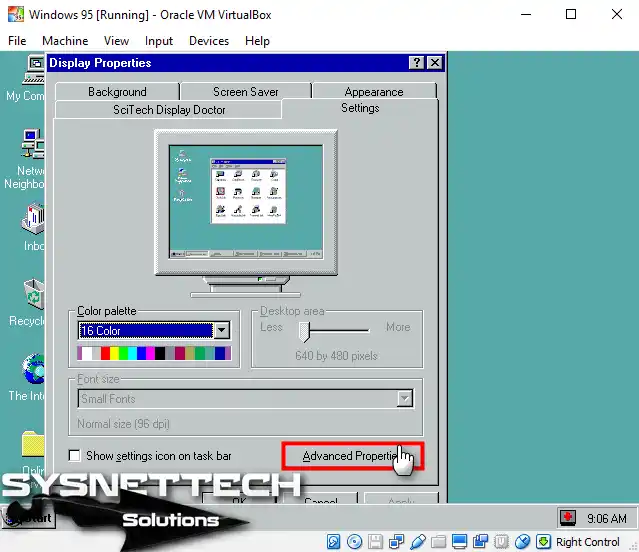
Step 15
Open Display Properties on your Windows 95 guest machine and click Advanced Properties, as in the image below.
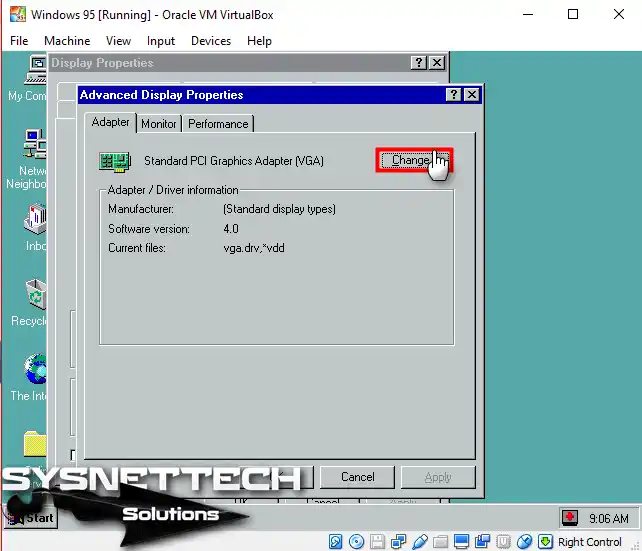
Step 16
Click Change to update the display driver in the Advanced Display Properties window.
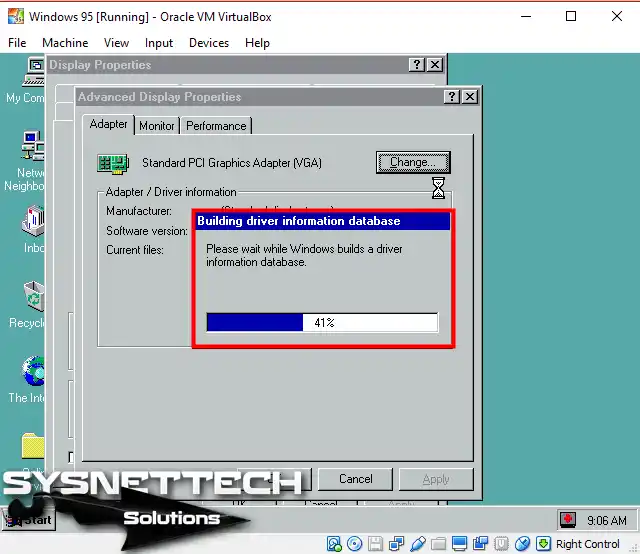
Step 17
Wait while Windows configures the information database for the display driver.
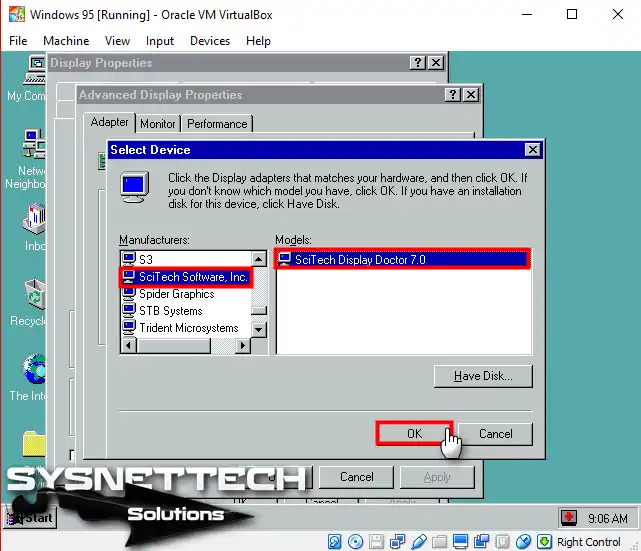
Step 18
In the Select Device window, select SciTech Software from the left panel, choose SciTech Display Doctor 7.0 in the model section, and click OK.
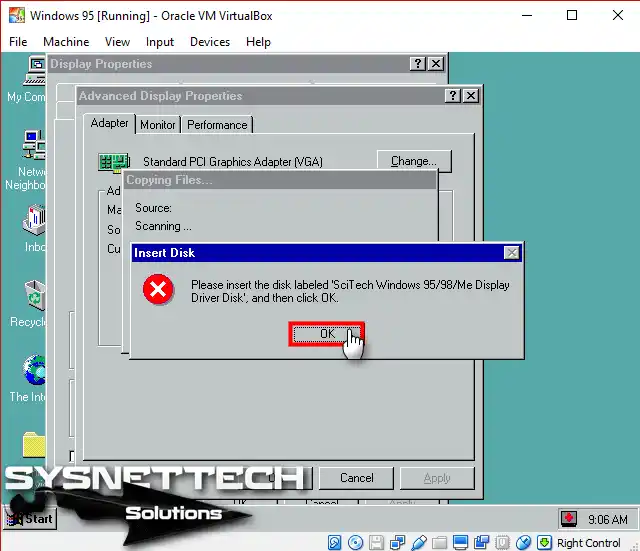
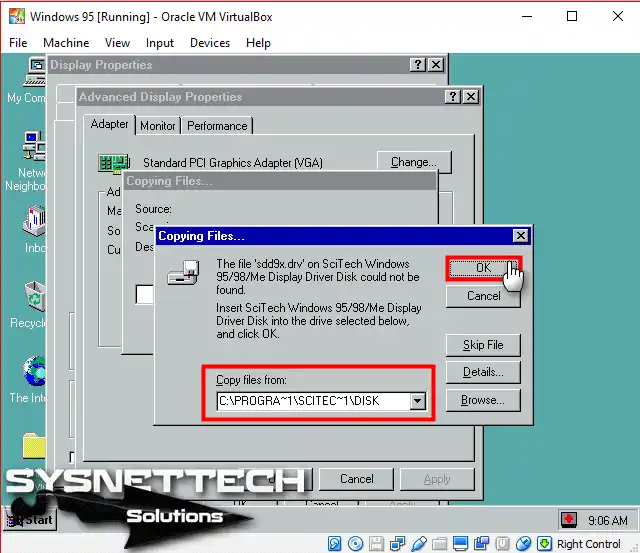
Step 19
Click OK again to dismiss the Insert Disk warning.
Step 20
Continue with Browse to select the location where the files will be copied.
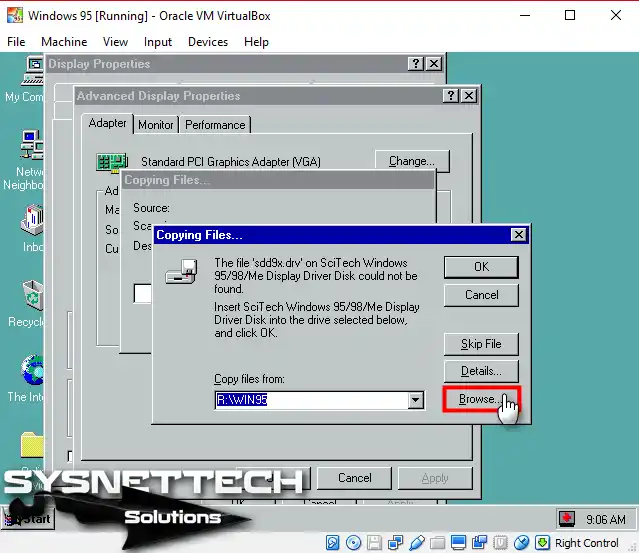
Step 21
Follow the path C:\Program Files\SciTech\Disk and select the sdd9x.drv file.
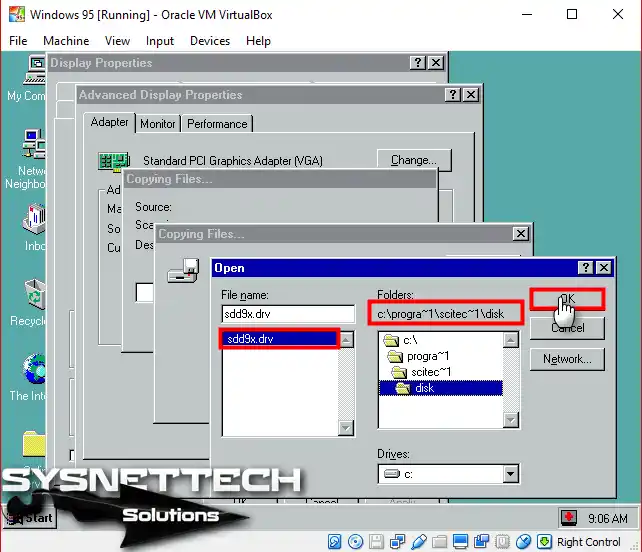
Step 22
After specifying the location of the driver file in the Copy files from section, continue.
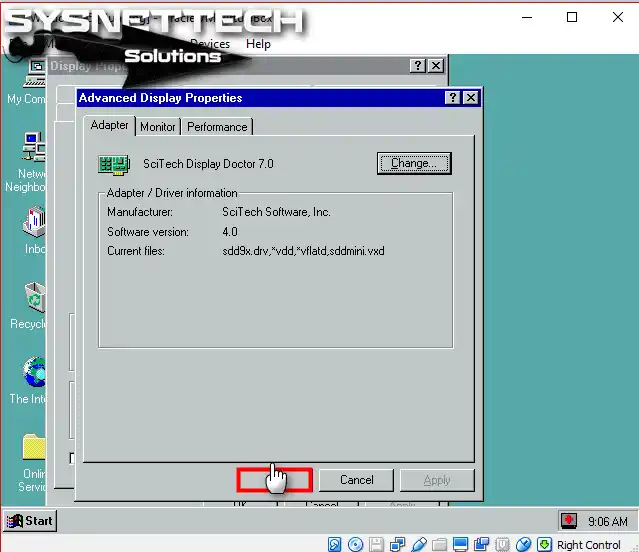
Step 23
After reviewing the screenshot below, you can see that you have successfully updated the display driver.
Step 24
After updating the driver, restart your Windows 95 virtual computer so that you can configure the display settings.
Step 25
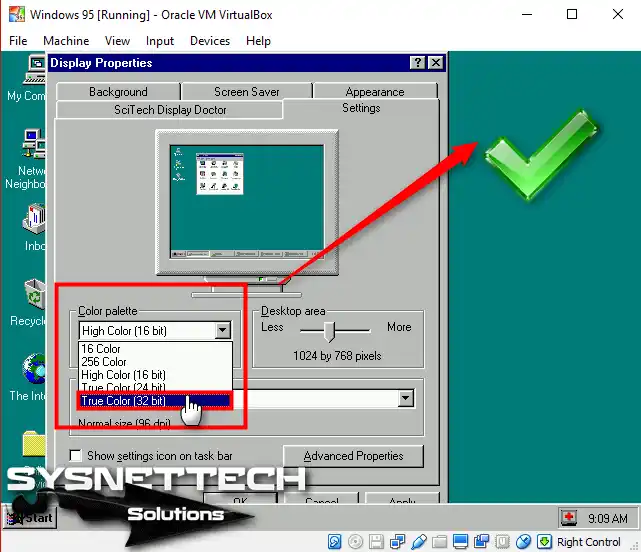
When you restart the VM, you will see that the True Color (32-bit) and Desktop Area options are active in the Color Palette section of the Display Properties screen. You can fix the Windows 95 or 98 screen resolution problem by configuring the options here.
For instance, as depicted in the image below, you can modify the guest machine’s display settings to True Color (32 Bit) and 1024X768.
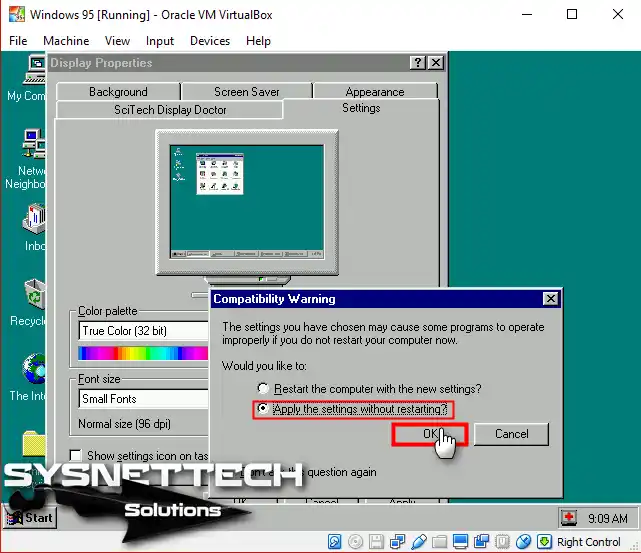
Step 26
After making the relevant changes, check Apply the settings without restarting and click OK.
Step 27
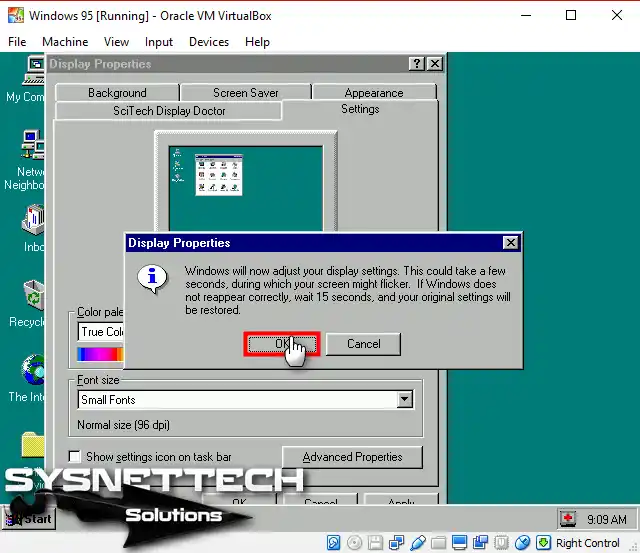
Click OK within 15 seconds to confirm the screen resolution change that will appear in the warning window.
Step 28
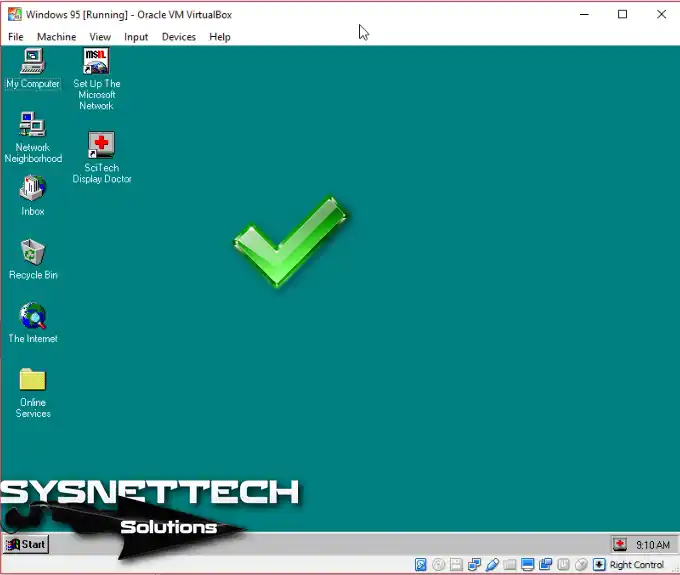
After setting up the Windows 95 screen resolution on VirtualBox, you will see an increased screen quality, as shown in the image below.
Video
Conclusion
In conclusion, you can adjust the resolution of older Windows operating systems by following all the details I have outlined in this article. Especially if you are running on Oracle VM VirtualBox, you may experience screen resolution problems on older OSes.
In short, you can use SciTech Display Doctor software for such display problems. You can improve image quality for Windows 95 & 98 by carefully following the configuration process. Therefore, you can reach the screen resolution you want for your virtual machine.

17 People Shared Their Experience
thank you
it working now!
how to get the download woking working
tolqabaqci the link not working for download
I installed the software following steps 1 through 13. Now the mouse won’t work inside my win 98 virtual machine. It worked before I installed your software.
Worked like a charm, THANKS!!!
You’re welcome, John!
Impressive tutorials, the whole series. Thank you. I finally have a working w95 VM!
I am glad you fixed your problem. Thanks for your comment.
Your the best thing since peanut butter. What you do, you do well. Thank you!!
After install this, when I shutdown from within Windows 95, the shutdown screen hangs. Is there a way to fix that?
I followed all steps, but for some reason, it does not work.
my Win95 display much better now… thank you so much !
I’m glad I helped, thanks for your comment.
now it shows a Windows Protection error on boot
after installing software my WIN98 VM stopped booting, stays in “Windows is now starting state”. This a good article though. Thanks for sharing the information
didnt work for me… not for Win 98, not for Win ME. I choose the drivers like informed, but simple not worked. I think is some conflict with my actual GPU, a RTX-2060. Old windows has always this limitations with video drivers
When I restart it, it says “Windows is now restarting . . .” until I just give up and close it. Do you know why that might be? Help, please.