
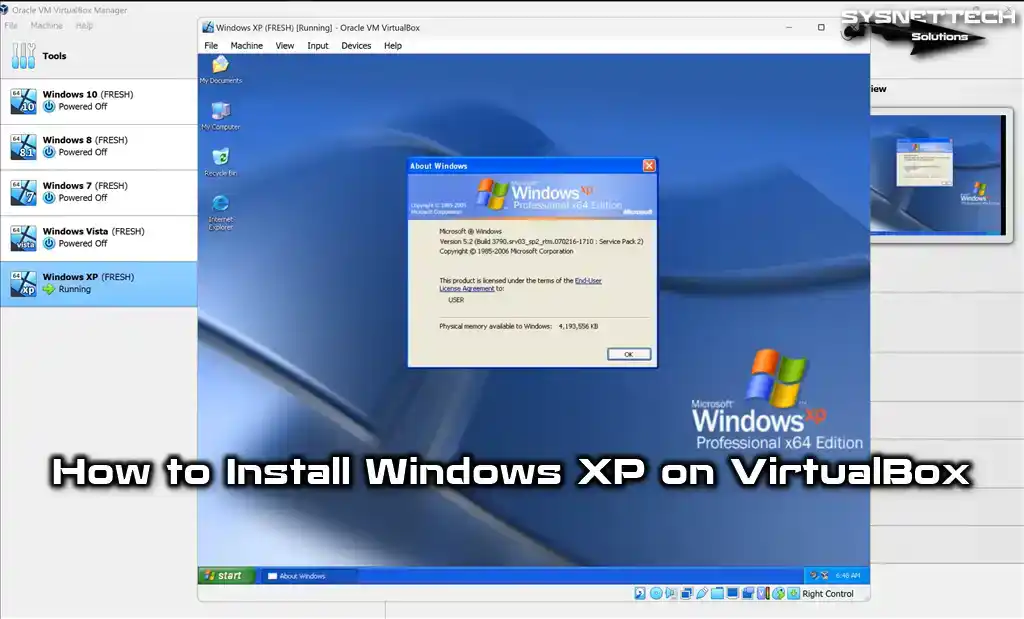
Do you want to run Windows XP SP1 x64 Professional using Oracle VM VirtualBox 7.0 on your Windows 11 & 10 operating systems? In this article, I will tell you how to run an old operating system on a virtual machine. Windows XP may still be valuable for specific applications. I will also emphasize the importance of security and compatibility when running old OSes.
First of all, as we know, virtualization provides a secure and compatible environment. Thus, you must meet the hardware requirements to run Windows XP effectively. For this reason, I will also show you how to configure a more accurate and proper virtual machine. As a result, you can create a computing environment with our professional guide.
How to Set Up Windows XP x64 SP1 Pro on Windows 10 / 11 using Oracle VM VirtualBox 7
On October 25, 2001, Microsoft developed and launched the Windows XP operating system, emphasizing facilitating its utilization across various devices. These devices include home and business computers, laptops, desktops, media devices, and tablets.
The most significant difference of this operating system type, whose first code name is Whistler, is that it supports 32-bit and 64-bit architectures.
By prioritizing performance, stability, and security, Windows XP delivers an optimized user experience. It is the first operating system to have product activation methods to prevent software piracy, which has threatened software developers.
Key features of Windows XP include Internet Explorer 6, Windows Media Player, downgrade/rollback device drivers, remote assistant, advanced firewall, system restore, wireless connectivity, application compatibility mode, and CD Burner.
Although Microsoft ended support for the XP system on April 8, 2014, many people still use this system today. This can create a severe vulnerability to both the local and Internet networks. Hence, we advise against installing Windows XP on your host computer instead of Windows 10 or 11.
However, users who want to use and experience Windows XP or play old games can install it on virtual machines. Thus, they can choose a safer way to use XP on an up-to-date operating system.
Before creating a virtual machine on your host, your processor must support the virtualization feature. Without this support, setting up a virtual computer on your host would not be possible. I recommend checking the virtualization feature of your CPU.
How to Create a New Virtual Machine for Windows XP
After installing the Oracle VM VirtualBox virtualization software on your host operating system, you must set the VM settings correctly to use Windows XP without any problems. Creating a VM that matches the hardware capacity of your physical host computer is essential in terms of performance and compatibility.
Step 1
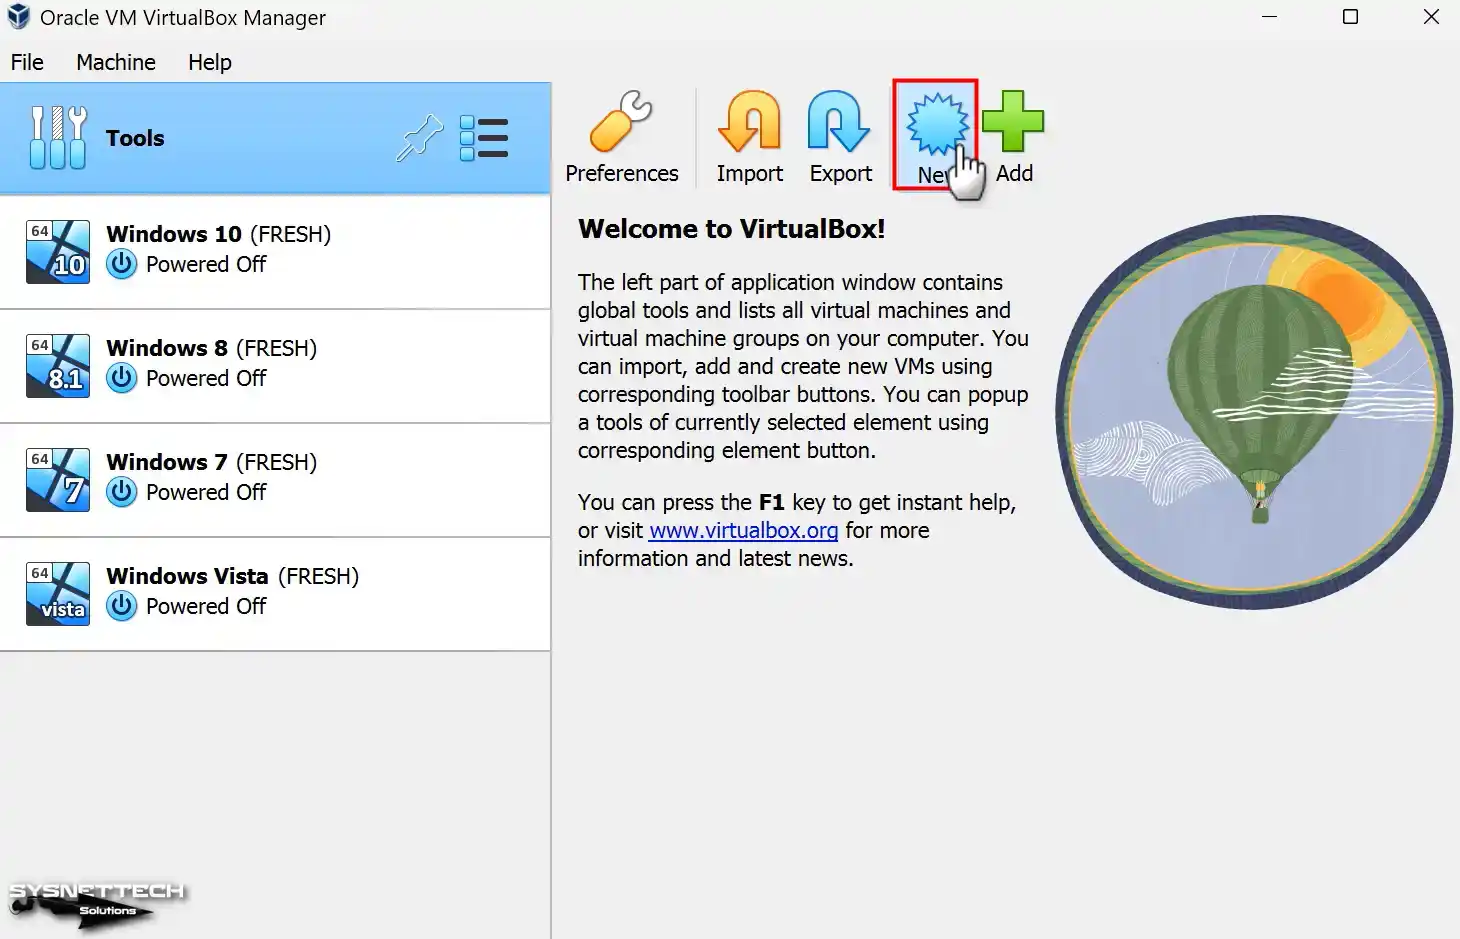
Open your Oracle VirtualBox program and open the virtual machine creation wizard from the tool menu on the program’s homepage or the New shortcut.
Step 2
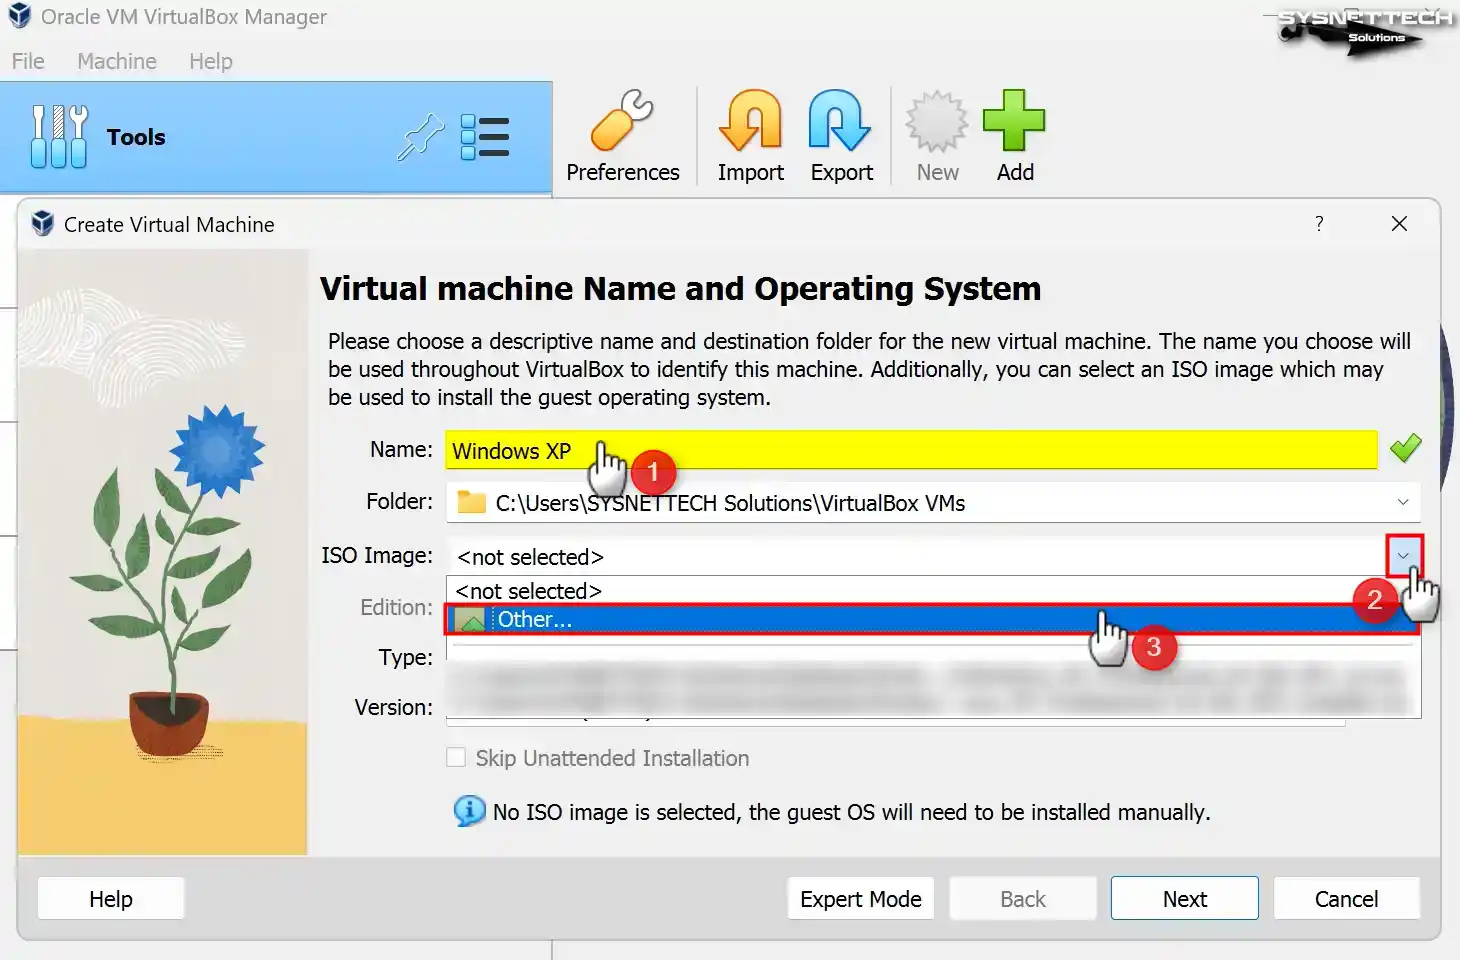
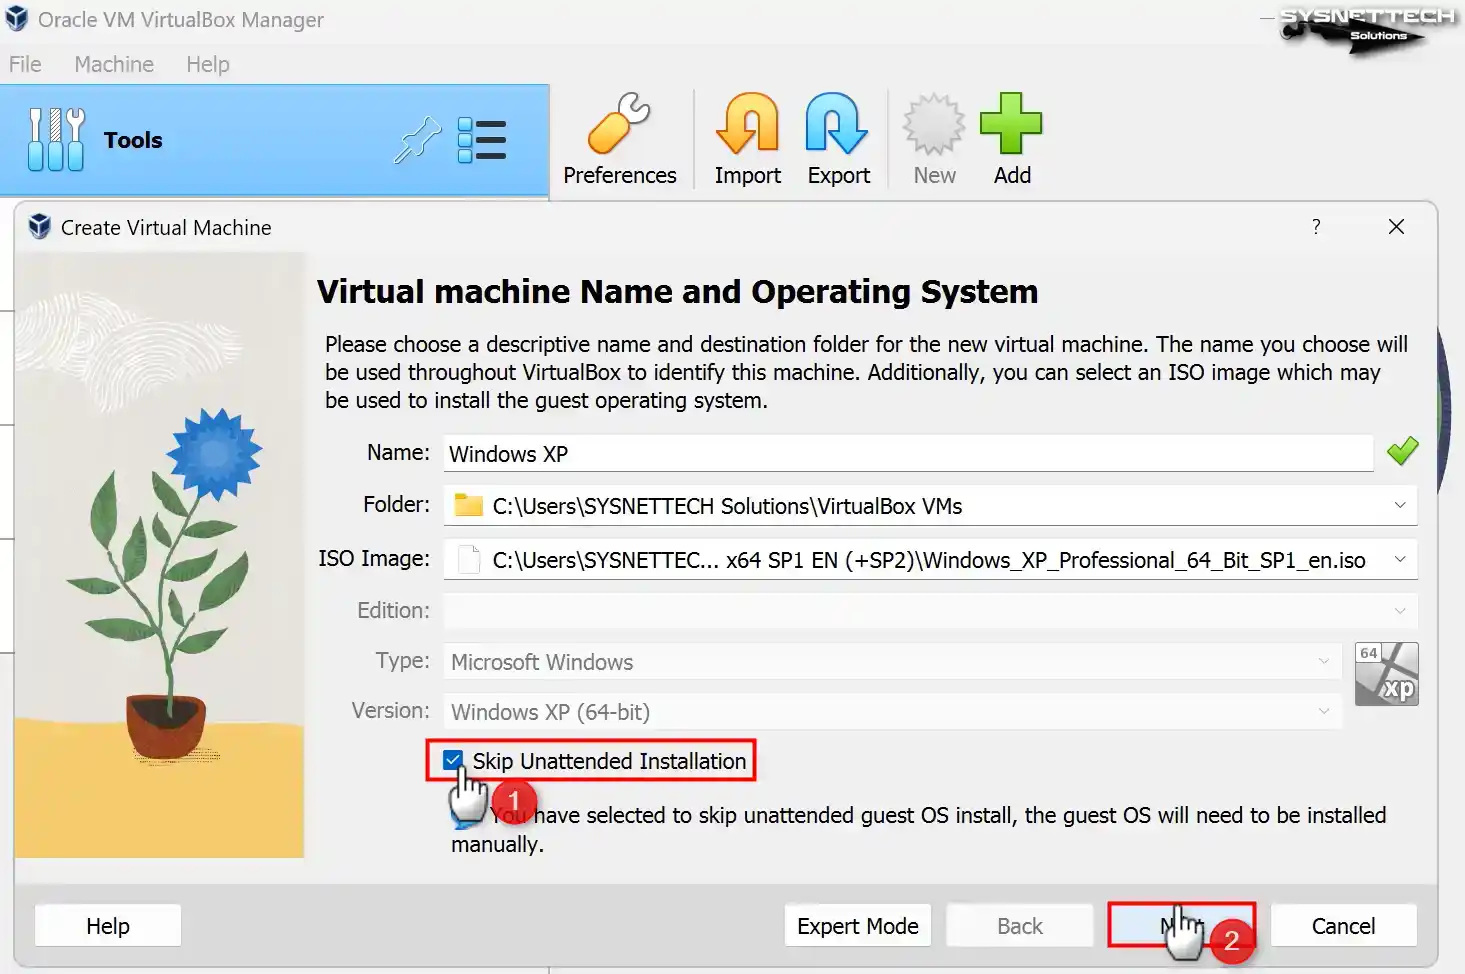
When the virtual machine preparation window appears, the initial step is to enter the name of the operating system you intend to install into the designated Name field. After entering Windows XP in the Name field, the values in the Type and Version fields will be automatically adjusted according to your typing system.
If you see the 32-bit value in the Version field after typing Windows XP and you will install 64-bit, configure this value manually.
You can change the position where you install the virtual machine in the Folder section. Suppose you desire to install the operating system on an external SSD or HDD storage device. In this case, you can pick “Other” from the pop-up window and select the installation location from your host PC.
Select Other from the ISO Image menu to add a Windows XP ISO file to the virtual pc.
Step 3
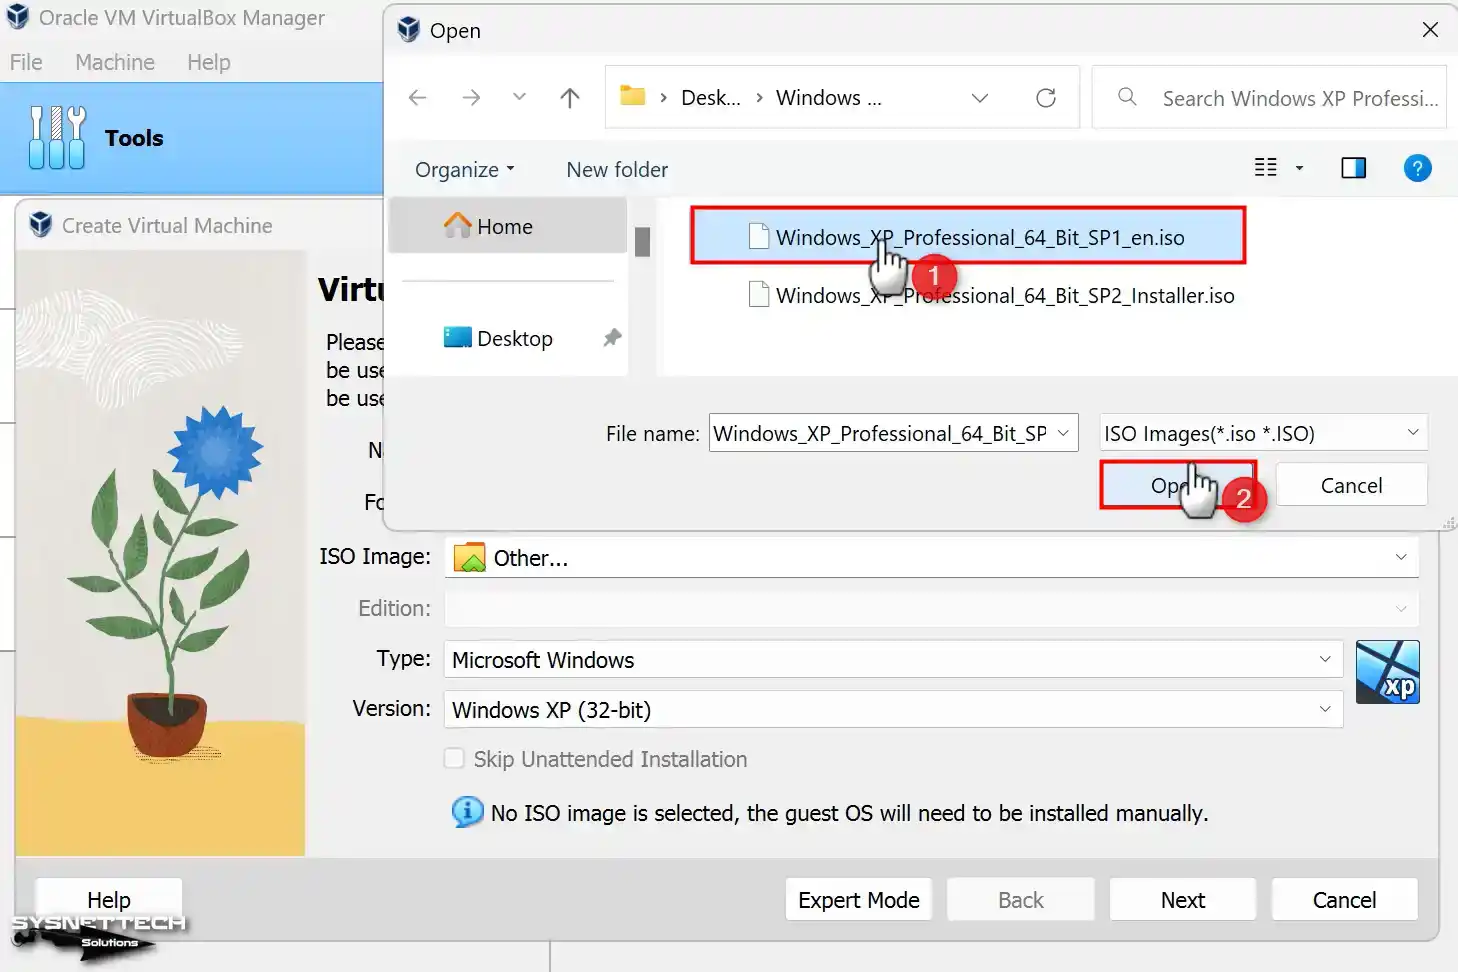
Select the Windows XP Professional 64 Bit SP1 image file you downloaded to your computer from the table below the article and open it.
Step 4
In the 7.x versions of VirtualBox, you can see the unattended installation option as the user interface has changed. Using this option, you can prepare a system with preconfigured usernames or product key settings.
If you prefer to install the system manually, select Skip Unattended Installation and click Next.
Step 5
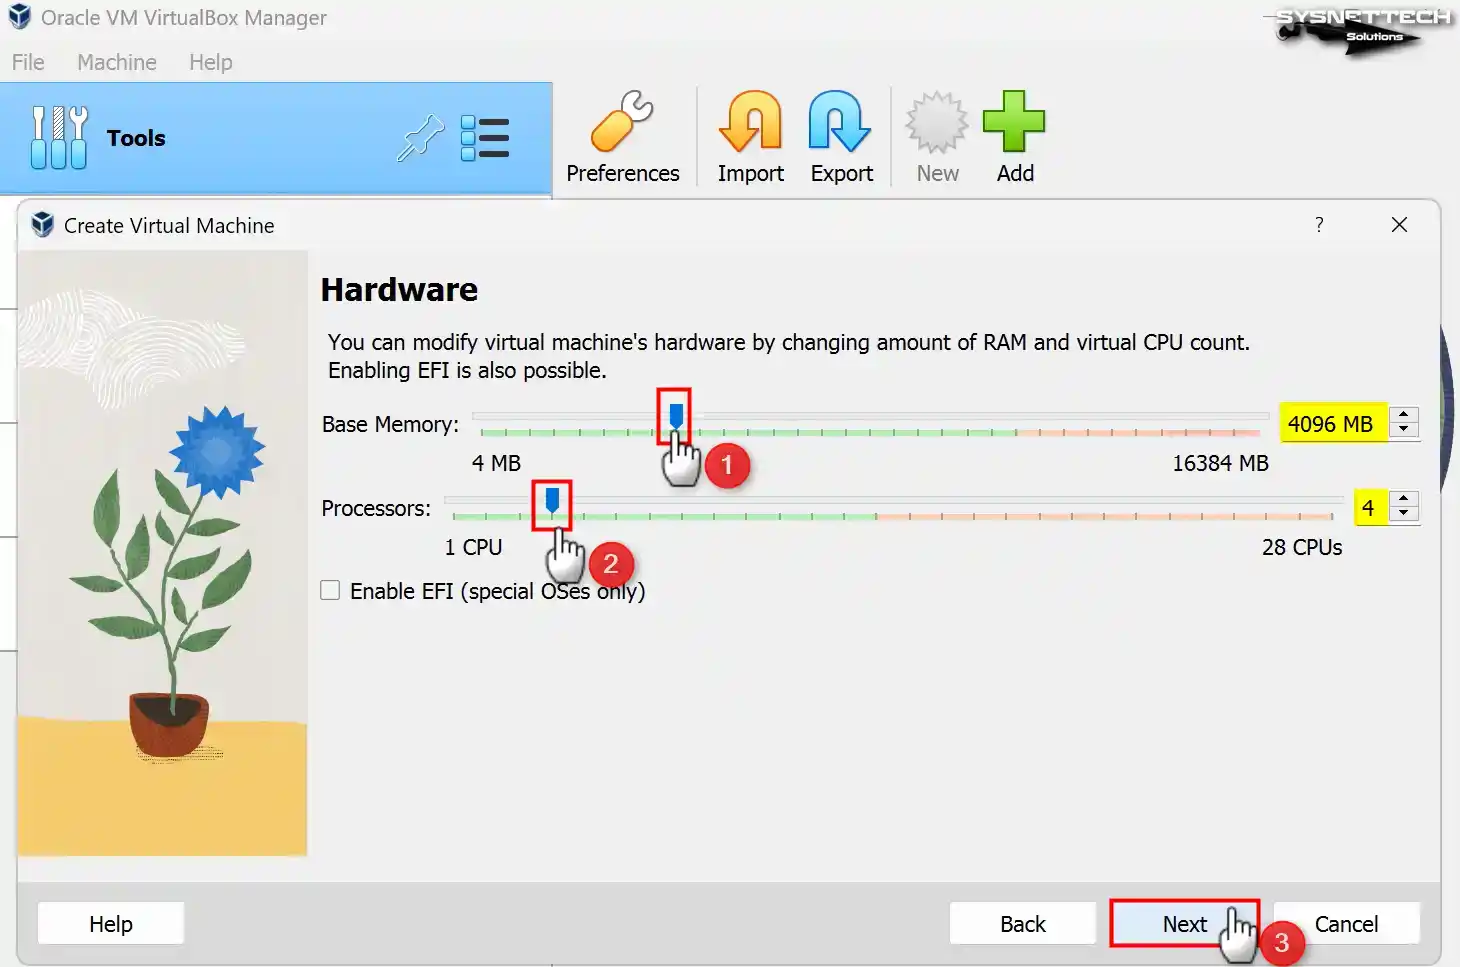
Configure a RAM size of 4096 MB (4 GB) for Windows XP as the base memory size. Suppose your host computer possesses a substantial amount of RAM. In that case, it is proposed to configure this value to a minimum of 4 GB or 8 GB.
In addition, configure the number of virtual processors to 4 so you can use your virtual computer more efficiently.
Step 6
Since you will install Windows XP from scratch in the virtual HDD settings, you must select the Create a Virtual Hard Disk Now option. If you have installed an XP virtual disk, you must select the Add an existing hard disk file option.
In VirtualBox 6.x versions, you can see the old settings on the virtual disk screen. For a sample, if you do not use a VM installed on VirtualBox with other virtualization software, choose VDI (VirtualBox Disk Image). You can use the VDI disk type in other software, but Oracle always recommends using the VDI type.
If you want to use as much disk space as the capacity of the virtual disk file on the disk where you will install the virtual machine, you can choose Fixed Size. Fixed Size can improve the performance of the VM, but it unnecessarily fills up the host disk space.
Therefore, by selecting Dynamically Allocated, only the disk space needed by the VM will be automatically allocated over the host disk. Do not change the path in File Location and Size to save the virtual disk to the installation location you set in the first step of the VM wizard.
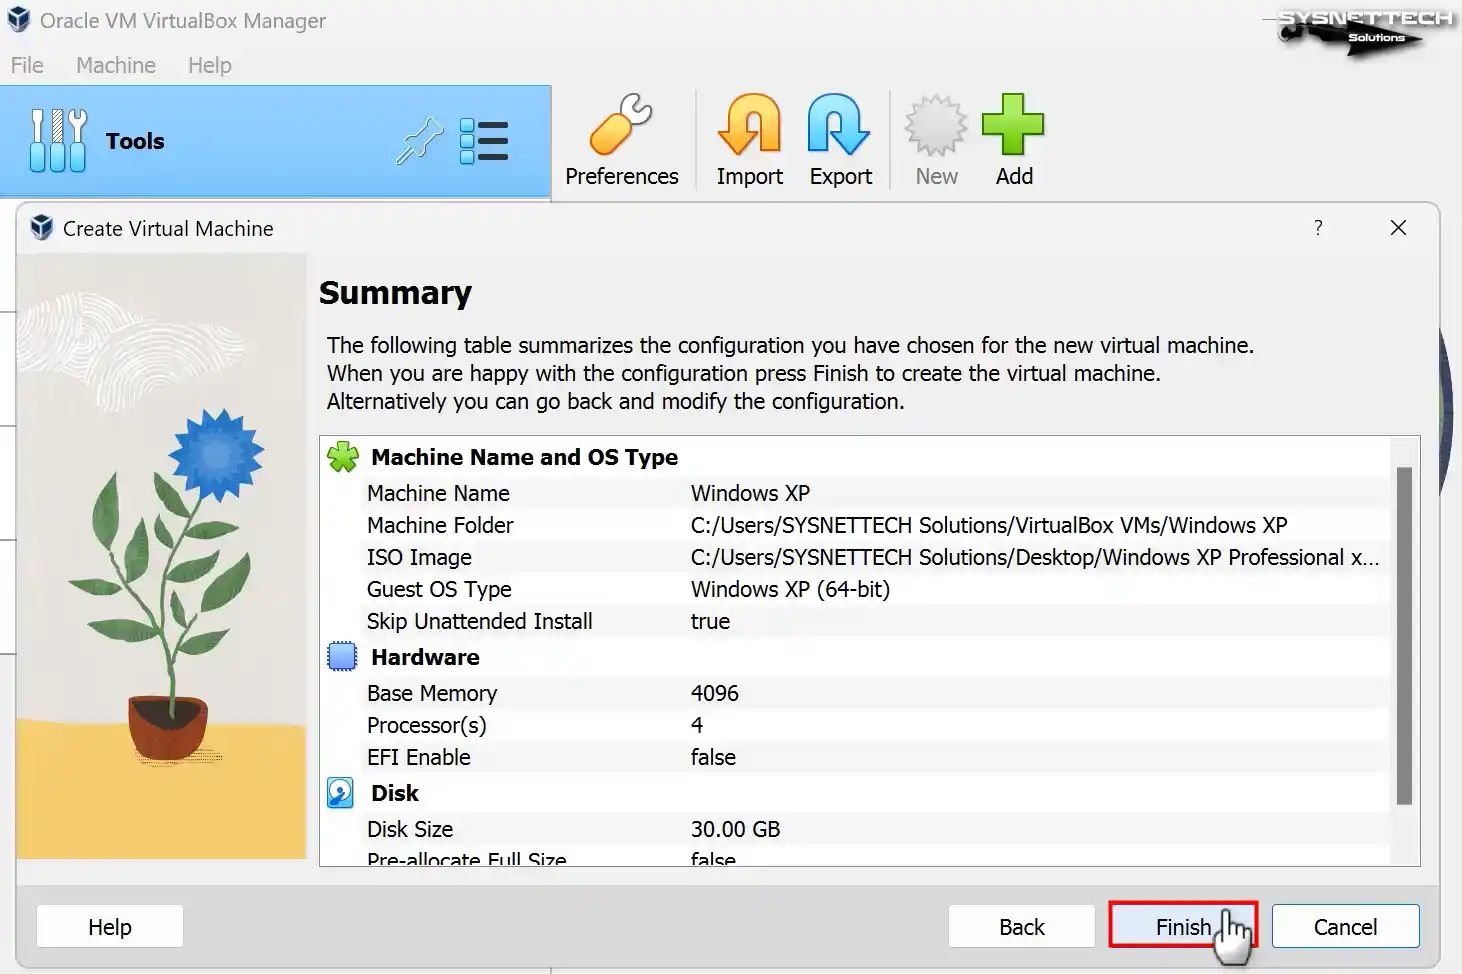
Regarding Windows XP, you can modify the virtual disk extent to a minimum of 30 GB. However, it is advisable to determine the disk size based on your specific work requirements.

Step 7
After adjusting the hardware settings of the Windows XP guest machine, check again and close the VM wizard.
Step 8
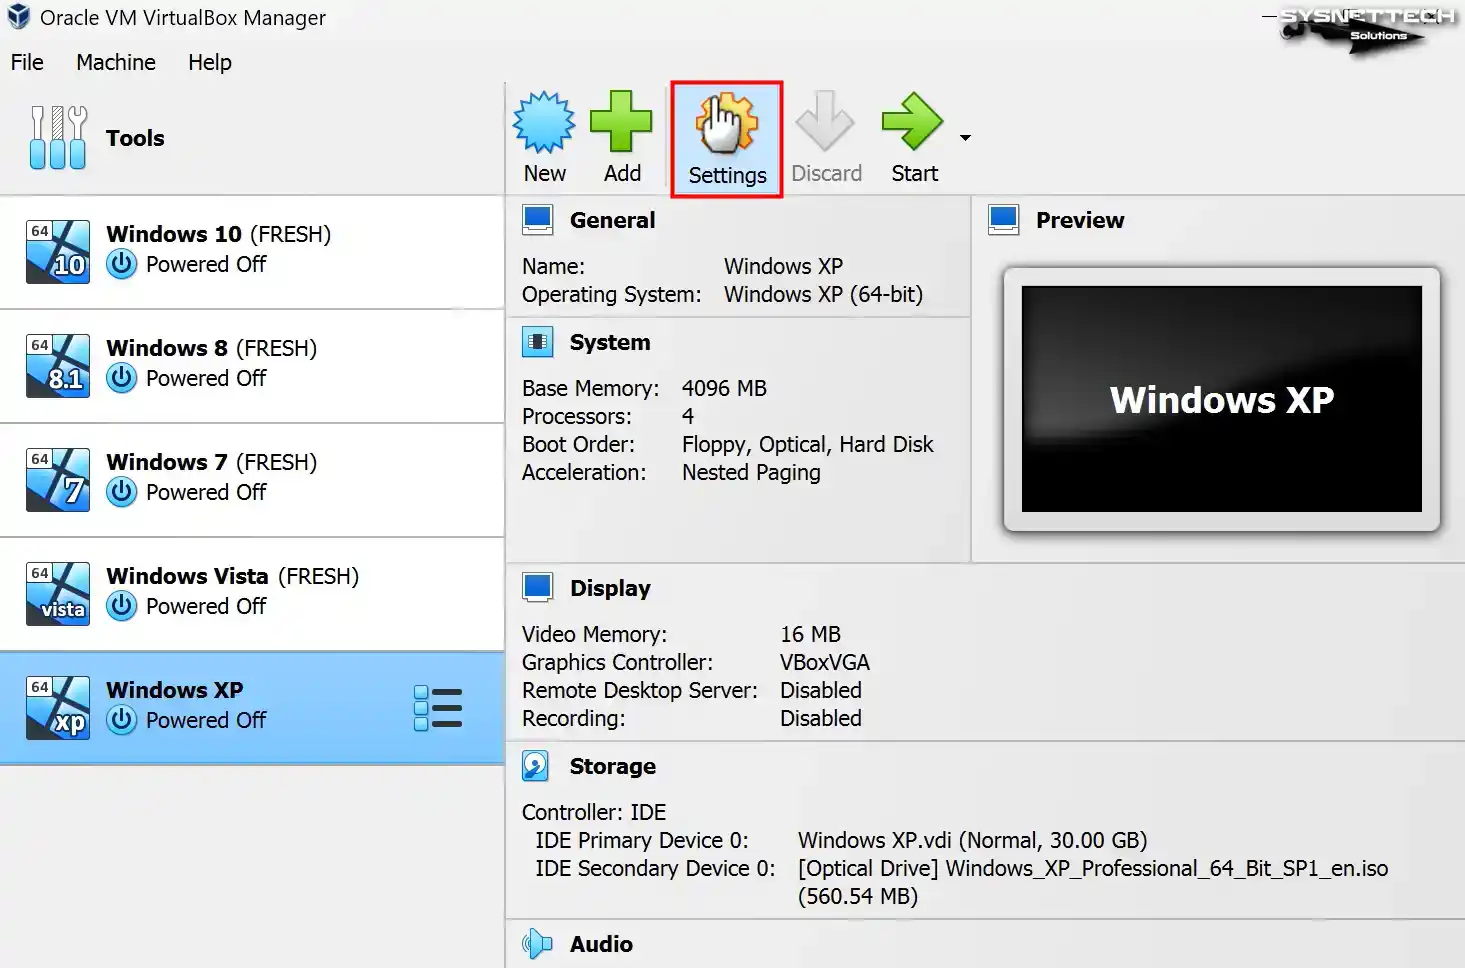
Click Settings to configure the hardware settings of the guest operating system.
Step 9
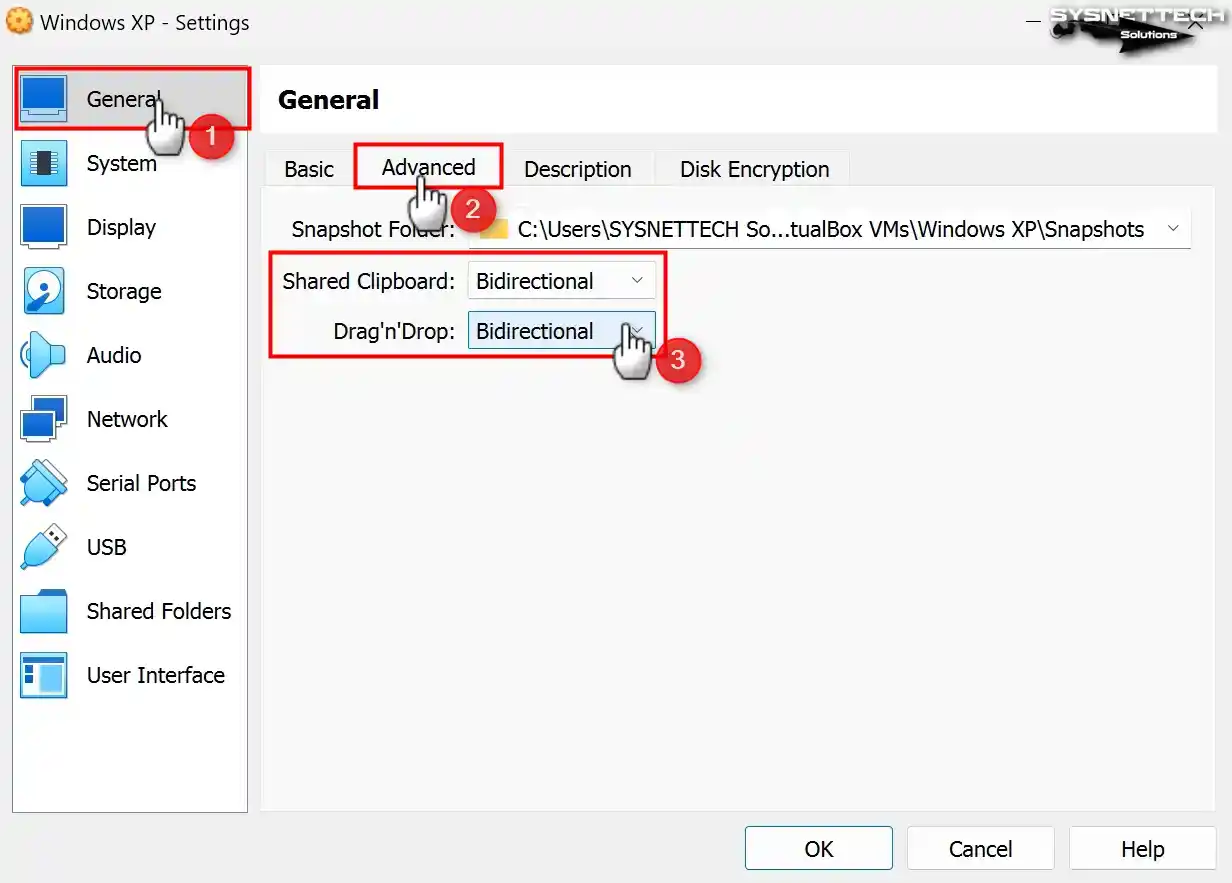
To permit file sharing between the host and the virtual machine in the settings window of the VM, configure the Shared Clipboard and Drag and Drop features as Bidirectional in the General / Advanced tab.
So you can share files or copy/paste text from the host to the VM and from the VM to the host.
Step 10
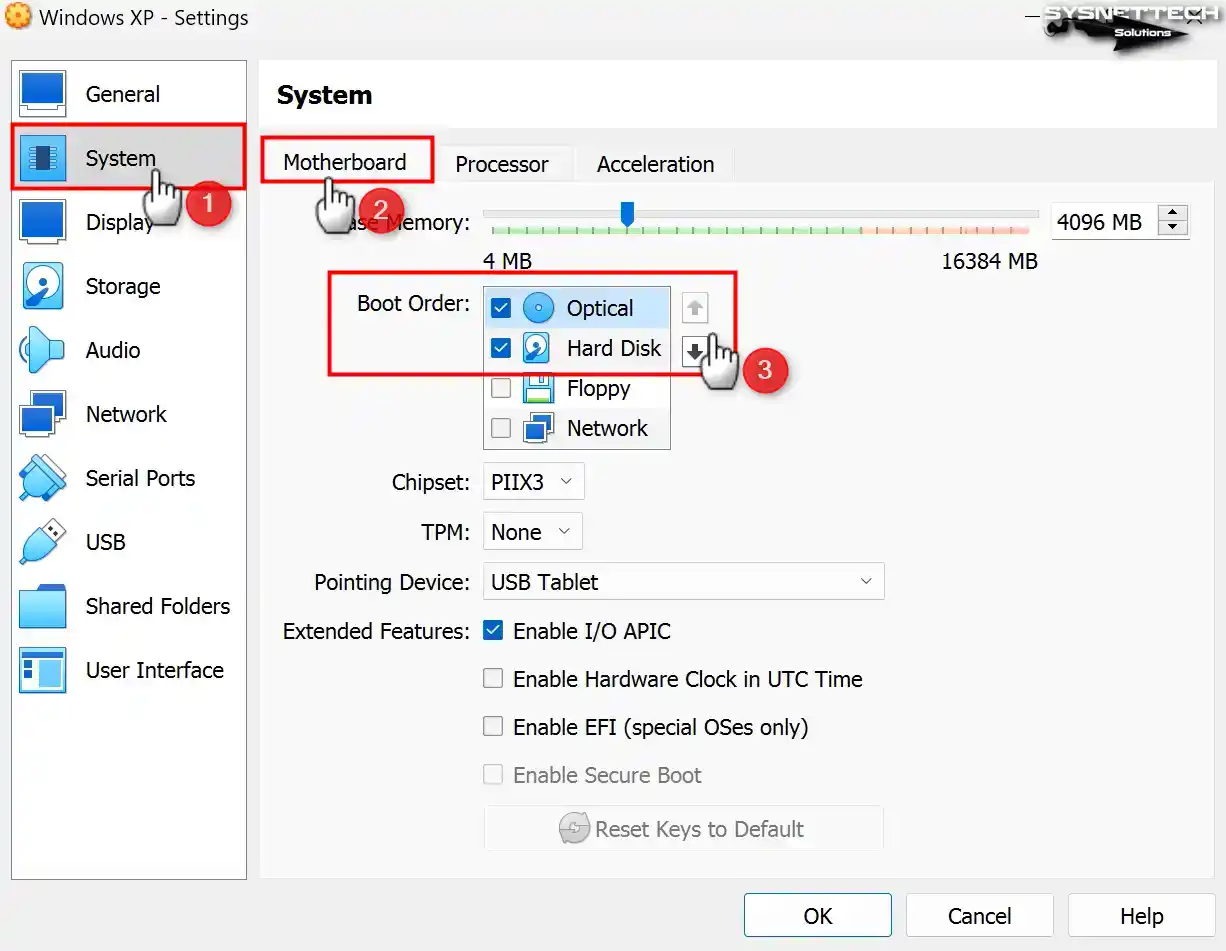
To install Windows XP on the virtual pc, select the Optical device as the direct boot device in the Boot Order index in the System / Motherboard settings to add the ISO file to the optical drive.
Step 11
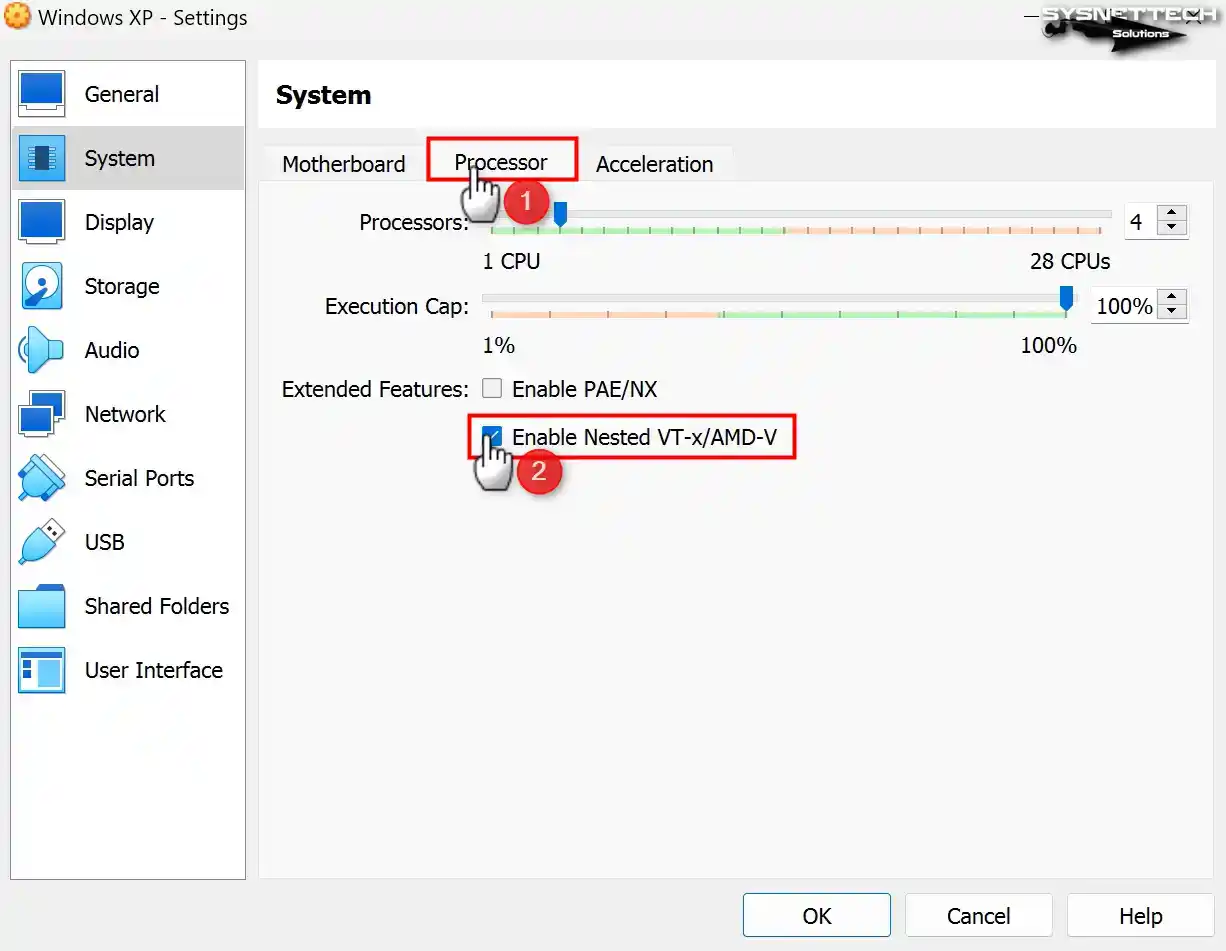
If you plan to use virtualization software on your virtual computer, enable the Nested VT-x/AMD-V feature from the processor device.
Step 12
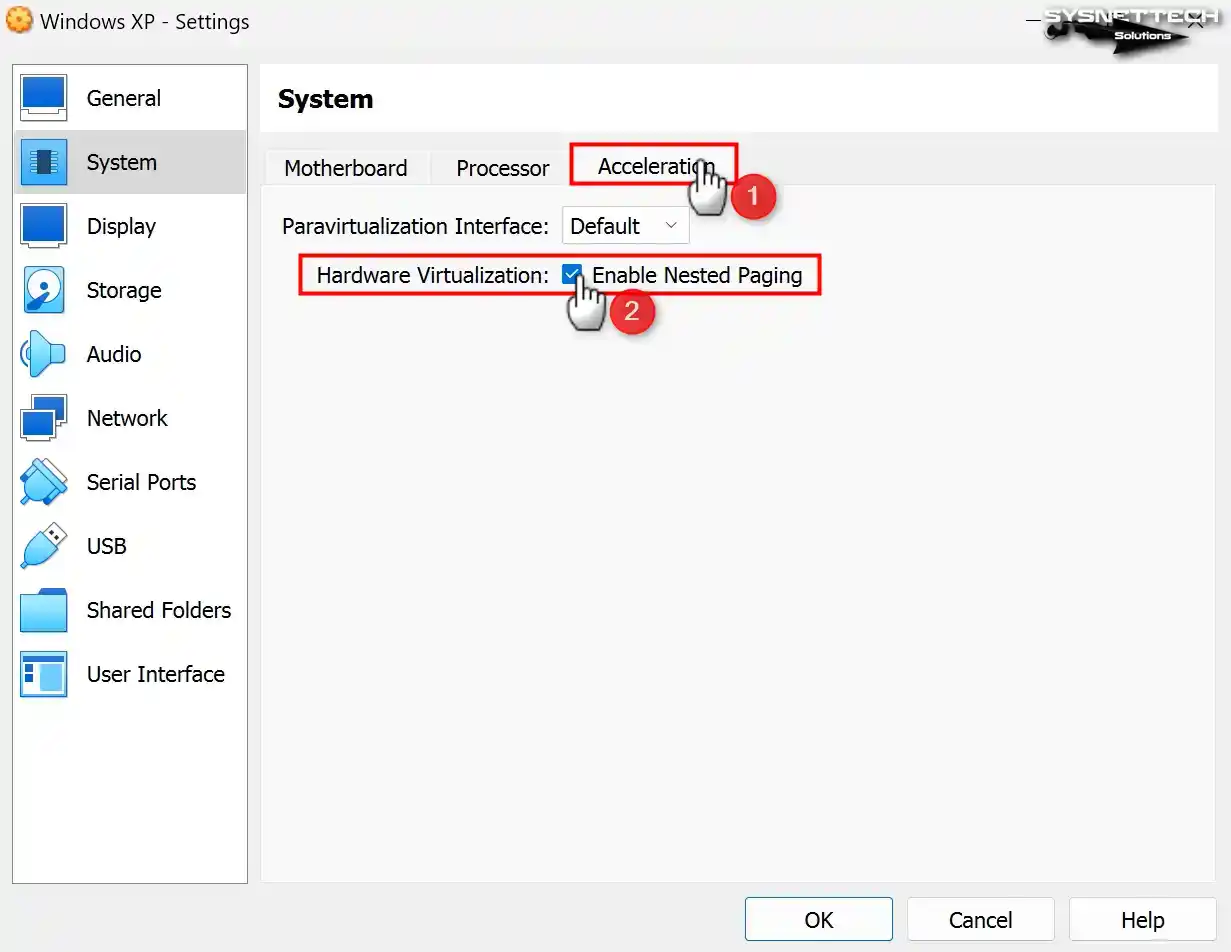
Enable Nested Paging for better memory management between your host and VM.
In certain conditions, it may be necessary to manually choose the virtualization interface within the Acceleration tab located in the virtual PC system settings.
The Paravirtualization Interface is in Default mode by default. The default mode will automatically select a virtualization engine according to the installed system type. Still, since no VTx interface is set for XP, you can change the value here to Hyper-V.
Step 13
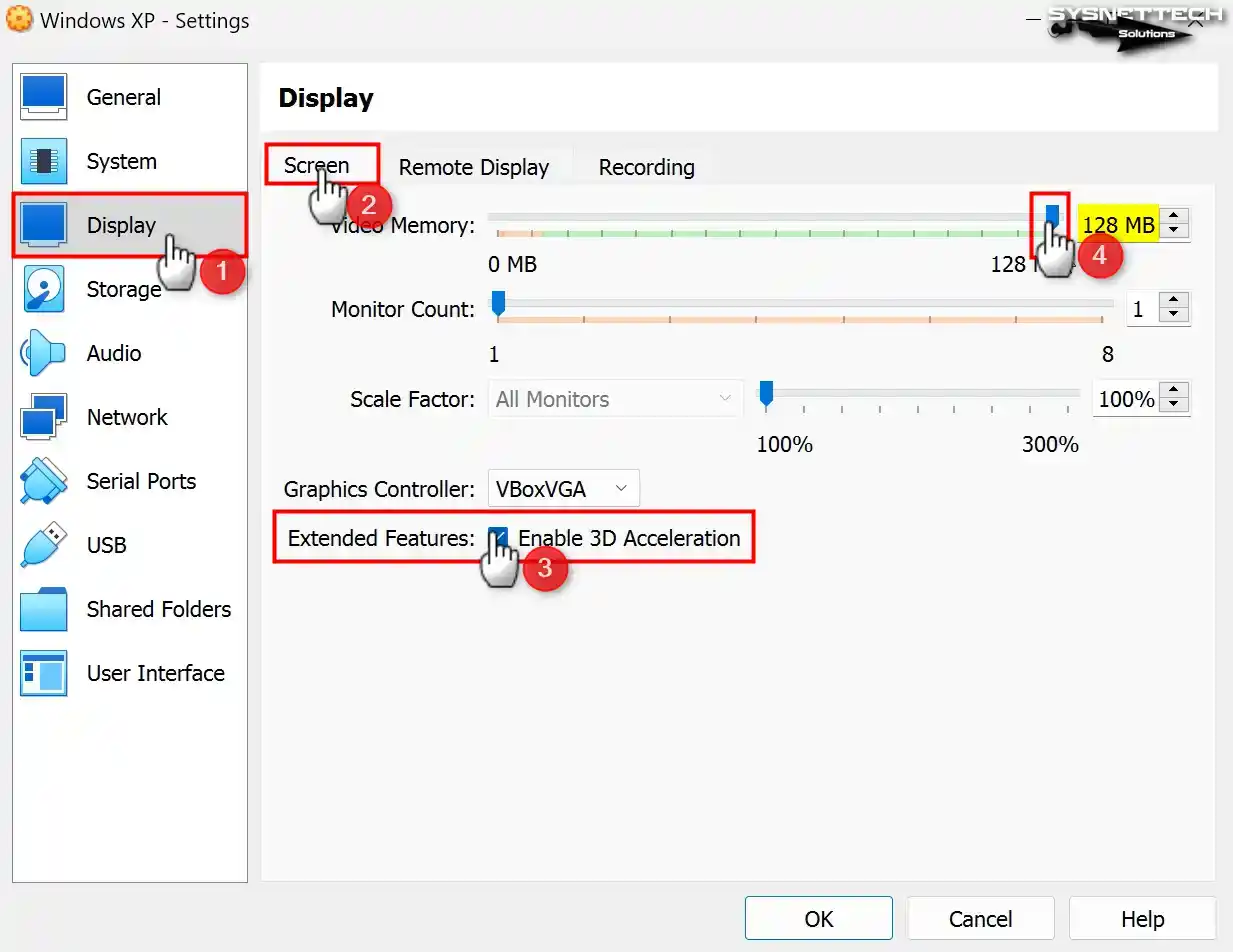
Enable 3D acceleration in the Display / Screen settings of the virtual machine and configure the Video Memory size to 128 MB.
Note: Please take note that although you enable 3D graphics acceleration on Windows XP in VirtualBox version 6.1, the Direct3D feature is regrettably no longer supported. If you wish to utilize Direct3D support, installing one of the 6.0 versions of VirtualBox on your system is advised.
Step 14
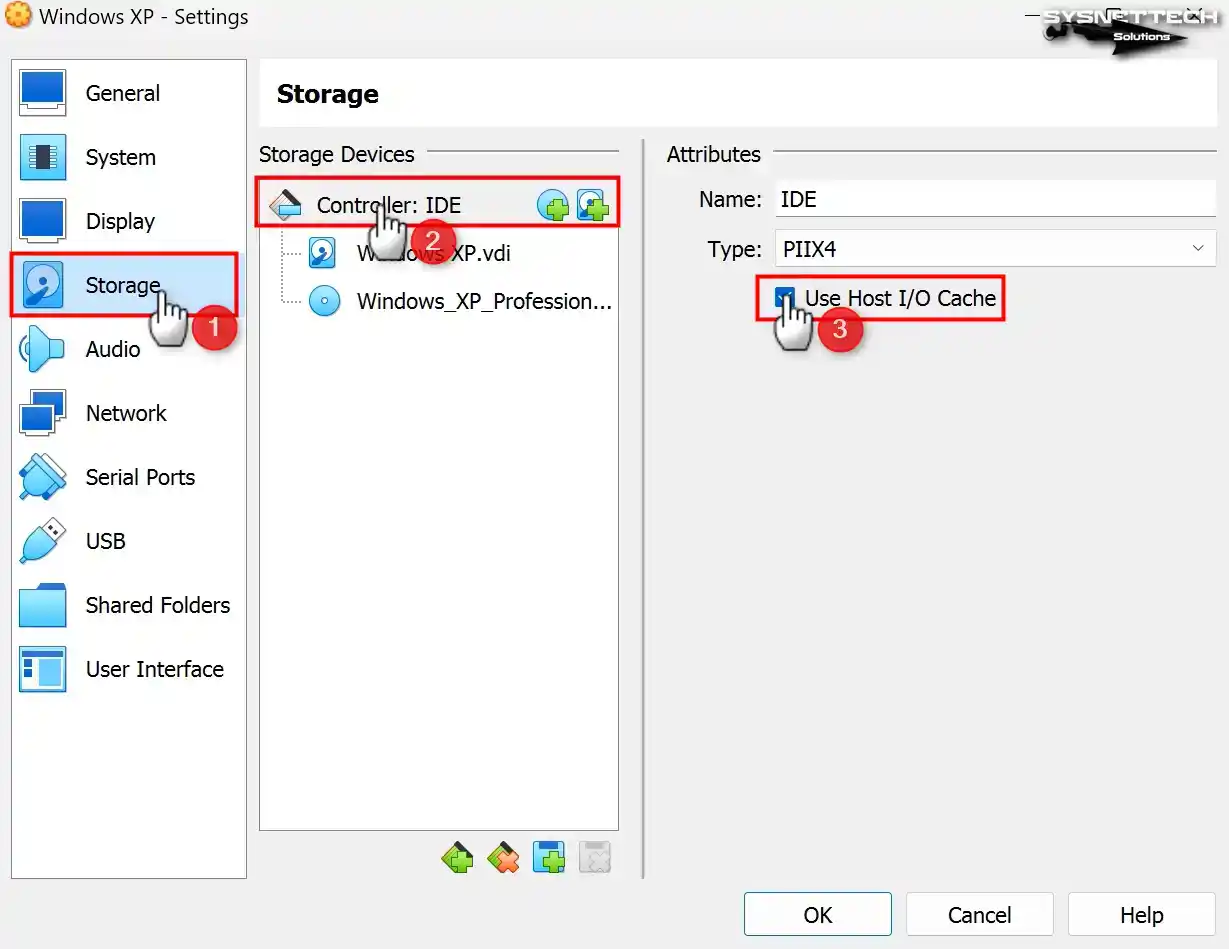
By default, the Host I/O Cache feature for the IDE controller is enabled in the storage volumes of the virtual PC. If the Host I/O cache is not allowed, enable it for virtual disk performance.
Step 15
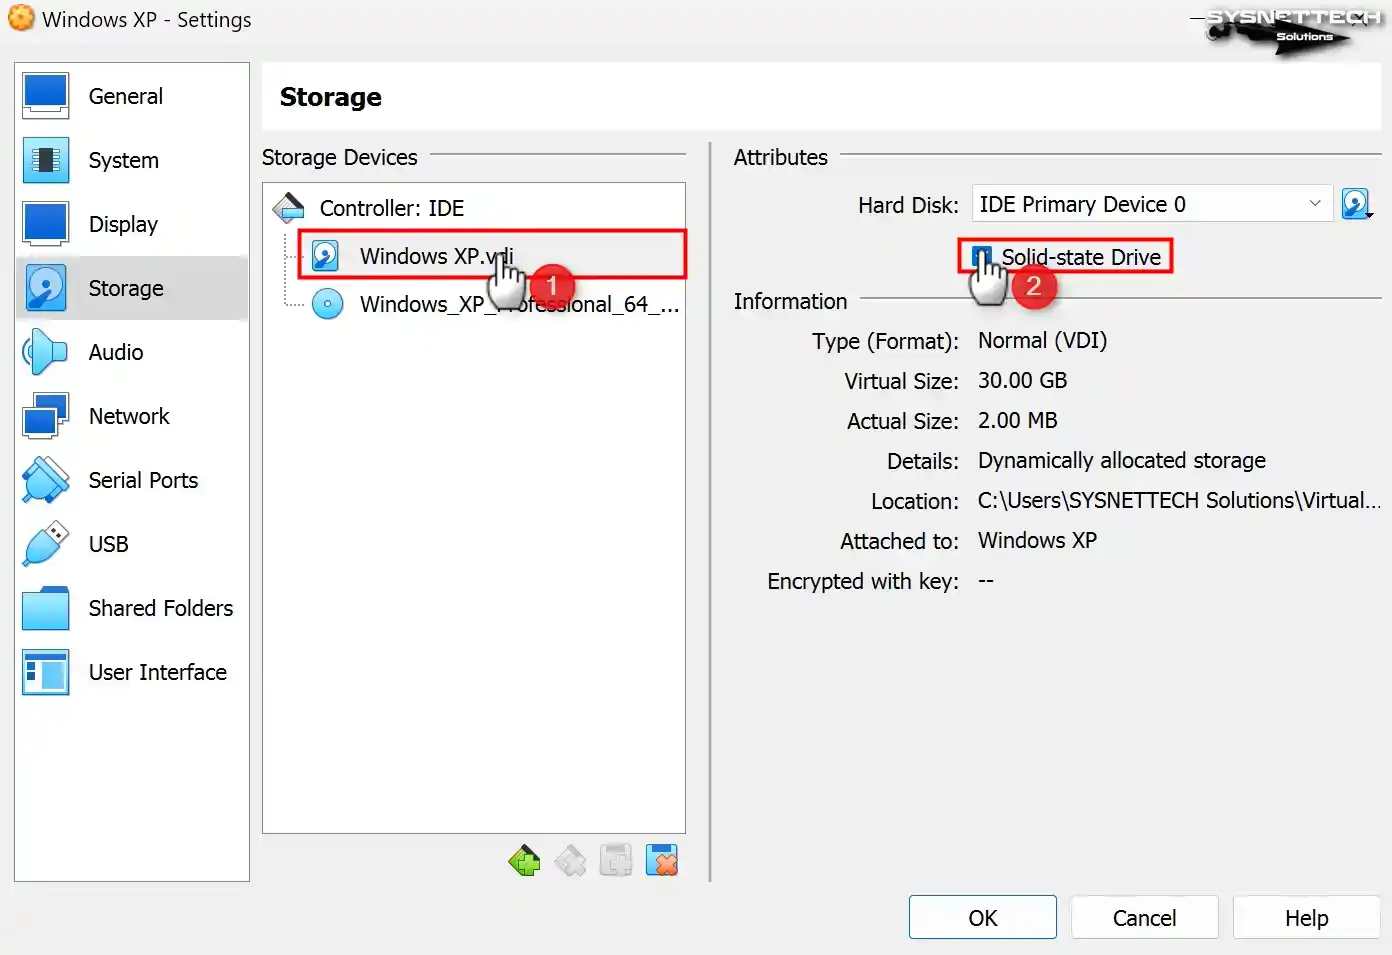
Check the Solid-State Drive (SSD) option to configure the WindowsXP.vdi virtual disk file as an IDE SSD.
Step 16
After preparing your Virtual PC, click the Start button to proceed to the steps of installing Windows XP on VirtualBox.

How to Install Windows XP in VirtualBox
After preparing the Windows XP virtual computer, you need to install Windows using the system’s ISO image. After running the VM with the image file as the startup disk, when the setup wizard opens, you should install it as if installing the Windows platform on a real computer.
Step 1
At the Windows XP Professional Setup screen, you must press Enter to begin installing Windows immediately. Otherwise, press F3 to exit the wizard or R to repair your system.

Step 2
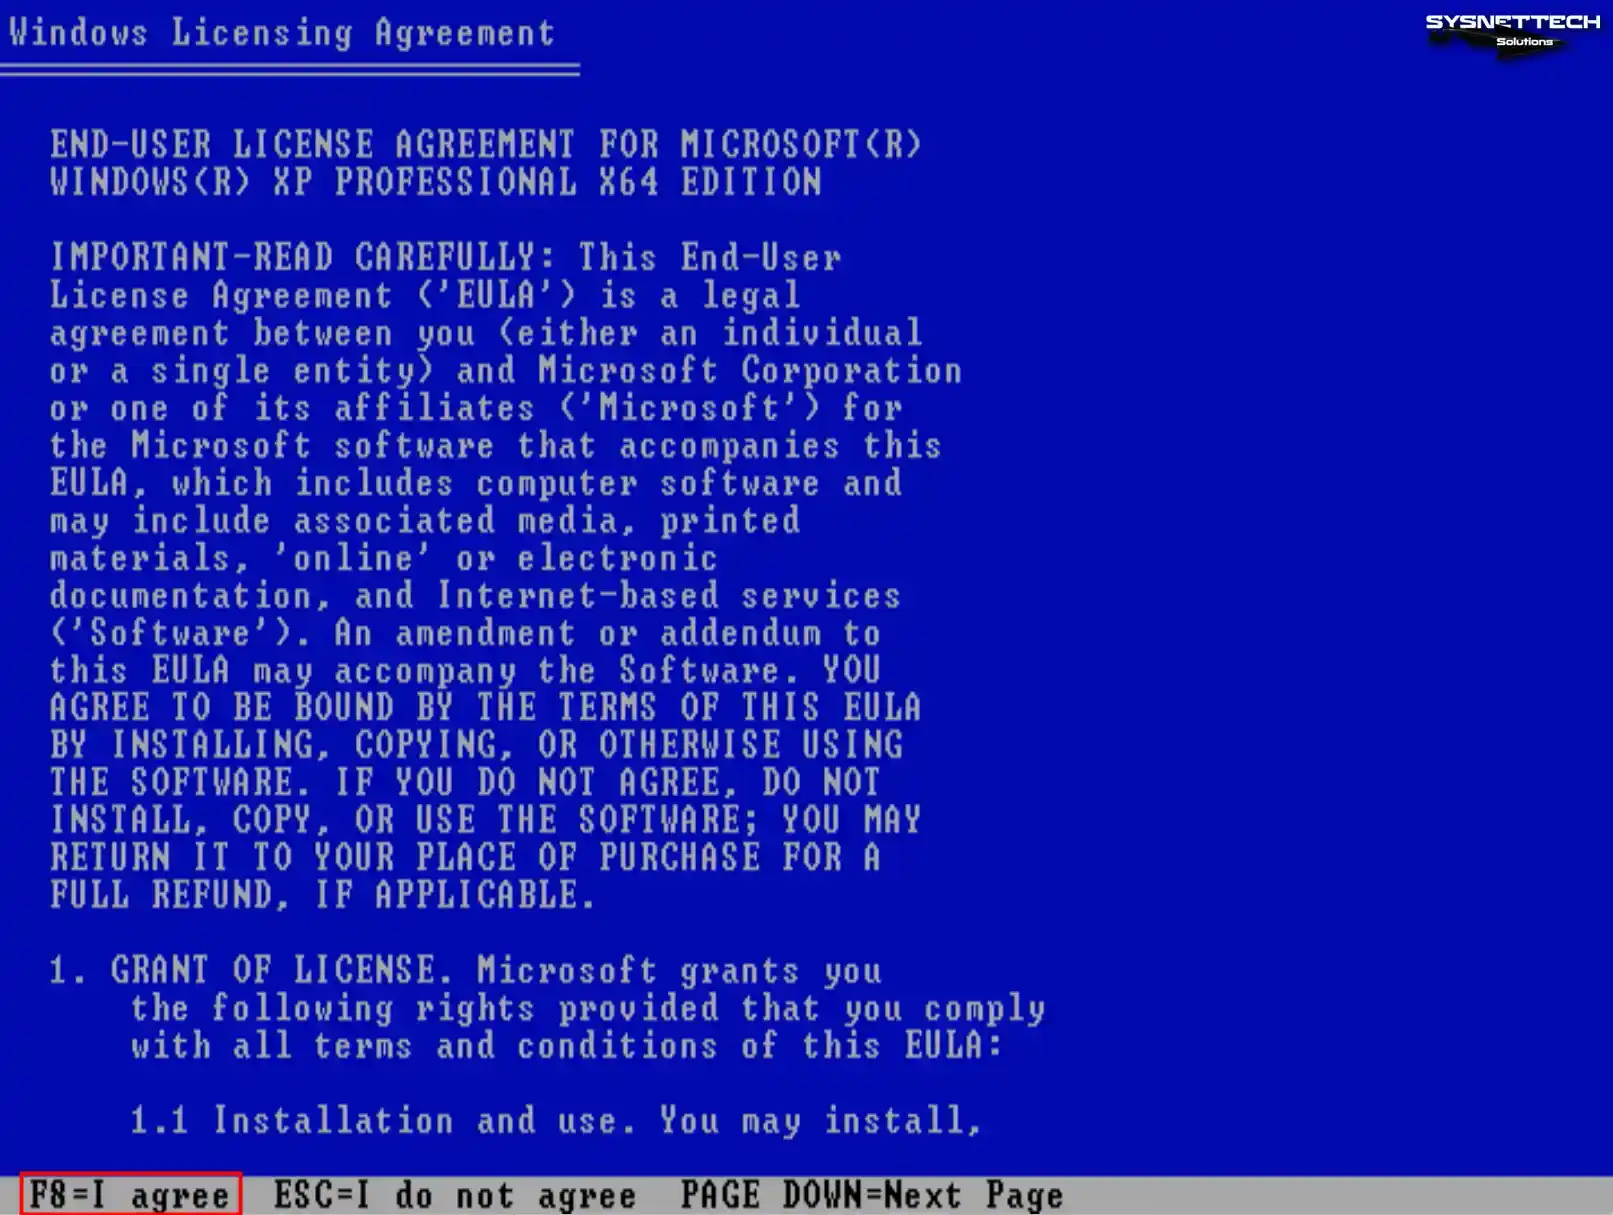
You must press Page Down to read the full text of the Windows XP license agreement in the setup wizard. After reading the license agreement, press the F8 key to accept and continue the installation.
Step 3
Press the C key to configure the unallocated disk space. You can also press Enter to have the wizard automatically organize the disk space and format the system disk.
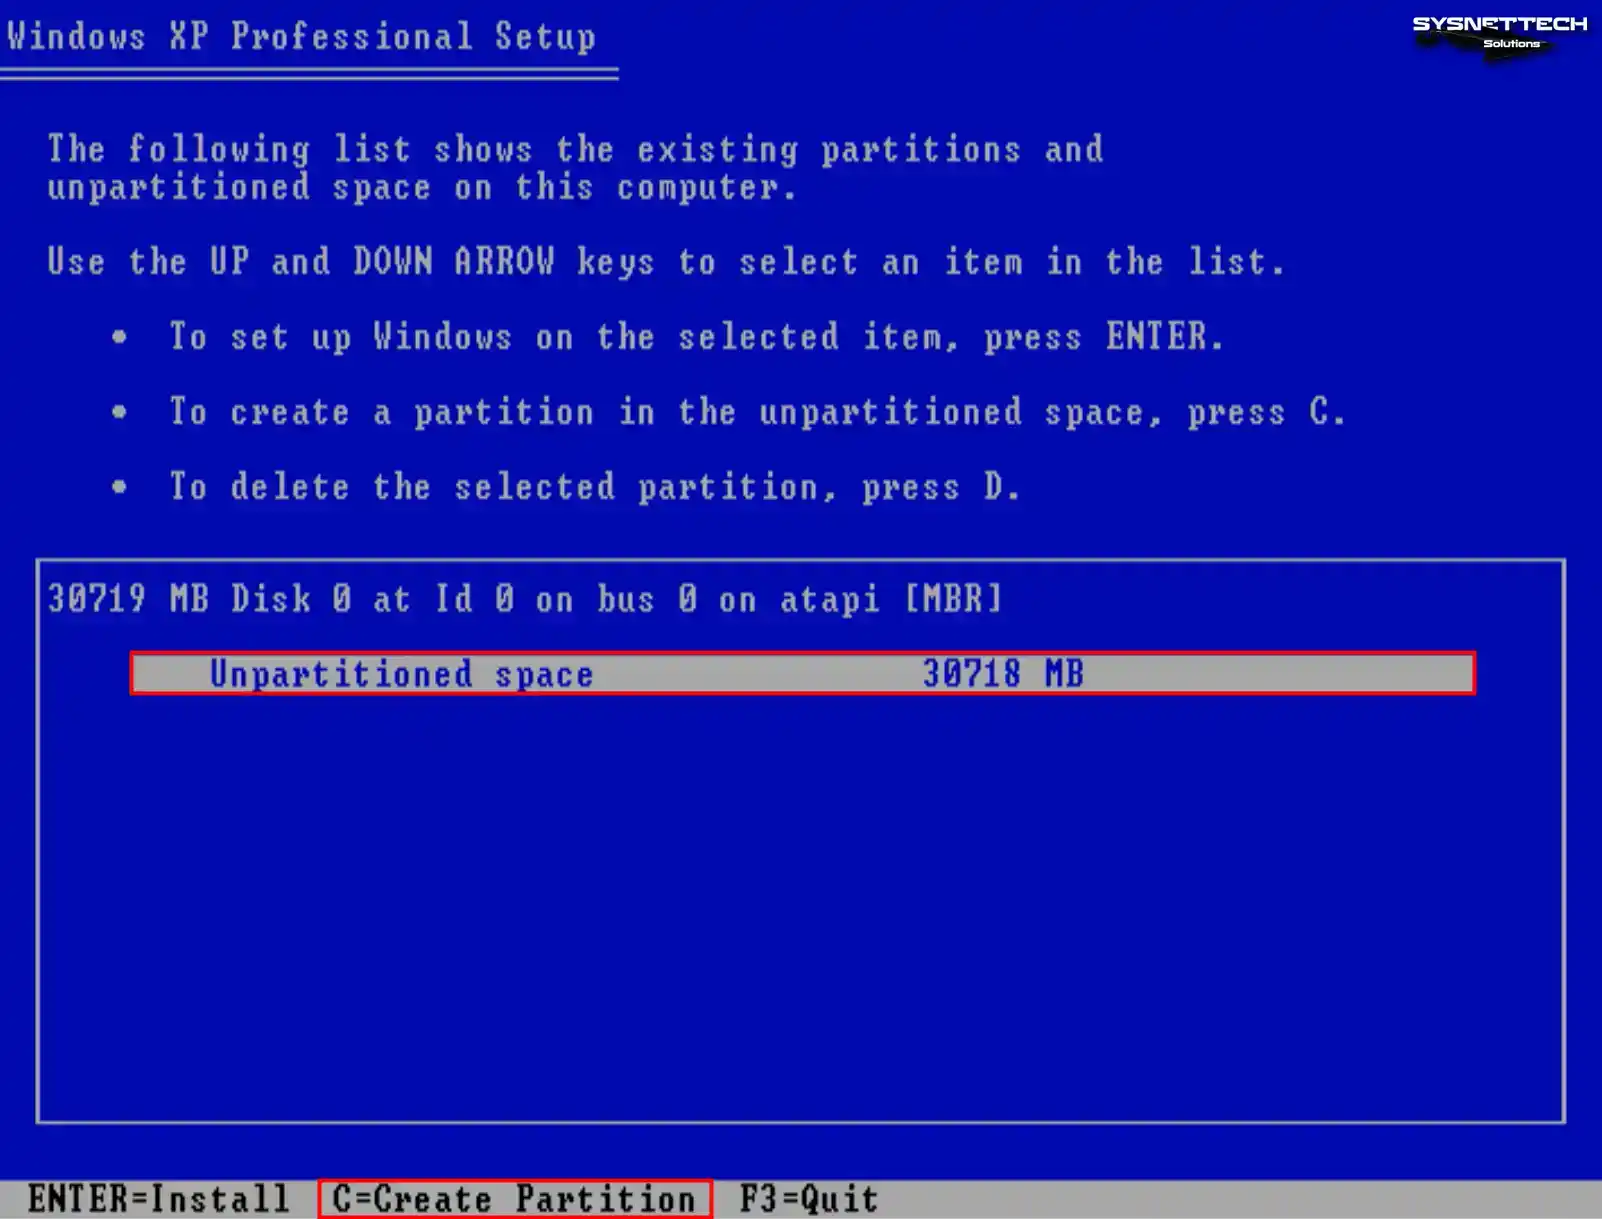
Step 4
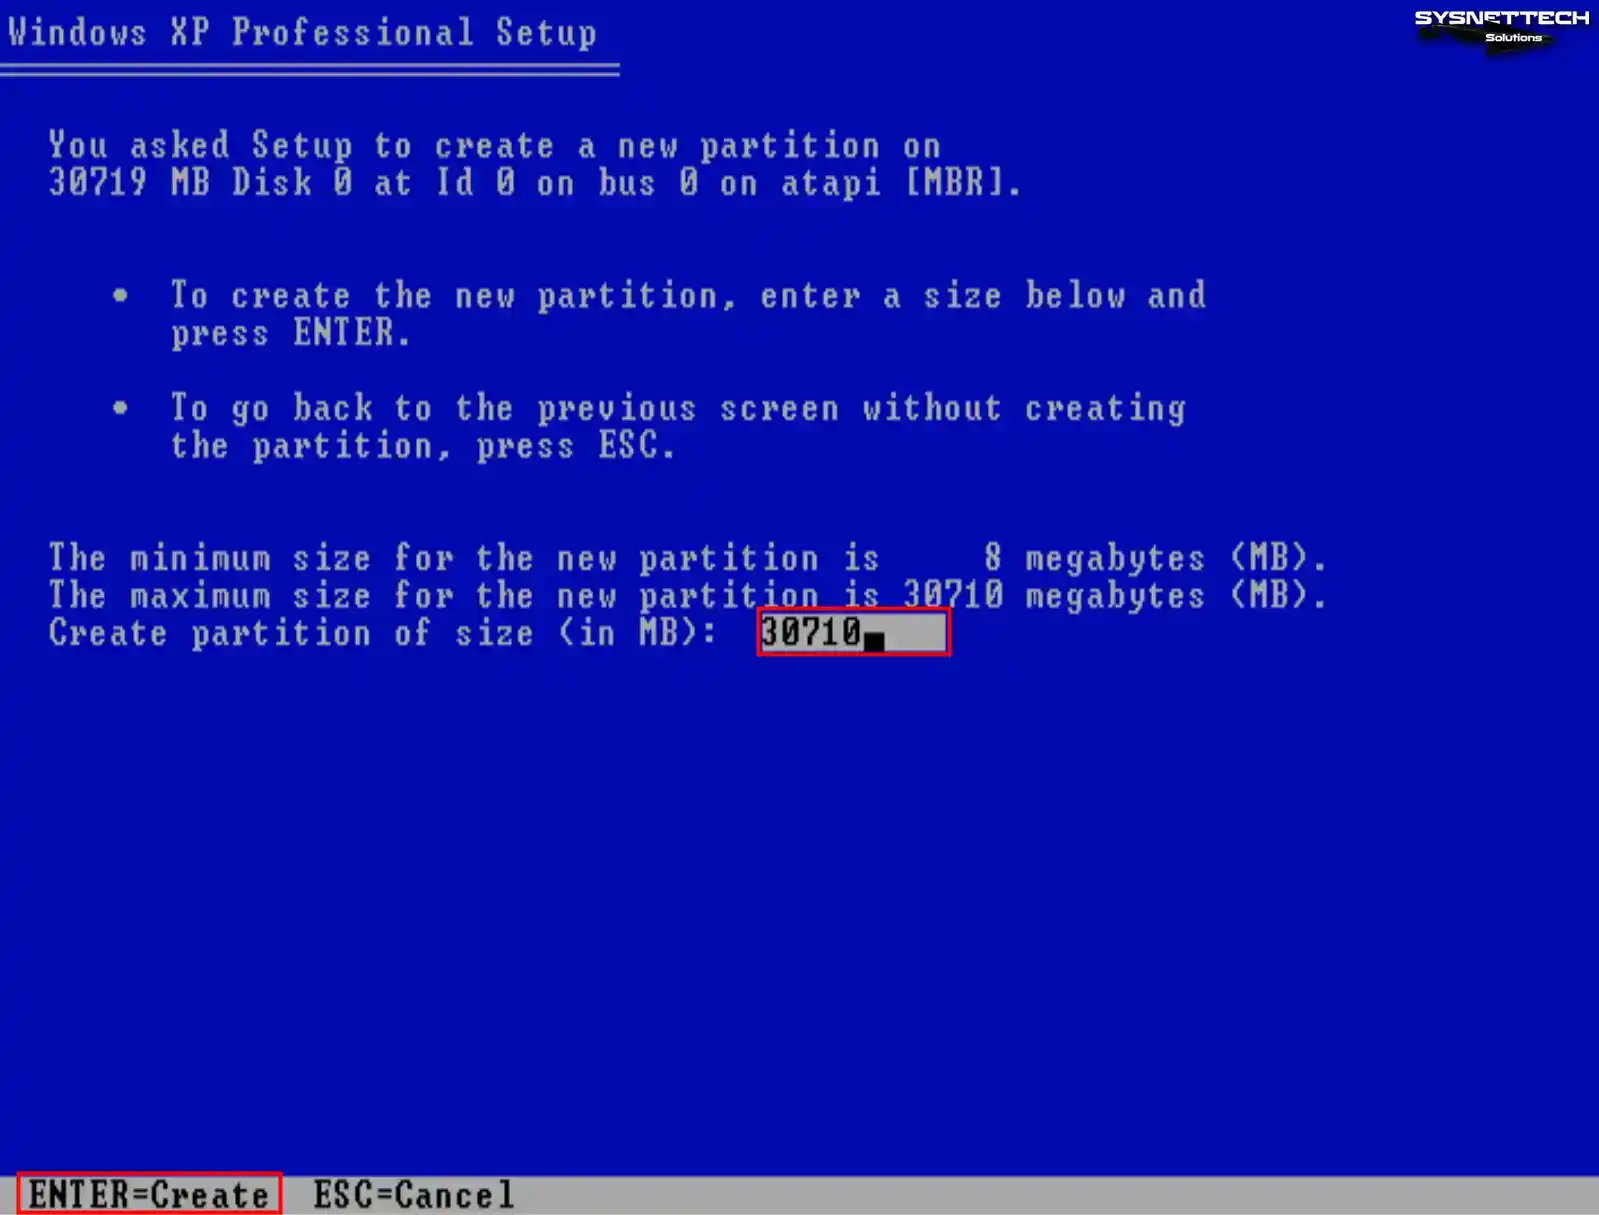
To make a new partition, you need to edit the disk space to be allocated after clicking C. You should use the entire disk space, as virtual machines generally use smaller disk space.
For example, if you configure the virtual disk size to 100 GB, allocating 20 GB for system setup and 80 GB for backup may make more sense.
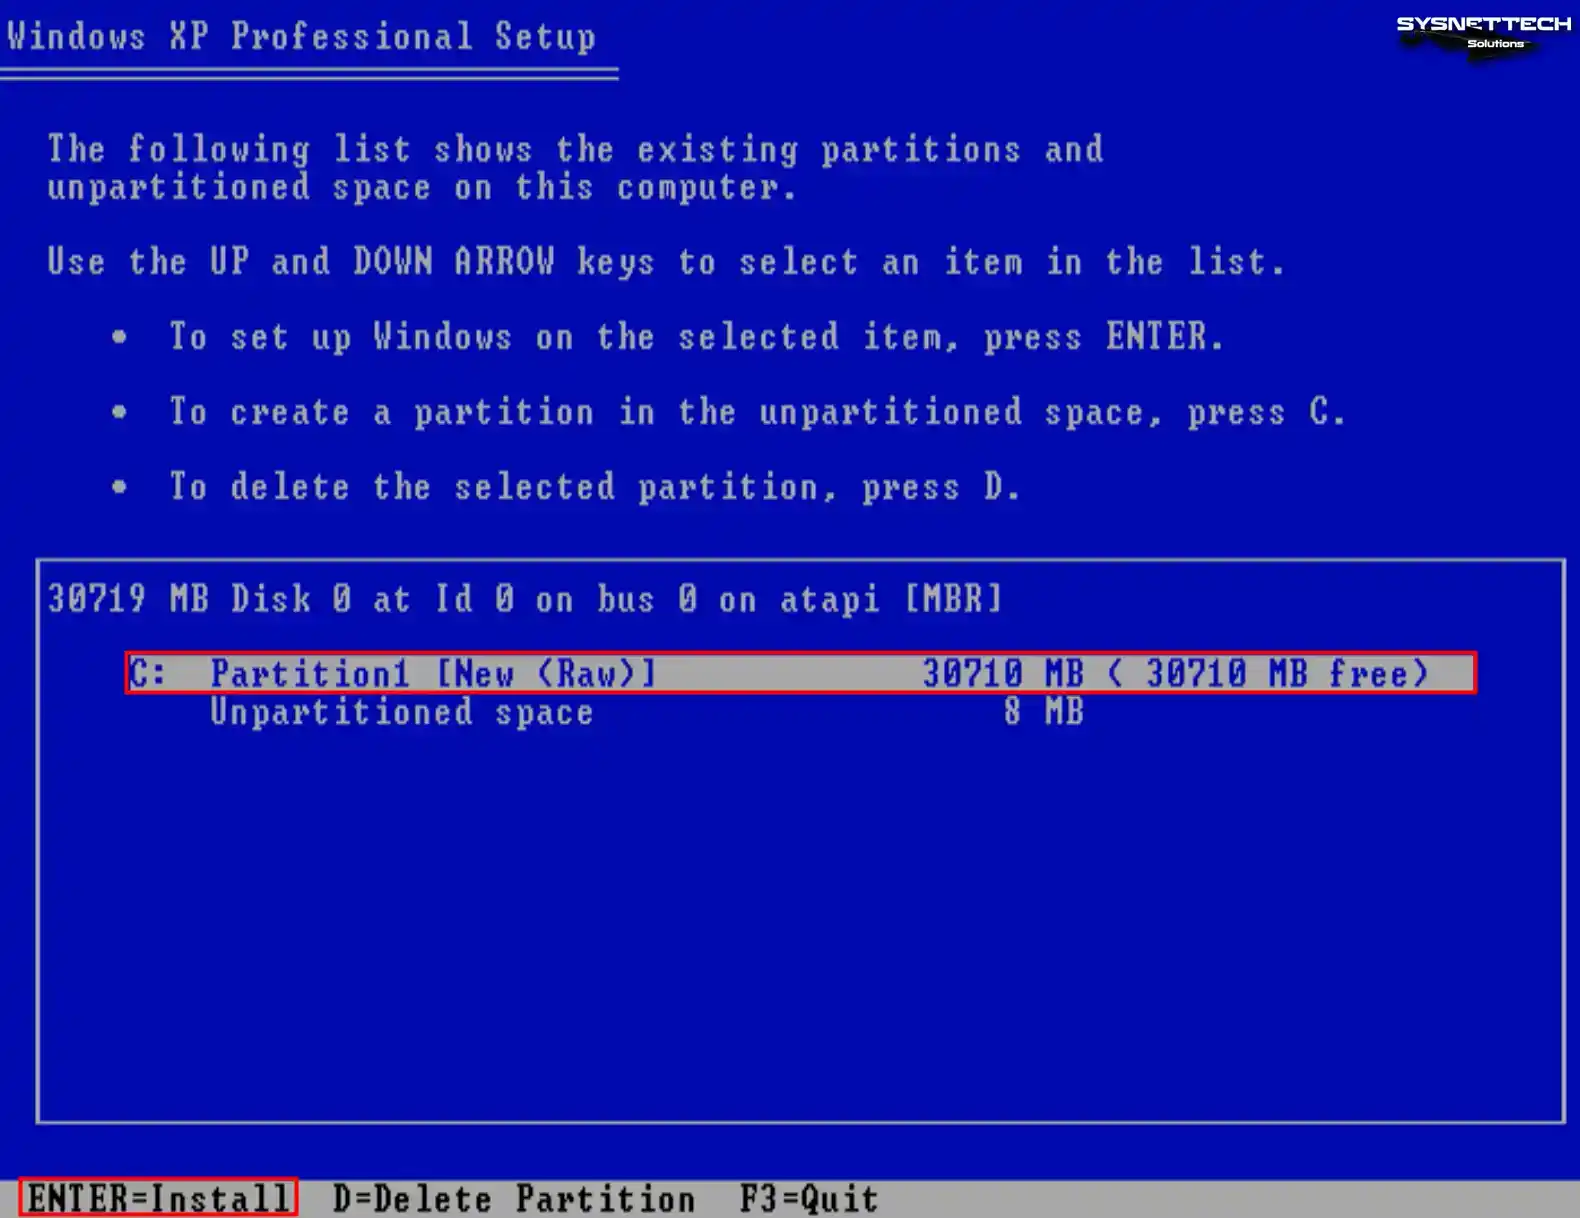
Step 5
Press Enter to start the Windows XP installation on the new partition you created.
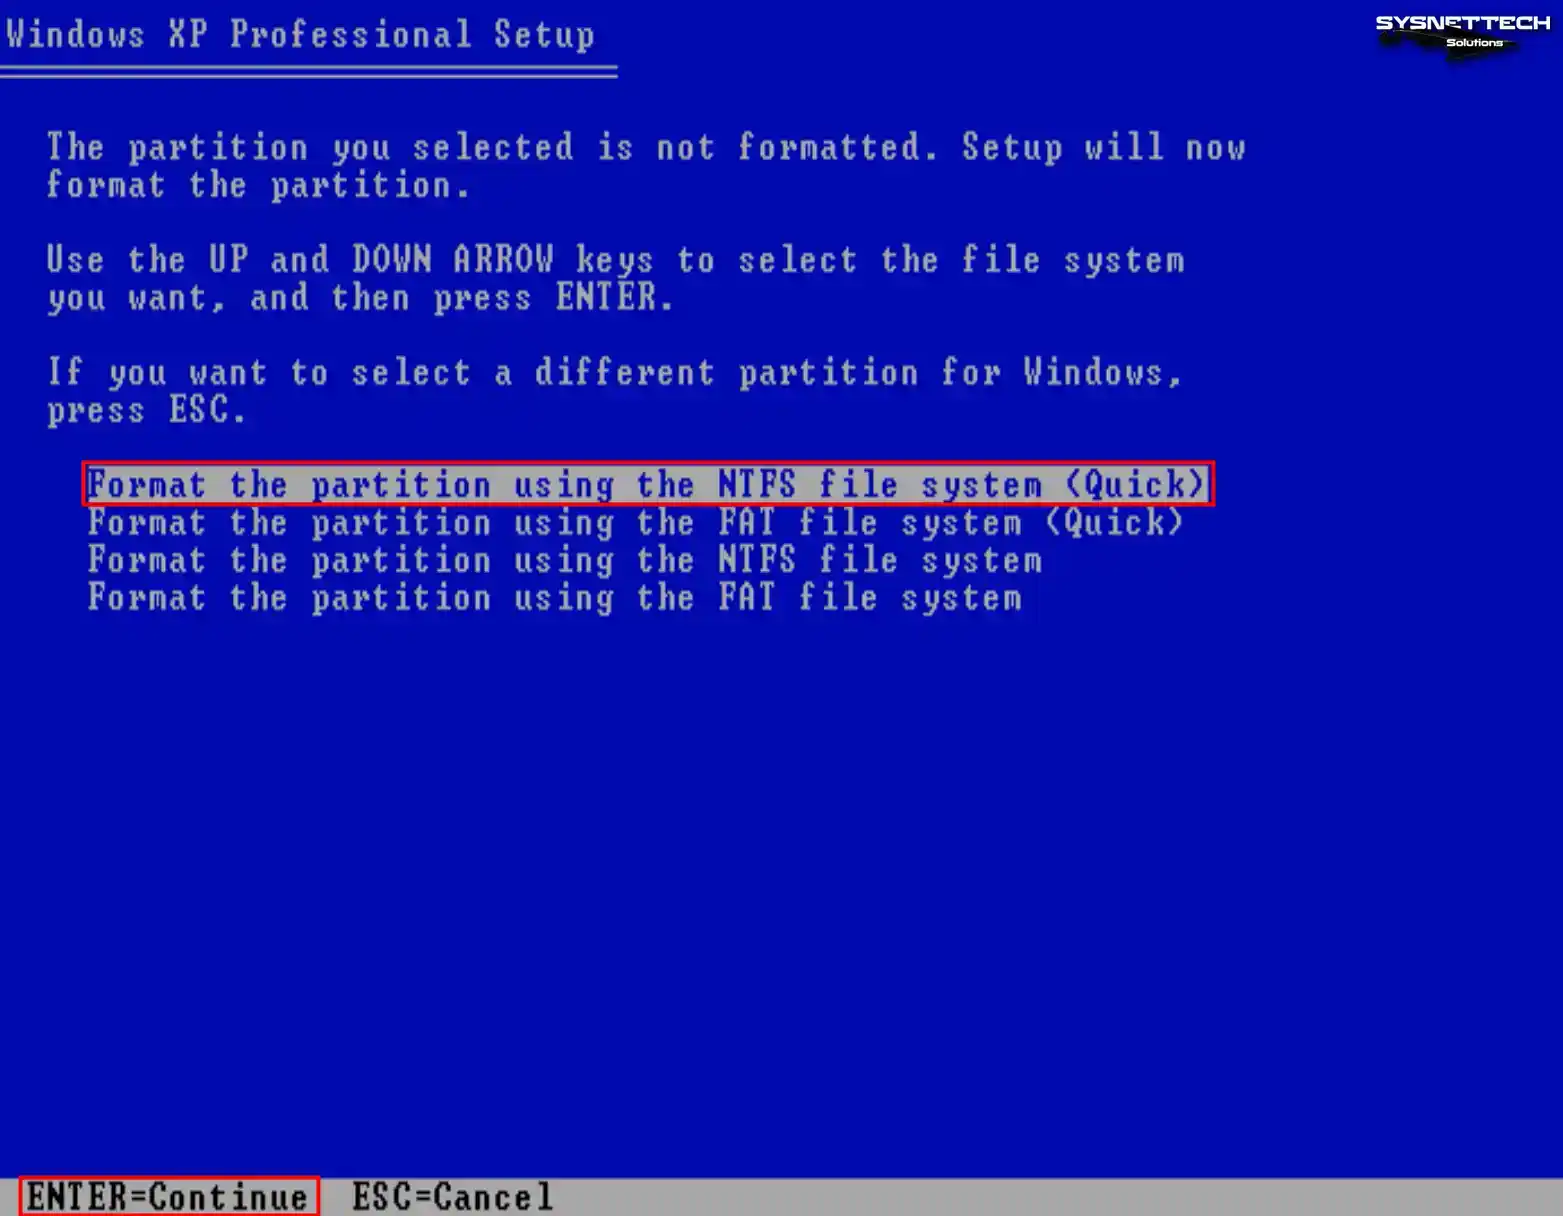
Step 6
Quickly format the virtual disk of the guest machine using the NTFS file system.
Step 7
Wait while the setup wizard formats your virtual disk.

Step 8
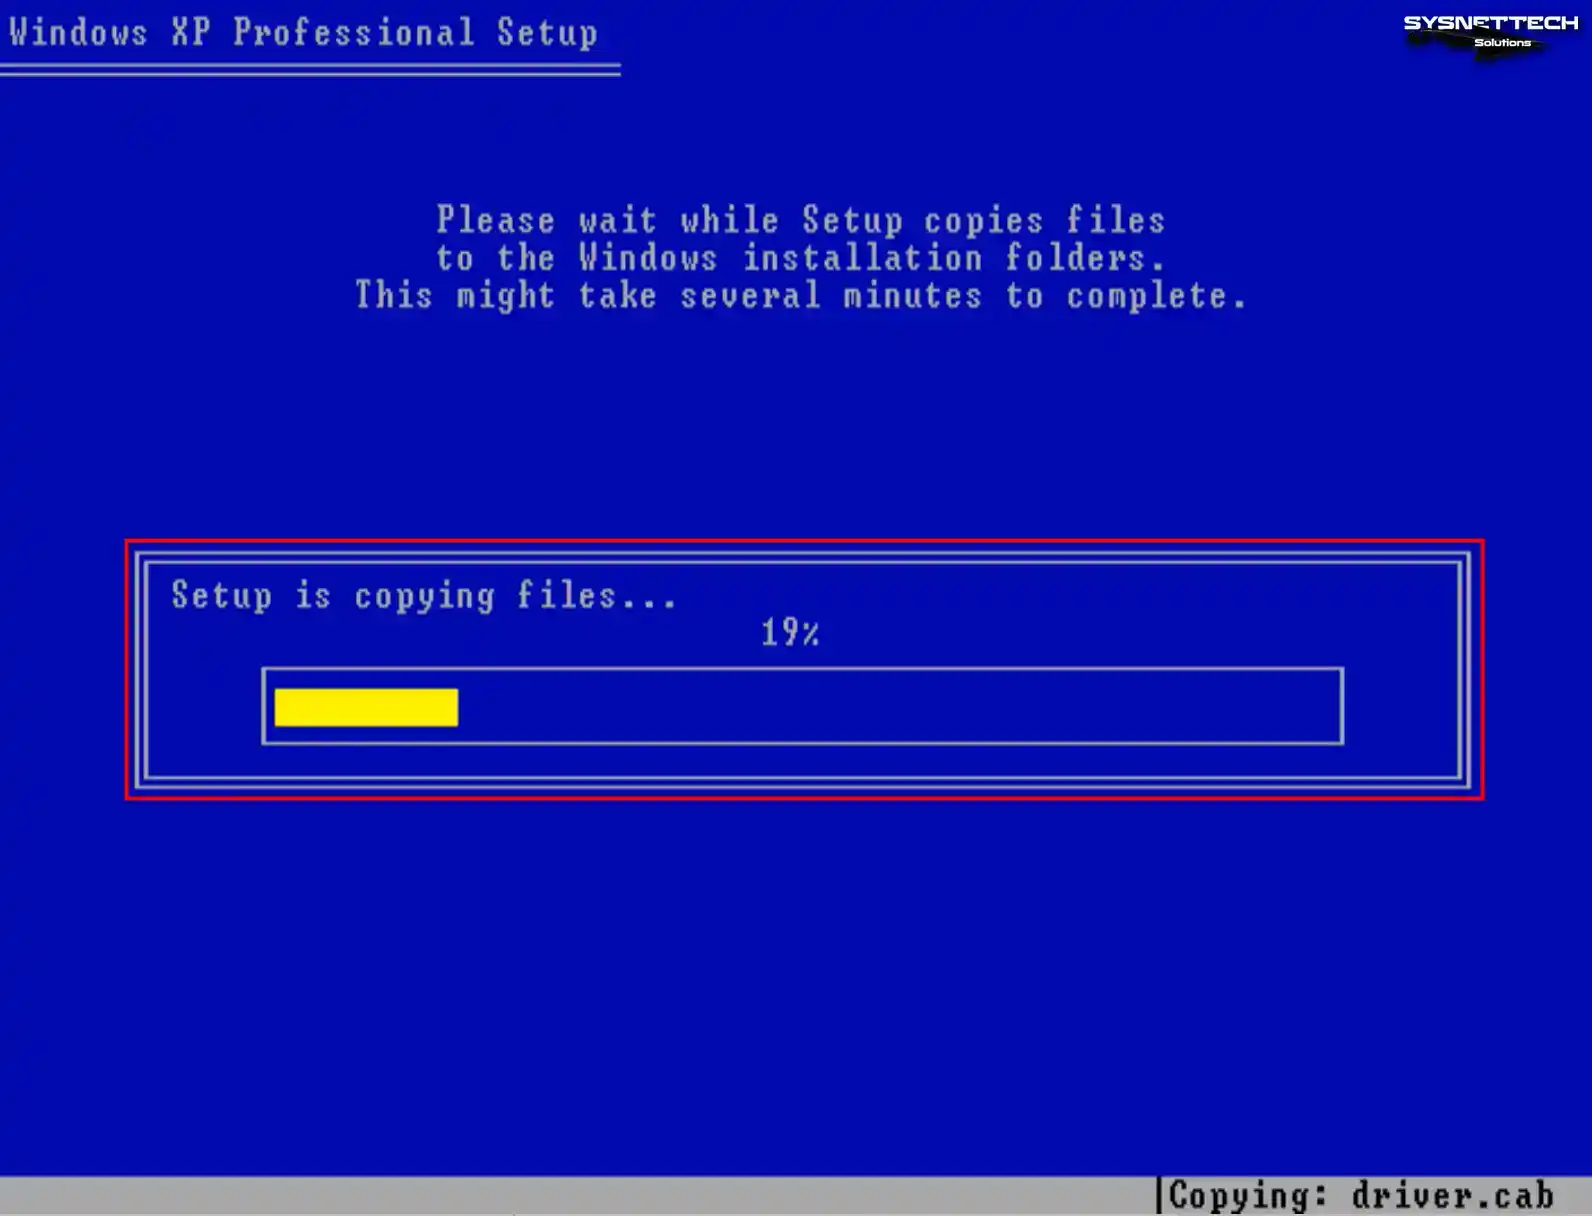
Once the virtual disk has been formatted to facilitate file copying, the XP system files will commence their transfer onto the disk.
Step 9
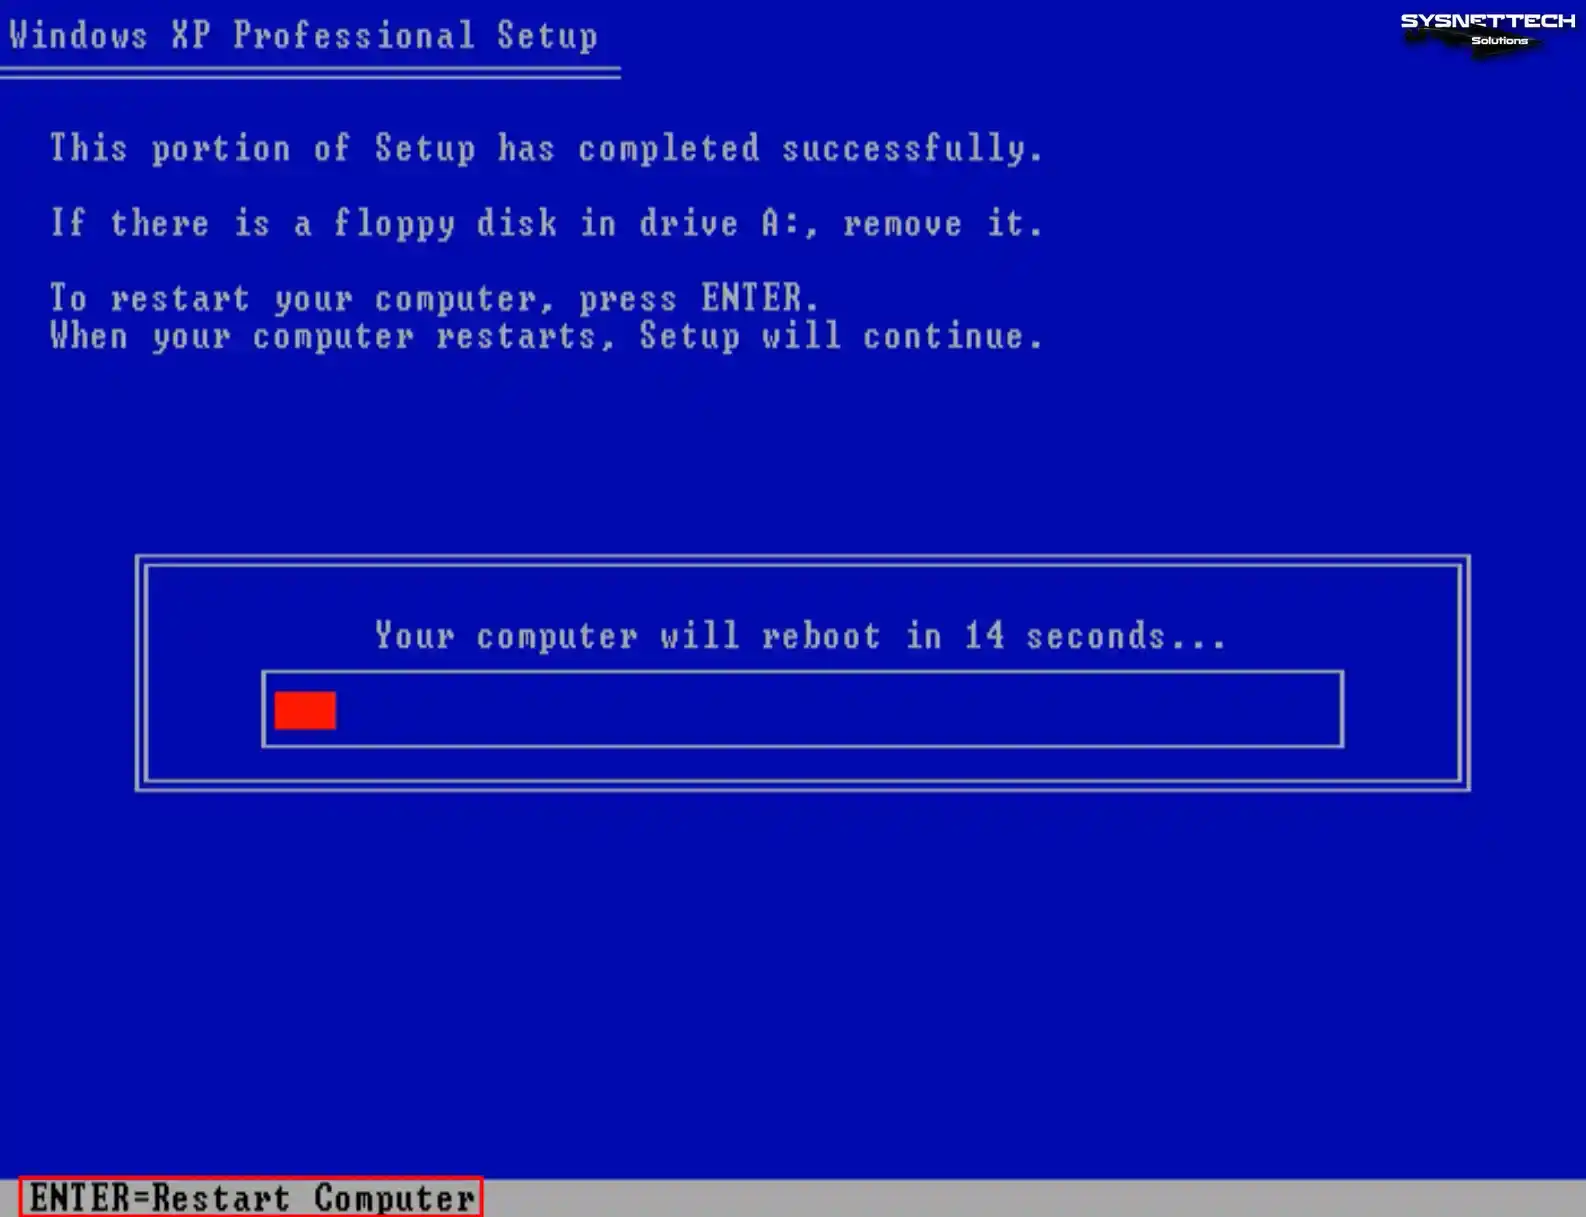
After copying the system files, your virtual computer will restart automatically in 15 seconds. You can press Enter to reboot your virtual system immediately. After your guest machine restarts, the installation will continue.
Step 10
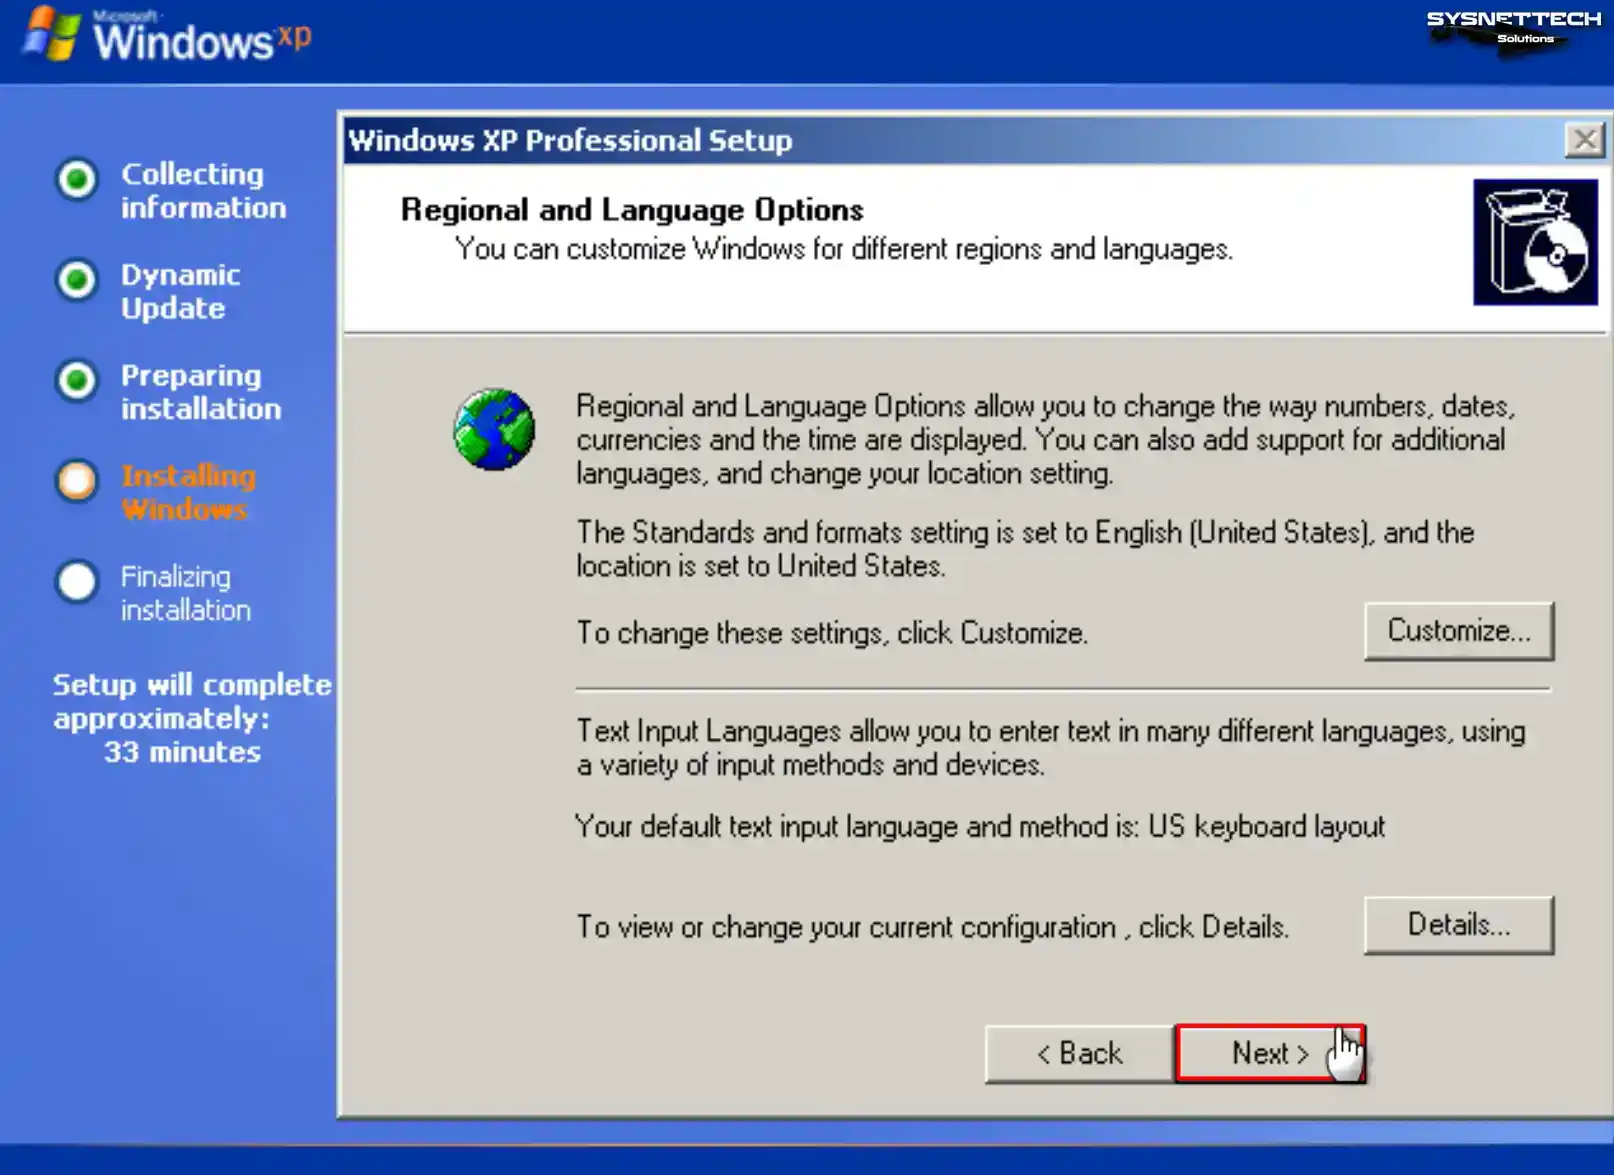
Configure the region and language options of Windows XP according to your country.
Step 11
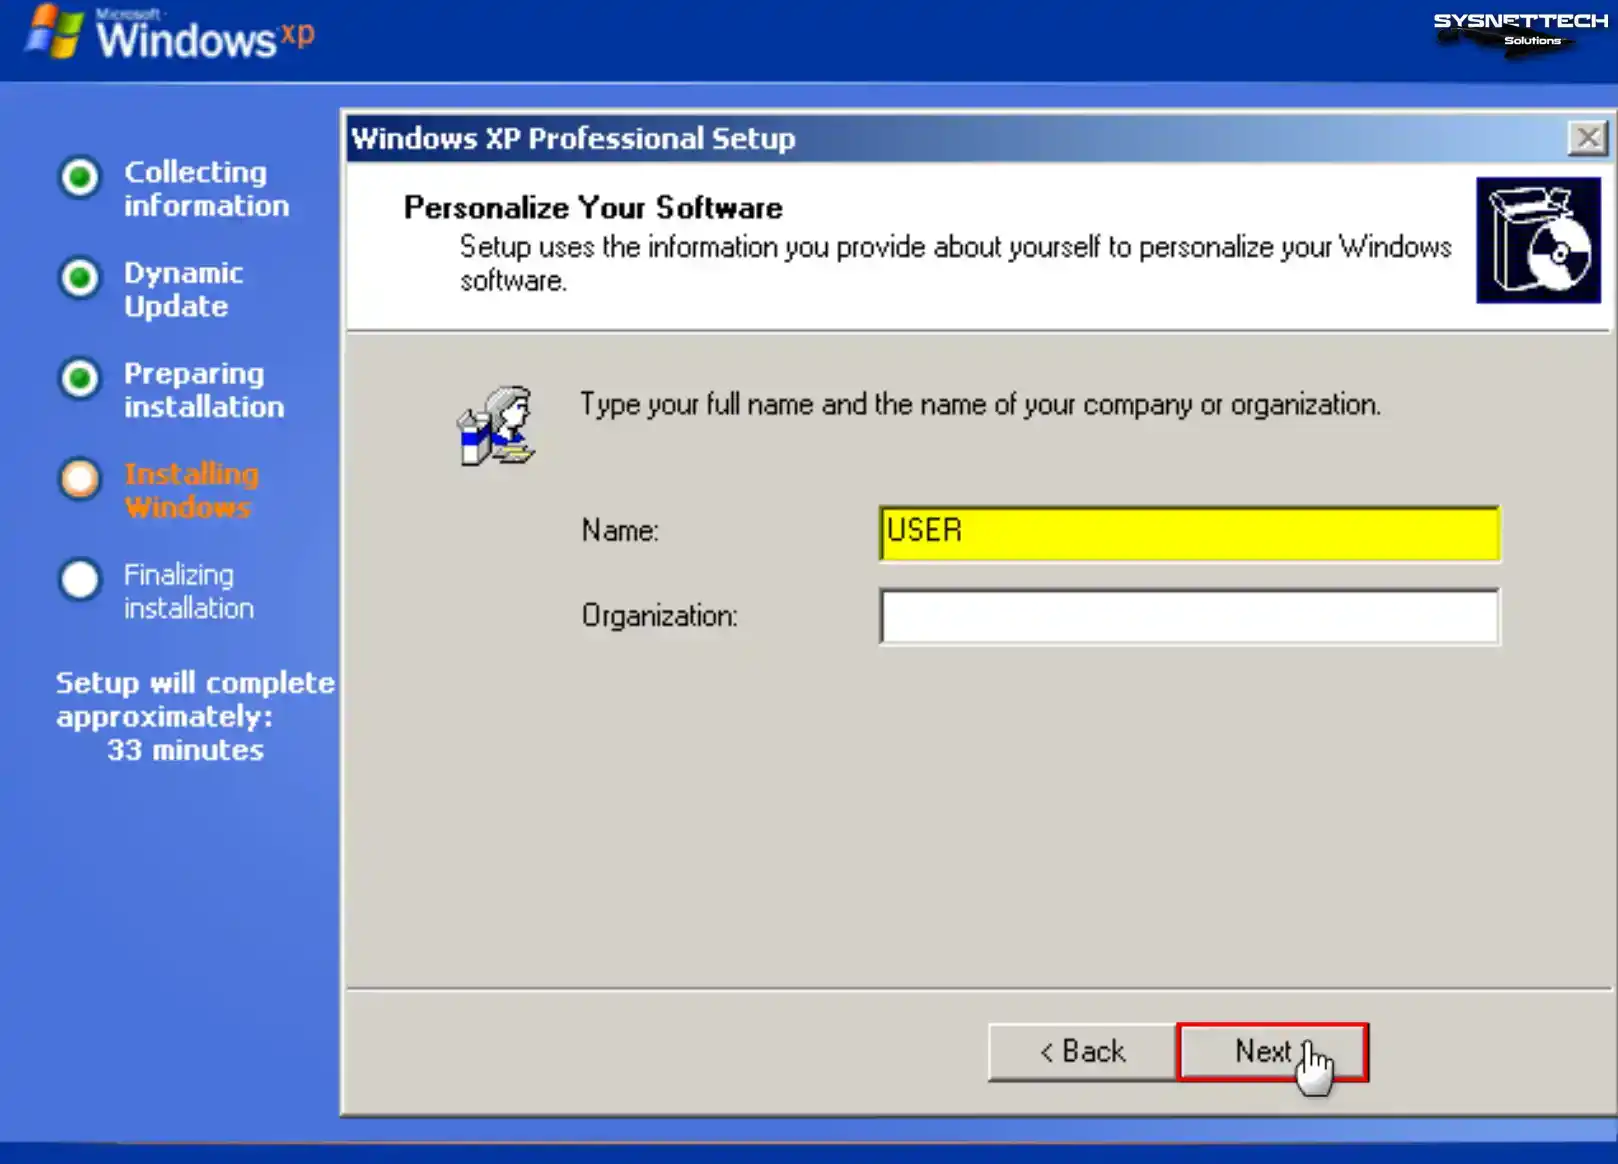
Type a name for the user account you will use in your virtual system and click Next.
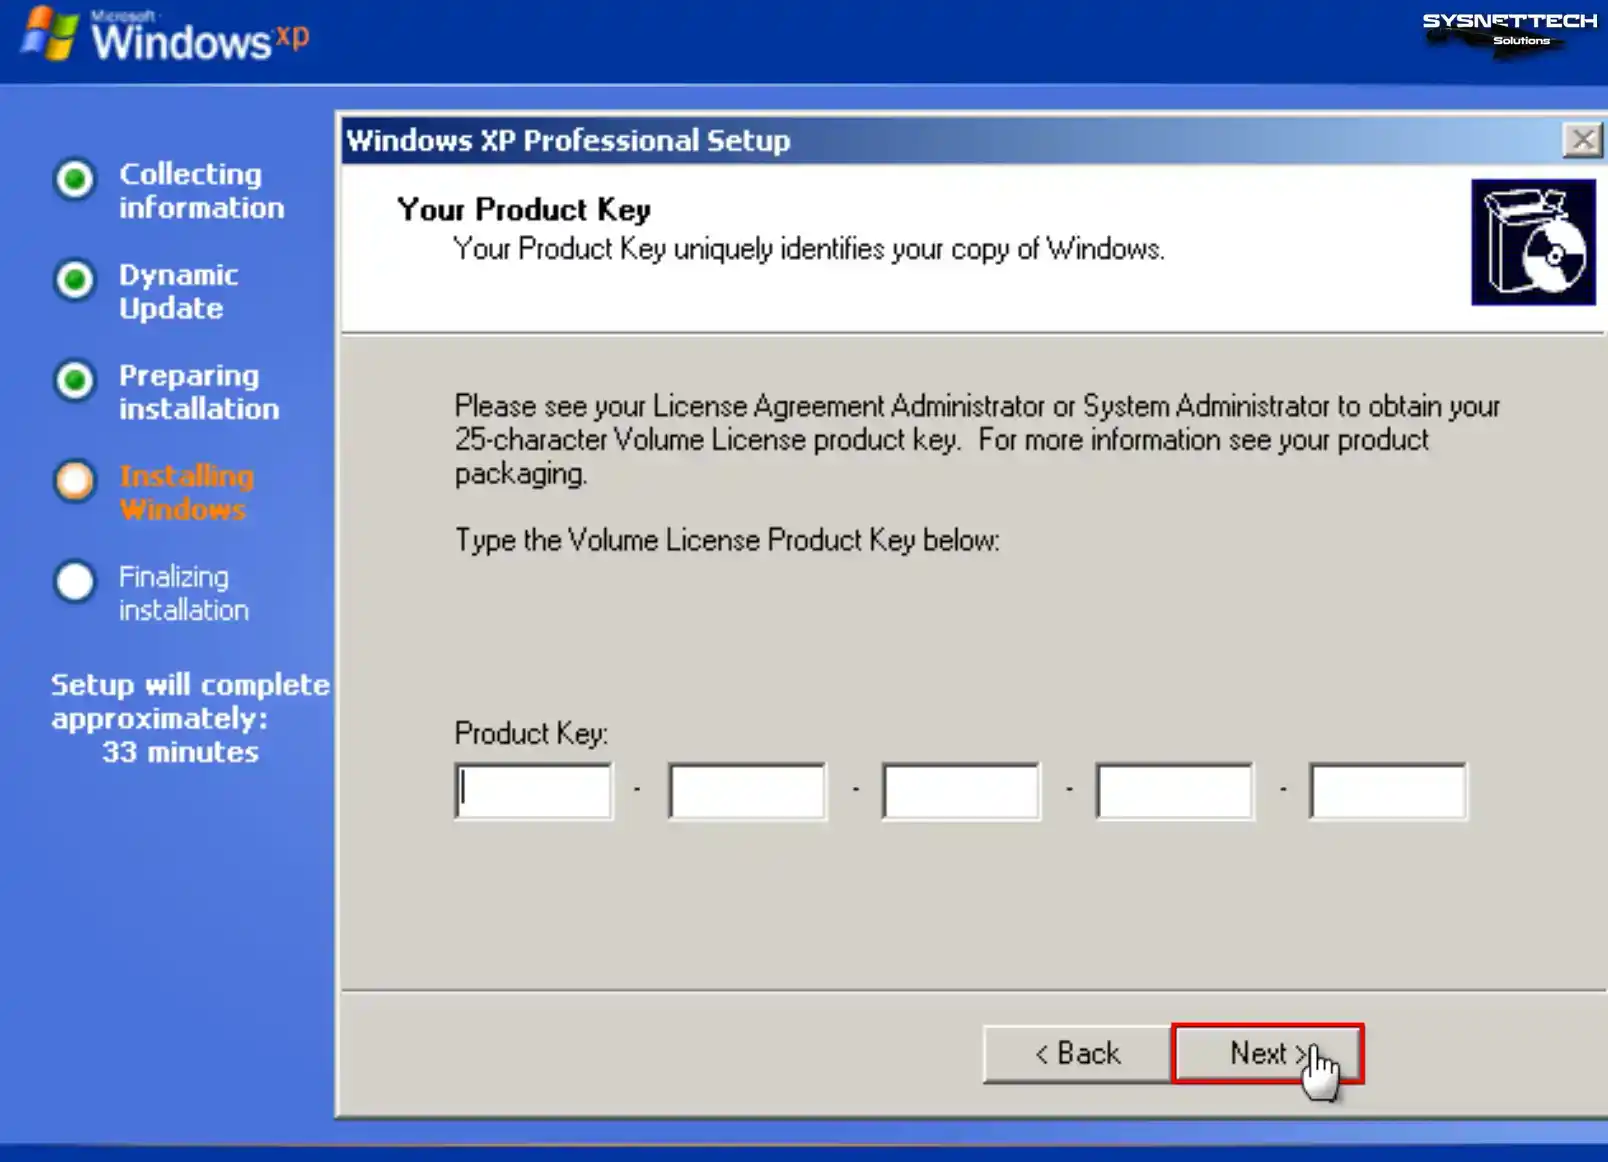
Step 12
Enter the Windows XP Pro product key you have and click Next.
Step 13
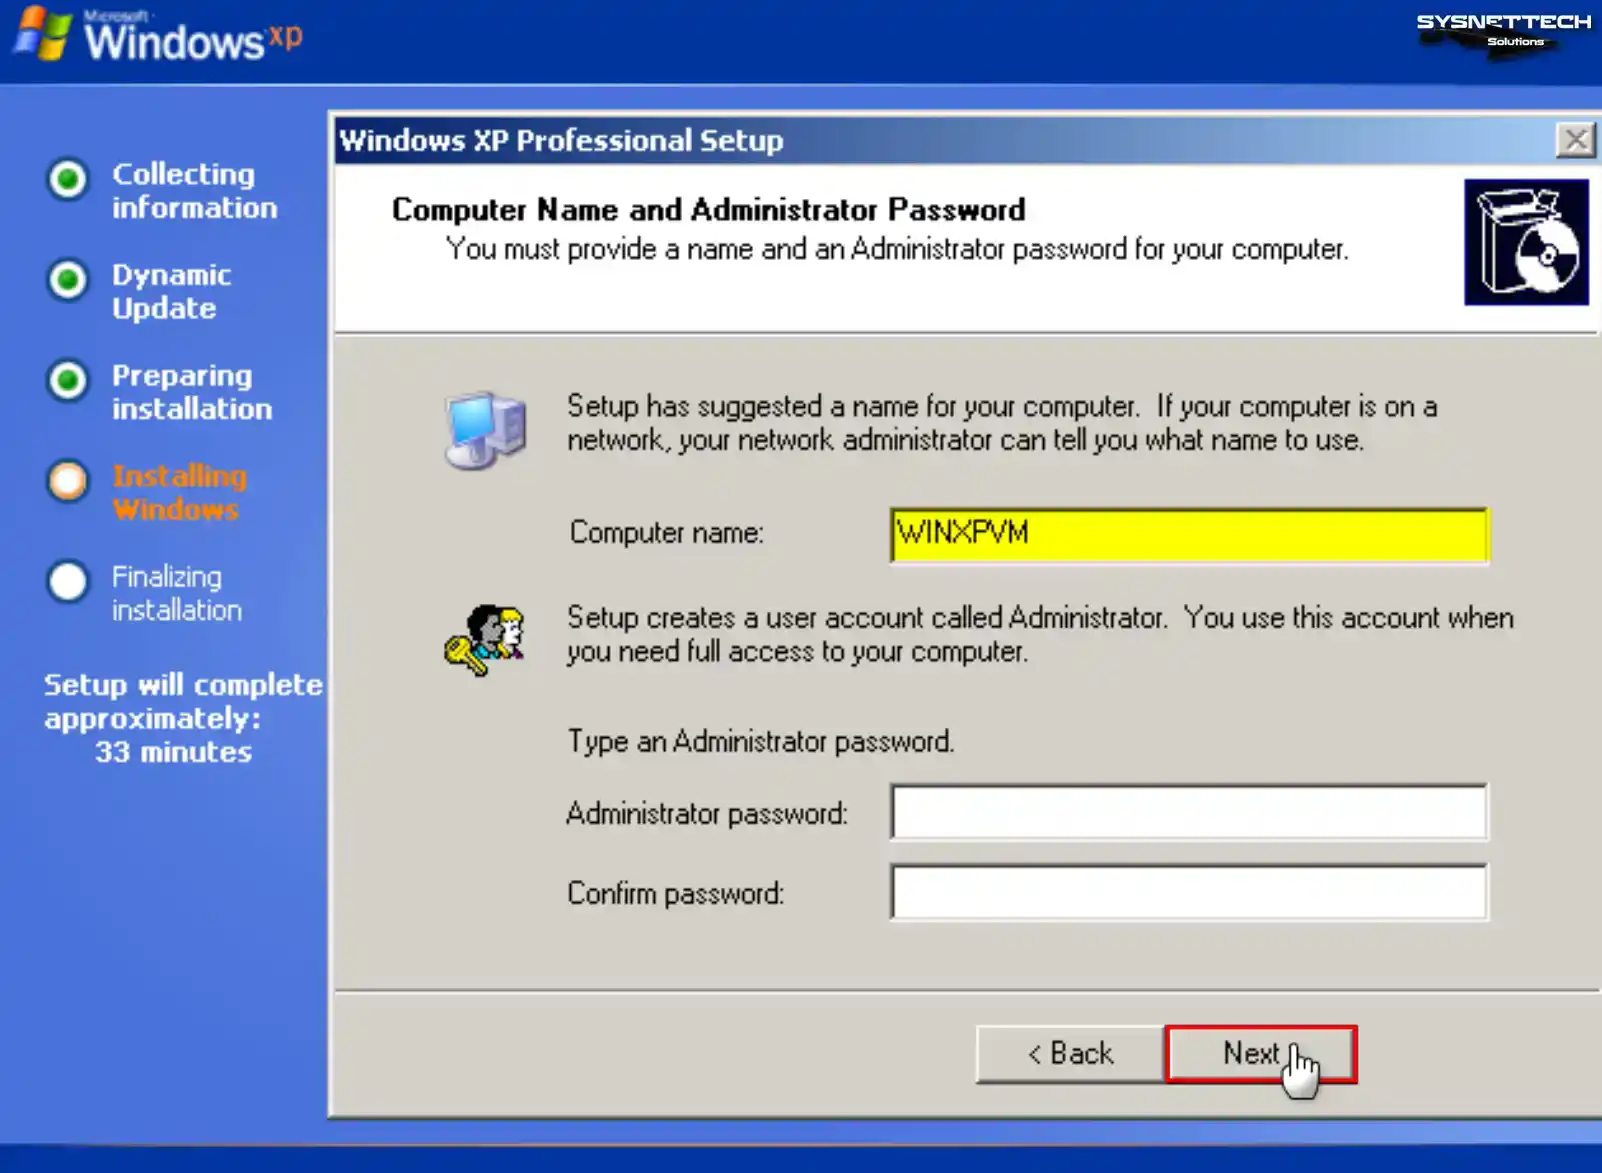
If you use your Windows guest machine in a network environment with multiple computers, ensure the computer name differs from other devices.
Type the PC name you want to use in the Computer Name field and create a new password for the Administrator account with full authority in your virtual system, or leave the relevant fields blank to avoid making a password, and click Next.
Step 14
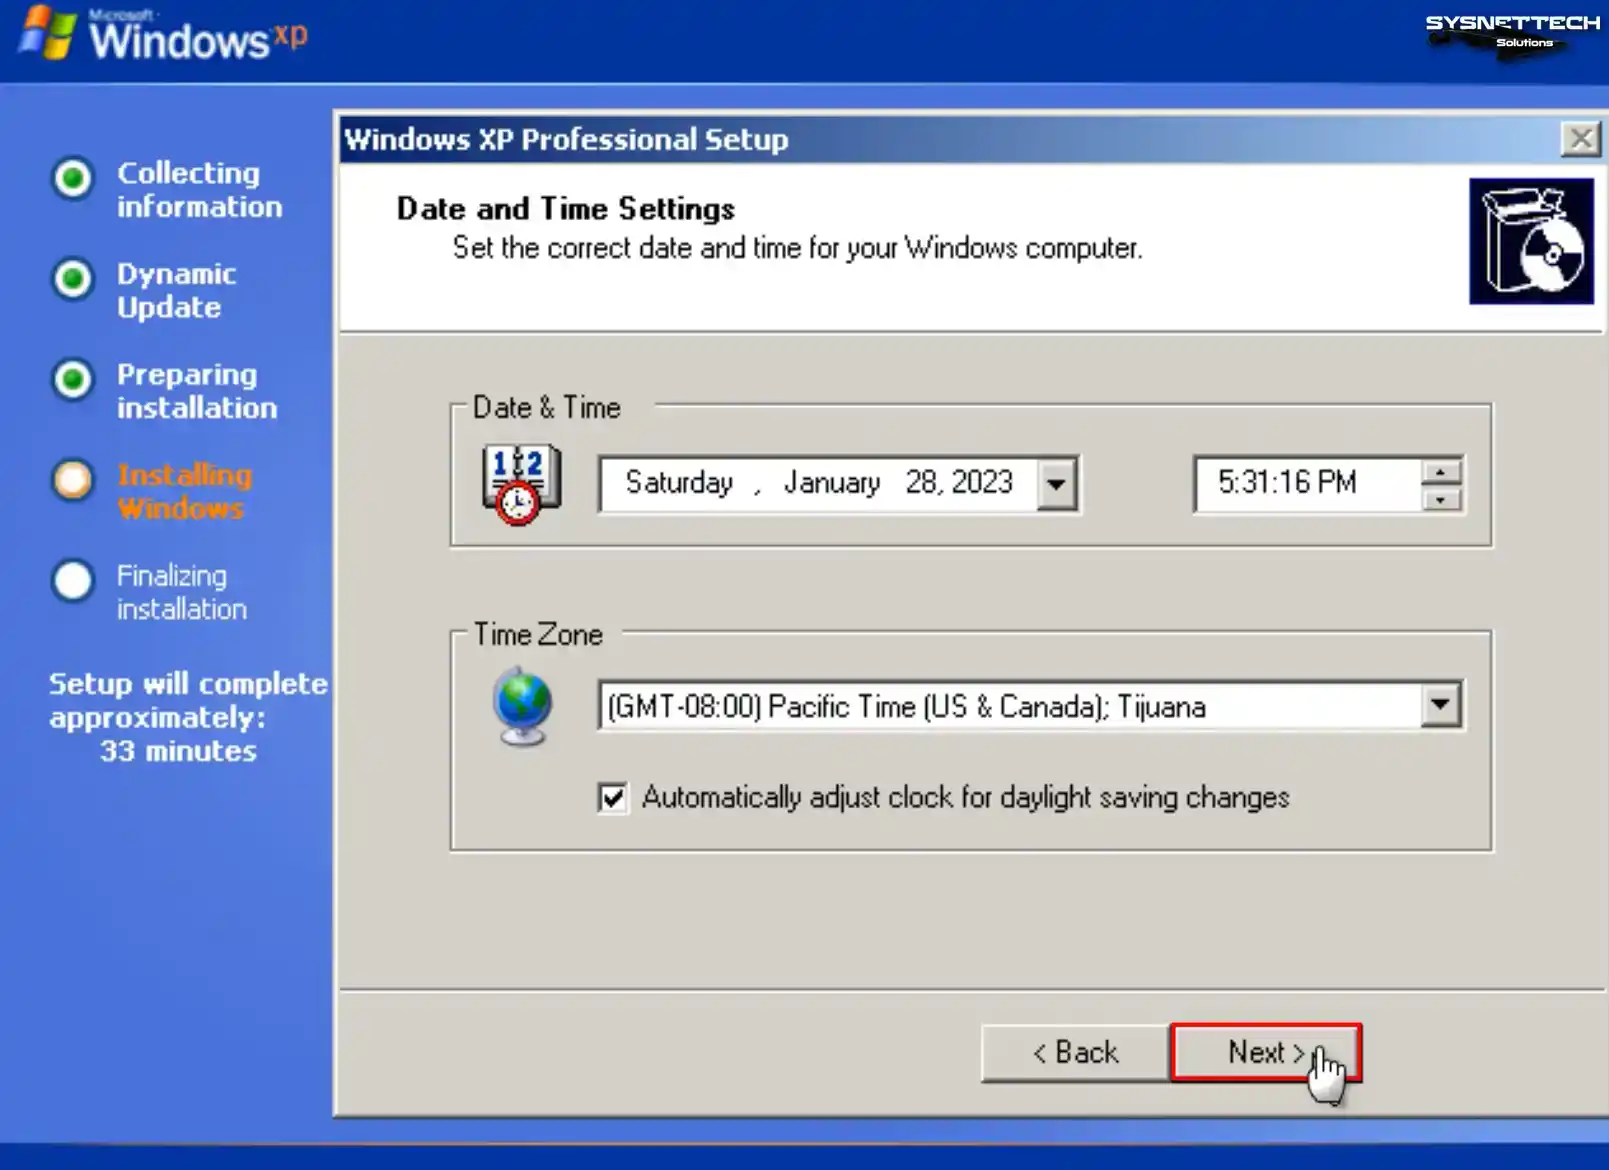
Configure your virtual computer’s date, time, and time zone settings according to your location and click Next.
Step 15
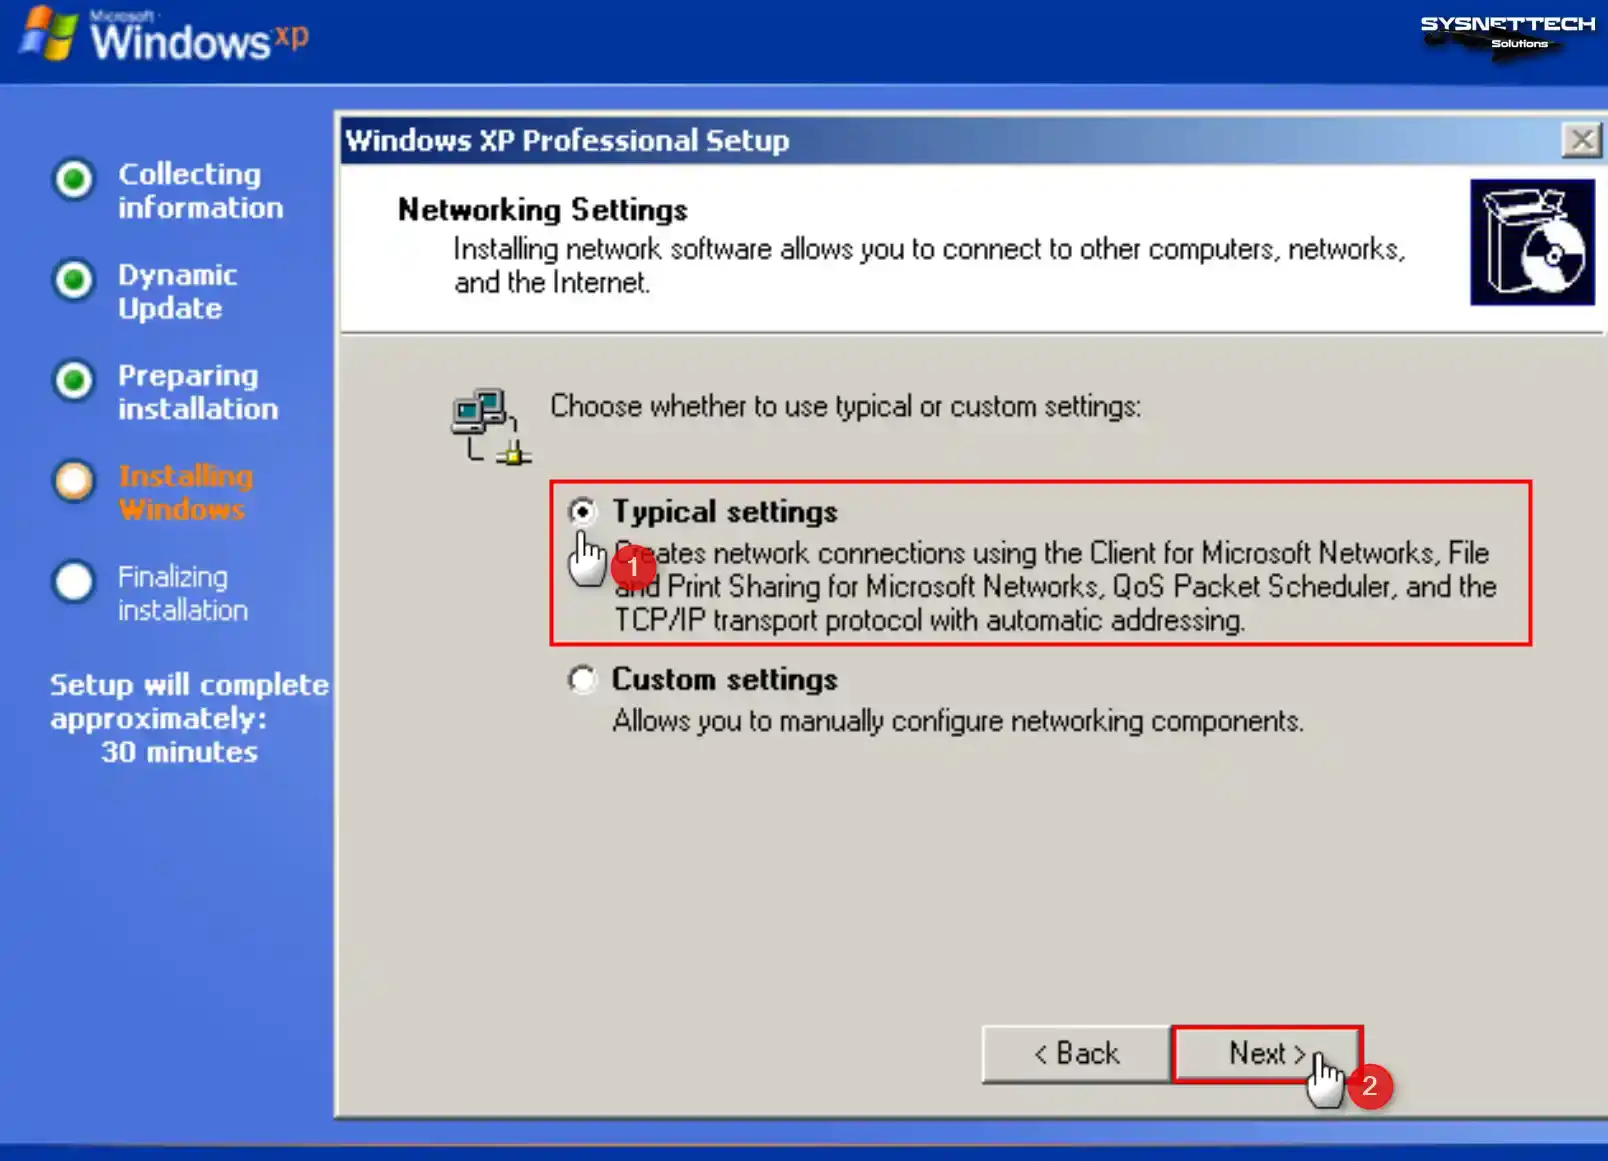
To use your VM in your physical network environment in the Networking Settings window, tick Custom Settings and make the relevant settings. You can also continue the installation by selecting Typical Settings in general.
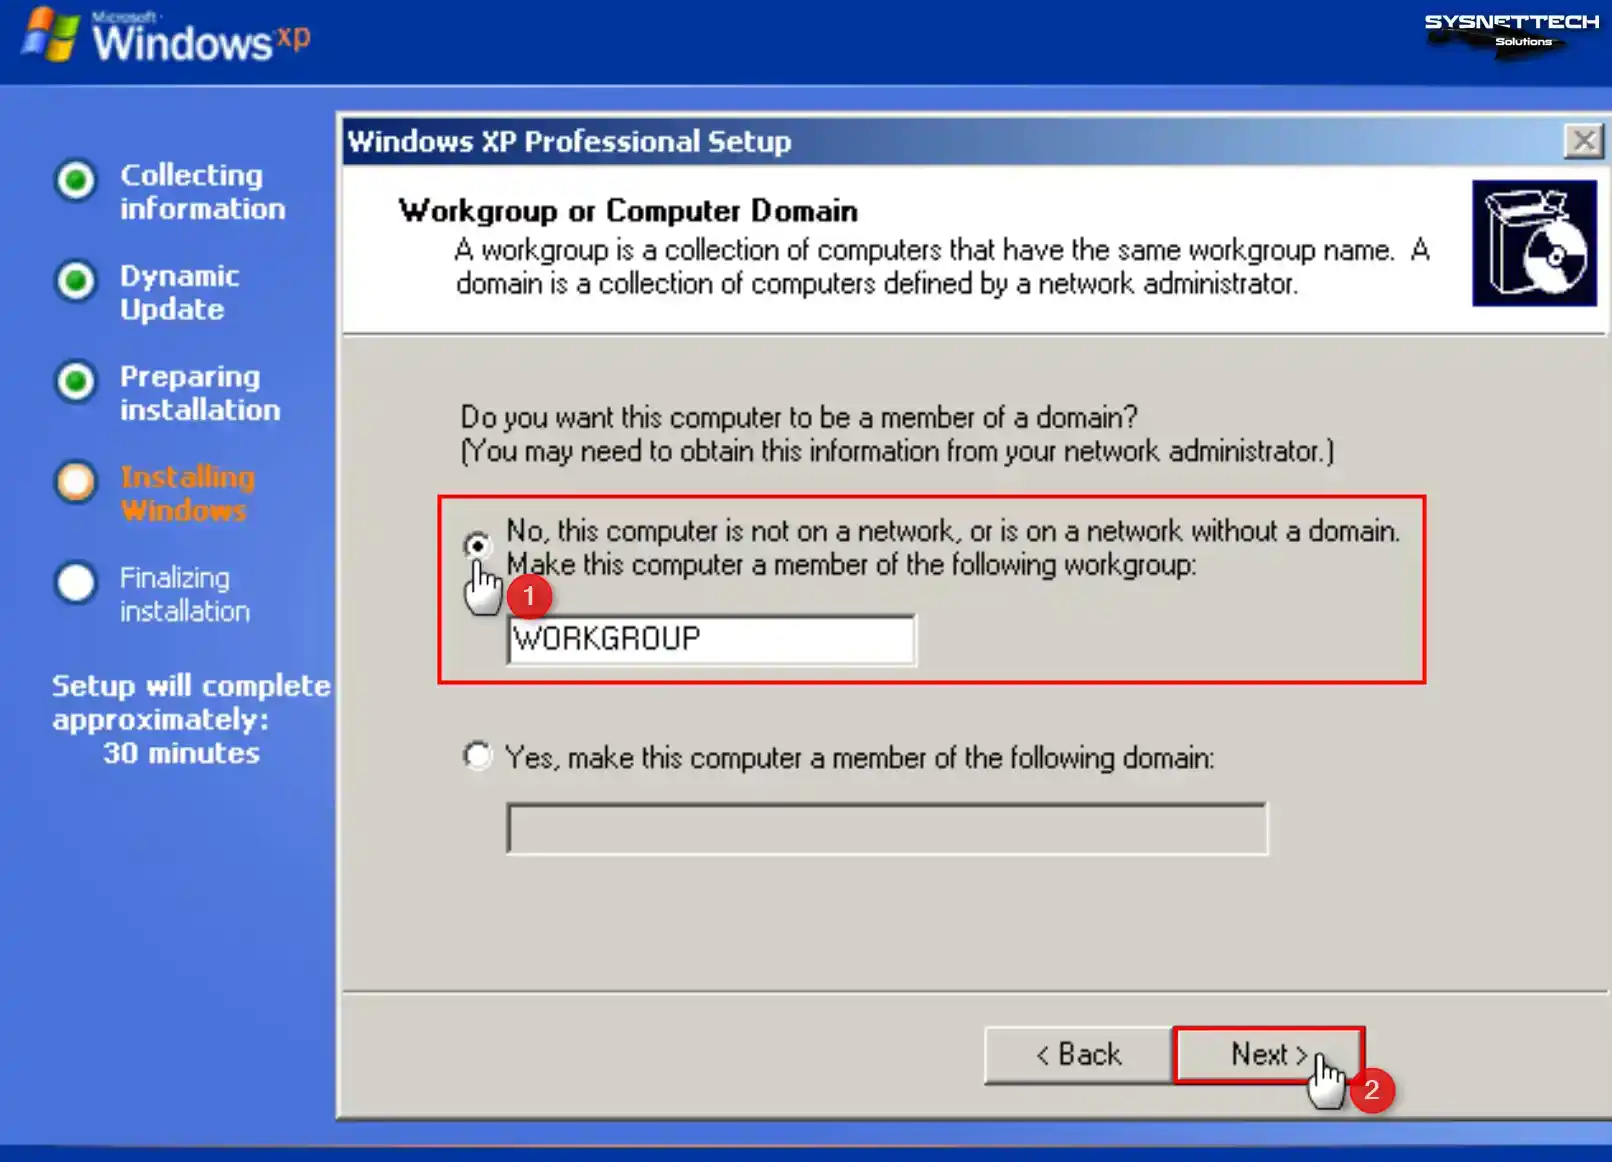
Step 16
According to your network structure, if you make the virtual machine a member of a Domain environment that provides an Active Directory service, you must select the Yes option and type your Domain information.
To use your VM for personal use without subscribing to a Domain environment, select WORKGROUP and click Next.
Step 17
Wait while Windows XP is installed on the guest machine.

Step 18
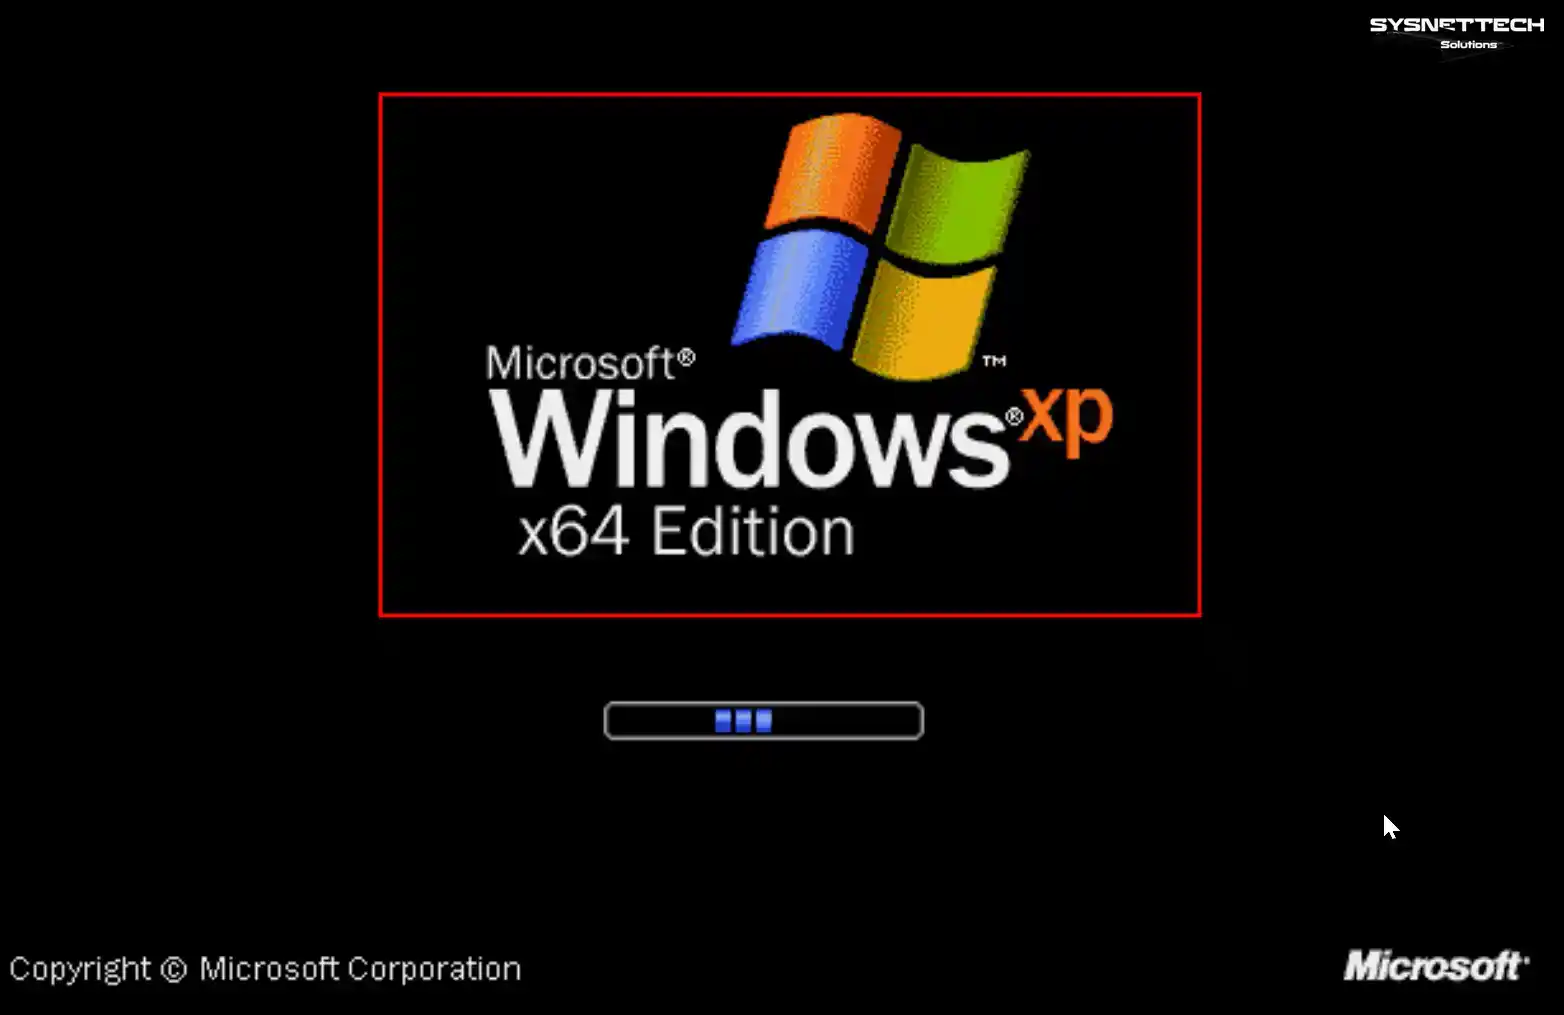
Wait while the Microsoft Windows XP x64 operating system boots up.
Step 19
After the Windows XP system files are copied, your system will reboot, and your desktop environment will be ready.
Step 20
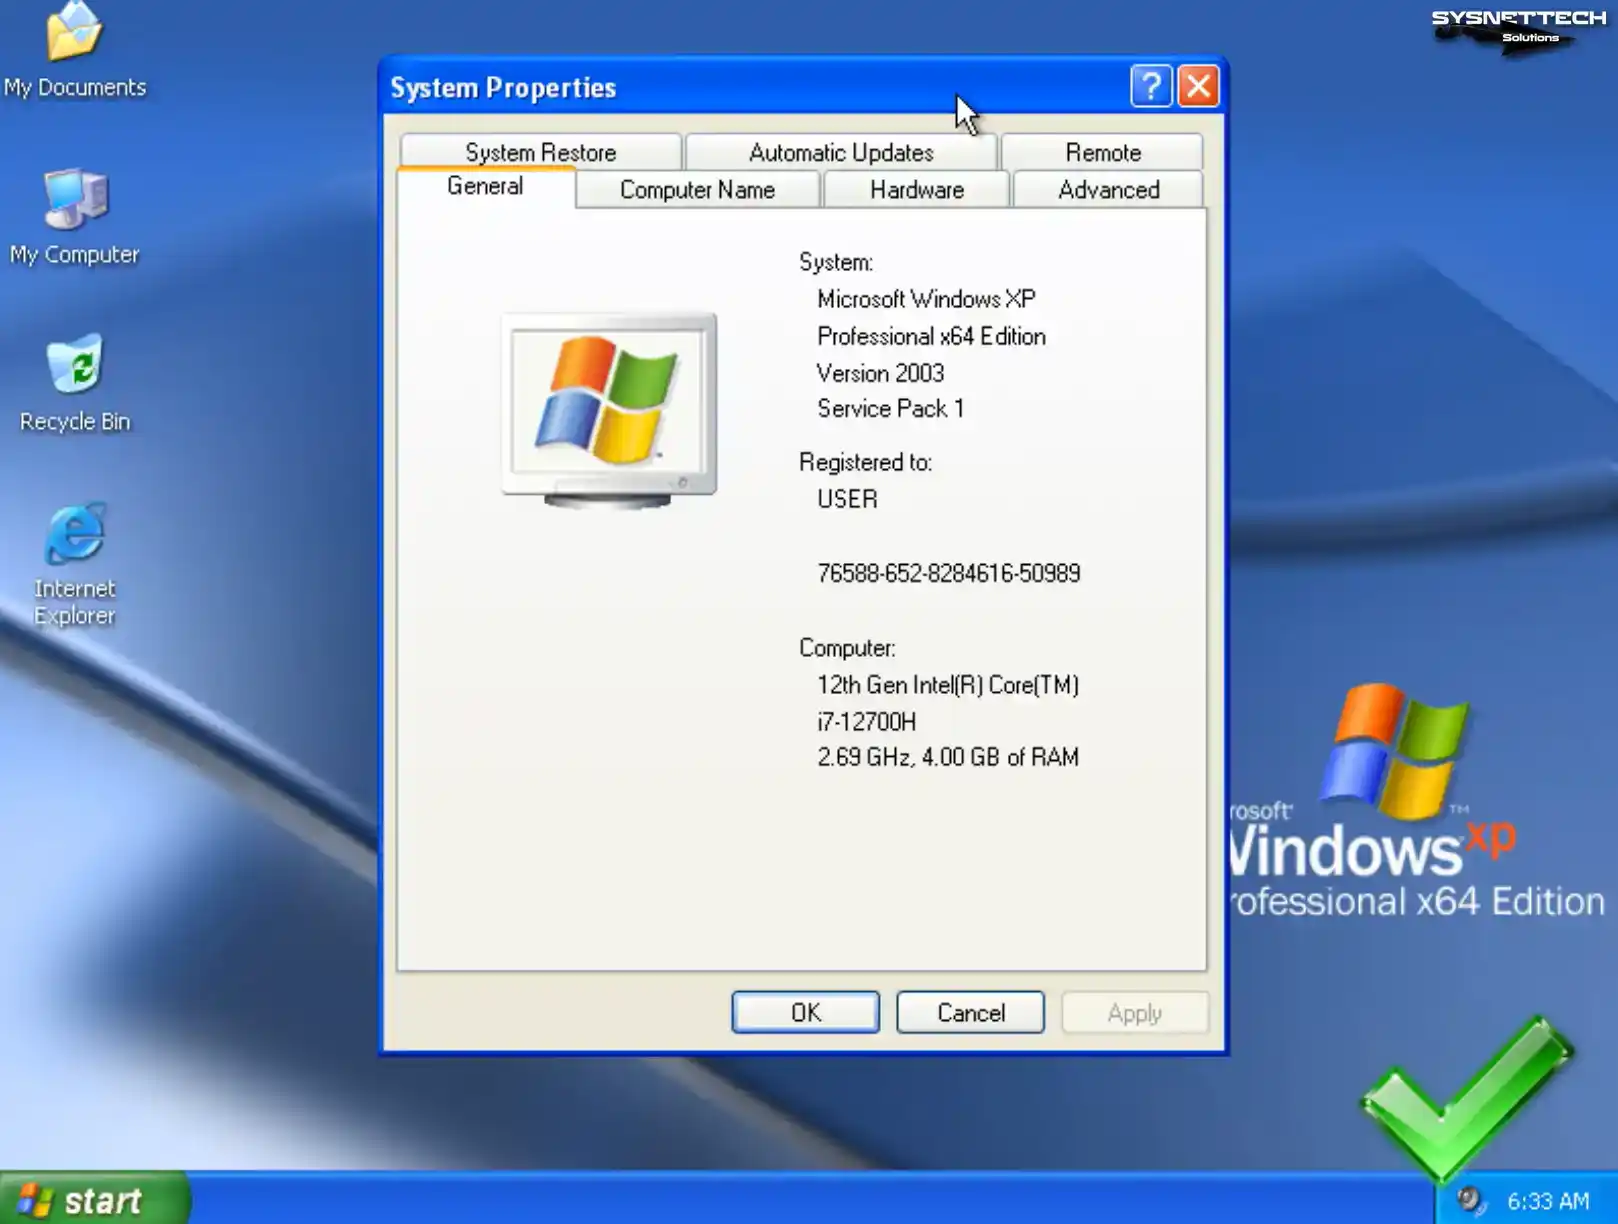
Right-click on My Computer, then click System Properties from the options that appear, and check the system information.
How to Install Guest Additions in Windows XP
After installing Windows XP within the virtual machine, it is essential to install Guest Additions to unlock various functionalities. These include achieving full-screen resolution, facilitating file transfer between the host and the VM, and enabling the utilization of the host computer’s hardware within the VM.
Step 1
To view the Computer Management window, right-click the My Computer icon and select Manage. Once the window appears, navigate to Device Manager and review the drivers that are not installed on your system.
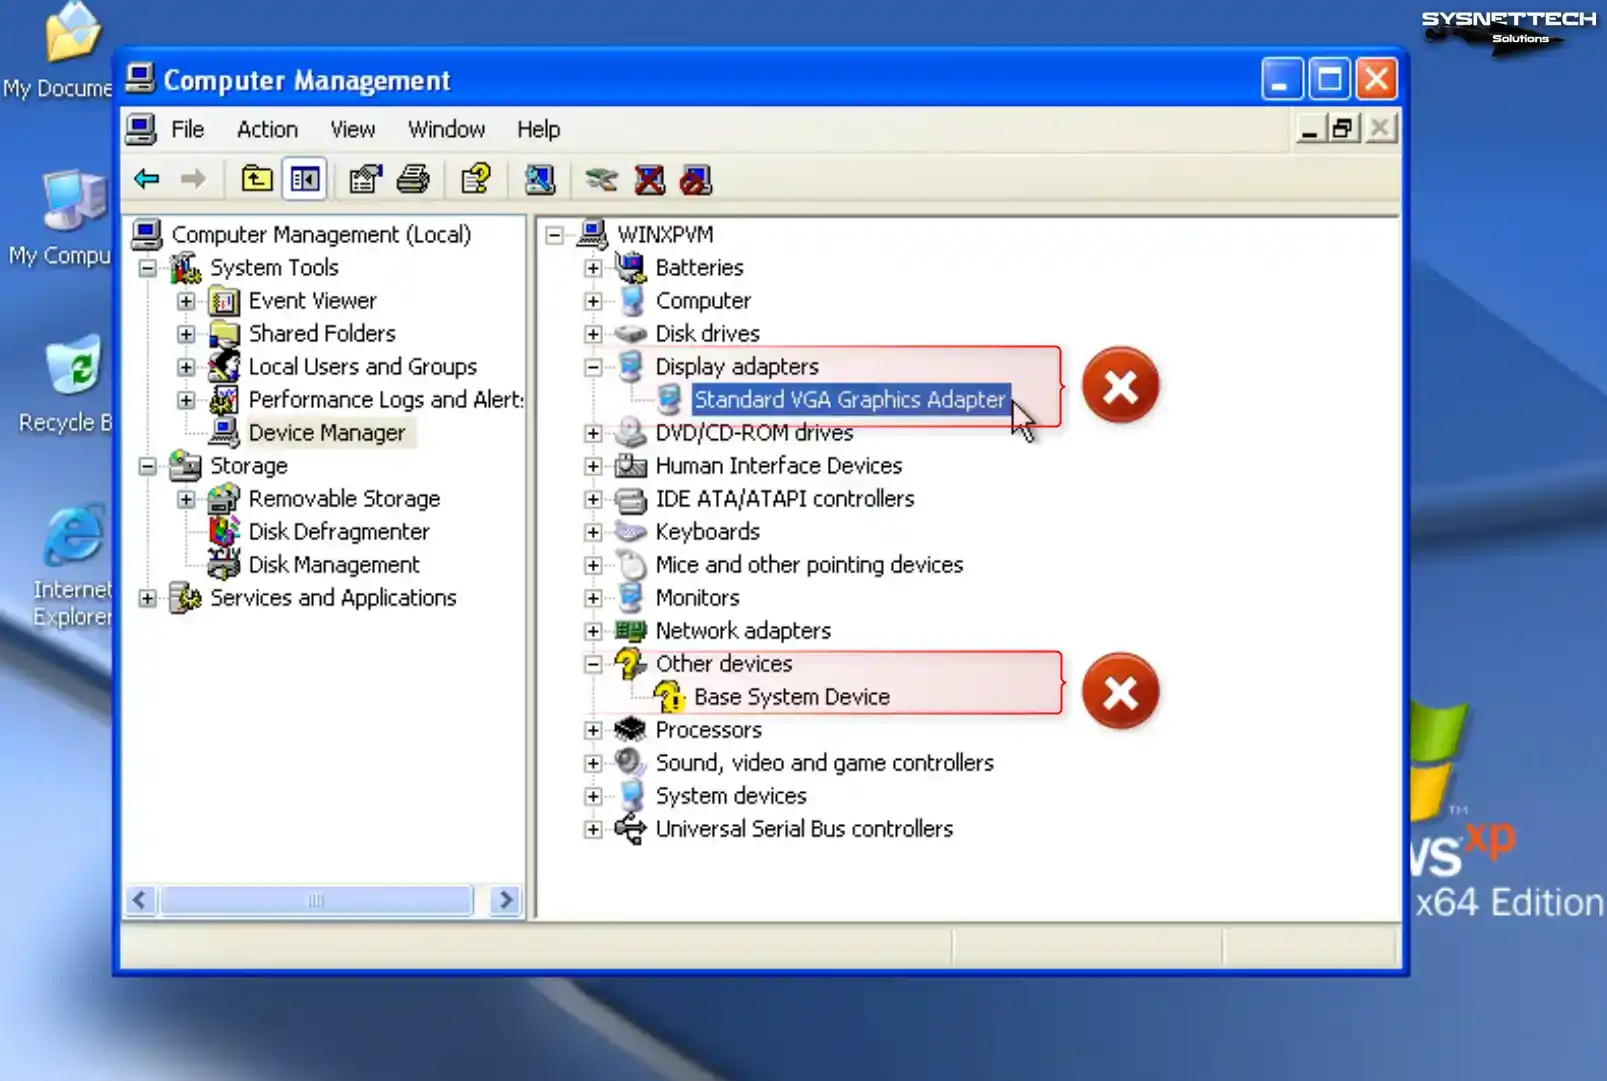
Step 2
Under normal circumstances, when installing Guest Additions on Windows XP, you will encounter an Unsigned Driver warning. This is not an error, but the driver for some devices cannot be fully installed.
To overcome the barrier imposed by unsigned drivers, you must modify a setting in the Group Policy settings. To continue, access the Start menu, enter “gpedit.msc” in the designated text box, and proceed by clicking OK.
When the Group Policy Object Editor is accessed, go to Windows Settings > Security Settings > Local Policies > Security Options and click “Devices: Unsigned driver installation behavior” from the options under Security Options.
Change the Devices: Unsigned driver installation behavior setting to Silently Succeed, and restart your virtual computer after clicking OK.

Step 3
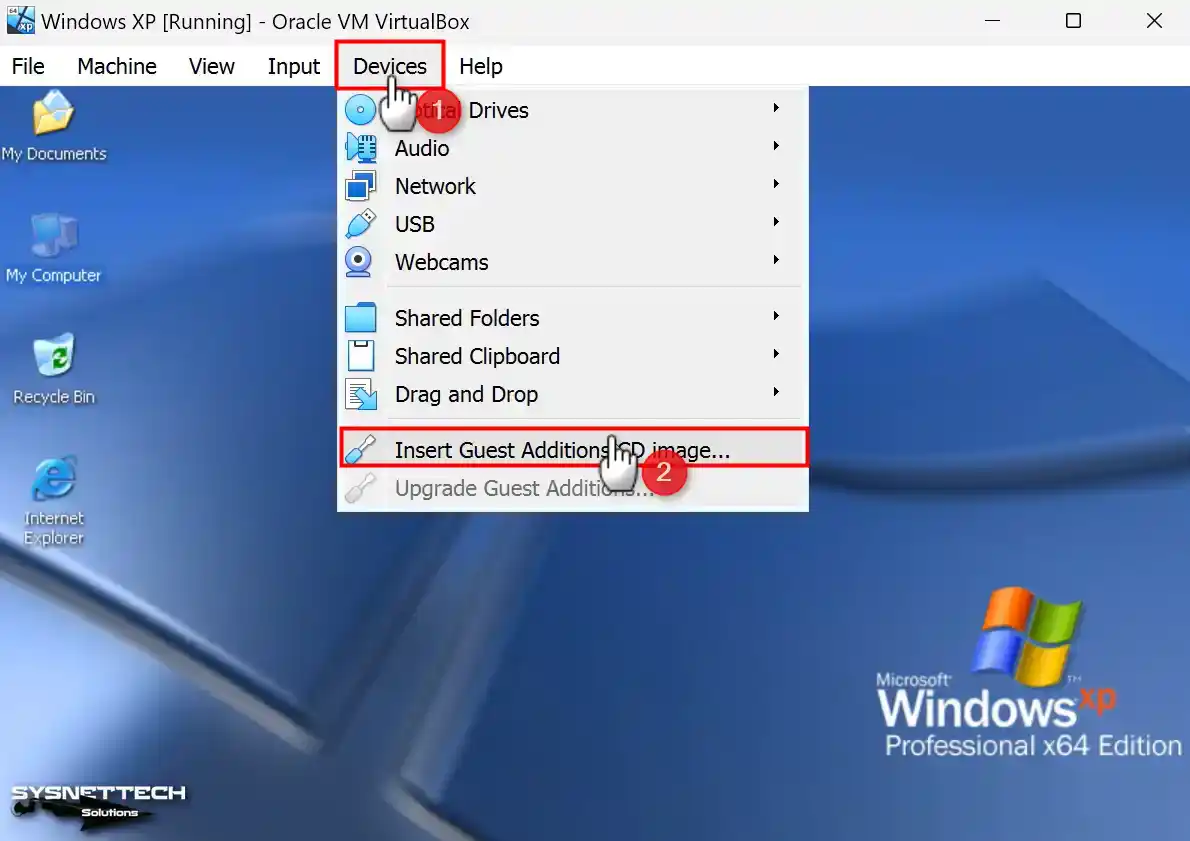
After your guest system is turned on, click Devices / Insert Guest Additions CD Image to install the guest add-ons software.
Step 4
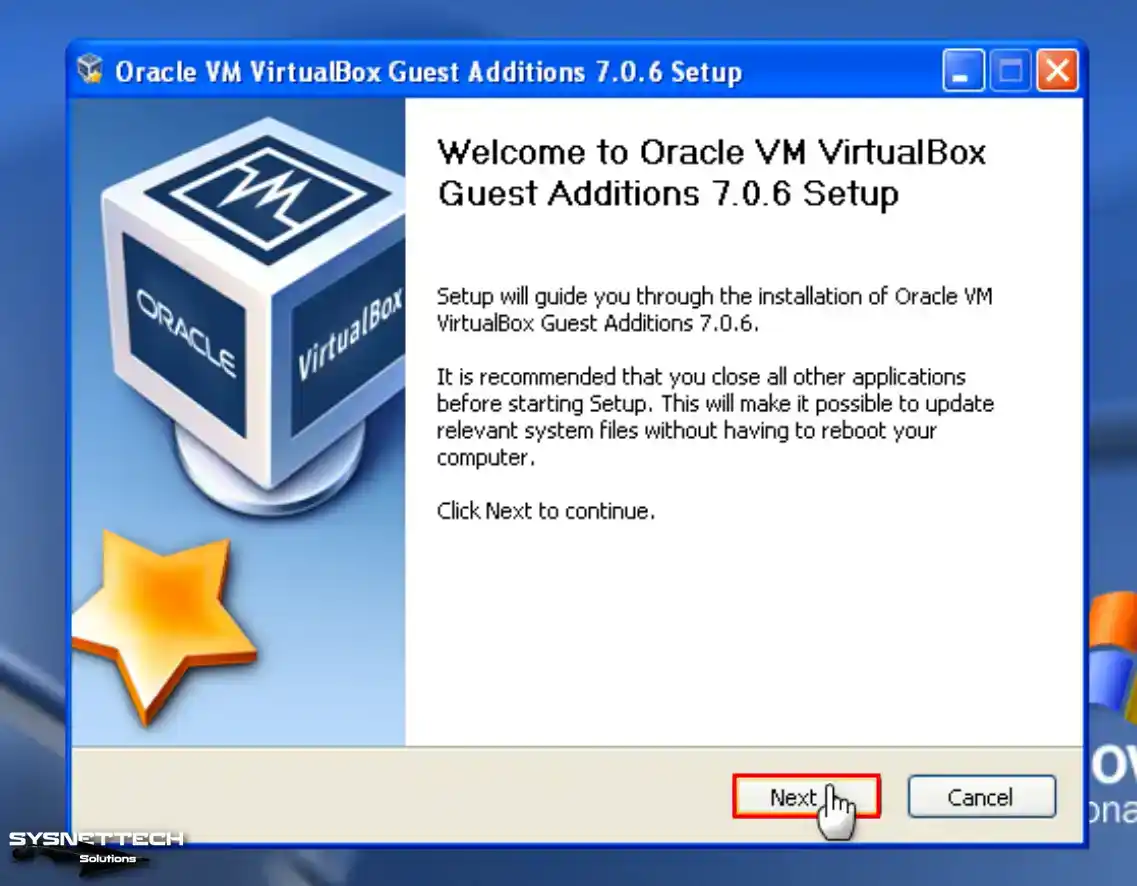
When the Guest Additions installation wizard starts, click Next to continue.
Step 5
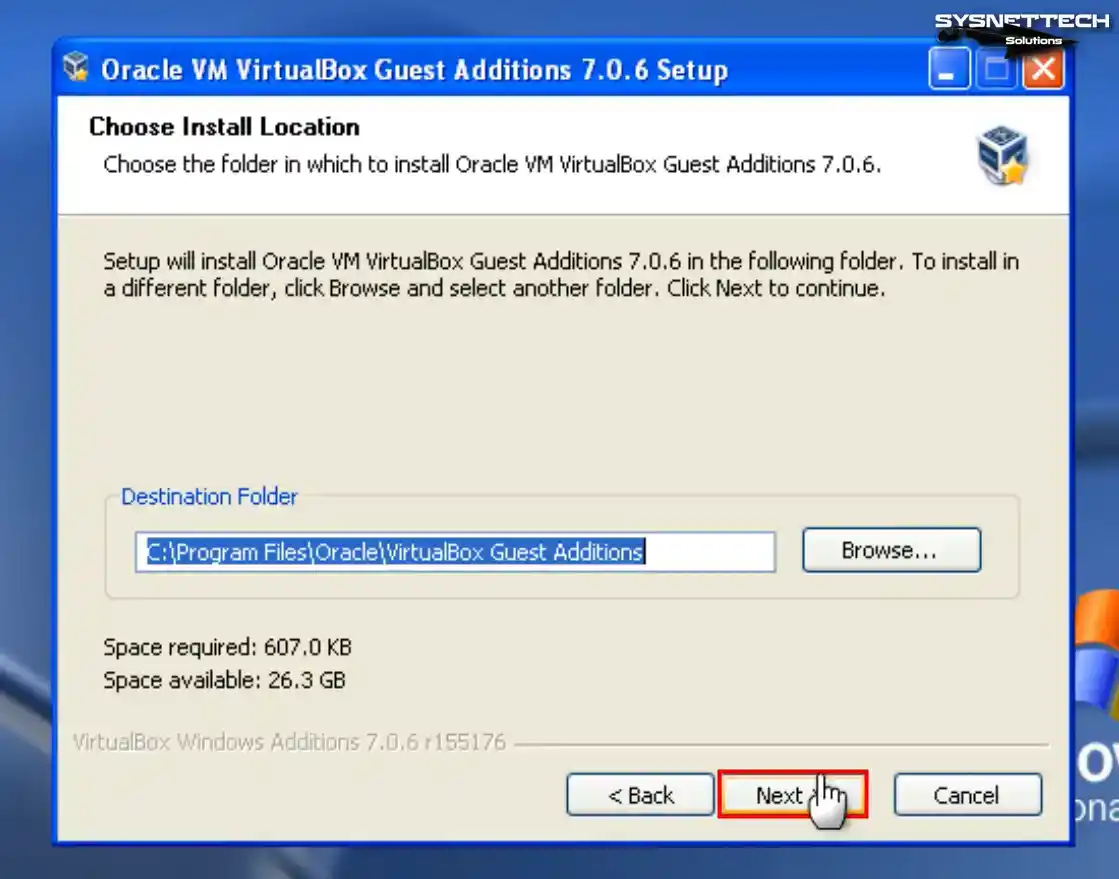
Continue without changing the installation location of the guest add-on software.
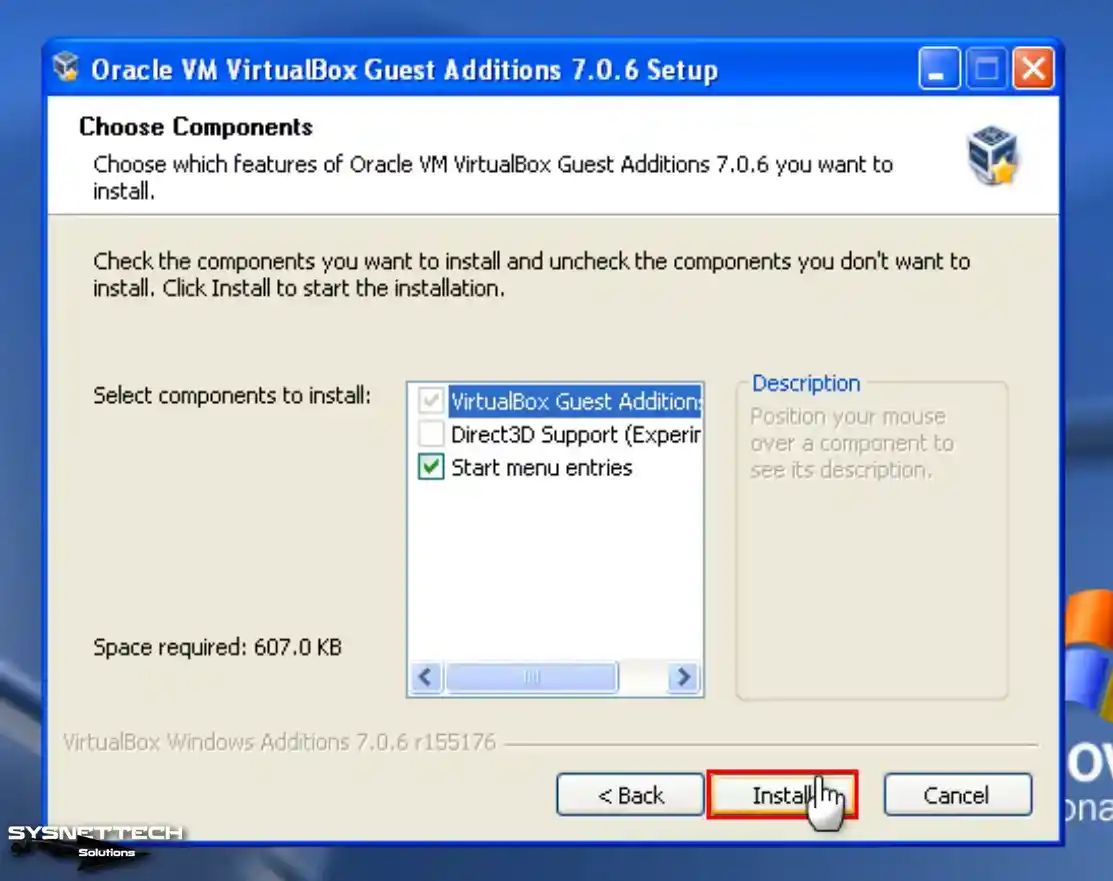
Step 6
You can see that Direct3D Support is not enabled in the Choose Components window of the setup wizard. Direct3D support for older operating systems has been discontinued in version 6.1 of VirtualBox. Therefore, installing the 6.0 version of VirtualBox is imperative to utilize this feature.
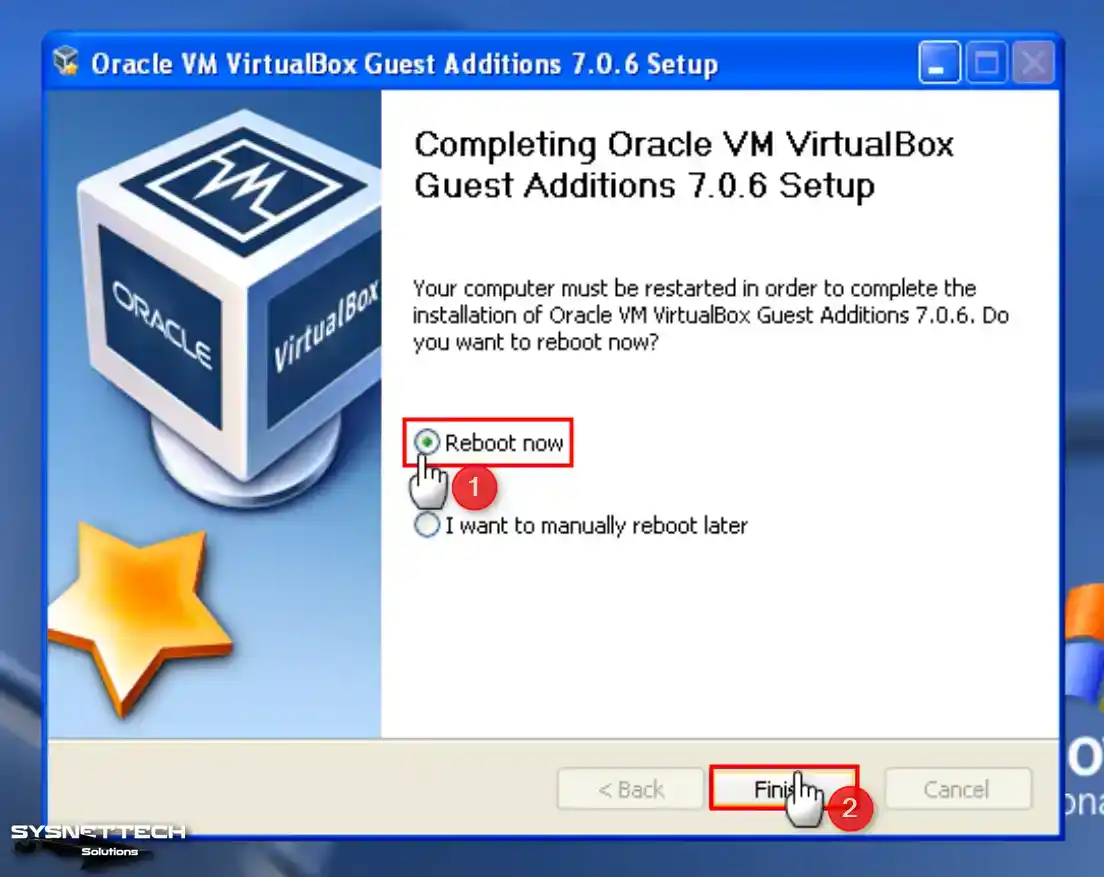
Step 7
After installing the tools of your guest system, restart your system.
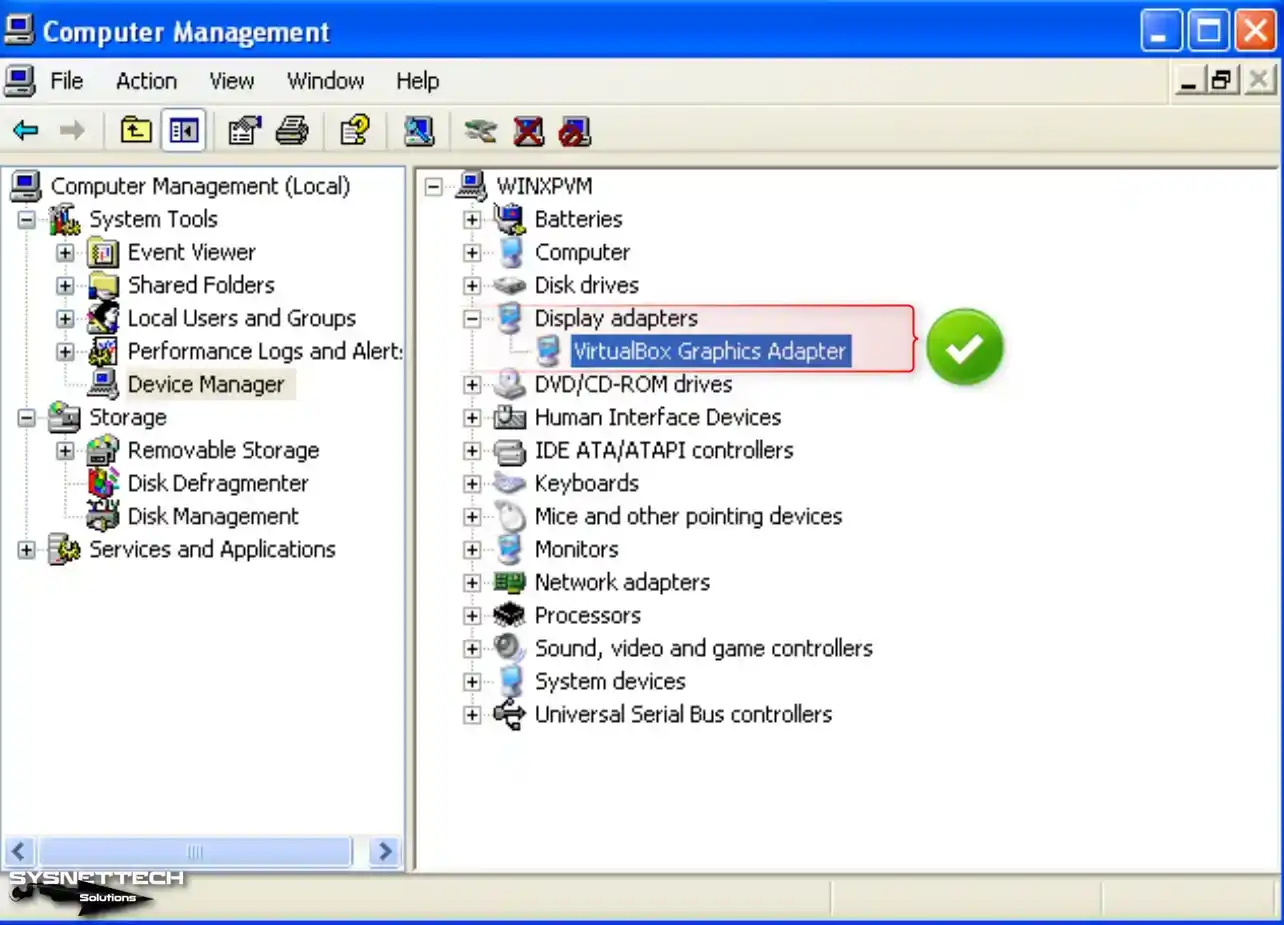
Step 8
After restarting your VM, view Device Manager again; you can see all drivers installed successfully.
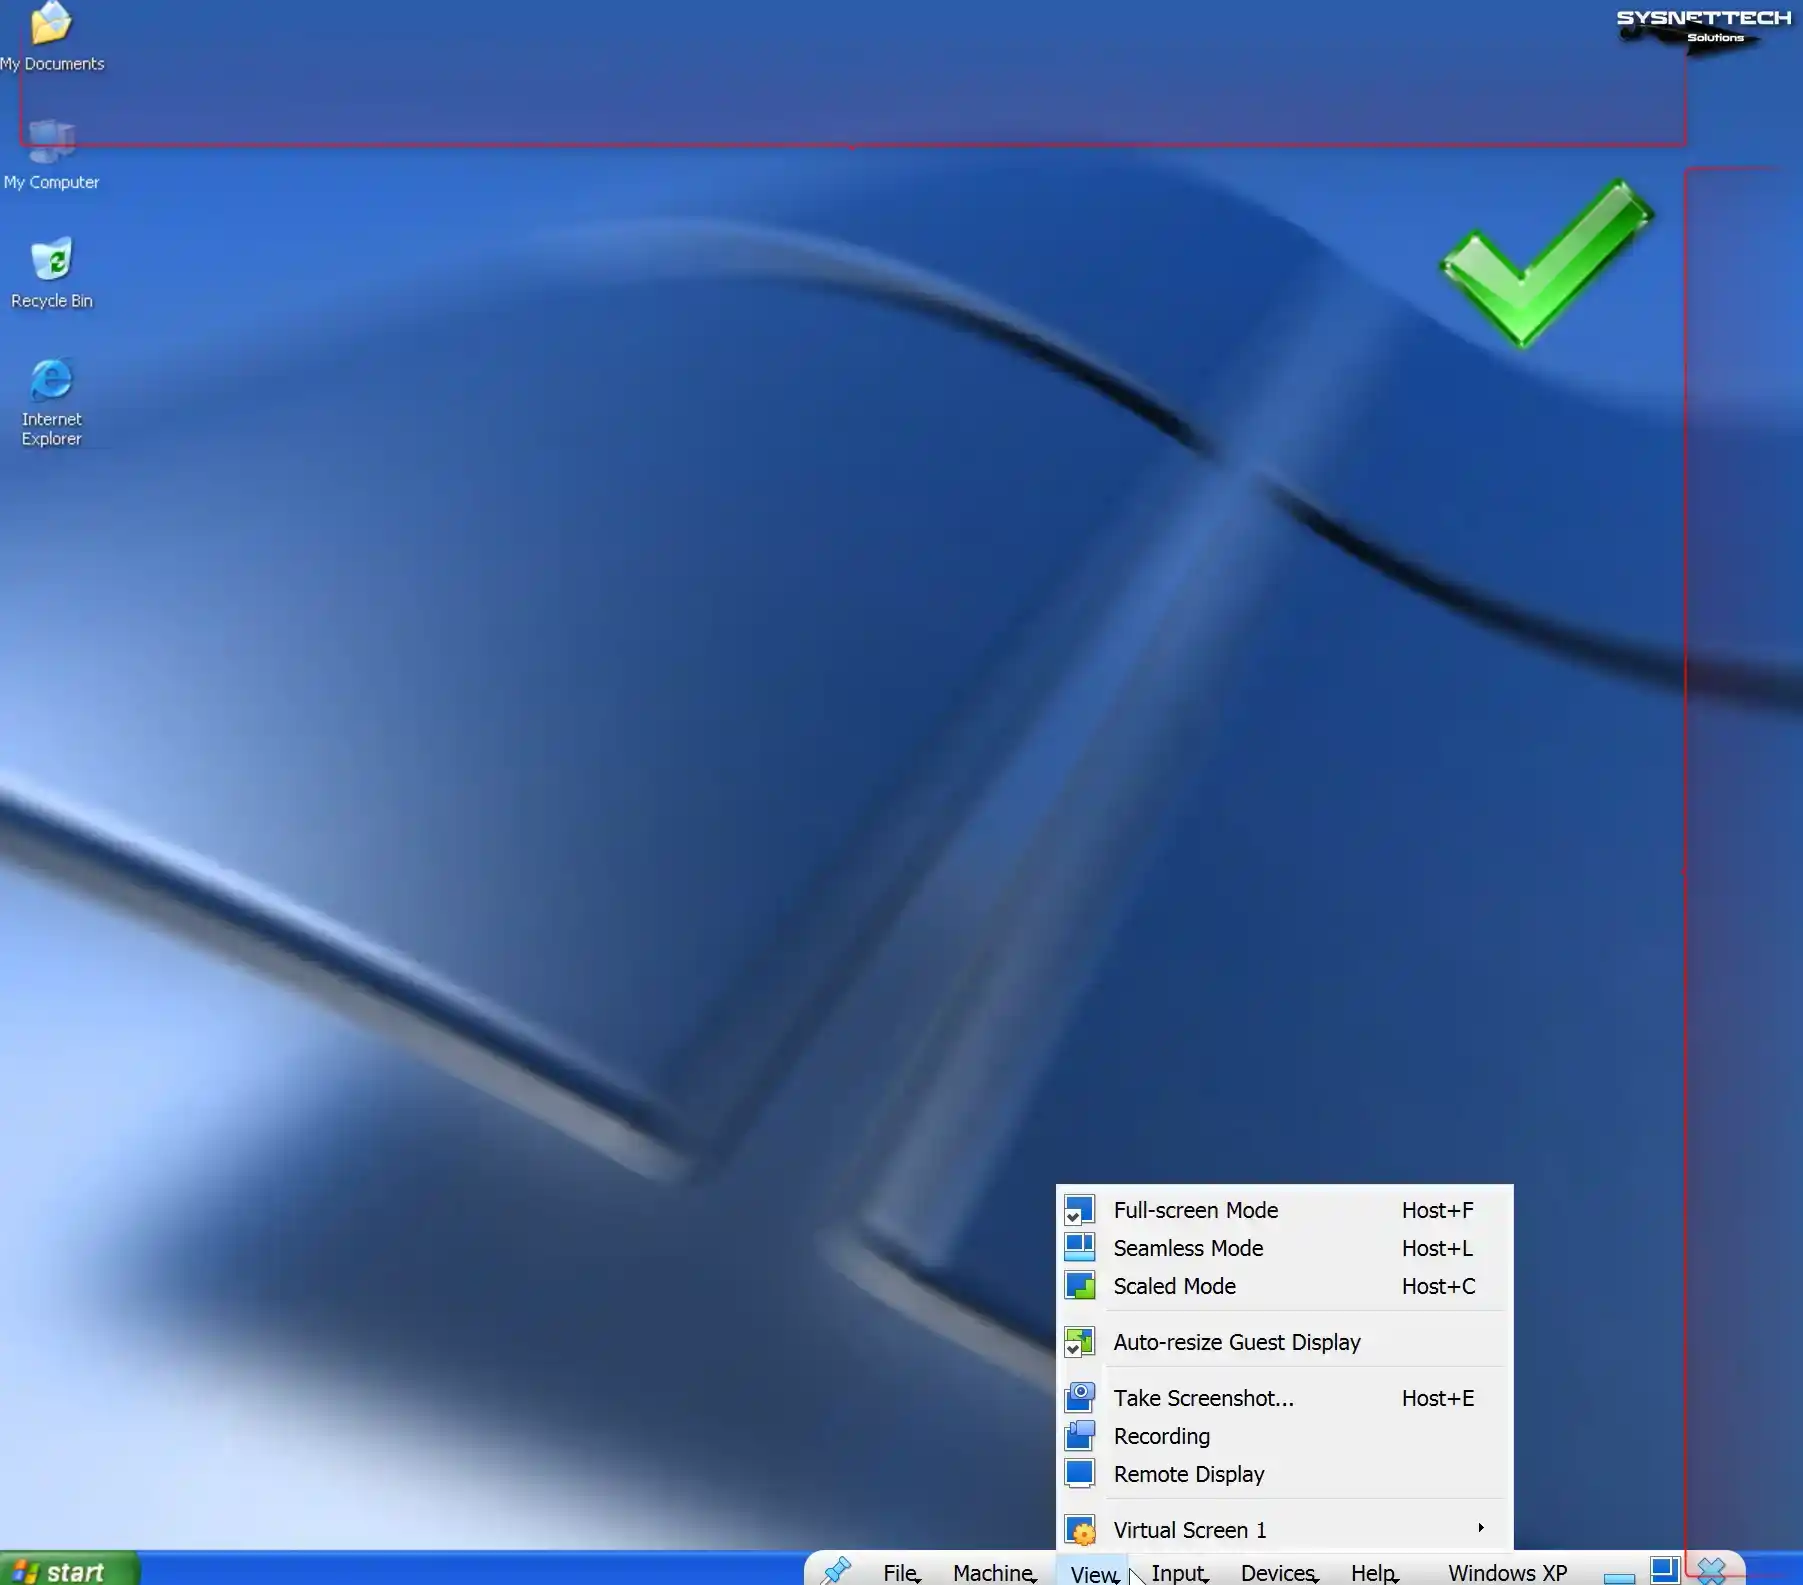
Step 9
You can use your virtual machine in full-screen resolution or scaled mode with the options in the View tab from the tool menu of VirtualBox.
Step 10
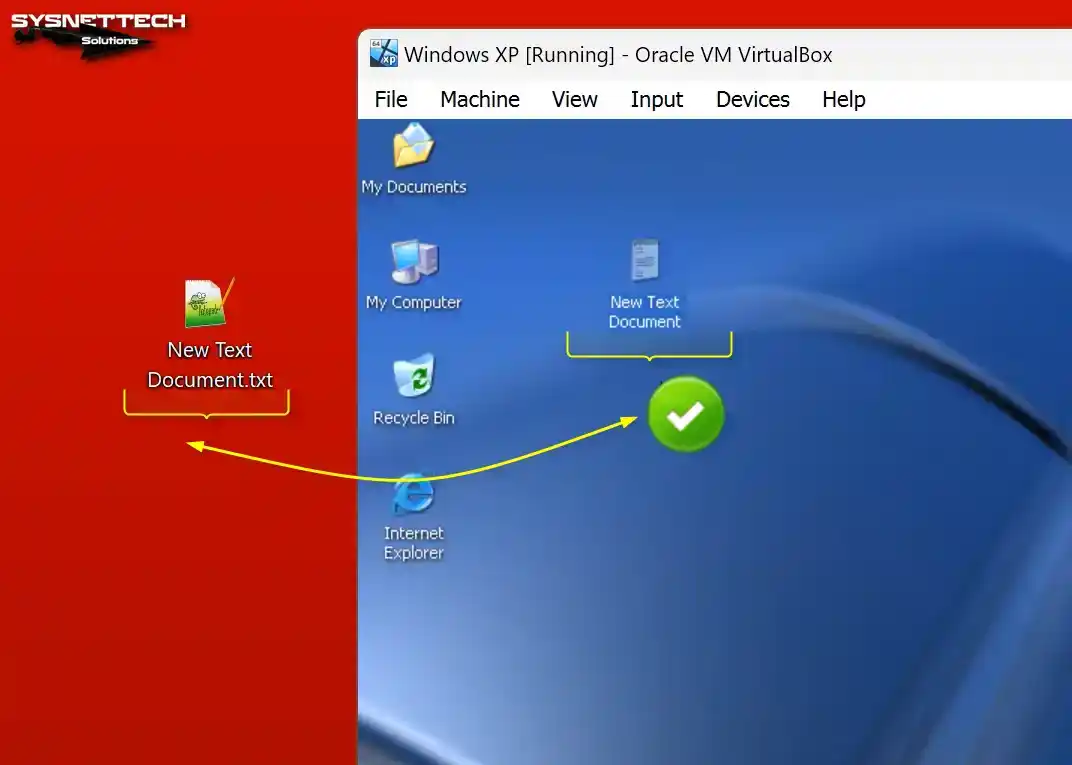
When employing the drag-and-drop method, you will observe the successful transfer of a text document from the desktop of your host computer to your virtual computer.
How to Configure a Shared Folder
Unfortunately, folder copying to the virtual machine fails on old systems. Before copying a folder, you must archive it using WinRAR or 7-Zip and then copy it to the VM.
Since it takes time to archive a folder with larger file sizes, you can transfer data faster by creating a public folder for your VM on your host computer and configuring the Shared Folder.
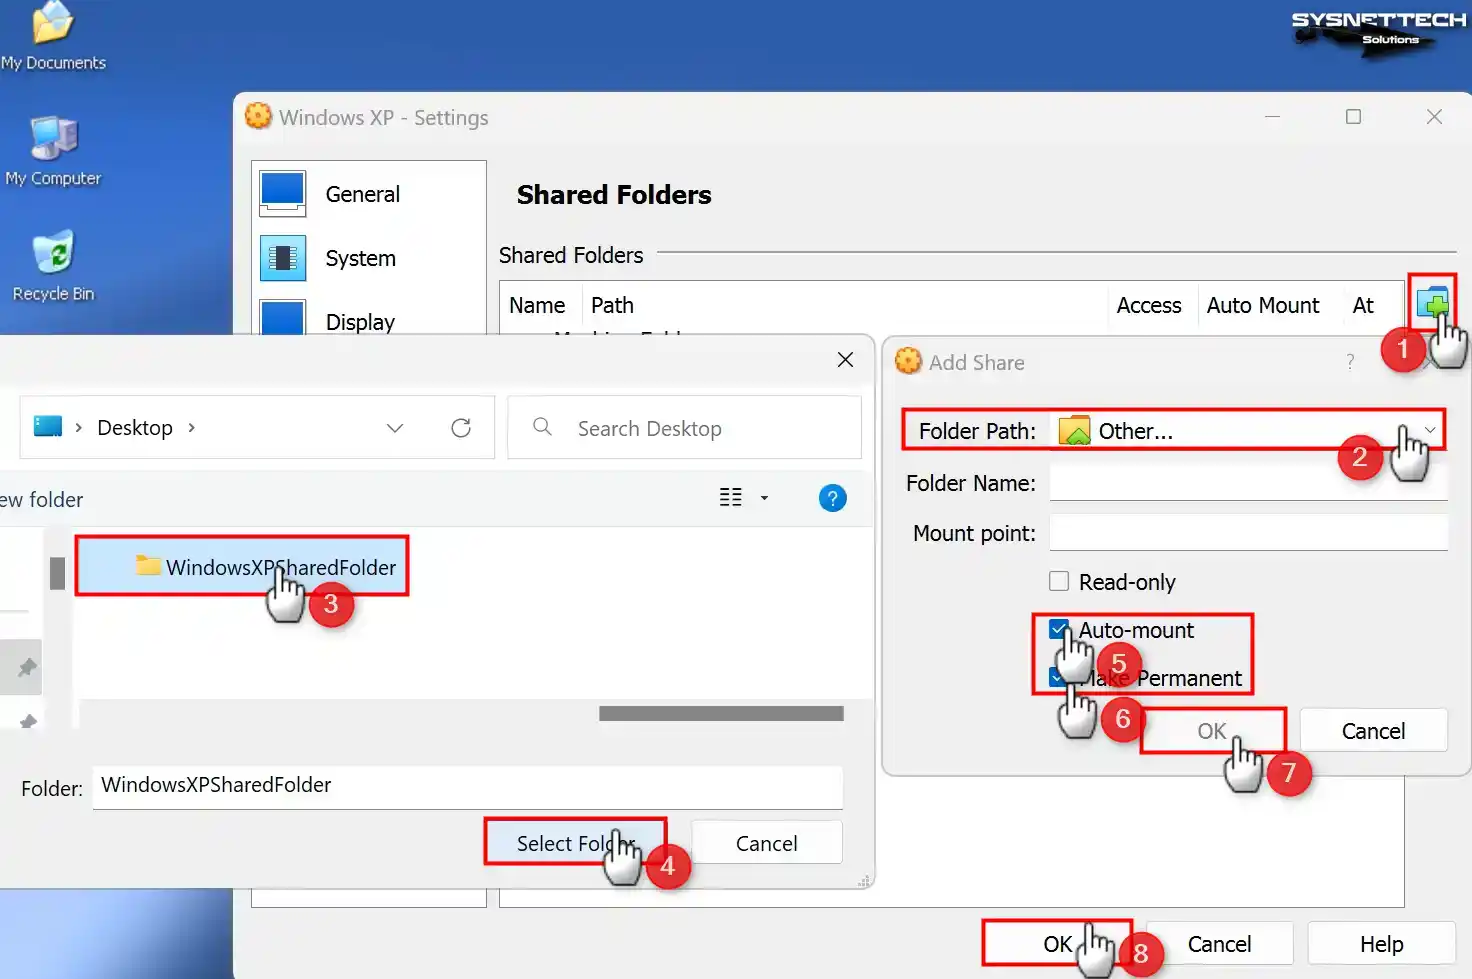
Click Devices / Shared Folders / Shared Folders Settings on your Windows XP virtual PC.

Click the green + button in Shared Folders settings and open the Add Share window. Specify the folder you created on your host PC in the Folder Path section.
Check the Auto-Mount and Make Permanent options and click OK to add the shared folder as a network drive.
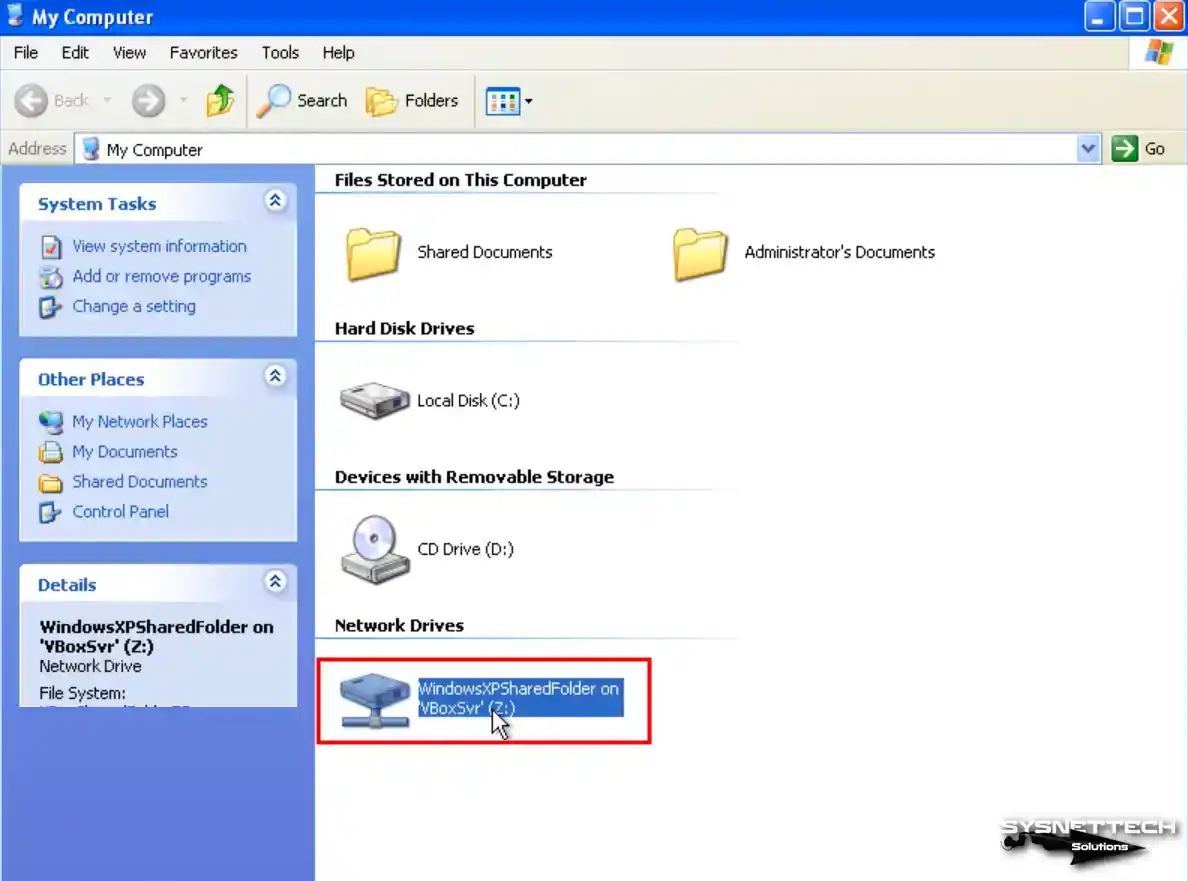
Upon opening the My Computer window, you will notice the inclusion of the Shared Folder as a network drive.
After viewing the network connections, switch to the Folder structure and click Entire Network / VirtualBox Shared Folders on the left. You can see that you can approach the folder on the host over the network.
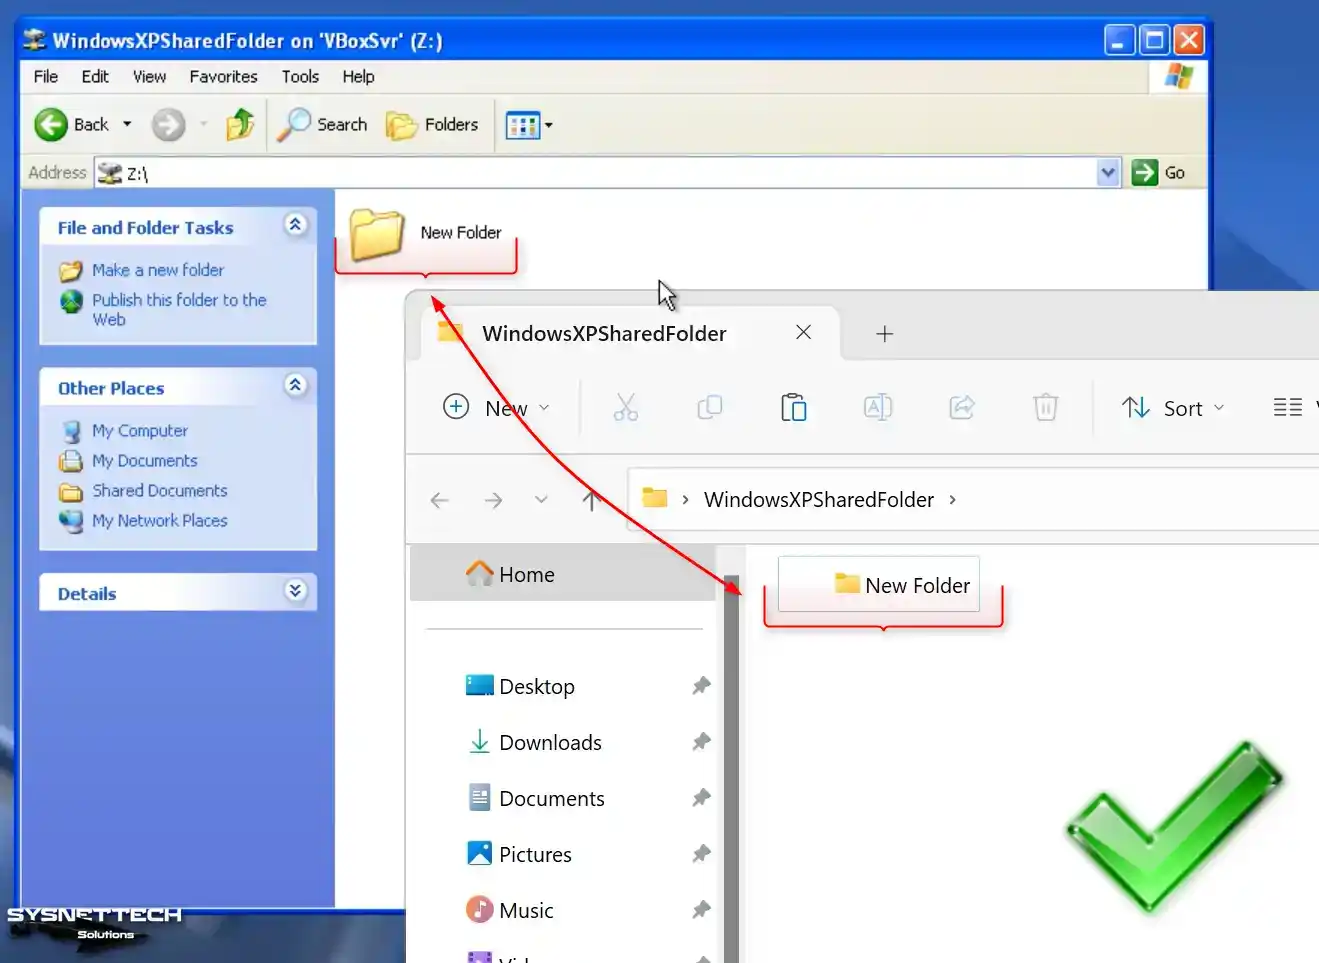
Create a folder in the shared folder on your host system and check that this folder is created simultaneously in your VM.
How to Check Internet Connection in Windows XP VM
Network and Internet connection settings are automatically configured after installing a virtual system with Oracle VM VirtualBox or other virtualization software. If the services of your virtualization software become corrupted, you may encounter difficulties in accessing the Internet.
Network settings of Windows XP guest machines running on Oracle VM are configured with a NAT coupler by default, and a different block is created than the IP block you use in your existing network.
Step 1
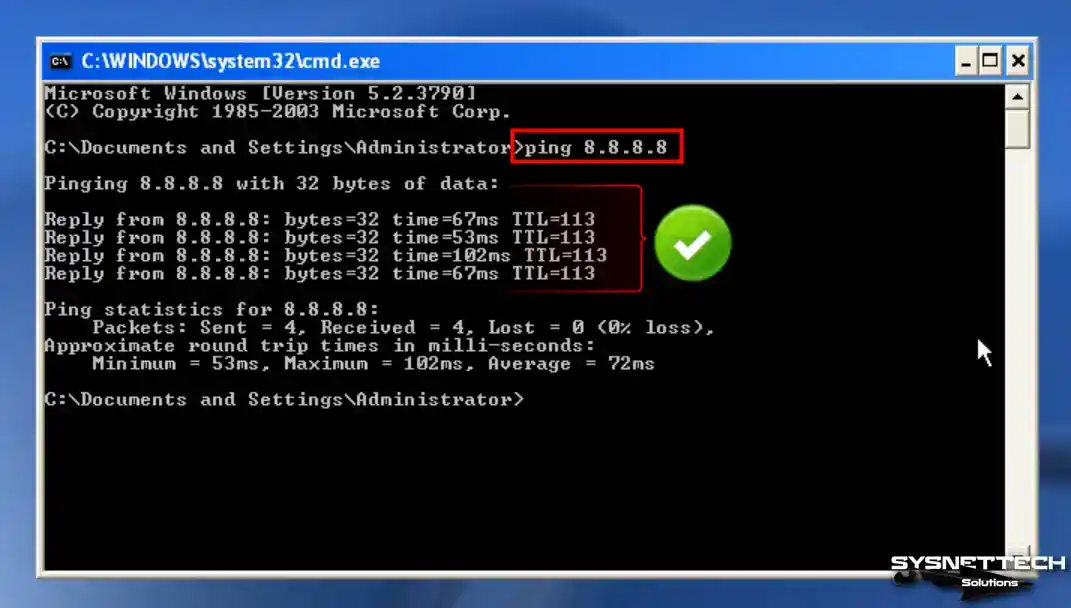
Open Run and execute the CMD command to check if the Internet connection is working smoothly in your virtual system. After opening the CMD prompt, ping the Google servers using the ping 8.8.8.8 command.
Step 2
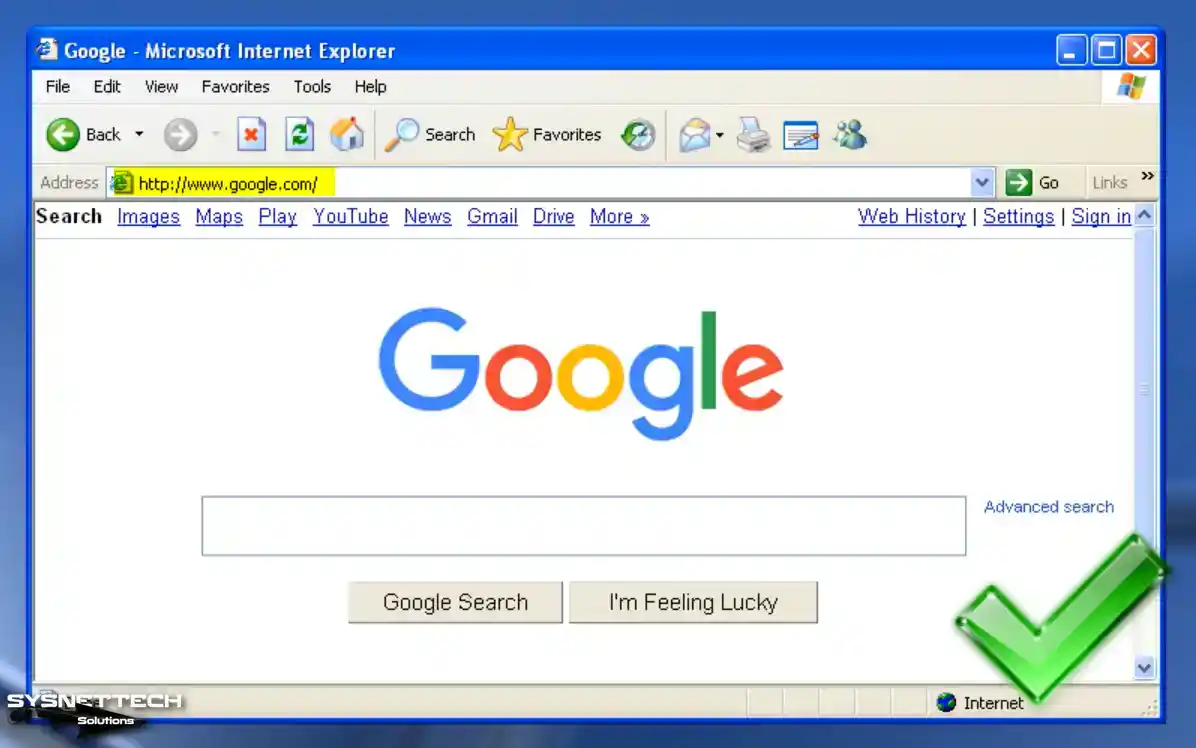
Once the ping test is successful, visit the Google homepage through the Internet Explorer browser to verify the health of your Internet connection.
How to Enable and Install USB 3.0 Driver
By default, enabling USB 3.0 support on a Windows XP virtual machine is not typically feasible. However, you can resolve this issue by substituting the USB controller. While USB 2.0 devices can be operated in the virtual machine without problems, enabling 3.0 or 3.1 supports faster file transfers using the more advanced technology.
Step 1
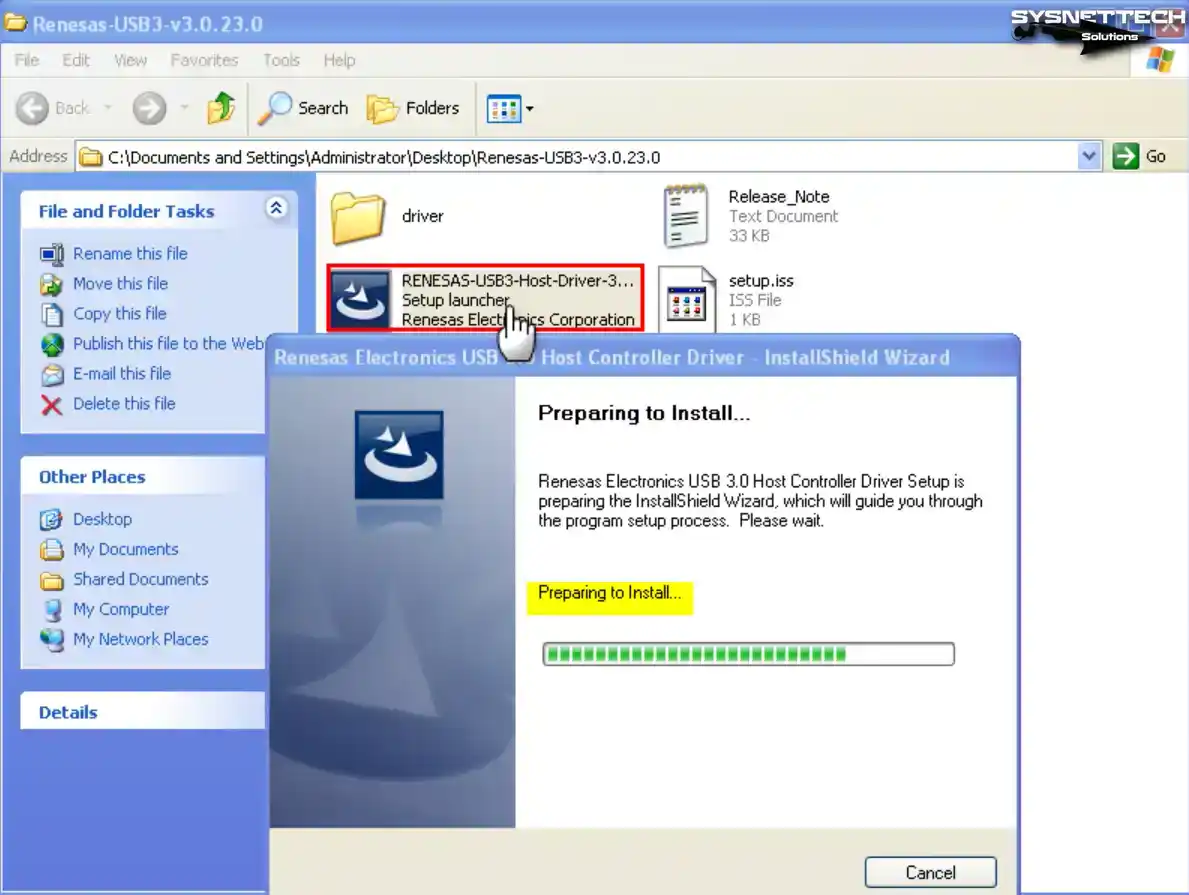
Before enabling USB 3.0 on your Windows XP guest machine, it is recommended to download the RENESAS Driver from the table located at the bottom of the article. Once downloaded, copy the driver to your system and proceed to double-click the setup file to initiate the wizard.
Step 2
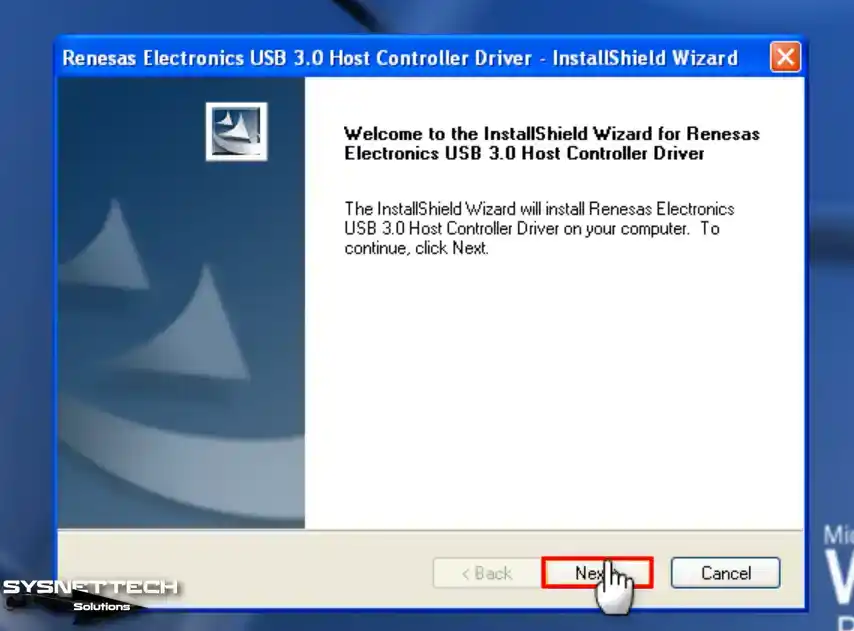
Click Next in the Renesas Electronics USB 3.0 Host Controller Driver wizard.
Step 3
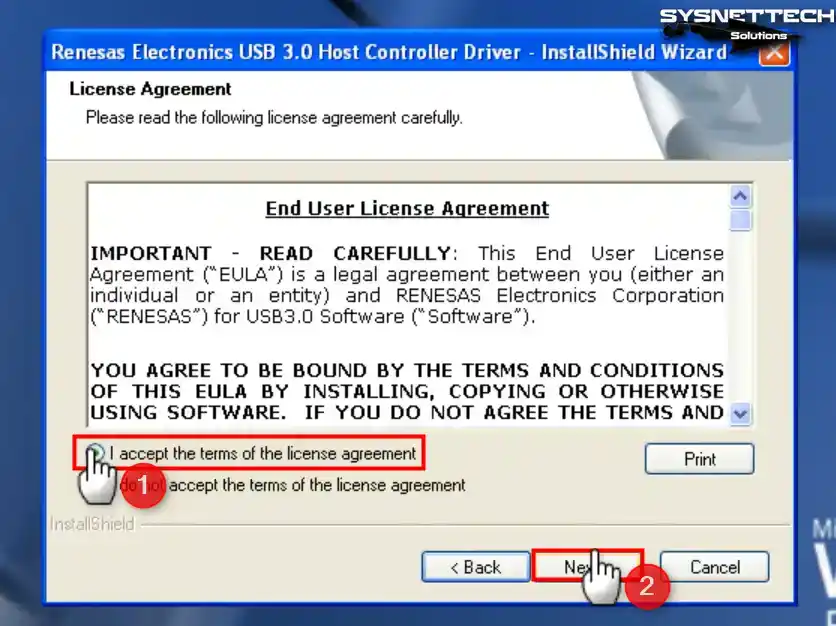
Accept the license agreement of the Renesas Electronics USB driver software and click Next.
Step 4
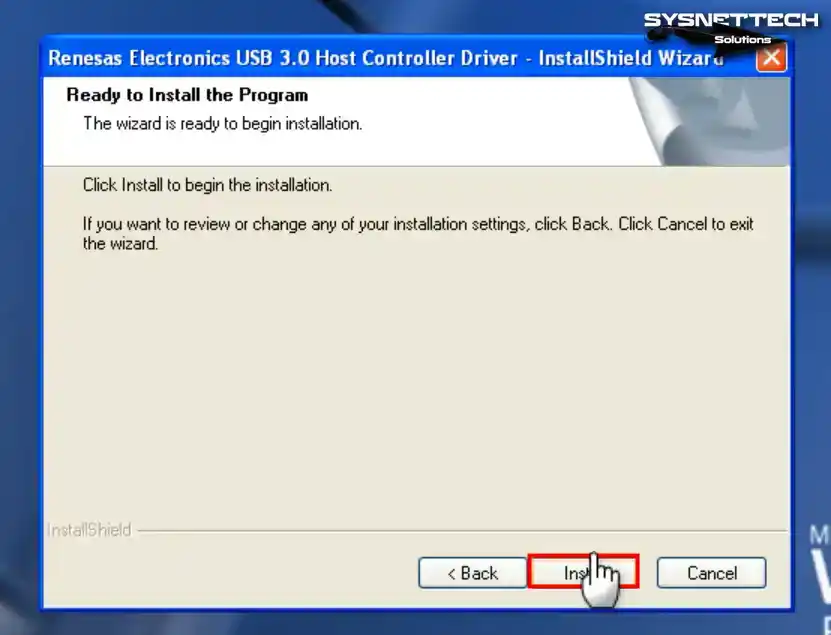
Click the Install button to build the USB 3.0 driver.
Step 5
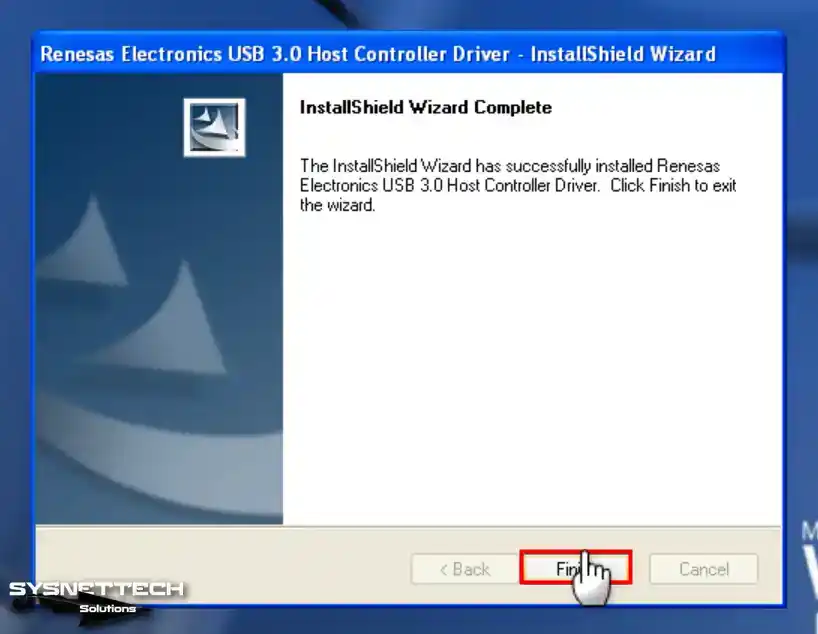
After installing the USB 3.0 driver on Windows XP, close the wizard by clicking Finish.
Step 6
Close the Oracle VM VirtualBox on your host PC, go to its installed location, right-click, and click Open in Terminal.
./VBoxManage setextradata 'Windows XP' VBoxInternal/Devices/usb-xhci/0/Config/ChipType uPD720201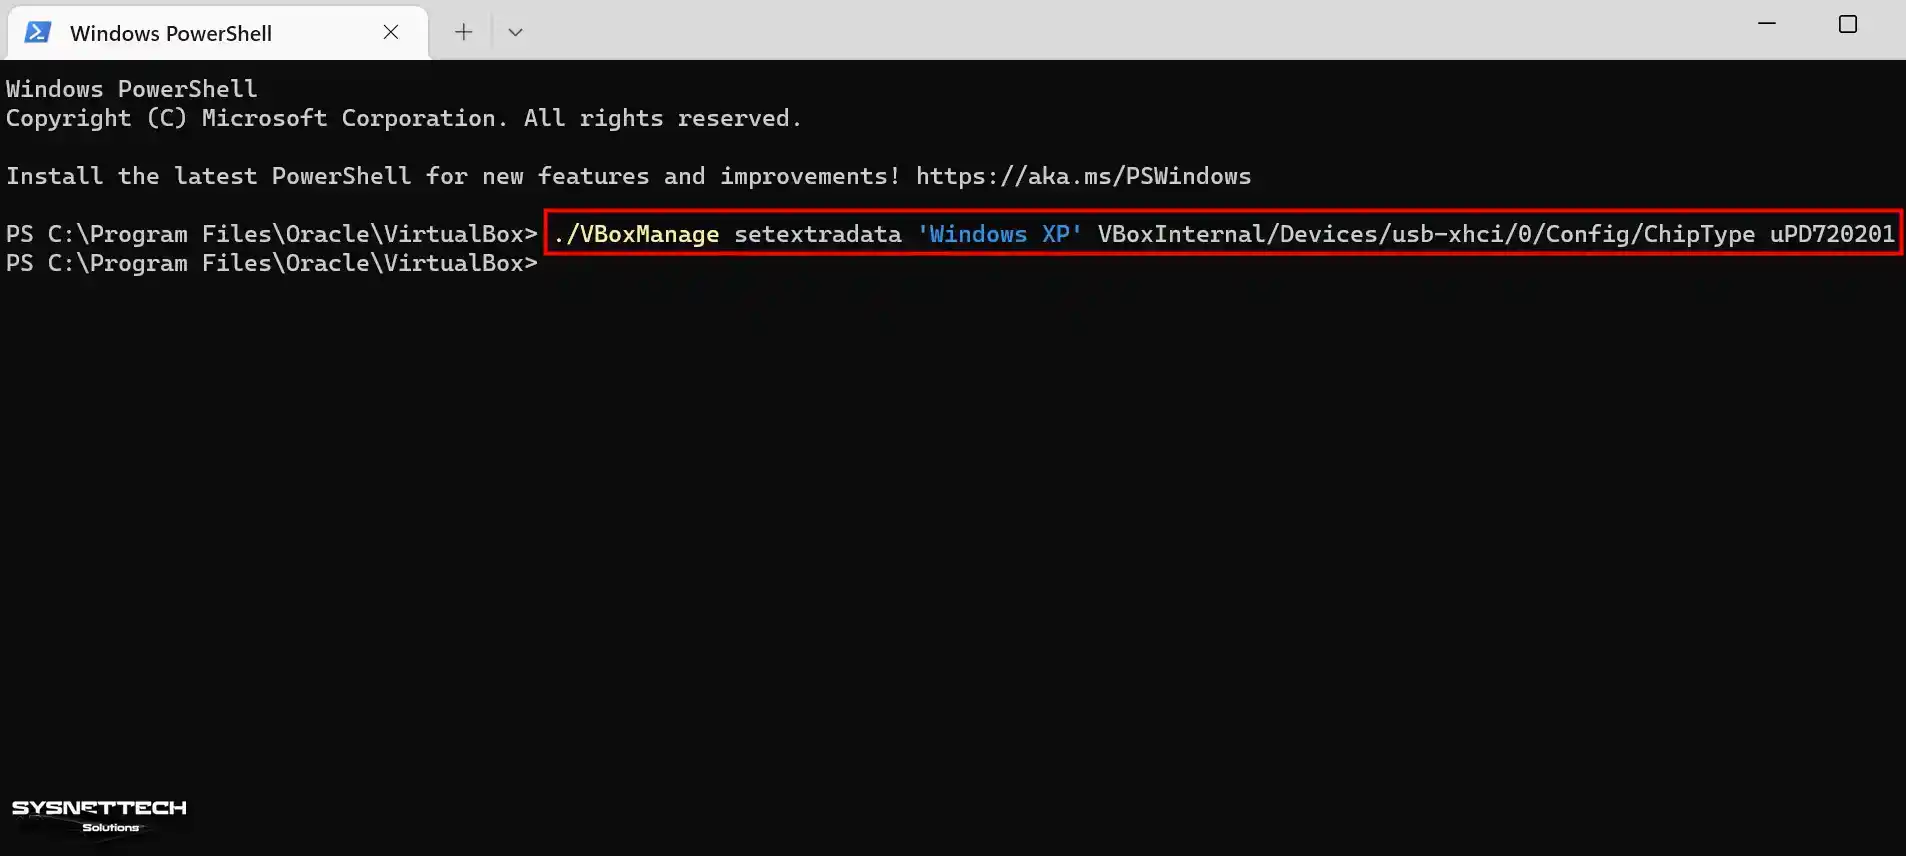
Step 7
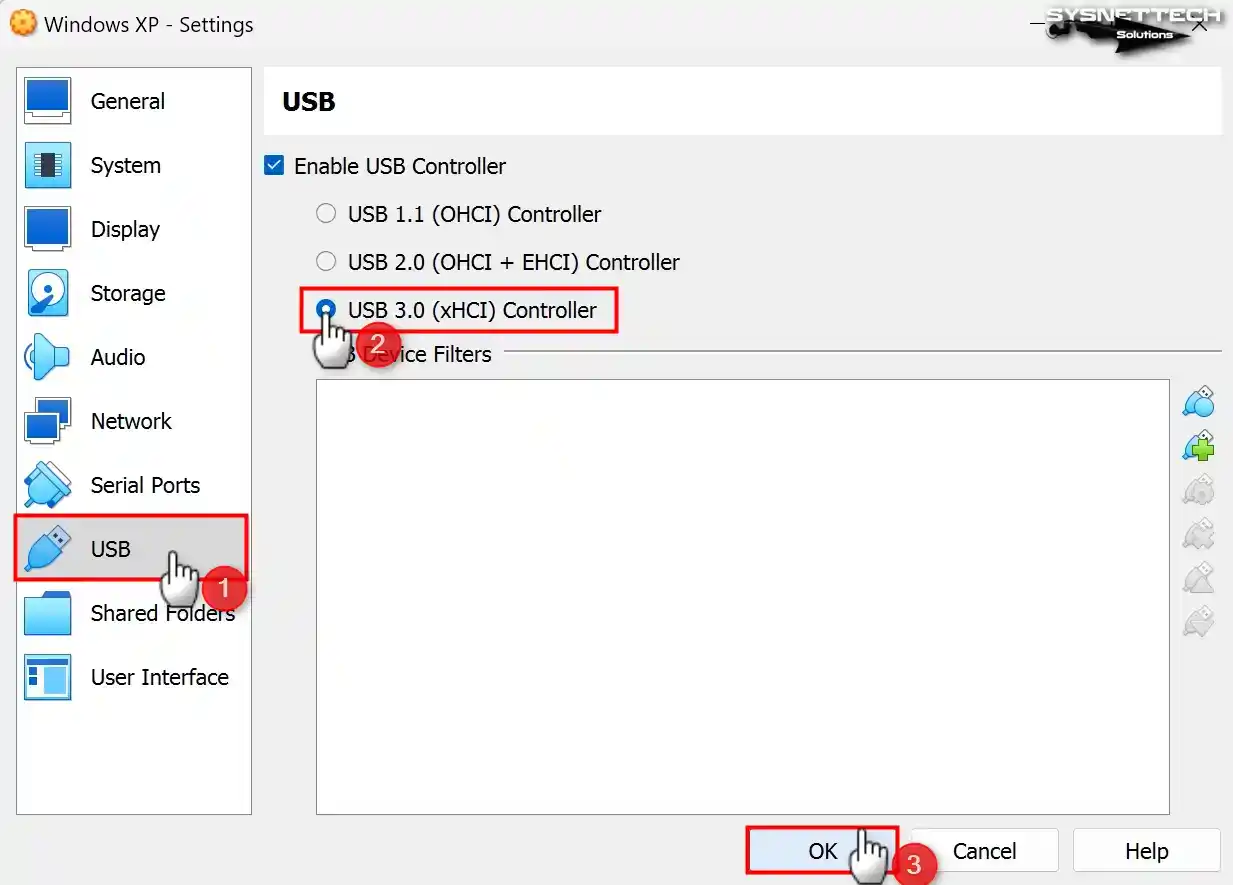
Open the Oracle program, select USB 3.0 (xHCI) Controller from the USB controller types, and click OK.
Step 8
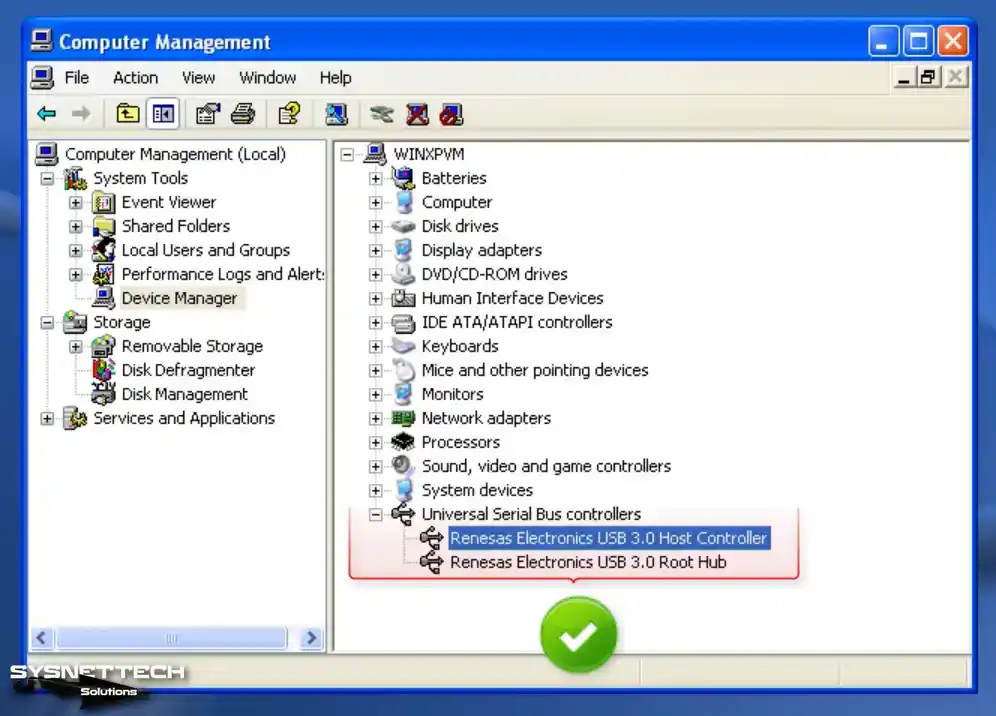
Open the Oracle program again, and after running your virtual PC, open Device Manager and check the Universal Serial Bus (USB) Controller device.
Step 9
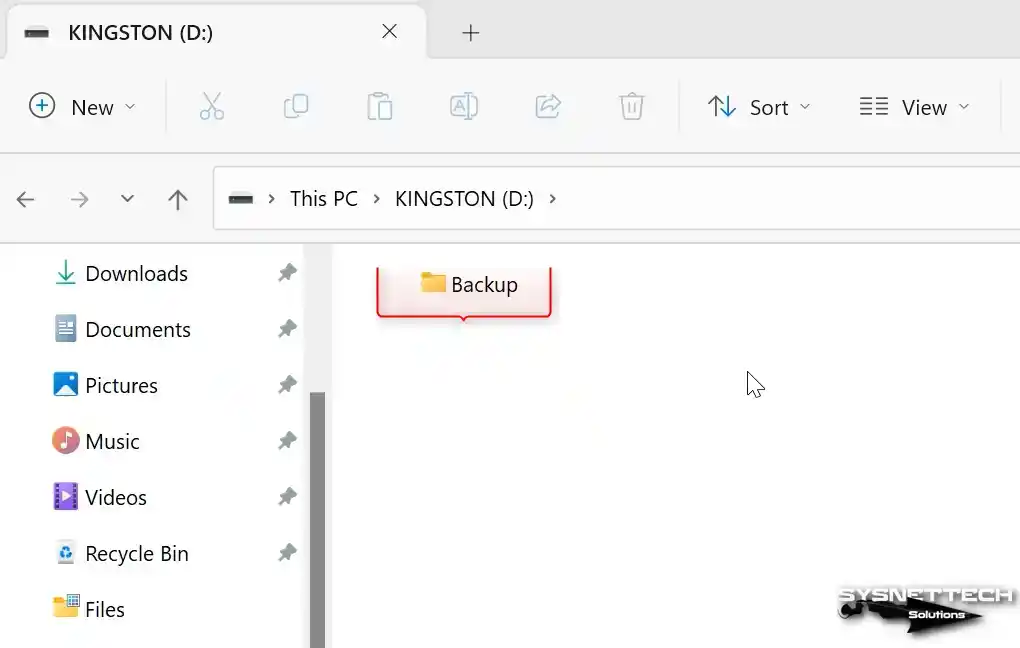
Connect your flash stick to one of the USB 3.0 ports on your computer and establish a folder called “Backup” inside it as an illustrative instance.
Step 10
After inserting your flash memory, click Devices> USB> Kingston DataTraveler 3.0 on the virtual machine.

Step 11
After adding your flash memory to your virtual PC, Mass Storage drivers will be installed automatically. When you view My Computer, you can see your KINGSTON USB stick or any other brand.
Upon inspecting the Device Manager, you will find the USB 3.0 memory under Disk Drives.

How to Change Video Memory to 256 MB
A maximum of 128 MB of GPU memory can be set for Windows XP in Oracle software, but there is a simple way to increase this Size.
Step 1
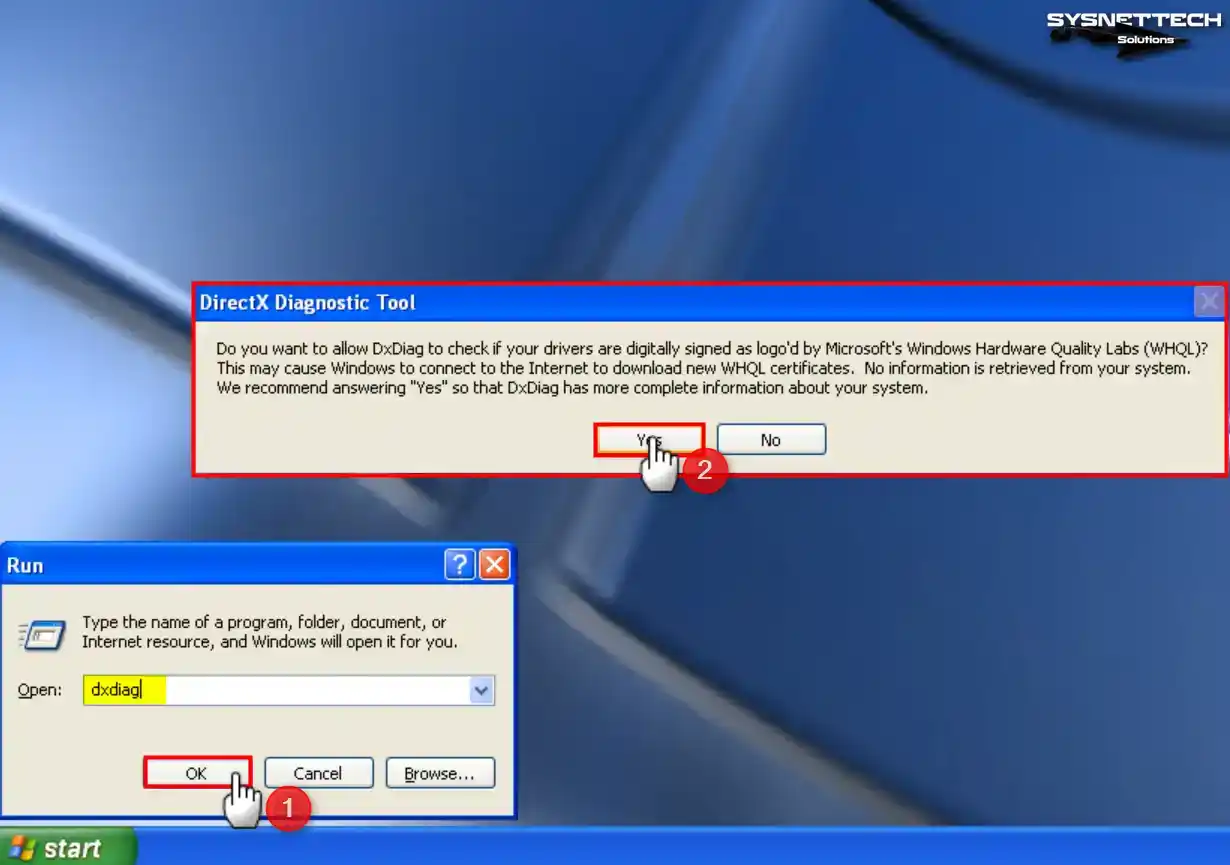
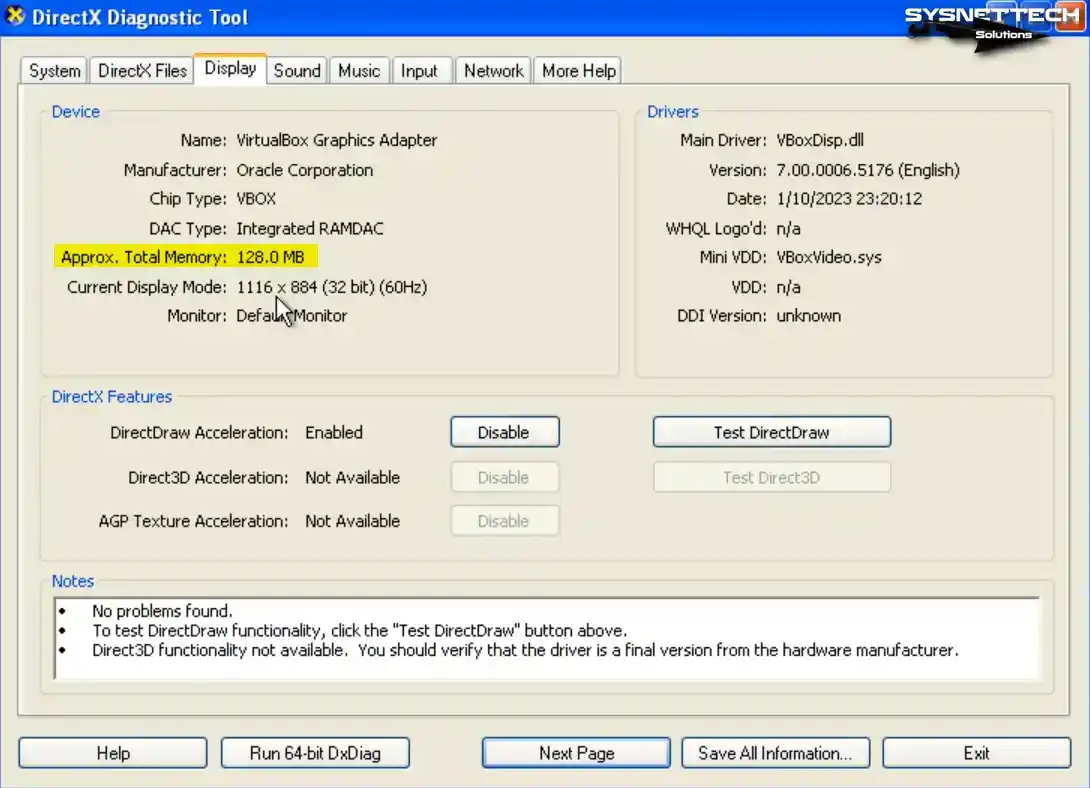
First, execute the dxdiag command in the Run window on your virtual machine and click Yes in the DirectX Diagnostic Tool window.
Step 2
Click the Display tab on DirectX Diagnostic Tools, check the Total Memory size, and check that the GPU memory is 128 MB.
Step 3
Close your virtual computer and VirtualBox program, open PowerShell again in the location where VirtualBox is installed, and execute the following command.
./VBoxManage modifyvm 'Windows XP' --vram 256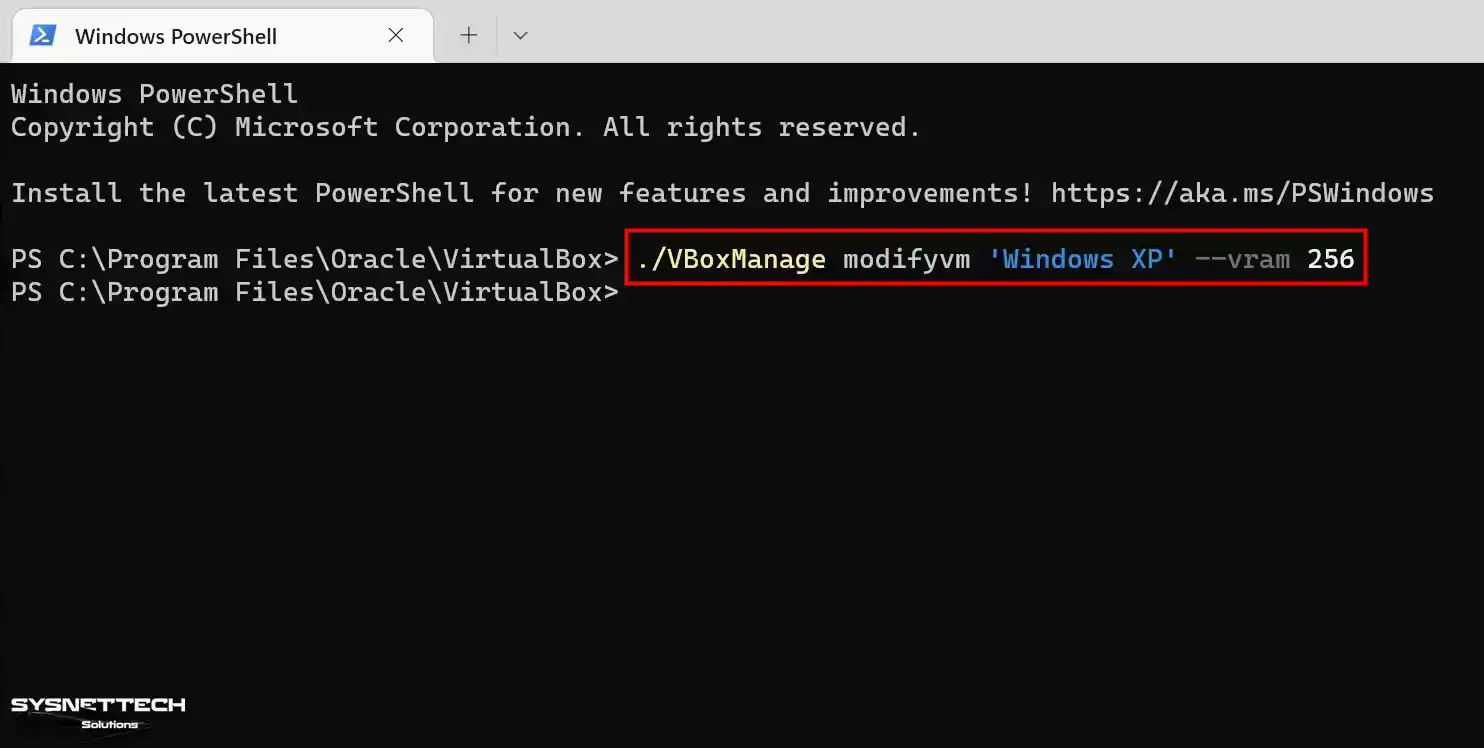
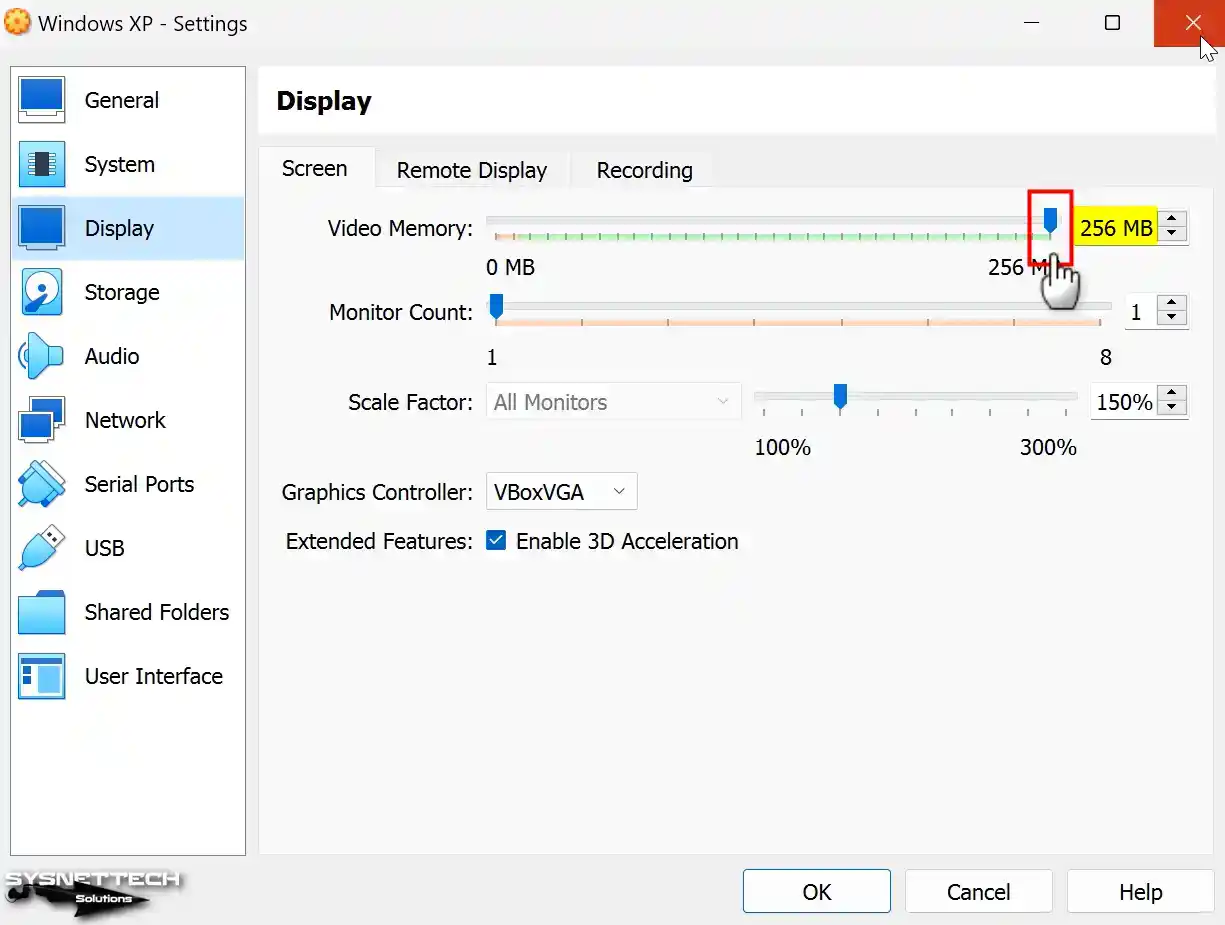
Step 4
Run Oracle VM VirtualBox, and after checking your VM’s settings, the Display / Screen / Video Memory size is 256 MB, and you will see that the operation was successful.
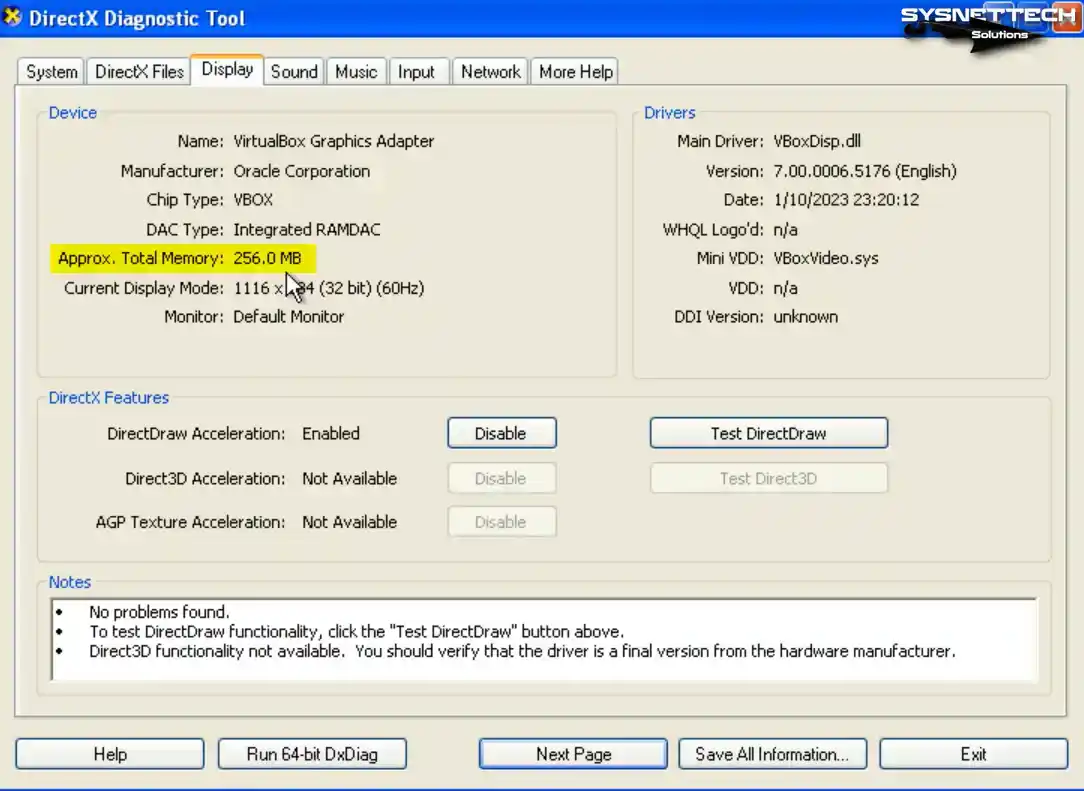
Step 5
When you run your Windows XP guest machine and open the dxdiag tool again, you can see that the total graphics memory size in the Display tab is 256 MB.
How to Upgrade Windows XP SP1 to SP2
If you desire to upgrade to SP2 on the guest appliance after installing the Service Pack 1 (SP1) edition of Windows XP, obtain the ISO image from the table at the base of the article and proceed with the following steps.
Step 1
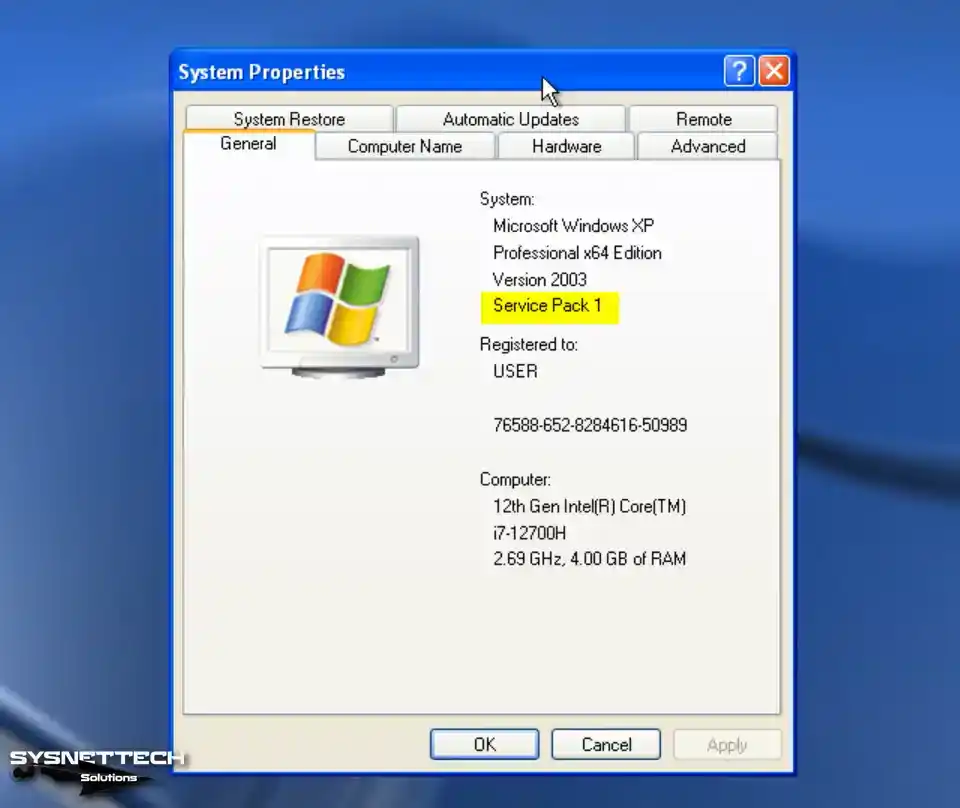
First, to view the properties of the XP system installed on your VM, right-click My Computer, open Properties, and check the Service Pack version.
Step 2
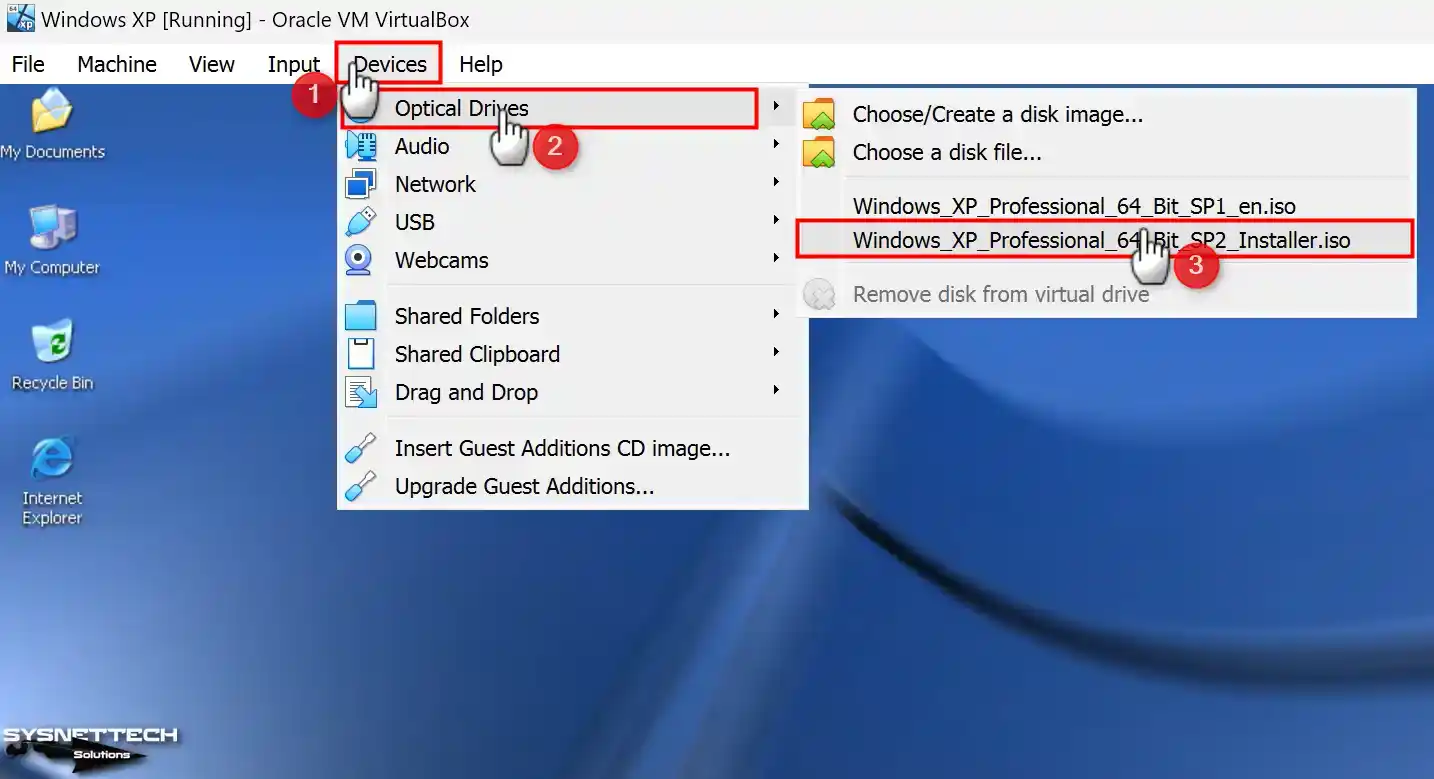
To add the SP2 ISO file to the VM, click Devices> Optical Drivers, select a disk file, choose the Installer image you downloaded to your computer, and click Open.
Step 3
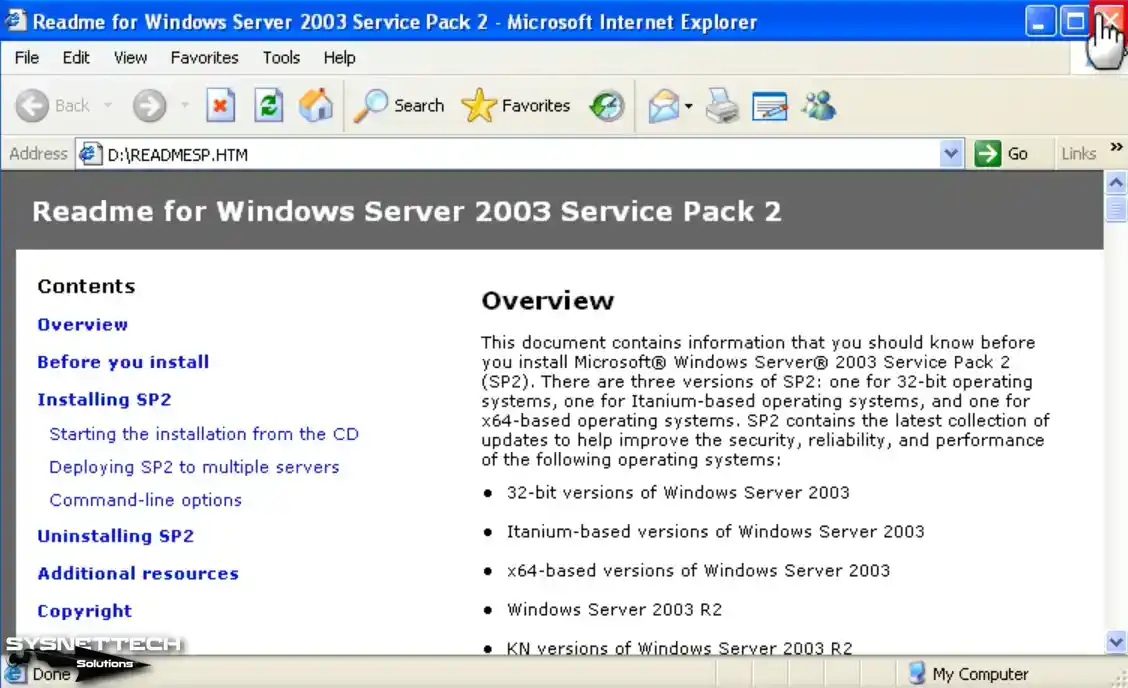
When the Readme HTML page opens automatically on your virtual system, close it.
Step 4
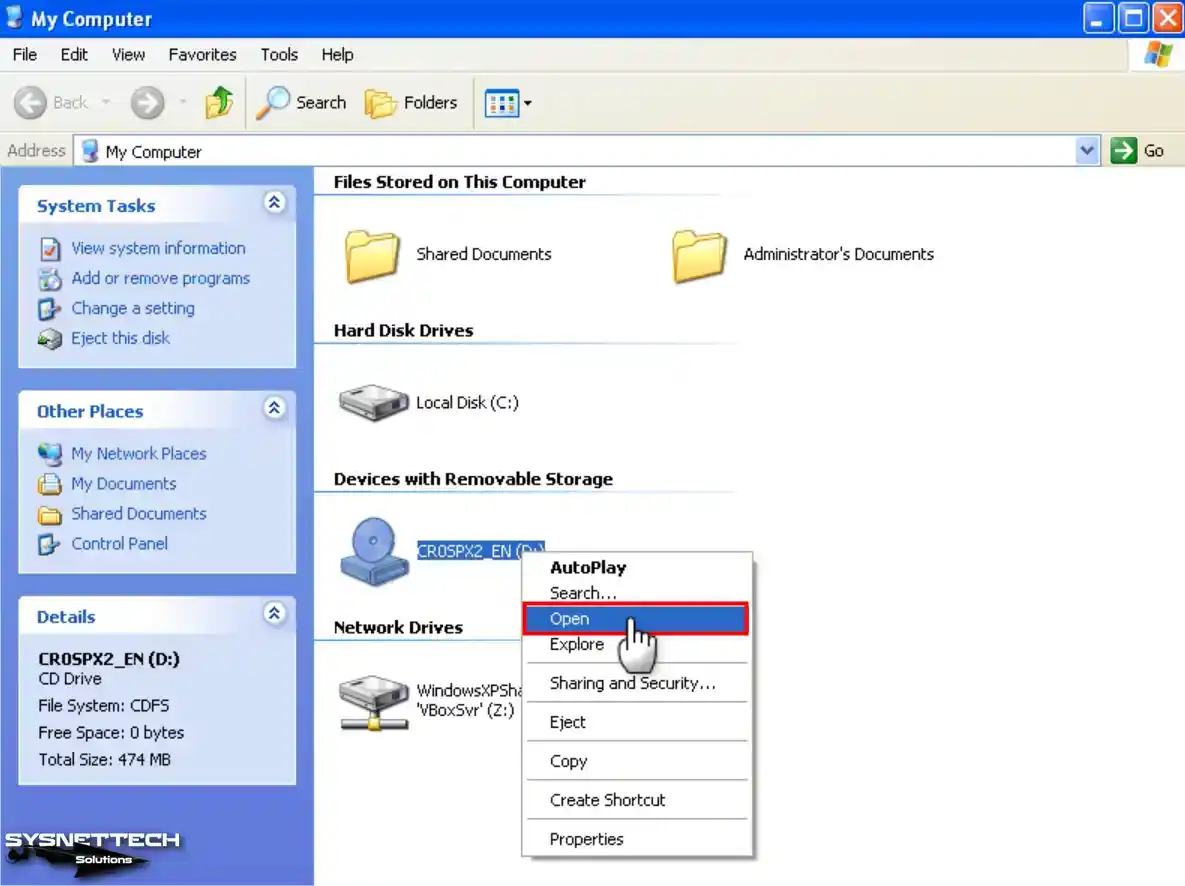
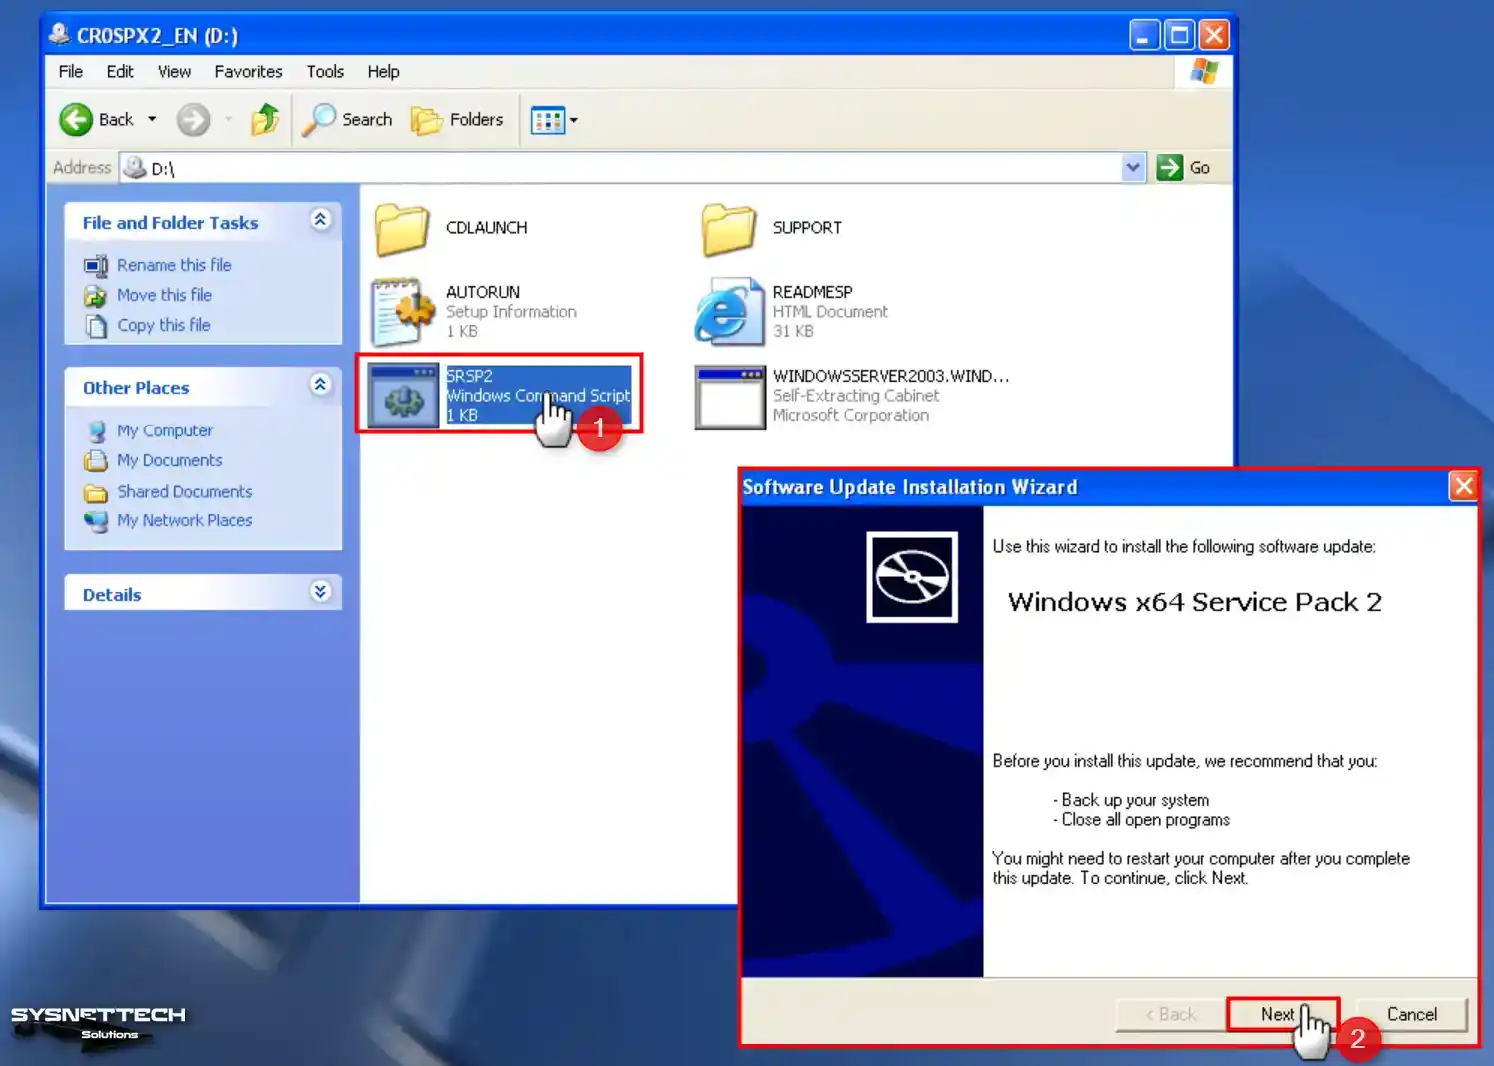
Open My Computer, right-click on the CD drive, and select “Open.”
Step 5
Double-click the SRSP2 command script in the Service Pack 2 CD image and start the installation. Click Next in the Windows x64 Service Pack 2 installation wizard.
Step 6
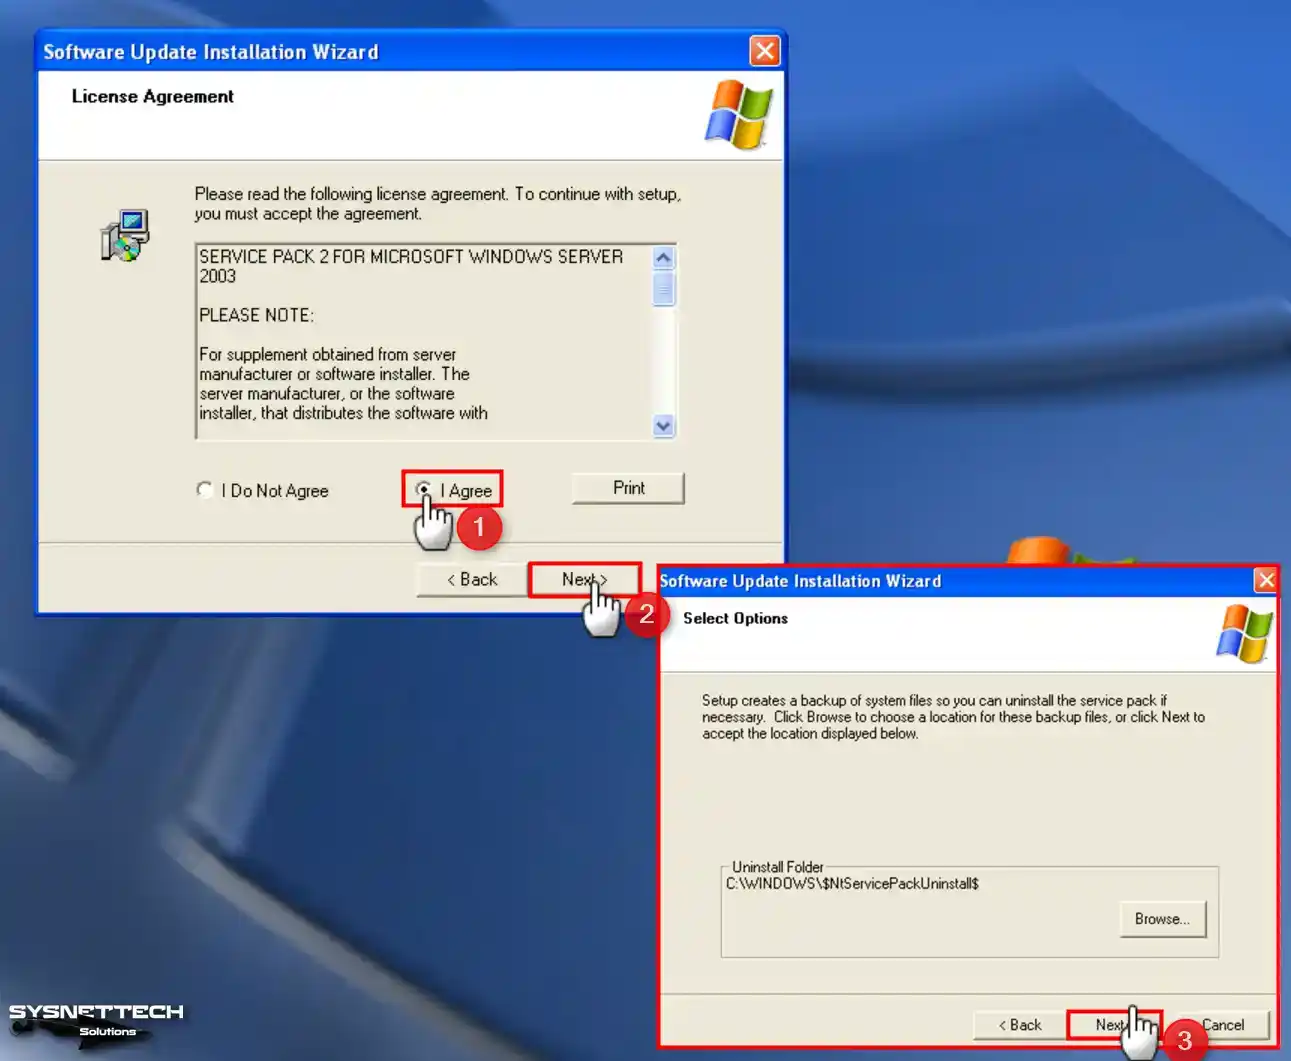
Accept the SP2 license agreement and click Next. If you want to downgrade Windows XP from SP2 to SP1 later, note the location in the Uninstall Folder. Continue with ‘Next’ to proceed with SP2 installation.
Step 7
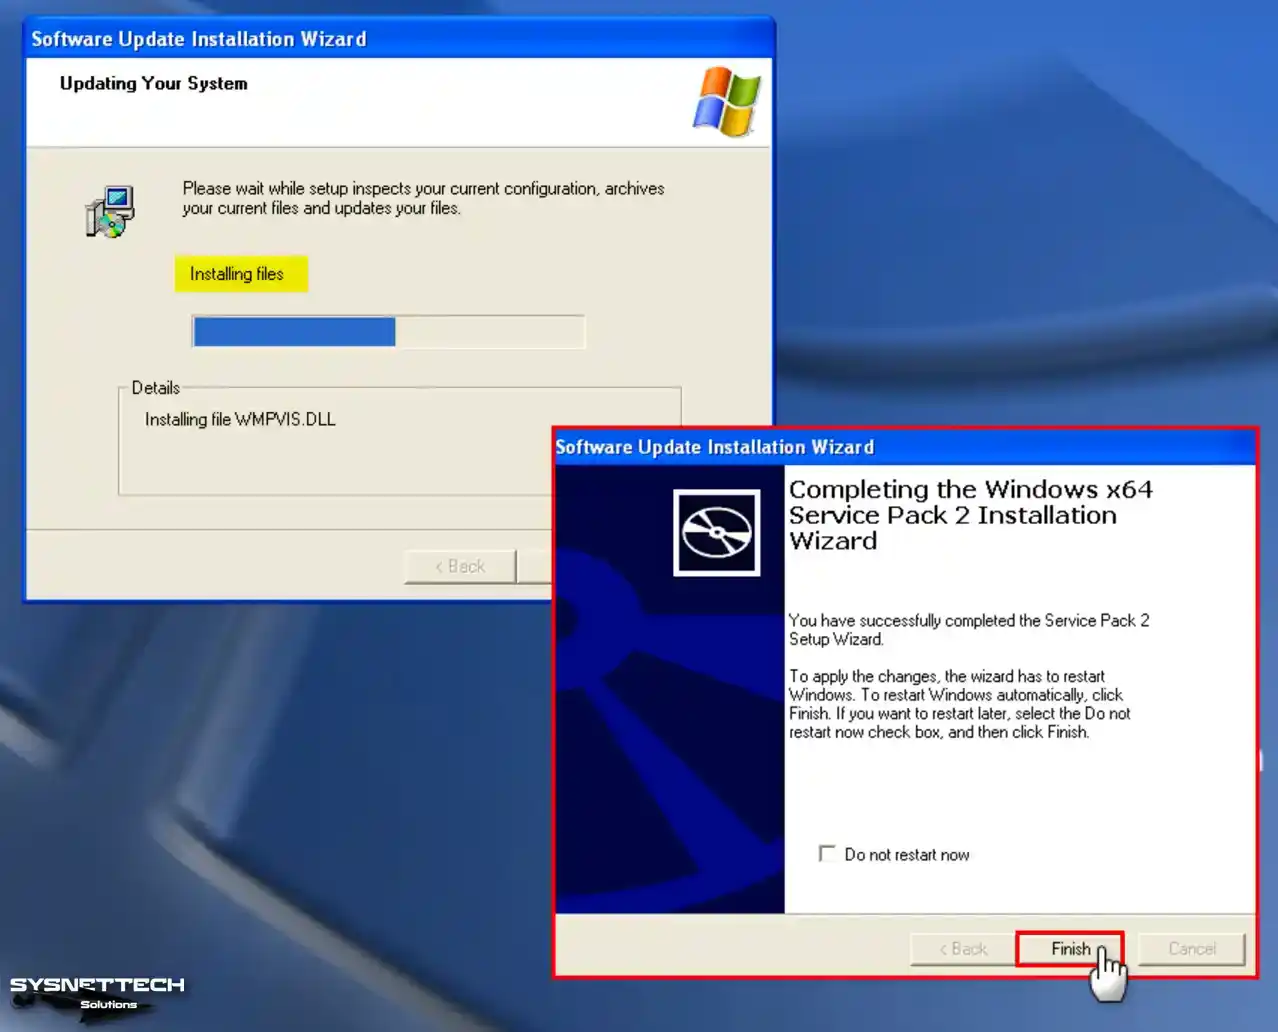
Wait while your virtual Windows XP system updates to SP2. When the SP2 setup wizard is complete, click Finish to restart your virtual system.
Step 8
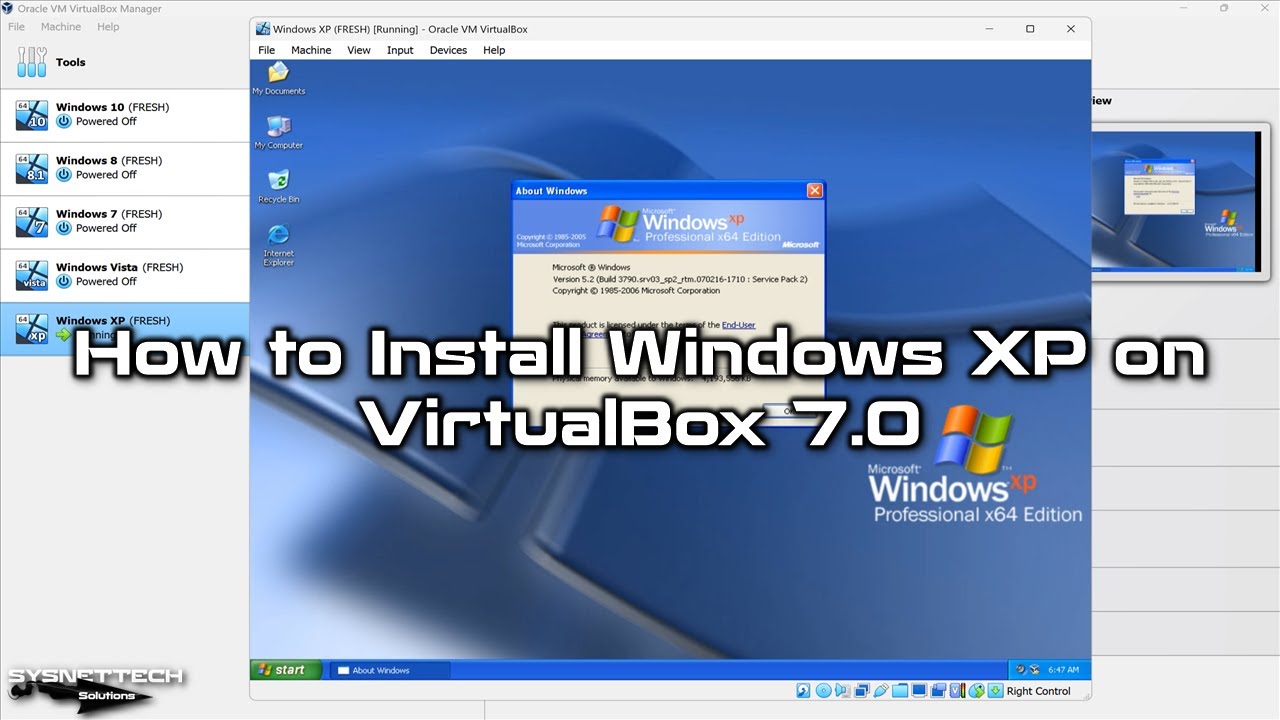
Upon revisiting the system properties, you will notice that Service Pack 2 (SP2) has been effectively installed.

Video
Installing Old Versions
Windows XP ISO ve USB Driver Download
Conclusion
As a result, you can run a Windows XP SP1 x64 Professional virtual machine with Oracle VM VirtualBox 7.0. You can install XP and enjoy its advantages with the steps I have outlined in this article. However, you can maintain the security and compatibility of your current modern operating system.
It would be best if you also prioritized security when using outdated operating systems. Virtualization offers a controlled solution for interacting with old software. As a result, this method is effective for experiencing old OSes in a secure environment.

36 People Shared Their Experience
It’s asking me to enter a product key. I tried some product keys from other sources but it’s not accepting any. Please help.
use this, I used it and it works H689T-BFM2F-R6GF8-9WPYM-B6378
no luck with that one. any other suggestions?
Use the one that comes in the .rar file. Once, unzipped it has the .iso and a text file with the product key
Works! Thanks bud!
Thank You!
A very thorough procedure. However at step 24 no Admin pwd was requested and at step 25, a key was requested. I tried a key I have but not valid. Unable to get further.
I used the key from Rob above and it worked OK.
Thanks.
Mine says there is a setting in system that’s invalid, but I don’t know what
Followed these instructions and it worked great. Now my only problem is trying to get the virtual system to recognize my network connection. I need to download software from the web and I have network activations that I need to access. Thank you.
Product Key ???
It’s in the zip file
Thanks, it works!
Is this 64-bit or 32-bit?
I’m trying to load XP from an original licensed disc I have, but when I click ‘start’, the message that comes up is “no bootable media found”. This is after I went to ‘storage’ and selected host drive D: (optical drive) and checked ‘passthrough’.
Hello Jimmy, I apologize for the late reply.
I think there is a problem with your Windows XP disk media. It should work smoothly under normal conditions. Or there may be a problem with your computer’s CD/DVD RW device. There are many problems with these devices in the latest Builds of Windows 10.
I would like to suggest you a way to try, with the UltraISO program, convert the Windows XP installation media to ISO and add it to the virtual machine.
Howdy, Excellent guide! I have a problem installing the VirtualBox Guest Additions though, it keeps failing.
The driver is installed, and the installers gives a message that a reboot is required. However, then a messages comes up saying “Execution returned exit code: 0”, and nothing further happens, no reboot is prompted. Then Windows XP considers the installation has not passed the Win XP Compatibility testing, and I can continue or stop the installation (obviously continue does not work).
I can’t seem to find a solution for this, and I think I need the Guest Additions to fully use Win XP, right?
Edit: never mind, I had to click “Continue Installation” multiple times. Apologies!
Hey I am having issues on step 13 where I need to click F8. I try to do ctrl f8, shift f8, ctrl shift f8, alt f8, you name it and nothing is happening. How do I enable my f8 key for the set up?
Turn off the virtual machine, click Devices/USB, and then choose Keyboard. Before doing this, try solving the problem by pressing FN + F8 in the license window.
Some Microsoft keyboards have an F lock key, if so, check it out.
Hi, Thanks for the detailed step by step guide, have successfully installed XP.
Only issue is how do I get the V-Box XP to access internet.
Need product key. It is not in the .rar file (unpzipped) or the the ISO file (unzipped). Tried Rob’s key, doesn’t work.
Mine setup says something like “No harddisk found, connect any. Now press F3 to reboot your PC”.
i use i windows xp
I don’t know: but the ISO file don’t wanna open.
Help>
Any suggestions for installing device drivers ?
With VirtualBox 5.2.44 and Windows XP SP3, even though the host BIOS supports a 1.2MB floppy disk drive, adding the Host Drive A yields “The disk media is not recognized. It may not be formatted” error. In addition, when you look at the properties for the drive, it says it is a 3.5 inch drive. Deleting and re-adding the drive through Devices has no effect.
I can’t find the download xp iso button…
Excellent installation instructions, thank you.
My purpose in creating a virtual XP on my new Windows 10 computer, was to use a program that worked will on my old XP computer. However, when I loaded the program and tried SET UP, I got a message “THIS APP CAN’T RUN ON YOUR PC – check with the software publisher”. This old program was written for Windows 98 and was never upgraded . Any suggestions?
I reached the point where you load Guest Additions, and then things went wrong. The installation of Guest Additions hung up (stopped) before completing, and I have no clue why. What are some suggestions on how to fix that? The process halted on the line just below the line that reads “Installing video driver . . .”
I have set up a virtual drive on another computer with an earlier version of VirtualBox, so this is not my first rodeo.
2021 and still in need of windows xp for some homework assignments. Thanks Rob for the w key
Hey! Whenever I click Insert Guest Additions CD Image, it doesnt open the wizard. Any fix?
For others who may be having issues where it hangs at the Installing Windows Screen:
At step 5, change processors to 1 instead of 4
Sry but i have a problem with black screen after install the guest additions, and work but not signal diplay only see the black screen
I managed to install it but am being asked for windows activation, which of course doesn’t exist anymore. I clicked on Activate and a new window opened and froze. I used the keygen to generate a key, as I have long since lost my XP disk.
Same issue, were you able to solve it?