

A strange discipline hums in enterprise server rooms. Desktop computers never reach this level. Moreover, standard storage fails for systems serving hundreds of users. That is exactly where SCSI comes in.
SCSI technology formed the backbone of data centers for years. Even today, it lives on in medical devices and industrial systems. What’s more, it still breathes inside retro computing cases.
This article will go far beyond a simple definition. After all, I will share real field scenarios with you. For instance, I will explain the troubles caused by wrong termination. I will also show the finer points of connecting an old scanner to a modern computer.
Over my career, I have set up many servers. In fact, each time, I saw the same truth. Specifically, your work won’t last unless you grasp the core principles. Especially in SCSI setup, daisy-chaining and termination are vital. So, I assure you this guide will serve you well. If you are ready, let’s dive into the depths of this legendary bus!

What Is SCSI (Small Computer System Interface)? The Evolution from SASI to Ultra-320 (1981-2003)
Today’s storage tech rests on bold choices from the 1980s. Back then, no single standard existed for floppy and hard drives.
However, each maker pushed its own custom solution. This created total chaos. Luckily, Shugart Associates took action to end it. Ultimately, it made the move that changed history.
Alan Shugart was a legend in the storage industry. His company wanted to build on its fame with floppy drives. As a result, the interface it created was not just a product.
In fact, it became the cornerstone of a huge ecosystem. This standard then matured within ANSI groups. Finally, it grew into the backbone of enterprise computing under the name SCSI.
What Is SASI? The Birth of Shugart Associates System Interface
Shugart Associates announced SASI in 1981. Actually, it was a pioneering storage interface. Its goal was very simple and clear. Specifically, it would create a shared I/O bus for floppy and hard drives. Until then, each device needed its own special controller. Because of that, costs rose needlessly.
SASI’s biggest innovation was making the command set independent of the device. As a result, one host adapter could recognize different devices. It could even talk to them without any issues.
Truly, this idea was revolutionary for its time. Consequently, Shugart Associates quickly submitted the design to ANSI. So, the standardization process officially began.
Commercial concerns brought a small name change. The committee replaced the “Shugart Associates” phrase with a neutral term. Then the name Small Computer System Interface was born. The soul of the protocol rose on the foundations of SASI. In other words, SCSI is essentially the protocol that standardized and expanded SASI.
SCSI-1, SCSI-2, and SCSI-3: Milestones in the Standards War
ANSI approved the first official SCSI standard in 1986. This version offered a 5 MB/s data transfer speed. It also clearly defined the basic command structure.
In contrast, the second generation in 1994 brought the real leap forward. The second generation expanded the command set and doubled the speed. Now SCSI was no longer just a standard for disks. Additionally, scanners and tape drives joined the family.
The third generation represented a shift to a modular structure. In other words, committees now defined commands and the physical layer separately. SPI (SCSI Parallel Interface) was the clearest example of this approach.
Because of this, different physical implementations could use the same command set. Thus, the SCSI ecosystem expanded incredibly. The table below summarizes the critical stages of this evolution.
| Standard | Year | Bus Width | Maximum Speed | Connector Type |
|---|---|---|---|---|
| SCSI-1 | 1986 | 8-bit | 5 MB/s | Centronics 50, DB-25 |
| SCSI-2 (Fast SCSI) | 1994 | 8-bit | 10 MB/s | HD50 |
| SCSI-2 (Wide SCSI) | 1994 | 16-bit | 20 MB/s | HD68 |
| SCSI-3 (Ultra SCSI) | 1995 | 8-bit | 20 MB/s | HD50 |
| Ultra Wide SCSI | 1996 | 16-bit | 40 MB/s | HD68 |
| Ultra2 SCSI | 1997 | 8-bit | 40 MB/s | HD68 (LVD) |
| Ultra-160 | 1999 | 16-bit | 160 MB/s | HD68, VHDCI |
| Ultra-320 | 2002 | 16-bit | 320 MB/s | HD68, VHDCI |
Serial Attached SCSI (SAS) and the Farewell Years of Parallel SCSI
In the early 2000s, the limits of parallel buses became clear. High frequencies caused signal integrity problems. Moreover, cable clutter and connector sizes created serious bottlenecks.
So, the industry found the solution in serial communication. Serial Attached SCSI was the direct result of this need. Consequently, SCSI completely renewed its physical layer.
SAS kept using the same proven command set. However, at the physical layer, it moved to point-to-point serial links. Because of this, thinner cables became possible.
Speeds increased and routing became much easier. Still, millions of parallel devices were running in the field. As a result, the transition took about a decade.
The last major parallel standard peaked in 2003. Ultra-320 delivered a full 320 MB/s bandwidth. Truly, this was the fastest disk interface of its era.
Sadly, it entered history as the last of its line. Nevertheless, even today, these old system components still survive. Retro computing groups and industrial applications keep them alive.
What Is SCSI? Basic Definition, Full Name, and ‘Scuzzy’ Pronunciation
Technical books often define SCSI simply. They say it is a standard that moves data between computers and peripherals. However, that definition never captures its true spirit.
In reality, the field truth is much more layered. Specifically, a smart controller comes into play. In short, with its own microprocessor and memory, it relieves the host system.
Unlike desktop interfaces, this system grants intelligence to devices. Each one manages its own command queue. Plus, it processes errors and optimizes data flow.
This philosophy lifts SCSI from a plain disk interface to a full data transfer protocol. Let’s now look closely at the core definitions.
SCSI Full Name and What “Small Computer System Interface” Means
SCSI stands for Small Computer System Interface. Its name’s “small” label comes from the 1980s viewpoint. Back then, mainframes were huge systems. SCSI was designed for more modest machines. Nowadays, that distinction has lost all meaning.
The common industry pronunciation is “scuzzy.” Actually, this friendly acronym grew naturally among technicians. Over time, it even made its way into official docs. I have used it for years when talking about this interface.
In fact, the pronunciation reveals the speaker’s real experience. It shows the person has truly worked hands-on with this hardware.
What Does the SCSI Interface Do and Where Is It Used?
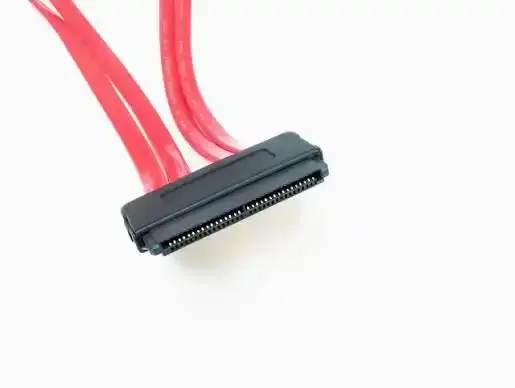
This input/output interface provides block-level access. It acts like a data bus. The processor sends a read request via the file system. That request then turns into physical sectors. The disk controller manages the conversion, easing the host’s load. As a result, SCSI boosts performance in multi-user environments.
Usage areas are truly wide. For example, server disks are the most common. Tape backup units and optical drives also belong to this family.
High-resolution scanners used SCSI in the 1990s. Pro graphics studios preferred these scanners. Medical imaging and industrial computers also benefited from this reliability.
Today, these old system components still exist. People mainly use them as backup units. Some institutions keep old tape drives for legal compliance. Therefore, understanding SCSI is not a nostalgic hobby. On the contrary, it is a current and practical need.
SCSI Architecture Model (SAM) and Its Layered Structure
SAM (SCSI Architecture Model) is the theoretical framework of the technology. SCSI architecture consists of four main layers. The application layer sits at the top. Below it, the protocol layer resides. Then comes the transport layer. Finally, the physical layer is at the bottom. This layered approach provides great flexibility. Different physical media can use the same command set.
The application layer talks directly to the operating system. The protocol layer prepares Command Descriptor Blocks (CDBs). Meanwhile, the transport layer moves data reliably. The physical layer covers cables and signaling.
This modular design is SCSI’s greatest strength. It works from parallel cables to serial links. You can switch from copper conductors to fiber optics. This flexibility keeps it standing for over thirty years. Indeed, developers build current standards like SPC-6 and SBC-5 on this very architecture.
SCSI Working Principles: Initiator, Target, Bus, and Command Set
The least understood part of this technology is its communication design. Desktop systems only need a simple master-slave link. However, here a much more sophisticated structure begins.
Multiple initiators and targets communicate without collisions. They share the same physical line smoothly. This feature makes SCSI essential for enterprise settings.
Now we’ll clarify the most confused ideas in the field. Chief among them are the initiator/target architecture and device IDs. Plus, once you understand the basics, you will see the system’s elegance. So, let’s examine the communication process step by step.
Initiator-Target Architecture: SCSI Controller (Host Bus Adapter) and Devices
This architecture has two main roles. They are initiator and target. The initiator is usually a host bus adapter card. This card connects via PCI or PCIe bus. The target is a peripheral. For example, it can be a hard disk drive or tape drive. The initiator sends commands, and the target replies.
The card, also known as a host adapter, has its own BIOS. During boot, the host adapter ROM starts. It then scans all connected devices one by one. Adaptec and LSI Logic cards became industry standards. These cards manage resources like DMA and IRQ assignment. Thus, they free the main processor from heavy loads.
A single HBA card can chain 8 or 16 devices in theory. However, signal integrity limits this number in practice. Termination rules also play a role. Each device must have a unique ID. You set this ID manually with a jumper block. Sometimes you use a rotary switch too.
SCSI Command Set (CDB), SPC-6 and SBC-5 Standards
The Command Descriptor Block (CDB) is a structured data block. The initiator tells the target what to do via this block. Each command consists of a few bytes. The first byte holds the operation code. The following bytes carry the logical block address. Parameters like length also reside here. This structure is independent of device type.
The T10 technical group still publishes standards today. SPC-6 (SCSI Primary Commands) defines common commands. SBC-5 (SCSI Block Commands) focuses on block storage.
It covers read, write, and format commands. These standards are still a reference for SAS disk architecture. Even NVMe bridges refer to them.
From my experience, the command set’s flexibility is SCSI’s biggest advantage. A tape drive and a hard disk are physically different. Yet they speak the same SCSI command set. This standardization makes life easier for system integrators.
SCSI Disk Bus Phases: From BUS FREE to MESSAGE Step by Step
Bus communication moves through specific phases. Each phase defines the line’s current state. This mechanism prevents collisions. Thus, multiple devices can share the same cable. Below, I explain these phases step by step.
- BUS FREE Phase: The bus is completely idle. No device uses the line. All signals are passive. It is the starting point for the next operation.
- ARBITRATION Phase: Devices request the bus. Each drives its own ID line. The highest-priority ID wins. This ensures a fair choice.
- SELECTION Phase: The winning initiator selects the target. It places the target’s and its own IDs on the lines. The target senses this and responds.
- COMMAND Phase: The initiator sends the Command Descriptor Block. The target receives and decodes the command. It then gets ready for the job.
- DATA Phase: Data transfer happens. The direction depends on the command type. During a read, the target sends data to the initiator. A write does the opposite.
- STATUS Phase: The target reports the result. It sends success, error, or busy codes.
- MESSAGE Phase: Devices send optional messages. You’ll see signals like command complete or disconnect.
These phases repeat thousands of times per second. Any error leads to a bus reset. If you get a command abort error, check the chain. Also, definitely review termination and cable quality.
The Physical World of SCSI: Cables, Connectors, and Signaling
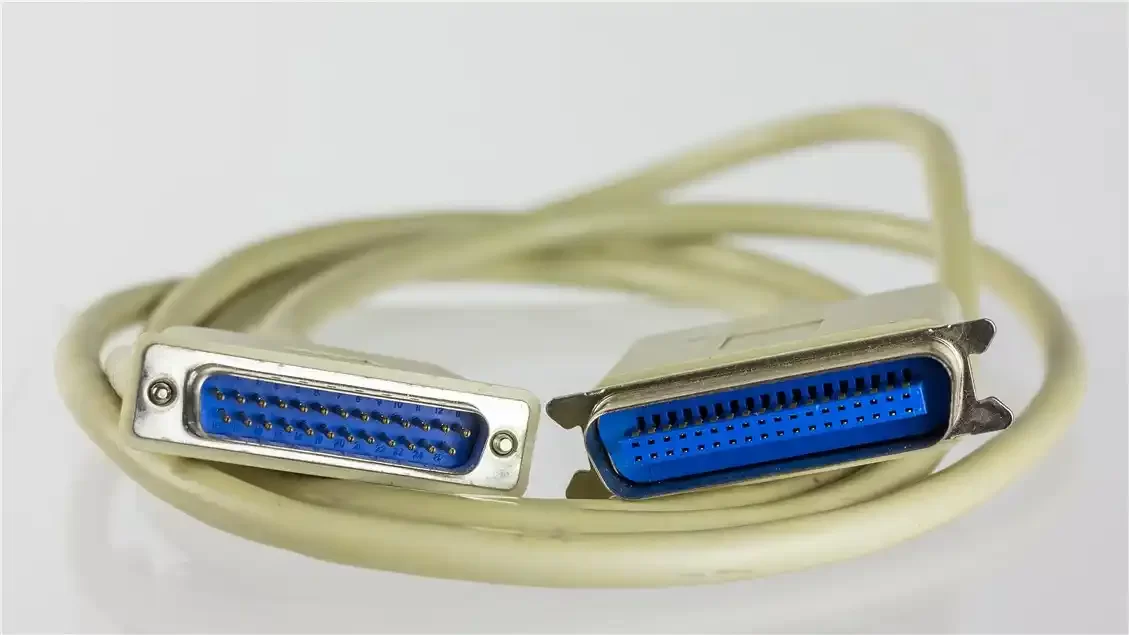
Understanding theory is only half the battle. The real fun begins with physical links. A wrong cable or mismatched connector can steal hours of your time. Signaling type confusion will give you headaches. Luckily, years of field work taught me these traps. Now I’ll show you how to avoid them.
Now I will cover all critical parts of the physical layer. For instance, we’ll talk about connector types and signaling types. I won’t forget daisy-chain rules and cable length limits. Trust me, this knowledge will save you a great deal of time in the field.
SCSI Cable and Connector Types: Centronics 50, HD68, SCA-80, DB-25
Many connector standards developed for SCSI over the years. Naturally, each one serves a different era. Below, I list the most common types and their traits.
- Centronics 50 (CN50): Used in first-generation external links. It has 50 pins, wide and sturdy. Common on old scanners and external SCSI enclosures.
- HD68 (High Density 68): A more compact alternative. Its 68 pins support 16-bit Wide links. It became standard in Ultra-320 and LVD applications.
- SCA-80 (Single Connector Attachment): Designed for server backplanes. It carries both data and power with 80 pins. It offers hot-swap support. Essential in enterprise setups.
- DB-25: Found on Apple Macintosh and old scanners. It’s a 25-pin standard D-sub connector. Signaling differences can cause compatibility issues.
- VHDCI (Very High Density Cable Interconnect): Appeared in the Ultra-320 era. Often used on RAID controller cards. It packs 68 pins into a tiny space.
Every connector has a pinout diagram. When making adapter cables, testing with a multimeter is essential. A wrong connection leads to signal reflection and data loss.
Signaling Types: The Differences Between SE (Single-Ended), LVD, and HVD
Signaling type is one of the most critical SCSI topics. Essentially, three different methods exist. Naturally, each has unique electrical traits. Cable length limits also vary.
| Feature | SE (Single-Ended) | LVD (Low-Voltage Differential) | HVD (High-Voltage Differential) |
|---|---|---|---|
| Signal Voltage | 0-5V (referenced to ground) | ±0.3V differential | ±5V differential |
| Max Cable Length | 1.5 – 6 meters | 12 meters | 25 meters |
| Noise Immunity | Low | High | Very high |
| Backward Compatibility | Yes | Not with SE | Not with SE or LVD |
| Common Era | 1986-1997 | 1997-2003 | 1990-1997 |
SE is the oldest and simplest signaling method. The system measures each signal line against ground. So, it is quite sensitive to noise.
LVD uses differential signaling. It measures the voltage gap between two lines. This makes it much more immune to noise. HVD works on a similar principle but with high voltage.
SE and LVD mismatch is the most common field problem I see. If you mix these two on the same chain, the whole bus drops to SE mode.
Performance drops sharply as a result. Connecting HVD devices to an SE or LVD bus causes physical damage. So, always check the labels.
Daisy Chain and Chaining Rules
Daisy-chaining is the hallmark of this data bus. You connect many devices to a single HBA card. You chain the devices one after another. However, this chain has strict rules:
- Determine the Cable Order: The chain starts from the host adapter card. You connect the first device’s input, then its output to the second. It goes this way up to the last device. Never use a star topology.
- Assign a Unique ID to Each Device: Every device on the chain must have a distinct ID. The same ID causes clashes and instability. You set IDs with a jumper block or rotary switch.
- Terminate Correctly: Place terminators on both ends of the chain. The host adapter sits on one end, the last device on the other. Turn off termination on devices in the middle.
- Do Not Compromise on Cable Quality: Impedance matching is critical for signal integrity. Use quality cables that meet standards. A bad cable creates signal reflections. It makes chaining errors unsolvable.
- Calculate the Total Cable Length: The total of all cables in the chain must not exceed the limit. For LVD, it’s 12 meters; for SE, 1.5 meters. You’ll see data corruption if you go past the limit.
SCSI’s Must-Have: What Is Termination and Why Is It Important?
Electrical engineering’s core rule is impedance matching. Otherwise, a signal reflects when it hits the cable end. That reflection mixes with the original signal. As a result, it corrupts data. Termination stops this reflection. It is a resistor network you place at the line’s end.
This concept is the key to a successful SCSI setup. Missing or wrong termination simply won’t let the system run. At least half the field problems stem from termination. Now let’s tackle this critical topic in detail.
Active and Passive Terminators: When Do You Use Which?
We divide terminators into two main groups. A passive terminator is a simple resistor network. It uses resistors that match the line’s characteristic impedance. However, it falls short at high speeds. Its noise immunity is also low. Plus, it cannot fully regulate voltage levels.
An active terminator contains a voltage regulator. It feeds off the TERMPWR line. It actively controls signal levels.
As a result, you get much cleaner signals. Active termination is essential for Ultra SCSI speeds and above. Similarly, you should prefer this type for LVD systems.
Whenever you can, use an active terminator. Passive ones are only suitable in old, slow systems. Also, you must physically place the terminator at the very end of the chain. That means on the last connector.
What Happens If You Don’t Terminate SCSI? Symptoms and Risks
If you skip termination, signal reflection is unavoidable. Square wave signals on the bus bounce back. They then interfere with the original signal. This causes bit errors and data corruption. At the OS level, the symptoms are frustrating.
The disk might not show up in the BIOS at boot. You constantly get command abort errors. You also see bus reset messages. Random freezes happen during data transfer. Even system crashes occur. The OS might see the disk as raw. When you see these signs, check termination first.
Long-term wrong termination can harm transceiver circuits. This risk is higher in HVD systems. So, act quickly on termination errors. Check the chain. Verify the terminator’s location. If needed, test with a multimeter.
Termination Jumper Settings and the Terminator’s Correct Position
Most internal devices control termination via a jumper block. These tiny plastic pieces short-circuit the pins. Examine the device label for the right configuration. Also, read the manual carefully.
First, determine the physical order of devices in the chain. Then enable termination on the two end devices. In contrast, disable termination on all devices in the middle. The host adapter usually auto-terminates. But older cards might need a manual setting.
For external devices, you use a special terminator plug. You attach this plug to the empty connector of the last device in the chain. Active ones have a power LED. If that LED is off, the TERMPWR line may have a problem. Remember, at least one device must provide termination power. Usually, the host adapter handles this job.
SCSI Standards, Speeds, and a Pros and Cons Analysis
Looking at the spec table, it’s hard not to be impressed. SCSI was far ahead of desktop solutions in its era. But every engineering marvel has a price. Complexity, cost, and noise limited its widespread use.
In this section, we will compare all versions by speed. We will also assess the pros and cons objectively. Additionally, we’ll explain why SCSI became a legend in some areas. We’ll also clarify why it fell behind in others.
Parallel SCSI Versions and Speed Limits: The Full Comparison Table
The table below gives a full breakdown of parallel versions. It shows data transfer speed and bus width. It will help you greatly when identifying old system parts.
| Standard Name | Bus Width | Maximum Speed (MB/s) | Connector | Signaling |
|---|---|---|---|---|
| Asynchronous SCSI-1 | 8-bit | 1.5 | Centronics 50 | SE |
| Synchronous SCSI-1 | 8-bit | 5 | Centronics 50 | SE |
| Fast SCSI-2 | 8-bit | 10 | HD50 | SE |
| Fast Wide SCSI-2 | 16-bit | 20 | HD68 | SE |
| Ultra SCSI | 8-bit | 20 | HD50 | SE |
| Wide Ultra SCSI | 16-bit | 40 | HD68 | SE |
| Ultra2 SCSI | 8-bit | 40 | HD68 | LVD |
| Wide Ultra2 SCSI | 16-bit | 80 | HD68 | LVD |
| Ultra-160 | 16-bit | 160 | HD68, VHDCI | LVD |
| Ultra-320 | 16-bit | 320 | HD68, VHDCI | LVD |
Ultra-320 is the peak of parallel technology. Its 320 MB/s bandwidth was remarkable for its time. Reaching these speeds demands perfect cable quality. Flawless termination is also essential. In the field, you could not always catch these ideal conditions.
SCSI Advantages: Performance, Reliability, and Multi-Device Support
This hardware interface’s clearest edge is its multitasking power. Thanks to its command queuing, it sorts and optimizes requests. This feature is vital for server disks. Connected devices’ own intelligence also relieves the main processor.
- Independent Command Processing: Each device has its own microcontroller. It sorts, prioritizes, and processes commands in parallel. Desktop interfaces dump this intelligence onto the host.
- High Bandwidth: Ultra-320 was unrivaled in its era. Its 320 MB/s speed was beyond gigabit networks. All devices on the chain shared this speed.
- Multi-Device Support: A single HBA card can chain 8 or 16 devices. These can be disks, optical drives, or scanners. They all share the same bus in harmony.
- Industrial Durability: These disks spin at 10,000 and 15,000 RPM. Makers build them for 24/7 operation. Thus, they offer far longer MTBF periods.
SCSI Disadvantages: Cost, Complexity, and Noise
SCSI also had clear downsides. Cost was the biggest hurdle. One server disk was three times the price of a desktop disk. Adding the HBA card, special cables, and terminators pushed the budget higher.
- High Cost: The disks’ advanced controller doubled the price. A quality motor and tough mechanical parts were expensive. Host adapter cards were costly too. That’s why only enterprise users could invest.
- Complex Setup: ID settings and termination demand serious know-how. Cable choice and signaling matching do too. One small mistake can stop the whole system. Desktop users could not accept this.
- Noise and Heat: A 15,000 RPM disk produces high noise. Heat output is also a big problem. These disks can’t run long without active cooling.
- Cable Clutter: Parallel cables are thick, heavy, and stiff. Routing them in tight cases is a nightmare. Serial technology completely solved this issue.
SCSI vs. Other Interfaces: IDE, SATA, SAS, and NVMe Comparisons
The storage world evolved at a dizzying pace over the last thirty years. SCSI sat right at the center of this evolution. Over time, it gave way to simpler and cheaper alternatives. Even so, its legacy lives on in many tools we use today.
Now I will compare this legendary interface to its rivals. I’ll clarify where each one shines. I’ll also show where each falls short. You will be able to place any storage technology you face into the right context.
SCSI vs. IDE and SATA: Server Intelligence vs. Desktop Simplicity
IDE and its modern version, the SATA interface standard, were designed for the desktop. On these interfaces, the on-disk controller is quite basic. The host CPU takes on most of the command processing load. This approach lowers cost. But it also limits performance somewhat.
SCSI moves intelligence directly onto the disk. Each unit manages its own command queue. The main processor does not wrestle with disk I/O. It can focus on its real job. Thanks to chaining support, you can connect far more devices. With SATA, that number is bound by motherboard ports.
SATA’s simplicity made it the clear favorite. It offered cheap cables and a plug-and-play setup. Low power use made it the dominant choice in the desktop market. However, when you need server-class reliability, SCSI was always ahead. The older IDE connection standard had similar limits.
SCSI vs. SAS: The Legacy of the Move from Parallel to Serial
SAS (Serial Attached SCSI) is SCSI’s direct heir. It uses the same proven command set. At the physical layer, it takes a completely different path. Instead of parallel transmission, it uses high-speed serial lines. By removing cable mess, it reaches much higher speeds.
The main difference lies in physical topology. The parallel version uses daisy-chaining. SAS is built on point-to-point links. You can scale to thousands of disks using expanders. Plus, SAS disk architecture offers dual port support. This redundant link is vital in enterprise systems.
The parallel version’s biggest limit was cable length. Signal integrity issues added to the trouble. Developers completely fixed these problems in SAS.
SAS cables are thin and flexible. You can also use these cables up to 10 meters. Modern disk models are compatible with SATA connectors. This backward compatibility eased the transition.
SCSI vs. NVMe: Dual-Actuator HDD Support and Modern Storage
NVMe opened a new era in storage. It connects directly to the processor via the PCIe bus. It offers latency measured in microseconds. Developers optimized NVMe entirely for flash storage. But there is an interesting link between SCSI and NVMe.
NVMe’s command structure draws from SCSI. Both offer deep command queuing and multitasking. NVMe pushes this concept much further. It offers up to 64,000 queue depth. You have dedicated queues per core. These numbers are beyond what Ultra-320 could ever have imagined.
Dual-actuator HDD support was a surprising step. Modern mechanical drives exploit SCSI’s multi-initiator talent. Dual-actuator disks can access two zones at once.
You can manage this feature with SCSI-derived protocols. The veteran interface’s DNA lives on in today’s SSD solutions and high-capacity HDD models.
SCSI RAID Setup and Hot Swap Configuration Guide
No one can ignore data redundancy in enterprise settings. A single disk failure must not halt the workflow. RAID technology steps in right at this point. SCSI is tailor-made for RAID setups. It proves itself with high performance and reliability.
Hot swap is another vital feature. It is the ability to swap a disk while the server runs. It completely eliminates service downtime. In this section, I will cover creating a RAID array and hot swapping.
Steps to Create a RAID Array on a Controller Card
A dedicated RAID controller card is at the heart of the job. Adaptec AACRAID and LSI Logic cards offer hardware RAID. These cards have their own processor and memory. They do calculations without burdening the host computer.
You can build a reliable array with the steps below. I suggest picking all disks of the same standard. Disks with different speeds or capacities limit performance.
- Enter the Card’s BIOS: Press Ctrl+A or Ctrl+M at boot. Enter the RAID BIOS. You will see all connected physical disks.
- Select Disks and Create an Array: Find the “Create Array” option in the menu. Mark the disks you want to use. All data will be erased at this stage. Be sure you have a backup.
- Set the RAID Level: RAID 0 gives speed, RAID 1 gives redundancy. RAID 5 is a balanced solution. You can do RAID 5 with at least three disks. RAID 10 is perfect for those wanting speed and redundancy.
- Adjust Stripe Size: This value decides how data splits across the disks. 64 KB or 128 KB is usually ideal. Choose a larger stripe for database servers.
- Initialize the Array: You need to start the array you created. This process writes redundancy information to the disks. It can take hours on large disks. You can keep working in the background.
- Present to the OS: Once BIOS tasks are done, the array appears as a single disk. You can format this disk and start using it.
Hot Swap Support: Requirements and Configuration
Hot swapping is the ability to change a disk while the server runs. It is vital for systems that run 24/7. Not every SCSI setup supports this feature. You must meet the requirements below.
- SCA-80 Connector and Backplane: Disks with special SCA-80 connectors are essential for hot swap. It combines data and power in one link. You plug the disk directly into the backplane slot.
- Supporting RAID Controller: Your card must offer hot swap support. Adaptec and LSI Corp’s enterprise lines provide this. The card must auto-detect the disk and rebuild the array.
- Operating System Support: Modern Windows Server and Linux offer hot swap. Older systems may have limits. You might need to scan for the disk via Windows Device Manager.
- Physical Design: You should be able to easily pull and push the disk slots. Server cases have slots you can reach from the front. These slots have status LEDs.
During the swap, first logically eject the failed disk via software. Then remove it physically from its slot. When you insert the new disk, the controller starts the rebuild. Performance might drop slightly during this process. You will have no service interruption.
SCSI Today: Retro Computing, Industrial Use, and Adapter Solutions
Many people think SCSI is a thing of the past. But the truth is far more colorful and interesting. It no longer appears in new server builds. Still, thousands of systems actively run it. This interface keeps breathing all around the world.
Retro computing groups keep the SCSI flame alive. They carefully preserve old Macintosh computers. Vintage servers and classic workstations are in the hands of fans. The industrial automation and medical device sector also uses this interface. SCSI still plays critical roles.
Do People Still Use SCSI? A Legacy from Servers to Medical Devices
The short answer is yes, and quite actively. You won’t see it in large data centers, but it’s strong in niche areas. Old MRI and CT devices use the SCSI interface. These machines cost millions of dollars. Replacing them just for the storage link isn’t worth it.
Industrial computers paint a similar picture. Factory automation systems have decades-old servers. These systems use tape backup units for redundancy. The SCSI data transfer protocol is so stable there’s no reason to change. The “don’t touch a working system” rule applies here.
You also find this technology in military and aviation applications. Since certification takes years, proven solutions stick around. SCSI’s reliability is its biggest asset. This technology is not a ghost; it’s a retired wise master.
Connecting Old SCSI Devices to a Modern PC: SCSI2SD, BlueSCSI, and RaSCSI Setup
Connecting an old device to a modern PC used to be challenging. Finding a compatible PCIe card was almost impossible. Signing drivers and ensuring Windows 11 support was difficult. SCSI2SD, BlueSCSI, and RaSCSI solved this at the root. These solutions emulate physical hardware.
SCSI2SD works as a converter card. On one side sits a 50-pin SCSI connector. On the other, an SD card slot. The device presents the SD card as a physical disk. Old system components get modern, quiet storage.
Below you can find SCSI2SD setup steps.
- Prepare the SD Card: Choose a fast, quality SD card. Insert the card into your computer. Format it using the SCSI2SD configuration tool. This tool sets the SD card to the sector size the old system expects.
- Configure the SCSI2SD Board: Connect to the board via USB. Adjust parameters like device type and ID. If these settings are wrong, the disk may not show up in the BIOS.
- Hook Up the Cables: Attach the proper 50-pin SCSI cable and power link. Check the termination power source. Enable termination on the board itself.
- Power On and Test: Boot the old computer or server. Confirm that the BIOS detects the disk. Run a low-level format if needed.
The BlueSCSI project is a newer, open-source alternative. It offers extras like Wi-Fi disk image loading. RaSCSI is Raspberry Pi based. It can share disks over the network. All three solutions bridge old system devices with modern storage.
SCSI PCIe Card Recommendation and Windows 10/11 Driver Signing Fix
For a direct link to a modern computer, a quality PCIe adapter is essential. Adaptec and LSI Logic are still the most reliable options. You need extra steps to run these cards on Windows 10 and 11.
You can do a smooth setup by following the steps below. Pick a card that fits a PCI Express x1 or x4 slot. Check the compatibility list for your motherboard chipset. After installing the card, boot and check BIOS settings.
- Find and Download the Driver: Get the Windows 10 driver from the maker’s site. Older cards might only offer a Windows 7 driver. In that case, manually edit the driver’s INF file.
- Disable Driver Signature Enforcement: Windows 10 and 11 block unsigned drivers. Turn off signature enforcement from advanced startup. This is temporary; you must repeat it each boot.
- Use Test Mode for a Permanent Fix: Open command prompt as an administrator. Run “bcdedit /set testsigning on.” Restart the computer. You’ll see a test mode watermark on the bottom right. Unsigned drivers work in this mode.
- Connect the Device and Test: After the driver installs, connect the device. Confirm it shows up in Windows Device Manager. If needed, restart and format the disk.
In-Depth Troubleshooting and Physical Disk Maintenance Guide
No technology is problem-free. Thirty-year-old mechanical disks and complex chaining cause trouble. If you know the right diagnostic methods, you can fix most issues quickly. Solving SCSI problems needs a systematic approach.
In this section, I will share the errors I encounter most in the field. I will also give their exact solutions. I’ll touch on disk upkeep and data recovery. These disks are rare parts. Treating them well guards both your wallet and your data.
Most Common SCSI Errors and Their Exact Fixes: BIOS, Boot, and ID Issues
Staying calm during troubleshooting is very important. A systematic path is essential. Below you will find the most common errors and how to fix them. I have lived through and solved each one myself.
- Disk Not Seen in BIOS: Check the cables and power link. Run a device scan from the SCSI BIOS. Make sure termination is correct. Try a different ID. If the disk doesn’t spin, the motor might be dead.
- ID Clash: If two devices share the same ID, the system throws errors. It might act randomly. Check the IDs of all devices. Fix the jumper settings per the manual.
- Not Booting: To boot from a SCSI disk, set the boot order right in the BIOS. Choose the host adapter BIOS first, then the disk. Make sure the disk has an active partition.
- IRQ Conflict: On old systems, the HBA card might share an IRQ with other cards. This causes freezes and data errors. Move the card to a different PCI slot.
- SCSI CD-ROM Boot: Set the drive’s ID correctly to boot from CD-ROM. On Adaptec cards, use Ctrl+A to enter the BIOS. Use the “Boot Device Options” menu.
Disk Maintenance: Thermal Paste Swap, Noise and Vibration Reduction
A SCSI disk spinning at 15,000 RPM needs special care. High heat output affects the mechanical part’s lifespan. Regular care keeps your disk healthy for years.
Thermal paste replacement is a vital but often ignored task. The disk controller chip heats up just like a CPU. Old thermal paste dries out and loses its heat transfer ability.
Carefully open the disk lid and apply fresh paste to the chip. The temperature can drop a few degrees. Be careful not to harm the head parking mechanism during this task.
The noise level can be annoying at high speeds. Spinning disk vibration causes resonance inside the case. Use vibration-damping screws and isolated slots. Clean the disk’s cooling block often. Dust buildup raises both heat and noise.
Data Recovery from a Disk: Basic Strategies and Using ddrescue
Data loss is every technician’s nightmare. If a SCSI disk starts to fail physically, the situation is critical. Before you panic, you can try some basic strategies. The ddrescue tool on Linux is your greatest help.
- Stop Using the Disk Now: Writing to a failing disk can destroy data. Pull the disk from the system and hook it to a backup machine. If you can, connect it in read-only mode.
- Grab a Raw Copy with ddrescue: This tool copies the disk while skipping bad sectors. It first does a fast pass to save healthy areas. Then it returns to the bad spots and retries. Save the image file to a different disk regardless.
- Cool and Rest: Failing disks often overheat. Cool the disk with a fan during the copy. If needed, let it rest for a few hours and keep going. Thermal expansion can make bad sectors temporarily readable.
- Get Professional Help: For problems like head crash or motor failure, see an expert. Opening the disk cover without a clean room causes permanent data loss.
SCSI (Small Computer System Interface) for Further Reading
SCSI is a deep-rooted technology in computer hardware. This section offers resources to help you grasp the topic deeply. You can reinforce your knowledge with these expert-level articles.
- ANSI Blog – INCITS 131-1994[S2013]: Computer Systems Interface Standard: This official standard sets the rules for storage device communication. It also presents command structures in depth.
- Wikipedia – Evolution of Parallel Interface Technology: This broad entry shows the development of the bus architecture. It also details different types and hardware traits.
- TechTarget – Technical Look at Legacy Disk Interfaces: This guide explains key concepts like data transfer speeds, cable lengths, and termination. Thus, it guides you in hardware choices.
- Red Hat – Storage Bus Management in Linux: This document offers fixes for device detection, addressing, and multi-path management. It also gives in-depth technical details at the OS level.
- Kernel.org – Kernel Driver Development Guide (Interface Layer): This developer resource explains the command transfer mechanism between hardware and software, plus driver programming interfaces.
- Lindy – Hardware Connection Protocols and Cable Types: This practical guide examines different connection types and signal transfer methods. Moreover, it offers detailed information on compatibility issues.
The 10 Most Asked Questions About SCSI
What does SCSI mean and what does it stand for?
What is the difference between SCSI and SATA?
What is SCSI termination and why is it important?
Is SCSI still used? What technology replaced it?
Why were SCSI disks expensive and preferred in servers?
How do you connect old devices to a modern PC?
How do you spot and fix a SCSI ID conflict?
What is the difference between SCSI and SAS?
What happens if you don’t terminate SCSI?
What is the BlueSCSI project and how do you set it up?
Conclusion: SCSI’s Past, Present, and Lasting Legacy in Storage Technology
SCSI is more than just a hardware interface. It is an engineering philosophy. The rule of pushing intelligence out to peripherals still lives today. Freeing the host CPU and favoring modularity carry on in NVMe and SAS ecosystems. The foundations we laid thirty years ago stay strong.
Maybe we won’t see a parallel cable in a new server. Understanding SCSI’s legacy lets us deeply grasp modern storage. For technicians keeping industrial systems alive, this knowledge is priceless. It’s also a treasure for retro computing fans.
One last piece of advice: If you find an old SCSI device, don’t scrap it. Get a SCSI2SD converter or a proper PCIe card. That veteran device can keep serving you for years. This technology didn’t die; it just took a different shape.

Be the first to share your comment