

This helpful article will look at ping parameters in different Microsoft operating systems. We will explain what they do and show you how to test your network using real-life examples.
How to Use Ping Parameters in CMD (Command Prompt)
Ping Parameters primarily uses the ping command and more advanced usage parameters. Ping tool is the most common program used to troubleshoot network connectivity problems.
With these settings, you can quickly figure out and fix problems with the network. You can quickly test the network connection by pinging your ADSL or Router’s LAN interfaces. Also, you can ping your Router’s WAN interfaces. It sends packets of 32 bytes by default.
You can ping an IP source or an Internet website. On Windows operating systems, open the Command Prompt. Using it, you can ping the target host continuously. Alternatively, specify the number of times through a host. When you ping an address, the default Ping number is 4.
You can use Ping parameters to address and gain testing experiences.
In network testing, ping alone may not be enough. A different tool is needed for file transfer problems. To get to the heart of the matter, this is where TFTP server setup comes into play. It is especially useful for testing connections behind firewalls. I have always found using these two together helpful.
Command-line tools form the foundation of Windows. To outline briefly, learning MS-DOS commands strengthens your CMD usage. Since this knowledge is very useful on older systems, knowing the basics always gives you an edge.
Understanding Ping Options and Learning to Use It More Effectively
To open the Command Prompt on the Windows operating system, press the Windows Key + R and open the Run window. Type CMD in the Run window and click the Open button.
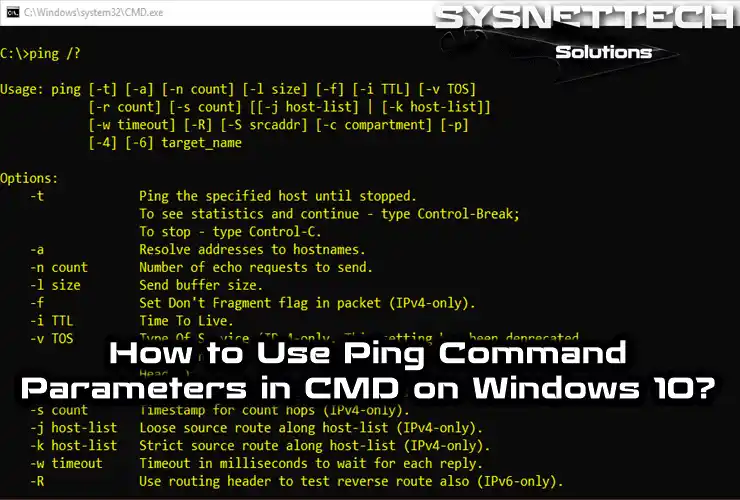
After opening the CMD prompt, type the ping /command and press Enter. As you can see in the output below, there are quite a few parameters.
You do not open the Command Prompt just for ping. As you may have noticed, finding the Windows installation date with CMD is quite easy. You can access this information with a single command.
Options include Usage and Options.
Usage: Explain the use of parameters.
Options: Explain the existing parameters.
C:\>ping /?

Usage: ping [-t] [-a] [-n count] [-l size] [-f] [-i TTL] [-v TOS]
            [-r count] [-s count] [[-j host-list] | [-k host-list]]
            [-w timeout] [-R] [-S srcaddr] [-c compartment] [-p]
            [-4] [-6] target_name

Options:
    -t             Ping the specified host until stopped.
                   To see statistics and continue - type Control-Break;
                   To stop - type Control-C.
    -a             Resolve addresses to hostnames.
    -n count       Number of echo requests to send.
    -l size        Send buffer size.
    -f             Set Don't Fragment flag in packet (IPv4-only).
    -i TTL         Time To Live.
    -v TOS         Type Of Service (IPv4-only. This setting has been deprecated
                   and has no effect on the type of service field in the IP
                   Header).
    -r count       Record route for count hops (IPv4-only).
    -s count       Timestamp for count hops (IPv4-only).
    -j host-list   Loose source route along host-list (IPv4-only).
    -k host-list   Strict source route along host-list (IPv4-only).
    -w timeout     Timeout in milliseconds to wait for each reply.
    -R             Use routing header to test reverse route also (IPv6-only).
                   Per RFC 5095 the use of this routing header has been
                   deprecated. Some systems may drop echo requests if
                   this header is used.
    -S srcaddr     Source address to use.
    -c compartment Routing compartment identifier.
    -p             Ping a Hyper-V Network Virtualization provider address.
    -4             Force using IPv4.
    -6             Force using IPv6.

C:\>
1) Ping -t Command
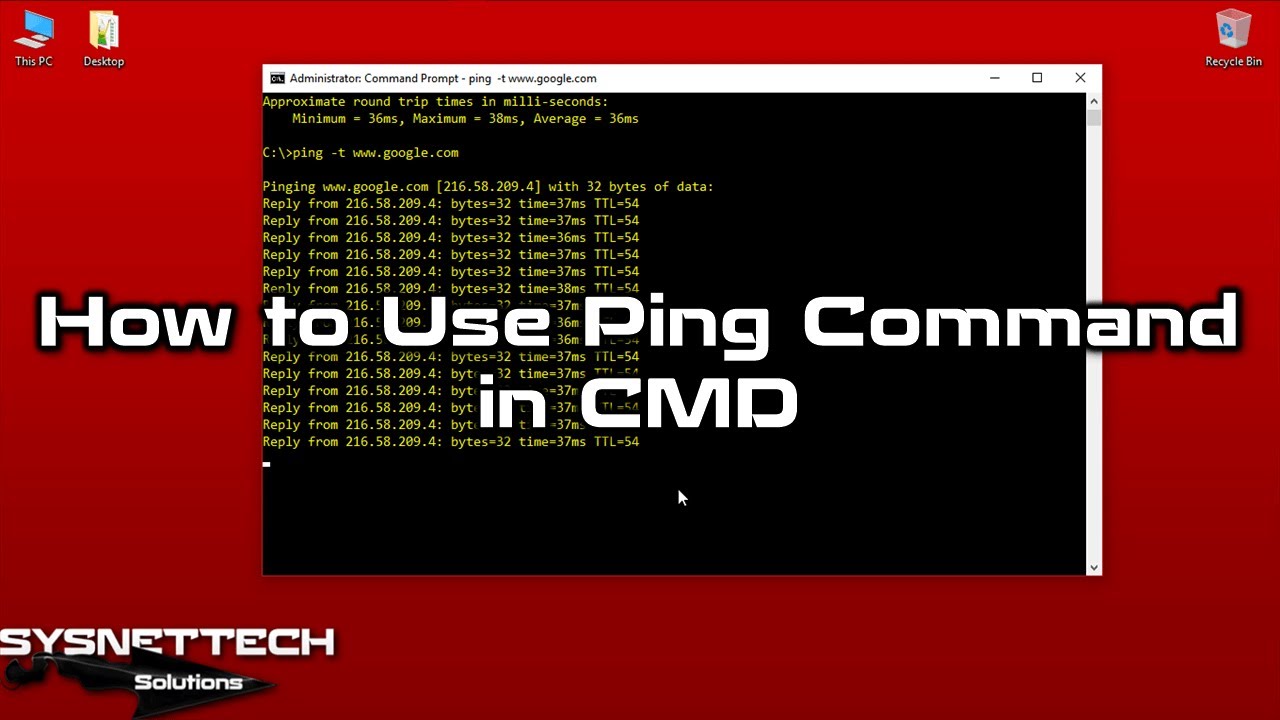
It continuously pings a specific IP address or website. This process continues until it stops. Press Ctrl + C to prevent/end the continuous ping command.
C:\>ping -t 8.8.8.8

Pinging 8.8.8.8 with 32 bytes of data:
Reply from 8.8.8.8: bytes=32 time=36ms TTL=57
Reply from 8.8.8.8: bytes=32 time=33ms TTL=57
Reply from 8.8.8.8: bytes=32 time=33ms TTL=57
Reply from 8.8.8.8: bytes=32 time=35ms TTL=57
Reply from 8.8.8.8: bytes=32 time=33ms TTL=57
Reply from 8.8.8.8: bytes=32 time=33ms TTL=57
Reply from 8.8.8.8: bytes=32 time=33ms TTL=57
Reply from 8.8.8.8: bytes=32 time=32ms TTL=57
Reply from 8.8.8.8: bytes=32 time=32ms TTL=57
Reply from 8.8.8.8: bytes=32 time=32ms TTL=57

Ping statistics for 8.8.8.8:
    Packets: Sent = 10, Received = 10, Lost = 0 (0% loss),
Approximate round trip times in milli-seconds:
    Minimum = 32ms, Maximum = 36ms, Average = 33ms
Control-C
^C
C:\>
2) Ping -a Command
This command displays the computer name of the computer with the IP address you are pinging. Ping the Google DNS server as in the following output and observe that the computer/server name is google-public-dns-a.google.com.
C:\>ping -a 8.8.8.8

Pinging google-public-dns-a.google.com [8.8.8.8] with 32 bytes of data:
Reply from 8.8.8.8: bytes=32 time=33ms TTL=57
Reply from 8.8.8.8: bytes=32 time=32ms TTL=57
Reply from 8.8.8.8: bytes=32 time=35ms TTL=57
Reply from 8.8.8.8: bytes=32 time=34ms TTL=57

Ping statistics for 8.8.8.8:
    Packets: Sent = 4, Received = 4, Lost = 0 (0% loss),
Approximate round trip times in milli-seconds:
    Minimum = 32ms, Maximum = 35ms, Average = 33ms

C:\>
3) Ping -n Command
This command assigns a specified number of pings to an IP address and website. Its value is 4 by default. You can ping the number of times you specify by adding -n to the command.
Linux and macOS systems do not have ping counts. If you want to ping the specified number of times to an IP address or website on macOS and Linux, you must use the ping -n + number command.
If you’re wondering how to ping on Linux and macOS, watch our Linux Ping and macOS Ping Usage videos.
I tested the link to the Google DNS server 3 times using the ping -n command.
C:\>ping -n 3 8.8.8.8

Pinging 8.8.8.8 with 32 bytes of data:
Reply from 8.8.8.8: bytes=32 time=33ms TTL=57
Reply from 8.8.8.8: bytes=32 time=33ms TTL=57
Reply from 8.8.8.8: bytes=32 time=34ms TTL=57

Ping statistics for 8.8.8.8:
    Packets: Sent = 3, Received = 3, Lost = 0 (0% loss),
Approximate round trip times in milli-seconds:
    Minimum = 33ms, Maximum = 34ms, Average = 33ms

C:\>
4) Ping -l Command
When you usually ping a destination, the packet size sent is 32 Bytes. You can increase this value with the ping -l command. The ping packet size limit is 65,500 bytes.
C:\>ping -l 2345 8.8.8.8

Pinging 8.8.8.8 with 2345 bytes of data:
Reply from 8.8.8.8: bytes=2345 time=68ms TTL=57
Reply from 8.8.8.8: bytes=2345 time=65ms TTL=57
Reply from 8.8.8.8: bytes=2345 time=62ms TTL=57
Reply from 8.8.8.8: bytes=2345 time=62ms TTL=57

Ping statistics for 8.8.8.8:
    Packets: Sent = 4, Received = 4, Lost = 0 (0% loss),
Approximate round trip times in milli-seconds:
    Minimum = 62ms, Maximum = 68ms, Average = 64ms

C:\>
5) Ping -l flood Command
This command sends the packet size you specify without destroying the destination. In short, the Echo Request packet adds the Don’t Fragment Flag 1 bit to the IP header, which enables sending packets without fragmentation.
You can use this parameter to resolve problems with the Path Maximum Transmission Unit (PMTU). When the echo-request packet tries to pass through the routers, the packet does not fragment.
C:\>ping -l 1500 -f 8.8.8.8

Pinging 8.8.8.8 with 1500 bytes of data:
Packet needs to be fragmented but DF set.
Packet needs to be fragmented but DF set.
Packet needs to be fragmented but DF set.
Packet needs to be fragmented but DF set.

Ping statistics for 8.8.8.8:
    Packets: Sent = 4, Received = 0, Lost = 4 (100% loss),

C:\>ping -l 1234 -f 8.8.8.8

Pinging 8.8.8.8 with 1234 bytes of data:
Reply from 8.8.8.8: bytes=1234 time=48ms TTL=57
Reply from 8.8.8.8: bytes=1234 time=53ms TTL=57
Reply from 8.8.8.8: bytes=1234 time=49ms TTL=57
Reply from 8.8.8.8: bytes=1234 time=48ms TTL=57

Ping statistics for 8.8.8.8:
    Packets: Sent = 4, Received = 4, Lost = 0 (0% loss),
Approximate round trip times in milli-seconds:
    Minimum = 48ms, Maximum = 53ms, Average = 49ms

C:\>
6) Ping -i TTL Command
This command adds the TTL value to the packet sent to the destination. The default TTL value is 255 and may vary between devices. When you set the TTL value to lower than the previously received value, the packet will never reach the destination address. It will display the message TTL Expired in Transit.
C:\>ping www.google.com

Pinging www.google.com [172.217.17.196] with 32 bytes of data:
Reply from 172.217.17.196: bytes=32 time=44ms TTL=54
Reply from 172.217.17.196: bytes=32 time=38ms TTL=54
Reply from 172.217.17.196: bytes=32 time=40ms TTL=54
Reply from 172.217.17.196: bytes=32 time=44ms TTL=54

Ping statistics for 172.217.17.196:
    Packets: Sent = 4, Received = 4, Lost = 0 (0% loss),
Approximate round trip times in milli-seconds:
    Minimum = 38ms, Maximum = 44ms, Average = 41ms

C:\>ping -i 9 www.google.com

Pinging www.google.com [172.217.17.196] with 32 bytes of data:
Reply from 209.85.143.115: TTL expired in transit.
Reply from 209.85.143.115: TTL expired in transit.
Reply from 209.85.143.115: TTL expired in transit.
Reply from 209.85.143.115: TTL expired in transit.

Ping statistics for 172.217.17.196:
    Packets: Sent = 4, Received = 4, Lost = 0 (0% loss),

C:\>
7) Ping -v TOS Command
This command sets the Type of Service in the IP header of the Echo-Request packet to be sent to the destination. The Type of Service value is 0 by default and can change from 0 to 255.
8) Ping -r Command
This command records the paths for the “Echo Reply” package received for the “Echo Request” package. The minimum value is 1, and the maximum value is 9.
C:\>ping -r 2 vmware.com

Pinging vmware.com [45.60.11.183] with 32 bytes of data:
Reply from 45.60.11.183: bytes=32 time=165ms TTL=53
    Route: 85.101.110.75 ->
           85.101.104.1
Reply from 45.60.11.183: bytes=32 time=167ms TTL=53
    Route: 85.101.110.75 ->
           85.101.104.1
Reply from 45.60.11.183: bytes=32 time=168ms TTL=53
    Route: 85.101.110.75 ->
           85.101.104.1
Reply from 45.60.11.183: bytes=32 time=166ms TTL=53
    Route: 85.101.110.75 ->
           85.101.104.1

Ping statistics for 45.60.11.183:
    Packets: Sent = 4, Received = 4, Lost = 0 (0% loss),
Approximate round trip times in milli-seconds:
    Minimum = 165ms, Maximum = 168ms, Average = 166ms

C:\>
9) Ping -s Command
Changes the Timestamp value in the IP address header and specifies the Hop Count time value. Records time information for outgoing and incoming Echo packets. The default value for this parameter is 1, and the maximum value is 9.
C:\>ping -s 3 192.168.1.1

Pinging 192.168.1.1 with 32 bytes of data:
Reply from 192.168.1.1: bytes=32 time=2ms TTL=64
    Timestamp: 192.168.1.1 : 14619372 ->
               192.168.1.1 : 14619372 ->
               192.168.1.250 : 14621765
Reply from 192.168.1.1: bytes=32 time=2ms TTL=64
    Timestamp: 192.168.1.1 : 14620404 ->
               192.168.1.1 : 14620404 ->
               192.168.1.250 : 14622796
Reply from 192.168.1.1: bytes=32 time=2ms TTL=64
    Timestamp: 192.168.1.1 : 14621449 ->
               192.168.1.1 : 14621449 ->
               192.168.1.250 : 14623841
Reply from 192.168.1.1: bytes=32 time=1ms TTL=64
    Timestamp: 192.168.1.1 : 14622469 ->
               192.168.1.1 : 14622469 ->
               192.168.1.250 : 14624860

Ping statistics for 192.168.1.1:
    Packets: Sent = 4, Received = 4, Lost = 0 (0% loss),
Approximate round trip times in milli-seconds:
    Minimum = 1ms, Maximum = 2ms, Average = 1ms

C:\>
10) Ping -j Host-List Command
It uses Loose Source Routing to set the Routers that a package should visit. The sending packet configures the following Router address for its first destination.
The Host List configures the ping packet’s path, and the maximum number of IP addresses in the Host List is 9.
11) Ping -k Host-List Command
This command uses the Strict Source Route option in the IP header. The next Router or Interface for the Strict Source Route must be active. The maximum number of Host-List IP addresses is 9. That is, IP numbers are listed consecutively in a host list.
12) Ping -w Timeout Command
It specifies the wait time for Echo Reply for sending Echo Request packets. We evaluate the time zone in milliseconds, and the default value is 4,000ms (4 seconds).
When you ping -w 8000 192.168.2.1 on a computer outside your IP block, the Request Timed Out message will be displayed every 8 seconds.
C:\>ping -w 8000 192.168.2.1

Pinging 192.168.2.1 with 32 bytes of data:
Request timed out.
Request timed out.
Request timed out.
Request timed out.

Ping statistics for 192.168.2.1:
    Packets: Sent = 4, Received = 0, Lost = 4 (100% loss),

C:\>
13) Ping -r Command
This command is only used in the IPv6 structure and follows the outgoing/incoming paths.
14) Ping -S srcaddr Command
You use this command to specify the source address.
C:\>ping -S 192.168.1.250 vmware.com

Pinging vmware.com [45.60.11.183] from 192.168.1.250 with 32 bytes of data:
Reply from 45.60.11.183: bytes=32 time=146ms TTL=54
Reply from 45.60.11.183: bytes=32 time=146ms TTL=54
Reply from 45.60.11.183: bytes=32 time=145ms TTL=54
Reply from 45.60.11.183: bytes=32 time=148ms TTL=54

Ping statistics for 45.60.11.183:
    Packets: Sent = 4, Received = 4, Lost = 0 (0% loss),
Approximate round trip times in milli-seconds:
    Minimum = 145ms, Maximum = 148ms, Average = 146ms

C:\>
15) Ping -4 Command
This command forces IPv4 to ping.
16) Ping -6 Command
This command forces IPv6 to ping.
Ping Commands > Video
Ping Tool FAQ for Network Testing
What are ping options, and what do they do?
Which flag should I use to ping nonstop?
How do I set packet size in the ping command?
How do -n and -t differ?
How do I change the timeout in the ping command?
What does the -a flag do?
What does TTL mean in ping output?
How do I force IPv4 or IPv6 in the ping command?
What is flood ping, and why does it need care?
How should I read packet loss in ping output?
Conclusion
In conclusion, now you know how to use ping commands. Thus, it is incredibly effective in troubleshooting network connectivity issues faster.
For example, pinging an IP address or website is simple. However, pinging a certain number of times or changing the packet size requires experience. In short, you can easily find the problems by adjusting the TTL and other things.
Additionally, the ping commands are the same whether you are using Windows or another OS. There may be a slight difference in some systems. But I recommend that you take the time to learn.
Other network tools besides Ping will also come in handy. You can use Telnet to connect to remote devices. Legacy protocols still save the day on some systems. The steps to enable Telnet on Windows are quite simple. Getting to know these tools is essential when learning network management.
In some cases, you may need to connect to and step in on a far-away server. Based on my experience, setting up secure shell access is a real lifesaver in this situation. Trusting a far-away connection without a coded tunnel is a huge risk.

5 People Shared Their Experience
Is there interval that user can control / change
I mean interval time between previous and the next ping messages?
I mean I wish that every ping packet will be sent with interval of 3Sec from the previous ping packet
In Linux there option – i that is an interval time
In Win – does such exist ?
Hello there.
You want to ping every 3 seconds, right? I’ve never done this before, but I did some research and found the most appropriate program to do it.
You can do this with the Ping Tester program. I’ve even downloaded this program and it works smoothly and nicely.
Also, download the “PsPing” software from Microsoft and run the CMD in the PsPing folder. Then, use the “psping -i 3 destination” command.
Example: psping -i 3 google.com
Could you explain the usage of the -c parameter?
ping -c, please 🙂