
Network design is getting much more complex. Because of this, strong simulation tools are now essential. Network workers and hobby users need these tools. GNS3 is a special tool that is very powerful. This tool lets you create detailed virtual network layouts.
Connecting virtual machines with VMware is a perfect way. This lets you significantly improve your network area. You also build a real-world testing area. This means you can securely test different setups and rules.
In this guide, we will join VMware computers to GNS3 by showing each step in order. This will let you make smooth talking in your simulated networks. You will also make them work completely. If you are studying for certification exams or trying out ideas, this joining will improve your hands-on skills a lot.
Connecting Virtual Machines to Simulate Real Networks in GNS3
First, you must set up VMware on your computer. Workstation Pro is a strong virtual tool. It lets you run many computers on one real machine. So, this setup starts the process of joining virtual machines to GNS3.
When you set up VMware, you also set up another key tool: the Virtual Network Editor. This tool lets you easily control the network links for your virtual PCs.
With the Network Editor tool, you can make virtual adapters. We often call these adapters VMnets. You can also easily set them up to use your chosen IP range.
These VMnets act much like virtual switches in GNS3. Also, they help your virtual devices talk to each other very well.
These VMnets let you accurately copy network cards. You also get the freedom to plan detailed network layouts. These plans are for practice and learning needs.
This way, you smoothly join your virtual PCs to your GNS3 program. Because of this, you get the power to simulate real-life network scenarios.
How to Add a VMware Virtual Machine to GNS3
Now we will add two virtual computers to our network topology. These machines run on VMware. To do this, follow the steps below to make the needed link to your Router.
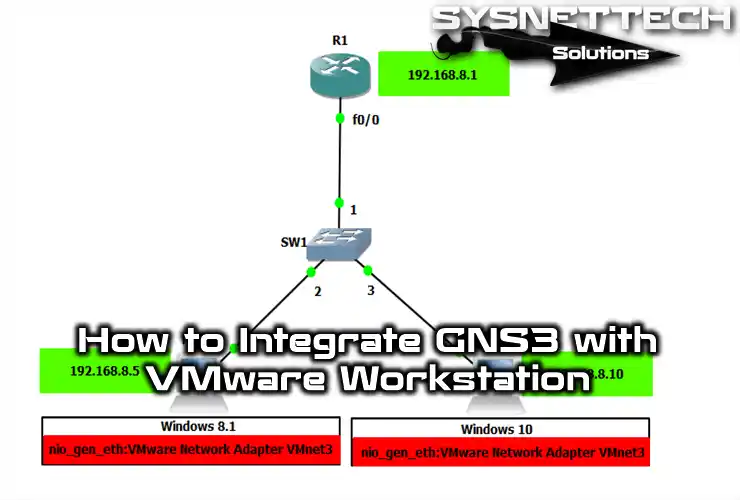
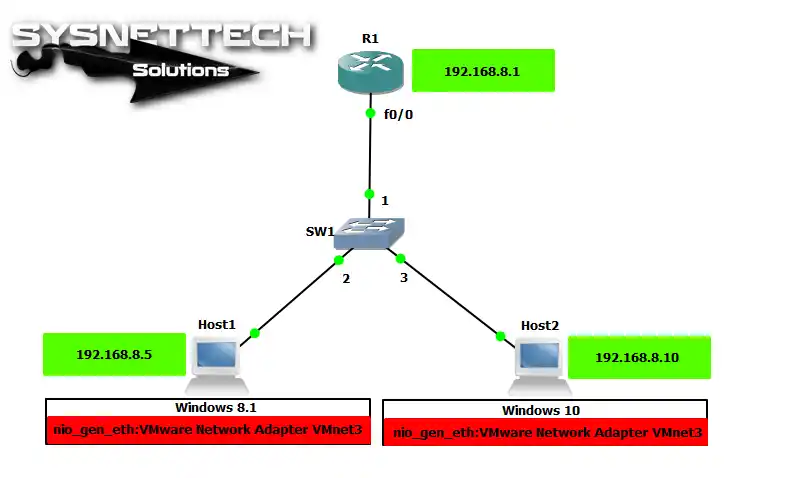
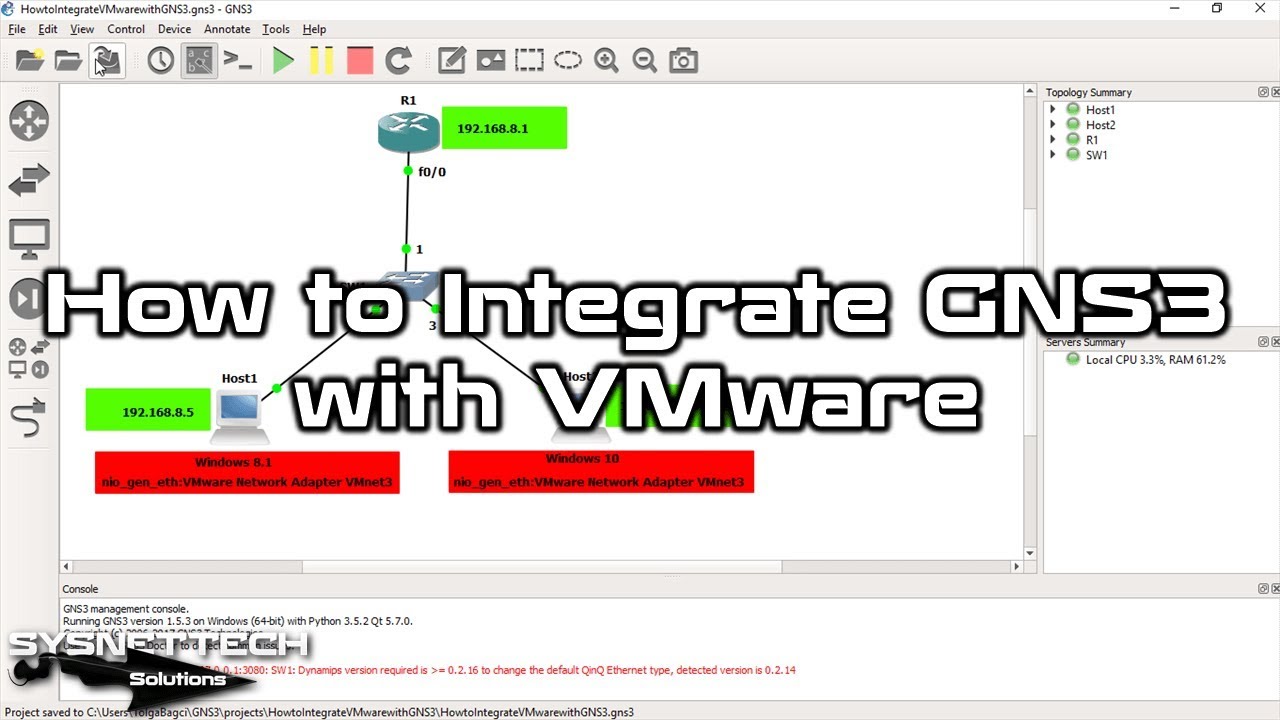
First, open the GNS3 program, and then make a network plan like the one in the picture. Be sure you have put in all the needed parts.
Drag and drop one Router & Switch as shown in the image. Then, add two Cloud PCs to the Switch.
Next, carefully make their links and settings. It is key to replicate the wanted network action correctly. Because of this, add exact IP address plans.
1. Configure VMnet Settings Based on Topology
Step 1
After making the layout in GNS3, open the Virtual Network Editor. Then, make a new VMnet. Next, set up this VMnet by choosing the IP address group as 192.168.8.0/24.
There is a key step for joining GNS3 with VMware. Because of this, you must set VMnets as Host-Only.

Step 2
The VMnet you created will be on your host computer. More specifically, you will see it in the Network and Sharing Center. Next, configure the TCP/IP settings for the VMware Network Adapter VMnet.

Step 3
When you open the settings for your VMnet adapter, select the TCP/IPv4 option. Then, press the Properties button for the IP setup.

Step 4
You need to enter an IP address in the TCP/IPv4 Properties window. Select this address from the block you defined for VMnet.

Step 5
To apply the changes you have made, press Alt + F4 on your keyboard. From the window that appears, select to restart your PC quickly.

2. Assign the Virtual PC’s Adapter to VMnet
Step 1
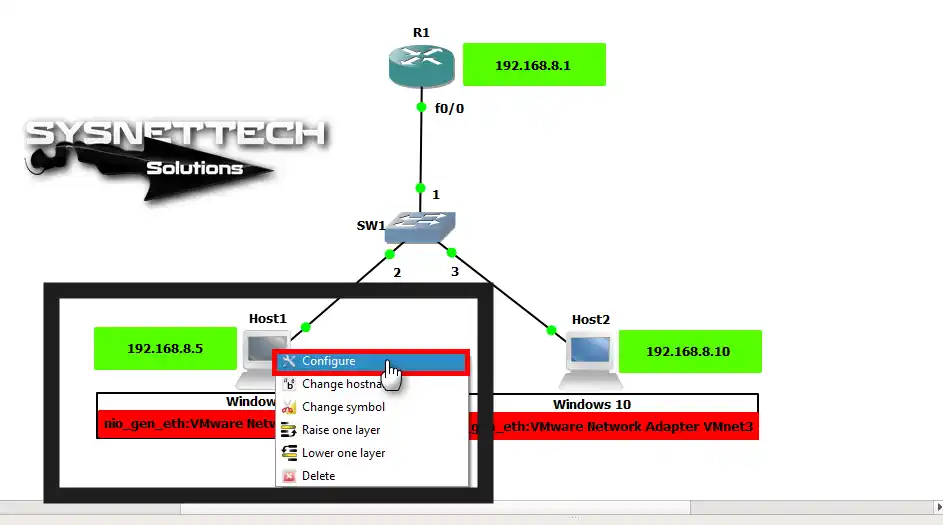
After restarting your computer, open GNS3 again. Then, start your VMware virtual machines. Next, right-click on Host1 in your network layout. Here, press the Configure choice to continue.
Step 2
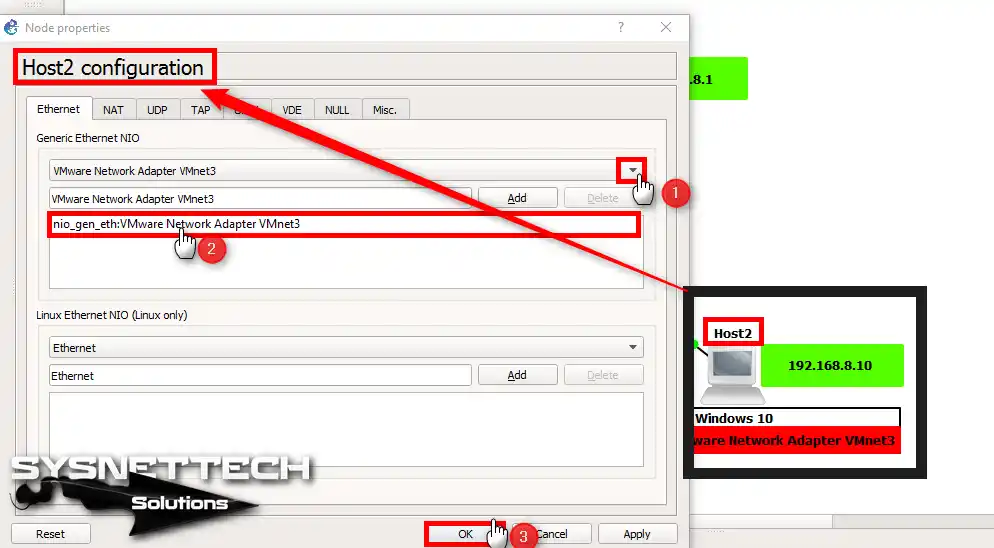
In the Host1 Settings window, go to the Ethernet tab. Here, choose the VMnet3 pick from the Generic Ethernet NIO options.

Step 3
Set up Host2 the same way. In detail, set up its adapter as VMnet3.
3. Configure VMware VMs as VMnet
Step 1
Before running your VMs, you need to make one more setting. First, I set the network adapter setting of the Windows 8 VM in our topology to Host-Only.
More specifically, I select VMnet3, just as I did in the first steps.
Go to the Custom (Specific Virtual Network) pick for your virtual PC. Select VMnet (Host-Only) and save your settings.

Step 2
Do the same things again for the Windows 10 virtual machine. That is, configure it as VMnet3 as well.

4. Assign IP Addresses to VMs Based on the VMnet IP Block
Step 1
You already typed an IP range in the VMware Network Editor settings. For VMnet3, this range is 192.168.8.0/24. Therefore, run the Windows 8.1 machine. Then, you must change its IP address. Set the new IP number to 192.168.8.5 according to the topology.

Step 2
Now switch to the Windows 10 machine. Set its IP address to 192.168.8.10.
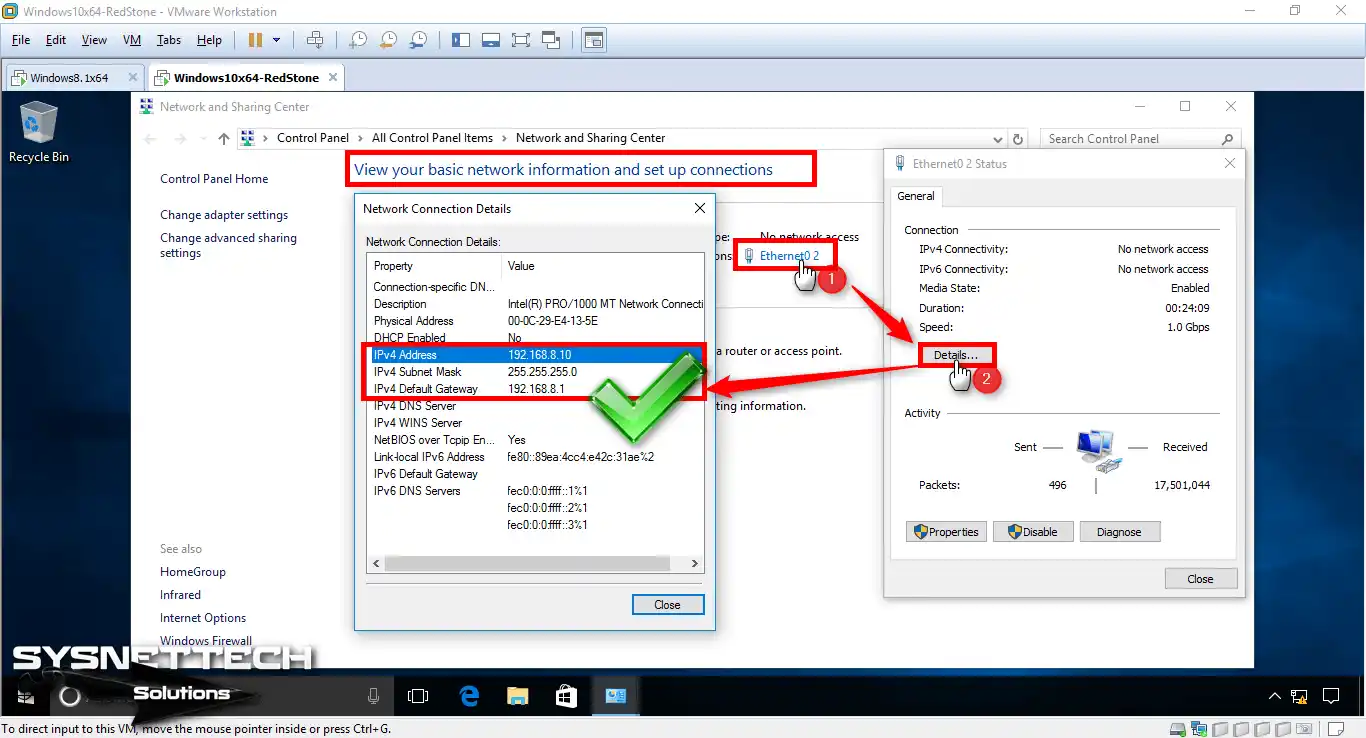
5. Verify the GNS3 Connection by Assigning IP Addresses from PCs
Step 1
Start a ping test from the Windows 8.1 machine. Use the IP address of the Windows 10 machine as the target. You can use this test to check the network connection.

Step 2
In the same way, do the test the other direction. This time, send a ping from Windows 10. Enter the IP address of the Windows 8.1 machine as the destination. This will allow you to verify the GNS3 to VMware VM connection fully.

6. Configure the Fa0/0 Port on GNS3 Router R1
It’s time to configure the Cisco Router’s interface. When you run the commands below, you will give an IP address to the FastEthernet0/0 port. But the address you give must be exactly as written in your layout, meaning 192.168.8.1.
R1# conf t
R1(config)# interface fastethernet0/0
R1(config-if)# ip address 192.168.8.1 255.255.255.0
R1(config-if)# no shutdown
R1(config)# end

7. Configure SW1 Settings
Step 1
Virtual machines can talk smoothly to each other. But sometimes an issue might happen. For example, you might not ping the Router from the VMs. If this action fails, the cause could be the Switch. In this case, you must set up the Switch you added to GNS3.
First, double-click on SW1. This will open its settings. Then, locate the settings for Port 2 and Port 3. Here, change the EtherType values as shown in the image.

Step 2
Now ping the Cisco Router R1 from the guest machines. So, you will do the process without any issues, as the picture below shows.

Step 3
Now ping from the Windows 10 VM as well, but the target should still be the Cisco Router.
As a result, as you can see, both virtual PCs can ping the Router without any issues.

8. Enable Telnet on R1 & Connect from VMs
Step 1
Now it’s time to enable telnet on the Router. We will then test connecting from the guest VMs.
R1# conf t
R1(config)# line vty 0 4
R1(config-line)# login local
R1(config-line)# exit
R1(config)# username cisco privilege 15 password cisco123
R1(config)# end

Step 2
You want to establish a telnet connection to the Router via Windows. First, you must enable the Telnet Client. This is a Windows service. Then, type the command “telnet 192.168.8.1” in the command prompt and press Enter.

Step 3
You established a telnet connection from the Windows 8.1 VM. In fact, you did this to access the Cisco Router. As you can see, you successfully accessed R1 from the VM.

Step 4
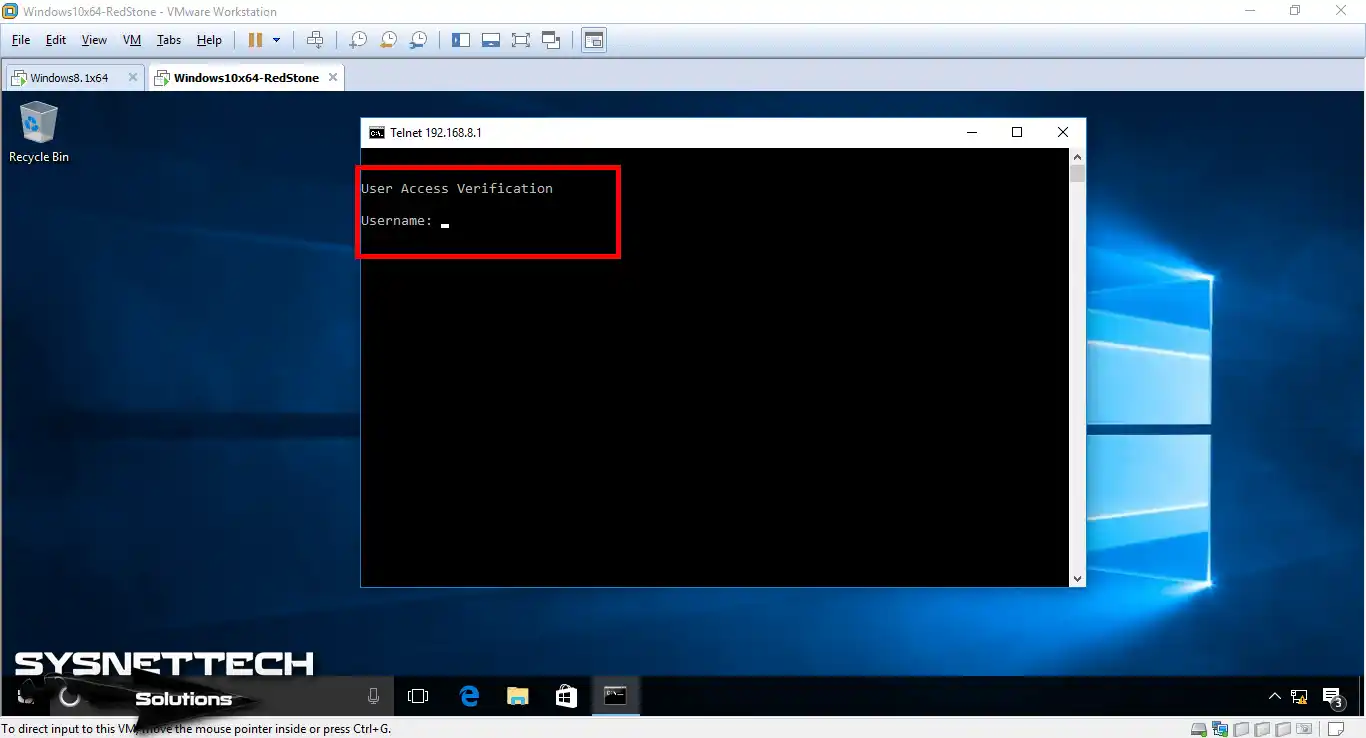
Now we will also connect from the Windows 10 VM. To do this, type “telnet 192.168.8.1” in CMD again and apply.

Step 5
As soon as you press Enter, you will connect to the Router. Here, enter your username and password. You made this information yourself. As a result, you can now start managing the Router from your VM.
Step 6
You have linked to the Router through telnet. You can check this from the picture below. As you can see, you have made the link successfully!

Step 7
Let’s execute a command on the Router console. Specifically, let’s type the “show line” command. This will allow us to check the sessions we have established with the existing R1.

How to Use Virtual Machines on GNS3 ⇒ Video
We have a video on how to use guest machines in the simulator best. I suggest watching the teaching video I have given below. This video will lead you step-by-step through integrating GNS3 with VMware. This way, you will get the most from your simulator time.
Also, join our YouTube channel to keep getting the newest guides. You will also get helpful tips and tools. In short, your help is critical to us because we keep making good videos for our group!
Frequently Asked Questions (FAQ) About GNS3 & VMware
- Why should I integrate GNS3 with VMware Workstation?
- What is required for integration?
- Can I run virtual machines in GNS3?
- How can I troubleshoot issues with my GNS3 VM connection?
Conclusion
In closing, VMware and GNS3 together let you build advanced virtual network setups. These help you copy real-world designs perfectly.
By doing what I told you, you can safely link your virtual machines to your setup. You can also easily use complex networking ideas in a safe space.
This practice method mainly grows your real-world skills. It also gives you the practice needed to pass your tests. Plus, it lets you try out new networking ideas.
It is essential to learn these tools for planning your network designs. For example, this knowledge lets experts keep up with new technology.
It also helps hobbyists fix complex problems. In short, you can use the strength of copying. This lets you grow your network planning understanding one more step now.
You have now connected GNS3 and VMware. This allows you to start building your network topologies for your Cisco exams. However, you need to add an IOS Router to your emulator software. After that, transfer your own IOS image to GNS3. This way, you can bring your simulated lab to life by configuring your virtual Router.

Be the first to share your comment