
In this article, we will examine how to set up PlayOnMac software to run Windows-compatible applications or games on an Apple Mac computer using the macOS Monterey operating system.
How to Use PlayOnMac to Run Windows-Compatible Apps or Games on Mac/macOS
Microsoft Windows is by far the most preferred operating system for gamers. Gamers using Linux and macOS systems have fewer game catalogs. Generally, playing big and up-to-date games is more efficient on Windows systems, but this may not be the case for gamers with a Mac computer.
Another way to play big and up-to-date games more efficiently on macOS systems or to use Windows-compatible programs is to install Windows 10 or Windows 11 next to your existing system with Boot Camp software. You can also use VMware Fusion software instead of Boot Camp and create solutions by installing Windows on a virtual machine.
You cannot typically run a Windows program (.exe) on Mac computers because the file extension of the programs that will usually be installed on macOS operating systems is .dmg. Therefore, if you want to find a solution quickly other than the methods we mentioned, you can use PlayOnMac.
PlayOnMac is a free program from Apple that lets you run Windows-compatible programs on iMac or MacBook computers. If you intend to use paid software, you can choose the Wine-based CrossOver software.
How to Download and Install PlayOnMac
After you run PlayOnMac on your Mac computer, you can install and run any Windows-compatible program you want by selecting supported software from the program’s interface and using the manual installation method.
You can find the list of office, multimedia, game, Internet, or development programs supported by PlayOnMac software here.
Step 1
To download the PlayOnMac software to your macOS system, click this link and visit the official website. After viewing the website, click the Download button in the upper right corner.

Step 2
If you are using macOS 10.15 or macOS 11+, click the download button at the top and confirm the download in the warning window that opens.

Step 3
After downloading the PlayOnMac_4.4.3.dmg file to your computer, click Downloads on the Dock and run the dmg file.

Step 4
Drag and drop PlayOnMac software to Applications.

Step 5
Wait while PlayOnMac is copying to Applications.

Step 6
After the copying process is completed, open the PlayOnMac program.

Step 7
Since you downloaded PlayOnMac from the Internet, a warning window will appear on your MacOS system. Click the Open button as you have downloaded the application from a secure source. Then, you can approve sending information such as your computer’s graphics card model and OS version to contribute to the development of the program.

Step 8
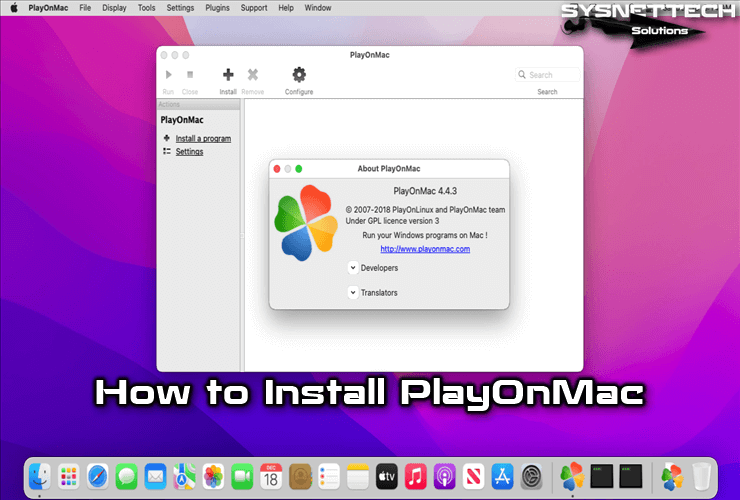
After installing PlayOnMac on your Mac, you can check the version of the program from the About section.

How to Install a Windows Program with an Exe Extension
After installing PlayOnMac, you can now install a Windows program with the exe file extension on your Mac.
Step 1
After running the program, click Install a program from the Actions panel.

Step 2
Click the Install a non-listed program option on the program installation screen, which includes various categories. Also, using this interface, you can find and install the programs supported by the program from the search section.

Step 3
Click Next in the information window informing you that you should leave the installation directory as default before starting the program installation.

Step 4
Click Next in the information window informing you that PlayOnMac is not related to WineHQ, and you should not submit any bug reports.

Step 5
Continue by clicking Next in the Manual Installation window.

Step 6
If you have installed a program before, you need to continue by selecting Edit or Update an existing application to make changes to the existing application. If you are installing a program for the first time, select Install a program in a new virtual drive and click Next.

Step 7
Type a name without spaces for the virtual drive of the program you will install and click Next.

Step 8
If there is a setting you want to configure or components you want to install before installation, you can do it from the options listed in this window. Click Next again to continue installing the Windows program, as you do not need to make any changes.

Step 9
Select the type of virtual drive you want to create according to the architecture of the program you will install and continue.

Step 10
Wait while the virtual drive with 32-bit architecture is being created.

Step 11
For example, to install Notepad++, download the program from this page to your computer. Then, click the Browse button to select the setup file of the Notepad++ application.

Step 12
Select the setup file of the Notepad program you downloaded to the Downloads location and click Open.

Step 13
After selecting the setup file, click Next to start the program installation.

Step 14
When the Notepad++ setup wizard opens, select the language to be installed and click OK.

Step 15
Continue by clicking Next in the Notepad++ v8 setup wizard.

Step 16
After reading the license agreement of the Notepad program, click the I Agree button.

Step 17
Leave the installation location as default and click Next.

Step 18
If there are any settings you want to change in the Select Components window, correct them and continue.

Step 19
After making the necessary settings, click the Install button to start the installation.

Step 20
After installing Notepad++, run it.

Step 21
After checking that the Notepad++ software is running smoothly on your macOS computer, select “?” from the tool menu. You can check the version of the program.

Step 22
After closing the note-taking software, click Cancel to load the command line developer tools later.

Step 23
To make a shortcut, select a file for PlayOnMac from the listed files and click Next.

Step 24
Type the name of the program for the shortcut and click Next.

Step 25
A new shortcut has been created for the Notepad software, but it may not work on current versions of macOS. If you try to open the program using the shortcut you created, it will not work.

Step 26
Click Run to open the program you installed on PlayOnMac.

Step 27
After checking that Notepad++ is running smoothly on your Mac, close it.

How to Create a Manual Shortcut
PlayOnMac works fine on most macOS versions, but it may cause shortcut errors in some versions. Therefore, if the shortcuts you have created are not working, you may need to make a manual shortcut.
Step 1
Right-click on the program you installed in the PlayOnMac interface, and then click Open the application’s directory.

Step 2
Right-click on Notepad++.exe and click Make Alias to create a manual shortcut.

Step 3
After creating the shortcut, drag and drop it on the desktop and try to open the program again.

How to Install XQuartz
You need to install the XQuartz application required to run a Windows application on your Mac.
Step 1
After double-clicking on the shortcut you created manually, you will see that XQuartz must be installed while the Notepad application is trying to open. You have to do this manually, as XQuartz is not downloaded automatically in this window.

Step 2
To download XQuartz for macOS, visit the official website from this link, click the XQuartz-2.8.1.dmg file in the Download section of the homepage, and start the download process.

Step 3
After downloading the XQuartz.dmg file, please open it and double-click the XQuartz.pkg file again in the opened folder. Allow the program to run in the warning window you encounter while starting the installation.

Step 4
Click Continue to proceed with the installation steps.

Step 5
After checking that the software to be installed in the Readme window is the X11 windowing system, click Continue again.

Step 6
After accepting the license agreement of XQuartz software, click Continue and then Agree.

Step 7
Click the Install button to continue installing on the macOS disk.

Step 8
To confirm the installation, type your macOS user password and click Install Software.

Step 9
After installing XQuartz, click Log Out and then confirm the deletion of the dmg file.

Step 10
Click the notepad.exe alias on your macOS desktop and open the program.

Step 11
With the Notepad shortcut, you can now run the program without any problems.

How to Uninstall a Windows Program
With PlayOnMac, you can easily remove an app you installed from your Mac.
Step 1
Select the program you installed from the software list and click the Remove button.

Step 2
When PlayOnMac Uninstaller opens, click Next to remove the program you selected from your system.

Step 3
Click Yes to delete the Notepad virtual drive.

Step 4
After Notepad++ has been successfully removed from your system, click Next.

Step 5
You can see that the Notepad application is no longer available in the PlayOnMac interface.

Video

2 People Shared Their Experience
Hello,
Thanks very much for the detailed instructions on installing PlayOnMac. I am encountering an error message when I attempt to install the program in my applications folder. About halfway through the installation, I get an error message: The operation can’t be completed because you don’t have permission to access “PlayOnMac”.
I am running the installation as an administrator and I have ensured that the security settings are set to permit downloads from anywhere. Please provide some assistance. Thanks!
Add the application under Security & Privacy / Accessibility and try again. If this does not solve your problem, execute “sudo spctl –master-disable” command in the terminal and then right-click / Get info on the PlayOnMac application and try to change permissions to Read&Write at the bottom.
If these methods solve your problem, I would appreciate it if you could give feedback.