
Companies are using servers more and more to send data safely between their nearby and faraway computer networks. But, sometimes, it might not be very safe. Bad people can get in through a not-secure remote desktop port.
That’s why tools to access computers from far away are very important for everyday work. SecureCRT helps people connect using different methods like SSH, Telnet, and rlogin.
This is a great tool that makes sure connections to faraway devices and servers are safe. In this article, we will look at the steps to install SecureCRT on an Apple Mac, like a macOS system. We’ll also guide you on how to connect remotely to a device or server on a network.
How to Setup SecureCRT on Mac
Suppose you want to connect to devices like a Router, Switch, or Server on a LAN or WAN network from far away. In this case, SecureCRT can help make it safe. So, this unique tool lets you do secure things on the network using the SSH2 way.
You may be preparing for Cisco exams with GNS3 on your Mac computer. If so, we recommend using SecureCRT to configure the Cisco Switch or Router. You can also use it remotely to manage an ADSL modem in your home remotely.
To install SecureCRT on your PC with macOS High Sierra, Mojave, Monterey, or Sonoma, do these steps:
Steps:
Step 1
Before proceeding with the installation steps, visit the VanDyke website and download SecureCRT.

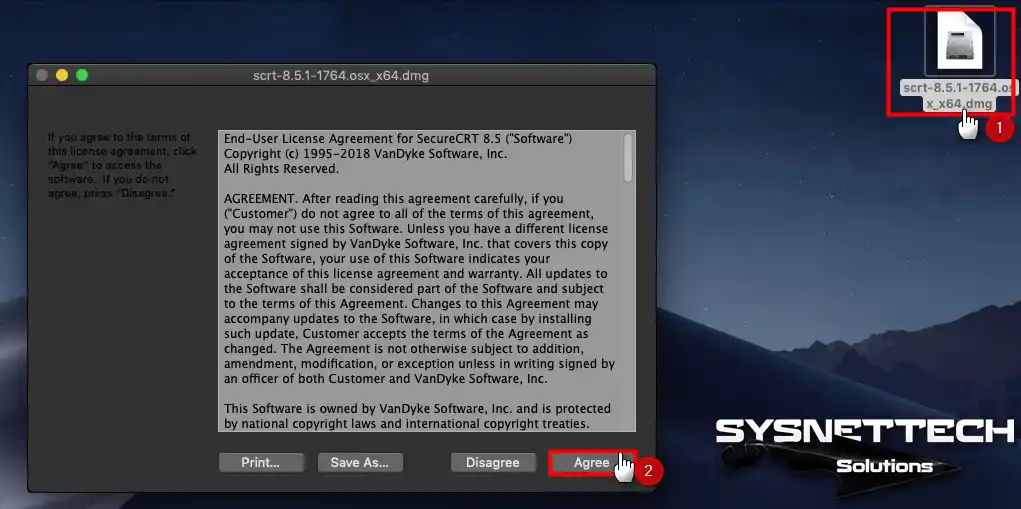
Step 2
After downloading the program, double-click on the .dmg file to start the installation.
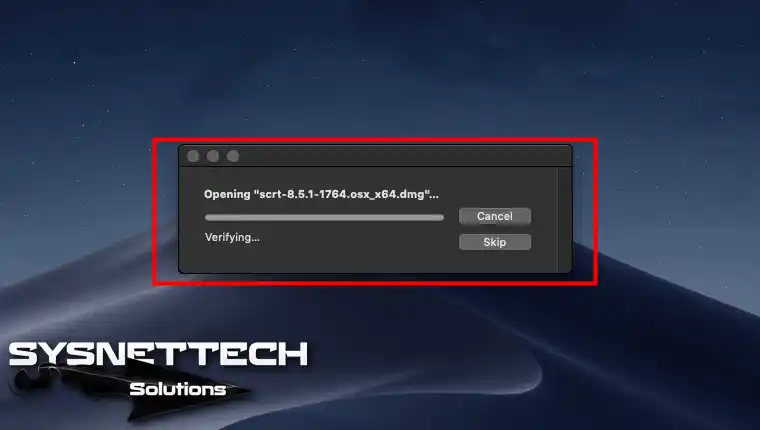
Step 3
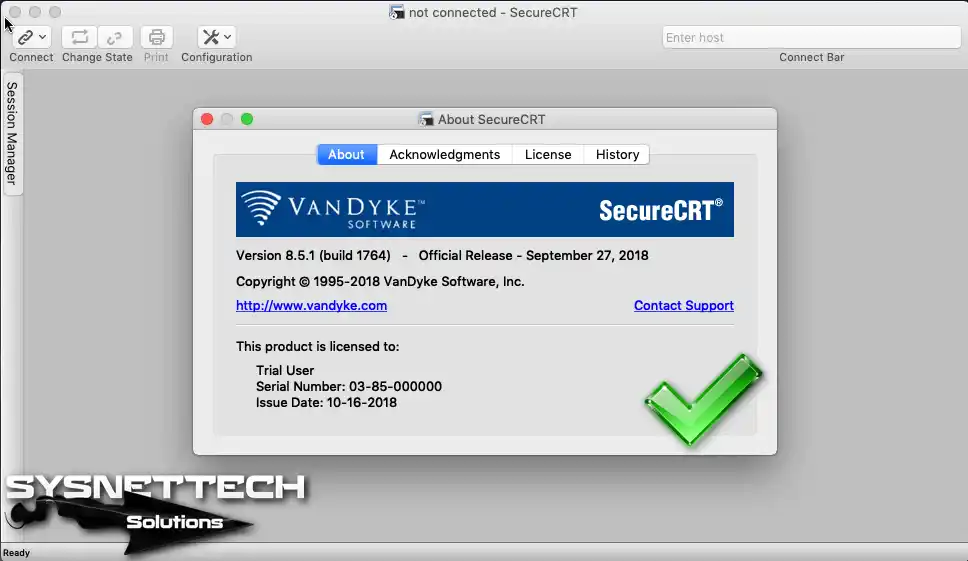
Wait while SecureCRT 8.5.1 opens.
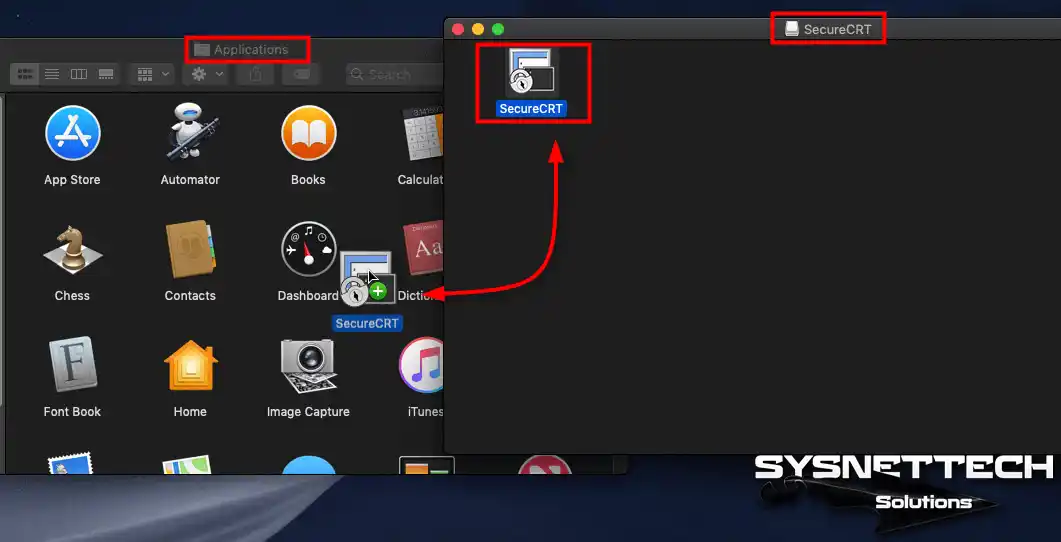
Step 4
Drag and drop the program into Applications on your Mac.
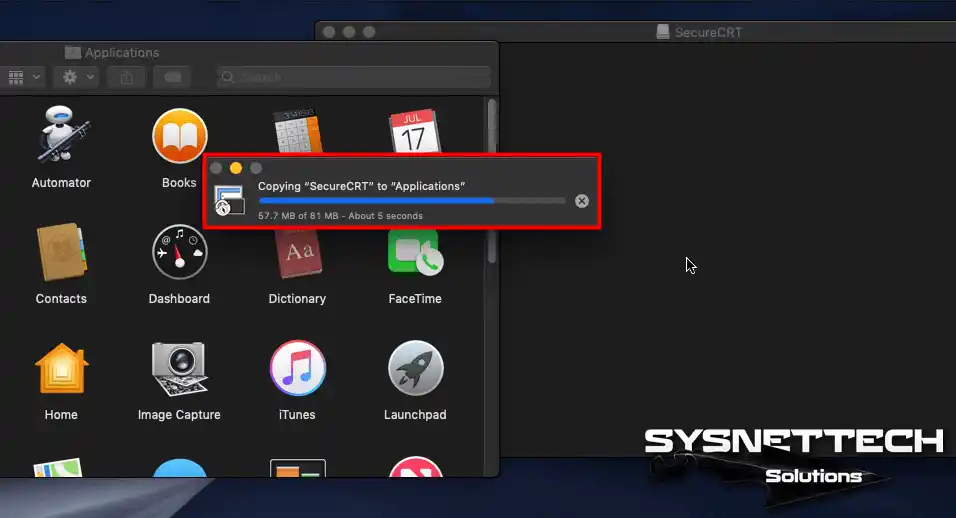
Step 5
Wait while the terminal program copies to Applications.
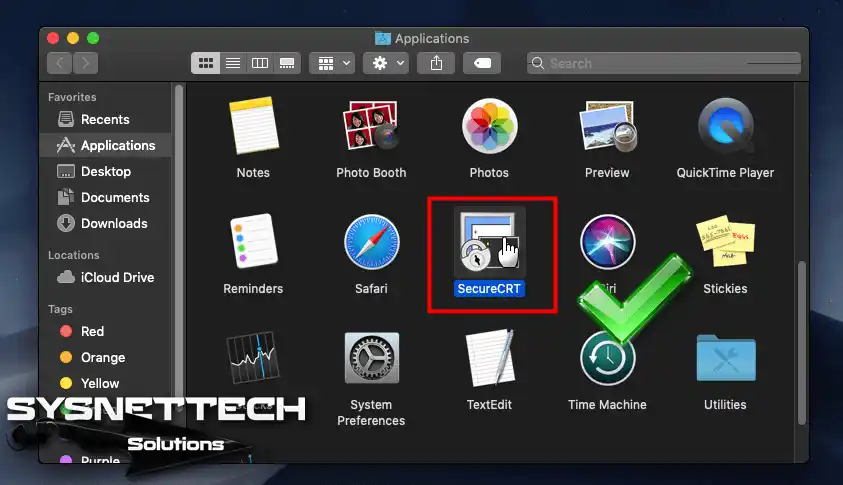
Step 6
After copying SecureCRT into Applications, double-click it to run it.
Step 7
To use SecureCRT for 30 days free of charge, click the I Agree button.

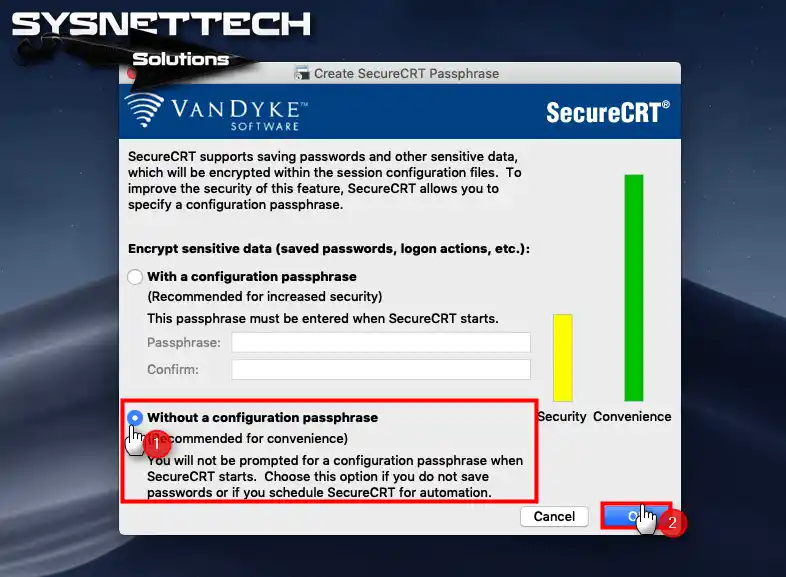
Step 8
Select “With a configuration passphrase” to make the configurations on the program more secure. If nobody else is using your Mac, select “Without a configuration passphrase” and click OK.
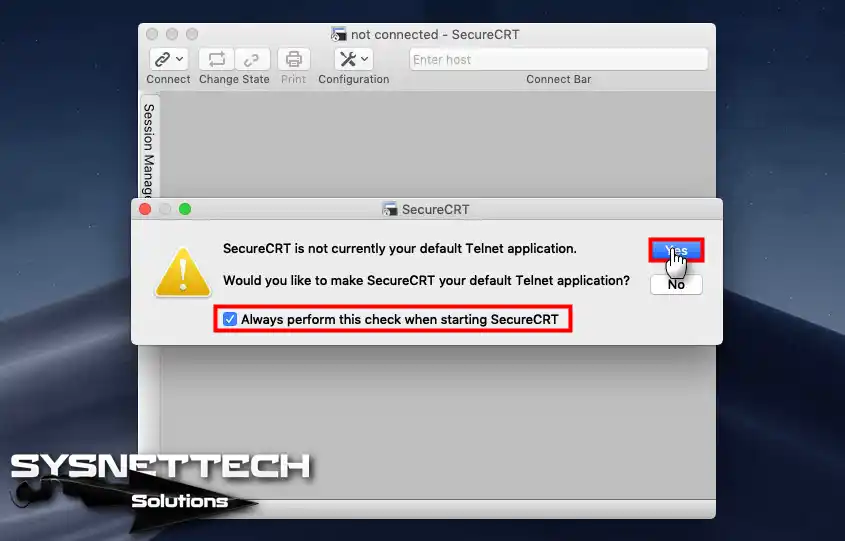
Step 9
Click Yes to make the default Telnet application.
Step 10
Close the Quick Connect window.
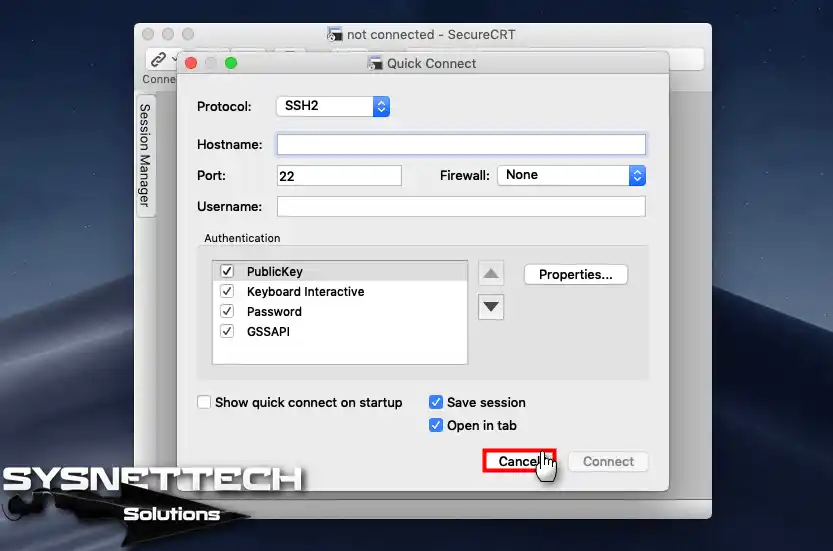
Step 11
After successful installation, proceed to the next step, which is to make a Telnet connection to the ADSL Modem / Router.
How to Use SecureCRT on a Mac PC
The terminal program on Mac is simple and easy to use. For example, you can use the Telnet protocol to make a remote connection to the ADSL Modem / Router on your local network.
Follow the steps below to configure a Telnet connection using SecureCRT.
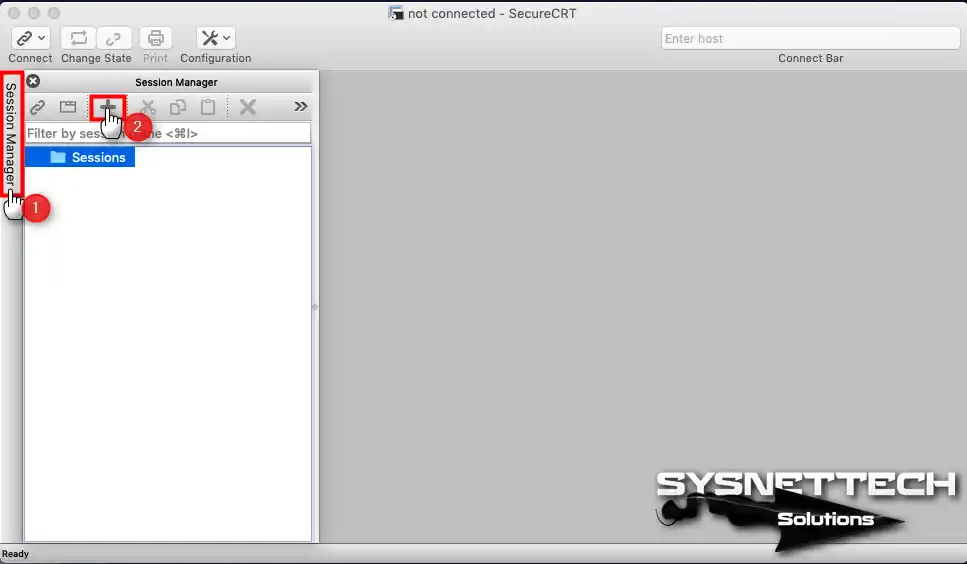
Step 1
Click Session Manager on the program and then click the “+” symbol to create a new session.
Step 2
In the New Session Wizard window, select the Telnet protocol and click Continue.
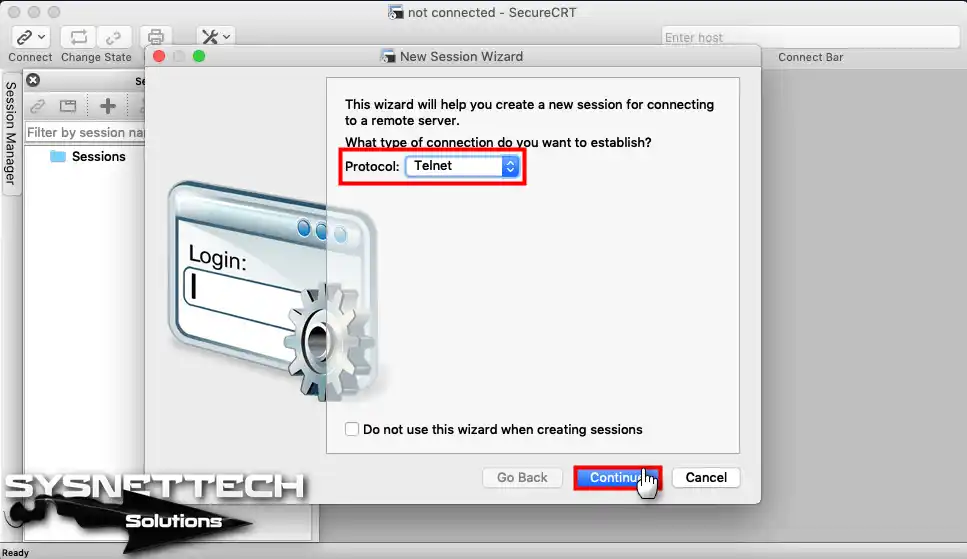
Step 3
Type the IP address and port number of your ADSL Modem and click Continue.

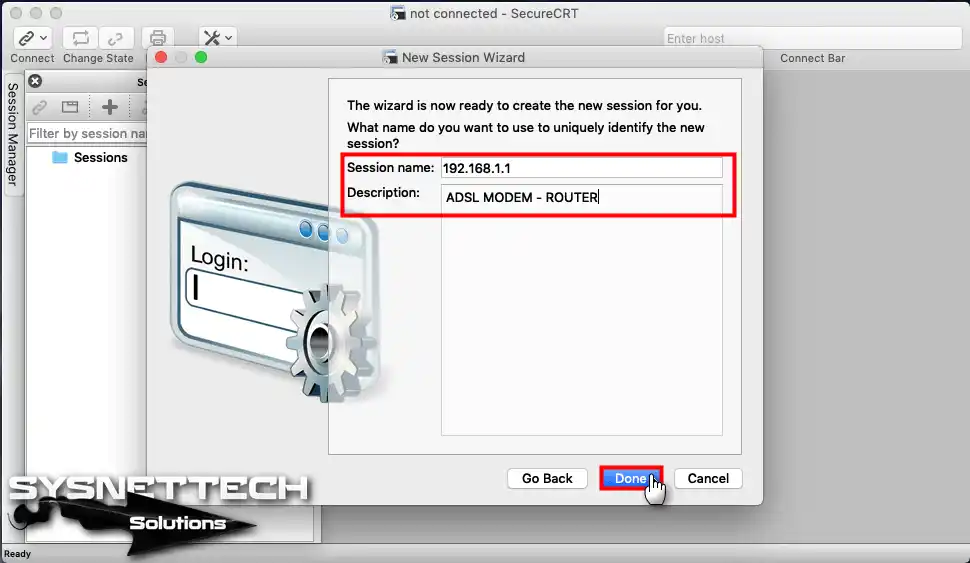
Step 4
After the new session has entered a name and description, click the Done button.
Step 5
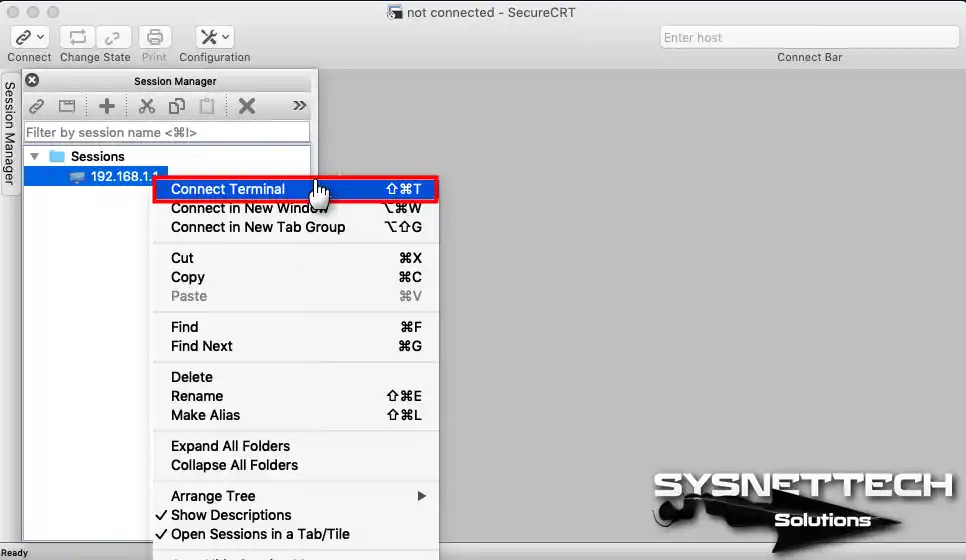
Right-click on the newly created session and click Connect Terminal.
Step 6
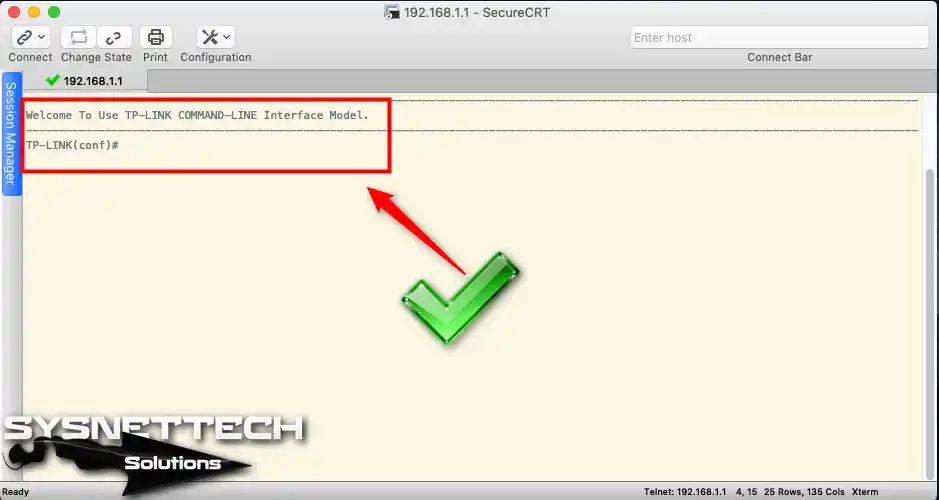
You have provided a remote connection to the ADSL Modem using SecureCRT!
Video
FAQ About SecureCRT on Mac
How many days can I use the SecureCRT trial on my Mac and what happens after?
Will I have compatibility problems on the newest macOS Sonoma or Monterey versions?
During installation, a ‘Configuration Passphrase’ question appears. What should I type?
The article shows a Telnet connection, but isn’t Telnet unsafe? Why not SSH?
What is the difference between this software and macOS’s own Terminal app? Why should I bother installing it?
I get a ‘Connection Refused’ error when trying to connect. Where should I look first?
Conclusion
After all, thanks to SecureCRT, you can get secure remote access to various types of servers and devices. Using this software on any macOS system on your Mac PC is a reliable and straightforward process. Once you have done all the steps, you need to connect to the remote device you want to access.
First, type in your device’s IP address, communication protocol, and login details. Afterward, start a safe, faraway connection. After you’ve added all the info, you can begin the connection. In short, this lets you start using the command line of the remote device.

Be the first to share your comment