

Windows remains the world’s most common desktop platform. However, Microsoft ships different builds for the European Union and Korean markets. These builds lack some system components. As a result, the Camtasia Studio installation fails in unexpected ways.
In my experience, Windows N and KN builds share the same core as standard builds. Yet Microsoft strips media libraries and multimedia codec components from the OS. So, when you install the video editor, the wizard stops the setup halfway.
In this guide, we walk through the setup process on Windows 10 and 11 N/KN builds step by step. I also explain how system components work at the OS level in plain terms. In addition, I share the error codes you may encounter and their permanent fixes.
First, let me make this clear: N and KN builds are not cut-down versions of standard builds. Microsoft only removed media playback technology. So, once you install the missing pack, the OS gains full functionality.
In business settings, this task becomes even more critical. After all, manual setup on hundreds of clients is not a realistic option. So, I also cover bulk rollout methods with tools such as PowerShell, DISM, and SCCM.
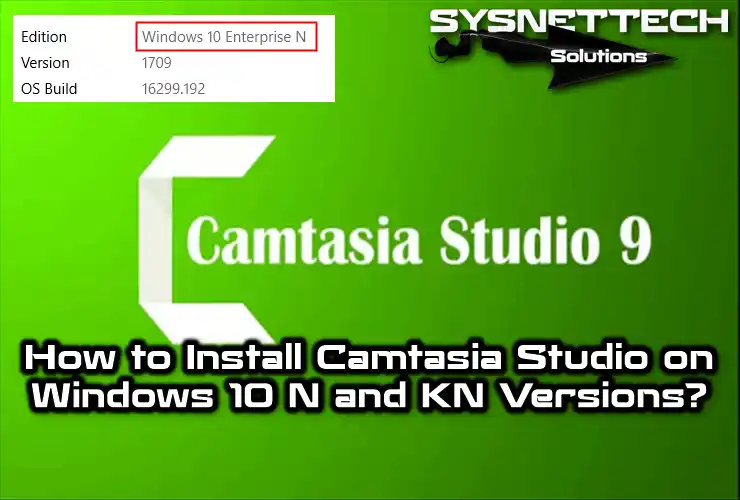
Why Is Camtasia Studio Installation Different on Windows N/KN Builds?
Camtasia Studio offers a complete solution for screen capture and video editing. The company TechSmith developed this tool. With it, users create training videos, slide decks, and software demos.
However, on Windows N and KN builds, OS components are missing. So, you cannot complete this task without issues.
Microsoft released N and KN builds due to European Union rulings. In addition, Korea Fair Trade Commission (KFTC) rules also drove this move.
The European Commission fined Microsoft 497 million euros in 2004 because Microsoft tied Windows Media Player into the OS and blocked fair competition.
These rules aim to boost fair competition in the media player market. Yet they add extra steps for professionals who use video editing software. Here is where the missing Media Feature Pack comes in.
What Are Windows N and KN Builds? (EU Antitrust and KFTC Rulings)
Microsoft makes Windows N builds specifically for European Union states. KN builds, on the other hand, target the Korean market.
In these builds, Microsoft does not ship Windows Media Player or Media Foundation. It also leaves out other media components by default. Therefore, these builds do not offer the same functionality as standard builds.
Antitrust rules barred Microsoft from tying the media player into the Windows core. This choice gives buyers and manufacturers the freedom to choose other media players. So, on N and KN builds, you must add media libraries yourself.
Also, KN builds resulted from similar rulings by the Korea Fair Trade Commission. Both builds lack the same system components. So, the fix steps are the same.
In my experience, check the build number when you verify your Windows build, since each Windows build carries a different build number. For example, Windows 10 22H2 uses build number 19045.
Why Is the Media Feature Pack Needed?
The Media Feature Pack is an official package. It contains the media components missing from Windows N and KN builds.
This pack adds the Media Foundation API and Windows Media Format technology to your system. In addition, it brings various multimedia codec components directly into your OS.
According to TechSmith’s own help page, this pack is required for Camtasia Editor to run on Windows N.
Without this pack, the Camtasia Studio installation fails. In particular, because system files such as wmvcore.dll and mfplat.dll are missing, the app will not open. The pack enables key functions such as video codec, sound capture, and MP4 export.
In my experience, users make this mistake most often: they start the Camtasia setup immediately, with no pack in place. As a result, the system stops the setup wizard halfway. So, add the pack first, then install the video editor.
Camtasia Studio Installation on Windows 10 & 11 N/KN Builds
To set up on N and KN builds, you first must install the missing pack. In this section, I also cover post-setup check steps.
Windows 10 N Media Feature Pack Setup Step by Step (Through Settings)
To add this pack on an N build, follow these steps:
- Open the Start menu and go to Settings.
- Follow the path Apps > Apps & features.
- Click the Optional features link.
- Press the Add a feature button.
- Find Media Feature Pack in the list and click Install.
- Once setup ends, restart your PC.
These steps work for Windows 10 build 1903 and later. On older builds, you may need to download the KB4039813 update from Microsoft’s own download page. A restart after setup is required; otherwise, the system components do not activate.
Step-by-Step Camtasia Studio 9 Setup (Visual Guide)
You want to set up Camtasia Studio 9 on a Windows 10 Enterprise N OS. First, you must download the Feature Pack on your PC. Then you can install this video capture app by following the steps below.
Step 1
First, run the setup file for the video capture app as an administrator.
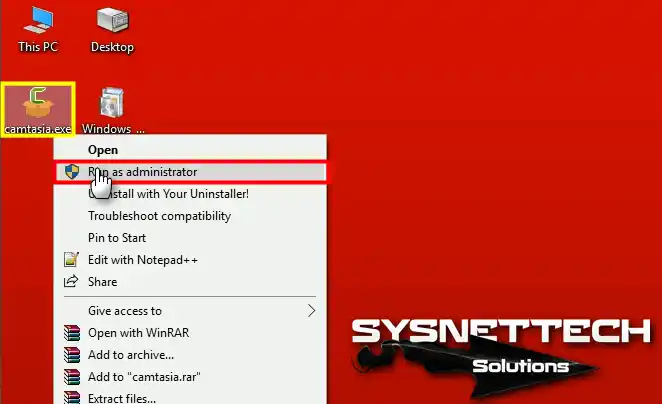
Step 2
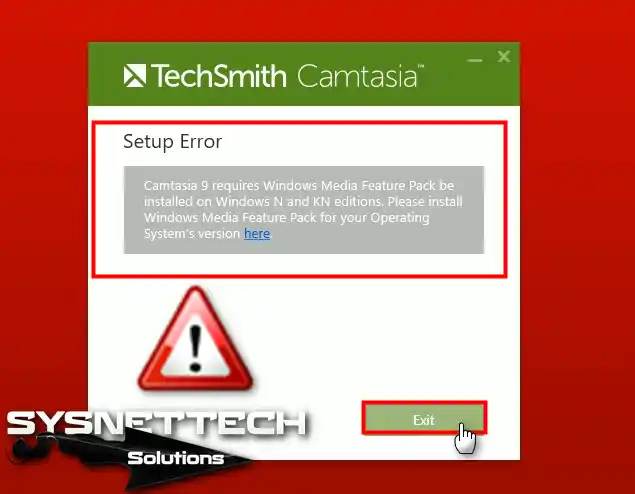
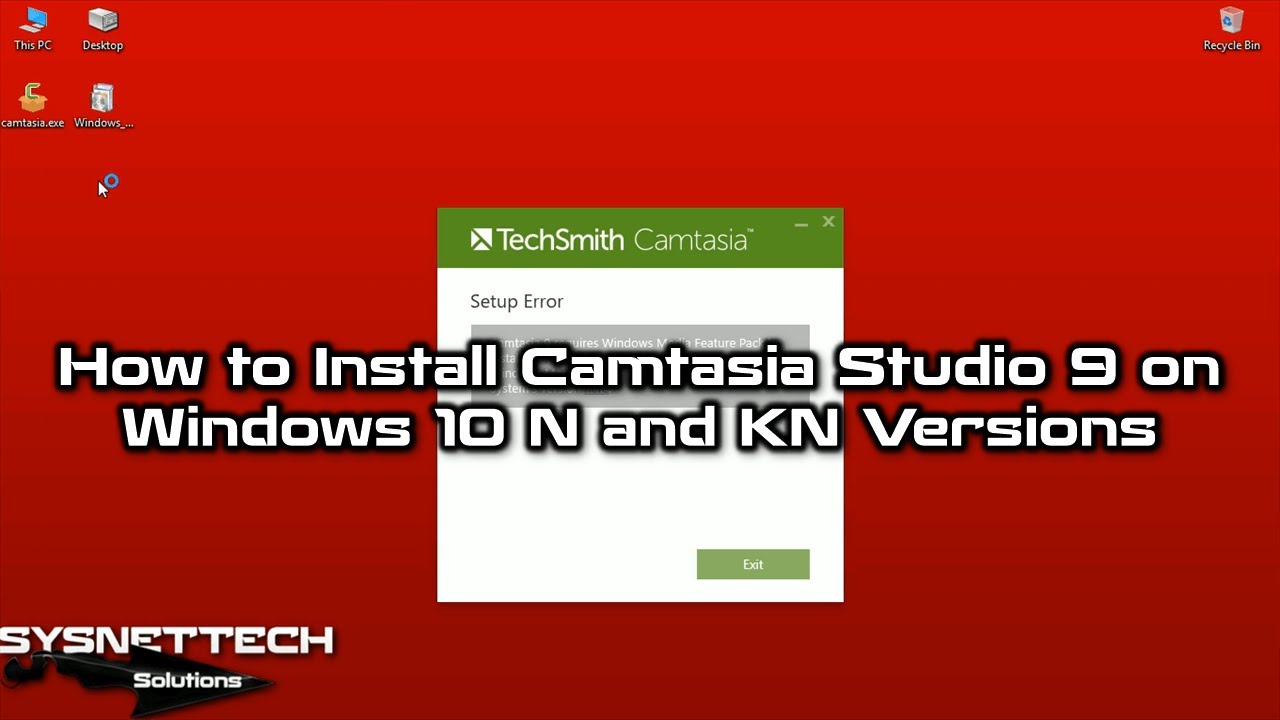
As you can see in the screenshot below, you will encounter a problem when you try to install this app on Windows N, since to set up Camtasia Studio 9, you must first add the Media Feature Pack.
In the Setup Error box below, you can download the needed app. Yet this app does not match your OS build. So, you may not be able to continue with the setup. Close the setup window by clicking the Exit button.
Step 3
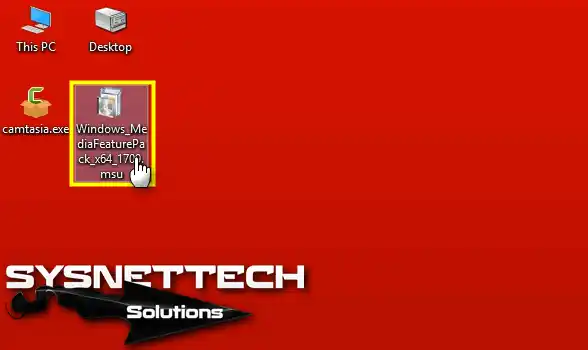
Now, download the multimedia app and double-click the setup file to install it.
Step 4
Click the Yes button to install Feature Pack for Windows (KB4039813).

Step 5
Click I Accept to agree to the Feature Pack license terms.

Step 6
Wait while the system installs media support for Camtasia.

Step 7
Once you finish setup, you must restart your PC so the changes take effect. Then click the Restart Now button.

Step 8
After you restart your PC, run the Camtasia setup once more. This time, you can see the setup start, as in the screenshot below.
Press Install to start the installation and finish the setup.

How Do You Add Windows 11 N Media Feature Pack? (22H2 and 23H2 Gaps)
On Windows 11 N, setup takes place with steps similar to Windows 10. However, Windows 11 has a few UI differences. Here are the steps:
- Follow the path Start > Settings.
- Go to Apps > Optional features.
- Click View features next to Add a feature.
- Select the pack from the list and press Install.
- Restart the PC after setup.
On Windows 11 22H2 and 23H2 builds, the pack name is the same. However, on 23H2, you can add some codec packs separately through Microsoft Store. For example, you may need additional downloads for the HEVC video add-on and VP9 codec support.
Is Media Feature Pack Needed After Camtasia Studio Setup? Check Steps
After you add this pack, you must verify that the app runs well. Here is the check method step by step:
- Run Camtasia Studio as an administrator.
- Create a new project and import a video file.
- Verify that the video preview plays.
- Record audio and play back the saved audio.
- Run an MP4 export test.
If any of these tests fail, you may not have added the pack correctly. In particular, wmvcore.dll and mfplat.dll errors show that system components are missing. In this case, install the pack again with PowerShell or DISM commands.
Install the Media Pack with PowerShell and DISM
For those who prefer the command line over the GUI, PowerShell and DISM options are available. These methods stand out as powerful tools for Windows OS maintenance. They are ideal for bulk rollout, especially in business settings.
Add-WindowsCapability Media.MediaFeaturePack Command with PowerShell
To add this pack with PowerShell, do the following:
- Open PowerShell as an administrator.
- Run this command:
Get-WindowsCapability -Online | Where-Object Name -like '*Media*' - Find the
Media.MediaFeaturePack~~~~0.0.1.0item in the list. - Type this command to install:
Add-WindowsCapability -Online -Name Media.MediaFeaturePack~~~~0.0.1.0 - Restart the system once the task completes.
This method works on Windows 10 and 11 N builds. If the command fails, you can add the -LimitAccess flag to block a connection to the Windows Update server.
DISM /Online /Add-Capability Command
DISM is a powerful tool built to maintain Windows OS images. Here are the steps to add this pack:
- Open Command Prompt as an administrator.
- Run this command:
DISM /Online /Get-Capabilities - Find the name
Media.MediaFeaturePack~~~~0.0.1.0in the list. - To install:
DISM /Online /Add-Capability /CapabilityName:Media.MediaFeaturePack~~~~0.0.1.0 - Restart the system after the task.
The DISM method lets you specify an offline source with the /Source flag on systems with a WSUS block. For example, you can install from a local Windows ISO with the /Source:wim:D:\sources\install.wim:3 /LimitAccess command.
Media Pack Setup with an Offline CAB File (No Internet Connection)
On systems with no internet access, you can download and add this pack as a CAB file. Here are the steps:
- Download the correct CAB file from the Microsoft Update Catalog.
- Unpack the file to a local folder.
- Open Command Prompt as an administrator.
- Run this command:
DISM /Online /Add-Package /PackagePath:C:\MediaPack\Microsoft-Windows-Media-Features-Package.cab - Then type the
DISM /Online /Add-Capability /CapabilityName:Media.MediaFeaturePack~~~~0.0.1.0command. - Restart the system.
Offline setup is essential for systems that run in air-gapped networks. When you download the CAB file, make sure it matches your Windows build (22H2, 23H2, and so on).
Errors You Encounter After Camtasia Setup and Their Fixes
Some errors can still occur, even after you add the pack. In this section, I share the most common error codes and fixes. These errors tend to come from missing DLL files or faulty system components.
Camtasia wmvcore.dll Error on Windows N: WMVCORE.DLL Missing Fix
The wmvcore.dll error is one of the most common issues on Windows N and KN builds. This error appears when you have not added the pack or when it has become corrupted. Here are the fix steps:
- Check that the pack is in place.
- Open Command Prompt as an administrator.
- Run this command:
regsvr32 wmvcore.dll - Restart the system once you get the success message.
- If the issue persists, remove the pack and add it again.
The TechSmith help team confirms that the wmvcore.dll error comes from a lack of media libraries on N and KN builds. So, the permanent fix for the issue is to add the pack.
Camtasia mfplat.dll Error and Media Foundation Runtime Fix
The mfplat.dll error indicates that the Media Foundation API is missing. This API is essential for video work and playback in the Windows OS core. Here are the fix steps:
- Make sure the pack is in place.
- Open PowerShell as an administrator.
- Run this command:
Add-WindowsCapability -Online -Name Media.MediaFeaturePack~~~~0.0.1.0 - Restart the system.
- If the issue persists, run the
DISM /Online /Cleanup-Image /RestoreHealthcommand.
mfplat.dll is part of the Media Foundation runtime. This DLL file is needed for video codec components to work correctly.
If the error persists, you may need to update the Microsoft Visual C++ Redistributable package.
Some errors can also come from a lack of .NET Framework. This component is often required on old Windows builds. Above all, I advise you to check this component as well by performing an offline .NET Framework setup.
Camtasia 0x80070643, 0x800f0954, and 0x80070002 Error Codes: Meaning and Fixes
The error codes you see in the Camtasia Studio setup tend to indicate issues in Windows components. Here are the three most common error codes and their fixes:
| Error Code | Meaning | Fix |
|---|---|---|
| 0x80070643 | VC++ Redistributable setup error | Remove and reinstall the VC++ Redistributable package |
| 0x800f0954 | WSUS block or Windows Update block | Set the UseWUServer value to 0 in the Registry or use an offline DISM setup |
| 0x80070002 | File not found error | Download the package again with the correct build |
The 0x80070643 error tends to result from a conflict between an old VC++ Redistributable build and a new one.
As a fix, remove all VC++ builds from the Control Panel and add them again. The 0x800f0954 error, on the other hand, appears on systems with a WSUS setup.
Media Feature Pack and Camtasia Studio Bulk Rollout in Business Settings
In business settings, adding the pack manually on hundreds of Windows clients is not a realistic option. So, teams perform bulk rollout with tools such as Group Policy, SCCM, and PowerShell DSC. In this section, I detail the business rollout methods.
Extra Info: In bulk rollout, teams use the Sysprep tool frequently. This tool prepares the system image for other machines. From here, using Sysprep ahead of bulk setup speeds up the work.
Media Feature Pack Rollout with Group Policy (gpedit.msc and FOD Rules)
To roll out this pack with Group Policy, follow these steps:
- Open the Group Policy Management console on the Domain Controller.
- Create a new GPO or edit an old one.
- Follow the path Computer Configuration > Administrative Templates > System.
- Find the Specify settings for optional component installation and component repair policy.
- Enable the policy and select the Download repair content and optional features directly from Windows Update option.
- Apply the GPO and run the
gpupdate /forcecommand on client PCs.
This policy lets the system download the pack directly from Windows Update in settings with a WSUS block. However, make sure your firewall rules allow access to Windows Update servers.
Camtasia Bulk Setup with SCCM and Media Feature Pack Integration (MSI Silent Setup)
You can install the app in bulk with SCCM (System Center Configuration Manager). Here are the steps:
- In the SCCM console, go to Software Library > Application Management.
- Create a new app and add the Camtasia MSI package.
- Set the setup command as follows:
msiexec /i "Camtasia.msi" /qn /norestart - Set a dependency for the package.
- As the dependency command, type
DISM /Online /Add-Capability /CapabilityName:Media.MediaFeaturePack~~~~0.0.1.0 - Start the rollout and watch the installation status on clients.
MSI silent setup lets you install with no user input. Setting the package dependency correctly is essential for the app to run without issues.
How Do You Install the Media Pack Under a WSUS Block? (0x800f0954 Error)
On Windows systems with a WSUS block, setup of this pack fails with the 0x800f0954 error. To work around this error, you can use these methods:
- In the Registry, go to
HKLM\SOFTWARE\Policies\Microsoft\Windows\WindowsUpdate\AU. - Set the
UseWUServervalue to0. - Restart the Windows Update service:
net stop wuauserv && net start wuauserv - Try to add the pack again.
- After setup, set the
UseWUServervalue back to its original state.
As a backup, you can use a local source with the DISM /Online /Add-Capability /CapabilityName:Media.MediaFeaturePack~~~~0.0.1.0 /Source:C:\Windows\servicing\Packages /LimitAccess command.
Camtasia Studio Build Compatibility Matrix: For Windows N/KN Builds (2020–2026)
Not every app build is compatible with Windows OS N and KN builds. In this section, I share the build compatibility matrix from 2020 to 2026. This matrix shows which build runs with which Windows build.
Camtasia 2020, 2021, and 2022 Windows N/KN Compatibility
The table below shows the N and KN compatibility for the 2020, 2021, and 2022 builds:
| Camtasia Build | Windows 10 N | Windows 11 N | Windows KN | Notes |
|---|---|---|---|---|
| Camtasia 2020 | Compatible (with pack) | Not compatible | Compatible (with pack) | Does not run on Windows 11 |
| Camtasia 2021 | Compatible (with pack) | Compatible (with pack) | Compatible (with pack) | Needs VC++ 2019 |
| Camtasia 2022 | Compatible (with pack) | Compatible (with pack) | Compatible (with pack) | Needs WebView2 Runtime |
Camtasia 2020 is not compatible with Windows 11 N. So, if you use Windows 11, you must upgrade to at least Camtasia 2021. In addition, the 2021 and 2022 builds run on Windows 11 N and KN with the pack.
Camtasia 2023, 2024, and 2026 Windows 11 N/KN Compatibility and System Requirements
The table below shows the Windows 11 N/KN compatibility and system requirements for the 2023, 2024, and 2026 builds:
| Camtasia Build | Minimum Windows | Pack Needed? | Additional Requirements |
|---|---|---|---|
| Camtasia 2023 | Windows 10 1909 or later | Yes | VC++ 2019, .NET 4.7.2 |
| Camtasia 2024 | Windows 10 20H2 or later | Yes | VC++ 2019, WebView2 |
| Camtasia 2026 | Windows 11 23H2 or later | Yes | VC++ 2022, AVX2 support |
Camtasia 2026 requires AVX2 instruction set support. So, it requires Intel Haswell and AMD Ryzen 2000 series or newer chips. We also recommend SSD storage for 4K video editing and 60 FPS capture.
On slow disks, 4K editing stalls. Running an SSD and HDD health test lets you spot issues in advance. So, I advise you to check disk health before you install.
The Gap Between KB4039813 and KB3145500: Which Media Feature Pack Should You Download?
Microsoft released the KB4039813 and KB3145500 updates for Windows N builds. However, these updates target different Windows builds. The table below shows the difference between these two updates:
| Update | Target Windows Build | Build Number | Notes |
|---|---|---|---|
| KB4039813 | Windows 10 1709 (Fall Creators Update) | 16299 | For older builds |
| KB3145500 | Windows 10 1607 (Anniversary Update) | 14393 | For very old builds |
For build 1903 and later, you add the pack through optional features. So, you no longer use updates such as KB4039813 and KB3145500.
Camtasia Setup on a Virtual Machine: VMware, VirtualBox, and Parallels Compatibility
Setup and operation in virtual machine environments is more complex than on real Windows clients. TechSmith does not officially support virtual environments. However, you can run it with some setups.
Why Does Camtasia Not Run on VMware and VirtualBox? (GPU Acceleration and Direct3D Blocks)
The app uses Direct3D and GPU acceleration for video work. On virtual machines, though, GPU acceleration tends to be limited or disabled. So, the app either does not open at all on a virtual machine or shows a black screen.
Even if you add the pack on a virtual machine, Direct3D rendering issues can arise. For example, Camtasia Editor lags when it redraws the canvas, or the video preview remains black. To fix these issues, you can enable 3D acceleration in the virtual machine settings.
Does Camtasia Run on a Virtual Machine Even With Media Feature Pack in Place?
Even with the pack in place on a virtual machine, the app is not guaranteed to run well. Here are common questions and their answers:
- Does it run on VMware? Most of the time, no. Video work fails without GPU acceleration.
- Does it run on VirtualBox? It may run as a test, but it is not stable.
- Does it run on Parallels? If you use Parallels on macOS, the Windows build does not run. You must use the Mac build.
- Is the pack needed on a virtual machine? Yes, but it is not enough. GPU acceleration is also needed.
If you must use the app on a virtual machine, enable 3D acceleration in VMware Workstation and disable GPU acceleration. Also, give the virtual machine enough video memory (at least 2 GB).
Codec and Speed Check Tests
After setup, you must run codec and speed tests. These tests verify that the pack runs correctly and demonstrate video processing capabilities. Here are the test methods step by step.
Camtasia Audio Capture Test on Windows N: USB Mic and Sound Driver Check
For the sound capture test:
- Plug your USB mic into the PC.
- Open the app and create a new project.
- Go to the Record tab and select the Audio option.
- Select your mic and press the Record button.
- Talk for a few seconds and stop the recording.
- Play back the saved audio and check the quality.
If you encounter issues during sound capture, update your audio drivers. Also, you can test with the Windows Sound Recorder app.
Camtasia Video Playback and MP4 Export Test (H.264/AVC, MPEG-4 Codec Check)
For the video playback and export test, follow these steps:
- Import a video file into the app.
- Play the video preview and verify that the sound is in sync.
- Follow the path Export > Local File.
- Select the MP4 format and verify the H.264 codec.
- Start the export process and wait for it to finish.
- Play the new MP4 file in Windows Media Player.
If you get an error during MP4 export, make sure the pack is in place. Also, if H.264 / AVC hardware acceleration is disabled, the export process can slow down.
Camtasia Screen Capture Test on Windows N: Black Screen and ‘Capture Could Not Start’ Fix
For the screen capture test:
- Open Camtasia Recorder as an administrator.
- Select the capture area (full screen or zone).
- Select the audio source (system sound, mic).
- Press the Record button and wait a few seconds.
- Stop the capture and preview the video.
If you encounter a black screen issue during screen capture, disable GPU acceleration. Also, change the Direct3D rendering settings.
TechSmith Camtasia Usage ⇒ Video
You can learn the media pack setup for Camtasia by watching the video below. You can also subscribe to our YouTube channel to support us.
Remove and Reinstall the Media Pack: Fix Cases
In some cases, you may need to remove and add this pack again. For example, this is necessary when the pack becomes corrupted or conflicts with another app. In this section, I share the remove and reinstall steps.
Pack Removal: Are Other Apps Affected?
Removing this pack can affect other media apps. Here are common questions:
- Is Windows Media Player affected? Yes, it does not run when you remove the pack.
- Is the Movies & TV app affected? Yes, video playback stops working.
- Is Groove Music affected? Yes, music playback does not work.
- Is the Skype media component affected? Yes, Skype cannot make video calls.
To remove the pack, run this command in PowerShell: Remove-WindowsCapability -Online -Name Media.MediaFeaturePack~~~~0.0.1.0. Restart the system after the removal process.
What If Setup Fails? (0x80072EE6 and Other Network Errors)
If setup of this pack fails, follow these steps:
- Make sure the Windows Update service is running.
- Check your internet connection.
- Temporarily disable the firewall.
- Open Command Prompt as an administrator and run the
DISM /Online /Cleanup-Image /RestoreHealthcommand. - Then try to add the pack again.
The 0x80072EE6 error tends to result from network connection issues. To fix this issue, check your DNS settings. In addition, remove proxies that block access to Windows Update servers.
Trusted Further Reading Sources for Camtasia Studio
Knowing system compatibility ahead of setup saves time. Also, official setup guides lay out steps in order. This way, you can ensure a smooth start for both Windows and macOS.
- TechSmith – System Requirements: This official page lists system requirements. It provides chip, RAM, and GPU information for Windows and macOS. It also compares storage space and OS builds.
- UIW Support Portal – Windows Setup Guide: This guide walks through Windows setup steps in order. It shows the download, setup, and license key input. It also explains the options in the setup screens. This way, you finish the first setup without issues.
- UIW Support Portal – macOS Setup Guide: This article shows the macOS setup process step by step. It covers downloading the DMG file and moving it to the Applications folder. It also includes steps to log in with a TechSmith account.
- TechSmith Support – Windows Fit Table: This help article provides a Windows compatibility table. It shows which Windows builds this software supports. It also lists Windows 10 and 11 build numbers.
FAQ About Camtasia Usage
Can I run Camtasia without the Media Feature Pack?
Is Camtasia Studio 2023 compatible with Windows N?
The Windows 11 N media pack is not in optional features. What should I do?
Is the Media Feature Pack needed after setup?
Does the Media Feature Pack come automatically with Windows Update?
Windows 11 KN Camtasia does not record sound. How do I fix it?
How do I perform a Camtasia Windows 11 22H2 setup?
What should I do if the pack setup fails?
Conclusion: The Key to Camtasia Studio Installation
On Windows OS N and KN builds, a Camtasia Studio installation is not possible without the pack in place.
This pack adds the missing media components to the system. It also provides the foundation the video editing software needs to run. After setup, run codec tests to make sure everything works correctly.
7-Point Checklist for Windows N/KN Camtasia Setup
- Check your Windows build and build number (winver command).
- Add the pack through Settings > Optional features.
- Restart the PC after setup.
- Verify that the pack is in place with PowerShell or DISM.
- Install the app as an administrator.
- Run audio capture, video playback, and MP4 export tests.
- If you get an error, update VC++ Redistributable and .NET Framework.
By following these steps, you can run the app without issues on Windows N and KN builds.
In business settings, you can use SCCM and Group Policy methods for bulk rollout. Keep in mind that without the pack in place, no media app runs correctly.

Be the first to share your comment