How to Enable SNMP on Windows 10

Quick Insight

You enable SNMP on Windows 10 by first opening the Programs and Features panel from the Start menu. You click the link to turn Windows features on or off and scroll to the list. There you check the Simple Network Management Protocol box and let the system apply the change. After the install, you open the Services console and set the SNMP service to run. You then add a community string like "SNMP" with read rights in the Security tab. So you unlock remote device tracking and keep the access locked to trusted hosts only.

Enabling the SNMP service in Windows operating systems consists of several steps. Activating this service in Windows 7, 8, 8.1, and 10 operating systems involves the same steps.

How to Enable SNMP on Windows 10

How to Install SNMP Service on Windows 10 Operating System

SNMP (Simple Network Management Protocol) provides management of network devices. You can control and manage all network devices that have a network card. A network device can be on a computer. We can monitor a computer’s information, such as processor usage, with this protocol.

After installing this service, we will configure the security settings and Trap configuration by checking whether it is working from the Services window.

How to Activate SNMP

To set it up, follow the steps below. After enabling this service, if you want to turn it off, follow the same process in reverse.

SNMP by itself is not enough for network control. Automatic IP sharing through DHCP is also needed to keep your devices’ IP names in order. This fully removes mess, especially in growing networks.

Step 1

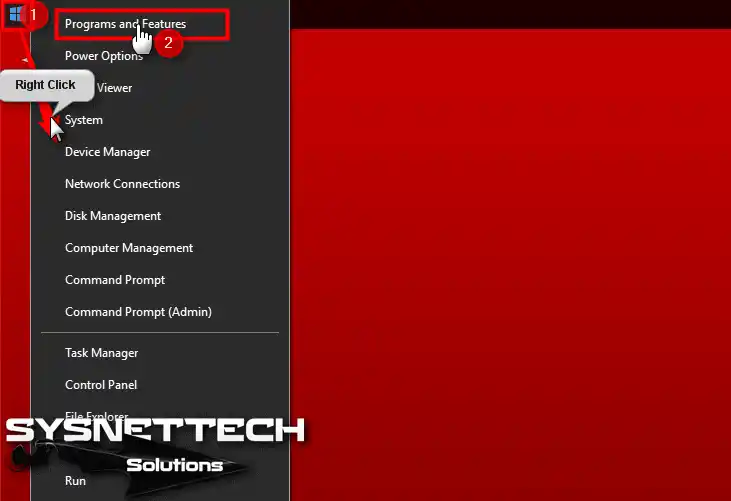
On the Win 10 Start menu, click the Right Button / Programs and Features.

Programs and Features

Step 2

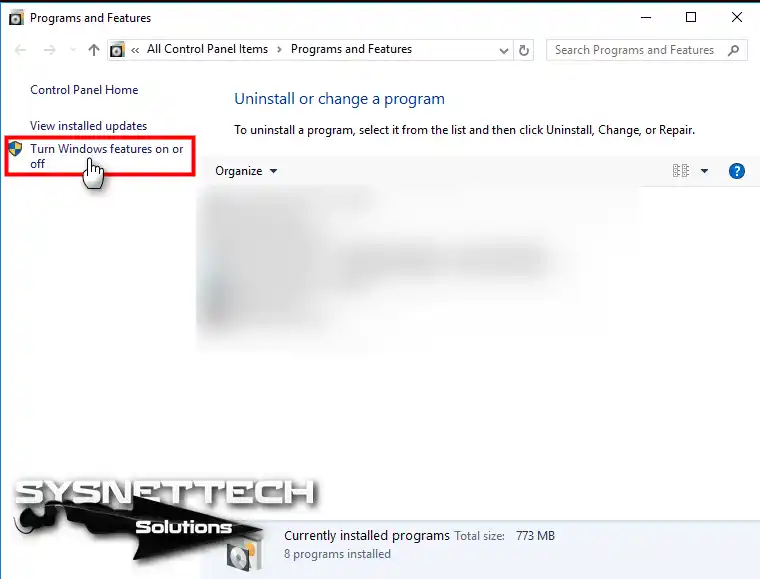
In the Programs and Properties window, click Turn on or off Windows properties, as shown below.

Turn Windows Features on or off

Step 3

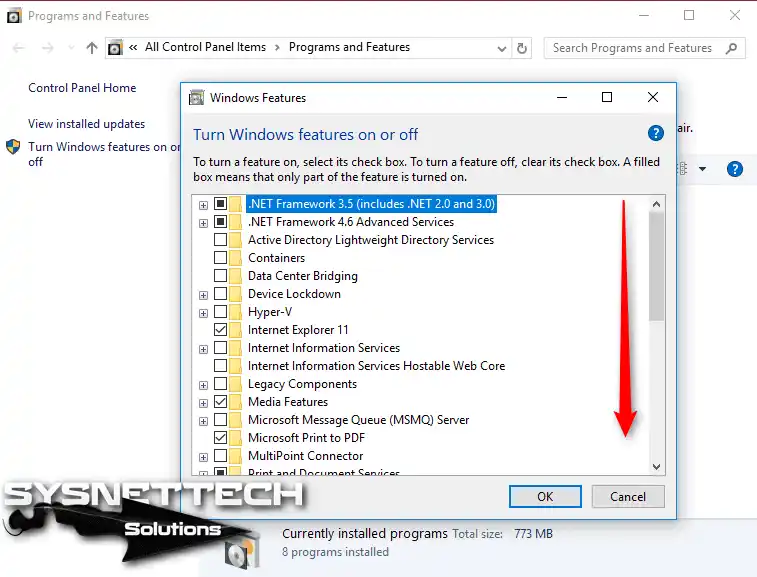
Windows properties window opened. Then, scroll down to list the following options.

Windows Features

Step 4

Check the Simple Network Management Protocol.
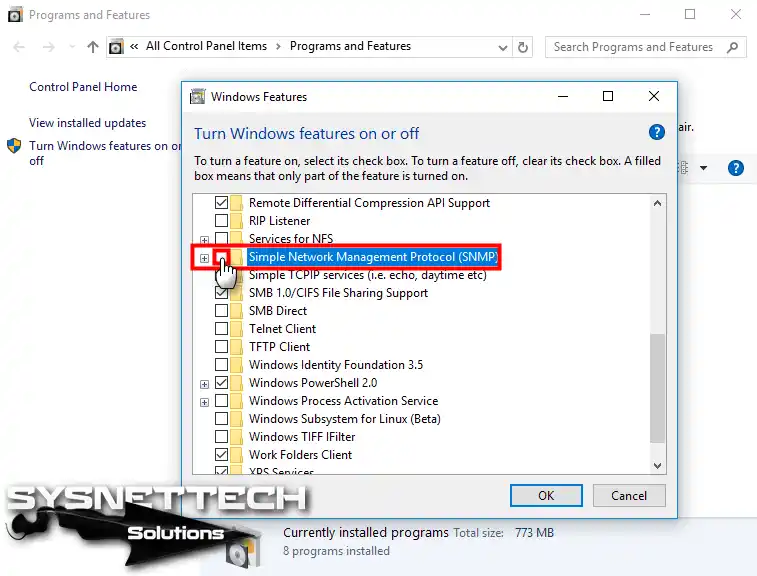
Simple Network Management Protocol (SNMP)

Step 5

Once you have selected this protocol, click OK to continue with the installation.
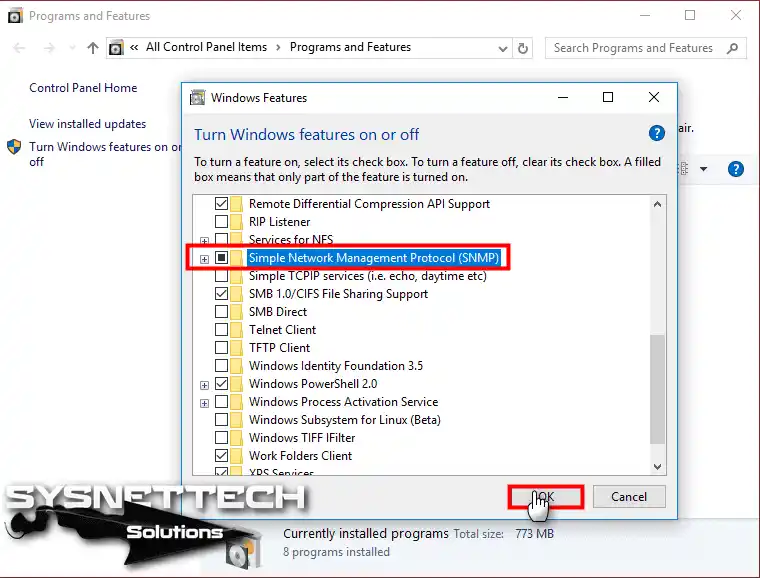
Installing SNMP

Step 6

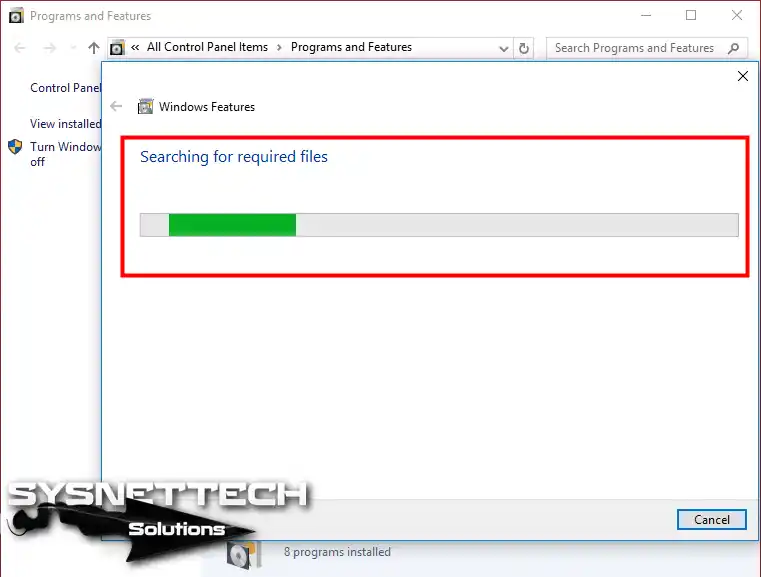
Searching for files needed for it.

Searching for required files

Step 7

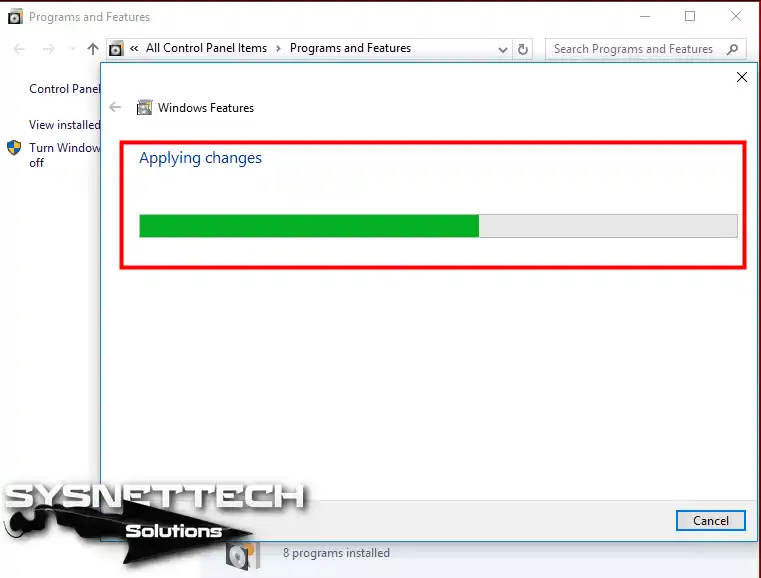
Applying changes.

Applying Changes

Step 8

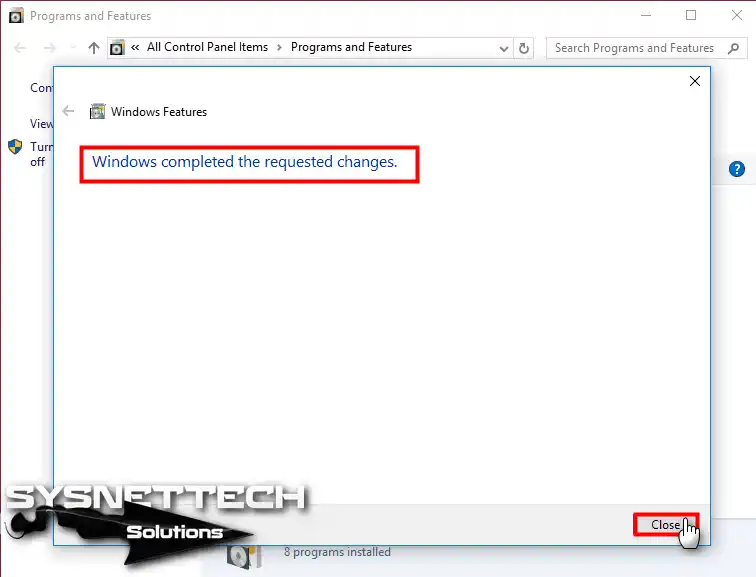
After you have completed the SNMP setup on Windows 10, please proceed to the next step to check it.

Windows completed the requested changes

Step 9

Press Windows + R to open the Run window, type services.msc, and click OK.
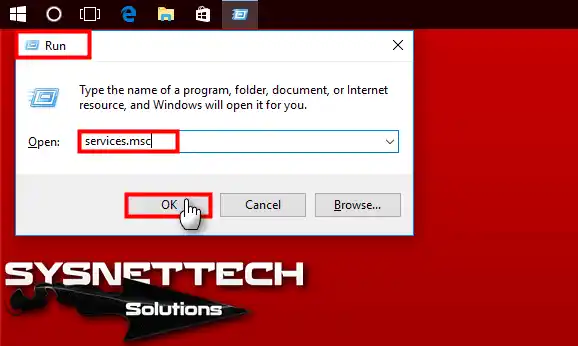
services.msc

Step 10

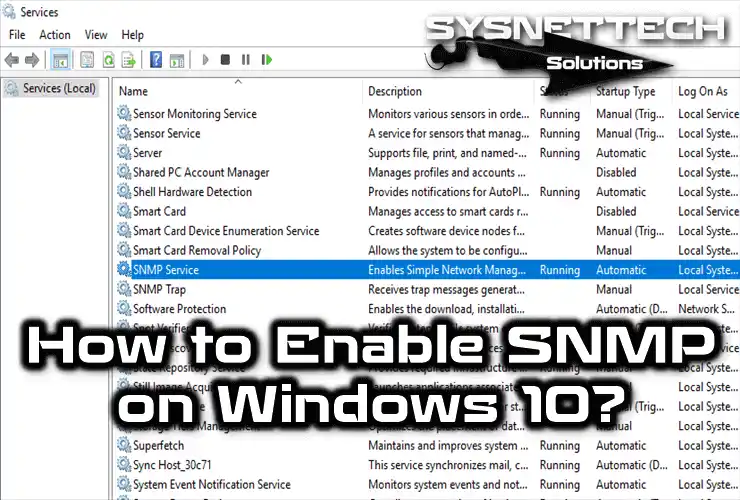
In the Services window, you can check that this service is running smoothly.
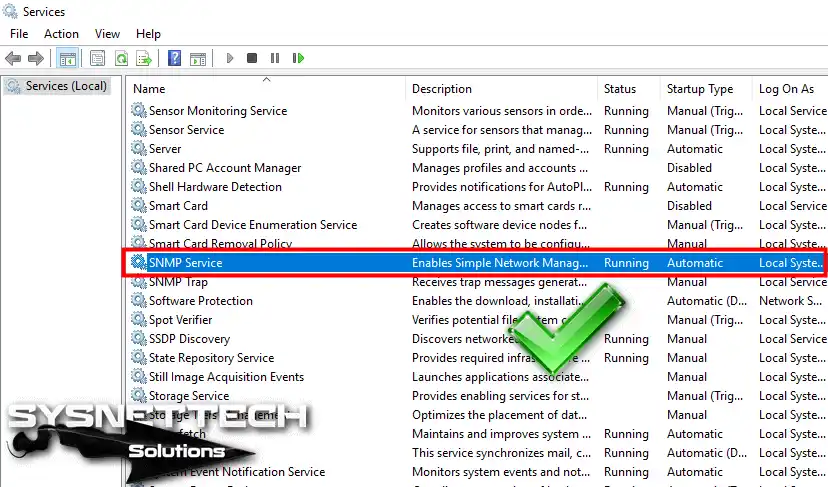
SNMP Service

How to Configure SNMP Security

After installing it, we will configure its security settings so that only devices with the specified Community information will be able to communicate with this service to provide network security.

Step 1

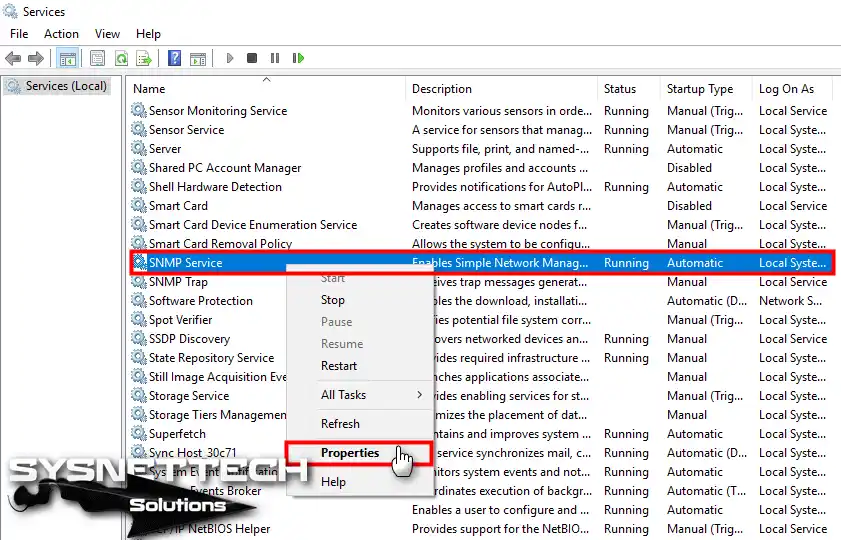
Likewise, in the Services window, click the right button / Properties on the related option.

Starting the Service

Step 2

The Service Properties window will open as follows. From this window, click the Security tab.
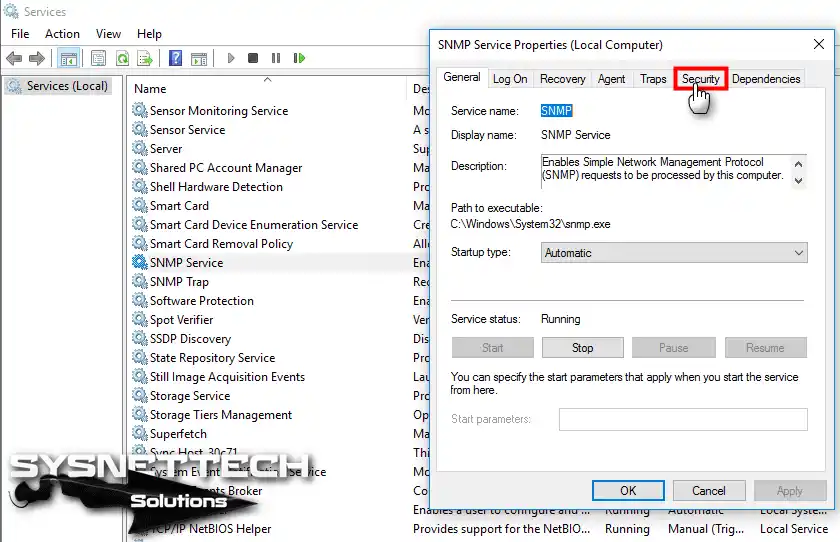
SNMP Service Properties

Step 3

As you can see in the image below, there are Community settings for this protocol. Click the Add button to add Community.
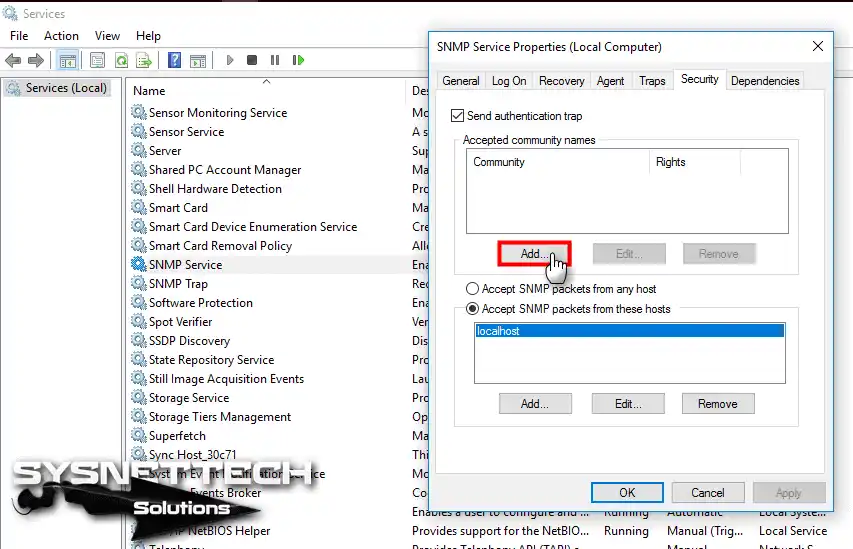
Accepted Community

Step 4

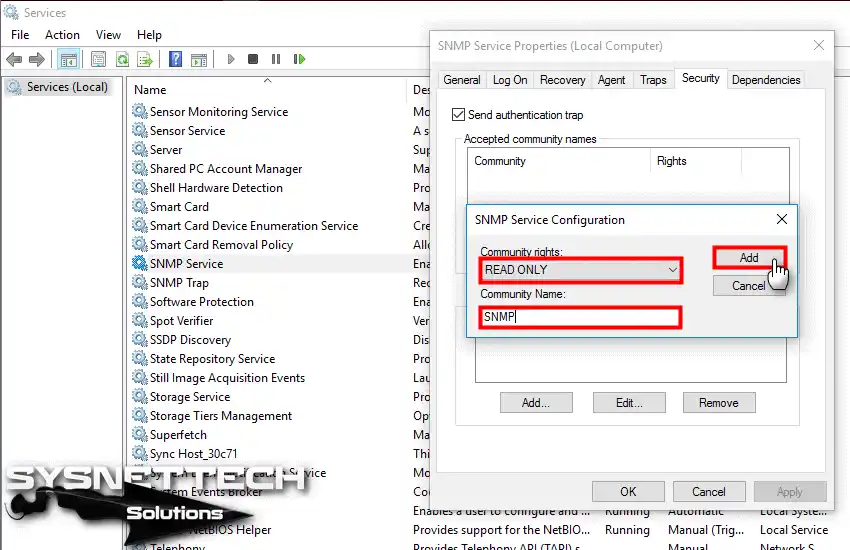
In the Community rights option, type READ ONLY and SNMP into the Community Name option and click the Add button to complete the operation.

SNMP Service Configuration

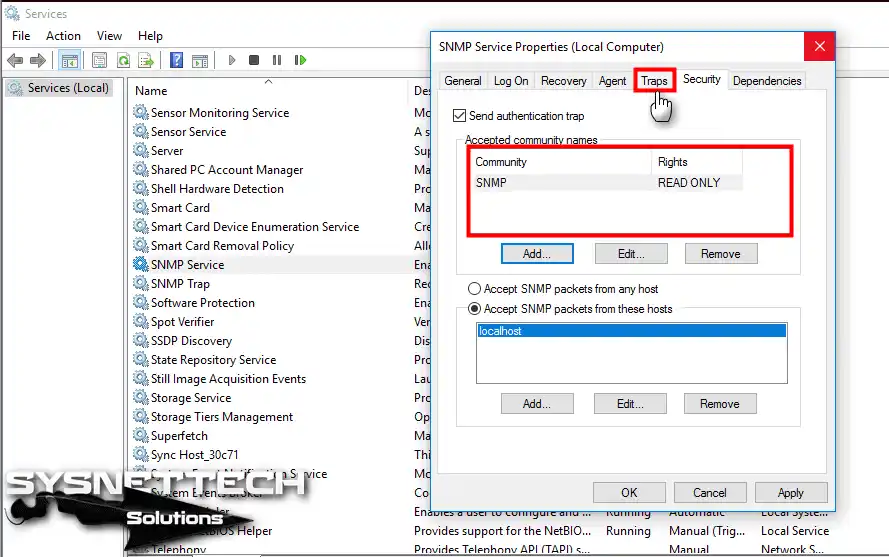
Step 5

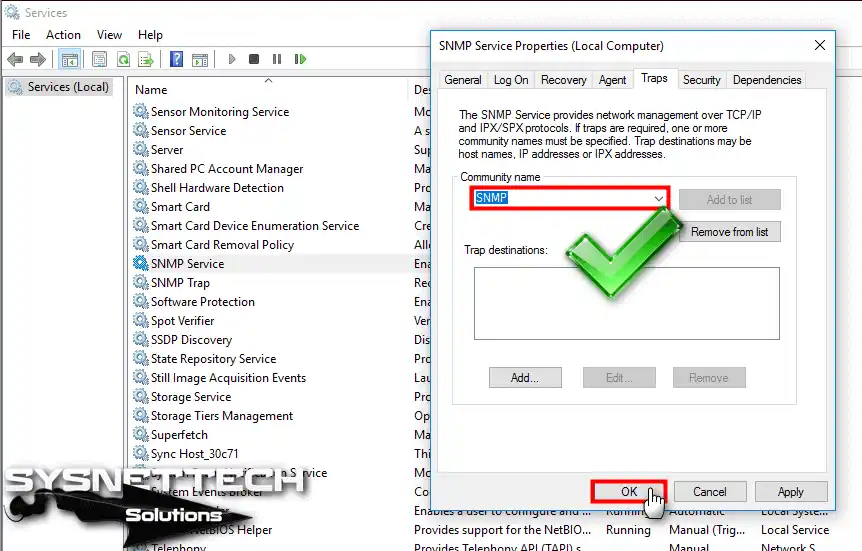
A second way to configure Traps is in the security settings. In the properties window, click the Traps tab.

Traps Configuration

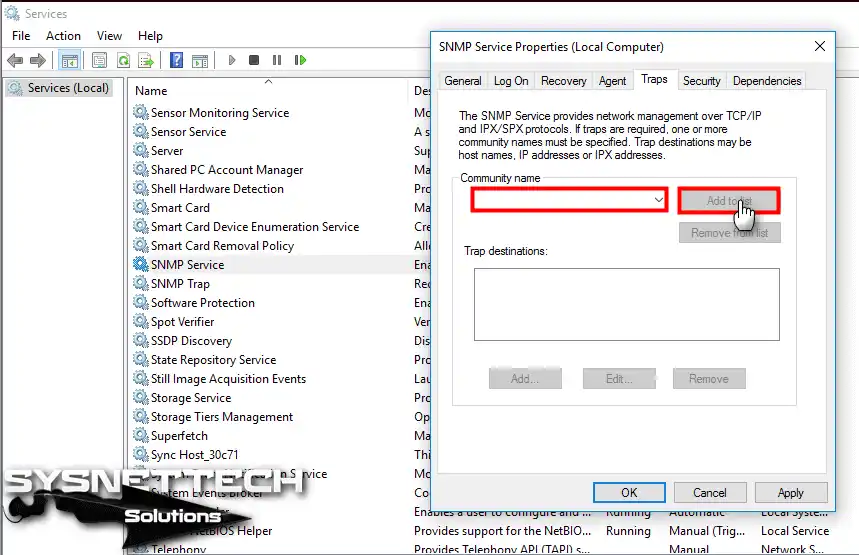
Step 6

In the Traps settings, type SNMP in the Community Name section and click the Add to List button.

Community Name

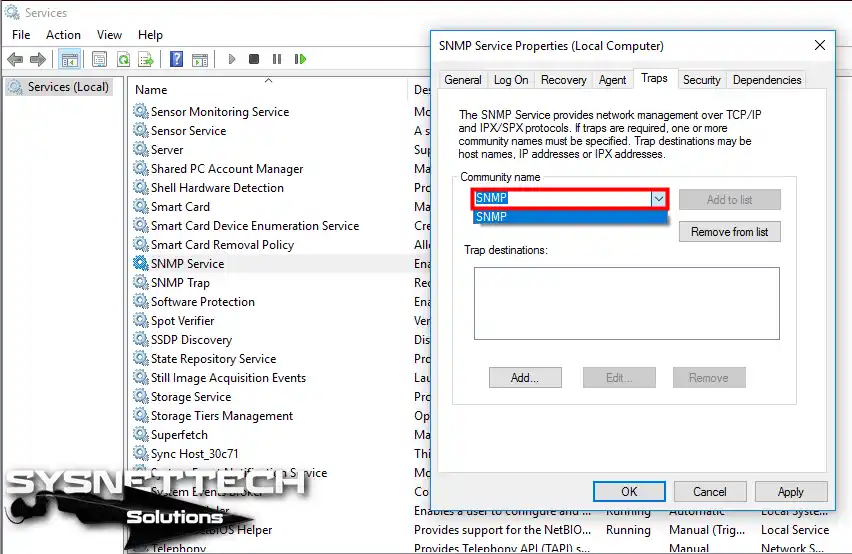
Step 7

Check the drop-down list where the name is added to the list in trap settings.

Check Community Name

Step 8

After configuring the security settings for this service installed on this PC, you can now remotely control and review the resources of your computer.

Close the Services

Video

To add this protocol, you can watch the video below and subscribe to our YouTube channel.
Video Thumbnail
Watch on YouTube

Frequently Asked Questions About SNMP

What is SNMP and why should I use it on Windows 10?

SNMP is a protocol that lets you monitor your network devices from one central point. You can remotely see data like CPU usage, memory status, and network traffic.
If you are a network admin or want to control multiple devices at home, this protocol saves the day.
By enabling SNMP, you can connect your computer to a management software and get instant alerts. So you actively track your system’s performance rather than passively.

How can I enable the SNMP service on Windows 10?

The process is very easy; let me explain step by step. Right-click the Start menu and go to “Programs and Features”. Click the “Turn Windows features on or off” option on the left side.
In the list that opens, check the “Simple Network Management Protocol (SNMP)” box. Press OK; Windows will install the needed files.
When the SNMP enabling process finishes, the service starts automatically. To check, type services.msc and see that the SNMP Service is running in the list.

How can I configure the security settings after enabling SNMP?

Security is critical here, because SNMP carries data over the network. In Services.msc, right-click SNMP Service and go to Properties.
In the Security tab, click the “Accepted community names” section. Add a new community with Add.
I usually suggest you use a custom name instead of simple ones like “public”.
Set the permission level to “READ ONLY”; this way only monitoring is done from outside, no changes are made. Do not skip this step after enabling, or your network stays at risk.

What are Traps in SNMP settings, and why should I configure them?

Traps are a mechanism that sends a notification to the management software when an event happens. For example, you get an instant alert when the CPU load goes over 90% or a service stops.
Switch to the Traps tab in the Properties window. Type the community name you created in the Community name part and add it with “Add to List”.
Then specify the target IP address (the IP of the management server) below. If you do not make these settings, you cannot get event notifications. So your chance of instant action drops.

What should I do if I want to turn off the SNMP service?

Very simple: you can go back the same way. Follow the path Programs and Features > Turn Windows features on or off. Uncheck SNMP in the list and press OK. Windows will remove the component and the service will be fully disabled.
As an alternative, you can stop SNMP Service from services.msc and set the startup type to “Disabled”. You return the system to its old state by doing the reverse of the activation process.
Do not forget, after you remove it, your monitoring software cannot see this computer.

I get a “Windows cannot find files” error during SNMP installation. What should I do?

This usually happens because of Windows Update or missing source files. First, connect your computer to the internet and try again. Windows searches for the needed files online.
If it still does not work, you can manually point to the files using an installation media of the same Windows version. As an alternative, repair the system integrity with DISM commands.
Make sure you have admin permissions for the SNMP service setup. In the worst case, you can also use third-party SNMP tools, but I suggest fixing Windows’ own component first.

Conclusion

In this article, we discuss how to enable and configure SNMP in the Windows 10 system.

Also, setting your DNS addresses right is just as key as setting the trap target. If you name your server by hostname and not by IP address, name lookup should work with no trouble.

They'll Thank You for Discovering This Guide!

Ready to do your loved ones a huge favor with just one click? Knowledge grows as it is shared.

1 Reader Comment

  1. Newer versions of Win10/Server 2012 (from Win10 1803 on?) no longer show SNMP by default in available features. (deprecated in favor of CIM) but service can be enabled via powershell.

Share Your Opinion