
If you have installed a Linux-based operating system and want to learn the version of the operating system you are installing, you can find out from the Settings / About. In addition, you can quickly obtain system information from the Terminal.
How to Learn Ubuntu System Info
In this article, we will talk about the simplest way to display system info on Ubuntu, the most popular Linux-based operating system. The most current version of Ubuntu is 19.04, and its code name is Disco Dingo.
There are many ways to learn system information on Linux operating systems. The simplest way to learn system information is to use ScreenFetch. You can easily find your system info with it.
For example, after installing Ubuntu, you can learn the version of the operating system, kernel information, GPU, CPU, and RAM information with this software.
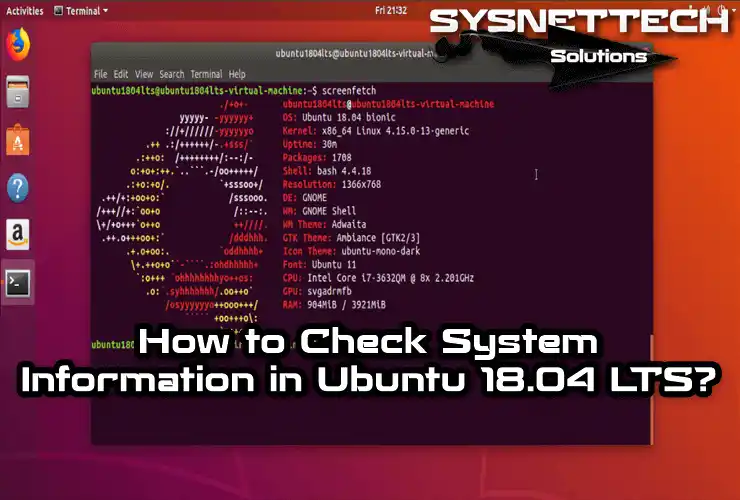
Using ScreenFetch on Linux, you can learn the following components;
- Username
- Hostname
- Operating System
- Kernel-Version
- Uptime
- Number of installed packages
- Shell version
- Screen resolution
- Desktop Environment
- Window Manager
- Window Manager Theme
- GTK Theme
- Icon Theme
- Font
- CPU
- GPU
- RAM
The ScreenFetch application runs on all Linux-based systems. To learn more about ScreenFetch, visit https://github.com/KittyKatt/screenFetch.
How to Find System and Hardware Specifications with ScreenFetch on Ubuntu 18.04 / 18.10 / 19.04
Follow the steps below to install ScreenFetch, which allows you to view system and hardware info.
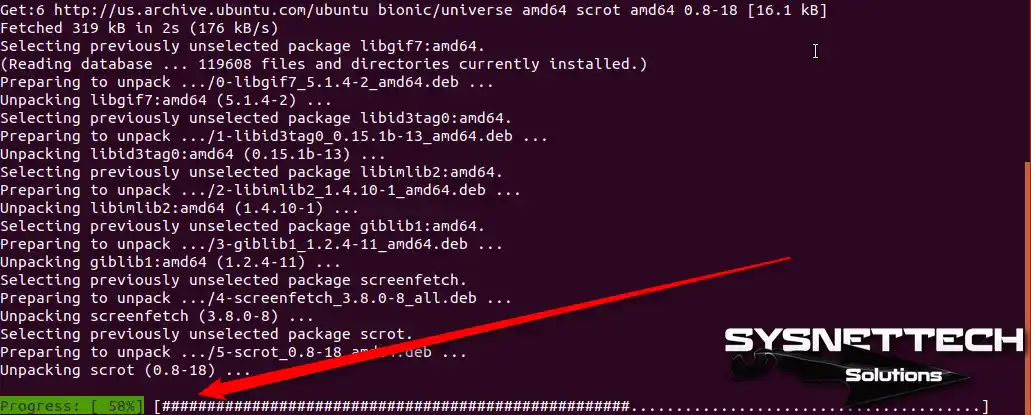
Step 1
Open Terminal on your desktop and execute “sudo apt-get install screenfetch” to start the installation.
sudo apt-get install screenfetch
Step 2
After this operation, you will see that the additional field will be used. Press Y to continue the installation, then press Enter.

Step 3
Wait while ScreenFetch is installed.
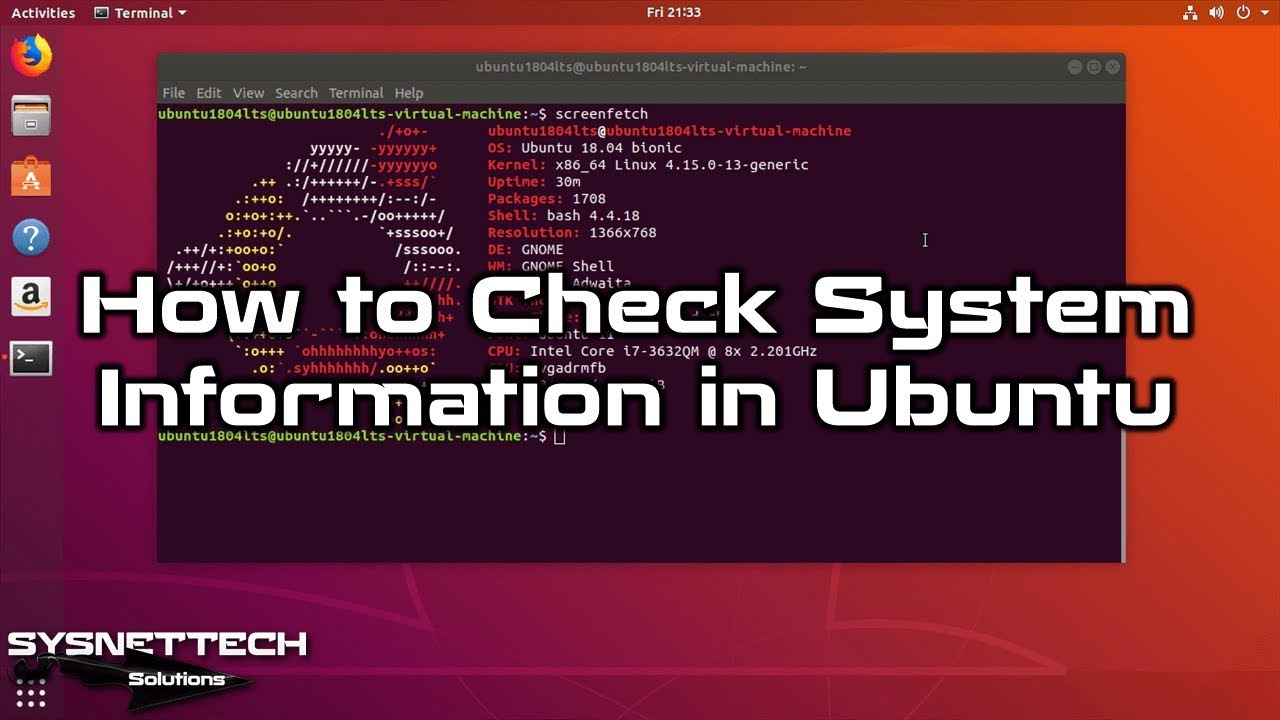
Step 4
After installation, perform the screenfetch command in the Terminal to learn system and hardware information.
screenfetch
Step 5
After applying the ScreenFetch command, you can check the system information in the Terminal interface as in the image below!

How to Check System and Hardware Features ⇒ Video
You can watch the video below to view system information using ScreenFetch on any Linux distribution, and you can also subscribe to our YouTube channel to support us.
Conclusion
In this article, we have briefly talked about how to learn the operating system version and hardware information using ScreenFetch. Thanks for following us!

8 People Shared Their Experience
Thank you. This was really helpful.
Rica ederim! Ayrıca, geri bildiriminiz için teşekkür ederiz!
Cool. Lightweight, correct, smart. It’s exactly great replacement for old utils like hwinfo, sysinfo. Thank you for sharing.
You’re welcome! Thanks for your feedback!
Good info. Thanks
You’re welcome! Thanks for your comment!
Neofetch is better.
Everyone has a choice 🙂