
In this article, I will tell you how to install Ubuntu 23.10 on a computer with a USB stick. It doesn’t matter whether you are using a desktop or a laptop PC; you can install both.
Before we start, Ubuntu is a widespread Linux distribution that we know with its broad support platforms. It is also ideal for those who are familiar with Linux commands or looking for a Windows alternative. So, let’s take a look at the system requirements, download the Ubuntu ISO, and prepare the USB installation media.
How to Install Ubuntu 22.10 from Scratch on a PC using a USB Flash Drive
If you are tired of using the Windows operating system, you can turn to alternatives. You can also consider changing your system to get used to Linux commands. In this case, I recommend Ubuntu, which has the most support platform on the Internet.
Entry-level users can improve their Linux experience with the Ubuntu distribution. In addition, thanks to this distribution, they do not have to pay for Windows. In addition, other Linux distributions offer a free option.
A license key is required to use Office software on Windows. However, you can use open-source office, media, and graphics software for free on the Linux/Ubuntu system. As a result, it is possible to get similar Windows programs for free.
Ubuntu 23.10, which we know as Mantic Minotaur, was released on October 12, 2023. However, this distribution, which does not have a long-term support version, will be supported until July 2024.
Now, I can hear that you want to install the latest version of Ubuntu on your PC. So, first, let’s download the ISO file from the official website. Then, let’s prepare the installation media by burning the ISO to a CD/DVD or USB memory.
System Requirements
Here are the recommended system requirements for this operating system that you will run on your PC or Laptop:
- 2 GHz Dual-Core Processor or Better.
- Minimum 4GB System Memory.
- Minimum 25GB of Free Disk Space.
- A healthy Internet Connection is required for Installing Related Packages During Installation.
- A DVD Drive or a USB Port for System Setup.
How to Download Ubuntu ISO and Prepare USB Installation Media
You can download Ubuntu ISO files from other websites on the Internet or from its official website. However, for the image file’s reliability, I recommend you download it from its website.
Step 1
To download the Ubuntu 23.10 ISO file to your computer, visit the official source. Then, scroll down the webpage a little and click on the Download button.

Step 2
After downloading the ISO image file, you need to download the Rufus program to prepare the USB setup media. Visit the Rufus website to download the system installation media creation software. Then, download the Exe or Portable version on the page you are viewing.
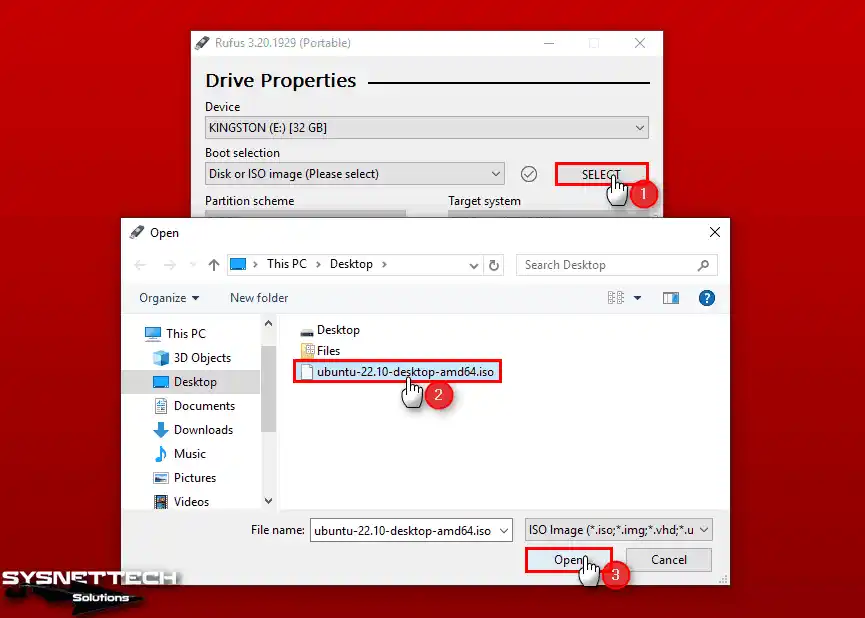
Insert an empty flash drive with a minimum capacity of 4 GB or 8 GB into one of the USB 2.0 or 3.0 ports of your PC. Then, run the Portable version of the Rufus program with a single click. Then, make sure that your USB is selected in the Drive Properties section.
Check that the Boot Selection setting is Disk or ISO Image. Then, select the Ubuntu ISO file by pressing SELECT and open it.
Step 3
If you want to install Ubuntu as UEFI, you should change the Partition Scheme setting to GPT. If you have an old PC, you should use the MBR scheme.
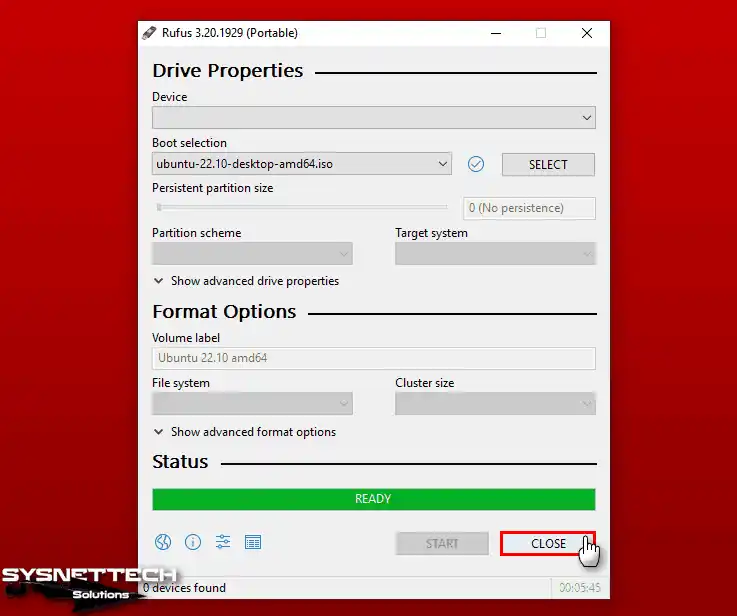
Now, you should burn the ISO image file to your USB stick. At this stage, click START to start the process.

Step 4
When the ISOHybrid Image Detected window opens, you need to select the burning mode. Also, you can burn the image file in ISO or Disk Image mode.
However, it is better to use the ISO Image Mode recommended by Rufus. So, click OK while the ISO mode is selected. Plus, you need to click OK again to confirm that all data on your flash drive will be deleted.

Step 5
When the ISO file-burning process is completed, check the status of your USB. Also, you can see that your USB is READY in the Status section. As a result, your USB is ready for installation after this stage.
How to Set Up Ubuntu Step-by-Step
After preparing the USB stick for this Linux edition, you need to plug it into your PC. Also, you need to boot your system from USB.
In addition, BIOS settings may be different on computers of other brands. Therefore, you need to learn how to access the BIOS and Boot menu from the manufacturers’ websites. In short, you can start the boot by making the correct settings.
Step 1
Once you have accessed your computer’s Boot menu, you need to start the installation. Here, you should select the name Removable Devices or USB.
However, these settings may differ on each computer. Usually, you can access the Boot menu by pressing F10, F12, F8, or ESC. In short, you can start the installation by selecting the correct setting.

Step 2
After booting your PC from USB, you will see the GNU GRUB menu. Then, you will see the option “Try or Install Ubuntu”. After selecting this option, you can press Enter to start the installation steps.

Step 3
You will need to wait while the system boots up. It would be best if you also waited for the installation wizard to prepare.

Step 4
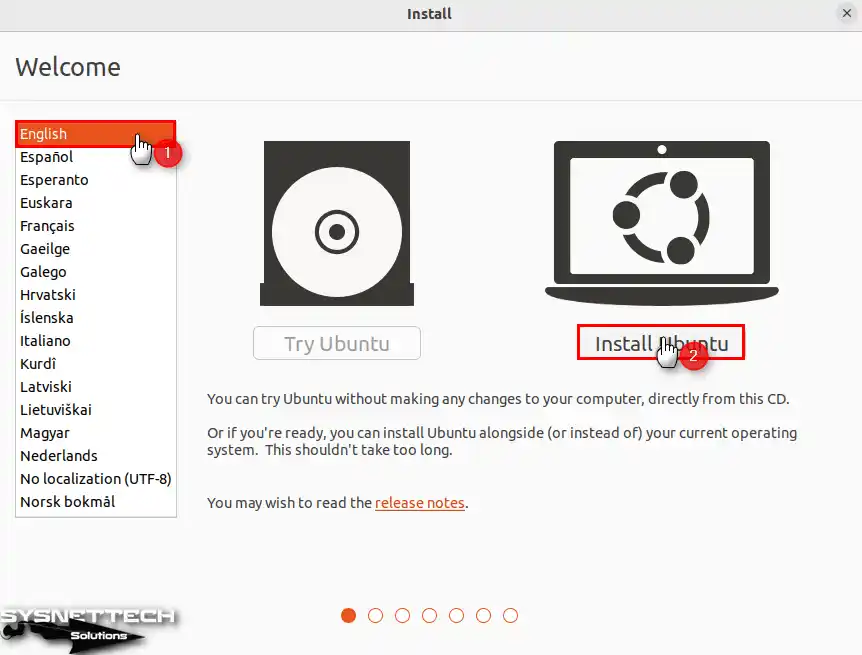
When the installation wizard opens, you will see the language options on the left panel. From here, you can choose which language your system will use.
After selecting the language, click the Install Ubuntu button to proceed with the installation steps.
Step 5
Choose a suitable layout according to your PC keyboard layout type. Moreover, click the Continue button after choosing the design.

Step 6
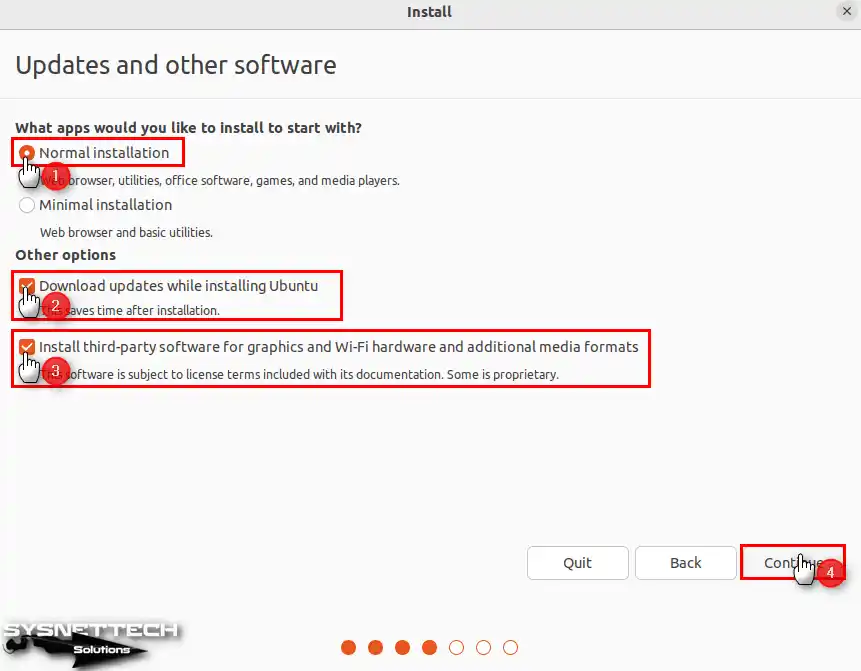
There are two ways to install Ubuntu distribution: normal or minimum features. In a normal installation, you will install the essential software required. Also, with the minimum installation option, you will install less software. Obviously, you can choose an installation option according to your needs.
In my opinion, choose the Normal Installation option. Then, go to Other Options. At this stage, decide to check for and install system updates. In addition, you can install 3rd party software that supports media formats. Finally, after making all the settings, continue.
Step 7
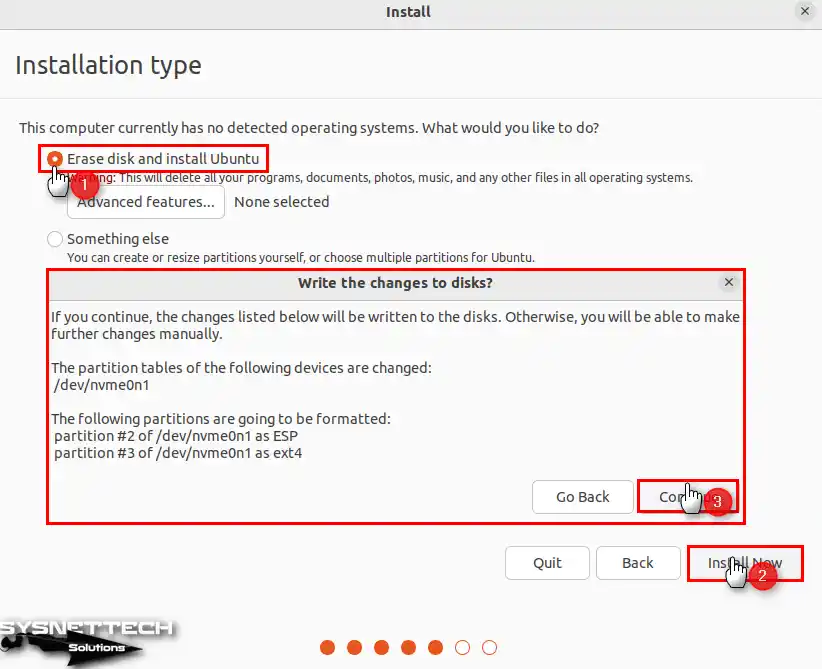
In the Installation Type section, choose a clean install. Also, make sure that there is no data on your hard drive or SSD. Then, select Disk Erase and Install Ubuntu. Finally, click the Install Now button.
You will see the question window “Do you want to confirm changes to the disk?” Here, after reviewing the disk partitions to be formatted, click the Continue button. After that, you can continue by confirming your action.
Step 8
To set the system time correctly, mark your city on the map. Then, check the city closest to your location and click the Continue button.

Step 9
In the Your Name section, write the full name of the computer owner. Moreover, enter your computer name and username in the other sections. After that, create a strong password for yourself.
Let me tell you something; if you do not want to enter a password when you restart your system, you can enable automatic login. After these processes, you can make a secure installation with these settings.

Step 10
Wait while the OS is being installed on your desktop or laptop. At this point, the wizard will download and install some large packages from the Internet. Therefore, the installation process may take a little longer, depending on your connection speed.

Step 11
Restart your PC immediately after installing the Ubuntu system.

Step 12
Remove the USB or DVD setup media from your PC and press Enter.

Step 13
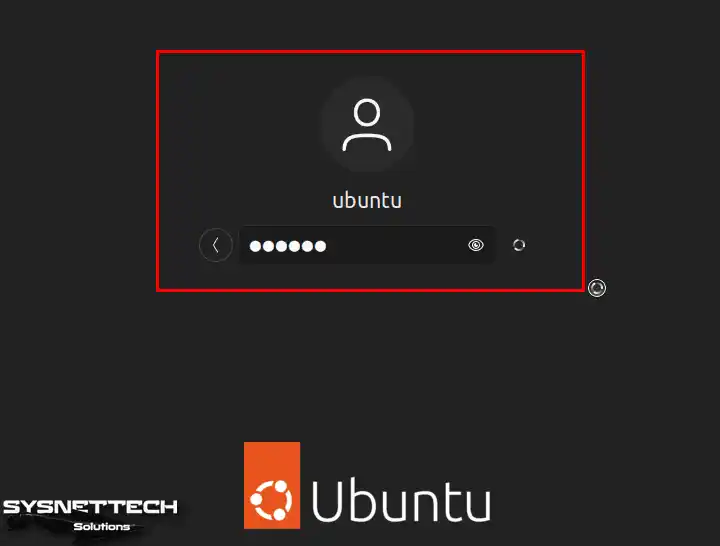
Type the password you have set for your user account to log in to your system. After that, log in by pressing the Enter key.
Step 14
On the Online Accounts screen, select your Google or other accounts. By signing in with these accounts, you can quickly view your online documents from your Linux system.

Step 15
There are several options on the Help Improve screen. For example, you can send information about the software you have installed, your computer model, or your bug reports.
Ultimately, you are sending this data to Canonical and contributing to the development of the Linux distribution.

Step 16
On the Privacy screen, you can enable apps to detect your location. What’s more, you can configure this option later. So you can adjust your privacy settings to fit your needs.

Step 17
You can use the software to install the popular applications listed on your Linux computer.

Step 18
After installing Ubuntu via USB, start the terminal by pressing CTRL + ALT + T. You can check the system version and codename by executing the “lsb_release -a” command on this console screen.
lsb_release -a
Video
Installing Old Versions
Frequently Asked Questions (FAQ)
- What are the system requirements for installing Ubuntu?
- How to create a bootable USB drive?
- Can I install Ubuntu alongside Windows?
- How do I format the disk during installation?
- Where can I get support for Ubuntu?
Conclusion
In conclusion, you will get a great opportunity by installing Ubuntu 23.10 on your PC. Frankly, this version is ideal for you to explore the world of Linux and improve your system experience.
Also, it gives you access to free and open-source software. Moreover, you can install this system without any problems by carefully following the steps I have given you. However, make sure that you meet the system requirements.
On the other hand, if you are going to switch from Windows, I am sure you will love the world of free software. In short, Ubuntu is suitable for users of all levels. It offers you freedom, flexibility, and community support.

Be the first to share your comment