

The more time you spend at your computer, the more critical your peripherals become. A keyboard, mouse, and monitor all matter. Yet a microphone is just as vital an input device. Whether you’re in a remote work meeting or a game chat, this small PC accessory is the backbone of your communication.
In 2026, the PC hardware ecosystem has expanded massively. We once viewed this peripheral as a simple sound input tool. Now it has become a desk essential. Picking the right model, setting up the correct connection, and optimizing software settings are all must-do steps.
I prepared this guide with 15 full years of PC hardware experience. We’ll cover every detail, from motherboard audio chips to USB connection standards. Windows 11 compatibility, driver issues, background hiss solutions, and budget advice are all here too. So, let’s get started!
What Is a Microphone? Core Working Principle & Historical Development
We call any device that feeds audio into your computer a microphone. This peripheral converts sound waves in the air into an electrical signal. The motherboard or an external sound card processes that signal. As a result, your voice turns into digital data.
The diaphragm is the core component that handles this conversion. In fact, a diaphragm consists of an extremely thin membrane. Sound waves strike this membrane and cause it to vibrate. The amplitude of the vibration depends on the loudness, while the frequency determines the pitch.
From Acoustic Energy to Electrical Signal: The Transducer Principle and the Role of the Diaphragm
The diaphragm is the heart of a microphone capsule. Manufacturers generally use materials just microns thick. Users often prefer Mylar, aluminum, or gold-plated plastic. When a sound wave hits the diaphragm, the diaphragm moves back and forth.
This mechanical movement turns into an electrical signal through various methods. For instance, in dynamic models, a coil attached to the diaphragm moves within a magnetic field. In condenser types, the capacitance between the diaphragm and backplate changes. However, both methods produce the same output: an AC voltage that represents the sound.
The mass and stiffness of the diaphragm directly affect the tonal character. Light diaphragms provide a fast transient response. Heavier diaphragms offer a smoother, warmer character. This is why you should choose different microphones for different usage scenarios.
From Analog Signal to Digital Data: ADC, Sample Rate, and Bit Depth
The signal coming from the diaphragm is still analog. A computer cannot understand this signal directly. This is exactly where the analog-to-digital converter (ADC) steps in. The ADC takes the continuous analog signal and converts it into discrete digital values.
Sample rate indicates how many times you take a measurement each second. CD quality uses 44.1 kHz. For streaming and gaming, 48 kHz is ideal. Bit depth defines the precision of each sample. 16-bit is standard, while 24-bit provides high quality.
A higher sample rate means a wider frequency range. A higher bit depth means a lower noise floor.
However, file sizes also grow exponentially. With USB audio devices, the ADC conversion takes place inside the unit itself. With XLR connections, an external sound card handles this task.
A Brief History of the Microphone: From Carbon Button to MEMS Chip
The first microphone emerged in 1876 with Alexander Graham Bell’s telephone. It operated on the principle of compressing carbon granules. Sound quality was very low by today’s standards. Yet for that era, it was revolutionary.
In the 1960s, the electret microphone was invented. A permanently charged material eliminated the need for external polarization. This technology brought headset and built-in laptop solutions to the PC hardware world. In the 2000s, MEMS microphone technology transformed cell phones and laptops.
Nowadays, a laptop carries 2 or 4 MEMS capsules. These capsules use beamforming technology to digitally suppress noise. You can no longer imagine a computer without this peripheral. In short, hardware and software optimization advance hand in hand.
Microphone Types: Dynamic, Condenser, Electret, MEMS, and More

There are dozens of microphone types on the market, and each uses a different conversion principle. As a result, each one has its own unique strengths and weaknesses. You need to understand these differences to make the right choice for your computer.
Dynamic models are famous for their ruggedness. Condenser types stand out with their sensitivity. Electret models offer an affordable alternative. MEMS chips represent the pinnacle of miniaturization. Now let’s examine each one with PC usage scenarios.
Choosing the right microphone prevents hours of background hiss and compatibility issues. I say this based on experience: first define your needs, then look for a model.
Core Differences Between Dynamic and Condenser Microphones (Comparison Table)
| Feature | Dynamic Microphone | Condenser Microphone |
|---|---|---|
| Operating Principle | Electromagnetic induction (coil + magnet) | Capacitance change (diaphragm + backplate) |
| Sensitivity | Low, rugged build | High, detail-oriented |
| Frequency Response | Midrange-focused, generally colored | Wide and flat, natural tone |
| Transient Response | Slow, smooth transitions | Fast, sharp attacks |
| Phantom Power | Not required | Generally needs 48V (except electret) |
| Durability | Very high, tolerates impact and humidity | Delicate, sensitive to humidity and impact |
| Price Range (2026) | $25–$240 | $45–$2,400+ |
| Ideal PC Use | Game chat, noisy office, live streaming | Quiet room, remote work, content creation |
The difference between dynamic and condenser is fully captured in this table. In a noisy environment, a dynamic microphone saves you. In a quiet home office, a condenser captures every detail.
But, in video meetings, image quality matters as much as sound. This is where webcam selection comes into play. To be clear, a good microphone and a quality camera complement each other.
For those using mechanical keyboards, dynamic models have an advantage. They won’t pick up your keyboard clicks.
Electret Microphones: The Affordable Cousin of the Condenser
An electret microphone is actually a type of condenser capsule. The key difference is that the diaphragm or backplate carries a permanent electric charge. This eliminates the need for an external polarization voltage. However, the built-in preamplifier still requires low voltage.
This microphone type is incredibly widespread. Nearly all built-in laptop microphone modules are electret. Headset and earphone mics are the same. They’re cheap, small, and deliver good-enough sound.
The difference between a condenser capsule and an electret mainly comes down to manufacturing cost. Electret capsules suit mass production. Sound quality falls short of full-fledged condenser models. But nobody can argue with the price-to-performance ratio it offers. It’s ideal for entry-level PC users.
MEMS and Beamforming Microphones: A Revolution in Laptops
Manufacturers produce MEMS microphones using semiconductor techniques. They integrate a tiny diaphragm and electronic circuitry onto a silicon chip. The size is smaller than a grain of rice. It works alongside a digital signal processing circuit.
Array microphone (beamforming) technology came to life with MEMS. Laptops feature 2 or 4 MEMS capsules in the screen bezel. These capsules detect where sound is coming from. Thanks to beamforming algorithms, they select the voice in front of the screen and suppress background noise.
Built-in beamforming microphone technology works for meetings. But an external microphone still delivers far better results. MEMS capsules have a limited dynamic range. Still, technological progress continues at full speed.
Special-Purpose Microphones: Lavalier, Shotgun, Boundary, and Headset
- Lavalier microphone: A tiny microphone you clip to your clothing. You use it for presentations and video shoots. Your hands stay free. Wireless models offer even more freedom of movement.
- Shotgun microphone: Its narrow pickup pattern captures distant sound. You mount it on a camera. It’s especially great for outdoor broadcasts.
- Boundary microphone: You place it on a flat surface. It’s ideal for conference halls and meeting tables. It covers a wide area.
- Headset: A microphone solution integrated with headphones. It suits gaming, call centers, and office use. Positioned close to your mouth, it reduces background noise.
Polar Pattern Guide: Which Pattern Does What?
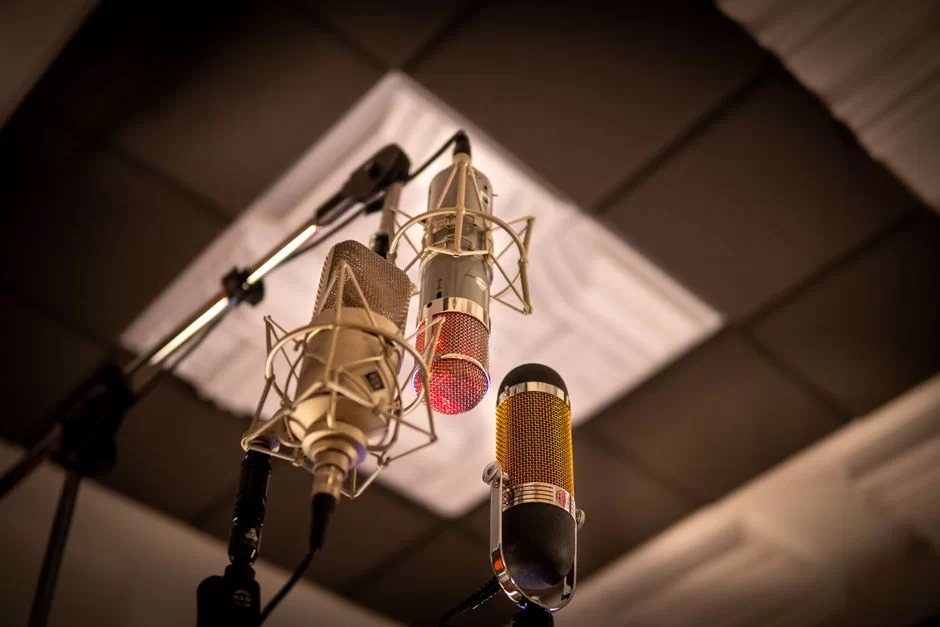
A polar pattern shows which directions a microphone capsule picks up sound from. This pattern directly determines how you’ll use the device. Choosing the wrong pattern can ruin your meeting or stream. The right pattern effectively eliminates noise.
Your pattern choice depends on your environment. An omnidirectional pattern works in a quiet home office. In a noisy office, cardioid is a lifesaver. Now let’s get to know each pattern through PC usage scenarios.
Cardioid, Supercardioid, and Hypercardioid: Trap Noise in the Back
The cardioid pattern is heart-shaped. It strongly picks up sound from the front. It reduces sound from the sides. So, it almost completely rejects sound from the back. This microphone type is ideal for home offices. It also cuts room echo and computer fan noise.
The supercardioid pattern has a narrower front pickup area. A small sensitivity lobe exists at the back. Side rejection is stronger than cardioid. Hypercardioid is even more extreme. The front area narrows further, and the rear lobe grows slightly.
These narrow patterns are ideal for noisy office environments. But be careful: the rear lobe can pick up unwanted reflections. This is why plain cardioid is safer than hypercardioid for home use.
Omnidirectional and Figure-8: When Should You Choose Them?
The omnidirectional pattern picks up sound with equal sensitivity from all directions. It captures room ambiance and natural reverb. It’s ideal for conference systems and meeting rooms. This microphone pattern doesn’t exhibit the proximity effect. That means bass won’t boom as you get closer to the source.
The figure-8 pattern picks up sound from the front and back. It completely rejects the sides. It’s perfect for face-to-face interviews. Two people can use a single microphone. But when using these patterns at home, pay attention to room acoustics. They record everything.
Shotgun and Narrow-Angle Patterns: Clear Audio Outdoors
Shotgun microphone models use an interference tube. This tube cancels out sound waves arriving from the sides through phase differences. As a result, you only hear the on-axis sound clearly. They’re ideal for outdoor broadcasts and video shoots.
Narrow-angle patterns are lifesavers in noisy settings. But using a shotgun at home is overkill. In a room with echo, a narrow pattern can make things worse. I believe cardioid is the most balanced choice for desk use.
Microphone Technical Specifications: Frequency Response, Sensitivity, THD, SNR, and Impedance
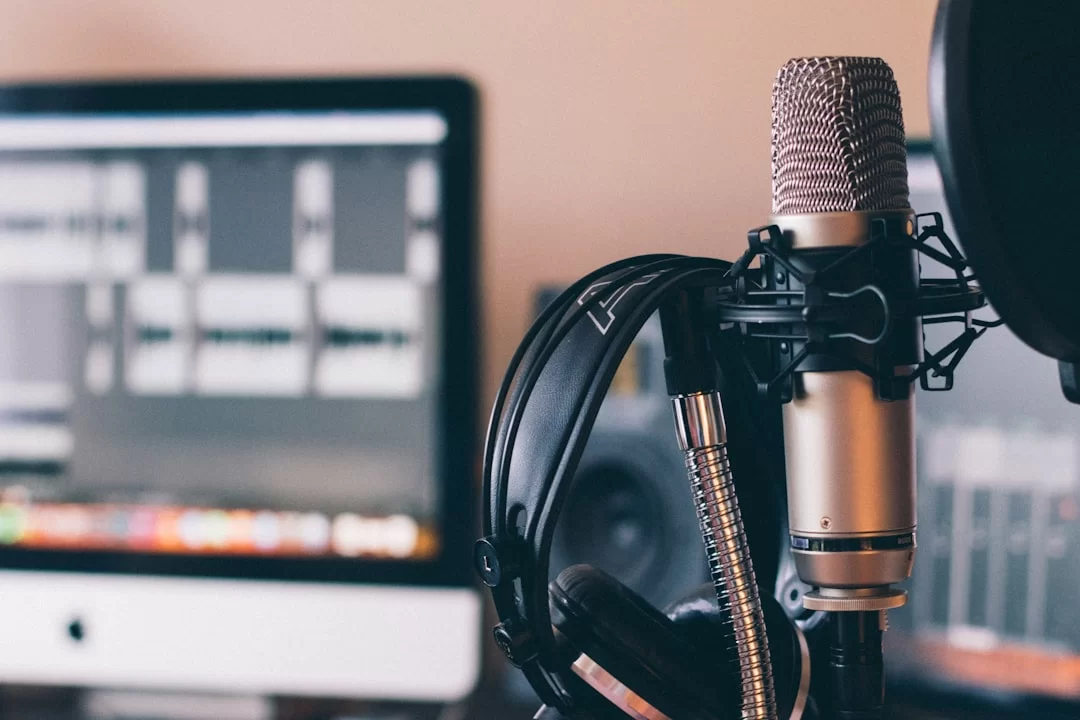
The spec sheet looks intimidating at first glance. But once you learn to read these numbers, your job gets easier. These data points guide your audio input device selection. When you’re torn between two microphones, the spec table decides.
Frequency response tells the tonal story. Sensitivity shows how strong a signal it produces. Self-noise reveals the quality of silence. Maximum SPL draws the line where distortion begins. Now let’s examine each one in detail.
Frequency Response and Tonal Character: Learn to Read the Graph
The frequency response graph tells you the tonal color. The horizontal axis shows frequency (Hz), and the vertical axis shows level (dB). A flat line means natural sound. Peaks and dips add character. So, how do you read a microphone frequency response graph? Here’s your answer.
For communication microphones, manufacturers aim for a slight peak between 2–5 kHz. This peak adds intelligibility to the voice. A dip in the bass region balances the proximity effect. On the other hand, a wide frequency range means a more natural sound.
A low-cut filter comes into play here. It cuts frequencies below 80 Hz. It cleans up foot stomps, AC hum, and wind noise. Plus, most microphones have a physical switch on the body for this filter.
Sensitivity, Self-Noise, and SNR: Measuring Silence and Detail
| Parameter | Definition | Ideal Range | What It Means |
|---|---|---|---|
| Sensitivity (dBV/Pa) | Voltage produced at 1 Pascal sound pressure | -30 dBV (high) to -60 dBV (low) | Higher sensitivity = stronger signal, needs less preamp gain |
| Self-Noise (dBA) | The base noise the capsule generates itself | 5 dBA (excellent) to 25 dBA (mediocre) | Lower self-noise = clean signal in quiet spaces |
| SNR (dB) | Signal-to-noise ratio | 70 dB (good) to 90+ dB (excellent) | Higher SNR = signal much stronger than noise, clean communication |
| Dynamic Range (dB) | The gap between the quietest and loudest signal | 100 dB (good) to 130+ dB (professional) | Wider dynamic range = handles everything from whisper to shout without distortion |
The self-noise floor is the enemy of quiet spaces. If you stream at night, a model below 10 dBA is a must. In a noisy office, this spec doesn’t matter much. The room noise already sits above the noise floor anyway.
THD (Total Harmonic Distortion), Maximum SPL, and Transient Response
THD measures the linearity of the microphone circuit. Low THD means clean, true-to-source sound. Values below 0.1% show you have a quality peripheral. High THD creates distortion and saturation.
Maximum SPL is the highest sound pressure the capsule can handle without distorting. If you shout while gaming, 130 dB SPL tolerance is enough. For normal speech levels, 120 dB is more than sufficient. But if you exceed the limit, the system clips the signal.
Transient response is how fast the diaphragm reacts to sudden sounds. Light-diaphragm models excel here. Dynamic microphone models offer smoother transitions. This difference matters for clarity in gaming and streaming scenarios.
Connection Interfaces: USB, XLR, 3.5mm Jack, Bluetooth, and Wireless Systems
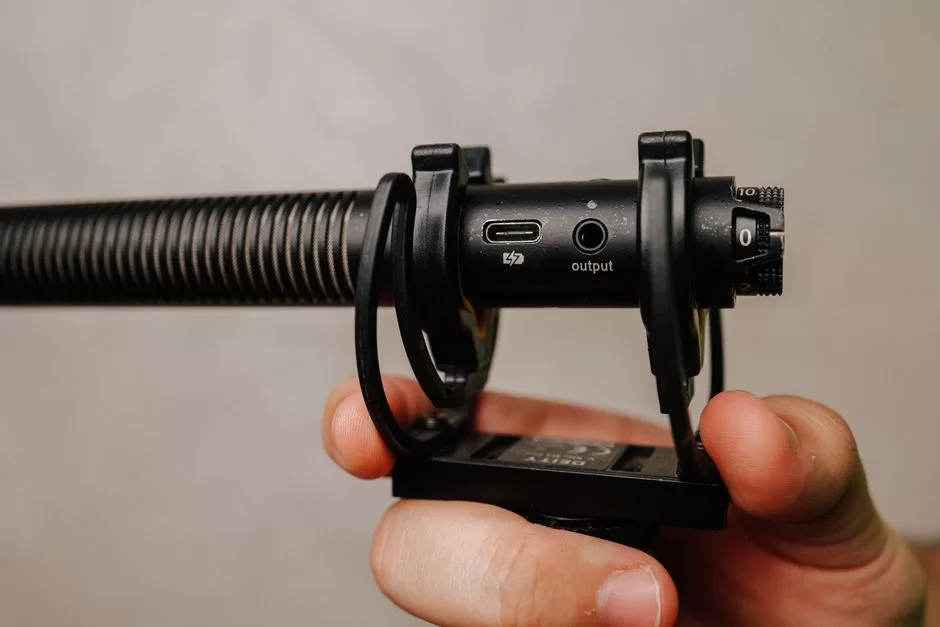
The connection type determines your setup ease and sound quality. USB provides plug-and-play convenience. XLR brings professional flexibility. A 3.5mm jack exists on every computer. Meanwhile, Bluetooth and wireless options promise freedom.
Which interface you choose depends entirely on your usage scenario. If you work remotely alone, USB is ideal. If you produce professional streams, XLR is a must. For travel and mobile use, you can consider wireless.
USB Microphones: Plug-and-Play Ease, Built-In ADC, and Sound Card Independence
USB computer microphone models make life easier. You connect them to your computer with a single cable. No external sound card or audio interface is needed. The DAC and ADC circuits sit inside the device. Plus, they’re ready to use right away with true plug-and-play logic.
Current USB models offer 24-bit / 96 kHz quality. A built-in headphone output lets you use direct monitoring. This means you hear your own voice without latency. Volume and mute controls sit right at your fingertips.
When choosing a USB microphone, pay attention to cable quality. Cheap models can produce cable hum. Shielded USB cables reduce this risk. Also, connect directly to a motherboard USB port rather than a hub. Hub connections create latency and interference.
XLR Microphone and Audio Interface: The Key to Professional Streaming
XLR connection is the professional world’s standard. Thanks to balanced signal transmission, there’s no interference even with long cables. The three-pin XLR connector carries ground, positive, and negative signals. How do you connect an XLR microphone to a computer? The answer is simple: with an audio interface.
Here’s the step-by-step XLR connection setup:
- Plug the female end of the XLR cable into the microphone body.
- Connect the male end to the audio interface’s XLR input.
- Connect the audio interface to your computer via USB or Thunderbolt.
- If you’re using a condenser model, turn on the phantom power (48V) switch.
- Slowly raise the gain knob. Your audio level should sit around -12 dB.
- On your computer, select the audio interface as the default input device.
An external audio interface gives you incredible control. You handle gain staging, EQ, and compression settings at the hardware level. Latency values are far lower than with a built-in sound chip. When I talk about streaming hardware, XLR is the first thing that comes to mind.
Wireless and Bluetooth Microphones: The Balance of Freedom and Latency
| Feature | Bluetooth Microphone | Professional Wireless (UHF/2.4 GHz) |
|---|---|---|
| Connection Range | 33 feet | 165–330 feet |
| Latency | 100–200 ms (noticeable) | 5–15 ms (nearly unnoticeable) |
| Audio Quality | Compressed codec (SBC, AAC, LDAC) | Uncompressed or lightly compressed |
| Frequency Stability | 2.4 GHz band, risk of Wi-Fi conflict | Dedicated frequency band, low conflict risk |
| Battery Life | 4–10 hours | 6–14 hours (replaceable battery) |
| Price Range | $15–$90 | $90–$900 |
| Ideal PC Use | Online meetings, sports, vlogging | Presentations, conferences, video shoots |
Connecting a Bluetooth microphone to a computer is easy. But the latency causes problems in live streaming. Your lip movements and audio fall out of sync.
This is why I recommend 2.4 GHz proprietary-protocol wireless systems for critical work. To solve frequency conflicts and interference issues, make sure you pair the transmitter and receiver correctly.
PC Hardware and Sound Cards: Motherboard Audio Chip, External Sound Card, Phantom Power
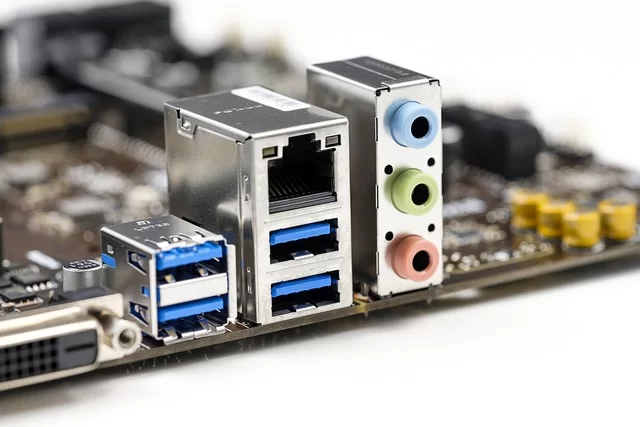
The sound card is one of the most critical links in your chain. Buy the world’s best microphone and plug it into your motherboard’s pink jack. You’ll be disappointed. Built-in onboard audio chips have limits. External solutions, on the other hand, make a real difference.
So when do you need an external sound card? If you use a dynamic microphone and your motherboard is high-quality, it might suffice. If you use a condenser model and want XLR, external is a must. Plus, if you’re building streaming hardware, you need an external sound card again.
Motherboard Microphone Input (Pink Jack) and Built-In Audio Chip (ALC892, ALC1200) Performance
The pink jack on the motherboard’s rear panel receives a mono signal. You make the connection with a 3.5mm connector. The built-in audio chip processes this signal. Realtek audio chip models are the most common on the market. The ALC892 motherboard microphone performance sits at a mid-range level.
The ALC892 chip supports 24-bit / 192 kHz. But in the real world, you won’t see these values. Electrical noise on the motherboard contaminates the signal. As gain increases, hiss grows. This becomes especially noticeable with sensitive condenser models.
The ALC1200 and ALC4080 are newer-generation chips. Their SNR values are better. But they still can’t compete with an external sound card. The motherboard microphone input works for emergencies and game chat. For professional work, however, an external solution is a must.
External Sound Card (Audio Interface) and Preamp: When Are They Necessary?
| Criterion | Built-In Motherboard Audio | External Sound Card (Audio Interface) |
|---|---|---|
| Noise Floor | High, electrical interference | Low, shielded circuitry |
| Gain Range | Limited, typically +20 dB | Wide, +50 to +70 dB |
| Phantom Power | None or very low voltage | Full 48V, stable power |
| XLR Input | None (3.5mm jack) | Yes (combo XLR/TRS) |
| Direct Monitoring | None | Yes (zero-latency monitoring) |
| Price | Free (comes with motherboard) | $45–$450 |
The difference between a preamp and a sound card can be confusing. The preamp boosts the signal to line level. So, the sound card converts the analog signal to digital. External audio interface devices offer both in one unit. Investing in a hardware audio interface pays off in the long run.
What Is Phantom Power (48V)? Which Microphones Need It?
Phantom power (48V) is DC voltage sent through the XLR cable. It polarizes the condenser microphone capsule and powers its built-in preamplifier. The name isn’t a coincidence: it rides invisibly on the signal line. In other words, it doesn’t affect the audio signal.
Dynamic models don’t need phantom power. Always check your microphone model before pressing the +48V button on your sound card. The audio interface connection and preamp compatibility are critically important.
Microphone Accessories: Pop Filter, Shock Mount, Boom Arm, Windscreen, and Stand Selection
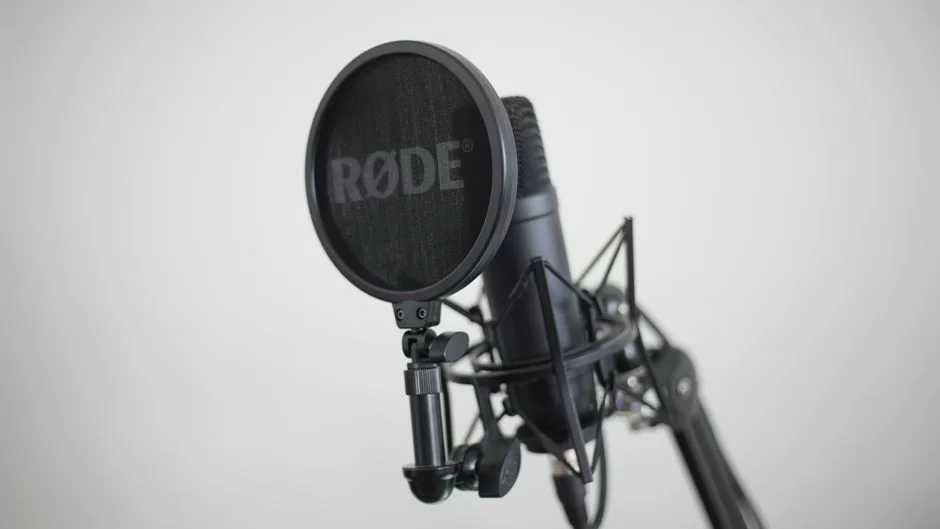
Accessories are the silent heroes of any microphone setup. Most people don’t want to spend money on them. But believe me, a $15 pop filter doubles the performance you’ll get from a $150 device. In short, clean communication is hard without accessories.
A pop filter stops plosive sounds. A shock mount dampens vibrations. Plus, a boom arm provides ergonomics and silence. A windscreen blocks wind noise during outdoor shoots.
Pop Filter and Windscreen (Deadcat): Blocking Plosives with Science
A pop filter is a thin layer of nylon or metal mesh. You place it between the microphone and your mouth. Plosive consonants like P, B, and T create a strong burst of air. When this burst hits the diaphragm, the system records a low-frequency pop. This filter disperses that airflow.
Does a pop filter really work? My answer is a firm yes. I’ve done countless setups since 2004. Not a single stream was clean without a pop filter. You can’t remove plosive pops with software. So prevention is always better than cure.
A windscreen (deadcat) breaks up the wind with its furry structure. It disperses the airflow reaching the microphone capsule during outdoor shoots. You generally don’t need one indoors. But if fan or AC air blows directly onto the capsule, a small windscreen helps.
Shock Mount and Boom Arm: Defeat Your Vibration Enemy
A shock mount suspends the microphone body with elastic bands. These bands absorb desk bumps, foot stomps, and keyboard vibrations. Without a shock mount, the slightest tap on the desk bleeds into the signal. An anti-vibration suspension solves this problem at the root.
You mount a boom arm to your computer desk. It positions the device ideally. It completely isolates it from the desk surface. It’s a must-have for any streaming hardware setup. Cheap arms loosen over time and produce spring noise. So I recommend quality models like the Rode PSA1 or Blue Compass.
If you use a quality boom arm with vibration-dampening pads, your vibration problem ends completely. Your investment in this duo pays you back with years of clean communication. A desktop microphone stand is a cheaper alternative. But its vibration isolation is zero.
Microphone Stand and Desktop Solutions: Ergonomics and Positioning
- Desk tripod: Small, portable, and cheap. It suits travel and mobile use. But it has no vibration isolation.
- Desktop microphone stand: Models with heavy cast bases are ideal. A foam pad reduces vibration somewhat. Works well when paired with a shock mount.
- Boom arm: You mount it to a wall or desk. It has a flexible arm. It’s the best for microphone positioning and proximity effect control. Plus, it’s the top choice of streamers and office workers.
The Reality in the US: Hardware Solutions for Background Hiss, Static, and Grounding Problems
Now let’s get to the most frustrating part. Most electrical wiring in the US is older and often poorly grounded. Many apartment units either lack a ground line or have an unhealthy one. This situation pushes thousands of users to search for PC microphone static noise solutions.
Background hiss, static, and hum are usually electrical. Trying to fix them with software is futile. You must pinpoint the source and intervene with hardware. I’ve set up countless home offices over 15 years. I’ve solved even the most stubborn background hiss problems.
Case Static Electricity and Microphone Static: Pinpoint the Source
A computer case builds up static electricity. If the case isn’t properly grounded, this charge flows to the microphone circuit. The result: an annoying static noise.
This problem becomes especially noticeable with metal-body models. Case static electricity and microphone static are the most common audio problems in the US.
Diagnose the problem step by step:
- Open the case side panel and check the grounding screws.
- Test the outlet’s ground line with a voltage tester or multimeter.
- Measure the voltage between the case and the microphone body. This value should be 0V.
- If present, replace an old, cheap power supply (PSU) with a quality model.
- For USB microphones, use a shielded cable with a ferrite core.
- For 3.5mm microphone PC connections, choose the motherboard’s rear panel. Front panel cables especially collect interference.
Ground Loop and Background Hiss: Using a Galvanic Isolator
A ground loop forms when two devices sit at different ground potentials. If your computer and audio interface are powered from different outlets, the risk is high. A current loop forms between them through the ground line. You hear this loop as a 60 Hz hum.
For a ground-related background hiss solution, use a galvanic isolator. This small device electrically isolates the signal path. It passes the audio and blocks DC current. You plug it into your 3.5mm or XLR connection. It costs between $6 and $15. The benefit it provides is priceless.
As an alternative, plug all equipment into the same power strip. This method equalizes ground potentials. It’s one of the cheapest and most effective solutions.
Also, if you use a laptop, try removing the charger and running on battery. If the hiss stops, the charger is the problem.
How to Reduce Hiss from Your Motherboard Audio Chip (ALC892)?
- Lower the gain level: Through the Windows audio control panel, keep gain below +10 dB. High gain raises the noise floor.
- Disable microphone boost: Never use the +20 dB boost option in Realtek microphone settings. This amplifies the noise.
- Optimize the sample format: 24-bit / 48000 Hz is the most stable option. 192 kHz strains the motherboard circuit and increases interference.
- Disable audio effects: Turn off all environmental effects and noise suppression in the control panel sound settings.
- Use the rear panel: The case front panel jack connects to the motherboard through a long cable. This cable acts like an antenna for interference. The audio input port on the motherboard’s rear panel is always cleaner.
Microphone Setup in Windows 10/11, Drivers, and Privacy Settings
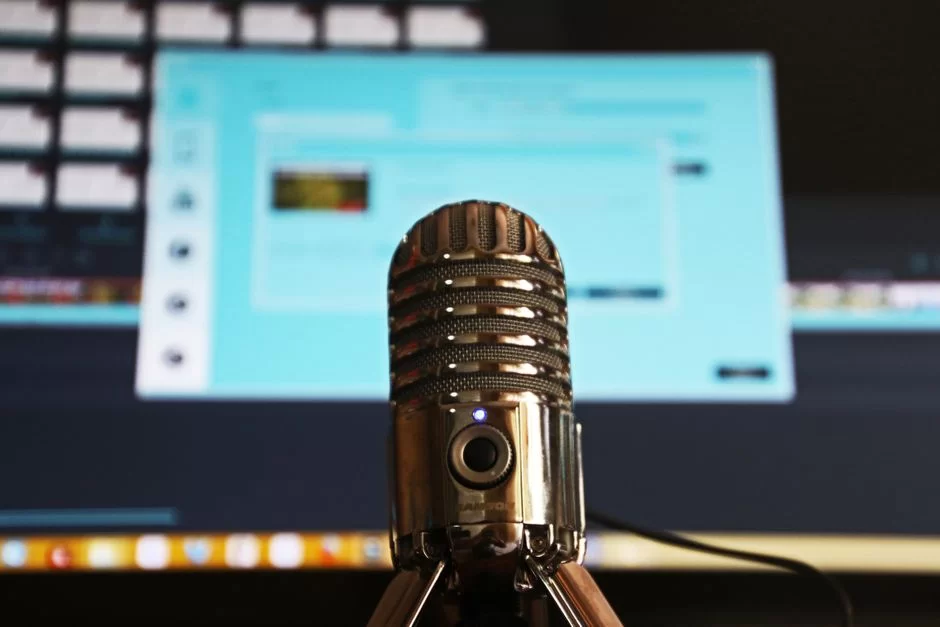
The hardware side is complete. Now it’s time for the software settings. Windows packs layers upon layers of audio settings. If you misconfigure one of these layers, all your effort goes to waste. So, let’s tackle them all in order!
The differences between Windows 10 and 11 are mostly in the interface. The core audio architecture is the same. I’ll provide steps that work for both operating systems.
Step-by-Step Windows 10 and Windows 11 Microphone Setup and Level Adjustment
- Right-click the Start menu and open “Settings.”
- Go to “System” and then the “Sound” section.
- In the Input section, select your microphone device.
- Click device properties. Then set the volume level to around 80%.
- Click the “Additional device properties” link.
- In the “Levels” tab, adjust the gain. Generally, 70–80 is ideal.
- Uncheck all boxes in the “Enhancements” tab.
- In the “Advanced” tab, select the 24-bit, 48,000 Hz format.
Run a computer microphone test immediately. In the Sound section, there’s a “Test microphone” button. Speak at a normal volume.
The progress bar should show between 60–80%. If it reaches 100% without shouting, lower the gain. If a whisper doesn’t pass 10%, raise the gain.
Microphone Driver Update and Device Manager Troubleshooting
When your microphone isn’t working, this is the first place you look for a fix. Open Device Manager. Expand the “Sound, video, and game controllers” category. Find your sound card here, right-click it, and update the driver.
If a USB microphone isn’t detected, look under “Universal Serial Bus controllers.” A yellow exclamation mark means a driver problem. Remove the device and restart the computer. Windows will then install the correct audio driver on its own.
If the computer doesn’t detect the microphone, the problem is sometimes the USB port. Try plugging it into a different USB port. A USB 2.0 port may work more stably than USB 3.0. Some older audio interfaces show incompatibility with USB 3.0.
Windows Microphone Privacy Settings and App Permissions
Privacy settings are tightened in Windows 10 and 11. Many users get stuck here. Follow this path: Settings > Privacy & Security > Microphone. Turn on the “Let apps access your microphone” option. Select which apps can access it individually.
Unless the operating system grants microphone permission, no app can capture audio. Check permissions for programs like Discord, OBS, and Zoom. Also, there’s a separate toggle for desktop apps. Don’t forget to turn that on too.
For browser-based apps, check site permissions as well. Google Meet and Microsoft Teams web versions request permission from the browser. If you’ve blocked microphone access in your browser settings, the other party won’t hear you.
Virtual Audio Cable for Advanced Audio Routing
A virtual audio cable is a software-based audio routing tool. It sends an audio output as a virtual input to another program. It is invaluable when configuring professional microphone settings for streaming and broadcasting. You can route game audio and microphone signals to separate channels.
Installation is simple, but configuration can be confusing. Each virtual cable creates one input and one output. You set the output as a program’s default speaker. You select the input as another program’s microphone source. It’s a powerful tool for hardware and software optimization.
Improving Audio Quality: Gain Staging, OBS Filters, AI Noise Suppression, and EQ
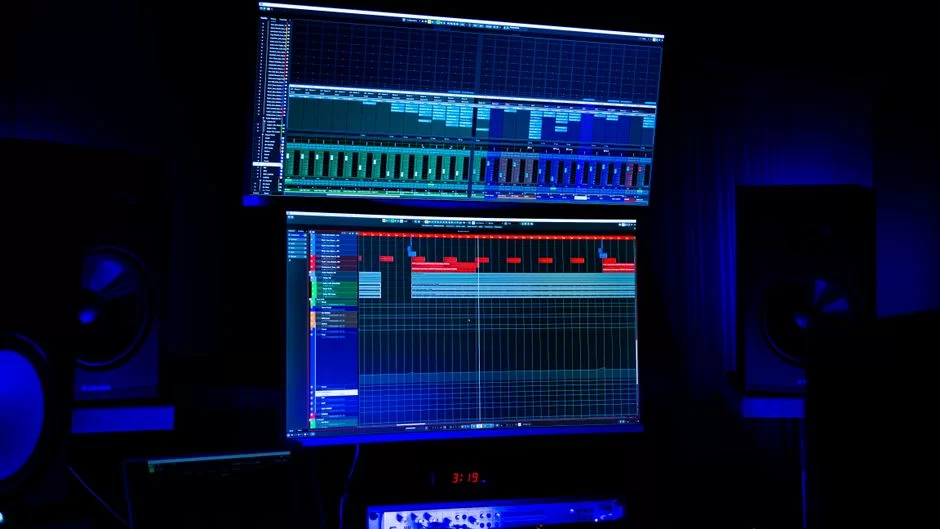
Hardware and connections are done. Now it’s time for signal processing techniques. Raw audio is rarely ready for streaming or meetings. Gain staging builds a clean foundation. EQ shapes the tone. A compressor controls dynamics. A noise gate cleans up silent moments.
The order of these processes matters. Filters applied in the wrong order ruin your sound. Now let’s build this chain together.
What Is Gain Staging and Why Is It Critical?
Gain staging means maintaining the optimal signal level at every point in the chain. It starts at the microphone capsule and continues to the streaming platform. At each stage, the signal should be neither too low nor too high. The target level is generally around -12 dBFS.
Incorrect gain settings lead to two disasters. With gain too low, you boost the signal later and the noise rises too. With gain too high, the signal clips and distortion occurs. You cannot salvage a clipped signal. This is why gain setting is the most critical step.
Think of the chain from start to finish: Microphone capsule → preamp → ADC → software input → filters → stream output. Check the signal level at each arrow point. Watch the meters in OBS or your communication software. Peaks should not exceed -6 dBFS.
OBS Studio Microphone Filters: Noise Gate, Compressor, EQ, and Limiter Setup
OBS Studio is the standard tool for streamers. Its built-in audio filters are quite successful. To set up OBS microphone filters, right-click your microphone input in the sources section and select “Filters.” But add the filters in this exact order:
- Noise Gate: Threshold -45 dB, close -55 dB. Completely cuts background noise during silent moments.
- Gain: Add enough gain to bring the signal level to -12 dBFS. For most microphones, +3 to +6 dB is enough.
- Compressor: Ratio 3:1, threshold -24 dB, attack 5 ms, release 100 ms. Controls sudden volume spikes.
- EQ (Equalizer): Cut below 80 Hz with a low-cut. Drop 200–300 Hz by 2–3 dB. Add a 1–2 dB peak at 3–5 kHz.
- Limiter: Ceiling -3 dBFS. Guarantees the signal will never clip.
This chain is enough for clean, professional streaming audio. Don’t change the filter order. If you place the compressor before the EQ, the tonal balance breaks. The limiter must always be last. Otherwise, you’ll try to process an already-limited signal.
RTX Voice, NVIDIA Broadcast, and Discord Krisp: AI Noise Suppression Comparison
| Software | GPU Requirement | Noise Reduction | Latency | Price |
|---|---|---|---|---|
| NVIDIA Broadcast | RTX 2060 and above | Very high (AI-based) | ~15 ms | Free (with RTX cards) |
| RTX Voice | GTX 1060 and above (RTX recommended) | High | ~20 ms | Free |
| Discord Krisp | None (CPU or GPU) | Medium-high | ~5 ms | Free (with Discord) |
| OBS RNNoise | None (CPU) | Medium | ~2 ms | Free (with OBS) |
Setting up RTX Voice microphone settings is very simple. Install the app, and select your microphone model as the input device. Adjust the noise reduction level to your needs. The 80% level works well for most settings. But if you push it to 100%, your voice may sound robotic.
NVIDIA Broadcast also offers room echo removal and virtual background features. Discord Krisp provides effortless noise suppression within chat apps. AI noise suppression technology has become standard in 2026.
Discord Hardware Settings and Audio Processing Optimization
- Enable noise suppression: Under Discord hardware settings, enable Krisp noise suppression. The standard option is sufficient.
- Turn off automatic gain control: This feature constantly changes your volume level. You don’t want this in professional use.
- Enable echo cancellation: If you use speakers, this feature prevents feedback. But you can turn it off if you use headphones.
- Turn off advanced voice activity: A manual threshold setting gives more consistent results. -40 dB is a good starting point.
- Set the audio subsystem to Legacy: The standard subsystem causes problems with some microphone models. Legacy mode offers wider compatibility.
Studio and Room Acoustics: Microphone Placement, Echo Control, and Acoustic Isolation
Room acoustics affect communication quality more than you might think. In an empty, echoey room, even a $300 microphone will sound unpleasant.
In a small, acoustically treated room, a $60 device works wonders. You cannot ignore isolation and echo control.
Applying these principles at home is easier than you think. You don’t need expensive equipment. In short, correct positioning and a few smart materials are enough.
Echoey Room Problems and Low-Budget Acoustic Treatment Solutions
- Bookshelf strategy: A full bookshelf is an excellent diffuser. It scatters sound waves and reduces echo. A bookshelf placed behind your microphone works wonders.
- Thick curtains: Windows are hard surfaces that cause reflections. Thick velvet curtains absorb these reflections. Make sure they’re wide enough to cover the entire window.
- Rugs and carpets: Hard floors are the main source of echo. Lay down as large a rug as possible. Definitely cover the floor area beneath your microphone.
- Acoustic panels: You can buy ready-made ones or build your own. Use rock wool or foam panels. Place them on the wall behind your microphone and on the side walls.
Microphone Positioning and the Proximity Effect
You see the proximity effect in directional microphone models. As you get closer to the source, bass frequencies rise in an exaggerated way. At 2 inches, the bass sounds full and rich. At 12 inches, you get a thinner, more natural tone. This is a physical phenomenon, not a flaw.
You can use the proximity effect creatively. If you want a more powerful tone, speak from 2–4 inches away. If you want a natural tone, leave 6–8 inches of distance. Speaking at a slight angle rather than straight into the capsule reduces plosive pops.
A boom arm is ideal for microphone positioning and proximity effect control. You can adjust the distance with millimeter precision. Spend five minutes recording tests at different distances. Your ears will find the right position right away.
Direct Monitoring for Latency-Free Recording
Direct monitoring is when the audio interface sends the microphone signal directly to your headphones. The signal doesn’t travel to the computer and back. This gives you zero latency. You hear your own voice in real time. Hearing latency during a meeting degrades your performance.
Most external audio interfaces feature a direct monitoring button. On USB microphone models, the built-in headphone output serves the same purpose. Never use the “Listen to this device” option in Windows audio settings. This method creates significant latency. Hardware monitoring is always superior.
Don’t set the monitoring level too high. This protects your ears and reduces the risk of feedback. With headphones, the feedback risk is quite low. But if you use speakers, make sure to place the microphone capsule in the speaker’s dead zone.
Best Computer Microphone Recommendations by Use Case
Theory is done. Now let’s get to practical recommendations. I’m listing microphone models that suit every budget and every computer usage scenario. This list is based entirely on my experience and current test data. I’m also providing all models with their 2026 prices.
Remember: the most expensive is not always the best. The one that fits your use case is the best. Using delicate, sensitive equipment while gaming makes no sense. Conversely, a gaming headset mic falls short for content creation.
Gamer and Discord Microphone Recommendations: For the Clearest Communication
- HyperX QuadCast S (USB): Comes with a built-in shock mount and pop filter. RGB lighting matches the gamer aesthetic. Offers 4 polar pattern options. In cardioid mode, it’s ideal for gaming. Price: starts at $293.
- Elgato Wave:3 (USB): Unrivaled in audio routing with Wave Link software. Clipguard technology hardware-blocks plosive sounds. A perfect solution for streaming and gaming. Price: starts at ~$120 – $170.
- Razer Seiren V2 X (USB): Offers compact size and supercardioid pattern. Ideal for gamers seeking a microphone that won’t pick up mechanical keyboard sounds. Price: starts at ~$65 – $85.
- Fifine AmpliGame A8 (USB/XLR): Budget-friendly with dual connectivity. RGB and a touch-sensitive mute button add convenience. A great choice for entry-level gamers. Price: starts at ~$47 – $60.
Professional Microphone Solutions for Podcast, Broadcast, and Streaming
| Model | Type | Connection | Polar Pattern | Standout Feature | Price (2026) |
|---|---|---|---|---|---|
| Shure MV7+ | Dynamic | USB + XLR | Cardioid | Hybrid connectivity, Voice Isolation technology | From $299 |
| Rode PodMic USB | Dynamic | USB + XLR | Cardioid | Built-in pop filter, rich midrange | From $199 – $260 |
| Audio-Technica AT2040 | Dynamic | XLR | Hypercardioid | Excellent off-axis rejection | From $99 – $129 |
| Rode NT1 5th Gen | Condenser | XLR + USB | Cardioid | 4 dBA self-noise (quietest on the market) | From $230 – $260 |
| Shure SM7dB | Dynamic | XLR | Cardioid | Built-in preamp, the gold standard of broadcasting | From $500 – $650 |
If you’re looking for a streaming microphone, lean toward dynamic models. In a noisy environment, a condenser picks up every click and clack. A dynamic microphone, on the other hand, focuses only on your mouth. In my opinion, the Shure MV7+ is the most flexible option with its USB and XLR support.
Best Budget Microphones for Meetings, Remote Learning, and Office Use
- Jabra Speak 510: Also works as a conference system. Provides 360-degree audio pickup. It’s portable and features Bluetooth. Price: from $111 – $150.
- Anker PowerConf: 6 MEMS capsules cover the entire table. USB and Bluetooth connectivity plus its rechargeable design let you carry it easily. Price: from $110 – $130.
- Fifine K678: A USB-connected desktop model. Focuses on the speaker with its cardioid pattern. Sound quality is surprising for its price. Price: from $50 – $60.
- Maono AU-A04: Comes as a complete kit. Pop filter, shock mount, and boom arm are included. A great starter set for remote learning. Price: from $45 – $60.
Portable Microphones for Travel and Mobile Use
- Rode VideoMic GO II: Lightweight and operates without batteries. Offers camera or phone connectivity. You can also connect it to a computer via USB. Price: from $99.
- DJI Mic 2: A wireless lavalier type. The transmitter-receiver set comes in a compact charging case. Offers a 820-foot range. The backup recording feature is a lifesaver. Price: from $250 – $270.
- Shure MOTIV MV88+: Compatible with phones and computers. Delivers rich recordings with stereo condenser capsules. What’s more, the kit includes a tripod and carrying case. Price: from $219.
- Saramonic Blink 500 B2+: A budget-friendly wireless lavalier set. Comes with two transmitters and one receiver. Also offers USB-C and Lightning connectivity. Price: from $110 – $160.
Microphone Maintenance, Moisture Protection, and Long-Life Usage Tips
A good microphone lasts for decades with proper care. In my studio, a 1998 model still works flawlessly. The secret is regular maintenance and correct storage. Neglect it, and it breaks in six months. But take good care of it, and you’ll use it for years.
Moisture and dust are the biggest enemies of these devices. Condenser capsules are especially hypersensitive to moisture. Moisture that accumulates on the diaphragm muffles the sound and causes permanent damage.
Moisture and Dust: The Hidden Enemies of a Condenser Microphone
A condenser capsule’s diaphragm is micron-thin. Moisture accumulates on this delicate surface and changes the capsule’s capacitance. The result: crackling, intermittent, or completely dead audio. This situation may seem temporary, but it leads to permanent corrosion.
To protect against moisture and dust, store your microphone in its case when not in use. Put silica gel packets inside the case. These packets absorb moisture and protect the capsule. If you live in a humid area, get a hygrometer. Humidity should not exceed 60%.
Cable Care, Connector Cleaning, and Storage Recommendations
- Wrap cables properly: Learn the over-under wrapping technique. Don’t wrap cables by bending them at the elbow. The internal conductors break over time and background hiss begins.
- XLR connector cleaning: Clean the pins with contact spray every 3-6 months. If you skip this, oxidation degrades signal quality and causes crackling.
- Watch the USB port: When unplugging a USB microphone, don’t pull from the cable. Grip the connector and pull straight out. Port damage is expensive to repair.
- Pop filter cleaning: Wash nylon pop filters in warm, soapy water every two months. Accumulated saliva and dust create hygiene problems.
- Storage: Store your microphone in its case or a closed cabinet. Protect it from direct sunlight and excessive heat. Also, cover it with a dust bag or cling wrap.
Learn More About PC Microphones
To round out the essential knowledge about this important PC hardware component, you can check out the authoritative resources below. These guides explain microphone types and connection protocols. You’ll also clearly learn the factors that affect audio quality.
- Lenovo’s PC Audio Input Hardware Guide: Comprehensively covers audio capture features and hardware compatibility across different computer models.
- Shure’s Guide to Connecting Professional Audio Devices to Laptops: Explains required interfaces, adapter solutions, and signal processing methods step by step.
- Audio‑Technica’s Guide to Choosing a USB Audio Recording Device: Compares performance differences between dynamic and condenser types with clear examples.
PC Microphone FAQs
My computer doesn’t detect my microphone. What should I do?
Which is better: a dynamic microphone or a condenser microphone?
What’s the difference between a USB microphone and an XLR microphone?
Why is my microphone producing static or background hiss?
What is phantom power (48V)? Is it necessary for every microphone?
What’s the best way to block background noise and fan sound?
How do I connect an external microphone to a laptop without a mic input?
How do I read a microphone frequency response graph and why is it important?
What does the pink jack do and which microphones use it?
Can you achieve professional-quality recording with a computer microphone?
Conclusion and Summary: Step Into Professional Audio with the Right Microphone Choice
As you’ve seen, choosing a microphone isn’t as complicated as people think. Define your needs, set your budget, and understand your environment. Honestly, the rest falls into place on its own.
Dynamic models are the lifesavers of noisy environments. Condenser types are the detail-catchers of quiet offices. USB delivers convenience, and XLR brings professionalism. With the right accessories, you can elevate any setup to the next level. Also, don’t forget about grounding and a galvanic isolator to fight background hiss.
My final piece of advice: expensive equipment doesn’t make you a professional. You can achieve excellent communication with a mid-range microphone as long as you treat your room acoustics, do your gain staging correctly, and arrange your filters in the proper order. Your voice is ready — now go show the difference in your meetings, games, and streams!

Be the first to share your comment