
In this guide, I want to talk about KVM and QEMU. I will also explain how you can use them on Linux systems. These open-source solutions provide a powerful way to run virtual machines.
Moreover, they are ideal for emulating different operating systems. I will tell you what KVM and QEMU are and how they differ. In addition, I will show you how to install and configure them on Linux. Let’s get started!

What are KVM and QEMU & How to Use Them?
KVM (Kernel-Based Virtual Machine) is an open-source virtualization solution for the Linux kernel. It also works with processors with Intel VTx and AMD-V technology.
To fully understand how KVM works, you need to know how the Linux kernel is built. The kernel has virtualization features already inside it.
In this way, it provides full virtualization using hardware acceleration. In addition, you can increase system performance with KVM. As a result, you get a powerful virtualization experience.
In addition, KVM requires QEMU to use its full virtualization capability. You can visit its website to get more information about this virtualization solution.
What is QEMU?
QEMU (Quick EMUlator) is an open-source system emulator. Also, you can run systems like Windows and Linux with QEMU. However, they have developed it to work on different hardware platforms.
Plus, it uses KVM for hardware acceleration. In short, it provides a Hypervisor Type 1 virtualization solution.
With QEMU, you can run ARM software on an x86-based computer. For example, Android developers can use the Android emulator on Eclipse.
But this emulator is one of the examples of ARM software. For additional information about ARM, you can refer to the following source. Thus, QEMU provides flexibility in different architectures.
For detailed information about QEMU, you can also visit the official website.
What is the Difference Between Them?
Now, let’s explain the difference between these two structures. We often use these terms together. In short, KVM is a virtualization method for Linux systems.
On the other hand, QEMU provides a user interface to KVM. In other words, QEMU needs KVM for the virtualization solution. In short, both work together.
| Advantage | Explanation |
|---|---|
| Performance | KVM delivers near-native performance for virtual machines by leveraging hardware virtualization extensions. |
| Wide operating system support | KVM and QEMU support many guest operating systems, such as Linux, Windows, and BSD. |
| Versatility | QEMU adapts to different use cases and environments, thus supporting emulation for multiple architectures. |
| Open source structure | Both provide transparency and flexibility and are open-source projects with community support. |
Running KVM & QEMU on Ubuntu
Virtualization infrastructures generally run with high stability in Ubuntu server environments. While minor differences between versions might sometimes change package names, don’t worry.
It is easy to configure KVM & QEMU on Linux-based Ubuntu, Debian, Linux Mint, and other systems. Also, this process is simple for Fedora, Kali Linux, and openSUSE systems.
After the installation, when creating a new virtual machine, you can choose KVM or QEMU as the Virt Type. Making the right choice will affect your virtualization performance. So you can quickly complete the configuration process.
Now, let’s install KVM & QEMU on Ubuntu. First, open the command terminal by pressing CTRL + Alt + T. Also, follow the steps below in order. Thus, check that the processes are going smoothly after each step.
Steps:
Step 1
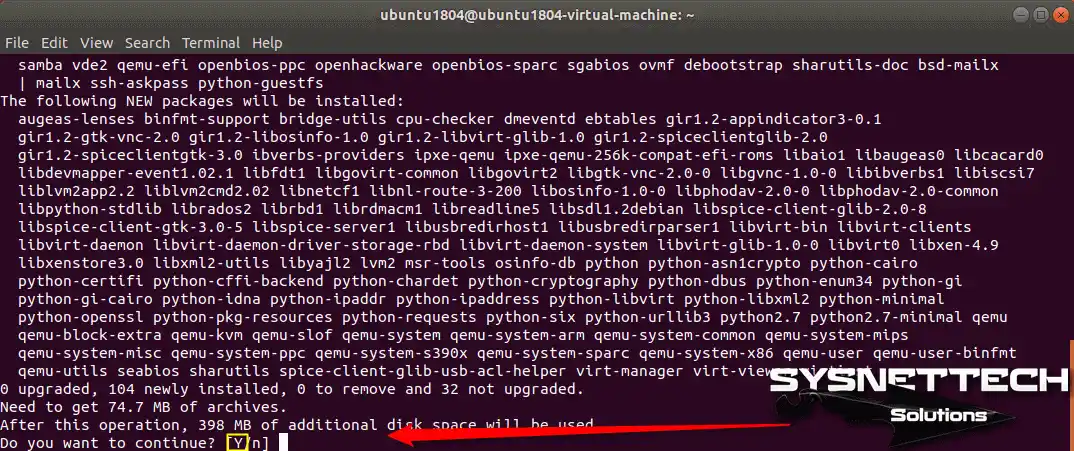
Regardless of your Ubuntu version, first, execute the command below in the terminal.
sudo apt-get install qemu-kvm qemu virt-manager virt-viewer libvirt-bin
NOTE: The libvirt-bin package was split into two parts in version 18.10. So, for installation on Ubuntu 18.10 or 19.04, execute the following command.
sudo apt-get install qemu-kvm qemu virt-manager virt-viewer libvirt-daemon-system libvirt-clients
Step 2
Press Y and then Enter to confirm the installation for the virtual machine manager.
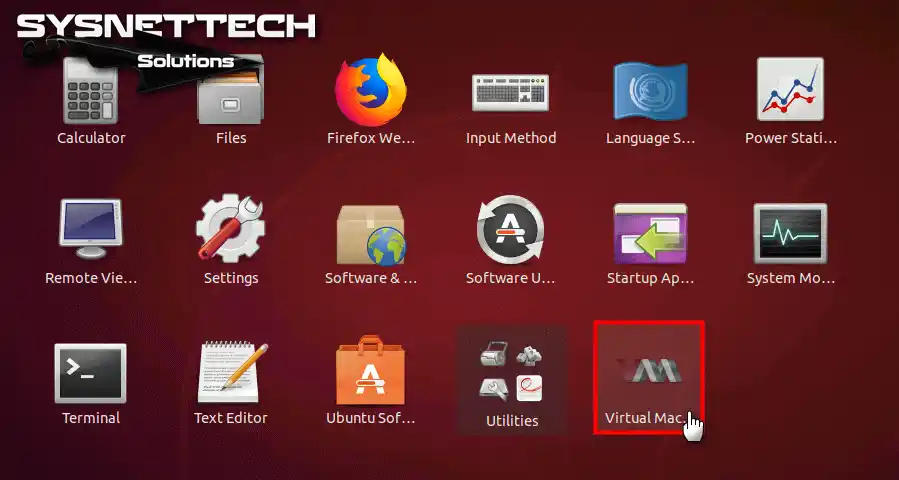
Step 3
After the installation is complete, open the Ubuntu Launcher. Immediately after that, find and run the Virtual Machine Manager.
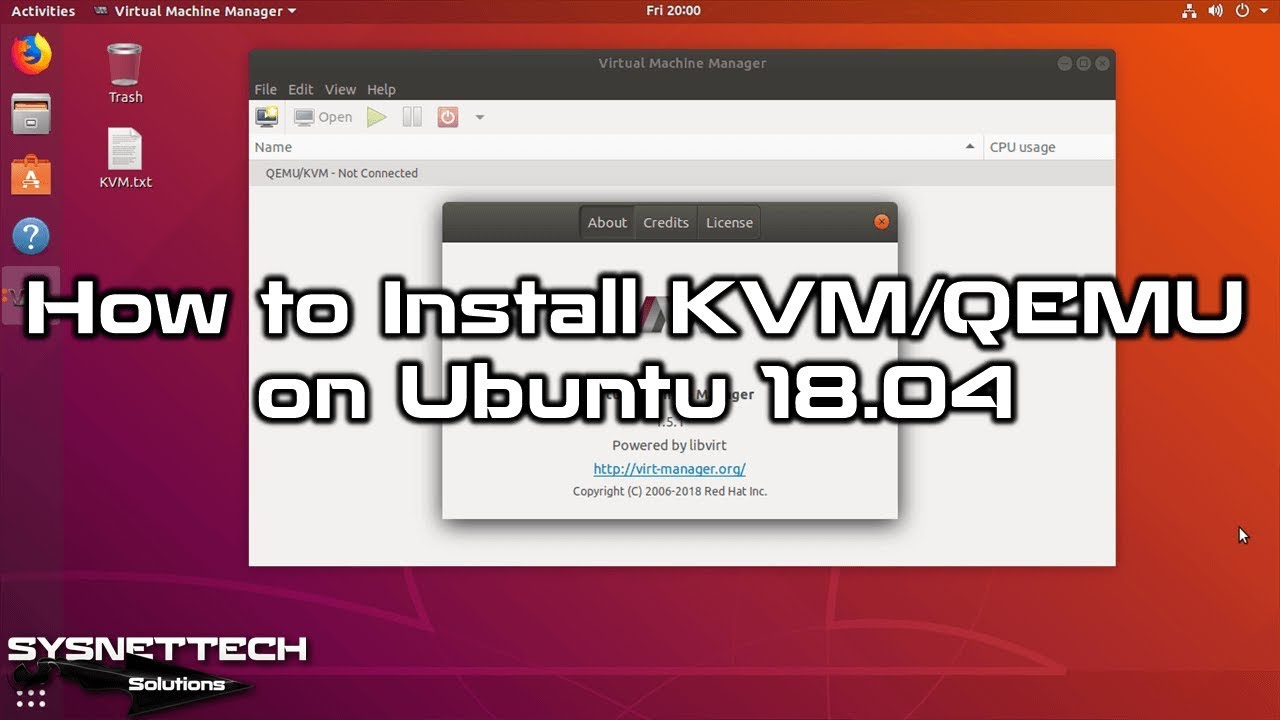
Step 4
You can check the Virtual Machine Manager version from the Help / About section.

Installation ⇒ Video
You can watch the video below to learn how to install Linux & Ubuntu on your PC. You can also subscribe to our YouTube channel to support us. In short, you can follow our new content by subscribing to our channel.
Frequently Asked Questions (FAQ)
- What are KVM and QEMU?
- Is it suitable for production environments?
- Like KVM, VMware, or VirtualBox?
- Can I run Windows as a guest operating system?
- What is Virtio, and why is it important for KVM and QEMU?
Conclusion
In conclusion, I have told you about the powerful virtualization capabilities of KVM and QEMU in Linux systems. I have also briefly touched on the differences between these technologies.
After that, you can effectively manage virtual machines by following the installation and configuration steps.

1 Reader Comment
can you run this on windows linux subsystem?