
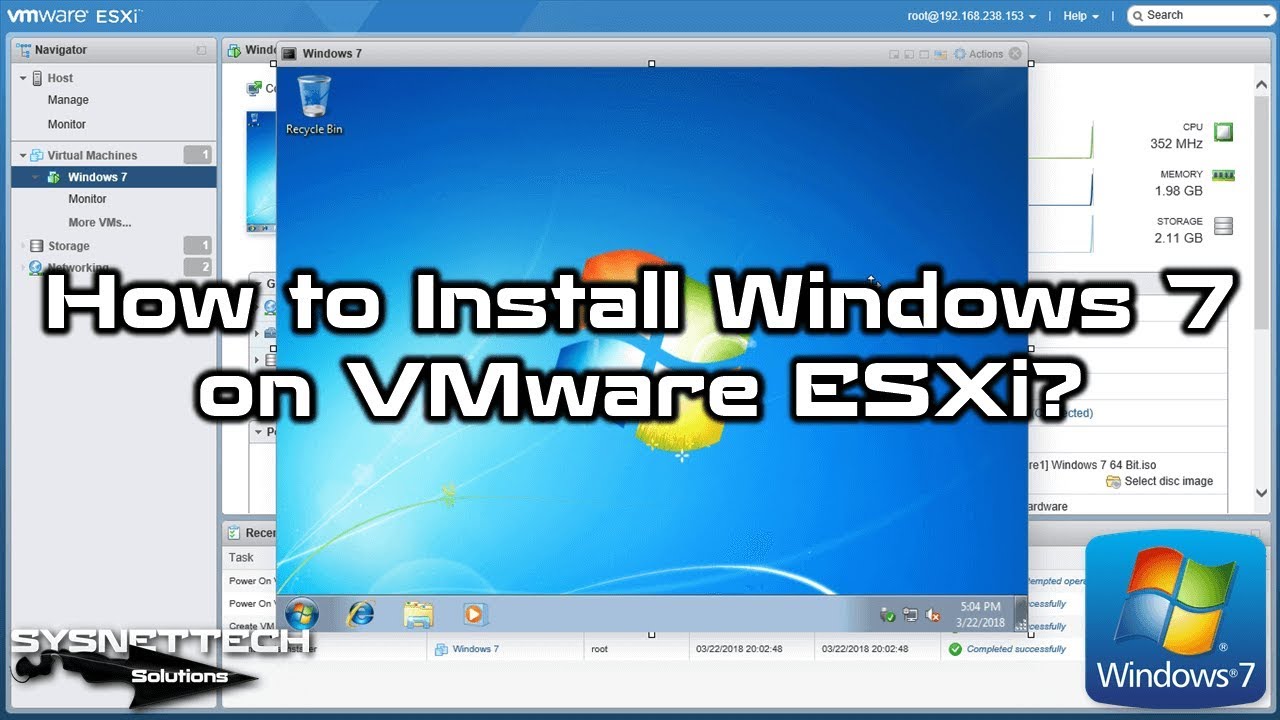
In this article, we will examine how to install Microsoft Windows 7 on a new virtual machine on the VMware vSphere Hypervisor server.
How to Setup Windows 7 on VMware vSphere ESXi 7.0
Before installing an operating system on VMware ESXi, you need to create a new virtual PC. You will also need to add the operating system’s ISO file to the virtual machine you are making.
If you want to create a test environment with VMware ESXi, we recommend purchasing a physical server. Because the most important thing required for VMware ESXi training is a physical server. However, if you cannot afford a server due to your budget, you can use the VMware Workstation virtualization program.
VM Workstation may be the wrong choice for ESXi training. But of course, you can use it for the testing environment. In short, the Workstation is in the Hypervisor Type 2 class, while the other is in the Type 1 class.
As a result, using Hypervisor Type 1 on Hypervisor Type 2 will be illogical. However, you can use it in test environments.
You can access our previous ESXi articles from the following links;
- What is ESXi?
- How to Install ESXi on a Workstation
- How to Create a VM in ESXi
- How to Add ISO Files to Datastore in ESXi
How to Run Windows 7 in ESXi vSphere 6.7U2
Follow the steps below to install the Microsoft Windows 7 64-bit operating system on vSphere.
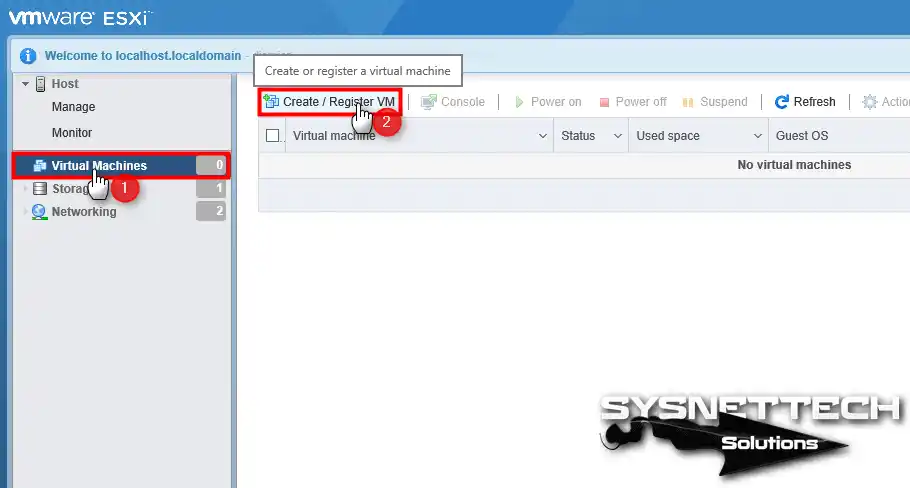
Step 1
Connect to the web interface of the ESXi server, choose Virtual Machines to create a new device, and then click Create / Register VM.
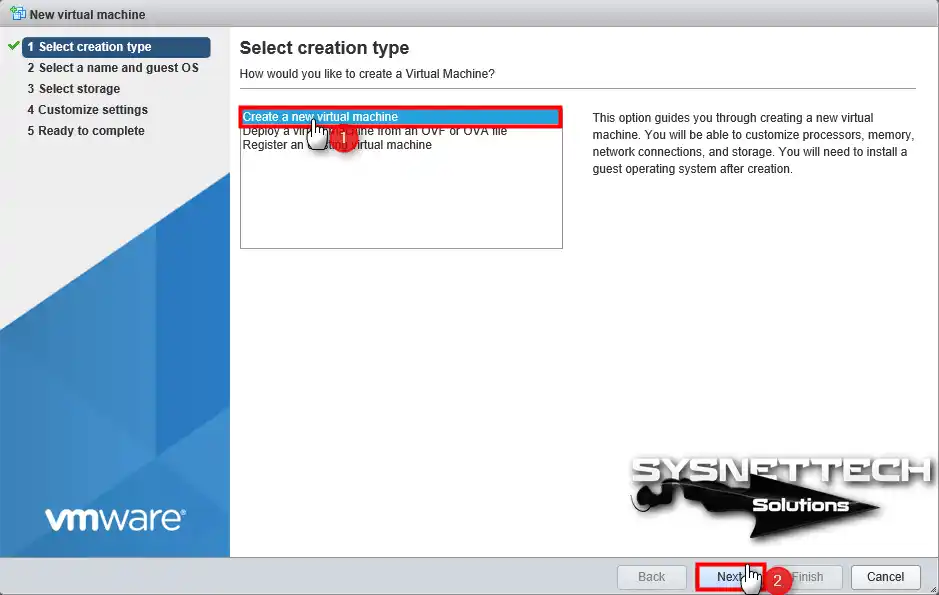
Step 2
In the New VM window, select Create a new VM and then hit Next.
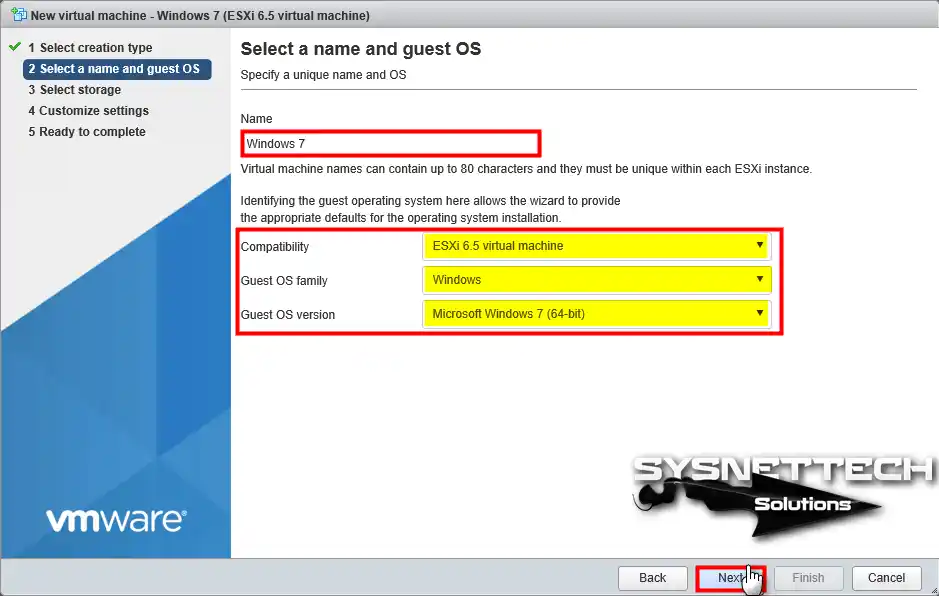
Step 3
Type in the VM name and hit Next when you have set the operating system version and family.
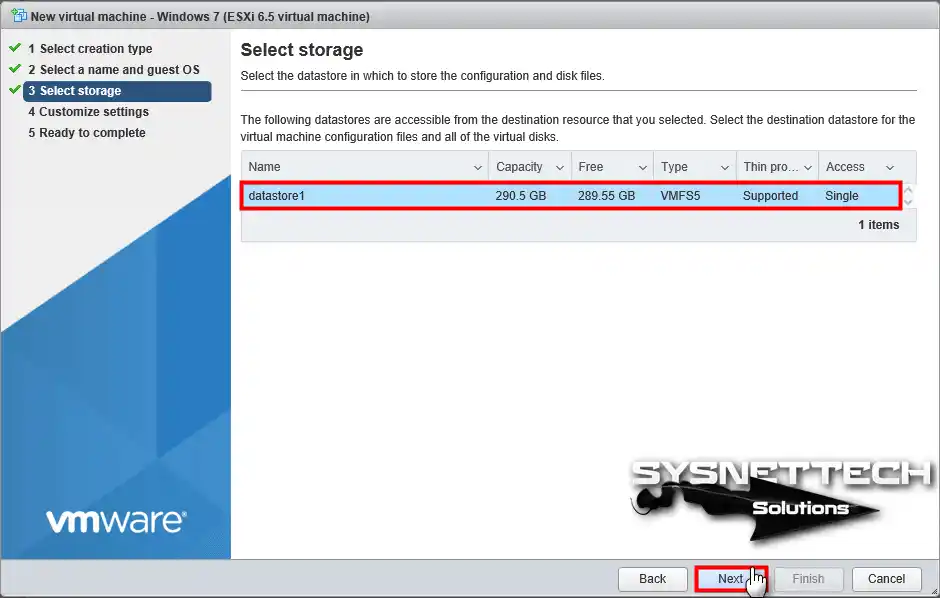
Step 4
Select the datastore on which the VM will be installed. Since there is only one datastore on VMware ESXi, datastore1 will be selected by default. Continue the installation by clicking the Next button.
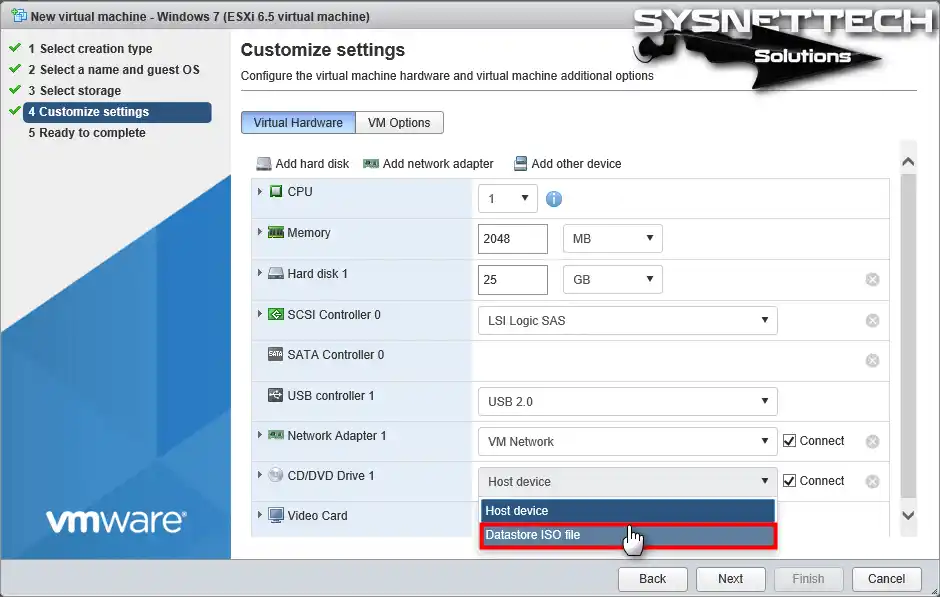
Step 5
To add the ISO file to the Windows 7 virtual PC, select Datastore ISO File from CD/DVD Drive 1.
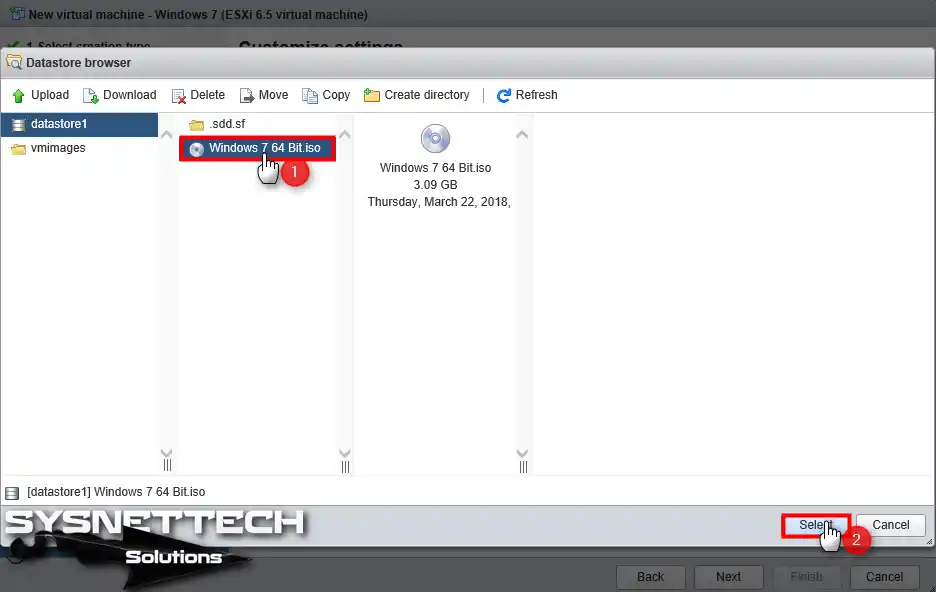
Step 6
Once the Datastore Browser is open, select the Win 7 64-bit ISO file and press the Select button.
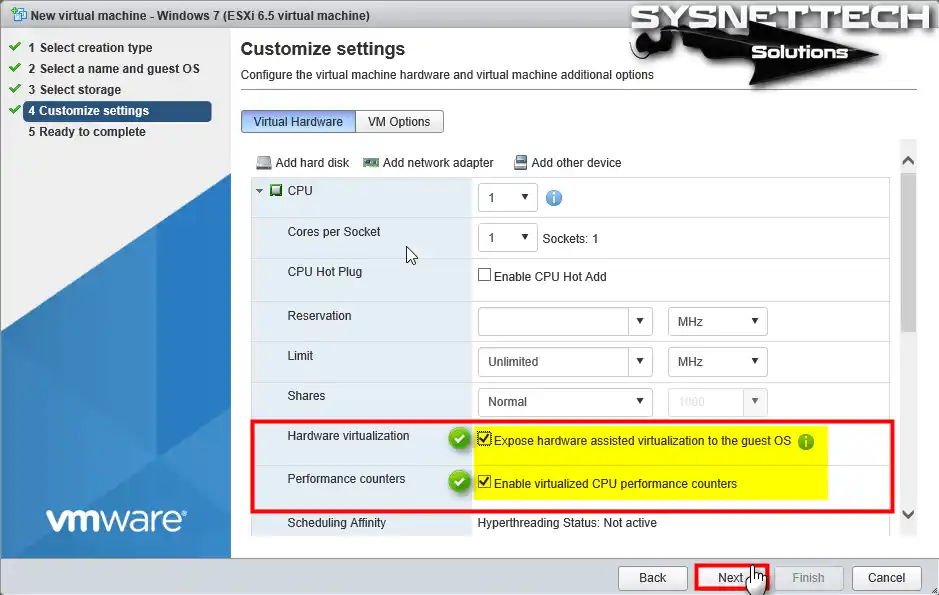
Step 7
Activate the Hardware Virtualization and Performance Counters features for the VM and press the Next button.
Step 8
After configuring the VM, click on the Next button.

Step 9
The summary information of the VM is as follows. Now, you must hit the Finish button to close the window.

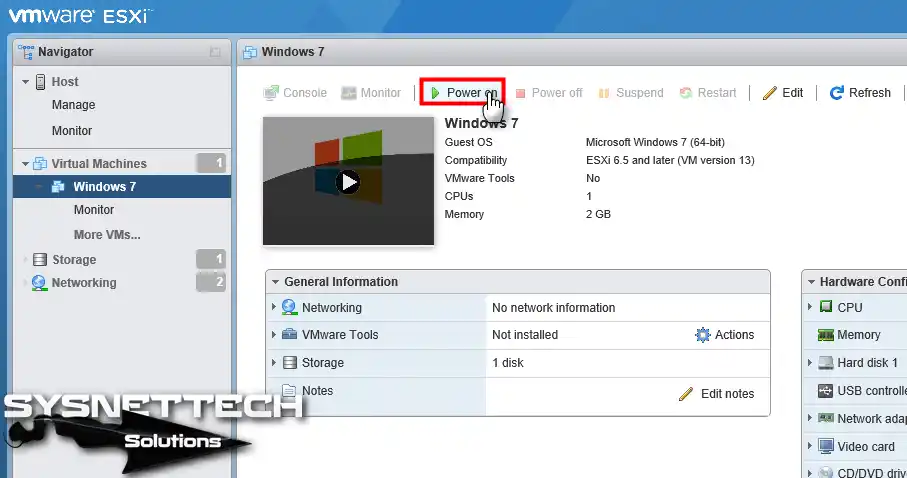
Step 10
To start the Windows 7 installation, choose Power on.
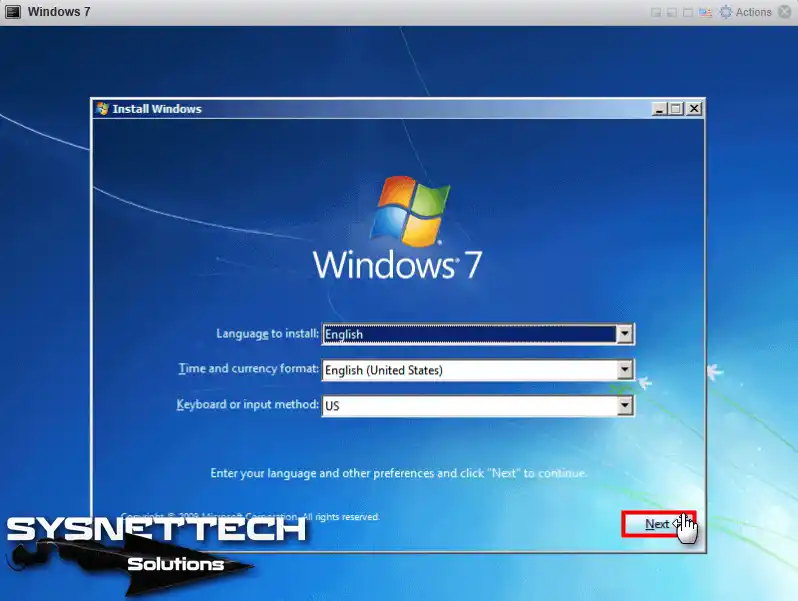
Step 11
Press on its Logo to open the Windows 7 virtual computer console screen. After the OS installation starts, configure your language, keyboard, and time settings, and then proceed to the Next button.
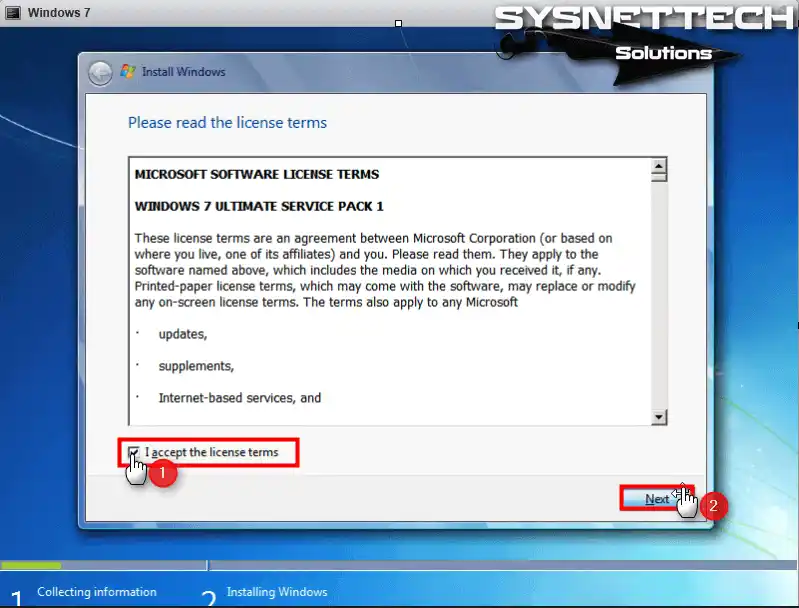
Step 12
To accept the Windows 7 license agreement, continue with the I accept the license terms option.
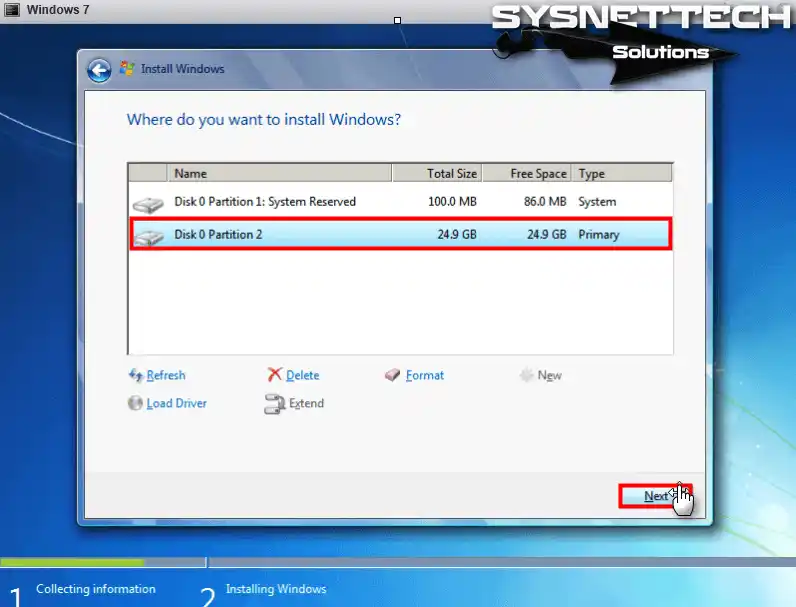
Step 13
You must configure the disk for ESXi Windows 7 VM. That’s why you should proceed by selecting Disk 0 Partition 2.
Step 14
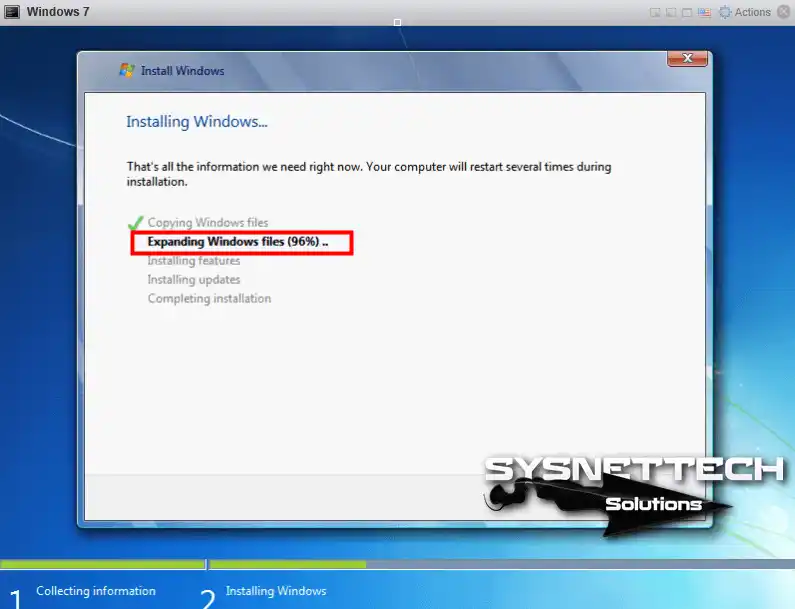
Please wait while the Microsoft operating system wizard expands its files.
Step 15
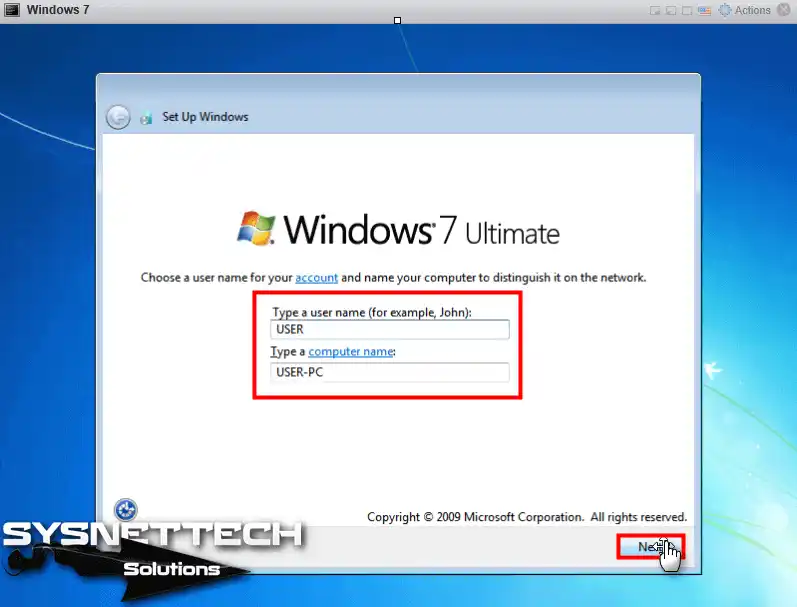
Type your username and computer name, and then click Next to continue.
Step 16
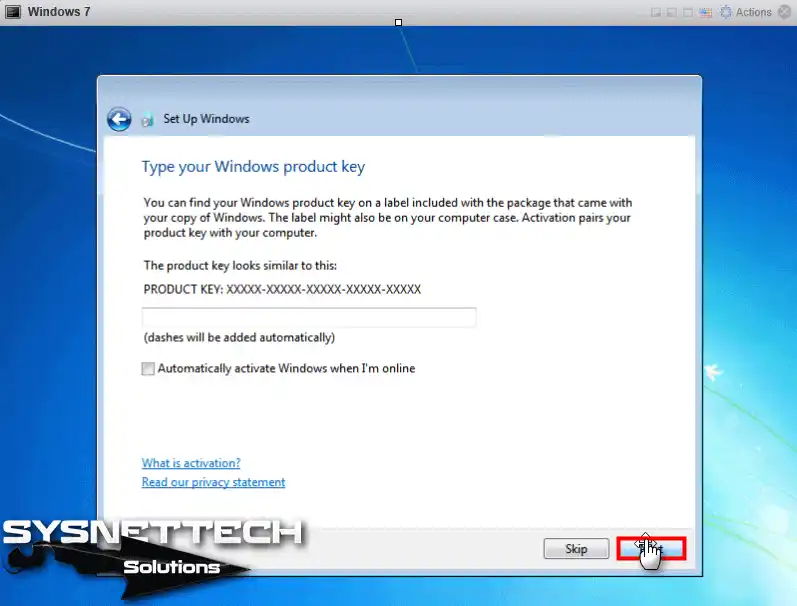
If you want to configure the license key later, click Next.
Step 17
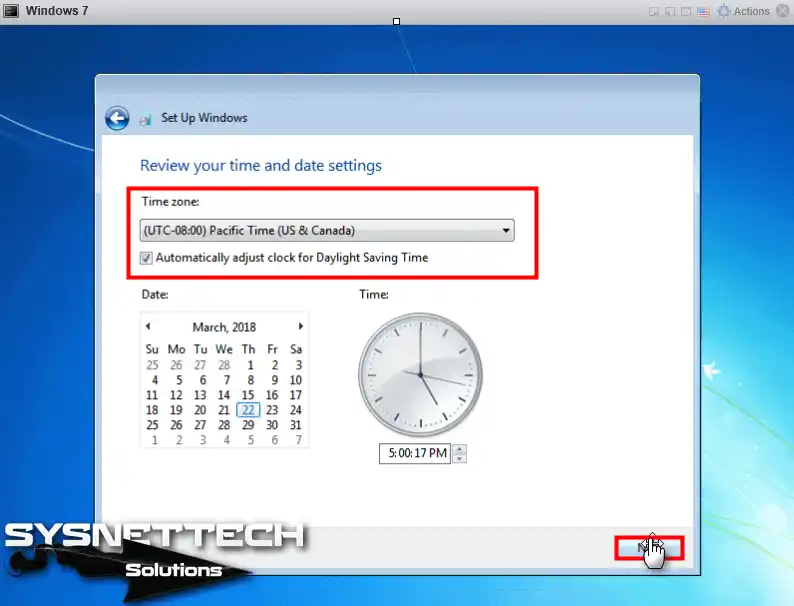
Do not forget to configure your time zone.
Step 18
Wait a moment while the Microsoft wizard completes your system settings.
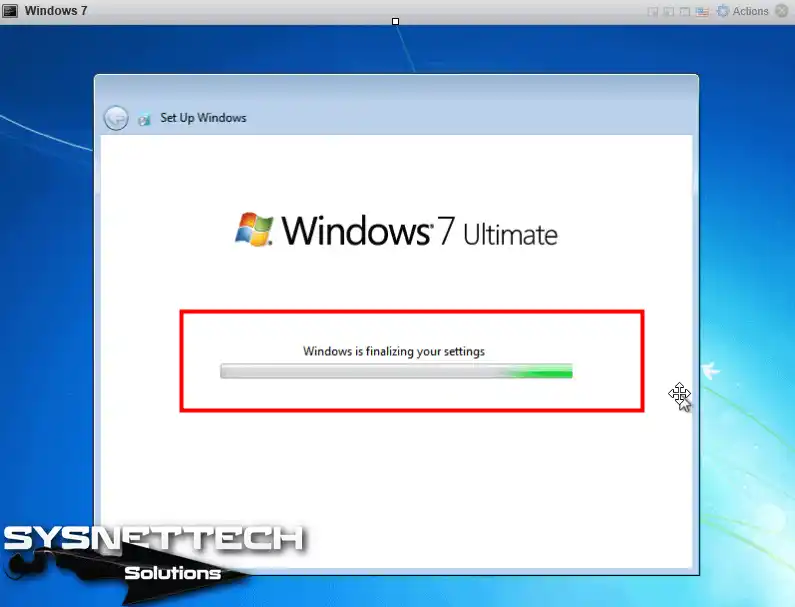
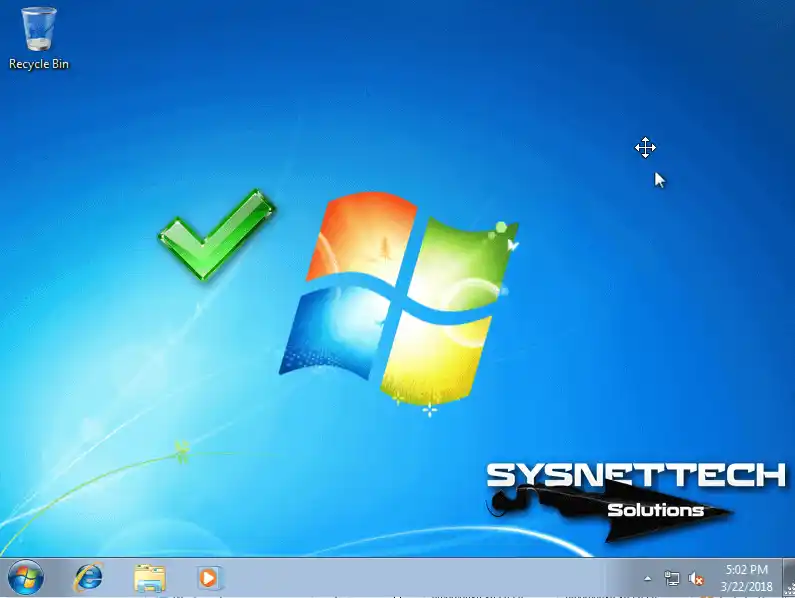
Step 19
After the Windows 7 installation has been successfully completed, now it is time to install VMware Tools!
How to Install VMware Tools
After installing the guest OS, you first need to configure VMware Tools. After installing this package, you can use the virtual machine with more performance. Additionally, you can use your device in full-screen mode.
Follow the stages below to install VMware Tools for a Windows 7 machine.
Step 1
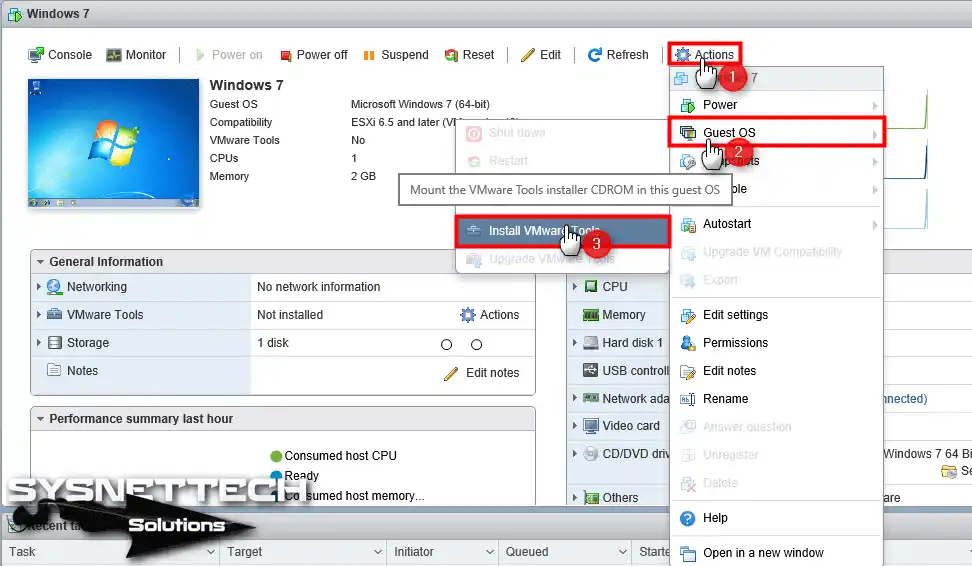
Select your Microsoft 7 OS on the screen. Then, the settings window of the virtual system will open.
To start the VMware Tools installation, first click Actions and click Guest OS from the listed options. Click on the Tools option from the options in Guest OS.
Step 2
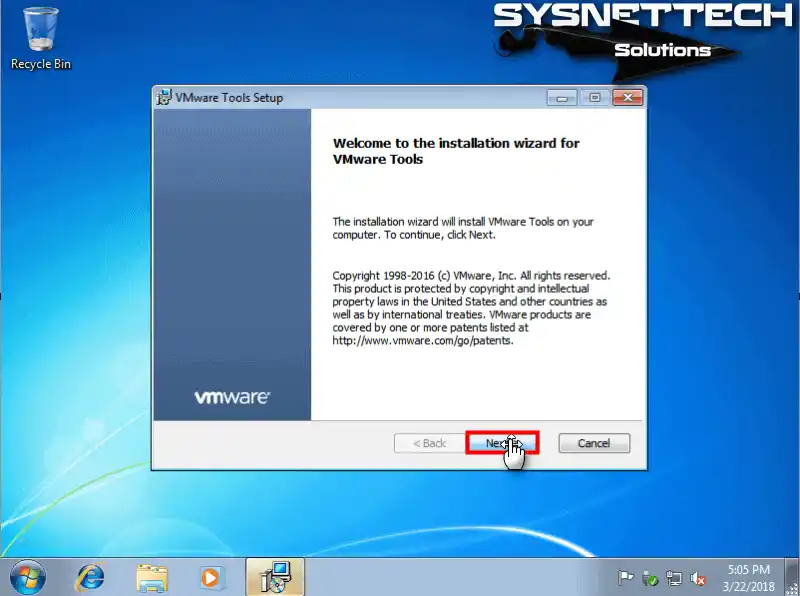
The installation of Tools on the Windows 7 virtual machine will start as shown below. Click Next to start the VM Tools setup.
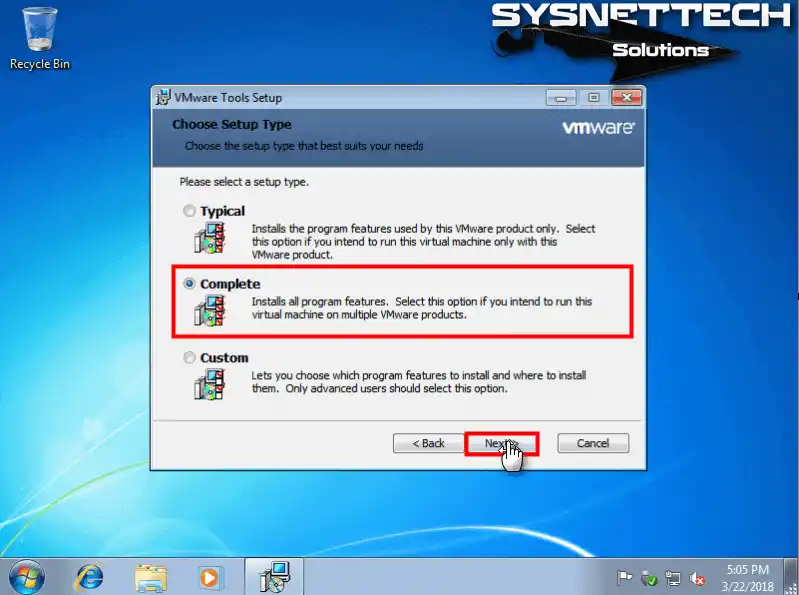
Step 3
In the Choose Setup Type window, select the Complete option and click the Next option.
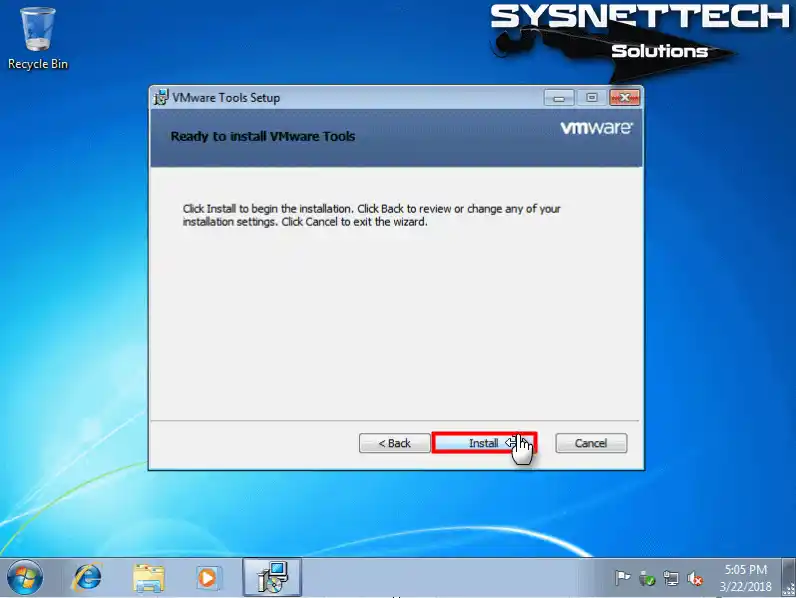
Step 4
Click the Install button to start the installation of VM Tools.
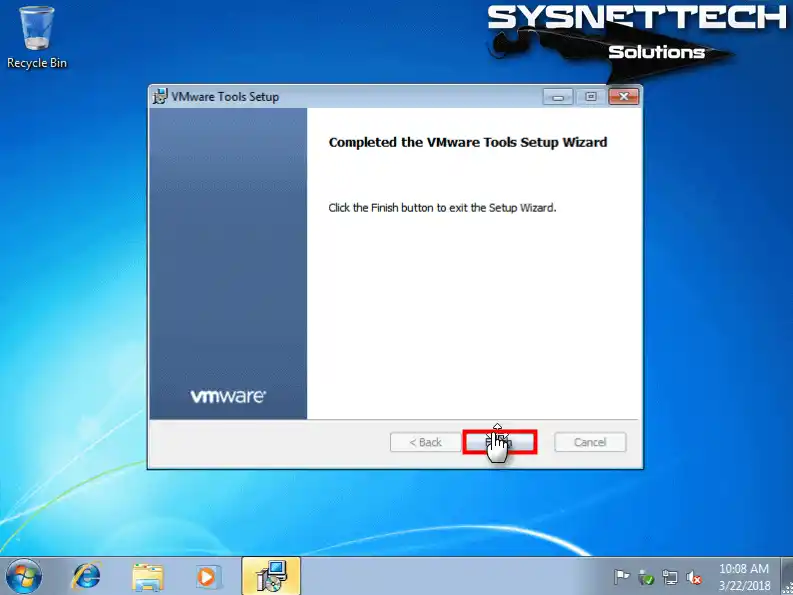
Step 5
After completing the installation of the Windows 7 virtual machine with Tools, click Finish.
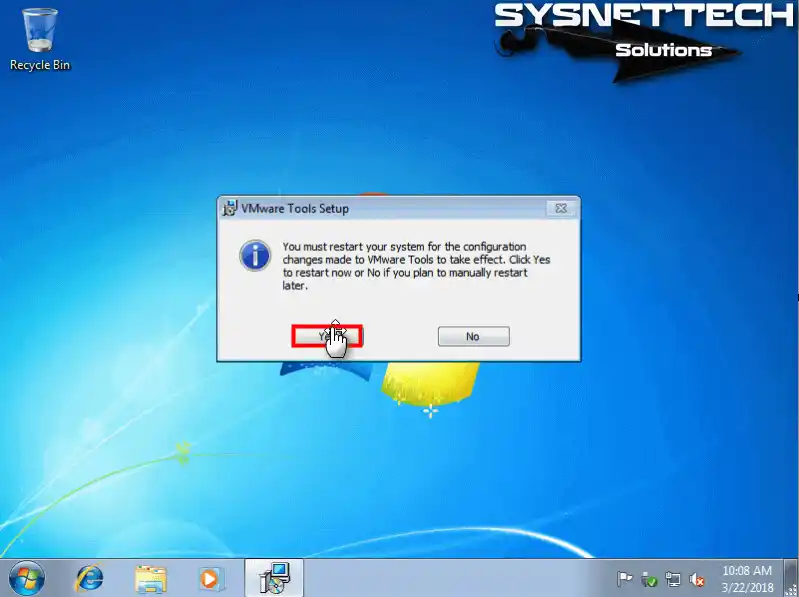
Step 6
Restart the virtual computer so the changes take effect.
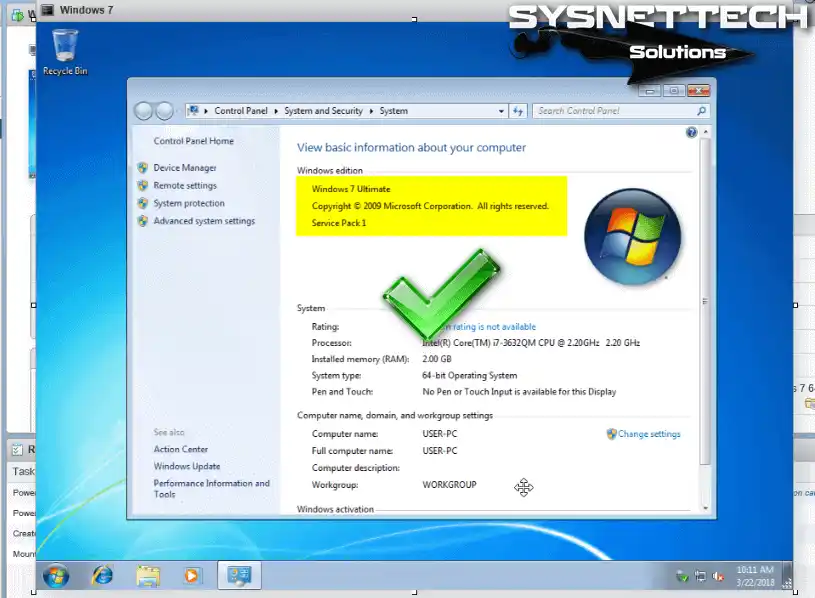
Step 7
The steps to install Windows 7 have been completed successfully! You can check the operating system information in My Computer / Features.
Video
You can watch the following video to install Windows 7 step by step, and also subscribe to our YouTube channel to support us.
Conclusion
As a result, in this article, we examined how to run Microsoft Windows 7 on a vSphere ESXi server.
In short, you can also configure VMware Tools by following the step-by-step instructions I have provided. This will give you a better virtual machine experience. Additionally, you can adjust your screen resolution to the desired setting.
This course is ideal for those who want to improve their virtualization and ESXi skills. It is a valuable resource for both beginners and professionals.

1 Reader Comment
This guide seems to not account for a few things. First, if you install tools through the web console, you will lose mouse control as soon as it installs the ps2 mouse driver. So be sure to use the e1000 ethernet option and use windows remote desktop to conclude that part. Also if you update the tools to release 12, windows 7 will refuse to install the unsigned drivers and rejects them. And on next reboot it will wind back to a previous snapshot.