

In this article, I will explain to you the method of creating virtual machines in the Debian 13 Linux distribution. Of course, I will also cover the process of installing and using Oracle VM VirtualBox.
First of all, VirtualBox lets you run Windows virtually. You can also use it for Linux and macOS systems. You can also use more than one OS, thanks to its flexibility and ease of use.
Why Should I Use VirtualBox on Debian?
You can get VirtualBox, made by Oracle, from its main web page. Notably, you can use this software free of charge. It also lets you run one or many pretend computers at the same time.
First, install Debian on your host computer. Debian is a very well-known type of Linux.
Next, you may choose to install the VirtualBox program on your system. As a result, you can create a Windows 10 virtual machine with this program.
If you install Windows with a Dual-Boot, you will need to restart your PC to switch between systems. So, moving between operating systems can be slow.
Thanks to Oracle VM, you don’t need to restart your PC. You can fast open your Windows virtual computer right after that. This way, you can start using it right away.
How to Use Oracle VM VirtualBox to Create a Virtual Machine on Debian
You have two ways to put it in place. First, you can set up the APT or Oracle sources. But the simplest way is to get the deb file straight from the website and put it in.
1. Download VirtualBox for Debian
Step 1
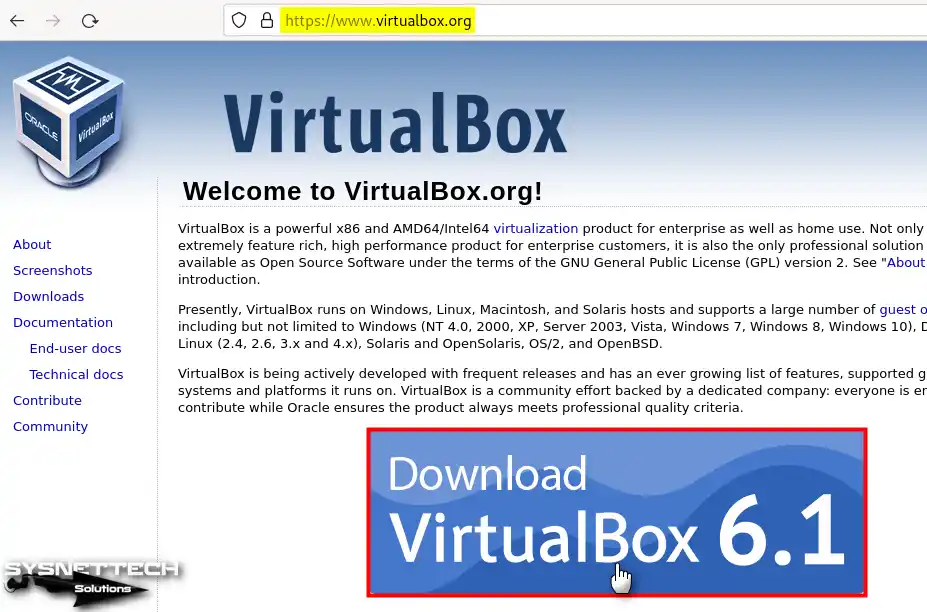
To get Oracle VirtualBox for Debian, first go to its website. Then, press the “Download” button as you see in the picture below.
Step 2
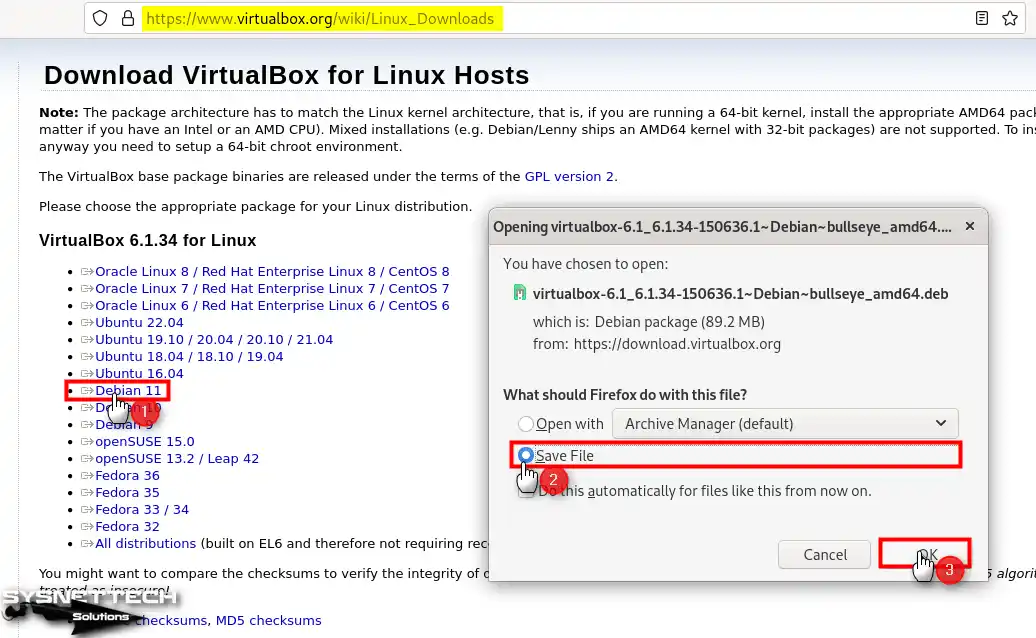
On the Download VirtualBox website, click Linux Distributions from Platform packages.

Step 3
Here, click on the Linux distribution on your computer. On the page that opens, select to save the deb package and click OK.
2. Update the Software Packages on Your Debian System
Step 1
Before you begin the setup, make the Debian package list new. To do this, type the “sudo apt update” command in the terminal window.
sudo apt update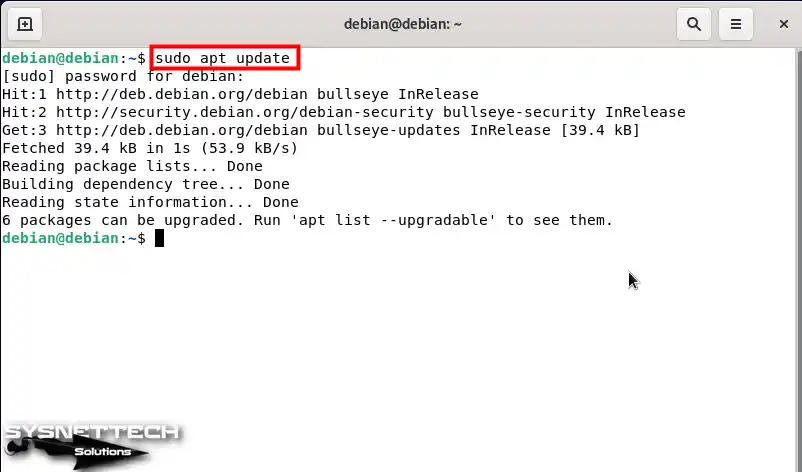
Step 2
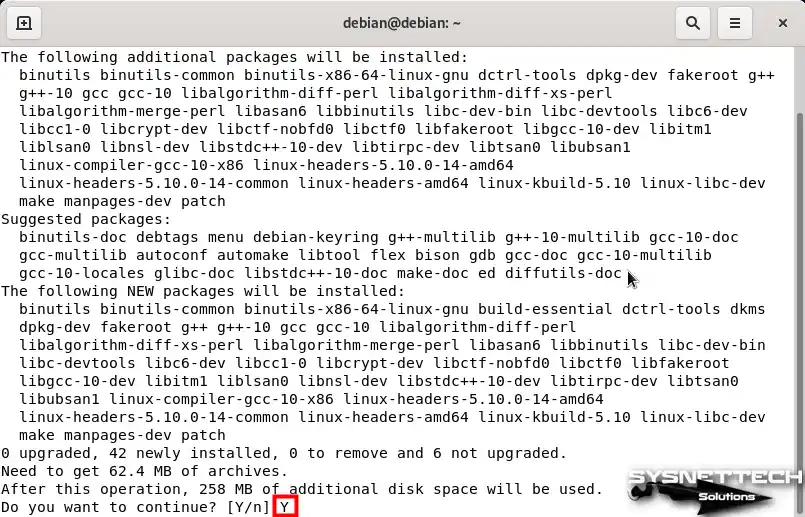
After you update the package list, you must add some things for the VM manager. That is, you must add the needed Linux kernels to your system. So, use the command “sudo apt install build-essential dkms” in the terminal.
sudo apt install build-essential dkms
Step 3
Check the new packages you will install on your system. Afterwards, type “Y” and press Enter to confirm.
3. Install VirtualBox VM Software
Step 1
After you get everything ready, open the terminal. First, go to the Downloads folder with the “cd ~/Downloads” command. Use the “ls” command to see what is in the folder. Last, make sure the deb package is there.
To install the VBox.deb package in place using the terminal, use the command below:
sudo dpkg -i virtualbox-6.1_6.1.34-150636.1~Debian~bullseye_amd64.deb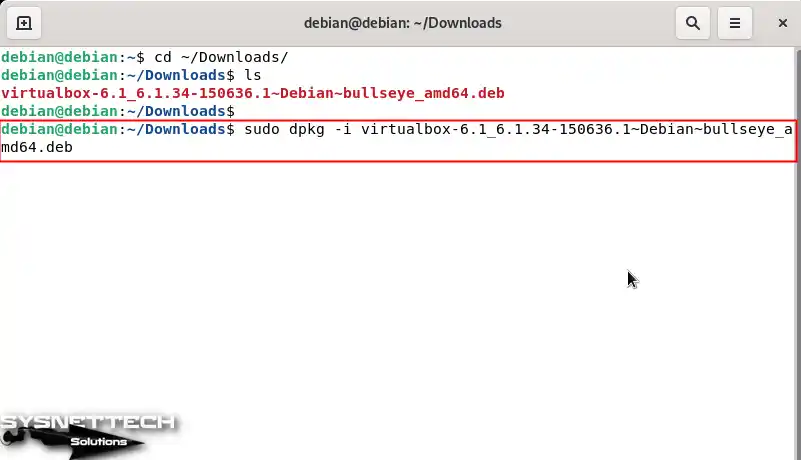
Step 2
When you install VirtualBox, you might see extra parts in the terminal. Because of this, you must install these packages. To fix this, type the command “sudo apt install -f.”
sudo apt install -f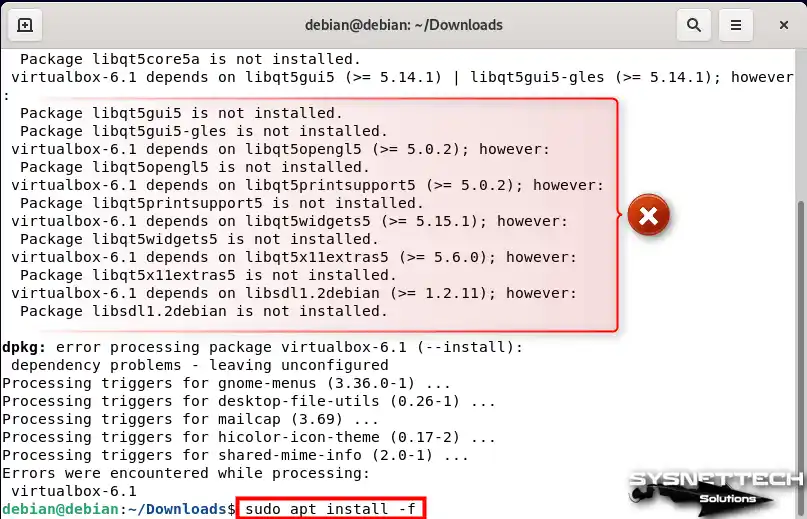
Step 3
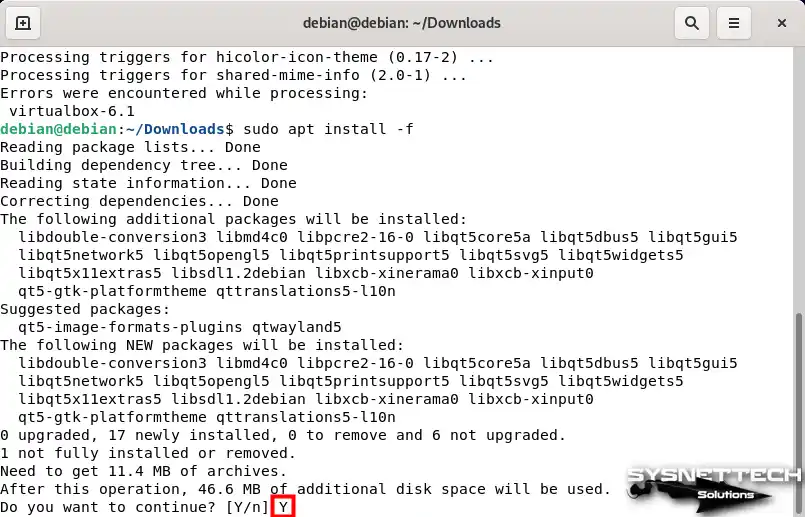
Here, you must press “Y” and Enter to say yes to putting in the new packages.
Step 4
You have now installed VirtualBox on your Debian 13 system without trouble. Now, find the program in the Activities area and start it.

Step 5
Also, check the number of the Oracle virtual-computer tool. To do this, go to Help / About to see the number here.

4. Install Extension Pack
After installing VirtualBox on Debian, you need to install the Extension Pack to install the drivers for guest machines and to use devices such as USB and webcam.
Step 1
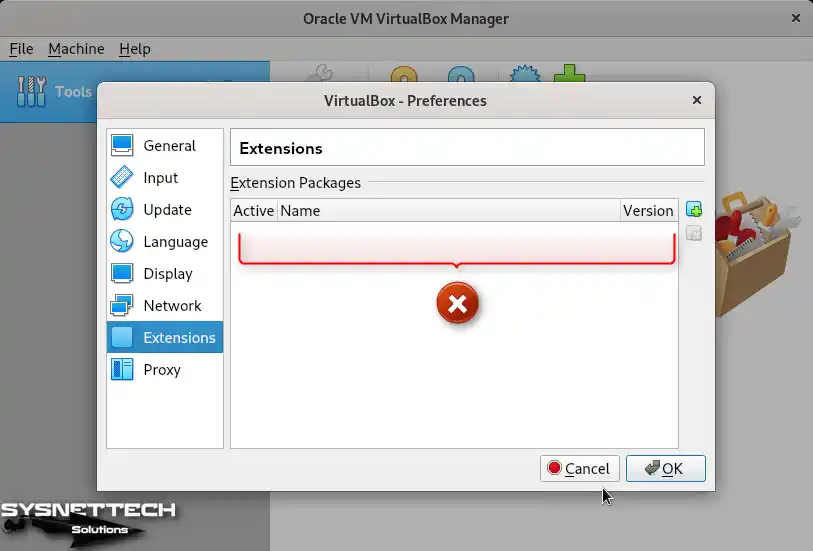
After clicking File / Preferences in the Oracle VM VirtualBox Manager tool menu, you can check whether the Extension Pack is installed in the Extensions section in the open window.
Step 2
After you get VirtualBox, you must also add the extra pack. First, go back to the VBox get-page. Then, press the “All Supported Platforms” choice and keep the “VBox-Extpack” file on your computer.

Step 3
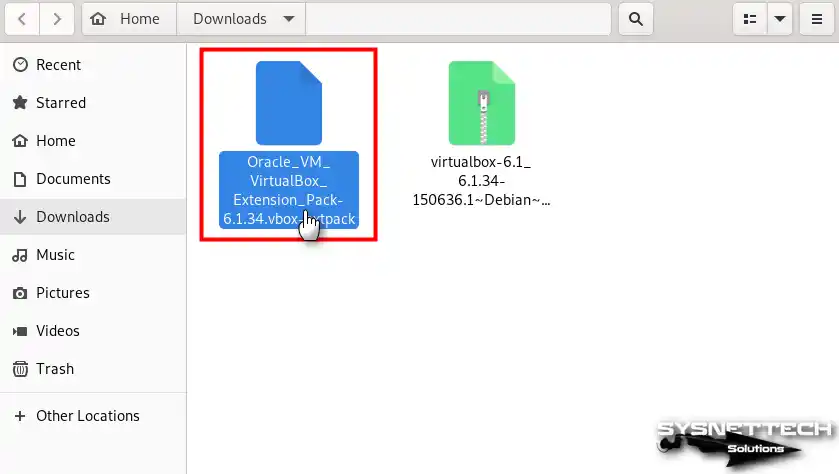
Go to Downloads and double-click on the VBox-Extpack package to start the installation.
Step 4
Click the Install button to configure the Extension package in the open information window.

Step 5
If you want to read the license thoroughly, click the “I Agree” button and scroll down the opened page.

Step 6
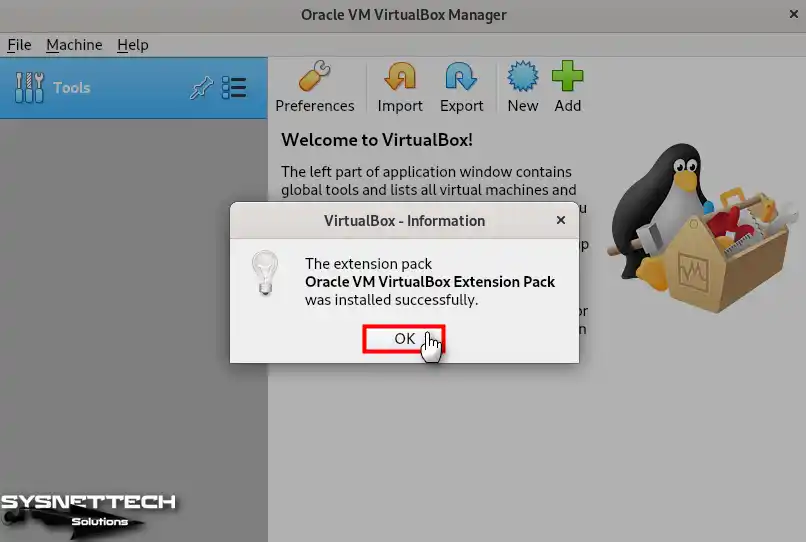
After successfully installing the Oracle virtualization software tools, click OK.
Step 7
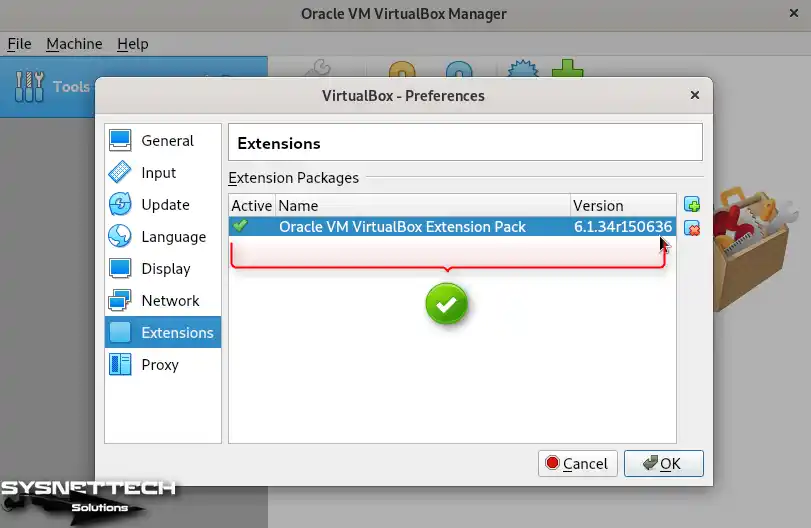
Now that you view the Extensions settings again, you can see that the Ext Pack has been installed in your VBox program.
How to Create a New Virtual Machine in Debian
You can now use Oracle tools on your Debian computer. In short, this lets you make new virtual machines. For example, you can run Win10 or other systems on them.
1. Create a Windows 10 VM
Step 1
Open VirtualBox Manager and click the New icon to start the virtual machine wizard.

Step 2
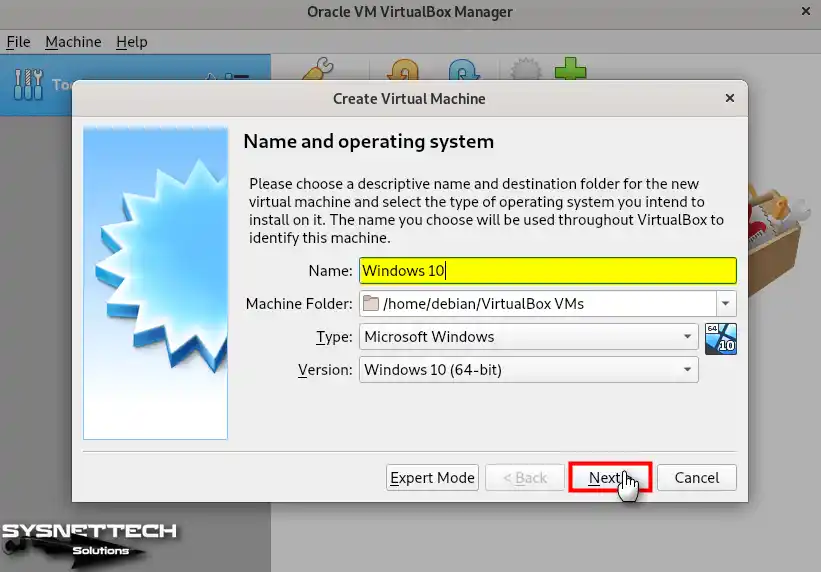
Type a name for the operating system you will install in the virtual machine creation wizard and click Next after selecting the installation location.
Step 3
For the virtual operating system to work more efficiently, determine a suitable virtual memory size according to the memory capacity of your host.

Step 4
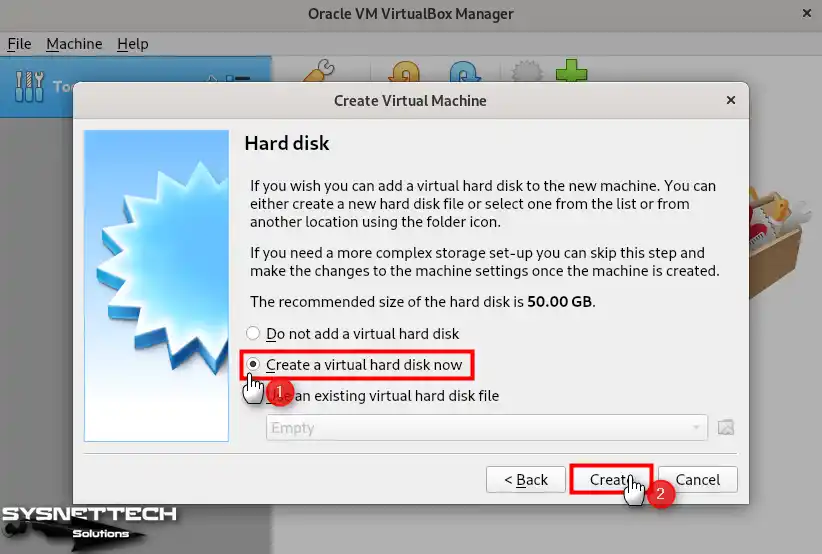
For the hard disk configuration of the virtual PC, choose to create a new virtual disk and click Create.
Step 5
Configure the file type of the virtual hard disk as VDI (VirtualBox Disk Image).

Step 6
You can set up both fixed-size and dynamically expanding virtual disk storage on your physical computer. If you want the virtual system to take up less space on your host disk, check Dynamically Allocated and continue.

Step 7
Configure an appropriate disk size depending on what you will do in your Windows virtual system.

2. Configure the Advanced Settings of the VM
Step 1
After preparing your virtual computer, open advanced settings to adjust performance and other locations.

Step 2
To share files between your Win10 VM and your host system, go to Advanced settings.
First, set the Shared Clipboard feature to Bidirectional. Also, change the Drag’n’Drop setting to Bidirectional. So, you can easily move files and copy text.

Step 3
Open the main board settings of the virtual computer. First, turn off Floppy from the Start Up list. Then, set the CD device as the first startup choice.

Step 4
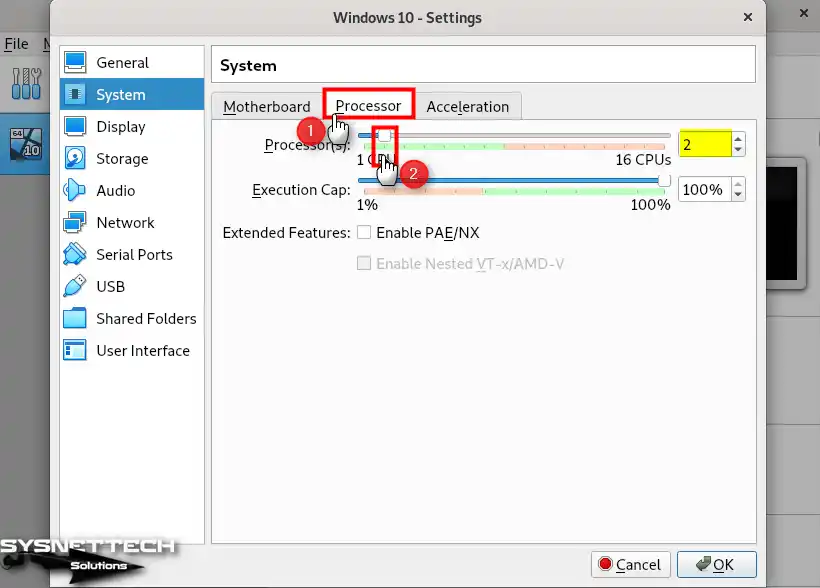
According to the processor type of your host computer, set a suitable vCPU number for your guest machine in the Processor settings.
Step 5
Open the Display settings for better graphics on the Win10 VM. First, turn on the 3D Acceleration option. Then, pick a video memory size that fits your host PC’s GPU’s power.

Step 6
From the Storage Devices section, pick Controller: SATA. Then, go to the Attributes section. Right here, turn on the Host I/O Cache option.

Step 7
Likewise, configure the Win10.vdi virtual disk file as a Solid-State Drive (SSD) to increase disk performance.

3. Add an ISO File to the VM
Step 1
To add the Windows 10 image to the virtual PC you created, first select the Empty optical drive. Here, click on the CD/DVD icon. Now, click on the “Choose a disk file” option from the menu that opens.

Step 2
Access the Windows 10 ISO file from its downloaded location, be it an internal or external drive.

Step 3
You may want to use USB 3.x devices on your VM. To do so, disable the settings by selecting the USB 3.0 (xHCI) Controller.

Step 4
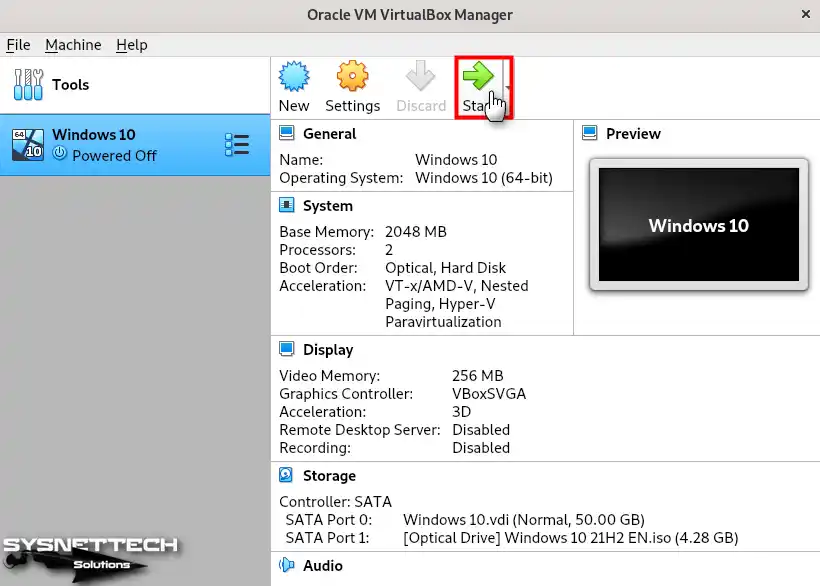
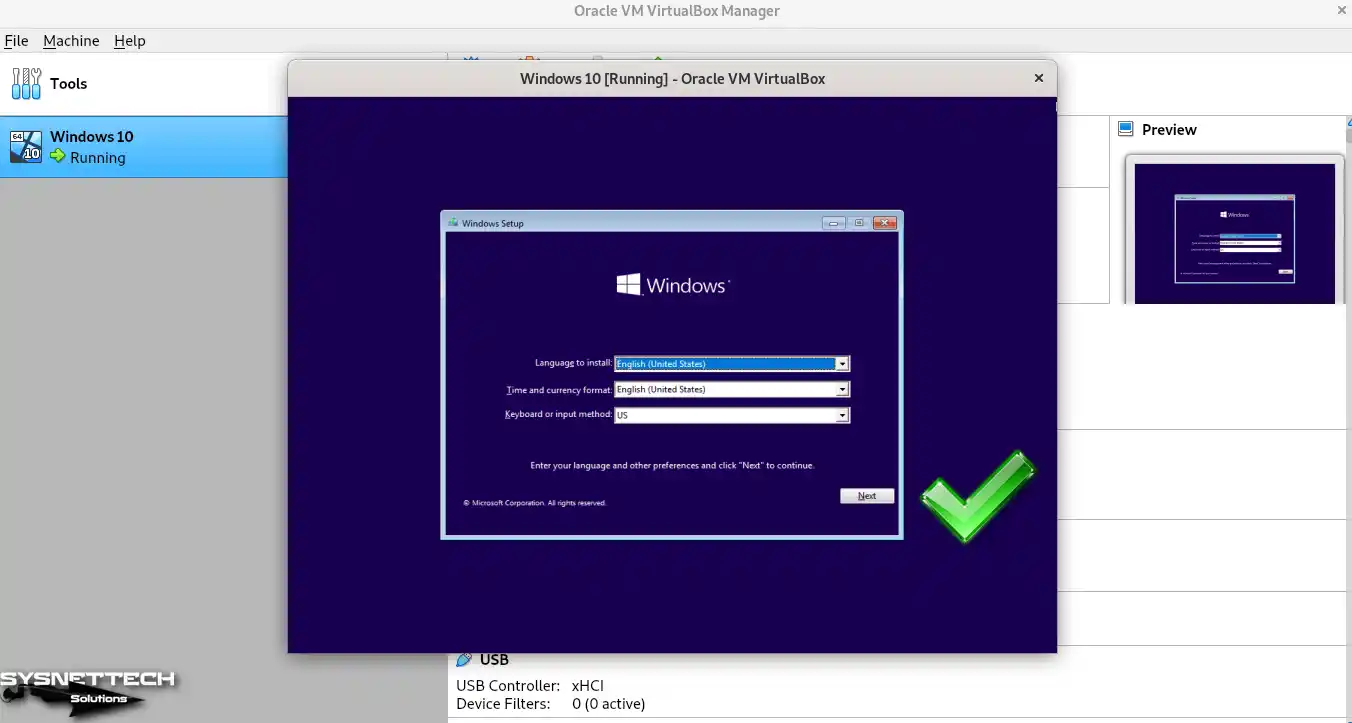
Run your Debian virtual computer to start the Windows installation.
Step 5
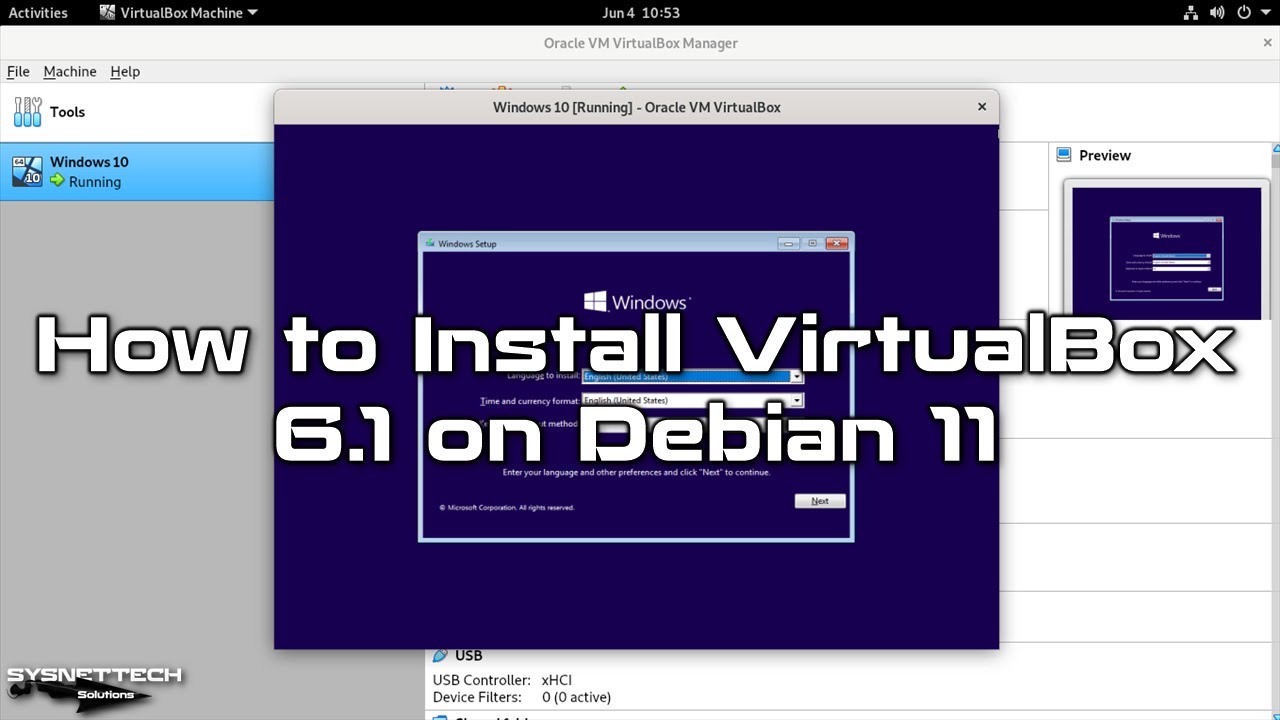
The setup wizard for Windows 10 will be initiated shortly after the virtual computer is launched.
4. Delete the Virtual Machine from Debian
You can quickly delete a guest machine installed with Oracle VM VirtualBox software from your Linux computer.
Step 1
Press the right button on your vPC in the VirtualBox list. Pick the “Remove” choice from the menu that shows up.
Then, press “Delete All Files” in the confirmation box that opens. This will erase your virtual PC and all its files.

Step 2
After you erase the pretend computer from your Debian system, you must do one more thing. So, look in the “VirtualBox VMs” folder under the “Home” area. This way, you know that the files for the machine are also gone.

How to Uninstall VirtualBox from Debian
If you want to uninstall VirtualBox software from Debian, you can do this via the terminal. This way, you can remove the software in a very short time.
1. Uninstall VirtualBox
Step 1
After backing up your installed systems, execute the “sudo apt remove –purge *virtualbox*” command in the terminal to uninstall the VM software.
sudo apt remove --purge *virtualbox*
Step 2
Press Y and Enter to confirm VBox-related packages are to be removed.

Step 3
Some folders or files may still be on your system when you uninstall VirtualBox. To delete unnecessary folders from your system, execute the commands below in the terminal.
sudo rm -rf ~/"VirtualBox VMs"
sudo rm -rf /usr/lib/"virtualbox"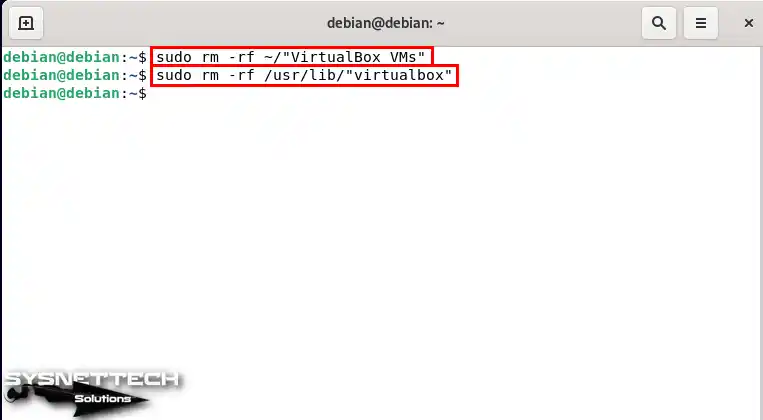
2. Remove All Dependent Packages Related to VirtualBox
After you remove VirtualBox, you should also clear away the extra packages. To do this, type the command “sudo apt autoremove && sudo apt autoclean” in the terminal. This will make your Debian system totally clean.
sudo apt autoremove && sudo apt autoclean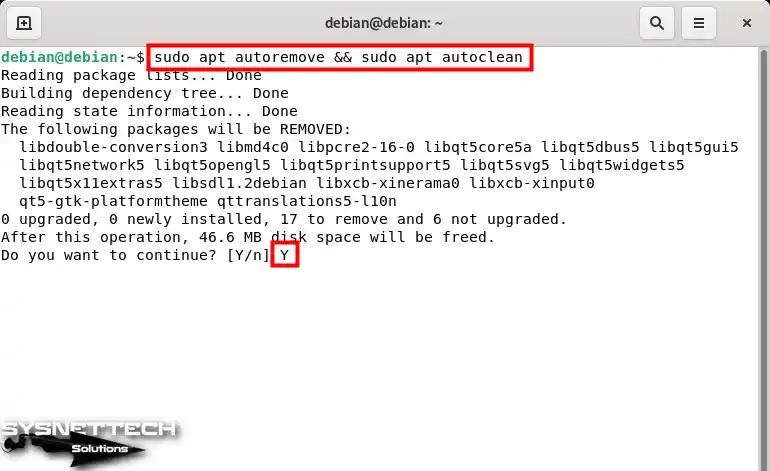
Now, remove the VBoxUsers group created when you set it up. First, see if the group is there. Then, you can take out the group without worry.
compgen -g | grep -i "vbox"
sudo groupdel vboxusers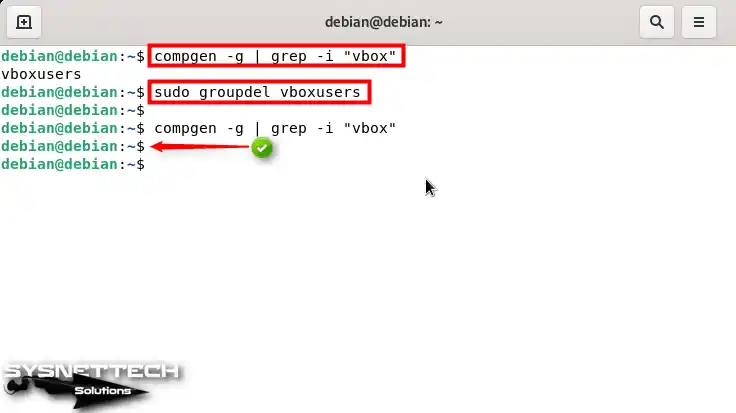
Frequently Asked Questions (FAQ) About Debian & VirtualBox
- Do I need the Extension Pack for VirtualBox in Debian?
- What are the system requirements for VirtualBox on Debian?
- If I use the Oracle program on Debian, will it harm my system?
Conclusion
As a result, VirtualBox allows us to create and run virtual machines on the Debian 13 Linux release. This feature provides a versatile and user-friendly platform.
If you follow all the steps I have outlined in this article, you can install it effortlessly. Moreover, you can install the necessary extensions and know how to run various operating systems.
This way, you can test different software environments or use other operating systems if you are developing applications.
In summary, it offers a powerful solution to meet your virtualization needs. Plus, you can seamlessly experience various OSes on a single host without the hassle of rebooting the system.
Also, you might be thinking about growing your virtualization skills. If so, I say you should read our article called Installing VirtualBox on Ubuntu. For example, if you want to run Windows or other Linux systems, our guide will give you a smooth time.

Be the first to share your comment