
In our online world, it is key for all to manage networks well. This is a key need, especially for people and companies. Also, devices must use one public IP address. For this, PAT (Port Address Translation) is a good way.
PAT, which we use in home networks and small businesses, optimizes our IP usage. It also makes things safer by hiding private addresses. Furthermore, this way makes the network work better. So, in this article, let’s explain step-by-step how to configure NAT PAT on a Cisco Router.
Whether you are new or skilled, learning PAT for Cisco tests will help you a lot. This technology makes the network design simpler and improves how it works. Now, let’s look at the steps needed to use this basic technology.
How to Enable NAT PAT on a Cisco Router with Packet Tracer
Port Address Translation (PAT) changes private IP addresses. It also gives global IP addresses using port numbers in this process. So, this lets us use our network resources more simply and safely.
PAT is the method we use most when compared to Static NAT and Dynamic NAT setups.
I would say home users or small businesses generally use it.
ADSL modems get the Internet using one IP address given by one ISP. All computers on a local network use one global IP address.
During this process, PAT helps to manage the connection. So, this makes sure that Internet access works in a way that is clear and fast.
PAT is also known as NAT Overloading. When a computer sends a packet to a destination, it appends a port number to its IP address. It then sends links the right way, making network flow smooth.
PAT is enabled by default on ADSL modems used by home users. This way, it hooks up devices to the web by itself with one address.
That is, this means that this process keeps running on its own in the background without users having to do any extra settings.
Why Use Packet Tracer to Set Up the PAT Protocol?
Packet Tracer is very useful for people who work with networks. Also, using it gives you many good things. Here are the main reasons to use it:
- Easy-To-Use Screen
It has a visual screen that makes networks easy. So, this means you can just drag and drop devices and make connections.
Also, since you see network layouts, it becomes easier for you to understand the PAT setup.
- Real Practice
It lets you try NAT & PAT setups without needing real hardware. Therefore, you can test them in person.
This real practice lets you try different setups. You can also better learn by seeing the results in real time.
- Fake Real-World Situations
It lets you copy real-world setups. So, this means you can get experience by making real network situations for setups like PAT.
- Quick Feedback
With the Cisco simulator, you can get quick feedback on the PAT setup between two Cisco Routers. In short, this means you can easily find and fix errors.
You can also ping IPs to check the connection. This way, you can ensure your PAT setup is working correctly. In fact, by testing, you eliminate the risk of disrupting live networks.
- Flexible Learning Tool
Packet Tracer works with many network types and technologies, not just PAT. You can grow your networking knowledge and skills.
Also, it can do many things, making it a whole learning place for new network workers.
- Low-Cost Option
For those wanting to get certified or grow their knowledge, Packet Tracer is cheap. It also removes the need for real devices and hardware. You can learn and practice your networking skills in a safe space at no extra cost.
How to Turn on PAT in Packet Tracer
To use PAT with Cisco Packet Tracer, go slowly. First, make a clear and straightforward plan for setup. Then, follow the setup steps in order.
Step 1
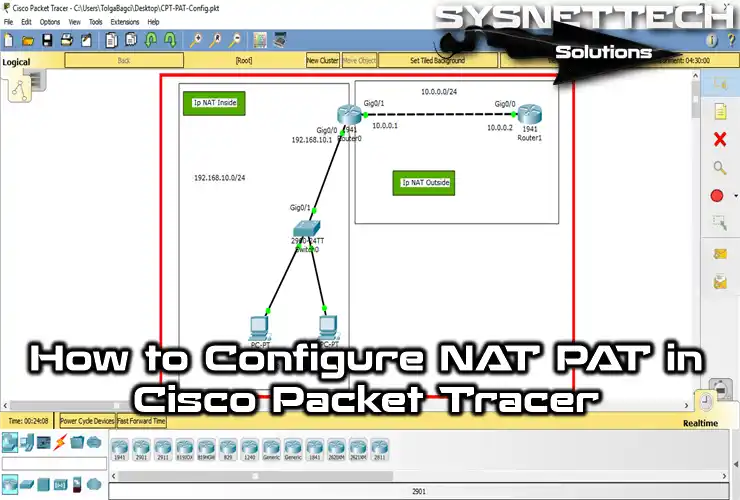
First, open the Cisco simulator program and make the needed topology.
Then give the correct IP addresses to the devices. Also, add notes to the workspace to make the layout more straightforward.
Step 2
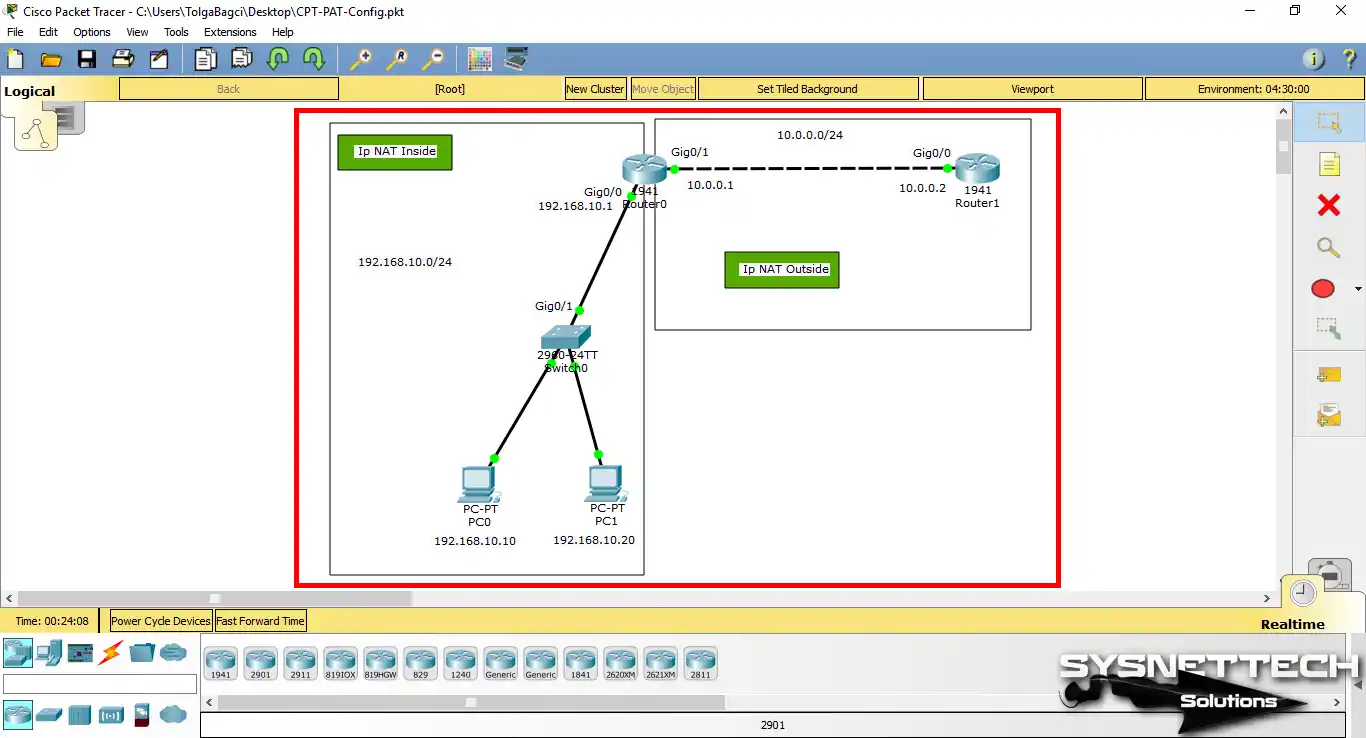
Configure the TCP/IP settings for PC0 and PC1 as described above. This step will ensure that network traffic works correctly.
Then check that the setup worked by testing the connections.
Step 3
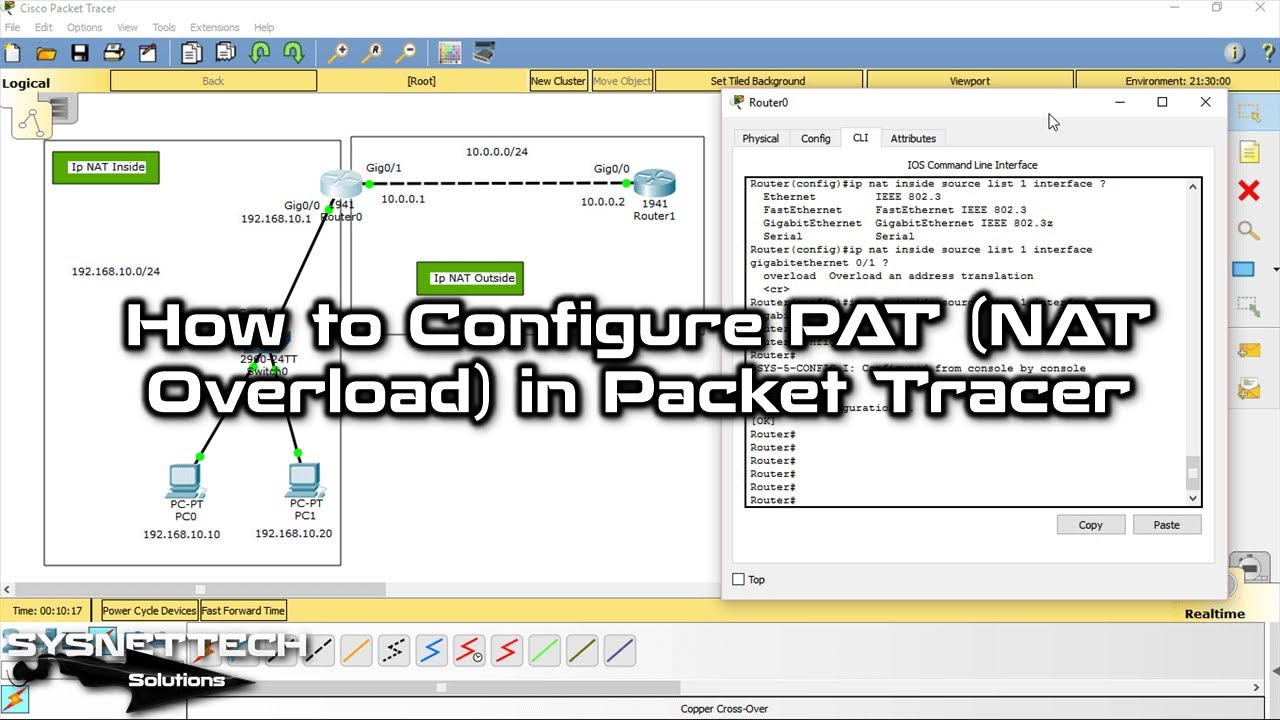
Follow the steps to enable PAT on the Cisco Router’s CLI command prompt.
First, type the commands in order and follow the steps carefully. After this, you will successfully turn on the PAT protocol.
Router# conf t
Router(config)# interface gigabitethernet 0/0
Router(config-if)# ip address 192.168.10.1 255.255.255.0
Router(config-if)# ip nat inside
Router(config-if)# no shutdown
Router(config-if)# exit
Router(config)# interface gigabitethernet 0/1
Router(config-if)# ip address 10.0.0.1 255.255.255.0
Router(config-if)# ip nat outside
Router(config-if)# no shutdown
Router(config-if)# exit
Router(config)# access-list 1 permit 192.168.10.0 0.0.0.255
Router(config)# ip nat inside source list 1 interface gigabitethernet0/1 overload
Router(config)# end
Router# wr

Step 4
You’ve configured PAT on Packet Tracer. Now, after completing it, ping the 10.0.0.2 address from computers on the local network.
In fact, this way will help you check that your network connection works properly. Plus, you can quickly find possible problems with this test.
In the picture below, you can see the computers on the local network linking to Cisco Router R1. So, this means your devices are talking correctly.

Step 5
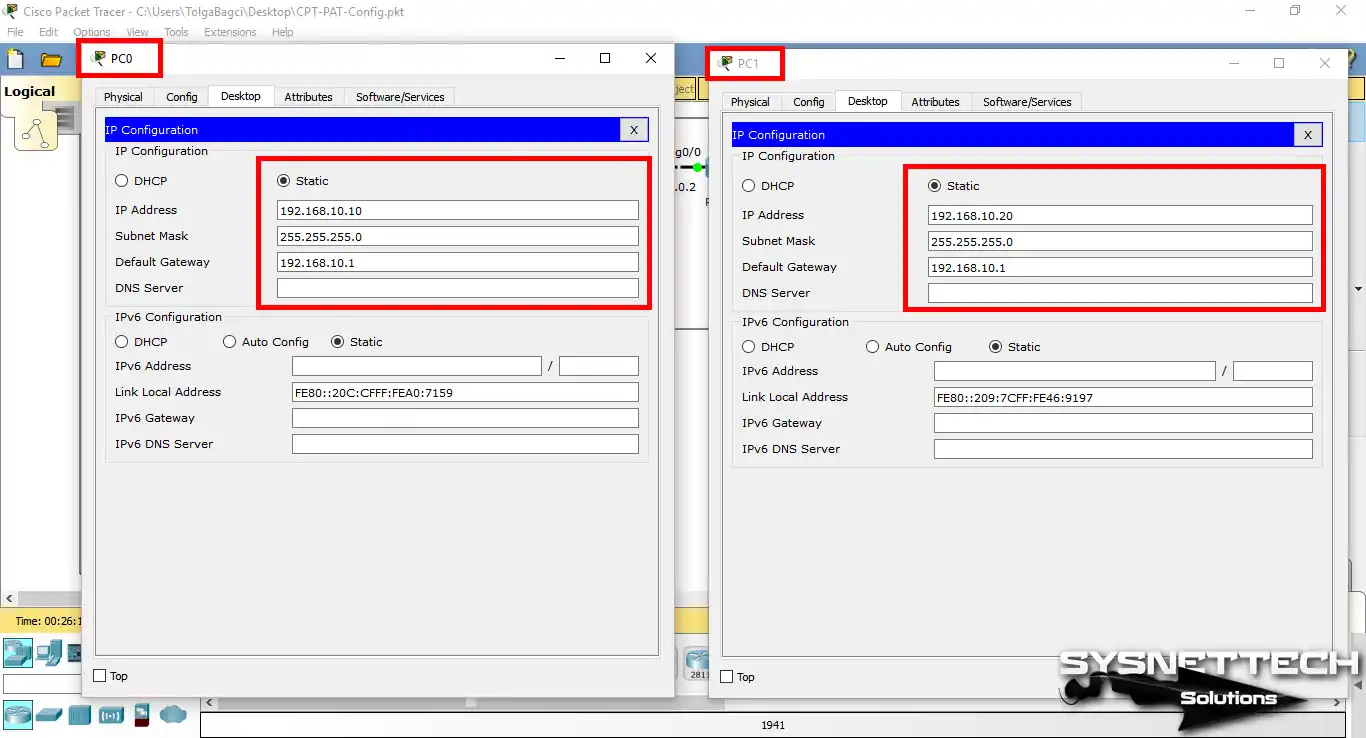
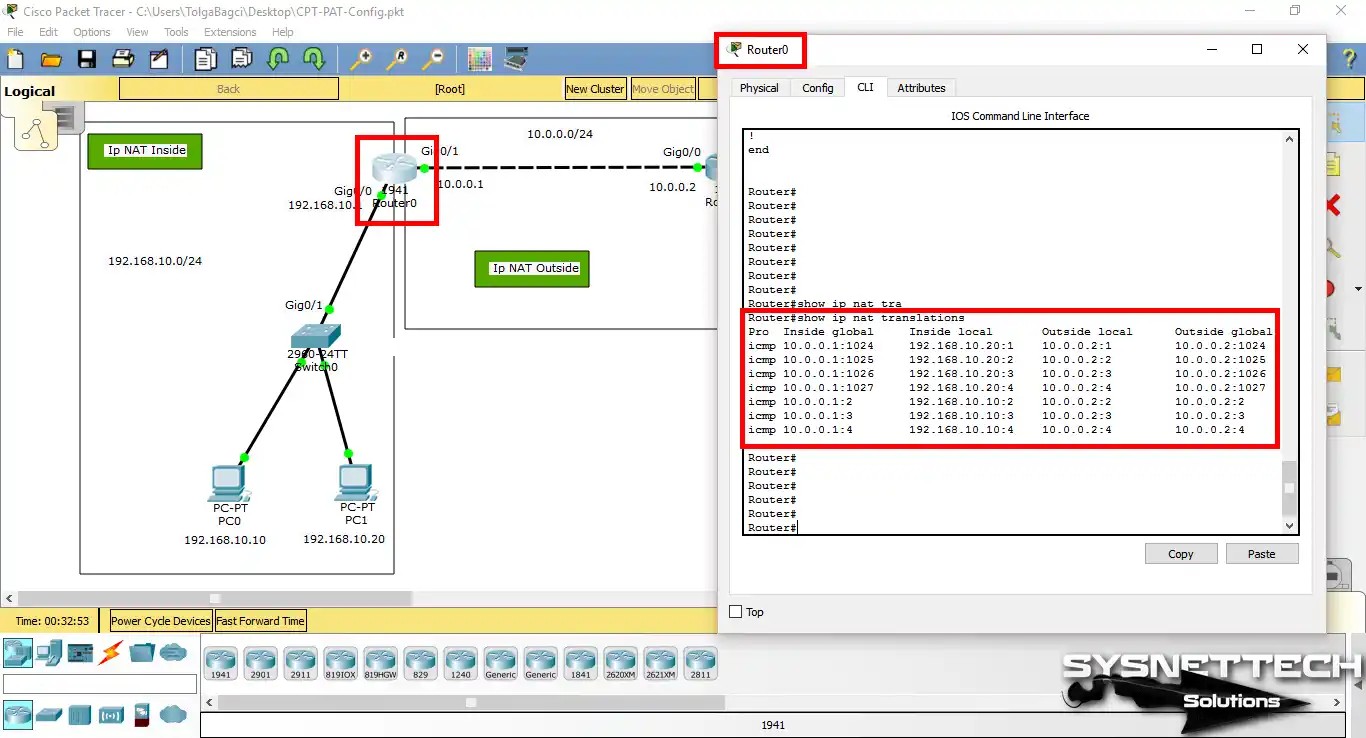
Click Router 0 and go into privileged setup mode. Then, run the “show ip nat translations” command and examine the NAT records.
Clearly, here you will check that the translation tables work correctly.
Show Commands for PAT
- PAT Show Commands
- PAT Statistics
- Router0 Running Config
- Router1 Running Config
Router0#show ip nat translations
Pro Inside global Inside local Outside local Outside global
icmp 10.0.0.1:1024 192.168.10.20:1 10.0.0.2:1 10.0.0.2:1024
icmp 10.0.0.1:1025 192.168.10.20:2 10.0.0.2:2 10.0.0.2:1025
icmp 10.0.0.1:1026 192.168.10.20:3 10.0.0.2:3 10.0.0.2:1026
icmp 10.0.0.1:1027 192.168.10.20:4 10.0.0.2:4 10.0.0.2:1027
icmp 10.0.0.1:2 192.168.10.10:2 10.0.0.2:2 10.0.0.2:2
icmp 10.0.0.1:3 192.168.10.10:3 10.0.0.2:3 10.0.0.2:3
icmp 10.0.0.1:4 192.168.10.10:4 10.0.0.2:4 10.0.0.2:4
Router0#show ip nat statistics
Total translations: 0 (0 static, 0 dynamic, 0 extended)
Outside Interfaces: GigabitEthernet0/1
Inside Interfaces: GigabitEthernet0/0
Hits: 7 Misses: 8
Expired translations: 8
Dynamic mappings:
Router0#show running-config
Building configuration...
Current configuration : 772 bytes
!
version 15.1
no service timestamps log datetime msec
no service timestamps debug datetime msec
no service password-encryption
!
hostname Router
!
ip cef
no ipv6 cef
!
license udi pid CISCO1941/K9 sn FTX1524V4OL
!
spanning-tree mode pvst
!
interface GigabitEthernet0/0
ip address 192.168.10.1 255.255.255.0
ip nat inside
duplex auto
speed auto
!
interface GigabitEthernet0/1
ip address 10.0.0.1 255.255.255.0
ip nat outside
duplex auto
speed auto
!
interface Vlan1
no ip address
shutdown
!
ip nat inside source list 1 interface GigabitEthernet0/1 overload
ip classless
!
ip flow-export version 9
!
!
access-list 1 permit 192.168.10.0 0.0.0.255
!
!
line con 0
!
line aux 0
!
line vty 0 4
login
!
!
end
Router#
Router1#show running-config
Building configuration...
Current configuration : 617 bytes
!
version 15.1
no service timestamps log datetime msec
no service timestamps debug datetime msec
no service password-encryption
!
hostname Router
!
!
ip cef
no ipv6 cef
!
!
license udi pid CISCO1941/K9 sn FTX15247004
!
!
spanning-tree mode pvst
!
!
interface GigabitEthernet0/0
ip address 10.0.0.2 255.255.255.0
duplex auto
speed auto
!
interface GigabitEthernet0/1
no ip address
duplex auto
speed auto
shutdown
!
interface Vlan1
no ip address
shutdown
!
ip classless
!
ip flow-export version 9
!
!
line con 0
!
line aux 0
!
line vty 0 4
login
!
!
end
Router#
YouTube Learning Video for Port Address Translation
To learn how to set up Port Address Translation on a Cisco Router, be sure to watch the helpful video below. I’m sure it will guide you step-by-step through the process.
Also, if you like our stuff, please join our YouTube group to help us and see our newest guides!
Frequently Asked Questions (FAQ)
- What do I need to configure PAT?
- What are the steps to configure PAT?
Conclusion
PAT is one of the most commonly used methods and uses over 64,000 ports. In this way, this makes it highly unlikely that router addresses will run out.
So, setting up PAT on a Cisco router is an important skill. It makes your network work better, primarily for homes and small shops. Also, when done right, connections are safer and more stable.
In short, PAT turns many private addresses into one public address using port numbers. So, this lets us link our devices to the web without needing many public addresses.
At the same time, because of this method, we can use our Internet without stopping and in a good way.
You can use the steps I show here in your test setup. In short, you will get good real practice.
By learning and using PAT, you can save IP address space. This way also makes your network safer and easier to handle.
So, with more Internet use, learning PAT & NAT setups will be helpful. This knowledge is beneficial for network workers. Thank you for reading this topic, and keep growing your knowledge!
Before I forget, to grow your knowledge of network setups, you should also see our guide on how to set up Static NAT in Packet Tracer. This way lets you directly link specific internal IP addresses to your public IP addresses.

Be the first to share your comment