
We know that broadcast traffic doesn’t pass through routers. However, a computer searches for DHCP by broadcasting over the network segment for an IP address request.
Since this traffic does not pass through routers, it cannot obtain an address if it cannot find a DHCP server in the same segment.
DHCP Relay Agent Operation Logic on Cisco Router
Now, think of two small networks. One office is in the Center, and one is in a Branch far or near.
To help DHCP broadcast requests work well, do these things. First, finding a DHCP server is key. This service lets computers get addresses easily.
So, there is a special rule for this traffic. It lets devices find a DHCP server. This means computers in both offices can connect well.
We have very few computers in our network. So, it does not make sense to build a special server for their addresses. You have two choices.
First, you can give a set IP address to each computer. Or, you can set up a DHCP relay agent service. Each choice is good, so pick what works for you.
A DHCP Relay Agent is a router or server. It hears DHCP broadcasts from clients. Then, it sends these notes to DHCP servers on other networks.
Relay agents are part of the DHCP rules. They follow set papers, called RFCs, that tell how it works. An “RFC 1542 Compliant Router” helps with DHCP broadcast traffic. This lets DHCP notes get to the right place. So, networks can handle IP addresses better.
DHCP clients use broadcasts to get an IP address from the DHCP server. But routers usually do not broadcast. They only do if you set them to.
Because of this, DHCP servers give IPs only to clients on the same network. To provide IPs for clients in other parts, you need more setup. You must set the network to let DHCP broadcasts reach the server from those clients.
The Relay Agent helps give out IPs to different places. A network adapter works as an agent. It gets DHCP broadcasts in its network. Then, it sends these broadcasts to the DHCP server as a direct message.
You can set up the Relay Agent on a router or server. Also, some other programs can do this job. This setup makes sure devices get IP addresses well.
How to Set Up a DHCP Relay Agent on a Router with Packet Tracer
Follow the steps below to install the DHCP Agent on the Cisco Router.
Steps:
Step 1
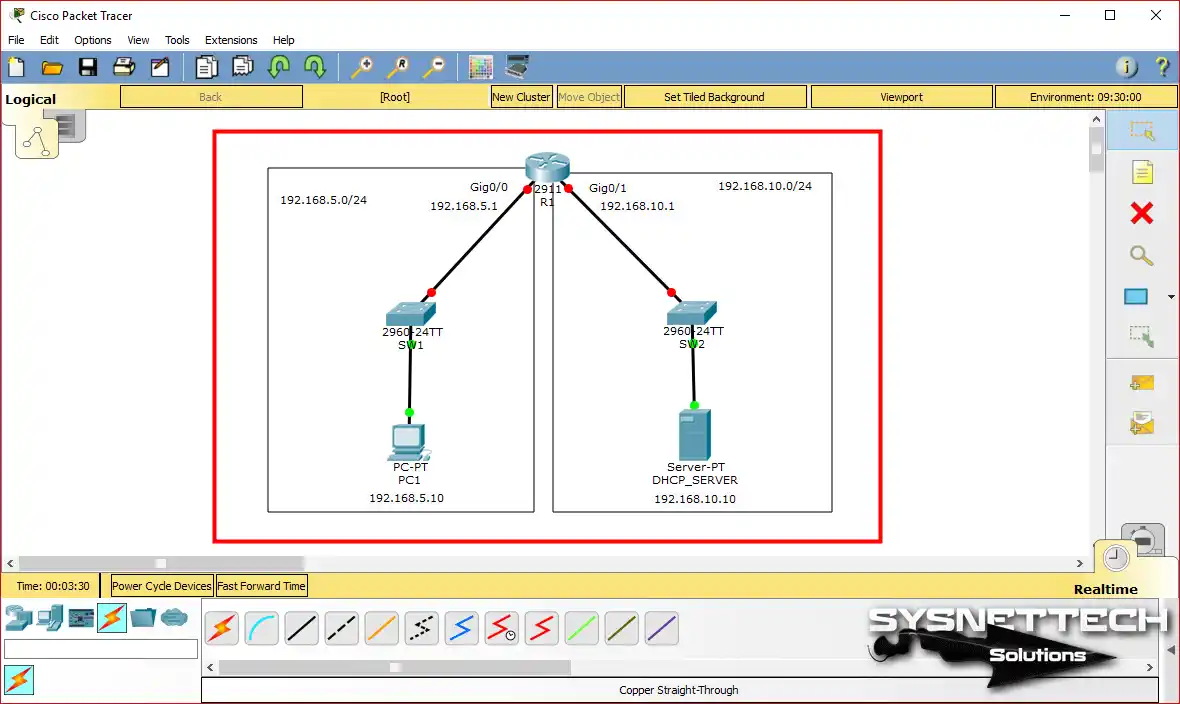
Open the Cisco simulator software and create a network topology for the DHCP as follows.
Step 2
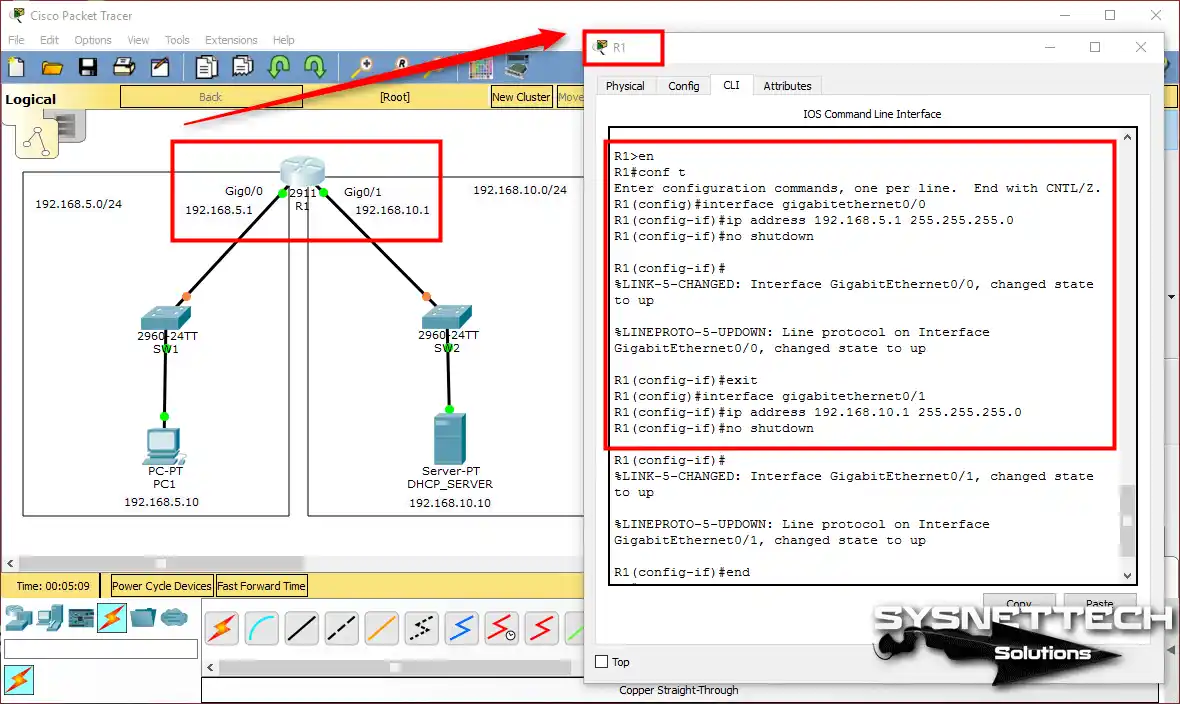
Open the Cisco Router R1 CLI command prompt and configure the Router’s GigabitEthernet interfaces as follows.
R1# conf t
R1(config)# interface gigabitethernet 0/0
R1(config-if)# ip address 192.168.5.1 255.255.255.0
R1(config-if)# no shutdown
R1(config-if)# exit
R1(config)# interface gigabitethernet 0/1
R1(config-if)# ip address 192.168.10.1 255.255.255.0
R1(config-if)# no shutdown
R1(config-if)# exit
Step 3
At this stage, the local DHCP server immediately kicks in. If you’ve never set up a pool before, you should check out the step-by-step guide on how to create a basic DHCP pool.
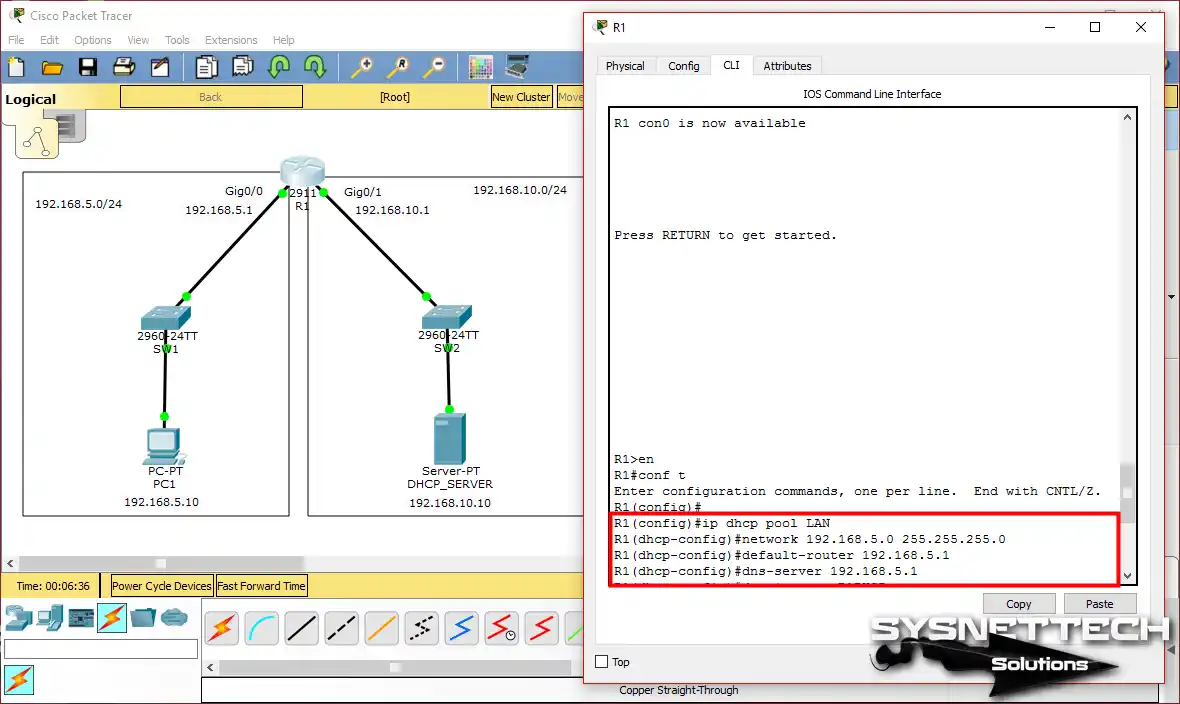
Configure the DHCP server on the Router as follows.
Here, the purpose of enabling DHCP is to see the difference between the Relay Agent. Then, we will try to get the IP address from a different location by canceling DHCP.
R1# conf t
R1(config)# ip dhcp pool LAN
R1(dhcp-config)# network 192.168.5.0 255.255.255.0
R1(dhcp-config)# default-router 192.168.5.1
R1(dhcp-config)# dns-server 192.168.5.1
Step 4
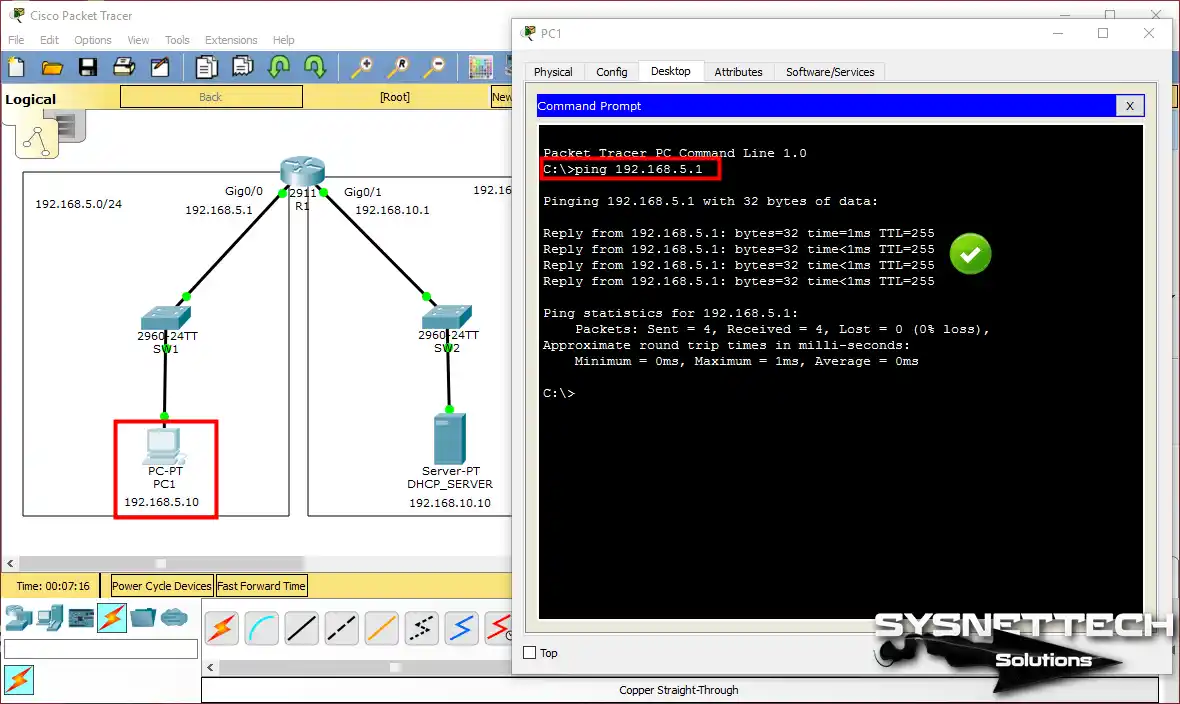
Ping the connection from the PC1 command prompt to the default gateway.
Step 5
Configure the IP address configuration of PC1 to DHCP.

Step 6
PC1 sends a DHCP Broadcast message and waits to obtain an IP address from the DHCP server on the network.
Step 7
PC1 successfully retrieved TCP/IP information from the DHCP server configured on the Router.

Step 8
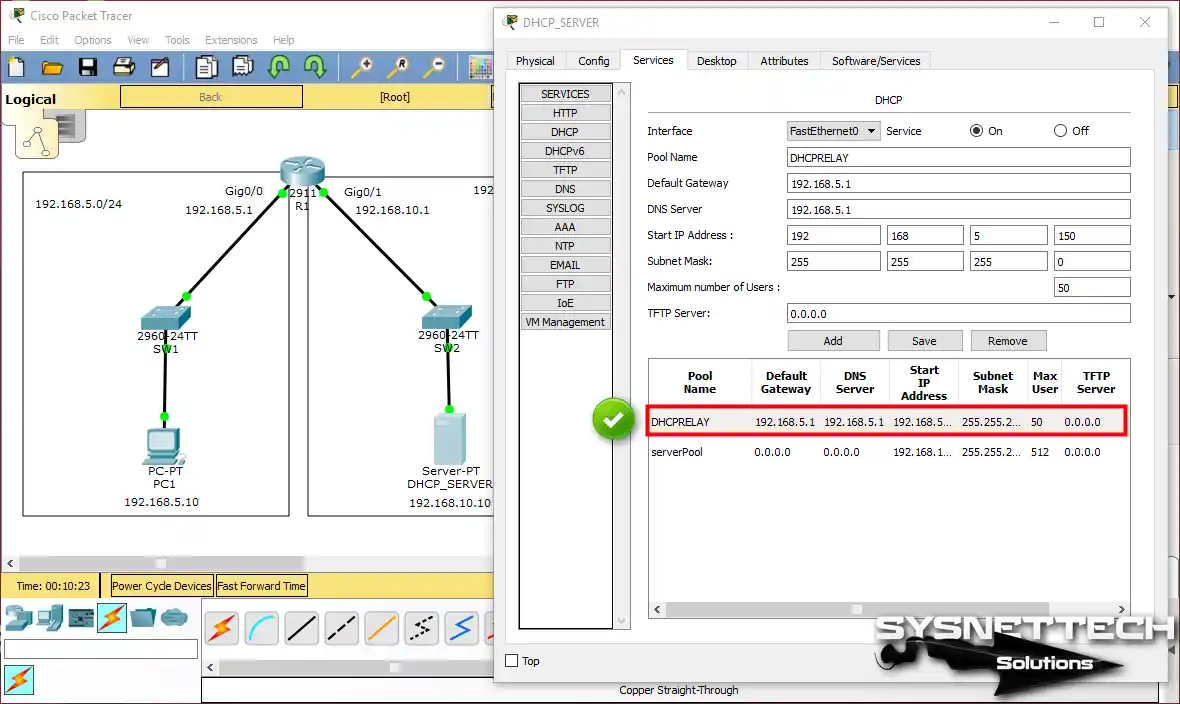
Configure the server you added to the 192.168.10.0/24 network as follows, and click the Add button to add the configuration to the list.

Step 9
After making sure that the DHCPRELAY pool is added to the list, proceed to the next step.
Step 10
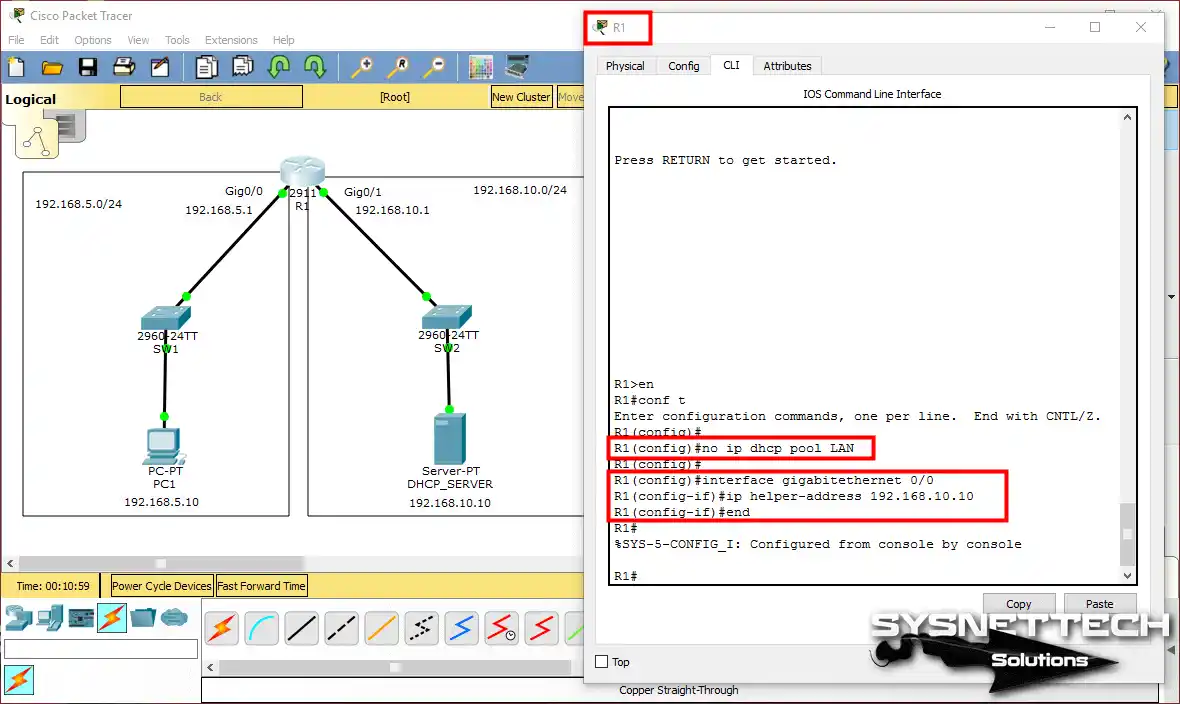
Delete the DHCP pool with the no ip dhcp pool LAN command, and then execute the ip helper-address command on the interface that will act as AGENT.
R1# conf t
R1(config)# no ip dhcp pool LAN
R1(config)# interface gigabitethernet0/0
R1(config-if)# ip helper-address 192.168.10.10
Step 11
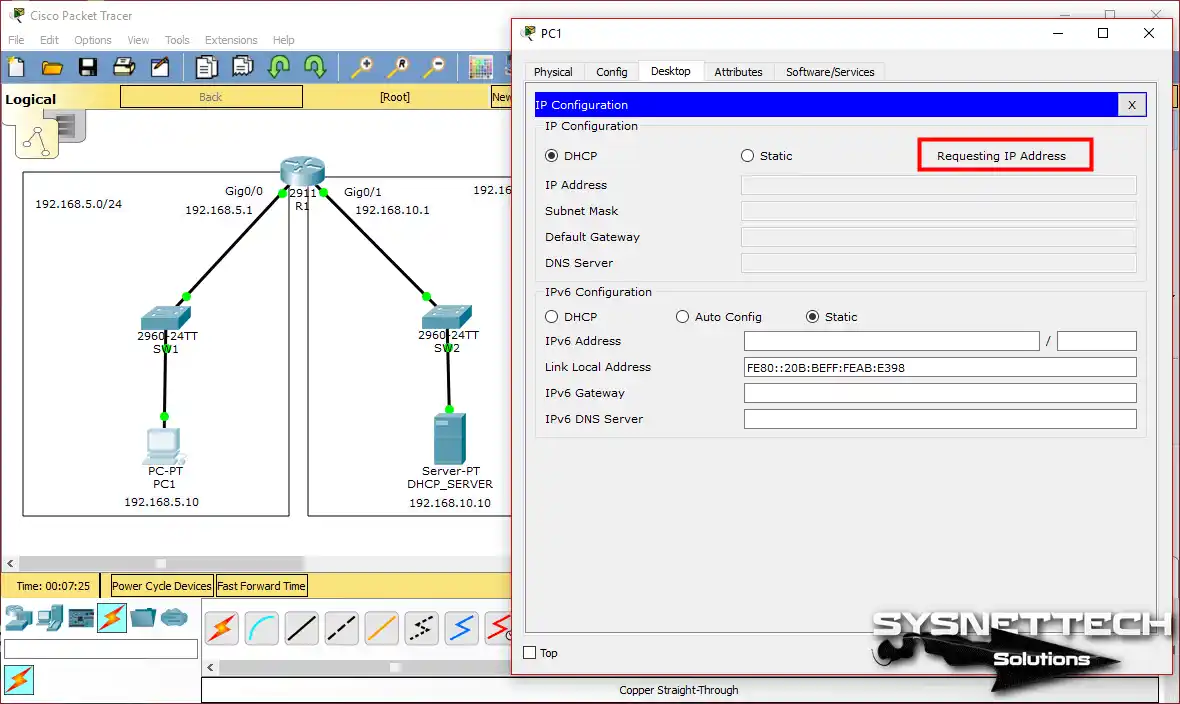
For PC1’s IP configuration, select Static and then choose DHCP.
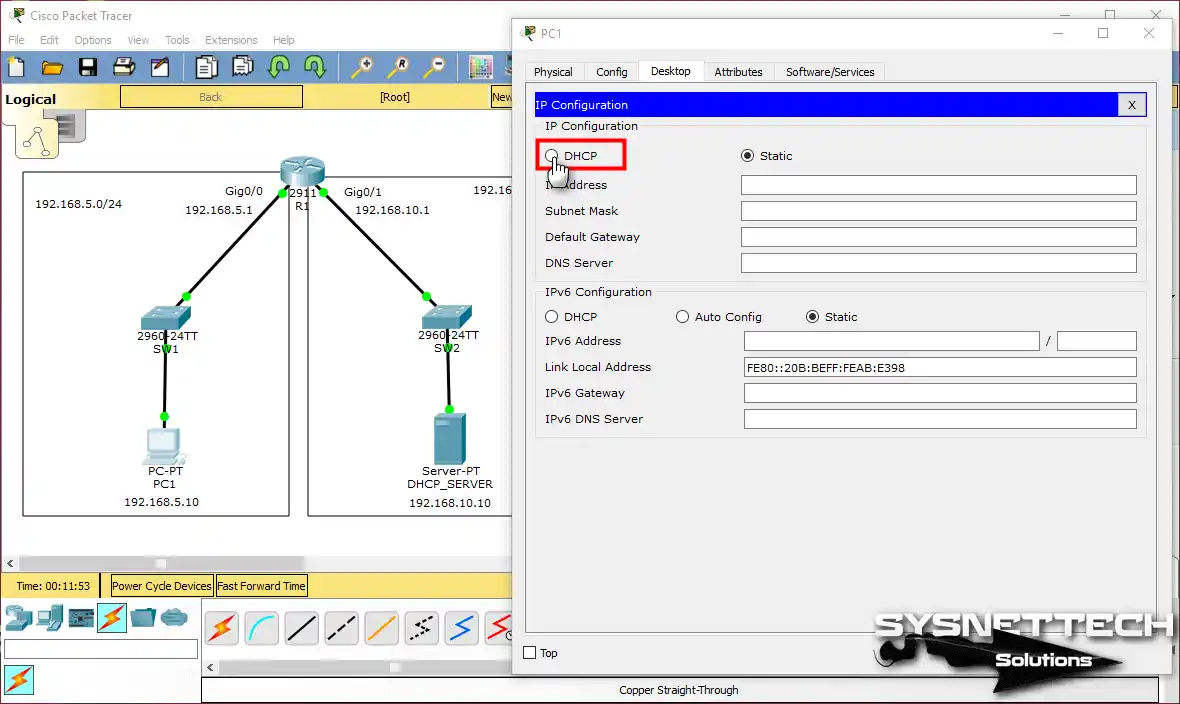
Step 12
Please wait while obtaining the IP address.

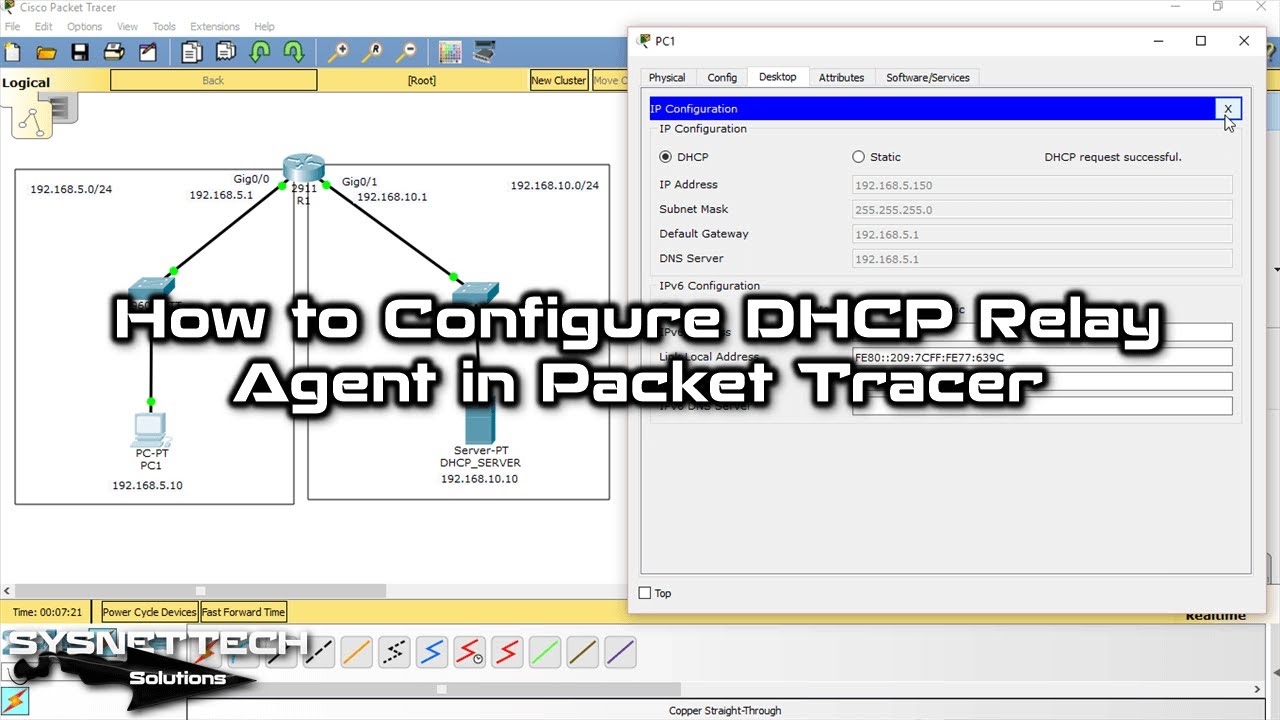
Step 13
As you can see in the image below, PC1 received its TCP/IP settings from the DHCP Server with IP address 192.168.10.10. You can also see that it gets the IP address from block 192.168.5.150 – 192.168.5.200 in the DHCP pool configured as Agent.

The commands in the simulation are almost the same as on real devices. But the simulation works in its own special way. If you learn what Packet Tracer can and cannot do, your work will become much easier.
To say it simply: this tool is not a real network for actual work. But it is a very good lab to learn all the ideas you need for the CCNA exam.
Video
You can watch the video below to enable the DHCP relay service on the Cisco Router and also subscribe to our YouTube channel to support us!
Conclusion
To end, using a DHCP relay agent is a good plan for your Packet Tracer network. It helps handle IP addresses in many parts with ease.
Also, it lets DHCP clients and servers in far places communicate well. This makes your network work better and cuts down on extra jobs.
If you have a small office or a big group, DHCP relay agents help. They make sure devices get the settings they must have to run well. With the correct setup, as shown here, you can make your network more steady.
This setup makes giving out IP addresses simple. Thanks for learning about these key network thoughts. We hope you do very well setting things up!

Be the first to share your comment