
As we use computers more, we must keep them safe from online risks. For example, Windows Defender is part of Microsoft systems and keeps us safe. But sometimes, you should turn off this tool, especially if you are using a different, better antivirus program.
In this article, I will show you step-by-step instructions on how to disable Defender in Windows 10 and 11. This way, you will fully control your security settings. I will also explain the Registry (Registry Editor) method.
How to Turn Off Defender in Windows 11 & 10 PC
Windows Defender works in the background on Windows 11 & 10. If this feature is on, it will quickly stop you from installing harmful software.
But if you want to stop Defender from acting on its own, you can change this in the settings. On the other hand, if you use a paid and strong antivirus, turning it off will help save memory.
But if you have no other protection on your PC, keeping it on is very helpful. Also, there are two ways to turn off Defender in Microsoft OS 11 or 10 fully.
But sometimes, you may not be able to turn it off forever because the system turns it back on. So, follow the steps below carefully to fix the problem entirely.
How to Turn Off Defender Step by Step
If you want to remove or disable it from your PC, you should see the steps below. This way, this antivirus will no longer work on your device, and you will have complete control.
As a result, you can manage your system’s security settings as you wish.
Step 1
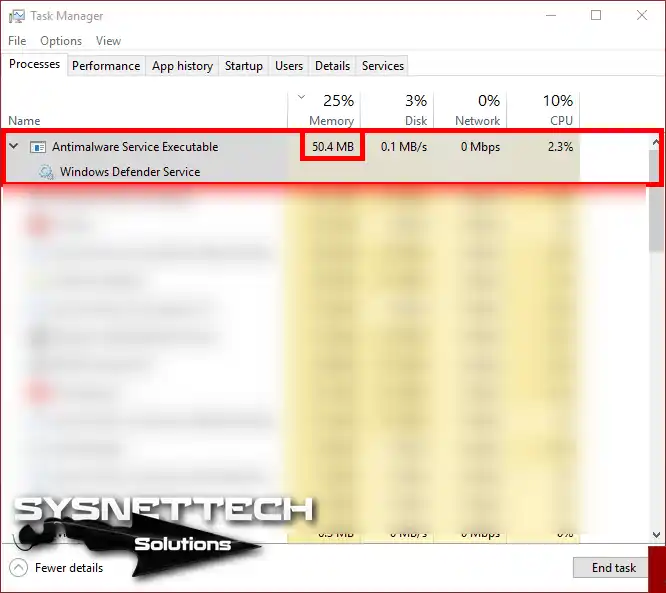
When you open the Task Manager, you will see that Windows Defender is using a lot of RAM. This may come as a surprise to you.
Because of that, memory use shows how it protects your system in real-time. So, you are always keeping your system safe from possible dangers.
Step 2
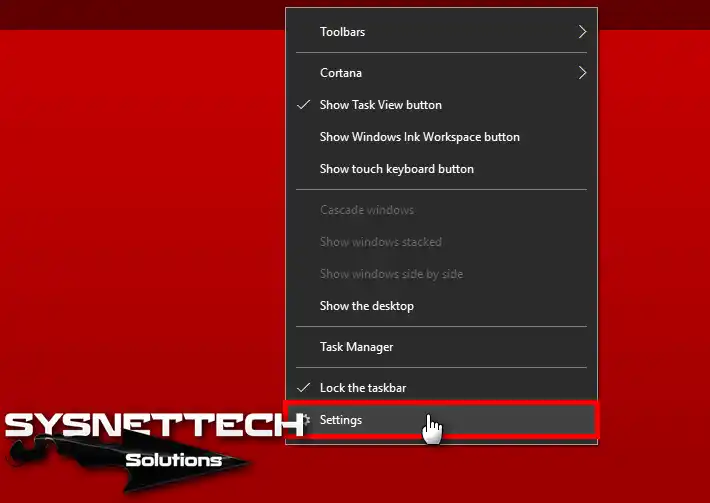
To disable Defender, you must first go to the settings menu. To do this, usually right-click on the taskbar at the bottom of the screen.
Then, from the context menu that you see, click on the “Settings” option. This way, you will open the window where you can make the necessary settings to turn it off.
Step 3
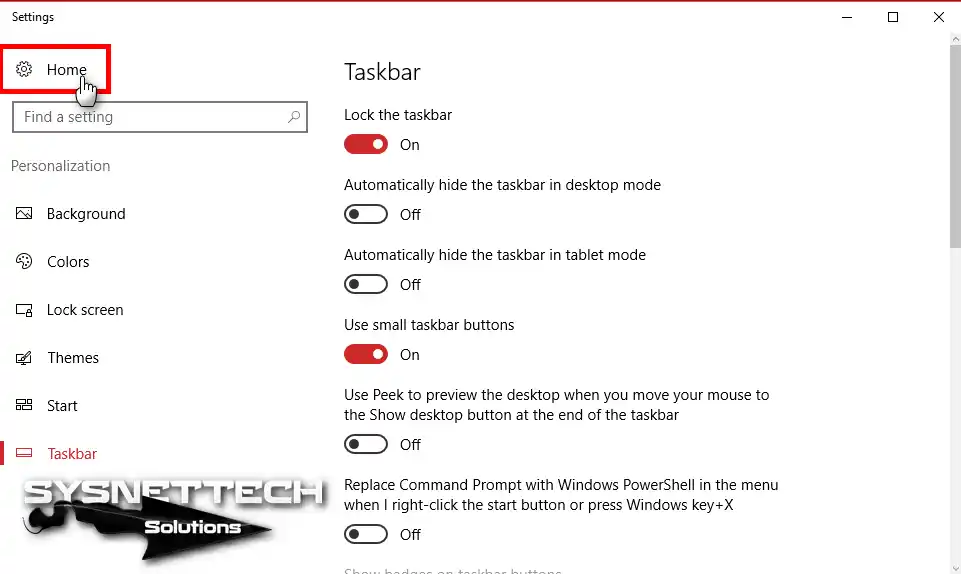
In the newly opened window, find and click on the ‘Home’ tab located at the top of the interface. In fact, this tab will be your gateway to the main features & settings.
Step 4
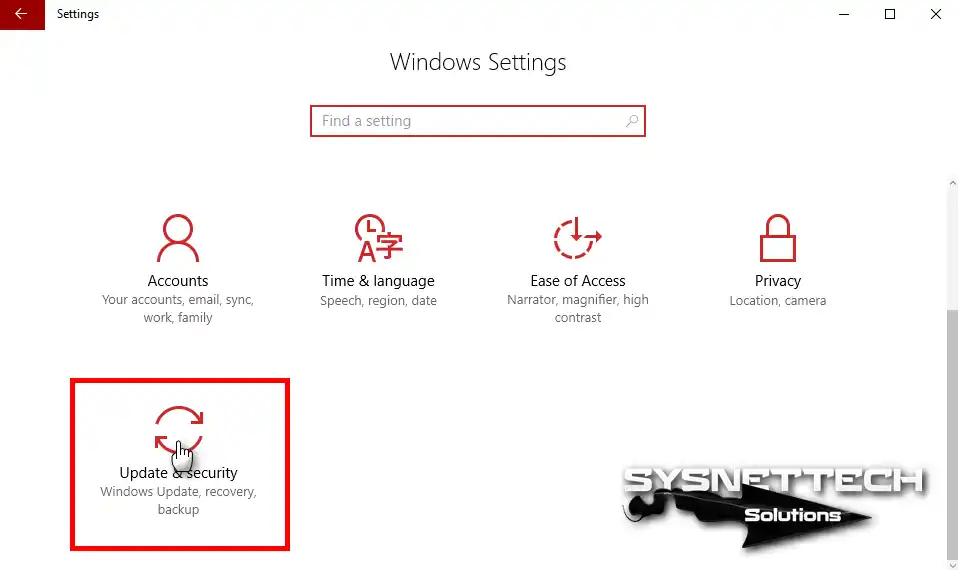
To keep going, open the Windows Settings menu and click on “Update & Security.” Here, you can manage system updates and security settings. You can also fix problems to keep your device working well.
Step 5
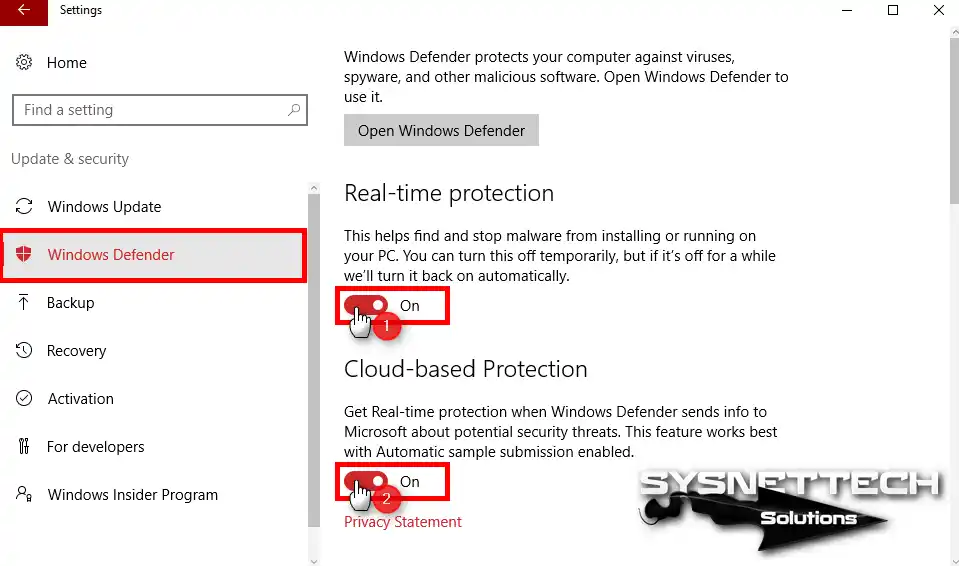
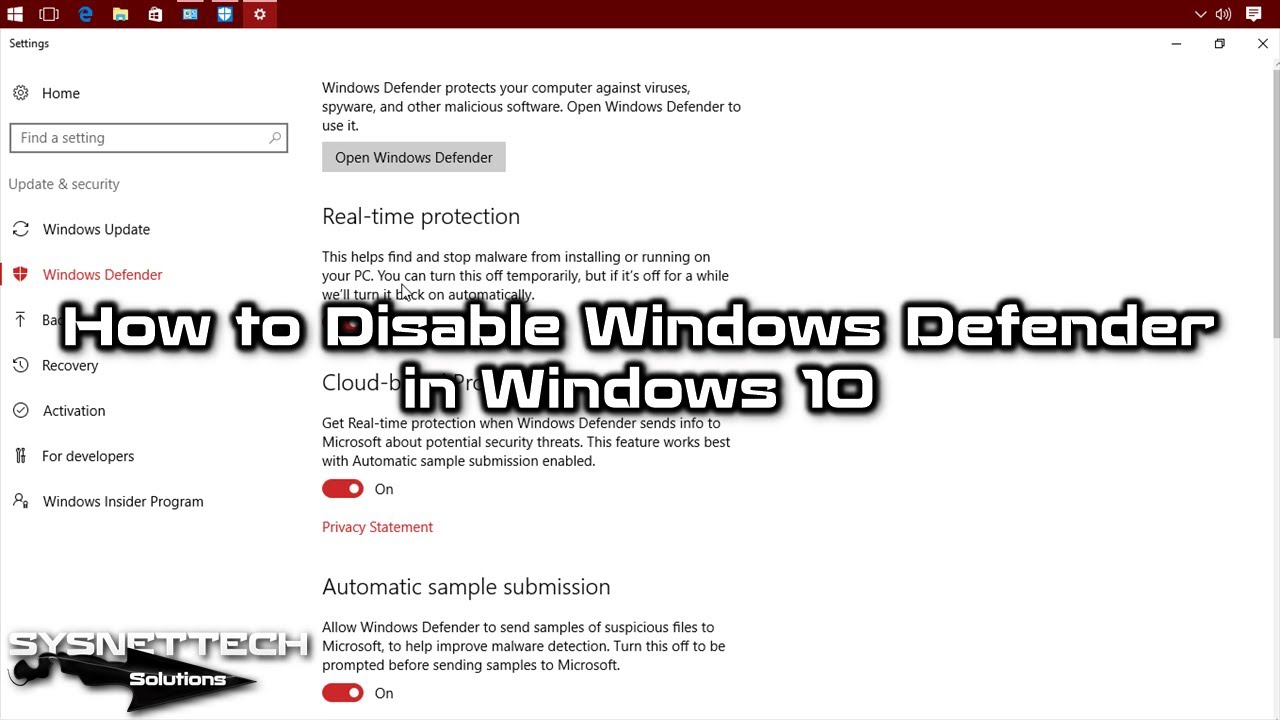
When you click on Windows Defender, you will see standard settings on the right. To make things better, turn off Real-Time Protection in these options.
Next, turn off Cloud-Based Protection too. This will let you set your security options again from the start.
Step 6
After you scroll down the window a little, turn off “Automatic sample submission.” Also, if you do not want to get notifications, turn off “Enhanced Notifications.”

Step 7
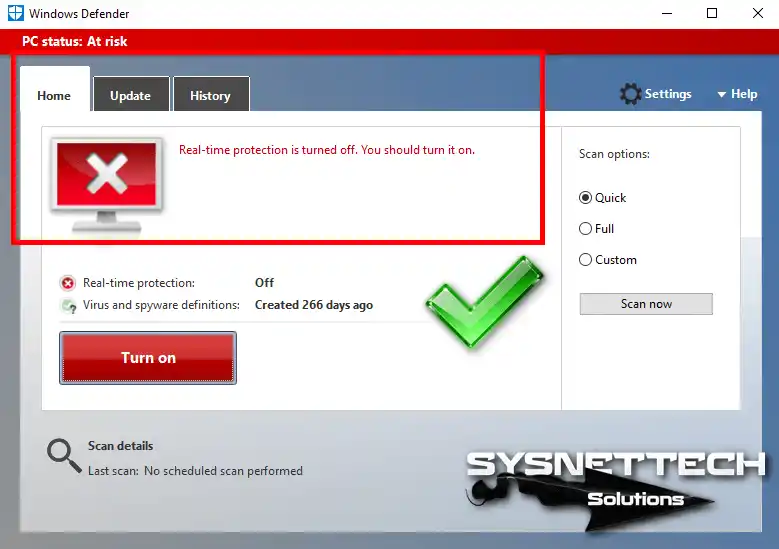
If you’re working on an older version of Windows 10, you’ll see the image below. But the newer builds have a more modern look. Fortunately, you’ll be able to know that you’ve disabled Defender software no matter what your system is.
Step 8
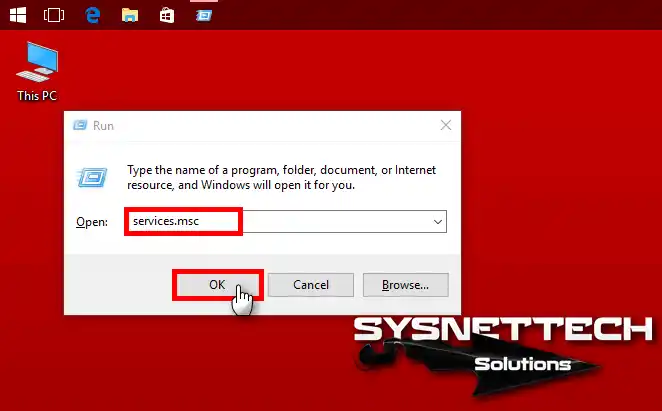
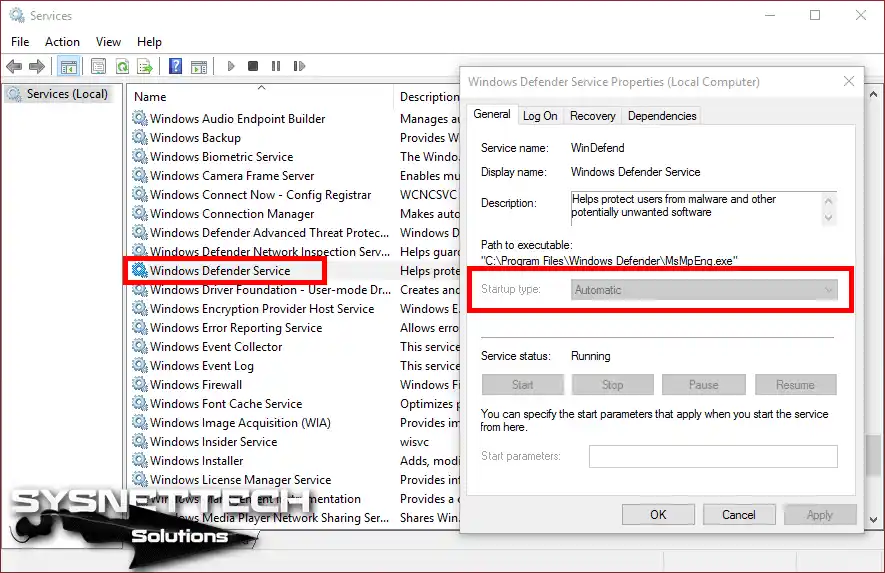
To open the services management console, first press Windows Key + R. In the Run toolbox that opens, type the command “services.msc” & hit Enter.
So, you will open the Services window, where you can see and manage system operations on your computer.
Step 9
First, scroll down to find the Windows Defender entry in the Services window. Then, double-click it here to open its properties window. However, don’t worry if you can’t interact with the options. In that case, move on to the next step to continue.
How to Disable Defender using Regedit
If you can’t disable Windows antivirus, you may need to go into the Registry settings. Thus, you can change your system settings from there in some cases.
By default, the Defender configuration in the Registry is as follows:
[HKEY_LOCAL_MACHINE\SOFTWARE\Policies\Microsoft\Windows Defender]
"DisableAntiSpyware"=dword:00000000

[HKEY_LOCAL_MACHINE\SOFTWARE\Policies\Microsoft\Windows Defender\Real-Time Protection]
"DisableBehaviorMonitoring"=dword:00000000
"DisableOnAccessProtection"=dword:00000000
"DisableScanOnRealtimeEnable"=dword:00000000
You can turn off Microsoft Antivirus by changing the Registry settings in Windows 10 or 11. First, download the needed files by clicking the button below. This step is crucial because it gives you the tools to make the changes safely and efficiently.
Step 1
After clicking the button above and downloading the Regedit file, unzip the file to a folder. Then, open the folder and double-click the file named Disable. This will change the settings you need and fix the problem.
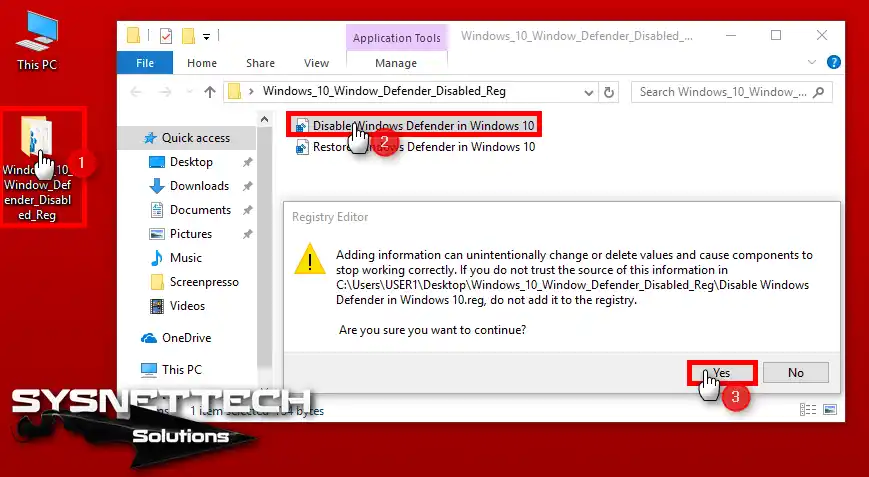
Step 2
Since the Reg file will make changes to your system, click the OK button in the Warning window without worrying.
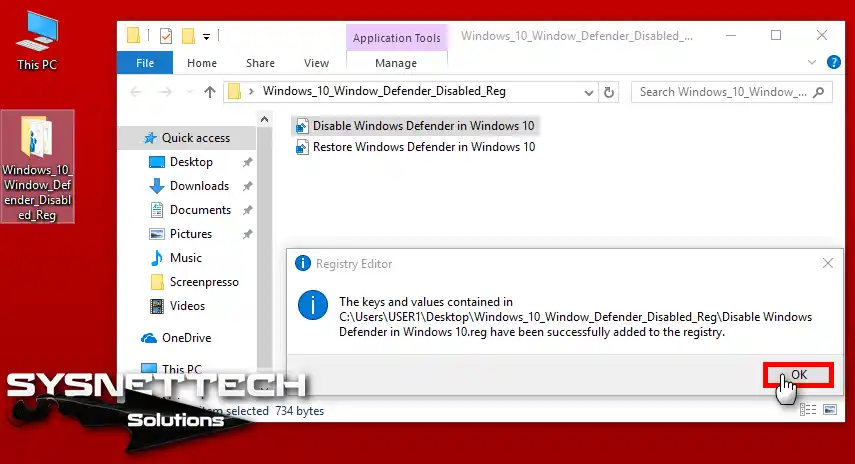
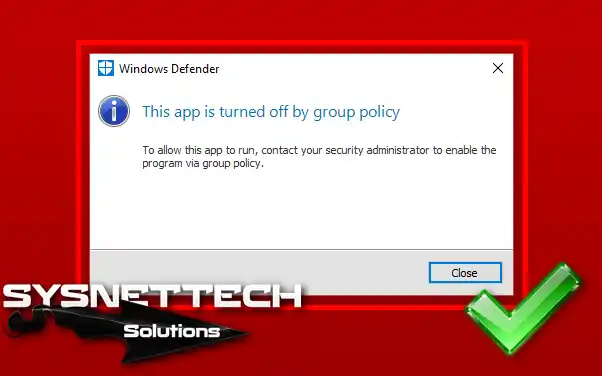
Step 3
Congratulations! You have successfully turned off Windows security software. You have removed these protection tools from your OS.
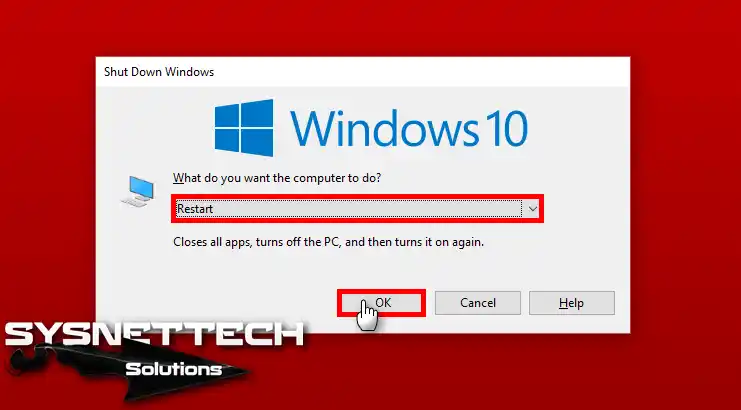
Step 4
You need to see the changes you made with the reg file more effectively. For this reason, proceed by rebooting your PC.
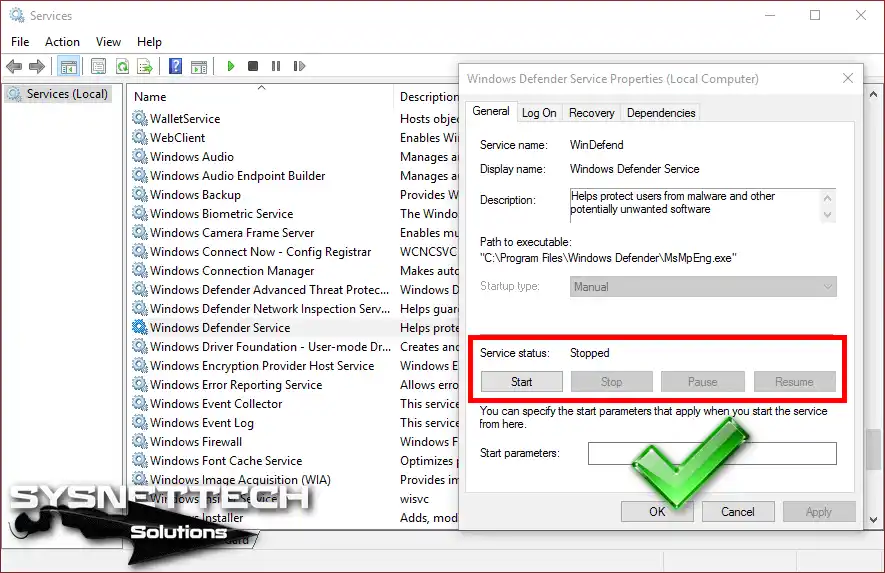
Step 5
As soon as you turn on your PC, go to Services. From there, check if the Windows antivirus service is running.
You should see Stopped in the Service Status label.
How to Enable Defender using Regedit
Turning Defender back on your computer is easy. To do this, use the ‘Restore.reg’ file in the folder you downloaded. If you want more help, you can watch our YouTube tutorial video below.
Video
Frequently Asked Questions (FAQ)
- Why should I disable Windows Defender?
- How do I disable Defender in Windows 11?
- How do I turn off Defender for good using Group Policy?
- Can I turn Defender back on later?
Conclusion
In short, you should control Windows Defender if you use another antivirus. So, you can help your computer work faster.
You can also easily turn this application on and off by following the steps above. In this way, you can adapt your security settings to your needs.
This way, you can control your system resources better. But if your device is not protected enough, it can get threats. So, I always say to make wise choices. Also, check your system protection often.

1 Reader Comment
Excelente aporte… Gracias Saludos